|
|
|
Porsche, and the Porsche crest are registered trademarks of Dr. Ing. h.c. F. Porsche AG.
This site is not affiliated with Porsche in any way. Its only purpose is to provide an online forum for car enthusiasts. All other trademarks are property of their respective owners. |
|
|

  |

| East coaster |
 Mar 16 2024, 06:50 PM Mar 16 2024, 06:50 PM
Post
#301
|
|
Senior Member  Group: Members Posts: 1,914 Joined: 28-March 03 From: Millville, NJ Member No.: 487 Region Association: None |
I also made a cover plate for the opening for the fuel tank. I have a drain valve that protrudes through the hole about 1” so I couldn’t use a flat plate/disk. I built a little box section to go over the opening and mounted it up.
  |
   |

 
|
| 76-914 |
Mar 16 2024, 07:43 PM
Post
#302
|
|
Repeat Offender & Resident Subaru Antagonist Group: Members Posts: 13,857 Joined: 23-January 09 From: Temecula, CA Member No.: 9,964 Region Association: Southern California |
Your interior came pout looking great man. (IMG:style_emoticons/default/beerchug.gif)
|
|
|
|
| East coaster |
Mar 22 2024, 03:52 PM
Post
#303
|
|
Senior Member Group: Members Posts: 1,914 Joined: 28-March 03 From: Millville, NJ Member No.: 487 Region Association: None |
Gettin’ legit! It’s licensed and insured now.
I need to finish up a few things to be ready for a test drive but it’s getting close. I need to bleed brakes and clutch, and machine my axles and get them installed, then it’s test drive time…….oh yeah, I should probably put the doors on too!  |
|
|
|
| waltonsm |
Mar 23 2024, 12:01 AM
Post
#304
|
|
Member Group: Members Posts: 93 Joined: 27-June 14 From: United States Member No.: 17,561 Region Association: Pacific Northwest |
QUOTE(76-914 @ Mar 16 2024, 05:43 PM)  Yeah! Awesome! That is way better than my $5 bed bath and beyond center console towel!! Maybe I should use the pile of material I bought and do something useful with it. |
|
|
|
| East coaster |
Mar 26 2024, 05:19 PM
Post
#305
|
|
Senior Member Group: Members Posts: 1,914 Joined: 28-March 03 From: Millville, NJ Member No.: 487 Region Association: None |
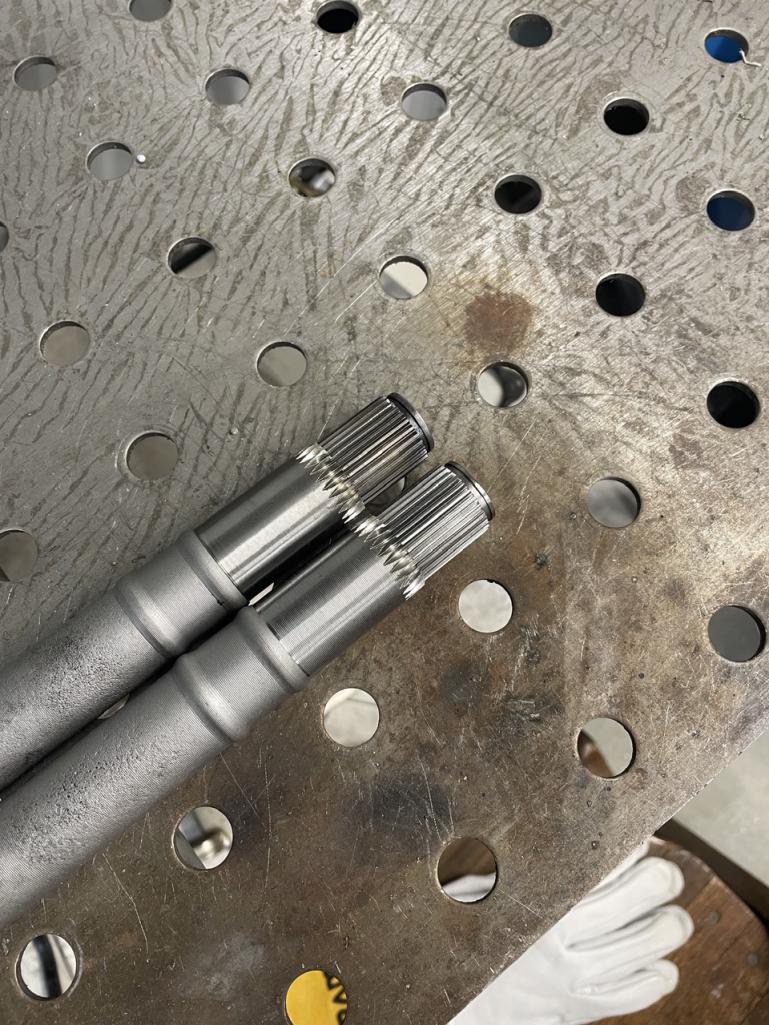
Made my first driveshaft today. I used a couple shafts as “practice” pieces to workout tooling and the process, and this is the first finished piece (which will go on the car). It’s been an interesting process and something I hadn’t done before, but I’m super pleased with the results.
This is a stock 914 shaft shortened and resplined to the 29 tooth Subaru CV spline. I’ll be using stock 914 outer CVs, with stock Subaru inner CVs.  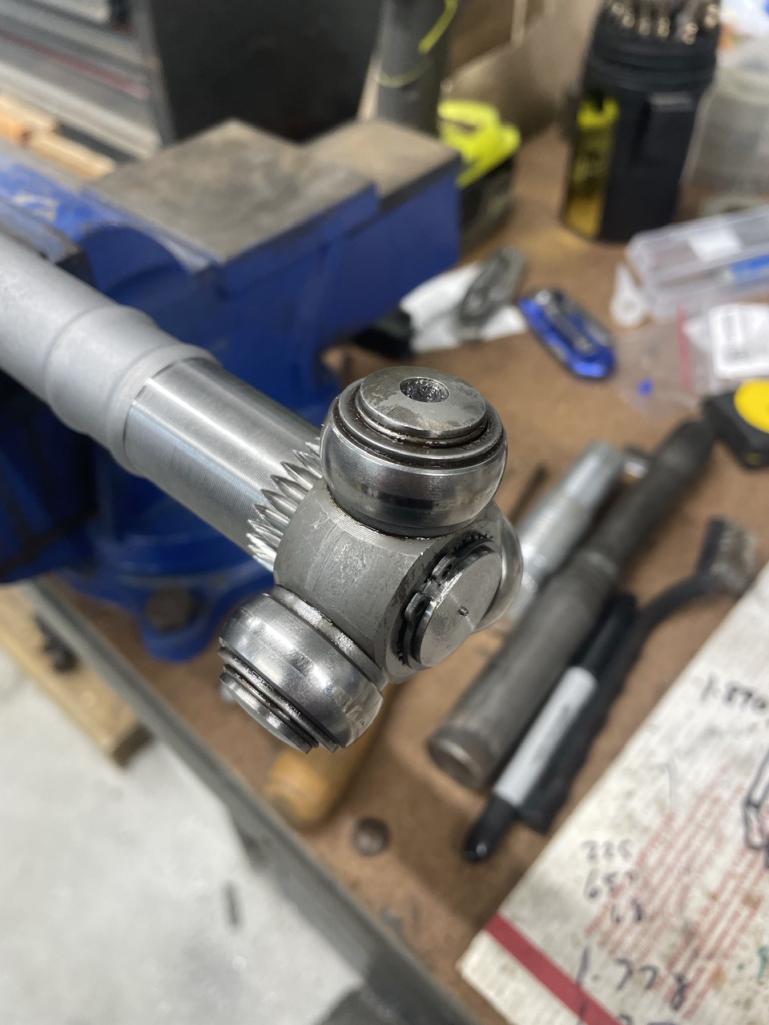 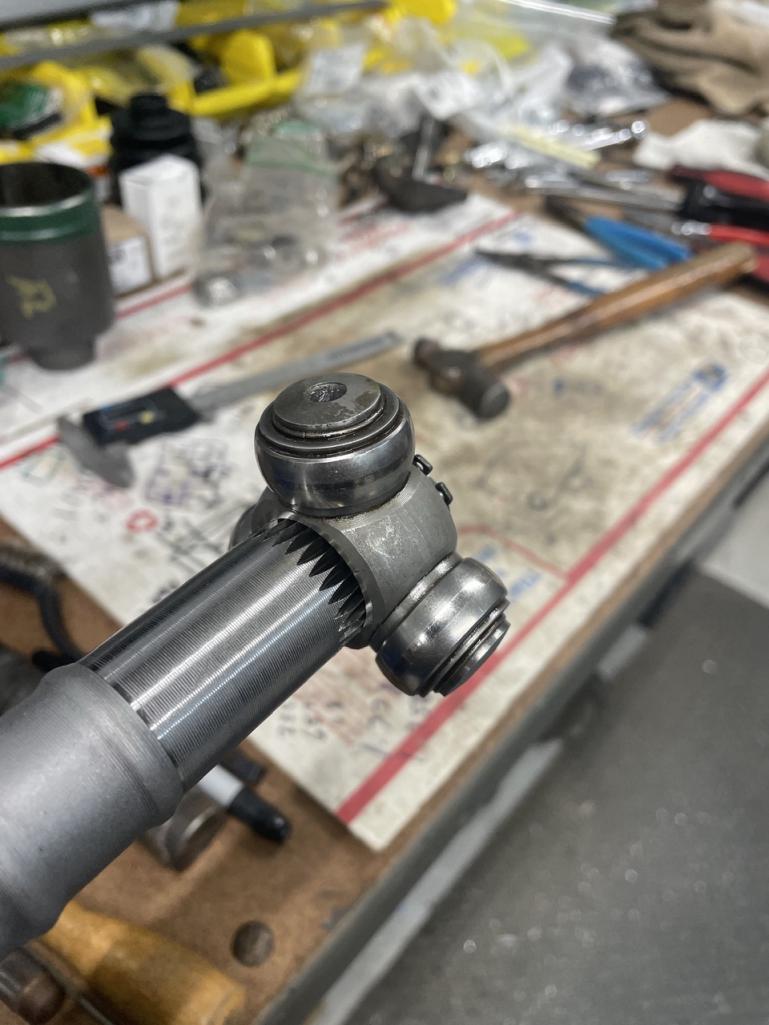 |
|
|
|
| 76-914 |
Mar 26 2024, 05:37 PM
Post
#306
|
|
Repeat Offender & Resident Subaru Antagonist Group: Members Posts: 13,857 Joined: 23-January 09 From: Temecula, CA Member No.: 9,964 Region Association: Southern California |
Nice work. You must have a nice mill and indexing head. I forget which engine you're running but a Turbo or 6 will eat those CV's if you have fat tires and hammer it. I just changed to 5 lug but I put 27K on it before I blew a 914 CV. I didn't do burn outs (well maybe the first year of two (IMG:style_emoticons/default/rolleyes.gif) ) or fat tires either.
|
|
|
|
| rick 918-S |
Mar 26 2024, 05:44 PM
Post
#307
|
|
Hey nice rack! -Celette Group: Members Posts: 21,196 Joined: 30-December 02 From: Now in Superior WI Member No.: 43 Region Association: Northstar Region |
QUOTE(76-914 @ Mar 26 2024, 06:37 PM) Nice work. You must have a nice mill and indexing head. I forget which engine you're running but a Turbo or 6 will eat those CV's if you have fat tires and hammer it. I just changed to 5 lug but I put 27K on it before I blew a 914 CV. I didn't do burn outs (well maybe the first year of two (IMG:style_emoticons/default/rolleyes.gif) ) or fat tires either. Geeze Kent I was kinda admiring those Suby ones. I was thinking they looked like you could get some articulation out of them. Well at least you can get them... |
|
|
|
| Maltese Falcon |
Mar 26 2024, 06:08 PM
Post
#308
|
|
914 Guru Group: Members Posts: 5,166 Joined: 14-September 04 From: Mulholland SoCal Member No.: 2,755 Region Association: None |
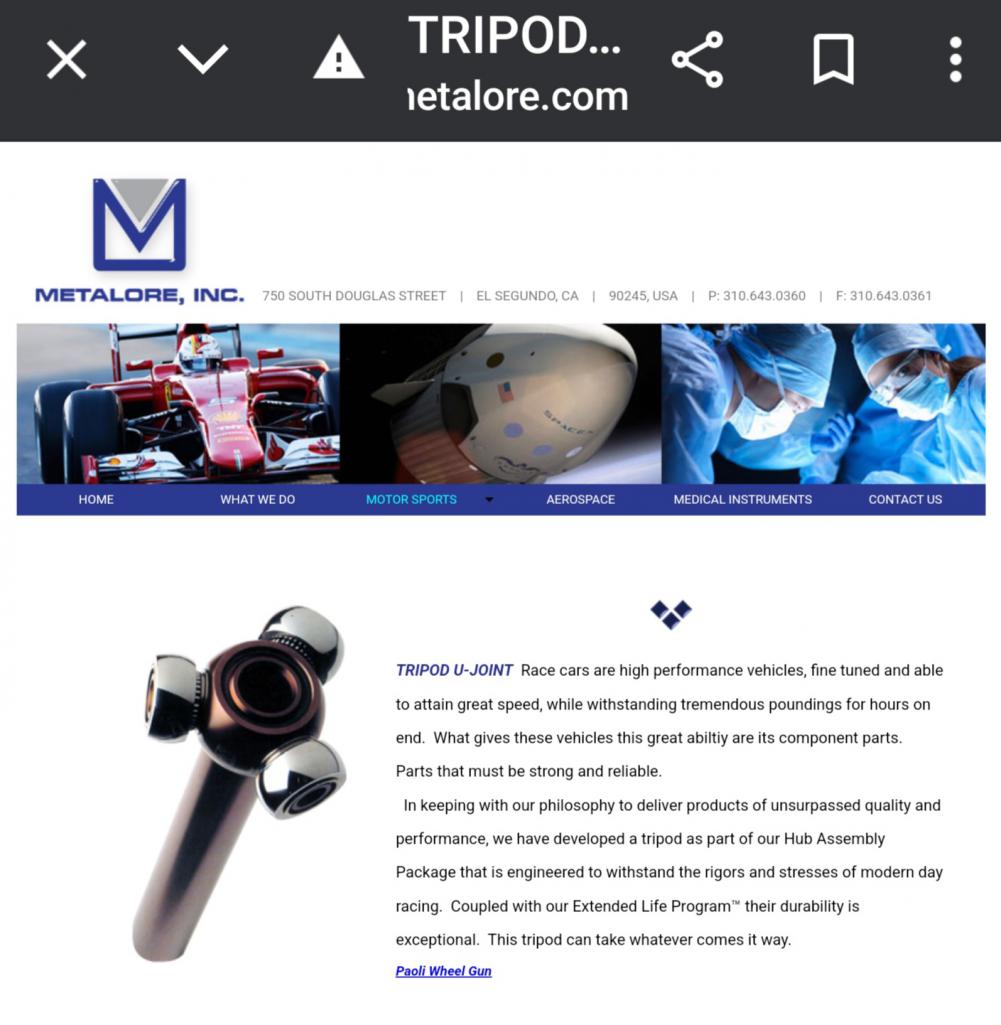
These Tri-Pod looking CV joints might be the ticket in high performance transaxles>>putting the power down; but don't know much about these mfg by Metalore inc. in El Segundo CA. Looks like their clients are major motorsports players (IMG:style_emoticons/default/driving.gif)
 |
 |
|
| East coaster |
Mar 26 2024, 07:38 PM
Post
#309
|
|
Senior Member Group: Members Posts: 1,914 Joined: 28-March 03 From: Millville, NJ Member No.: 487 Region Association: None |
I’ll be running a NA 2.5 Suby engine so hopefully these will be fine, I guess I’ll find out. I figure the 914 end will be the weak link, but I ran those with my 3.6 6 conversion and only broke one in 9 years.
|
|
|
|
| East coaster |
Mar 27 2024, 07:36 AM
Post
#310
|
|
Senior Member Group: Members Posts: 1,914 Joined: 28-March 03 From: Millville, NJ Member No.: 487 Region Association: None |
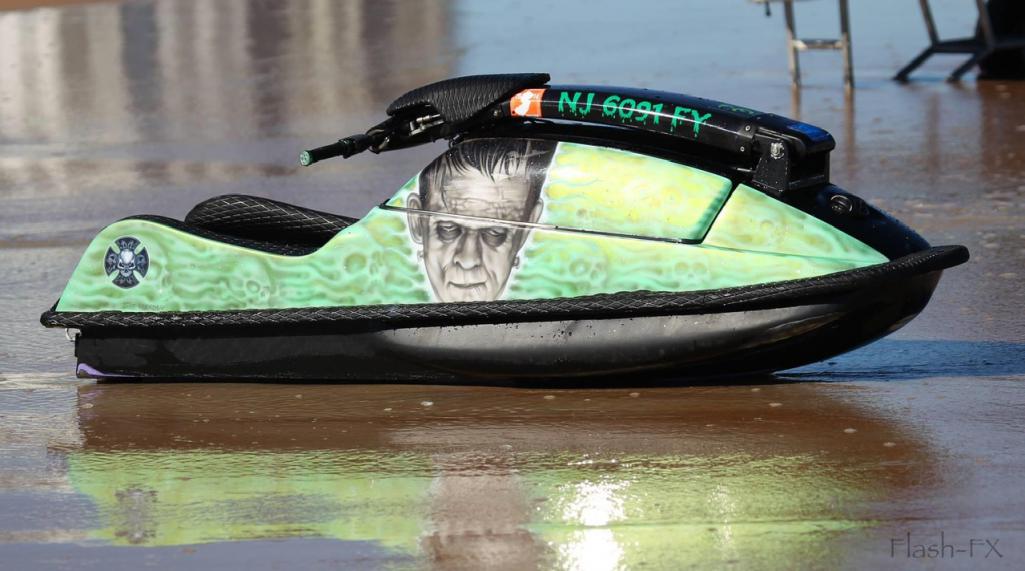
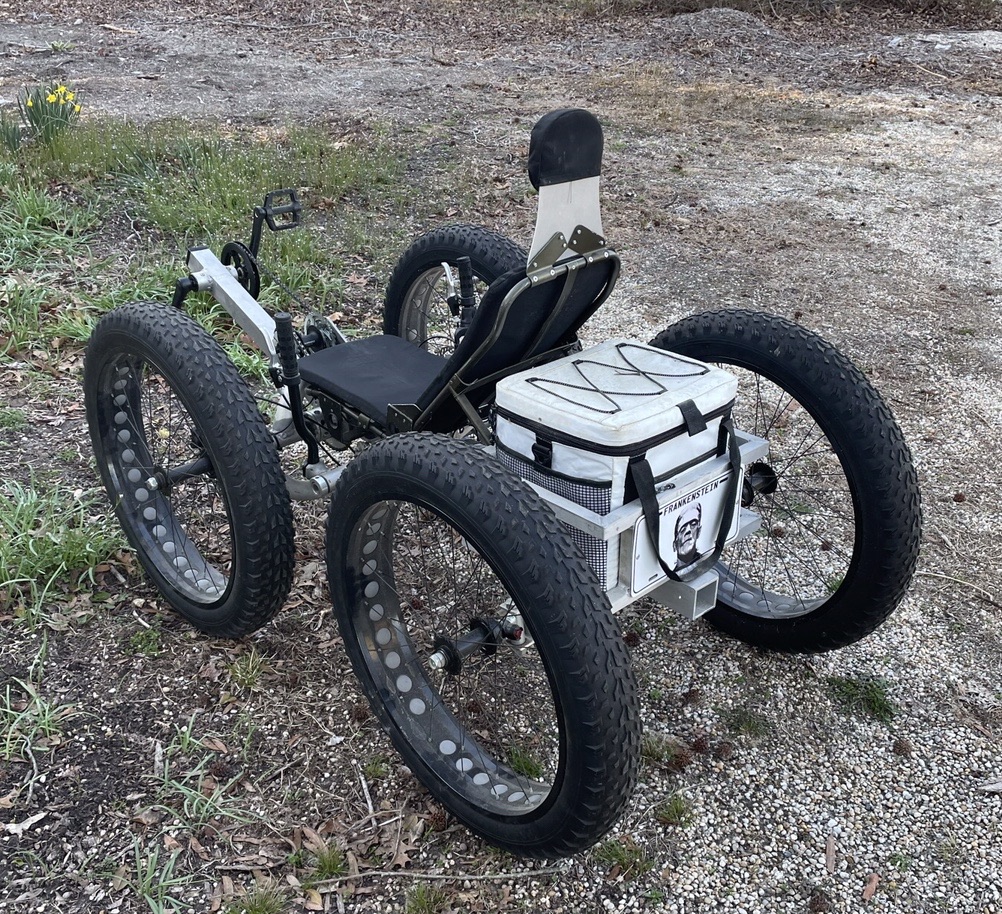
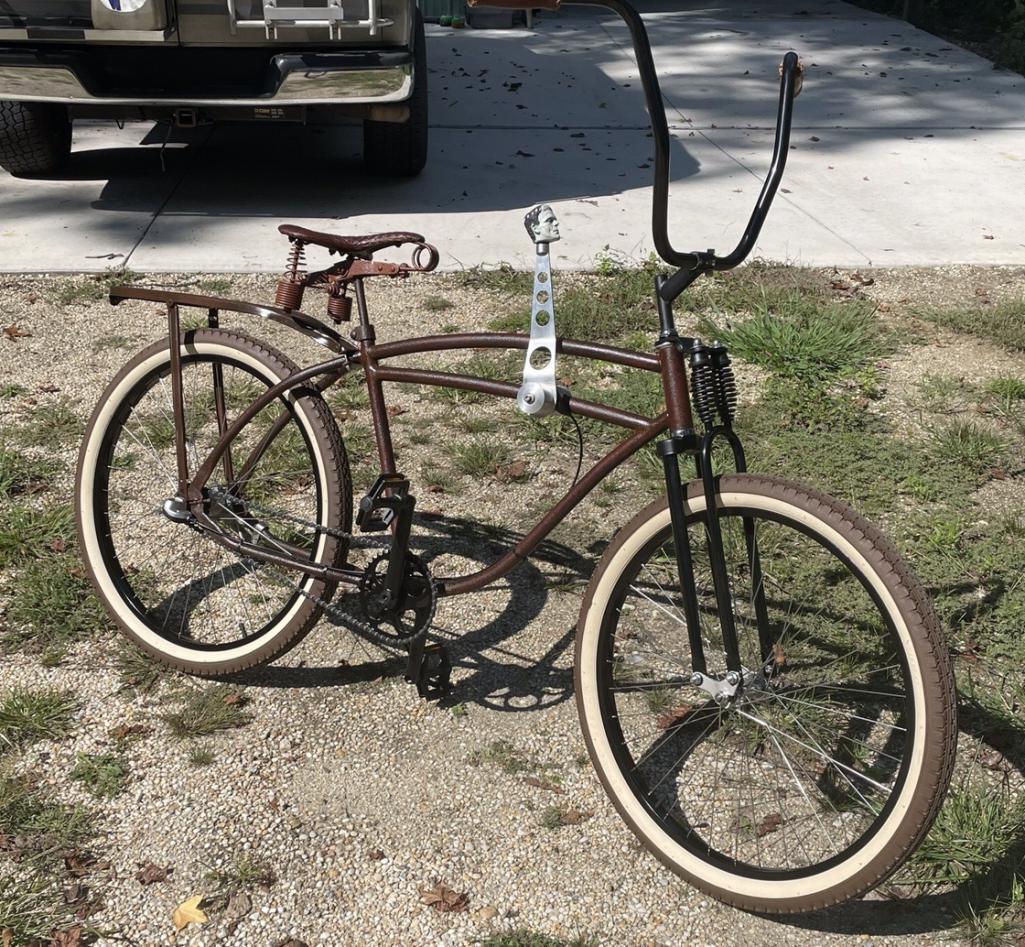
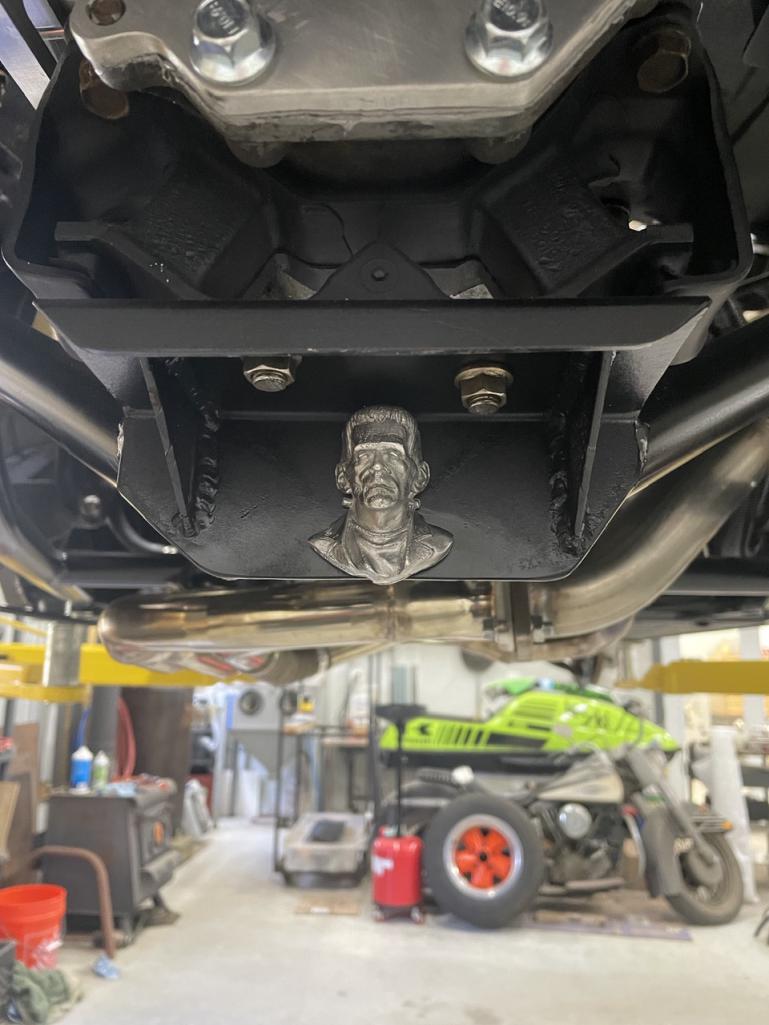
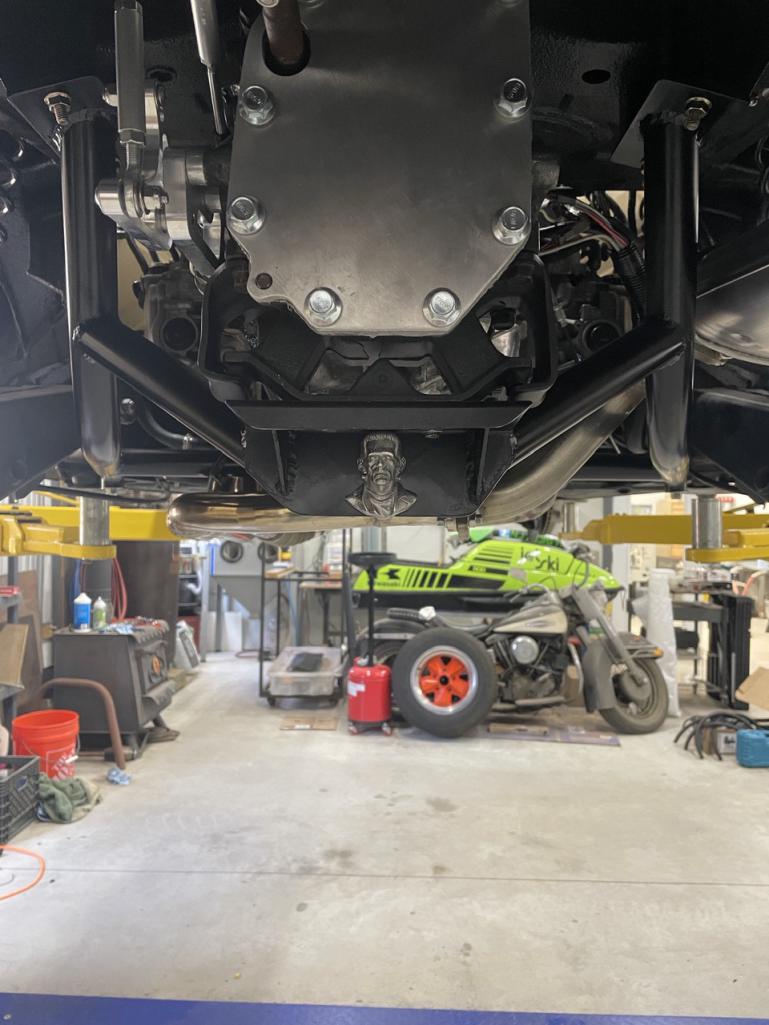
Many years ago my friends dubbed my shop “Frankenstein’s lab” because of the varied things I like to build and the approach taken. Probably like most here, I enjoy a lot of different things in the mechanical domain. I’ve built boats, airplanes, motorcycles, bicycles, and, of course, cars. A while back I embraced the Frankenstein theme and started tagging my projects with some form of Franky image. Here’s a couple of past projects and their tag, and my more subtle tagging of my Safari project.
     |
|
|
|
| Shivers |
Mar 27 2024, 08:37 AM
Post
#311
|
|
Senior Member Group: Members Posts: 3,255 Joined: 19-October 20 From: La Quinta, CA Member No.: 24,781 Region Association: Southern California |
QUOTE(East coaster @ Mar 26 2024, 04:19 PM) Made my first driveshaft today. I used a couple shafts as “practice” pieces to workout tooling and the process, and this is the first finished piece (which will go on the car). It’s been an interesting process and something I hadn’t done before, but I’m super pleased with the results. This is a stock 914 shaft shortened and resplined to the 29 tooth Subaru CV spline. I’ll be sing stock 914 outer CVs, with stock Subaru inner CVs. Very cool. Must be gratifying to be able to be that precise with your work. Mine are always close but I don't win many cigars. |
|
|
|
| East coaster |
Mar 27 2024, 01:10 PM
Post
#312
|
|
Senior Member Group: Members Posts: 1,914 Joined: 28-March 03 From: Millville, NJ Member No.: 487 Region Association: None |
And driveshaft #2 done, ready for a little paint and CV assembly.
 |
|
|
|
| rick 918-S |
Mar 28 2024, 06:15 AM
Post
#313
|
|
Hey nice rack! -Celette Group: Members Posts: 21,196 Joined: 30-December 02 From: Now in Superior WI Member No.: 43 Region Association: Northstar Region |
|
|
|
|
| East coaster |
Mar 30 2024, 05:08 PM
Post
#314
|
|
Senior Member Group: Members Posts: 1,914 Joined: 28-March 03 From: Millville, NJ Member No.: 487 Region Association: None |
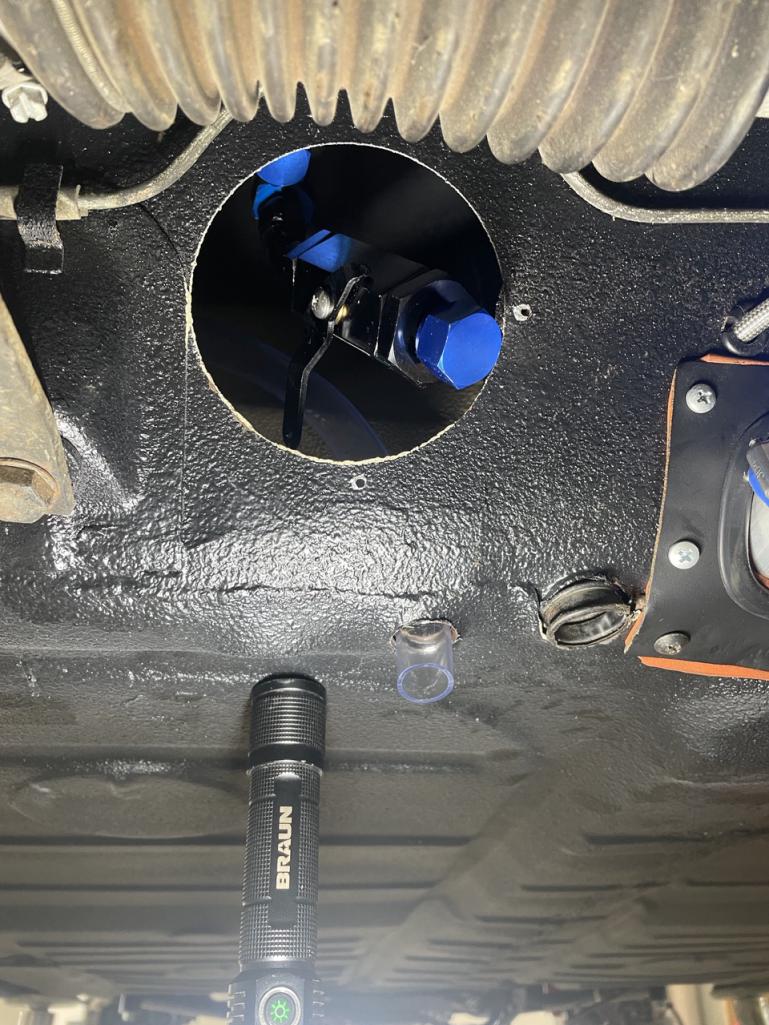
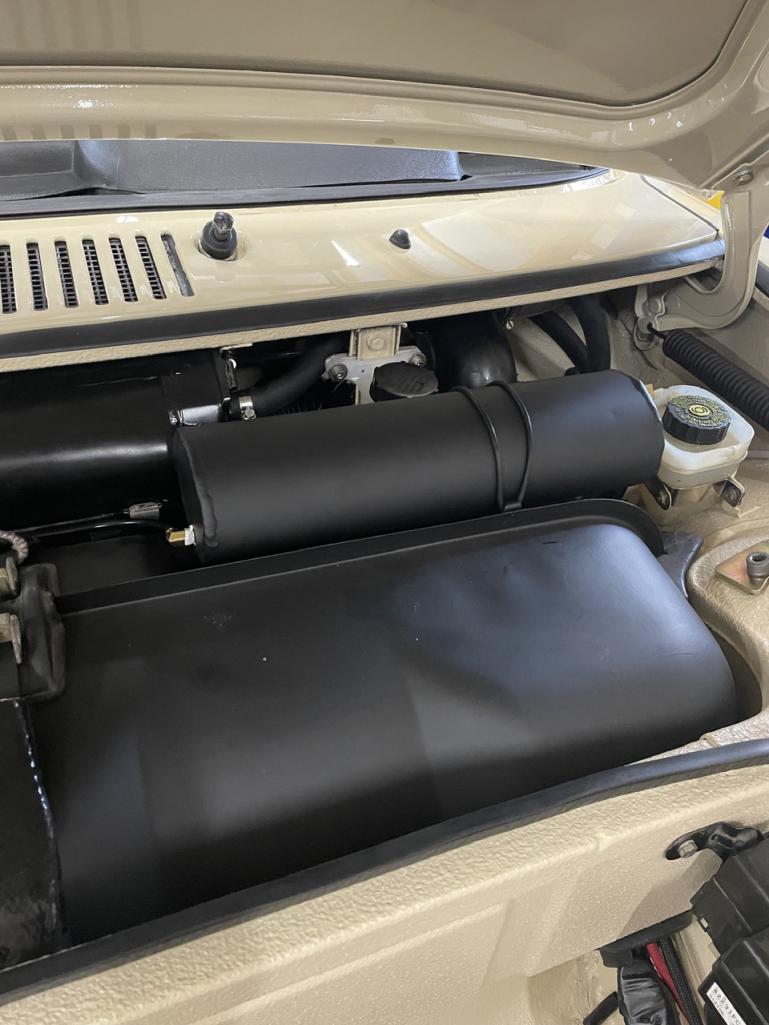
Since I’m running the Suby fuel pump I can’t use the factory expansion tank. I really want a proper evap system so I don’t get fuel smell/fumes. I made an expansion tank to reside where the factory charcoal canister used to go and I’ll be putting a canister in the engine compartment.
The tank is less volume than the factory tank but was the most I have room for. The inlet is at the bottom of the tank, with the exit at the top. I welded a baffle plate inside just below the top fitting to keep fuel from getting to the exit (I hope). I used a piece of 3” tube and flattened it to an oval shape. The tank will get a bath in flat black to help it blend with the fuel tank and not be too obtrusive. 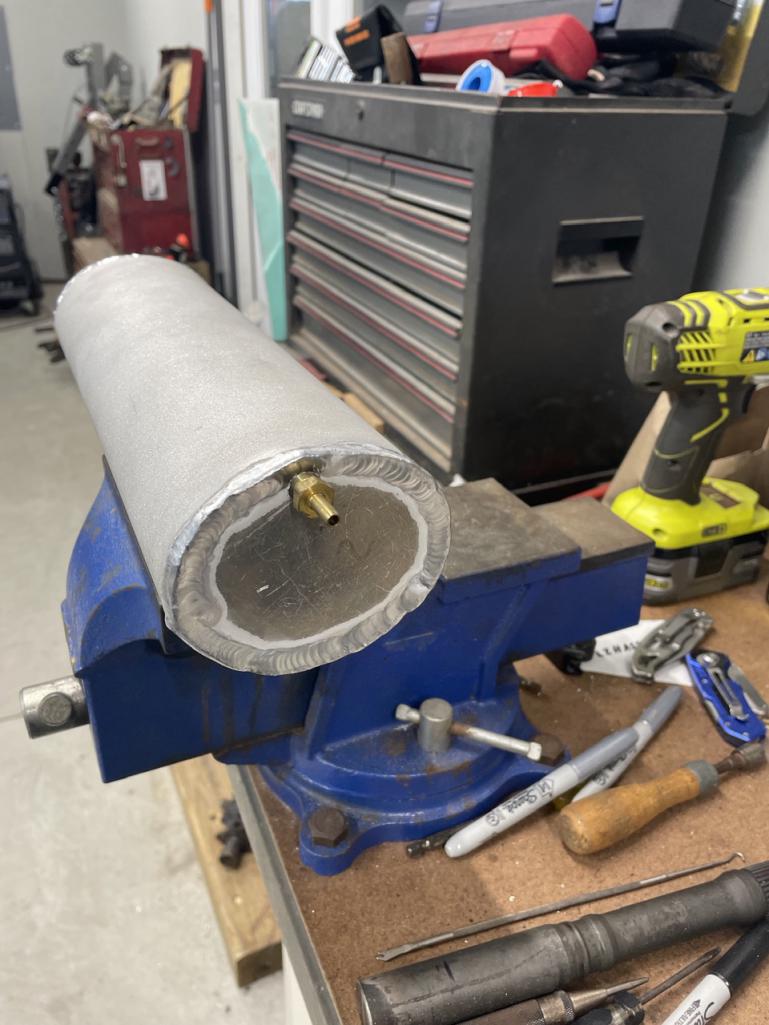 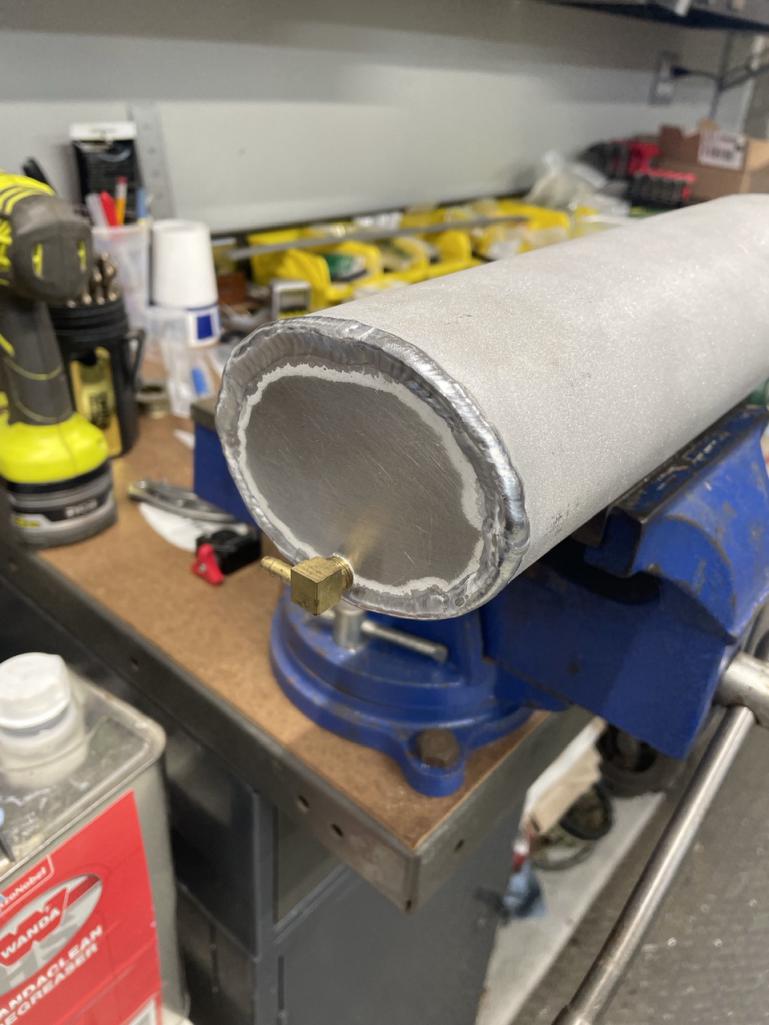 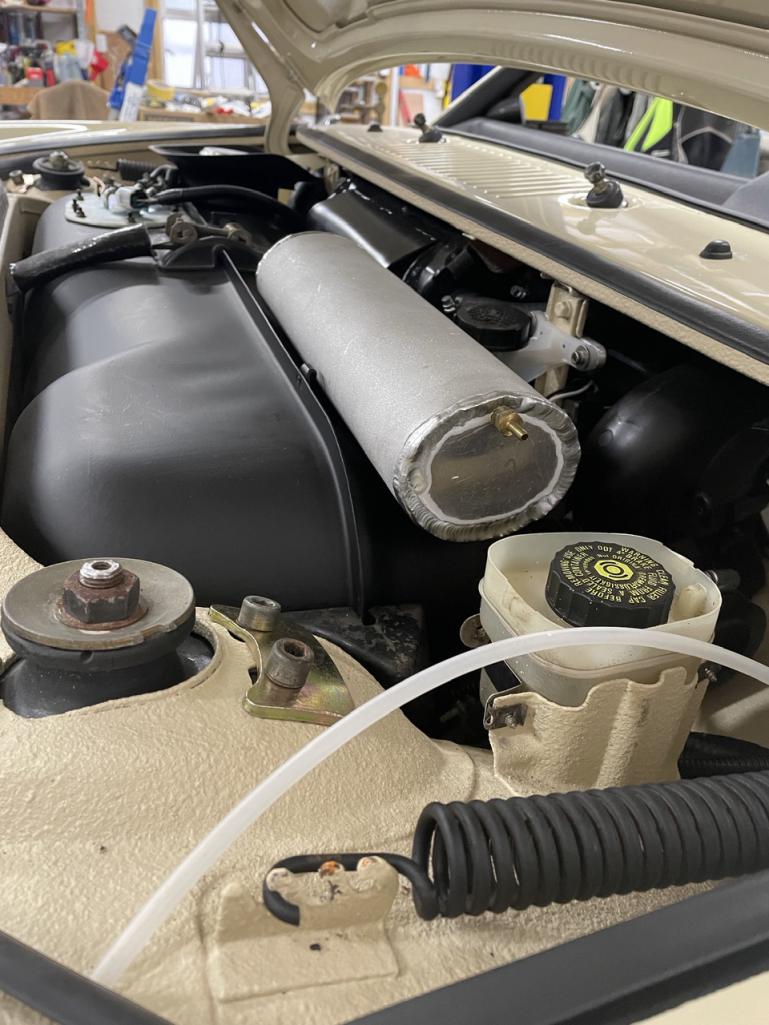 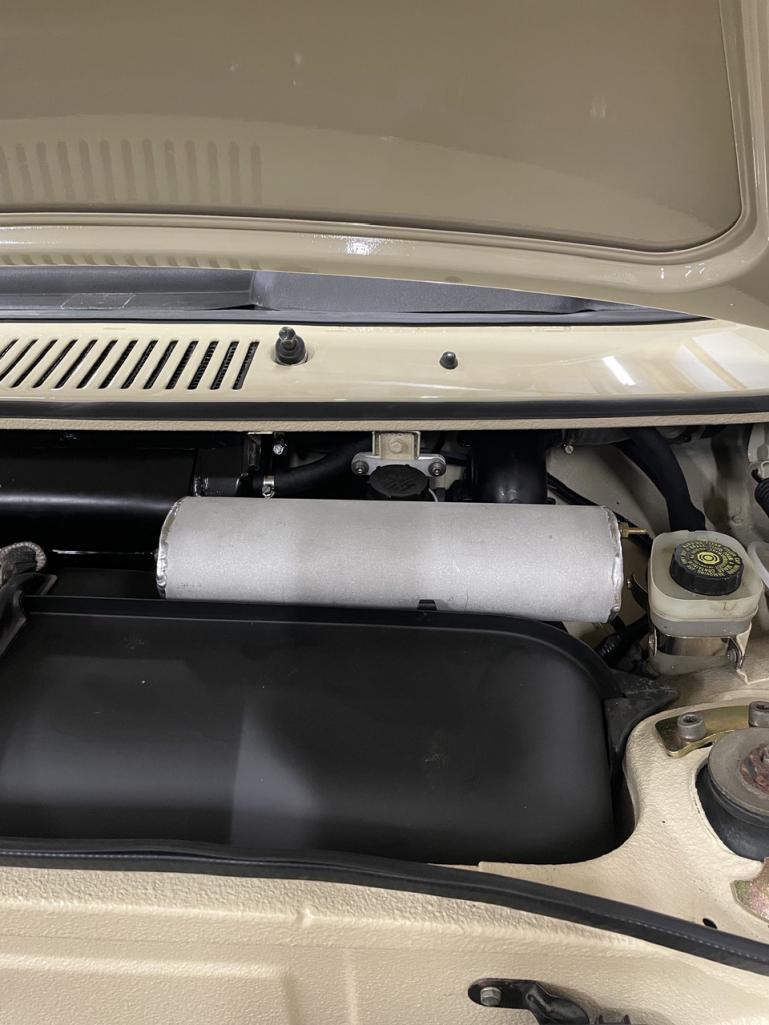 |
|
|
|
| East coaster |
Mar 31 2024, 07:44 PM
Post
#315
|
|
Senior Member Group: Members Posts: 1,914 Joined: 28-March 03 From: Millville, NJ Member No.: 487 Region Association: None |
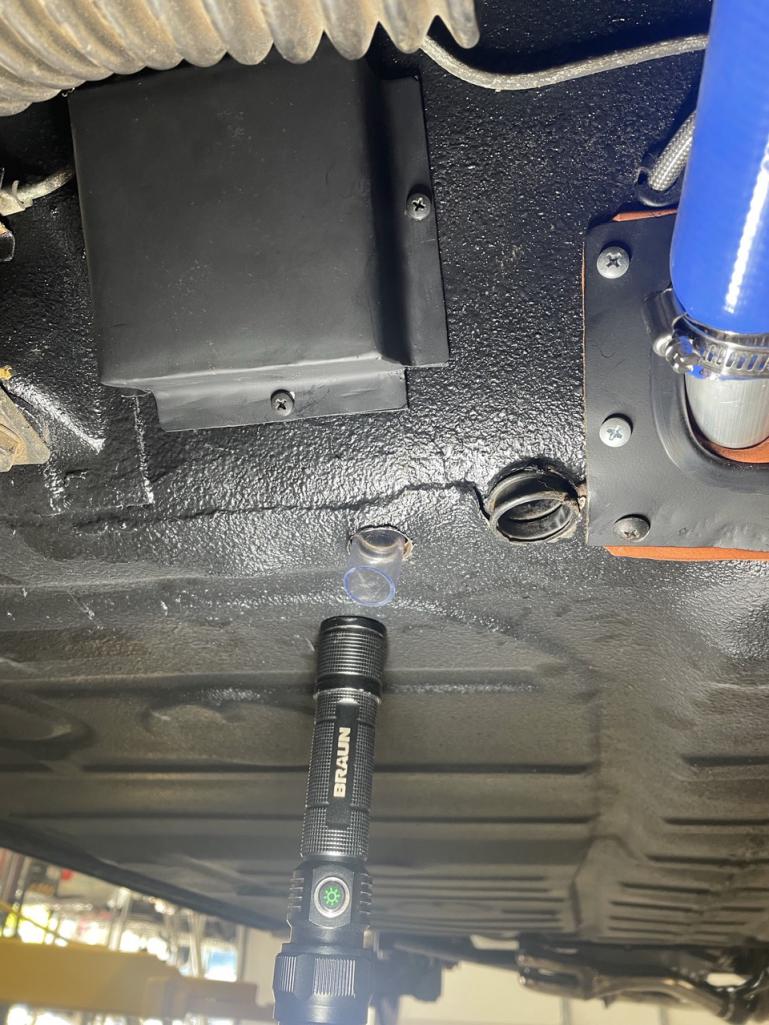
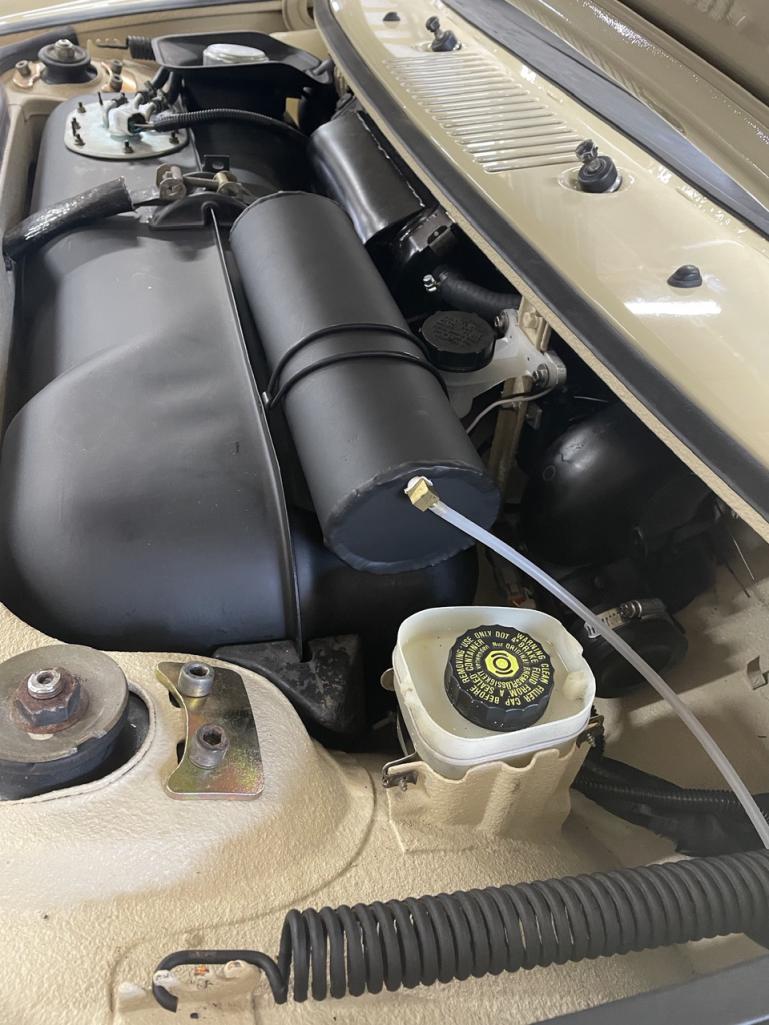
A little flat black does wonders…….expansion tank installed and plumbed, and waiting for the charcoal canister.
  |
|
|
|
| East coaster |
Apr 1 2024, 05:08 PM
Post
#316
|
|
Senior Member Group: Members Posts: 1,914 Joined: 28-March 03 From: Millville, NJ Member No.: 487 Region Association: None |
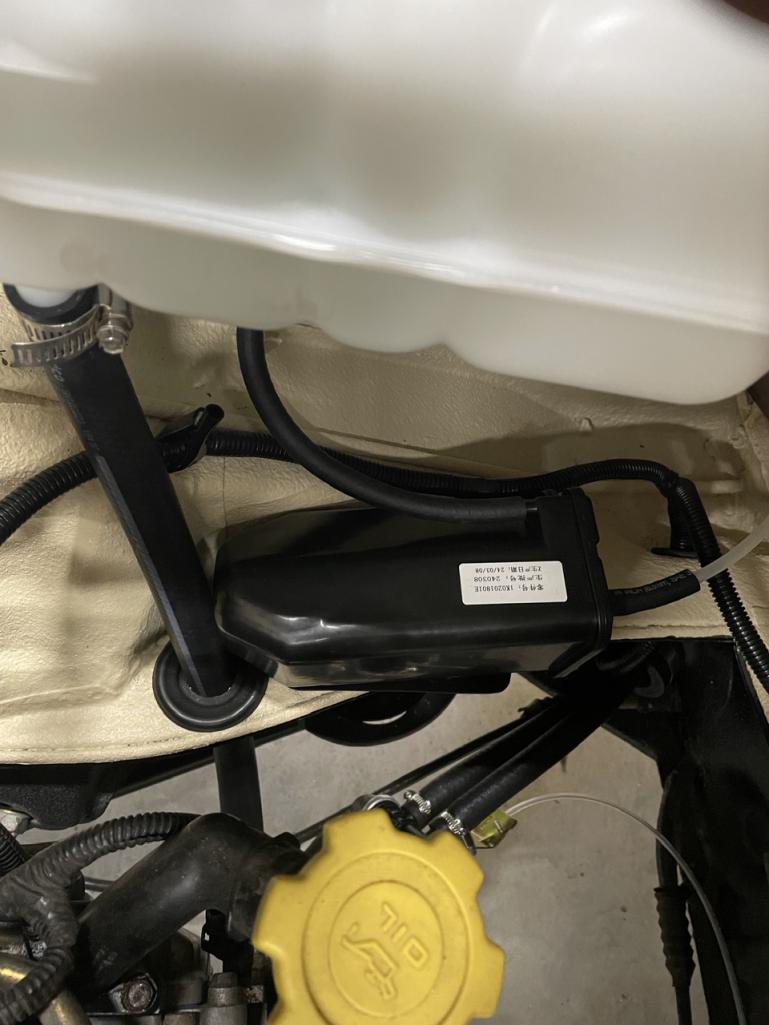
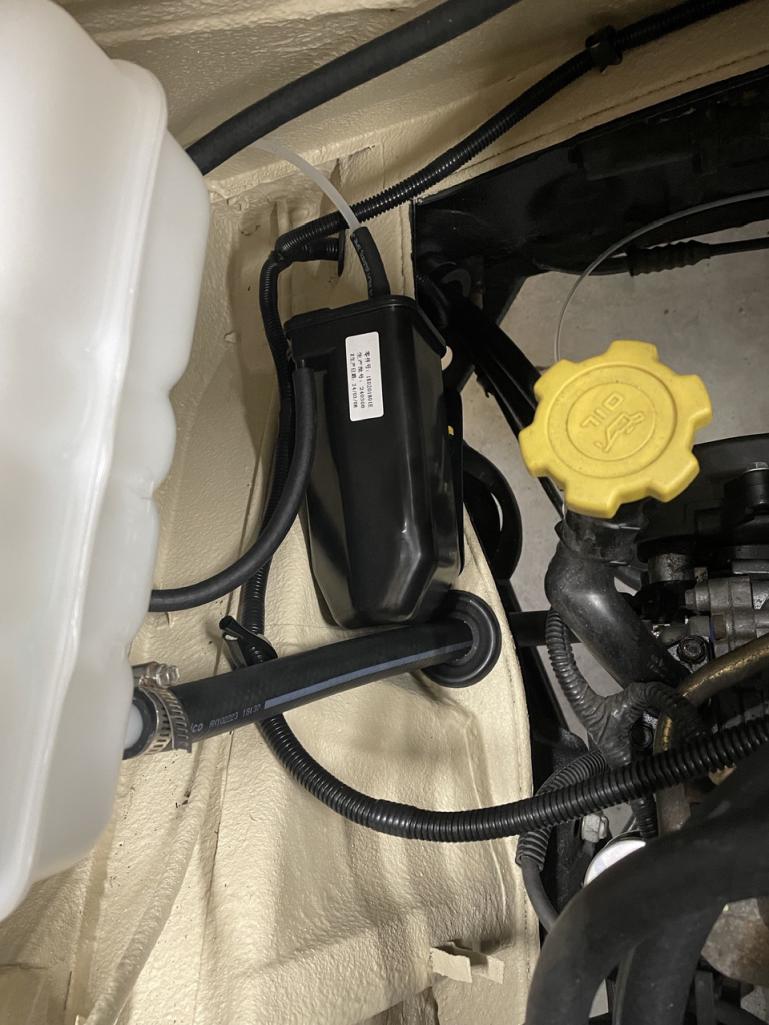
Wrapped up the evap system install today. I used a charcoal canister from a VW Jetta and installed it just under the coolant reservoir. It’s all plumbed up and ready to remove stink.
  |
|
|
|
| East coaster |
Apr 3 2024, 05:52 AM
Post
#317
|
|
Senior Member Group: Members Posts: 1,914 Joined: 28-March 03 From: Millville, NJ Member No.: 487 Region Association: None |
One axle built and installed, hopefully get the second one in today.
Just need to bleed brakes and clutch and maybe the first test drive this weekend….woohoo! 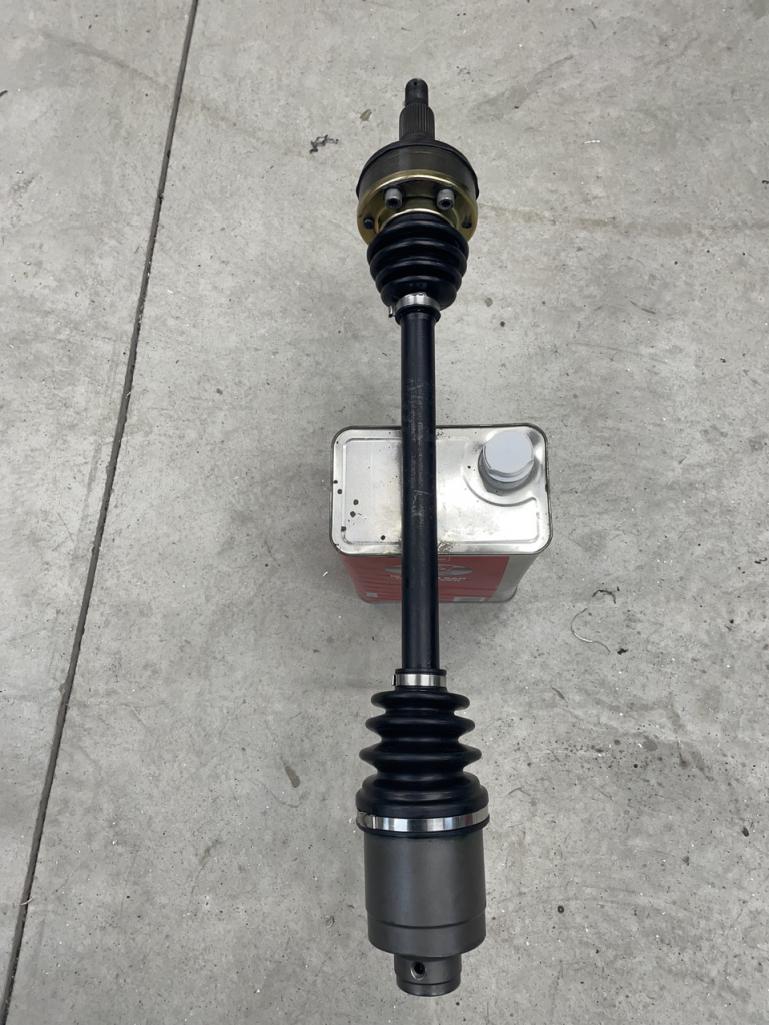 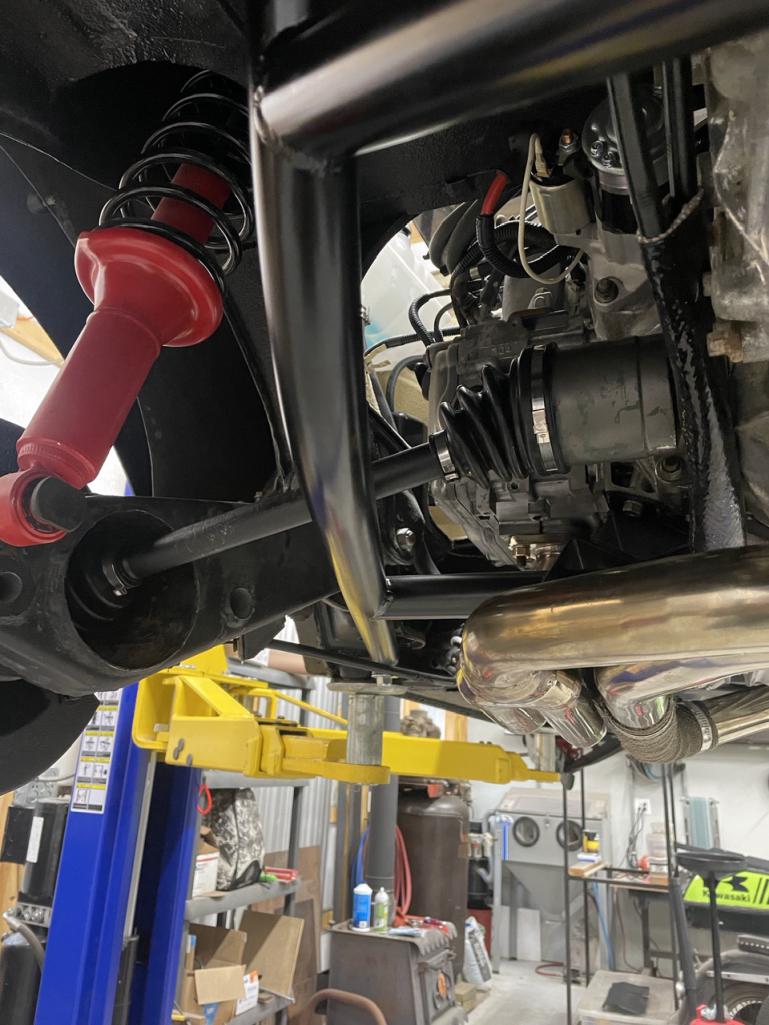 |
|
|
|
| East coaster |
Apr 3 2024, 04:16 PM
Post
#318
|
|
Senior Member Group: Members Posts: 1,914 Joined: 28-March 03 From: Millville, NJ Member No.: 487 Region Association: None |
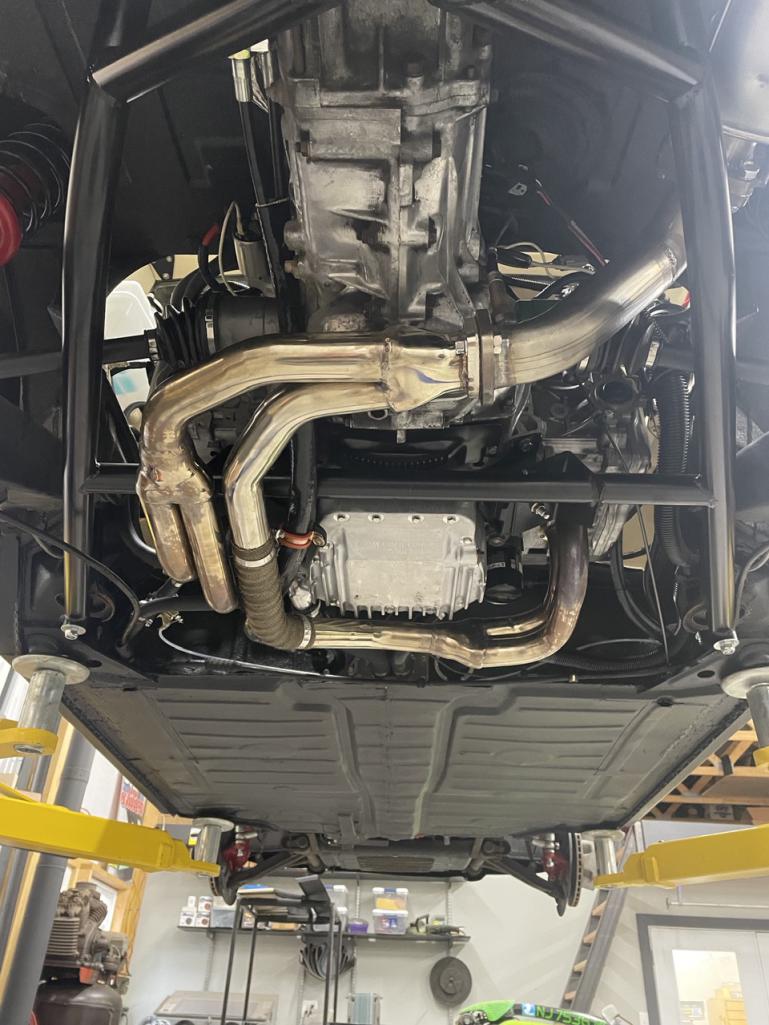
Built up other axle and got it installed…….just might be able to manage a rip around the property this weekend yet.
  |
|
|
|
| Chris H. |
Apr 4 2024, 06:15 AM
Post
#319
|
|
Senior Member Group: Members Posts: 4,071 Joined: 2-January 03 From: Chicago 'burbs Member No.: 73 Region Association: Upper MidWest |
Congrats (IMG:style_emoticons/default/beerchug.gif) ! Looks great, and most importantly you finished it! Or at least this version of it. You're fabrication skills are very impressive.
|
|
|
|
| East coaster |
Apr 6 2024, 04:42 AM
Post
#320
|
|
Senior Member Group: Members Posts: 1,914 Joined: 28-March 03 From: Millville, NJ Member No.: 487 Region Association: None |
Made a master cylinder brace yesterday. I wanted something bolt-in rather than welded. This is a two piece bolt together solution that mounts between the master cylinder mount point (between nut and MC body) and the suspension cross member.
I found that a front strut tube is the exact diameter to fit the cross member tube. I had an old junk strut laying around and cut a piece of tube to make the brace. The long section is just a piece of steel angle cut to size and shape. I made a threaded attach point between the long section and the tube so it installs/removes easily. Without the brace you could see the deflection in the floor and MC would bend downward on hard braking. With the brace it doesn’t deflect at all. The design transfers the load into the cross member, and the bottom of the steel angle keeps the MC from flexing downward. Nothing earth shattering here, as many have made similar braces, but I thought I’d share my version. It just needs a shot of flat black and it will be installed for good today. 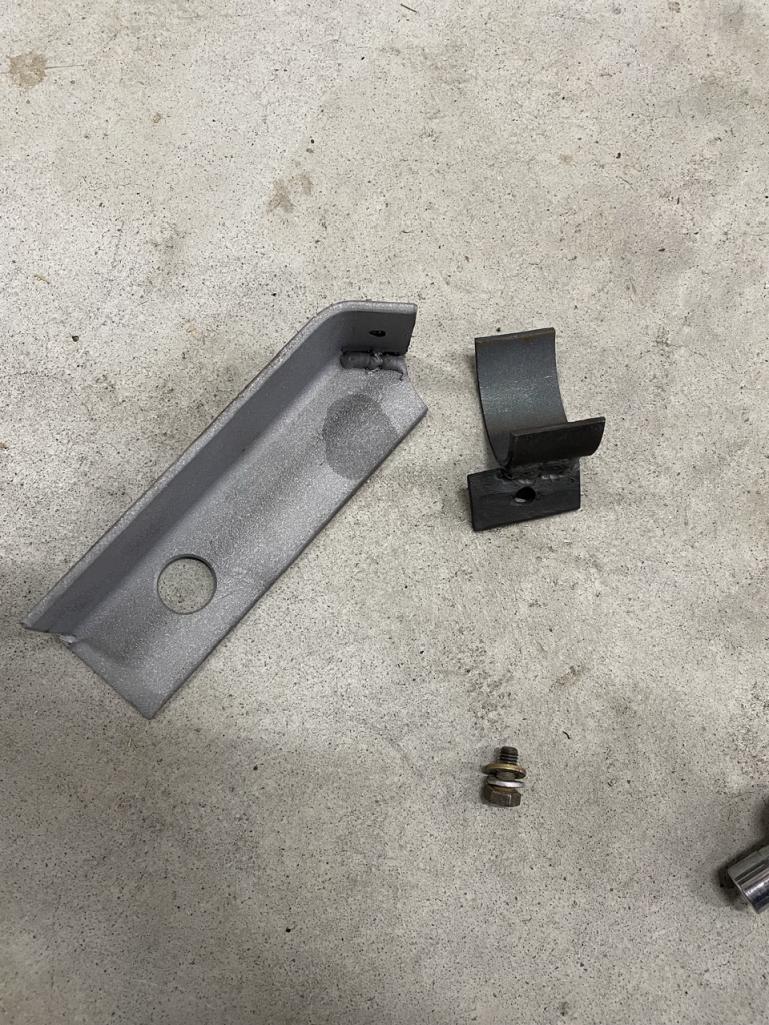 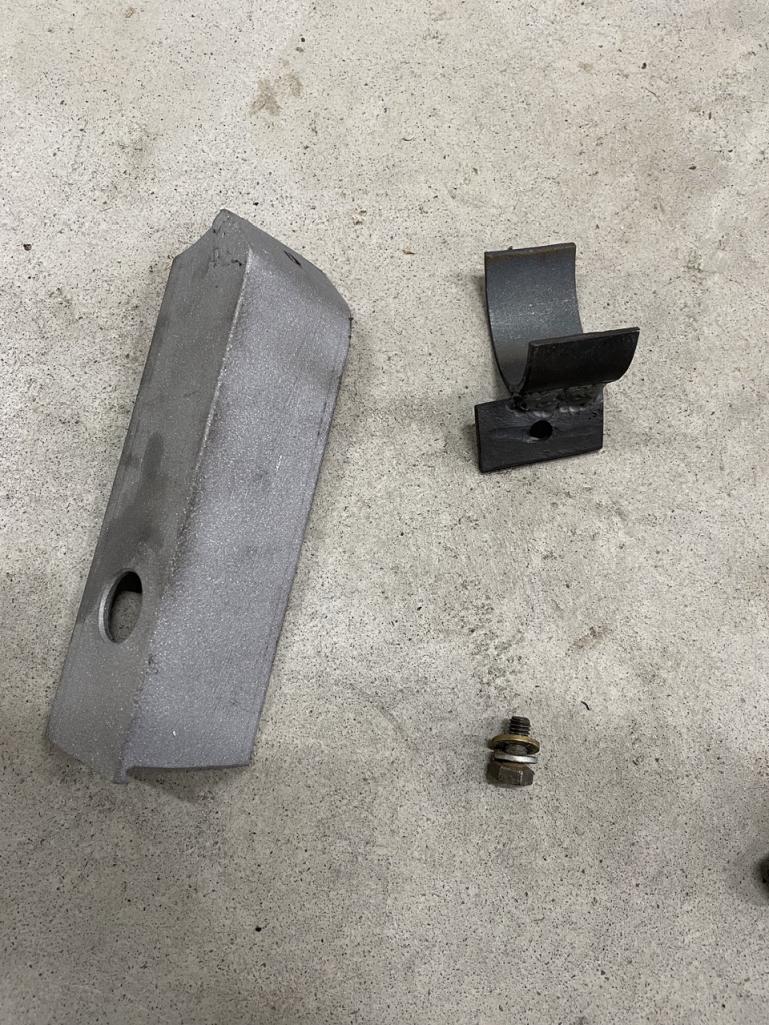 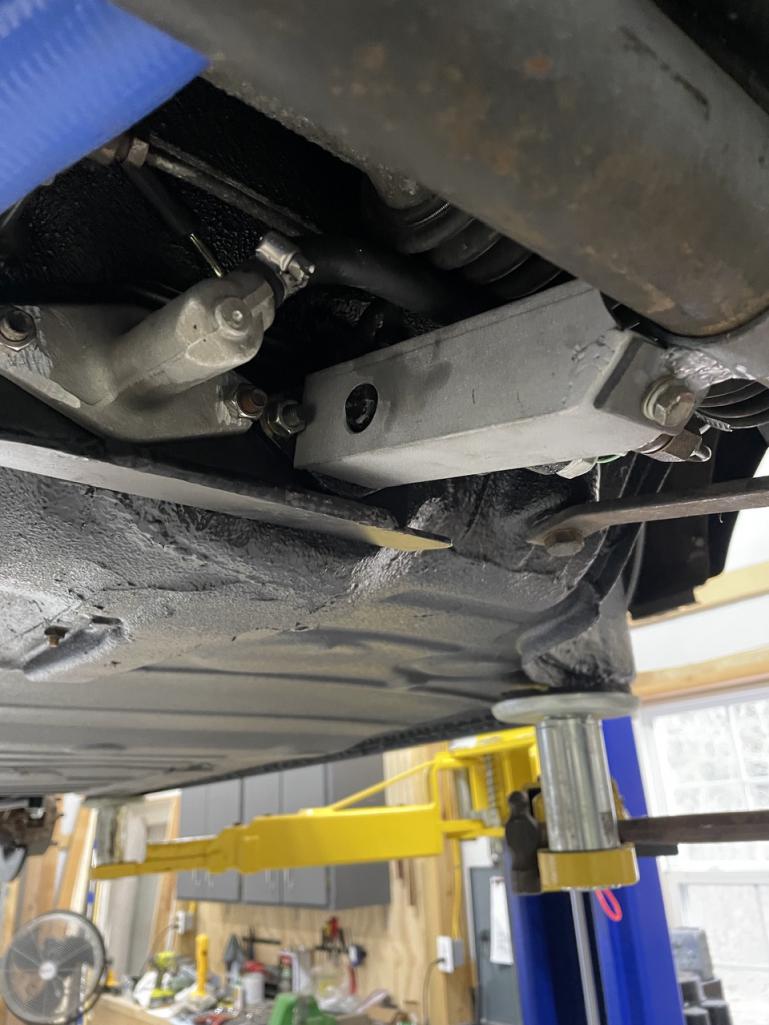 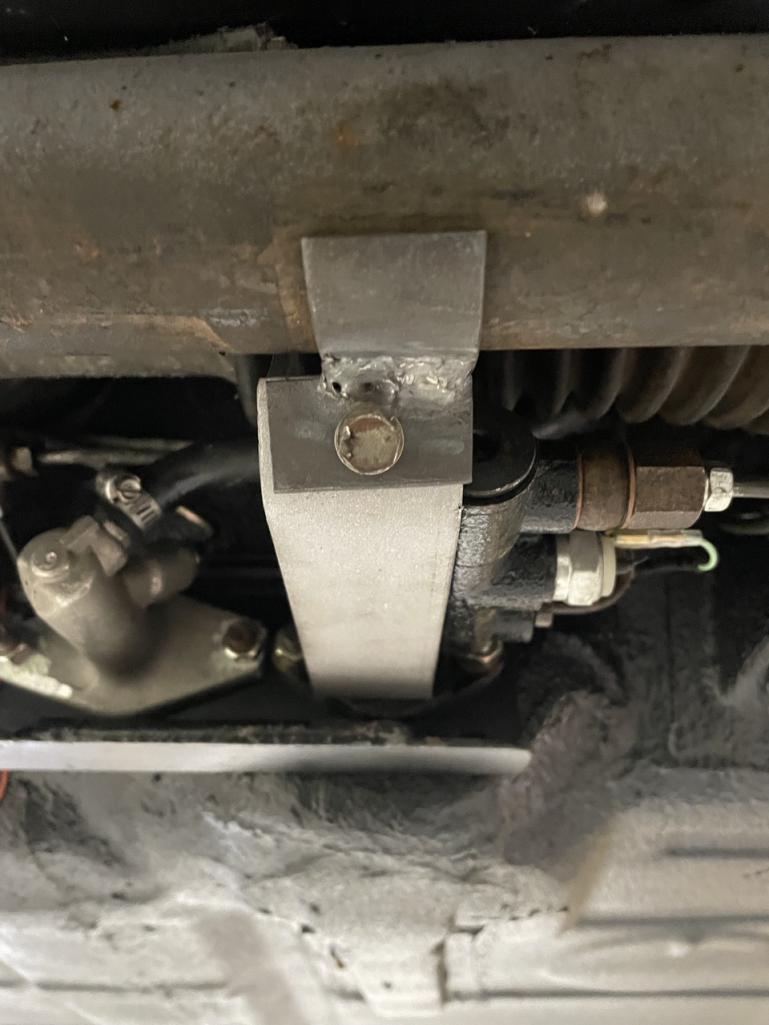  |
|
|
|
|
1 User(s) are reading this topic (1 Guests and 0 Anonymous Users)
0 Members:

|
Lo-Fi Version | Time is now: 12th February 2026 - 02:15 PM |
Invision Power Board
v9.1.4 © 2026 IPS, Inc.