|
|
|
Porsche, and the Porsche crest are registered trademarks of Dr. Ing. h.c. F. Porsche AG.
This site is not affiliated with Porsche in any way. Its only purpose is to provide an online forum for car enthusiasts. All other trademarks are property of their respective owners. |
|
|

  |

| seanpaulmc |
 Aug 30 2023, 03:48 PM Aug 30 2023, 03:48 PM
Post
#1
|
|
Member  Group: Members Posts: 299 Joined: 6-December 16 From: Orlando, FL Member No.: 20,649 Region Association: South East States |
Would someone post a picture of an unharmed passenger side A-pillar door support reinforcement panel showing the bottom attachment? Angled looking up would be best.
My original does not have the clarity to show the proper fit at the bottom flange. Here's where I'm working from. 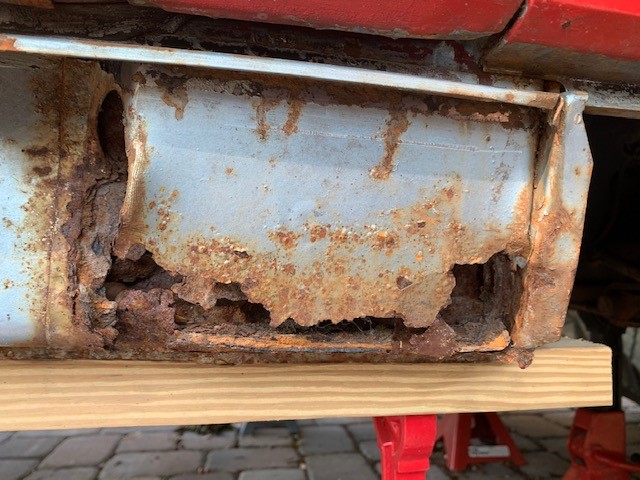 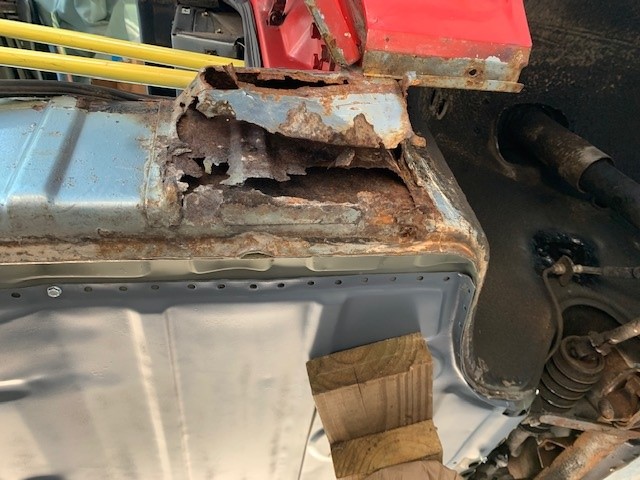 I have the longitudinal patch fully welded in now, so here's where I'm at. Need to go back and find/make the hole for the longitudinal cover.  This is the RD replacement panel. Nice piece. 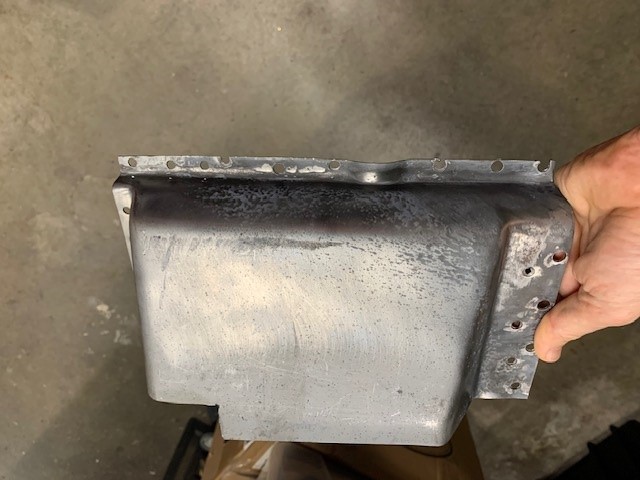 I believe the original piece does not have this bottom flange that is on the RD piece. The RD piece would need to be trimmed at the bottom so it does not to cover the bolt hole for the outer long cover and factory weep holes on the longs in this area. Alternatively, the RD piece could be welded in as-is and just cover up the holes. I would like to see the original configuration accommodates the holes before make a decision on which way to do it. Thanks World! Sean |
   |

 
|
| seanpaulmc |
Aug 31 2023, 06:28 AM
Post
#2
|
|
Member Group: Members Posts: 299 Joined: 6-December 16 From: Orlando, FL Member No.: 20,649 Region Association: South East States |
Bump to the top.
42 views no pics yet. |
|
|
|
| Superhawk996 |
Aug 31 2023, 07:51 AM
Post
#3
|
|
914 Guru Group: Members Posts: 5,819 Joined: 25-August 18 From: Woods of N. Idaho Member No.: 22,428 Region Association: Galt's Gulch |
Not clear on the the question being asked.
What you have in hand is the remnant of a clamshell overlay. Not the actual OEM box section that rust has consumed. It is essentially offset by one metal thickness so that it lays over the top of the OEM metal. |
|
|
|
| Superhawk996 |
Aug 31 2023, 07:58 AM
Post
#4
|
|
914 Guru Group: Members Posts: 5,819 Joined: 25-August 18 From: Woods of N. Idaho Member No.: 22,428 Region Association: Galt's Gulch |
The RD clamshell was made of three pieces spot welded together
The entire thing was meant to mount OVER existing OEM metal. I believe you have the front portion which RD now sells separately 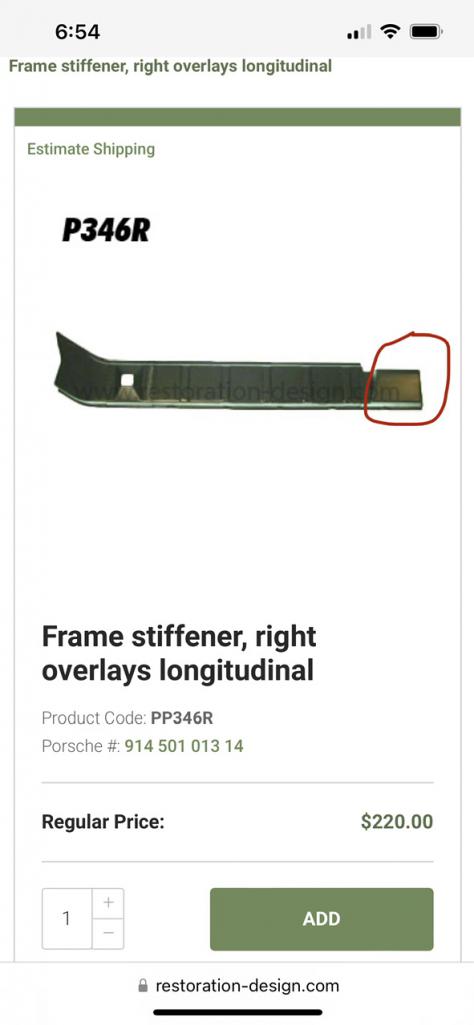 You should be able to use as is or cut, trim, blend as you see fit. |
|
|
|
| Superhawk996 |
Aug 31 2023, 08:13 AM
Post
#5
|
|
914 Guru Group: Members Posts: 5,819 Joined: 25-August 18 From: Woods of N. Idaho Member No.: 22,428 Region Association: Galt's Gulch |
See if this helps - Google is your friend. I’m sure there are other pics in build threads
http://www.914world.com/bbs2/index.php?showtopic=231859 OEM piece had a couple drain slots in the bottom. You’ll need to cut those into RD part. I fabricated mine from scratch before RD was offering just that front part of the clamshell separately. |
|
|
|
| seanpaulmc |
Aug 31 2023, 08:20 AM
Post
#6
|
|
Member Group: Members Posts: 299 Joined: 6-December 16 From: Orlando, FL Member No.: 20,649 Region Association: South East States |
Thanks, SuperHawk. The feedback is helpful.
Looking for a view of this... 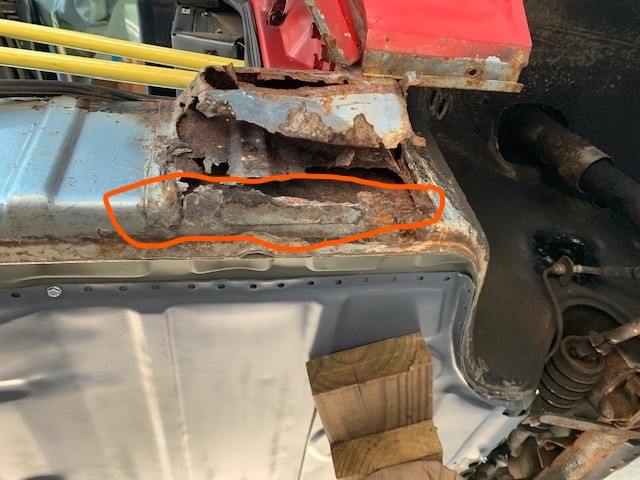 I get the gist of it from this picture but would like to see one that's intact. You are correct about the RD piece. The repair patch they sell is the same piece that comes off of their outer frame stiffener (cut to fit). Thank you. Again, appreciate the feedback. |
|
|
|
| Montreal914 |
Aug 31 2023, 08:24 AM
Post
#7
|
|
Senior Member Group: Members Posts: 1,558 Joined: 8-August 10 From: Claremont, CA Member No.: 12,023 Region Association: Southern California |
I believe you are referring to this?
This is the driver side. Yes, the outer layer doesn't go all the way to the flanged area. Large size picture, click and zoom to see the detail of the cut out (2 drains, and clearance for the rocker cover screw). Happy repair! (IMG:style_emoticons/default/smash.gif) (IMG:style_emoticons/default/welder.gif) (IMG:style_emoticons/default/smile.gif) 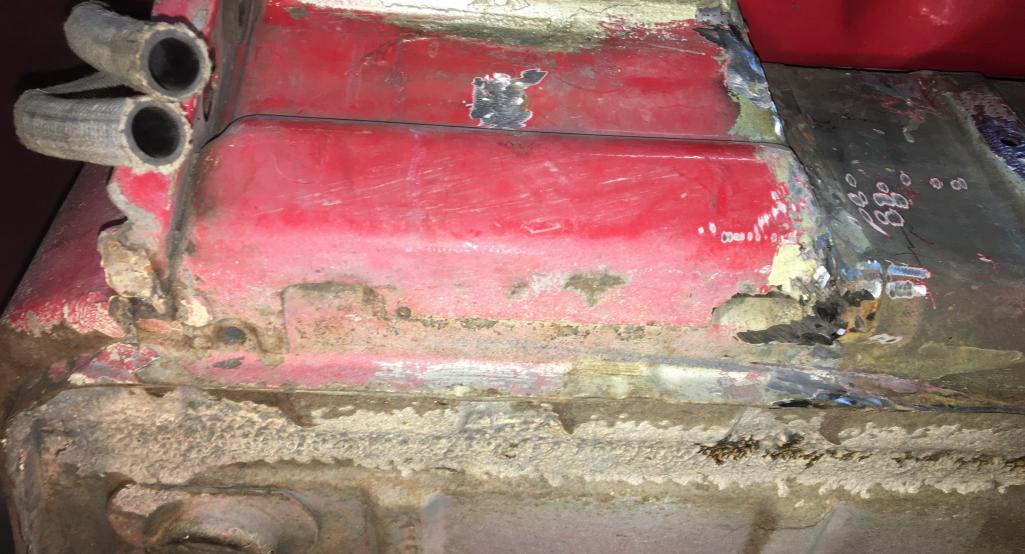 |
|
|
|
| Superhawk996 |
Aug 31 2023, 08:30 AM
Post
#8
|
|
914 Guru Group: Members Posts: 5,819 Joined: 25-August 18 From: Woods of N. Idaho Member No.: 22,428 Region Association: Galt's Gulch |
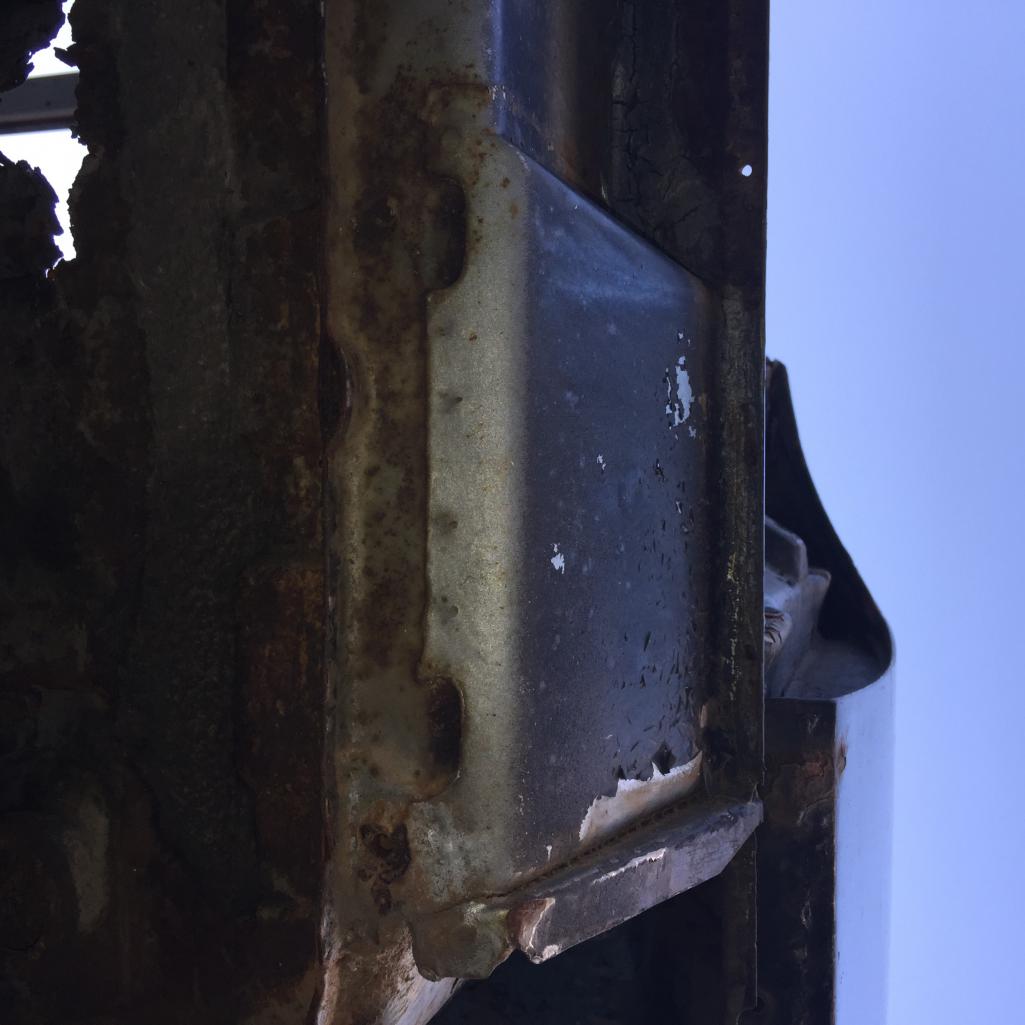
Not exactly perspective you want and this is driver side
All I’ve got 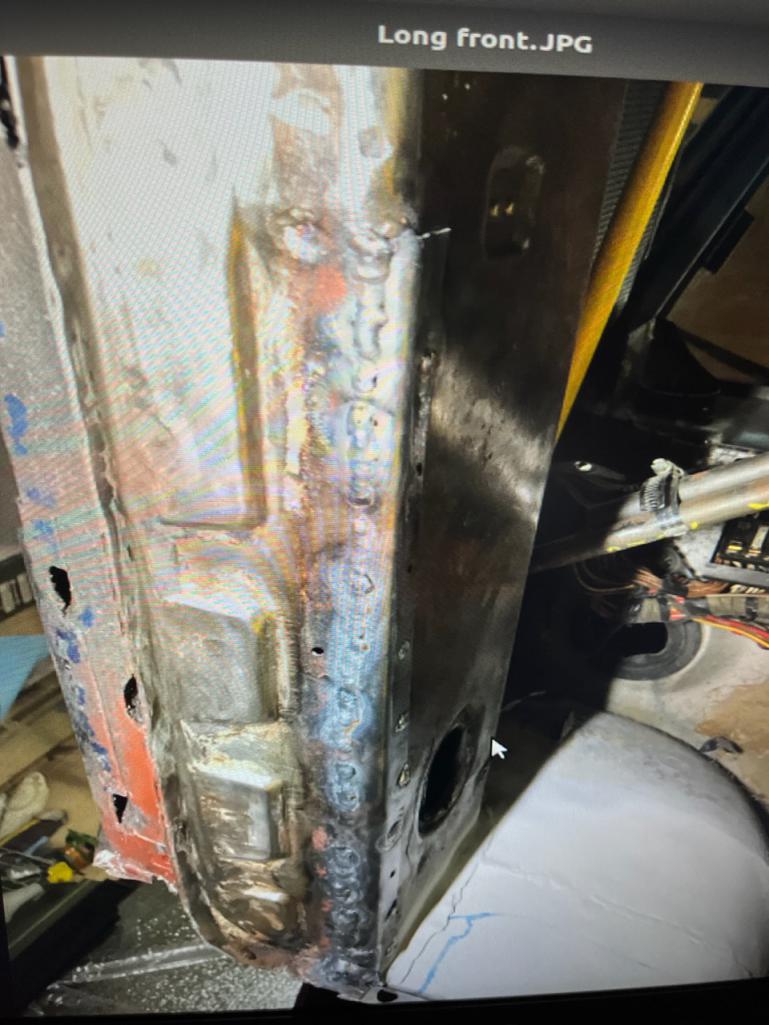 |
|
|
|
| Shivers |
Aug 31 2023, 08:49 AM
Post
#9
|
|
Senior Member Group: Members Posts: 2,373 Joined: 19-October 20 From: La Quinta, CA Member No.: 24,781 Region Association: Southern California |
|
|
|
|
| seanpaulmc |
Aug 31 2023, 09:48 AM
Post
#10
|
|
Member Group: Members Posts: 299 Joined: 6-December 16 From: Orlando, FL Member No.: 20,649 Region Association: South East States |
Great pictures everyone. Exactly what I needed.
Original shows good sized cut outs in the support bracket making for a large weep hole. So the question is make it like original or use the full replacement piece and eliminate the weep holes. Thanks again, All! |
|
|
|
| Shivers |
Aug 31 2023, 01:20 PM
Post
#11
|
|
Senior Member Group: Members Posts: 2,373 Joined: 19-October 20 From: La Quinta, CA Member No.: 24,781 Region Association: Southern California |
QUOTE(seanpaulmc @ Aug 31 2023, 08:48 AM)  Great pictures everyone. Exactly what I needed. Original shows good sized cut outs in the support bracket making for a large weep hole. So the question is make it like original or use the full replacement piece and eliminate the weep holes. Thanks again, All! I would leave them. Probably the only reason that piece hasn’t rusted out. That is the rear of the wheelhouse and will load up with mud, sand, dirt and water. That is rustworm food. |
|
|
|
| seanpaulmc |
Sep 2 2023, 06:27 PM
Post
#12
|
|
Member Group: Members Posts: 299 Joined: 6-December 16 From: Orlando, FL Member No.: 20,649 Region Association: South East States |
Again, thanks for the pictures and giving me some clarity.
To close this out, Here’s the modified piece for install… 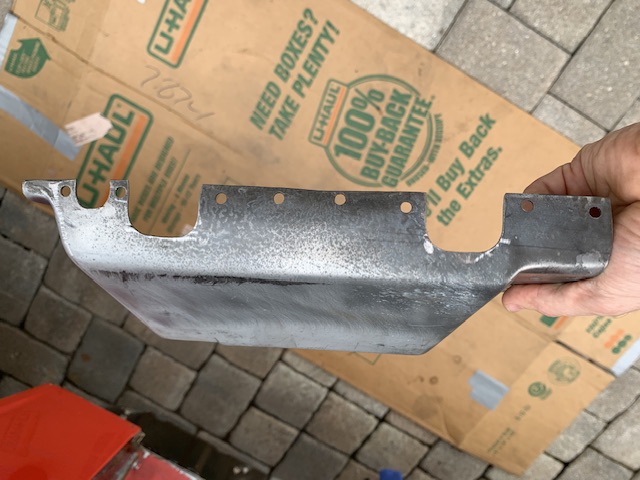 |
|
|
|
|
1 User(s) are reading this topic (1 Guests and 0 Anonymous Users)
0 Members:

|
Lo-Fi Version | Time is now: 15th May 2024 - 01:27 PM |
Invision Power Board
v9.1.4 © 2024 IPS, Inc.