|
|
|
Porsche, and the Porsche crest are registered trademarks of Dr. Ing. h.c. F. Porsche AG.
This site is not affiliated with Porsche in any way. Its only purpose is to provide an online forum for car enthusiasts. All other trademarks are property of their respective owners. |
|
|

  |

| jhynesrockmtn |
 Jan 21 2024, 05:21 PM Jan 21 2024, 05:21 PM
Post
#21
|
|
Member  Group: Members Posts: 440 Joined: 13-June 16 From: spokane wa Member No.: 20,100 Region Association: Pacific Northwest |
I did the whole front on my BB last year. New struts, bushings, ball joints, rack rebuilt by 914rubber, turbo tie rods, etc. Ian's videos were my guide. That nut will come off easiest with a rattle gun. I have an electric dewalt that was very helpful on my front and rear suspension. Yes, you are missing the washer that has a tab that bends up.
|
   |

 
|
| iankarr |
Jan 21 2024, 05:28 PM
Post
#22
|
|
The wrencher formerly known as Cuddy_K Group: Members Posts: 2,564 Joined: 22-May 15 From: Heber City, UT Member No.: 18,749 Region Association: Intermountain Region |
Glad my bleeding knuckles helped the greater good (IMG:style_emoticons/default/wink.gif)
|
|
|
|
| r_towle |
Jan 22 2024, 05:07 PM
Post
#23
|
|
Custom Member Group: Members Posts: 24,705 Joined: 9-January 03 From: Taxachusetts Member No.: 124 Region Association: North East States |
I remember when I was doing autox weekly, I replaced everything with different parts…all new
The final thing I had to chase was wobbly steering. I could feel it even more amplified with all the race suspension. It turns out that steering racks don’t last forever, and steering u-joints also do not have unlimited lifespans. Check the basics, tie rods, ball joint and bearings. Upper strut bearing/rubber Then check for any play at all in the steering wheel to steering rack….and then the ring /pinion inside the rack. I had to rebuild that piece, and replaced a few ujoints. Btw, make a note (picture) of all steering ujoints while steering wheel is straight….it matters when you got put it all back together. Rich |
|
|
|
| rjames |
Jan 23 2024, 10:41 AM
Post
#24
|
|
I'm made of metal Group: Members Posts: 4,315 Joined: 24-July 05 From: Shoreline, WA Member No.: 4,467 Region Association: Pacific Northwest |
Happy to report that last night I was able to finally get the top strut nuts off without having to buy an impact driver or a special wrench to hold the washer/spindle assembly. That F'er was on tight, though.
QUOTE(r_towle @ Jan 22 2024, 03:07 PM)  I remember when I was doing autox weekly, I replaced everything with different parts…all new The final thing I had to chase was wobbly steering. I could feel it even more amplified with all the race suspension. It turns out that steering racks don’t last forever, and steering u-joints also do not have unlimited lifespans. Check the basics, tie rods, ball joint and bearings. Upper strut bearing/rubber Then check for any play at all in the steering wheel to steering rack….and then the ring /pinion inside the rack. I had to rebuild that piece, and replaced a few ujoints. Btw, make a note (picture) of all steering ujoints while steering wheel is straight….it matters when you got put it all back together. Rich Thanks, Rich. Everything seemed tight when trying to move by hand; No movement with anything connected to the strut housing, the steering shaft is tight, and the U-joint looks good. Starting to think the issue may be the rack, although holding out hope that it's just a worn hockey puck. Hope to have it all out by next weekend. |
|
|
|
| pek771 |
Jan 24 2024, 11:26 AM
Post
#25
|
|
Member Group: Members Posts: 275 Joined: 23-November 05 From: Conover, NC Member No.: 5,175 Region Association: None |
Your rack needs maintenance, at best
|
|
|
|
| rjames |
Jan 26 2024, 07:47 PM
Post
#26
|
|
I'm made of metal Group: Members Posts: 4,315 Joined: 24-July 05 From: Shoreline, WA Member No.: 4,467 Region Association: Pacific Northwest |
More progress, slow, but progress none the less:
Got the struts removed after much violence with a hammer. First came trying to separate the tie rod from where it attaches to the strut assembly. A few billion blows with a hammer didn't seem to be doing much. I ended up having to MacGyver a too small bearing puller held tight with a plumbers wrench to get them removed on each side. The hammer redeemed itself when trying to remove the ball joints from the struts. Lots of pounding and a torch to heat things up eventually allowed me to beat the bejesus out of them into submission and get them out. Now I've got this to deal with. All the vids show a fastener that one could use a chisel on to loosen up. Of course that isn't what I have. Stuck the strut in a vice and tried to use an adjustable wrench on it, but it would budge. Is heat applicable here, too? Should I Dremel a chunk out of it and then use a chisel and my new best friend Mr. Hammer to try and get it loose? 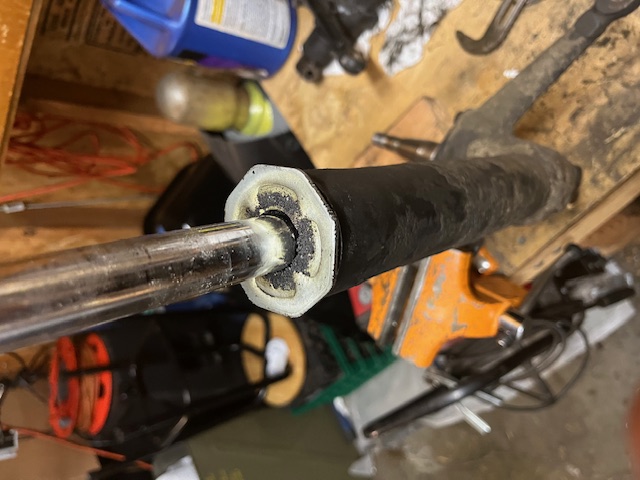 |
|
|
|
| DennisV |
Jan 27 2024, 05:35 AM
Post
#27
|
|
Senior Member Group: Members Posts: 670 Joined: 8-August 20 From: Santa Rosa, CA Member No.: 24,575 Region Association: Northern California |
QUOTE(rjames @ Jan 26 2024, 05:47 PM) Now I've got this to deal with. All the vids show a fastener that one could use a chisel on to loosen up. Of course that isn't what I have. Stuck the strut in a vice and tried to use an adjustable wrench on it, but it would budge. Is heat applicable here, too? Should I Dremel a chunk out of it and then use a chisel and my new best friend Mr. Hammer to try and get it loose? I've had some surprisingly good luck getting stuff like this to move with a BIG pipe wrench. Though it will probably chew on the surface where it grabs. Another effective, but possibly destructive, option is an impact hammer with chisel attachment. Looking forward to seeing your reassembly order of operations. (IMG:style_emoticons/default/popcorn[1].gif) |
|
|
|
| rjames |
Jan 29 2024, 09:53 PM
Post
#28
|
|
I'm made of metal Group: Members Posts: 4,315 Joined: 24-July 05 From: Shoreline, WA Member No.: 4,467 Region Association: Pacific Northwest |
Got the gland nut off finally after applying heat and much swearing.
Pulled out the KYBs the PO had installed. Interesting how one is really discolored. What caused that? Wish I could powder coat the struts, but after a bit of cleaning and minus all the oil on the outside, they’ll be going back in as is, albeit with new Konis. 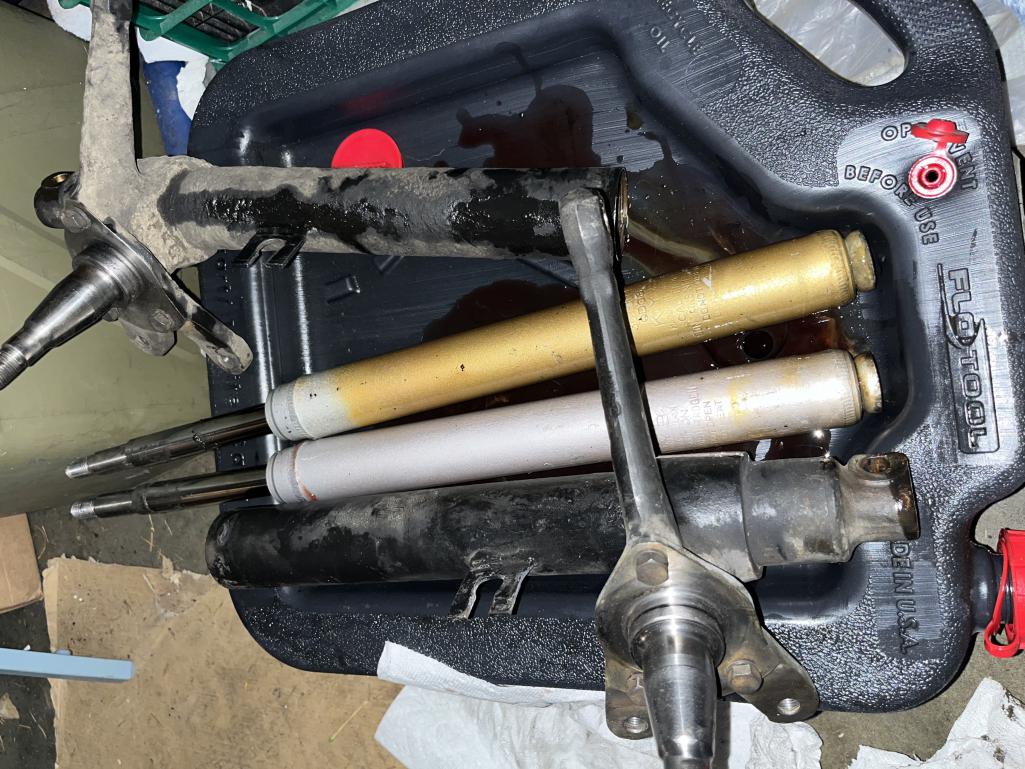 |
|
|
|
| r_towle |
Jan 30 2024, 08:58 PM
Post
#29
|
|
Custom Member Group: Members Posts: 24,705 Joined: 9-January 03 From: Taxachusetts Member No.: 124 Region Association: North East States |
Making progress….woohoo!
I have a 2006 997 that is wobbly wobbly. I have to do all of what you are doing , starting this weekend. It saddens me that my 40 and 50+ year old Porsche cars did not have rubber that disintegrated. 2005-6 used something weird…it falls apart once you get the rubber out. Good luck with your project. Do take a look at the rack and pinion….there are articles out there on how to rebuild it, it’s not terribly hard todo, and worth it. Rich |
|
|
|
| rjames |
Feb 1 2024, 06:33 PM
Post
#30
|
|
I'm made of metal Group: Members Posts: 4,315 Joined: 24-July 05 From: Shoreline, WA Member No.: 4,467 Region Association: Pacific Northwest |
Thanks, Rich. Yeah- I'm already residing myself to rebuilding the rack (or sending it out to be rebuilt).
Here's where I'm at now. Cleaned up the struts and got most of the undercoating off without also taking the paint off. It's too cold for painting, otherwise I'd be inclined to strip them completely and repaint, It's a huge improvement from how they looked before, so will likely leave them as is. 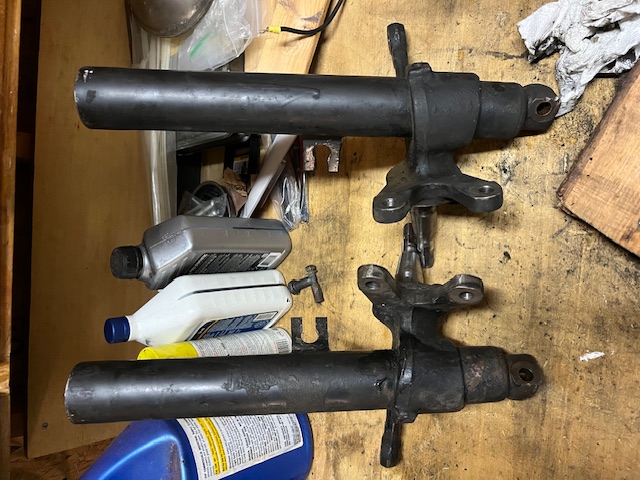 Left control arm ready for bushing removal and some cleaning. 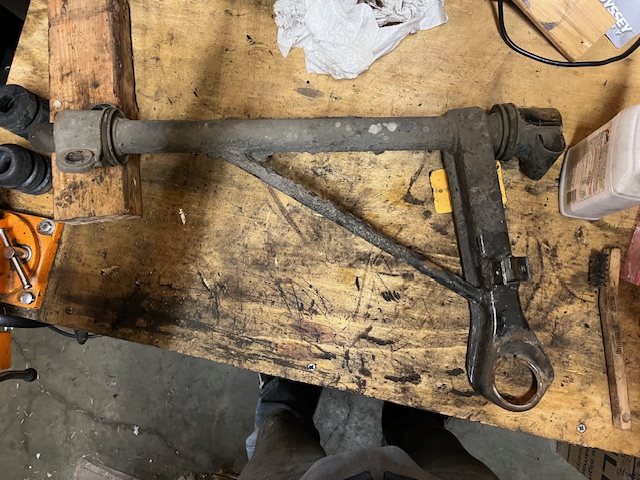 Haven't pulled the right control arm and torsion bar yet, but here's how the left one looked. Is this too far gone to re-use? 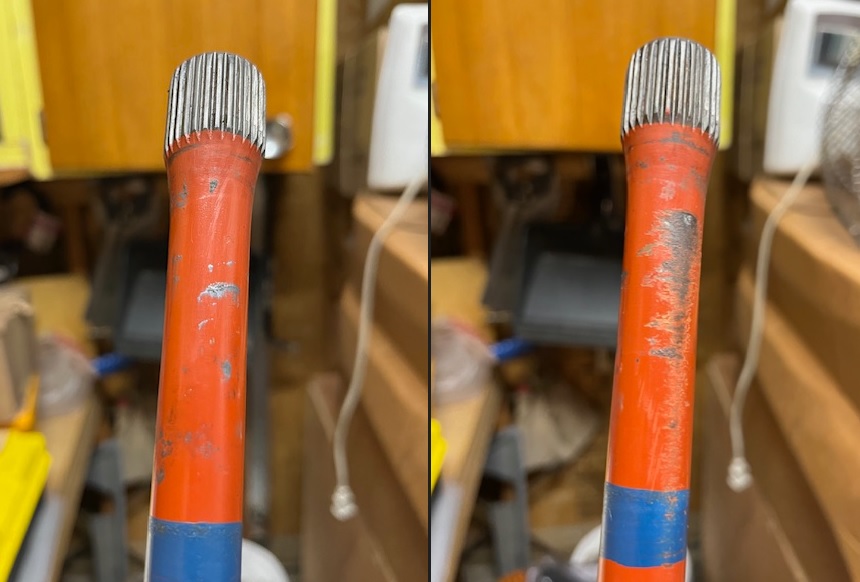 |
|
|
|
| rjames |
Feb 9 2024, 01:12 PM
Post
#31
|
|
I'm made of metal Group: Members Posts: 4,315 Joined: 24-July 05 From: Shoreline, WA Member No.: 4,467 Region Association: Pacific Northwest |
It took a while, but I got 99% of the undercoating off of the control arms without damaging the paint underneath too badly.
Bushings came off easily enough with a little heat.  Bushings were definitely worn. It's easy to see why the torsion bars were rubbing. If your 914 still has the original bushings, it's time to replace them. 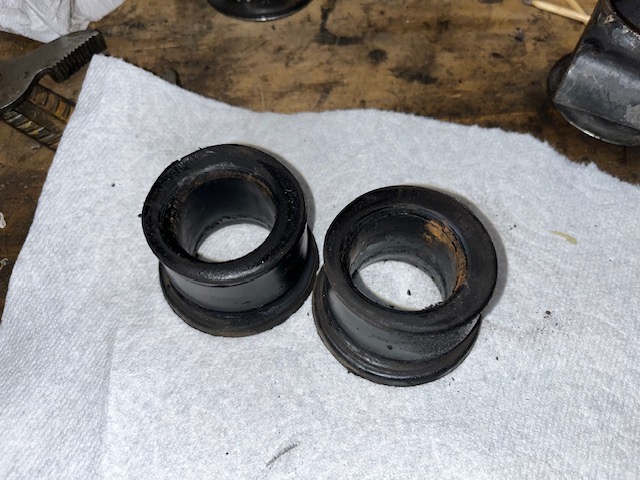 Question for @iankarr or anyone else who wants to weigh in: In the most helpful bushing install video Ian posted, it is said to index the the carriers at 21 and 14 degrees (front/rear), but I measured mine right before removing the bushings and they were 43 and 27 degrees (front/rear) on both sides. Anything I should be concerned about here or is that just a result of their last position when I jacked up the front end? |
|
|
|
| iankarr |
Feb 9 2024, 11:20 PM
Post
#32
|
|
The wrencher formerly known as Cuddy_K Group: Members Posts: 2,564 Joined: 22-May 15 From: Heber City, UT Member No.: 18,749 Region Association: Intermountain Region |
I don't remember which manual I got those numbers from, but i noticed that I had to adjust the angles slightly on installation.
|
|
|
|
| Superhawk996 |
Feb 10 2024, 07:26 AM
Post
#33
|
|
914 Guru Group: Members Posts: 7,219 Joined: 25-August 18 From: Woods of N. Idaho Member No.: 22,428 Region Association: Galt's Gulch |
21 and 14 are the correct angles to allow the LCA to align to the body at install with LCA in proper rebound position. Those numbers are in the Elephant Racing install instructions.
Rubber bushings should not rotate on the LCA if installed properly. Whatever angles you may have had when you removed worn out and slipping bushings is irrelevant. |
 |
|
| DRPHIL914 |
Feb 10 2024, 08:44 AM
Post
#34
|
|
Dr. Phil Group: Members Posts: 5,830 Joined: 9-December 09 From: Bluffton, SC Member No.: 11,106 Region Association: South East States |
@rjames
wow great job, thats a big job to tackle, i did most of that about 10 years ago, but i didnt do the new strut inserts but feel like its time to do that soon, but am wrestling with whether or not i should then upgrade to actual 5 lug front not drilled 4 lug to 5 lug with studs int he OEM rotors, im just not sure itw worth the trouble and expense. what brand strut inserts did you get? if i follow the KISS principle and just get a set of sport bilistein inserts or such, i am sure this would be the most cost effective option. anyway , you are going to love how well your car handles with all that new gear i knowi did!!! Phil |
|
|
|
| rjames |
Feb 10 2024, 05:11 PM
Post
#35
|
|
I'm made of metal Group: Members Posts: 4,315 Joined: 24-July 05 From: Shoreline, WA Member No.: 4,467 Region Association: Pacific Northwest |
@DRPHIL914 I went with Konis front and rear when they were on sale everywhere a while back. I did the rear ones a few month ago along with new 100 lb. springs. Looking forward the improvements that all the new parts should bring!
|
|
|
|
| rjames |
Feb 10 2024, 05:13 PM
Post
#36
|
|
I'm made of metal Group: Members Posts: 4,315 Joined: 24-July 05 From: Shoreline, WA Member No.: 4,467 Region Association: Pacific Northwest |
QUOTE(Superhawk996 @ Feb 10 2024, 05:26 AM) 21 and 14 are the correct angles to allow the LCA to align to the body at install with LCA in proper rebound position. Those numbers are in the Elephant Racing install instructions. Rubber bushings should not rotate on the LCA if installed properly. Whatever angles you may have had when you removed worn out and slipping bushings is irrelevant. I'll index them accordingly, thanks. I'm still trying to figure out how they could be so far off. Over double the angle for both ends on both sides? What would cause that? |
|
|
|
| Superhawk996 |
Feb 10 2024, 08:56 PM
Post
#37
|
|
914 Guru Group: Members Posts: 7,219 Joined: 25-August 18 From: Woods of N. Idaho Member No.: 22,428 Region Association: Galt's Gulch |
QUOTE(rjames @ Feb 10 2024, 07:13 PM) I'm still trying to figure out how they could be so far off. Over double the angle for both ends on both sides? What would cause that? Worn bushings are letting LCA rotate within them. I suspect that when you jacked up the car, the LCA went further into rebound. The correct position with new bushings will be in rebound below curb, but not full travel rebound to the limit of strut travel. This allows for a mild bushing preload at curb and the bushing adding a rising rate as the LCA goes into compression over bumps. You’ll probably have to use a jack to bring the LCA up to the strut to get the ball joint attached. This assumes you are using Elephant Racing bushings. Other brands - I can’t vouch for. |
|
|
|
| rjames |
Feb 10 2024, 11:02 PM
Post
#38
|
|
I'm made of metal Group: Members Posts: 4,315 Joined: 24-July 05 From: Shoreline, WA Member No.: 4,467 Region Association: Pacific Northwest |
QUOTE(Superhawk996 @ Feb 10 2024, 06:56 PM) QUOTE(rjames @ Feb 10 2024, 07:13 PM) I'm still trying to figure out how they could be so far off. Over double the angle for both ends on both sides? What would cause that? Worn bushings are letting LCA rotate within them. I suspect that when you jacked up the car, the LCA went further into rebound. The correct position with new bushings will be in rebound below curb, but not full travel rebound to the limit of strut travel. This allows for a mild bushing preload at curb and the bushing adding a rising rate as the LCA goes into compression over bumps. You’ll probably have to use a jack to bring the LCA up to the strut to get the ball joint attached. This assumes you are using Elephant Racing bushings. Other brands - I can’t vouch for. That all makes sense- thanks. And I'm using the 914 Rubber bushings. Chose them based on the many threads comparing compounds/manufacturers. Hopefully I made the right choice as I’d like not to have to do this job again any time soon. |
|
|
|
| rjames |
Feb 18 2024, 12:05 PM
Post
#39
|
|
I'm made of metal Group: Members Posts: 4,315 Joined: 24-July 05 From: Shoreline, WA Member No.: 4,467 Region Association: Pacific Northwest |
Spent several hours last night removing the tie rods. The lock washer that sits between the rack and the tie rod may or may not have been making things harder. I'm still having a hard time picturing how it actually keeps the tie rod from turning at all, but whatever- they will be replaced with turbo tie rods anyway.
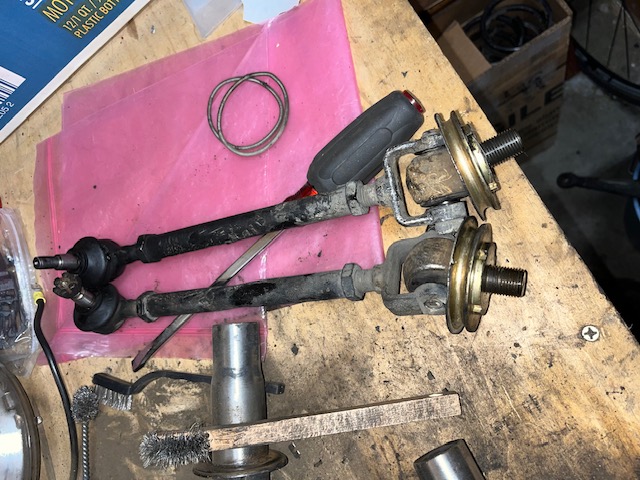 After getting the passenger side off without any special tools, I remembered that I bought a tie rod removal tool which worked like a champ and allowed me to remove the driver's side easily enough without removing the master cylinder. 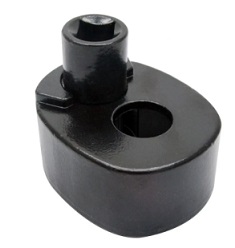 Remember my goal of not removing the MC because I just installed it not too long ago? Is it really going to be possible for me to remove the rack without removing the master cylinder? Based on what I'm seeing it doesn't seem possible. 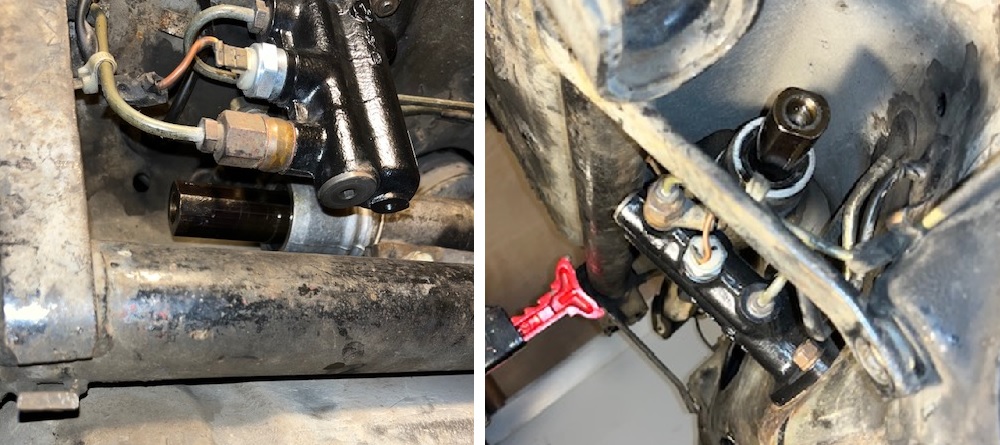 |
|
|
|
| jhynesrockmtn |
Feb 18 2024, 02:11 PM
Post
#40
|
|
Member Group: Members Posts: 440 Joined: 13-June 16 From: spokane wa Member No.: 20,100 Region Association: Pacific Northwest |
QUOTE(rjames @ Feb 18 2024, 10:05 AM) Spent several hours last night removing the tie rods. The lock washer that sits between the rack and the tie rod may or may not have been making things harder. I'm still having a hard time picturing how it actually keeps the tie rod from turning at all, but whatever- they will be replaced with turbo tie rods anyway. After getting the passenger side off without any special tools, I remembered that I bought a tie rod removal tool which worked like a champ and allowed me to remove the driver's side easily enough without removing the master cylinder. Remember my goal of not removing the MC because I just installed it not too long ago? Is it really going to be possible for me to remove the rack without removing the master cylinder? Based on what I'm seeing it doesn't seem possible. I sent my rack to 914rubber to be rebuilt. I left the MC in place. I don't remember it being an issue, but I had the whole suspension console off the car. 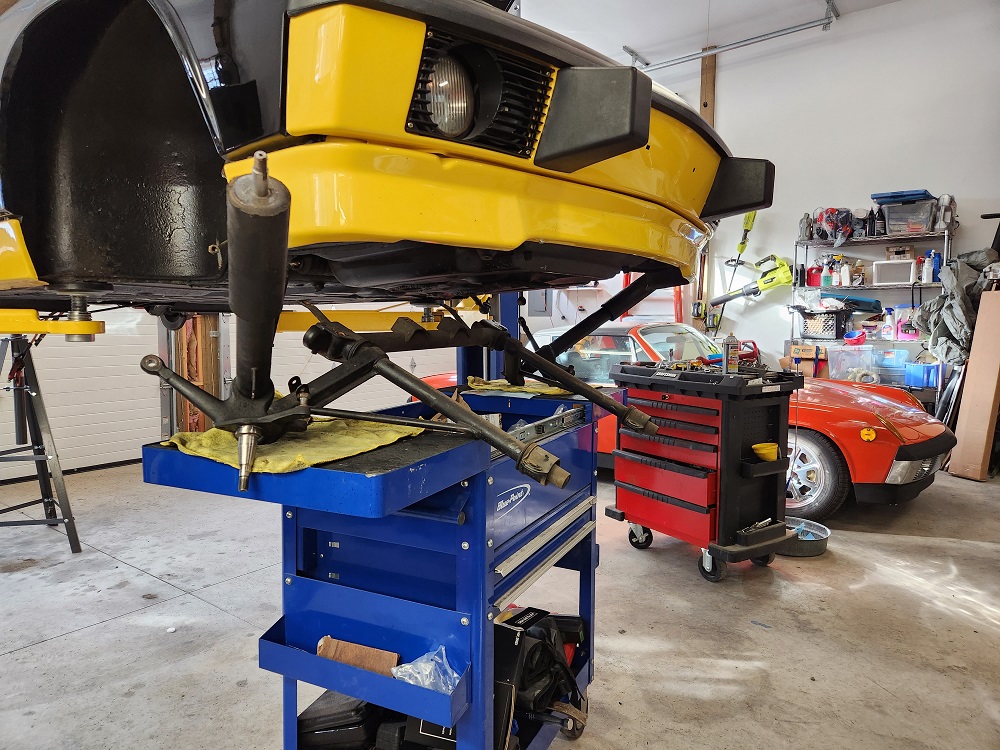 |
|
|
|
|
1 User(s) are reading this topic (1 Guests and 0 Anonymous Users)
0 Members:

|
Lo-Fi Version | Time is now: 12th July 2025 - 12:12 PM |
Invision Power Board
v9.1.4 © 2025 IPS, Inc.