|
|
|
Porsche, and the Porsche crest are registered trademarks of Dr. Ing. h.c. F. Porsche AG.
This site is not affiliated with Porsche in any way. Its only purpose is to provide an online forum for car enthusiasts. All other trademarks are property of their respective owners. |
|
|

  |

| friethmiller |
 Dec 15 2023, 12:24 PM Dec 15 2023, 12:24 PM
Post
#41
|
|
Senior Member  Group: Members Posts: 1,358 Joined: 10-February 19 From: Austin, TX Member No.: 22,863 Region Association: Southwest Region |
QUOTE(technicalninja @ Dec 15 2023, 11:49 AM)  Are you planning on painting it in the dirt as well? Well, I don't mind painting primer out there in the dirt. For the final paint job, I might be forced to throw up a few walls and make a temporary paint booth or something. I painted my other 914 a few years ago. I rented a paint booth located at a local airport. It had been previously used to paint helicopters. It was my first experience painting a car. A little nervous thinking about painting black but I'll cross that bridge later, I guess 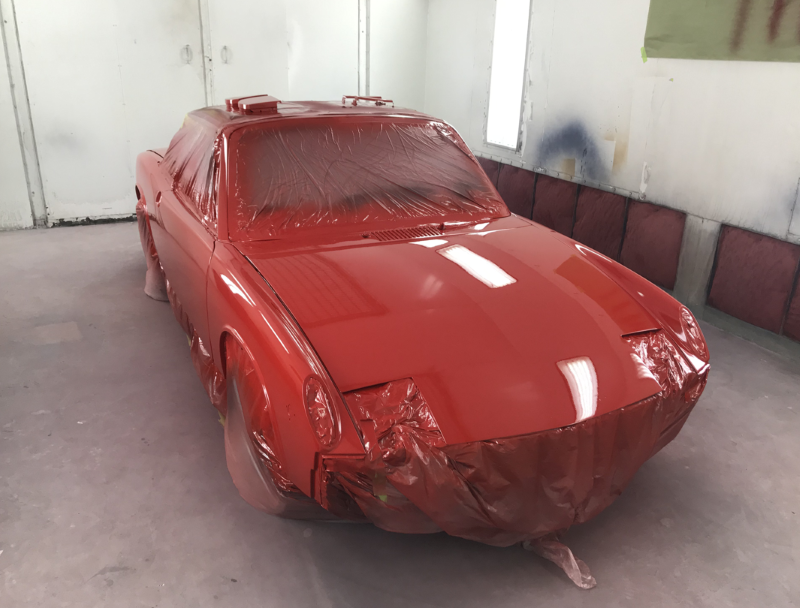 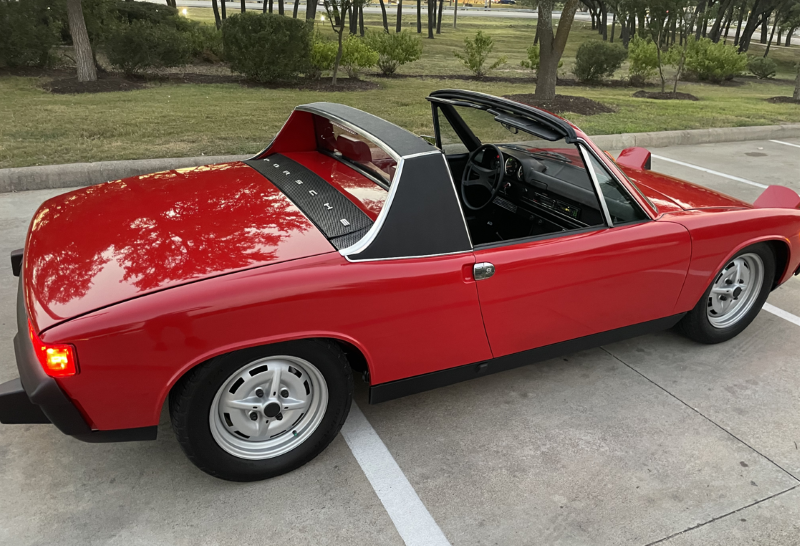 |
   |

 
|
| technicalninja |
Dec 15 2023, 12:33 PM
Post
#42
|
|
Advanced Member Group: Members Posts: 2,531 Joined: 31-January 23 From: Granbury Texas Member No.: 27,135 Region Association: Southwest Region |
Looks like you kicked ass on the first paint job as well!
I was kidding about painting in the dirt... Using a proper paint booth is mandatory in my book. That one you used for the first car looks fine IMO. I'll shoot primer in bad conditions. The primer that is on the outside surfaces that show needs the booth IMO... As for shooting black, it is the easiest by far... You can really determine how "wet" you are easily with good lighting. Prepping for black is by FAR the hardest prep out there. It HAS to be perfect as black shows imperfections down to ten thousands of an inch! All of my dad's bucks for fiberglass products were intentionally painted black for that reason. You can see your mistakes (highs/lows) SO much better in black. Wanna go "all the way"? This is how we make molds for fiberglass projects... Paint and polish your project black then take a small penlight and lay it on one side of your project. Extreme darkness and the tiny penlight will show flaws down to the .0001 range. Fix issues, lather rinse repeat until you cannot find anymore. Then you "super wax" it followed by PVA mold release. This is the point you cover it with gelcoat then resin and glass to make a mold to re-create this "prefect" shape. After you're done with your mold you DESTROY the buck (that you've just spent 2 weeks making perfect!) with sledge hammers... That part is far more fun than you might imagine! By the end of the "make it perfect" phase the HATE is strong. Black cars are my nemesis. Harder to keep clean, magnifies bodywork issues, a LOT harder to cool in our 100+ summers. Nothing good IMO about black. You have a bumblebee, you're screwed! Has to stay black... |
|
|
|
| bkrantz |
Dec 15 2023, 07:54 PM
Post
#43
|
|
914 Guru Group: Members Posts: 8,733 Joined: 3-August 19 From: SW Colorado Member No.: 23,343 Region Association: Rocky Mountains |
QUOTE(friethmiller @ Dec 15 2023, 07:44 AM) QUOTE(bkrantz @ Dec 14 2023, 08:00 PM) Outstanding work and attitude. And you seem to be violating the axiom about speed ro quality. Gonna have this done in time for Christmas? @bkrantz - I violate no axioms! I wish I could. You are seeing work performed over several weeks in the later part of 2022. I'll have to date my work on this thread. Next up is the tunnel and cross member and then the venerable passenger side longitudinal and hell hole. Still impressive, sir. |
|
|
|
| friethmiller |
Dec 16 2023, 09:50 PM
Post
#44
|
|
Senior Member Group: Members Posts: 1,358 Joined: 10-February 19 From: Austin, TX Member No.: 22,863 Region Association: Southwest Region |
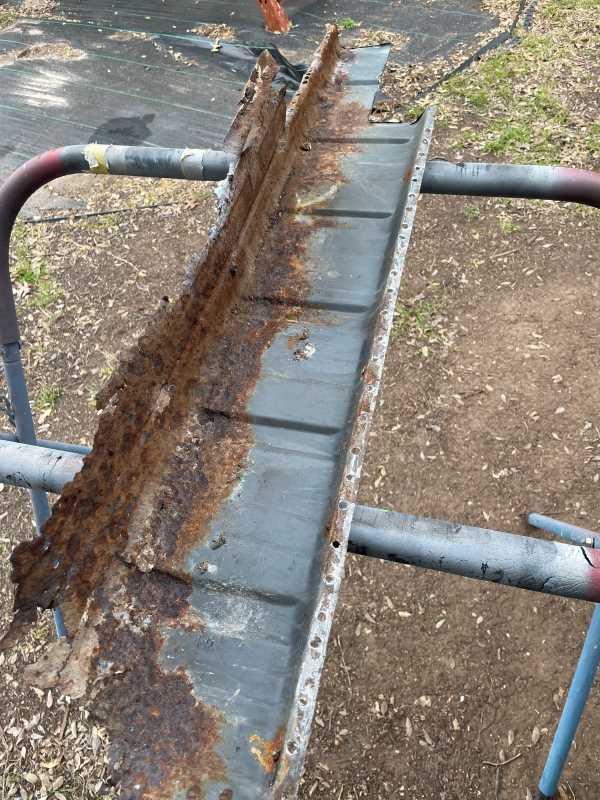
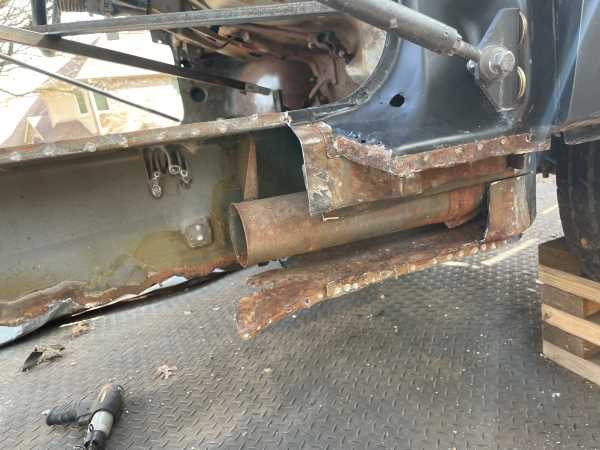
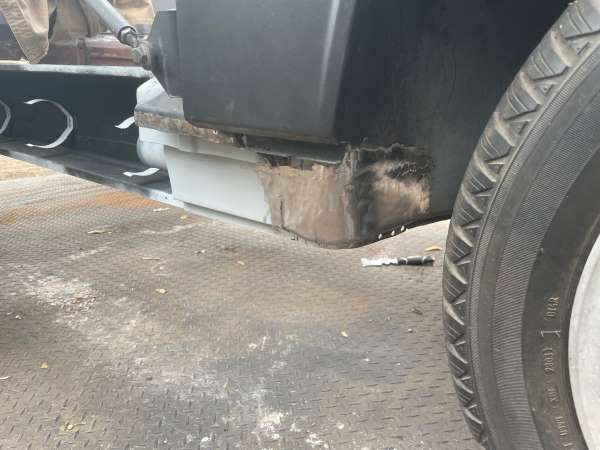
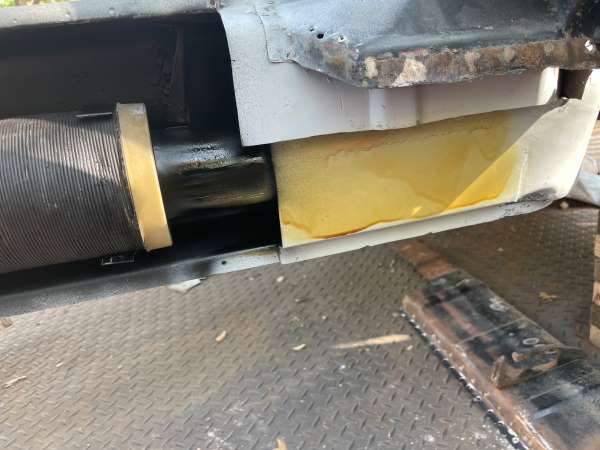
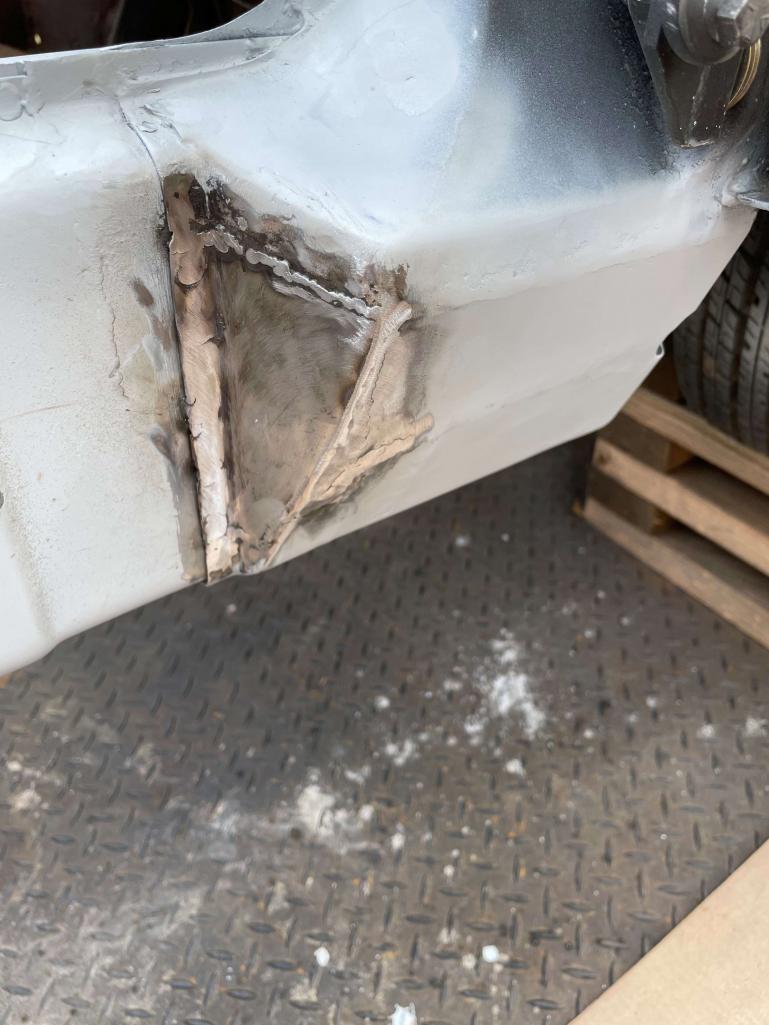
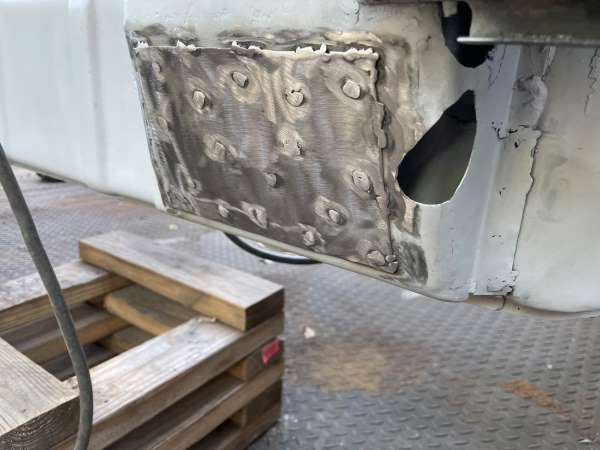
Rear Fender Removal (1/2023): The following photos highlight the work required to completely remove both quarter panels and sill plates. I'm going to need full access to the inner structure to make sure all problem areas are addressed.
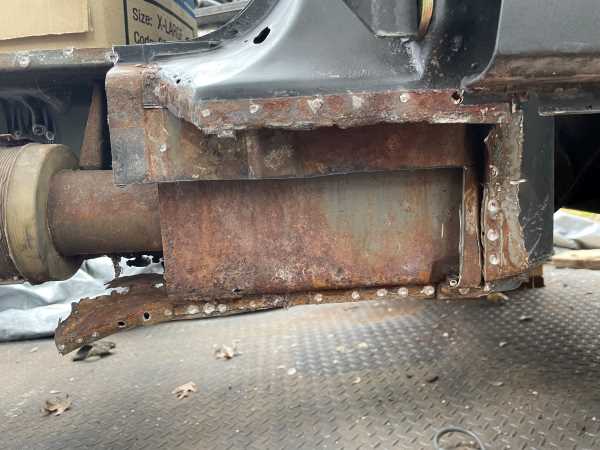
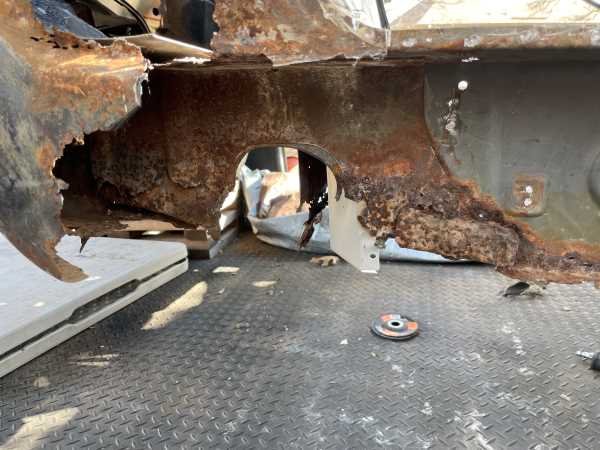
Removal of Drivers side: 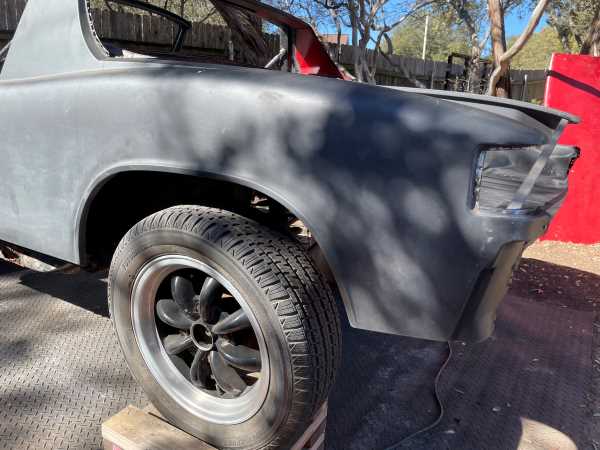 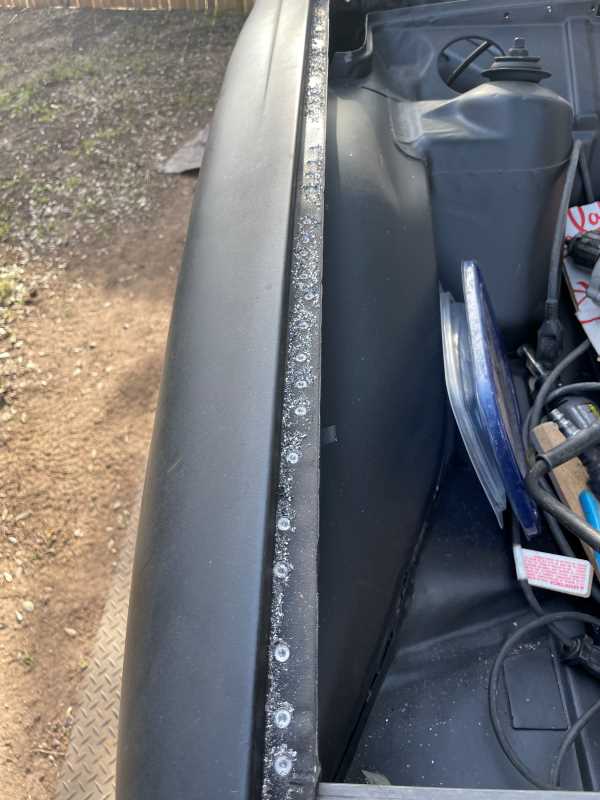 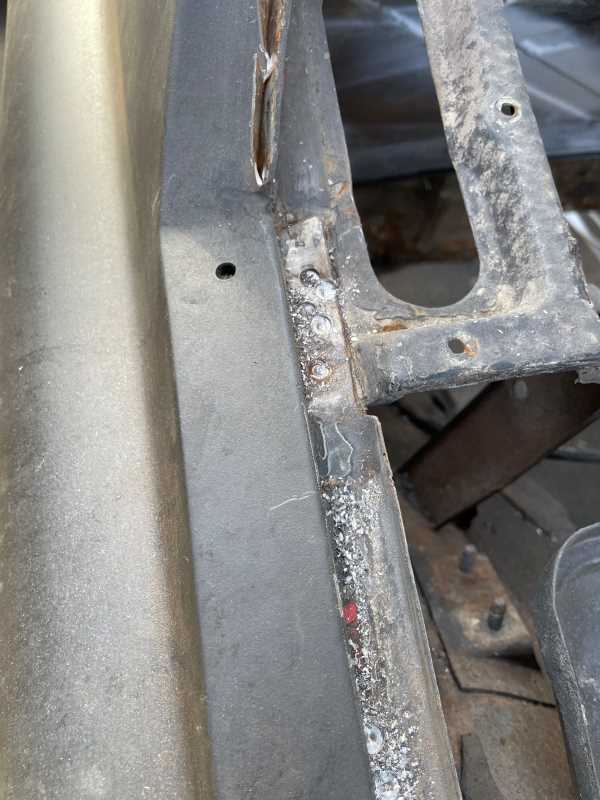 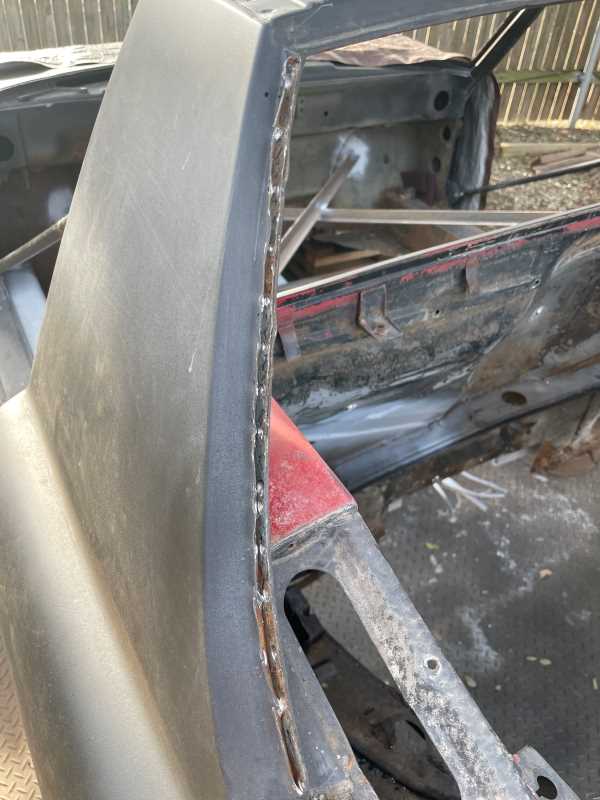 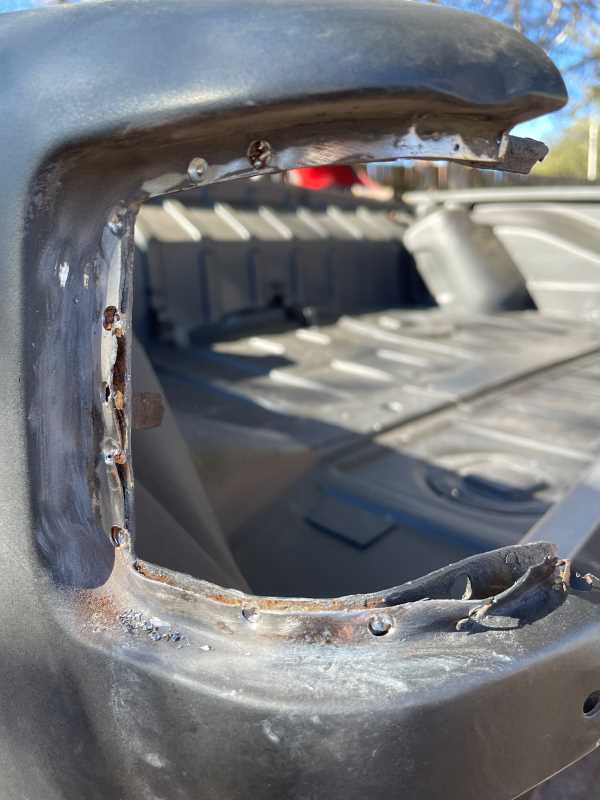 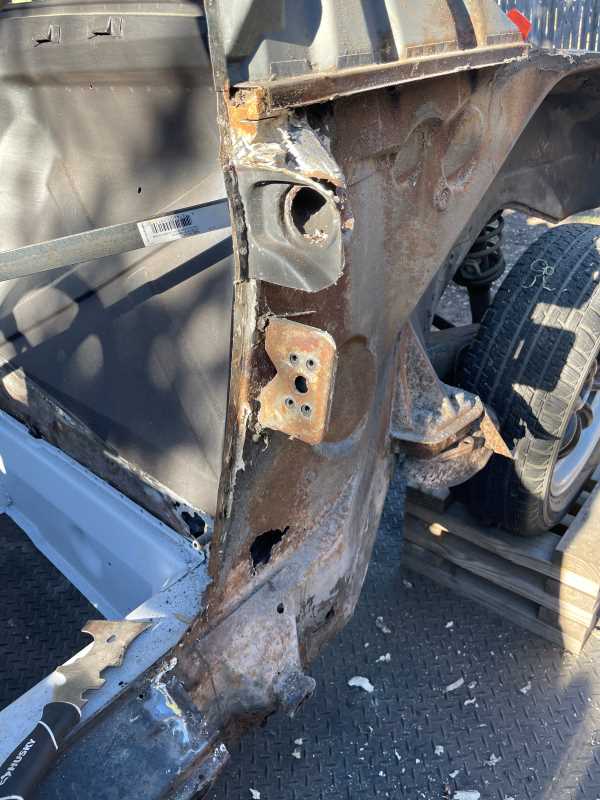 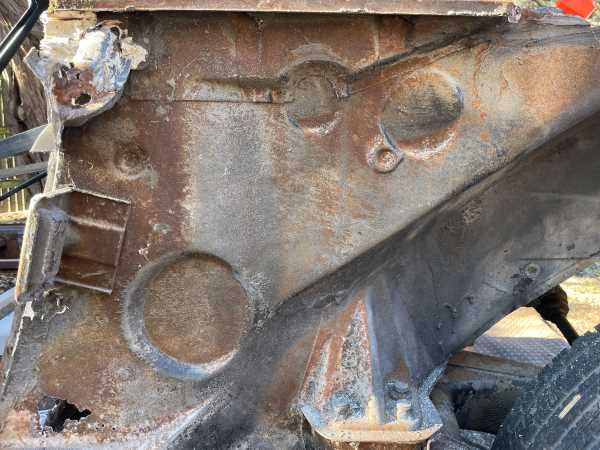 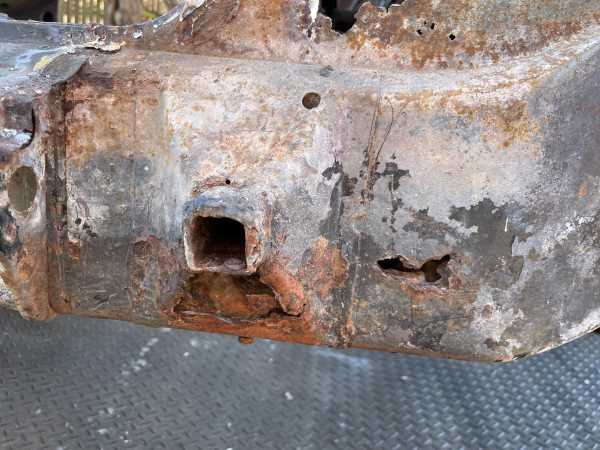 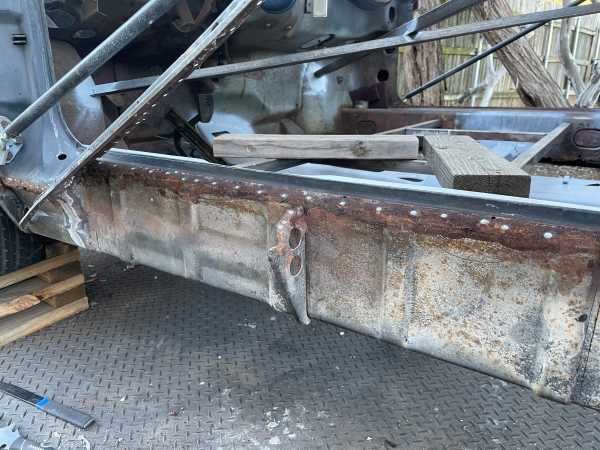 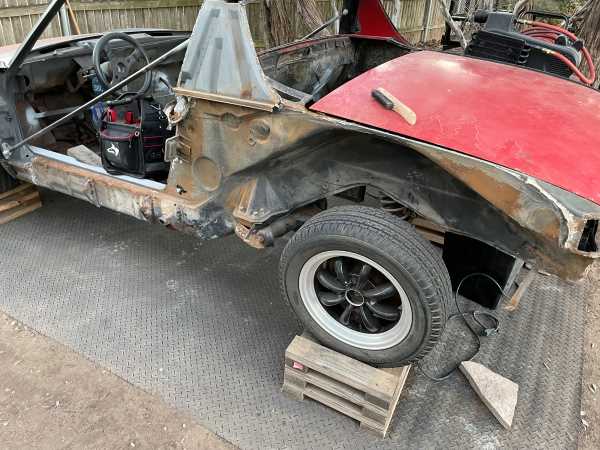 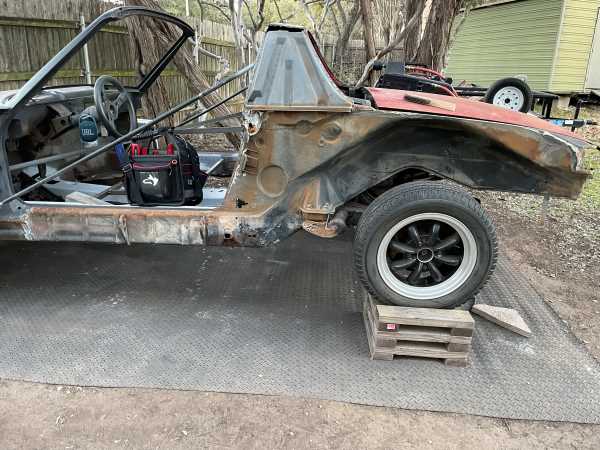 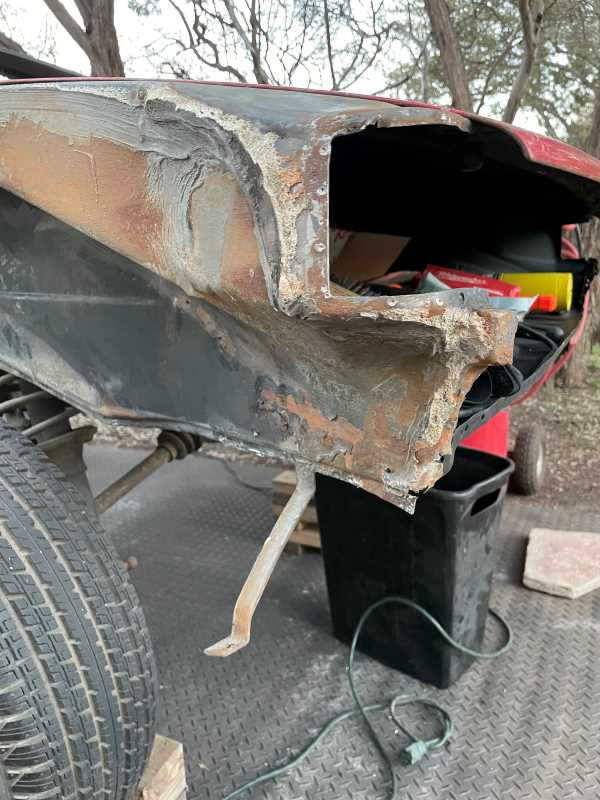 Exposed Passenger side: Note the metal just behind the jack point in the "hell hole". It's a facade! There is nothing behind it. Completely gone! 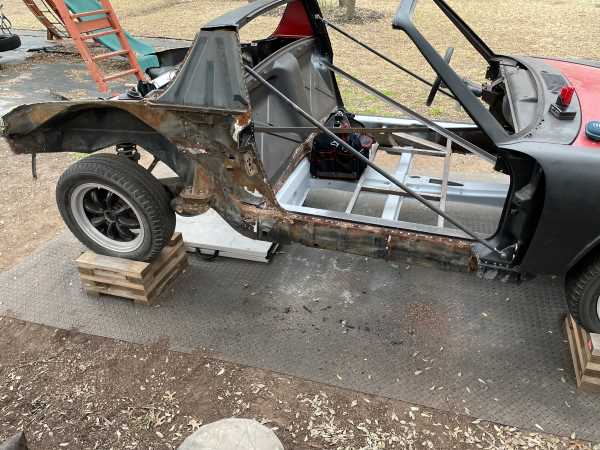 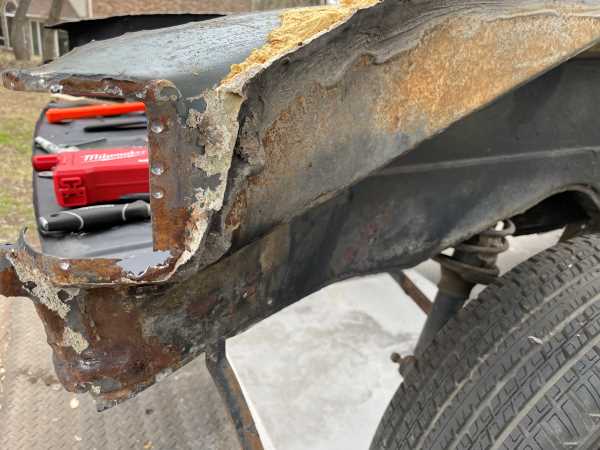 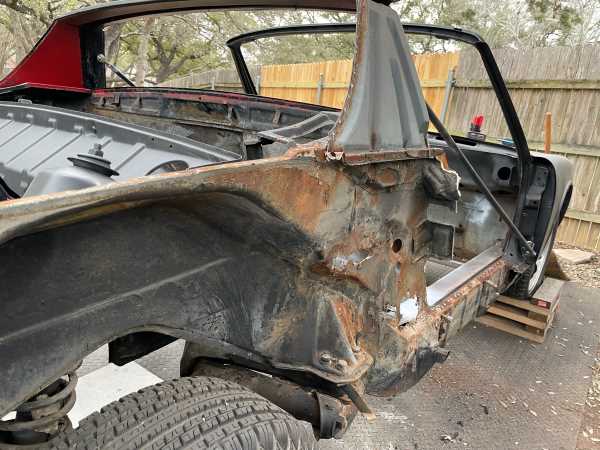 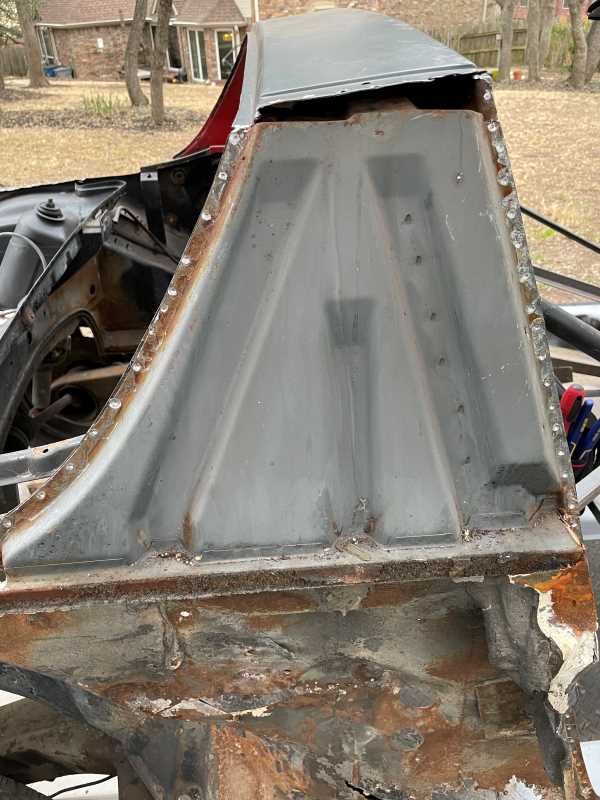 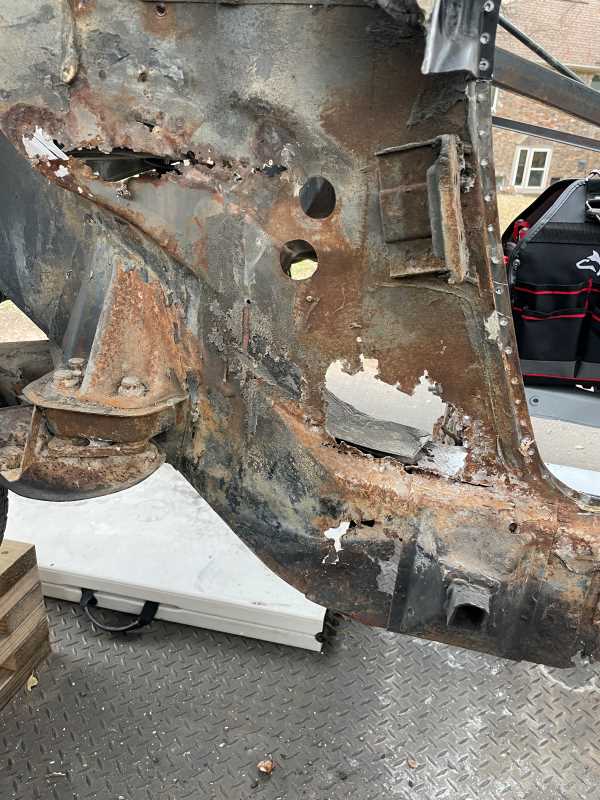 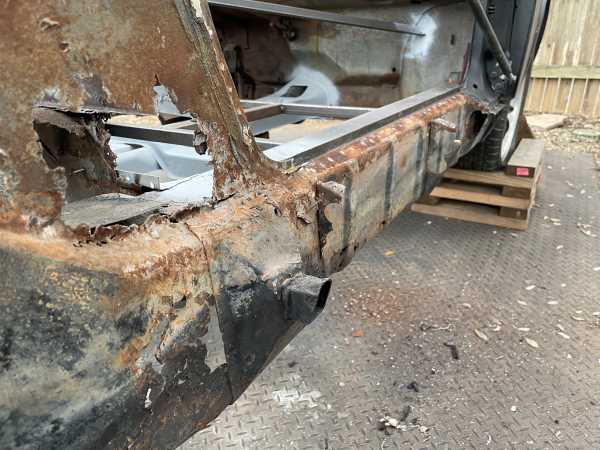 Attached image(s) 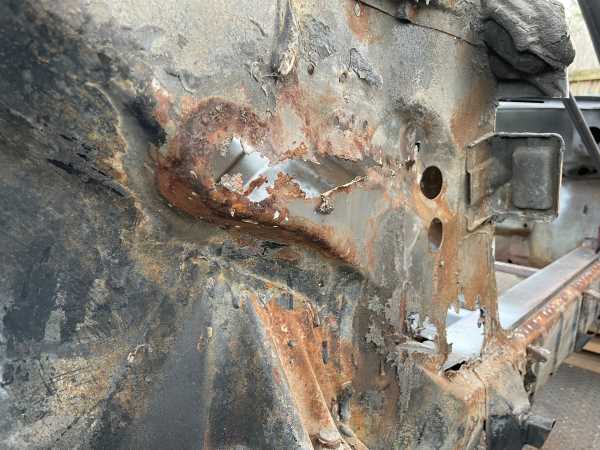
|
|
|
|
| friethmiller |
Dec 18 2023, 11:02 AM
Post
#45
|
|
Senior Member Group: Members Posts: 1,358 Joined: 10-February 19 From: Austin, TX Member No.: 22,863 Region Association: Southwest Region |
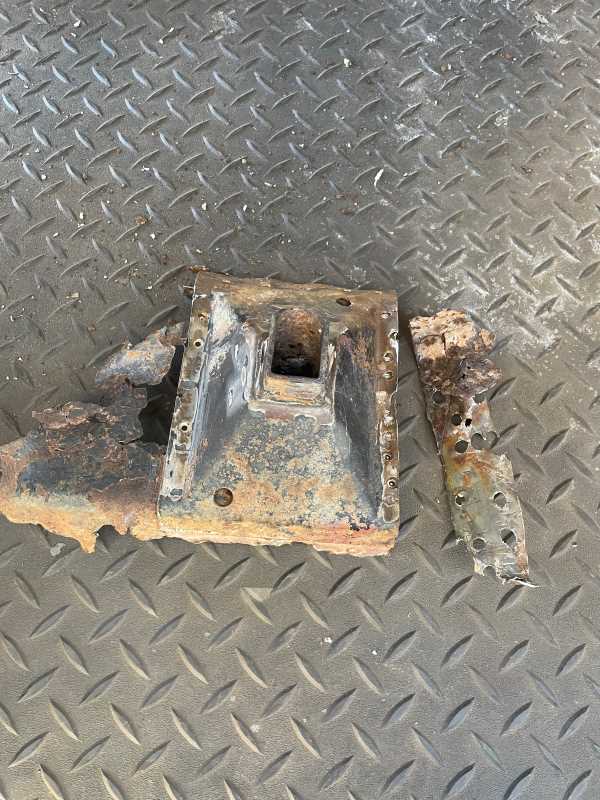
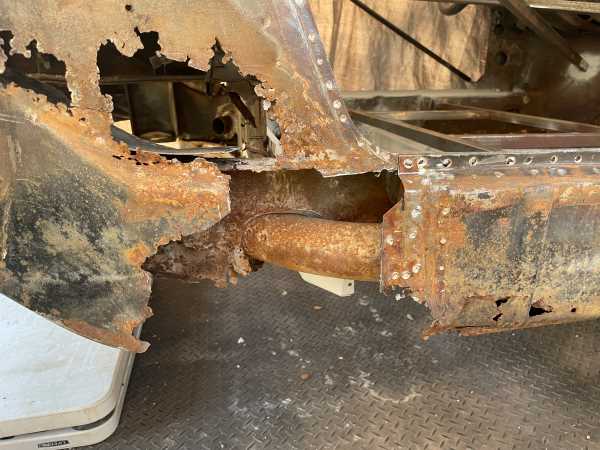
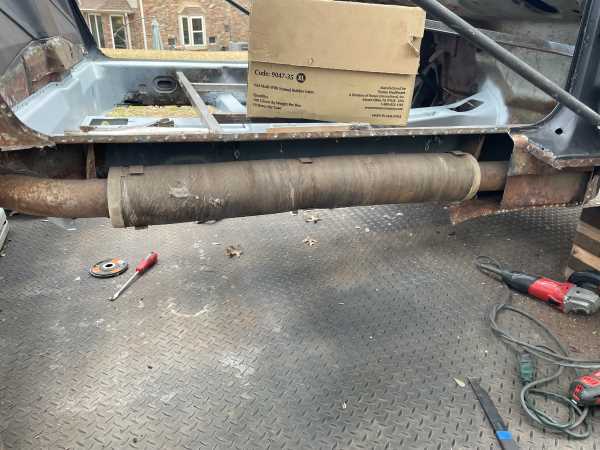
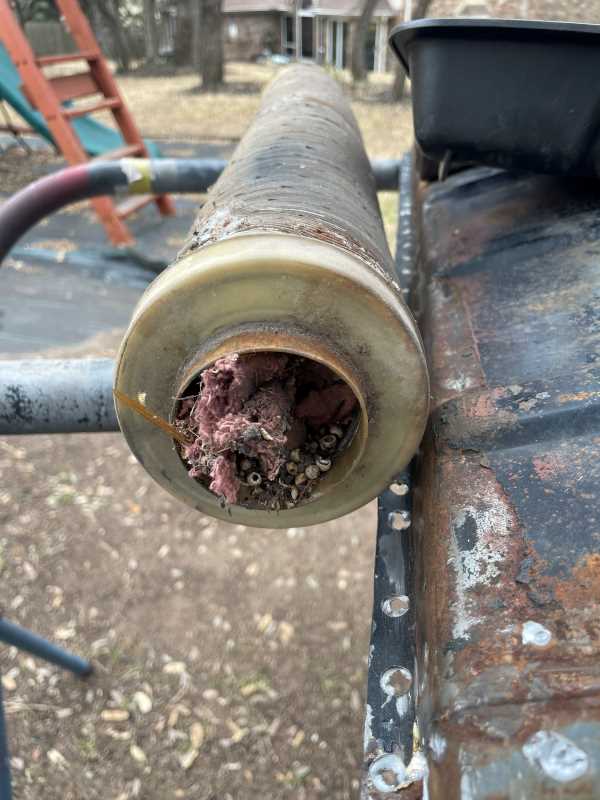
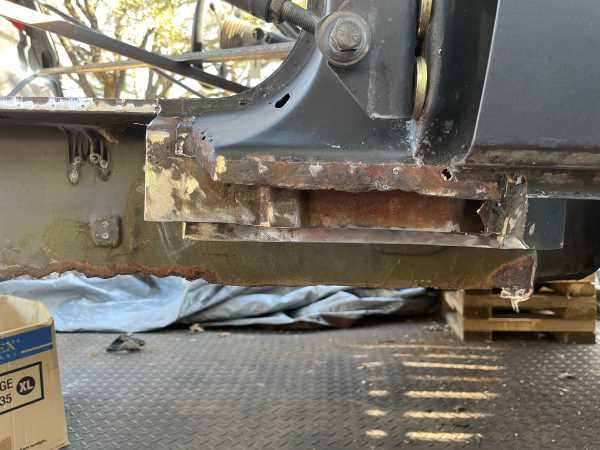
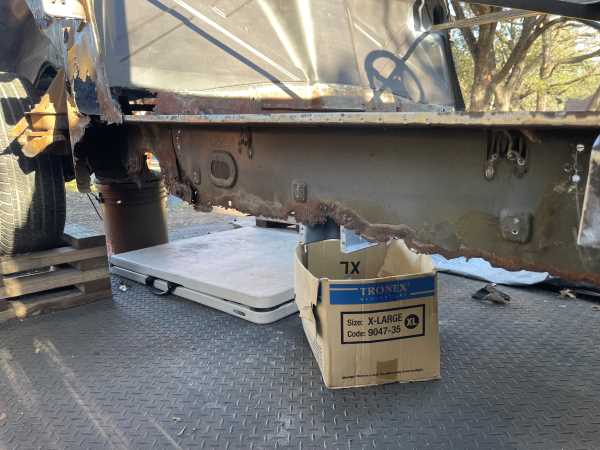
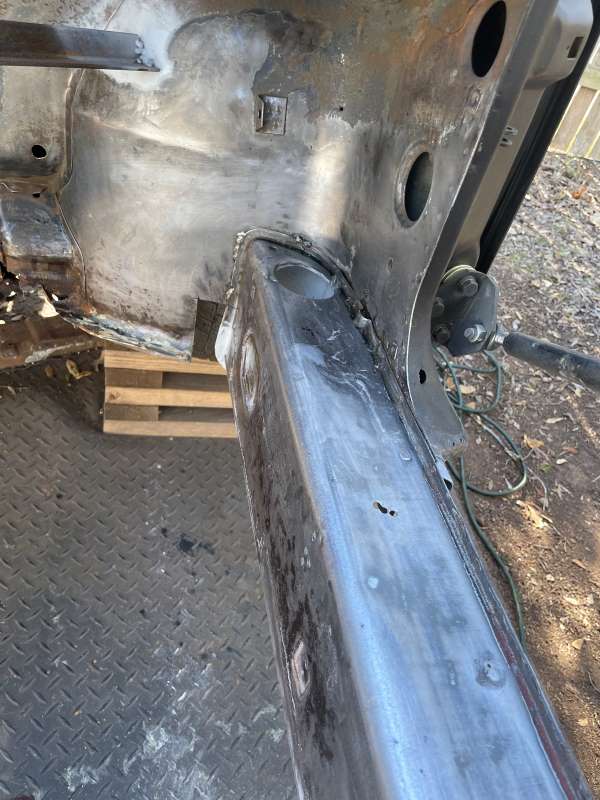
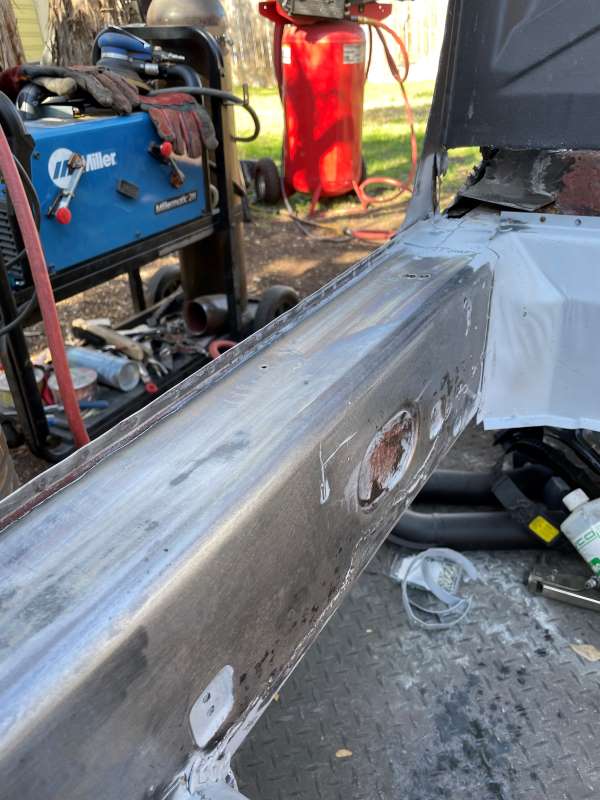
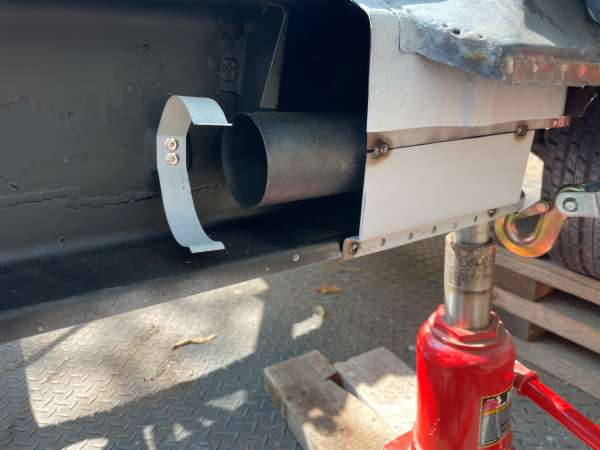
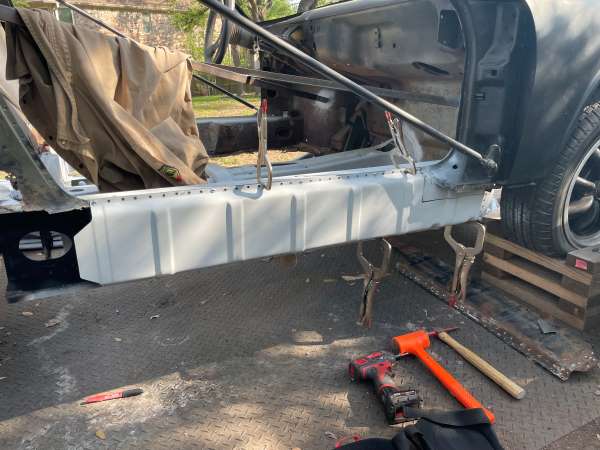
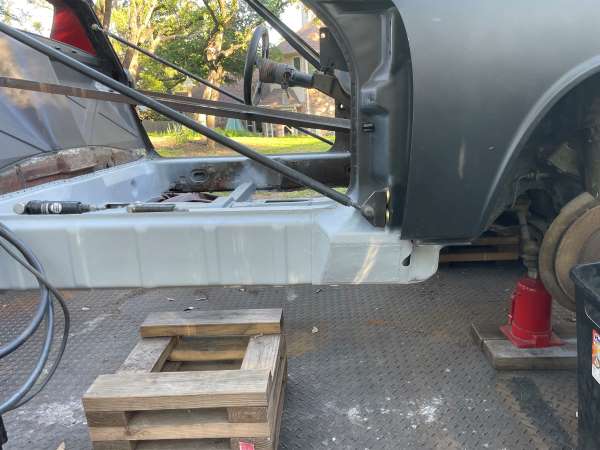
Passenger Side Longitudinal - Part 1 (1/2023): It was pretty easy exposing the longitudinal on this car. With the hell hole a mess and most of it rusted away, a few cuts, a few drilled-out spot welds, and I was finished. Note the jack point - it practically fell off in my hands. The inner rocker panel and door support panel were cut back in a step-wise fashion to facilitate welding it all back up at the end. I also had to completely clean (soak) the heater tube. I guess the mice had made it their home at one point. Yuck!
          |
|
|
|
| technicalninja |
Dec 18 2023, 11:51 AM
Post
#46
|
|
Advanced Member Group: Members Posts: 2,531 Joined: 31-January 23 From: Granbury Texas Member No.: 27,135 Region Association: Southwest Region |
Nasty!
Now I'm worried about my heater tubes... Can you imagine ALL of your heat is going through a rodent cesspool... We all use a borescope to check the "longs". I'm going to put it down the tubes as well. Fred, very impressed by your level of competence. I see lots of crap in HVAC systems. The worst are rodent carcasses. Get one that's been in the car a week and you cannot breathe anywhere close to it. Get one stuck in a blower fan and the inside of the blower housing is evenly coated with rodent "juices". Makes me retch! I CHARGE extra in those instances! More if I actually vomit... |
|
|
|
| Jamie |
Dec 18 2023, 11:56 AM
Post
#47
|
|
Senior Member Group: Members Posts: 1,213 Joined: 13-October 04 From: Georgetown,KY Member No.: 2,939 Region Association: South East States |
QUOTE(technicalninja @ Dec 18 2023, 09:51 AM) Nasty! Now I'm worried about my heater tubes... Can you imagine ALL of your heat is going through a rodent cesspool... We all use a borescope to check the "longs". I'm going to put it down the tubes as well. Fred, very impressed by your level of competence. I see lots of crap in HVAC systems. The worst are rodent carcasses. Get one that's been in the car a week and you cannot breathe anywhere close to it. Get one stuck in a blower fan and the inside of the blower housing is evenly coated with rodent "juices". Makes me retch! I CHARGE extra in those instances! More if I actually vomit... It is hard to understand how such a small carcass can produce such large amount of stink! Don't ever use Decon poison if you don't want dead mice behind the drywall where you can't easily remove them! (IMG:style_emoticons/default/hissyfit.gif) |
|
|
|
| friethmiller |
Dec 18 2023, 12:20 PM
Post
#48
|
|
Senior Member Group: Members Posts: 1,358 Joined: 10-February 19 From: Austin, TX Member No.: 22,863 Region Association: Southwest Region |
QUOTE(technicalninja @ Dec 18 2023, 11:51 AM) I CHARGE extra in those instances! More if I actually vomit... Wow! Yes, I'd charge extra for that, too. After cleaning the tube with a large pipe brush, I soaked it for about 3 days in a mild detergent. I let it dry out for about a week. It smelled fine so I repainted the outside and installed it back in the car. You'll see that in Part 2 and Part 3 coming soon. |
|
|
|
| technicalninja |
Dec 18 2023, 12:25 PM
Post
#49
|
|
Advanced Member Group: Members Posts: 2,531 Joined: 31-January 23 From: Granbury Texas Member No.: 27,135 Region Association: Southwest Region |
Had a cat that CLEARED a 2500 sq foot attic of roof rats; BIG roof rats over a 3-week period. We were worried she'd kill one and leave it up there.
All of them got dropped through the access hole and then the fat assed Siamese would howl at the opening till I provided a shoulder to allow easy egress from the attic. She could go UP the vertical ladder OK, coming back down was her problem. No blood ever, couldn't tell HOW she killed them. Some were 1/2 her size! She never "left one behind" thank God. Worst car for me was a family of mice, nesting on the top of the cabin air filter. They had chewed a hole in it and when the owner turned on the blower, sucked them in and distributed them in the blower housing (adults) and evaporator core (babies). 2 adults, six babies, beyond NASTY! Made me ask myself "why am I doing this shit?" Back to your original programming... |
|
|
|
| friethmiller |
Dec 18 2023, 02:18 PM
Post
#50
|
|
Senior Member Group: Members Posts: 1,358 Joined: 10-February 19 From: Austin, TX Member No.: 22,863 Region Association: Southwest Region |
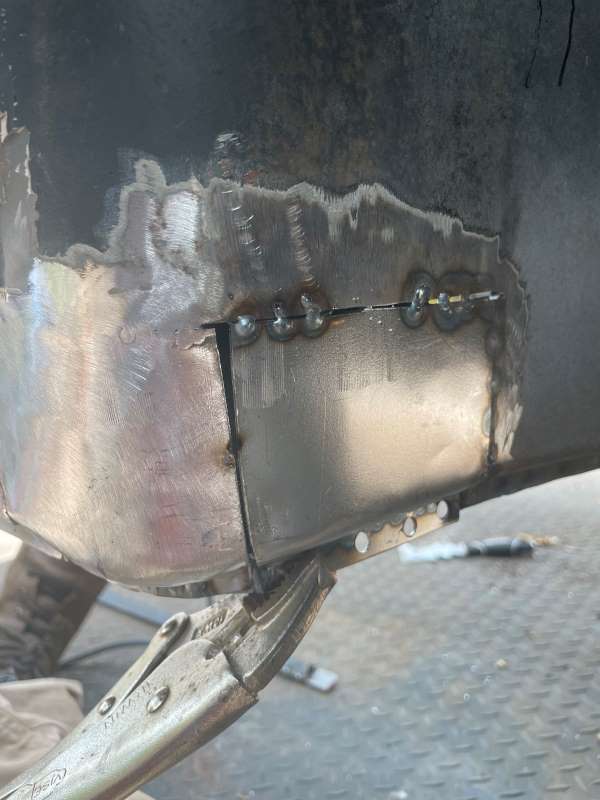
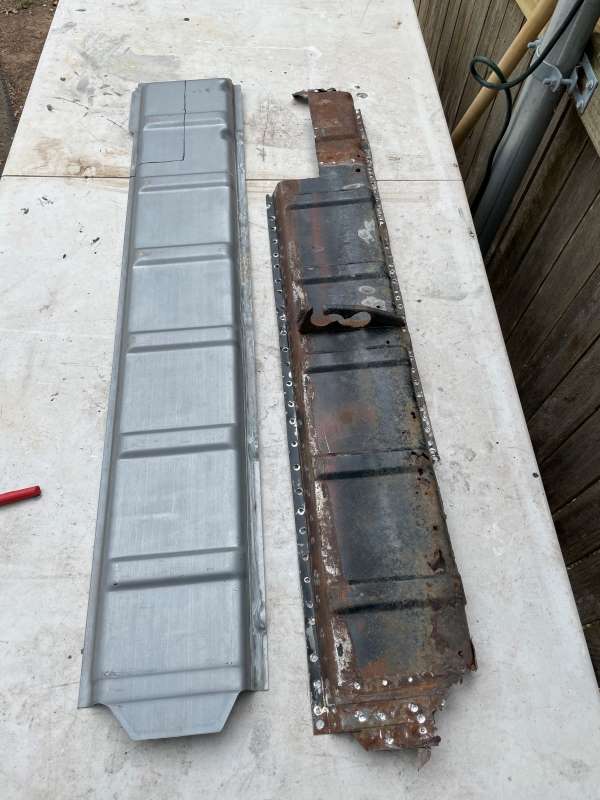
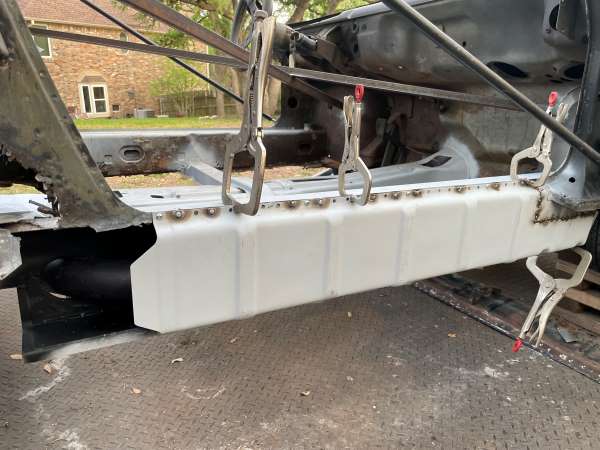
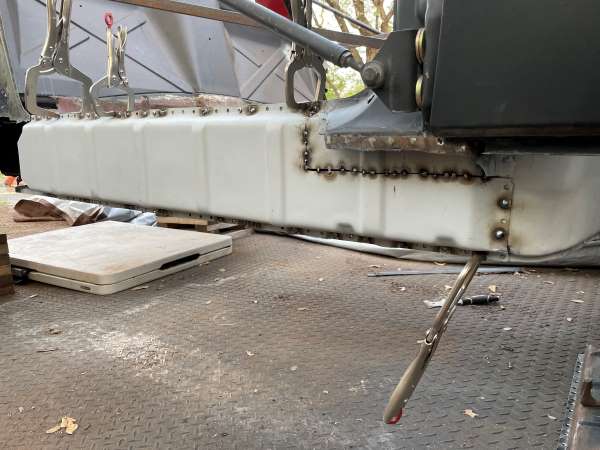
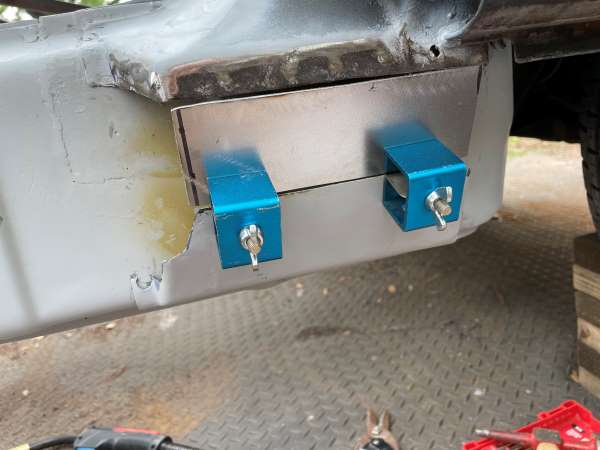
Passenger Side Longitudinal - Part 2 (1/2023): Ok, here are the photos of my repair of the passenger longitudinal. I used the repair piece made by Restoration Design and their replacement seat belt mount (bolt). Like with my last 914, I'm using just the bottom half of the new longitudinal and I prefer to cut this in 1/2, as well. Last time, I used the top half of the passenger side longitudinal repair piece for the driver side and it worked out well. I saved some money in the process, too.
IMO, the key here on doing this repair is using the new rocker panel (also an RD replacement) to set the correct distance. Once this is set, I draw a line and cut the piece. The new crossbar kind of got in the way but it wasn't too bad. You may noticed that I mis-cut the back piece a little and then added additional metal at the interface with the crossbar. It all worked out in the end. 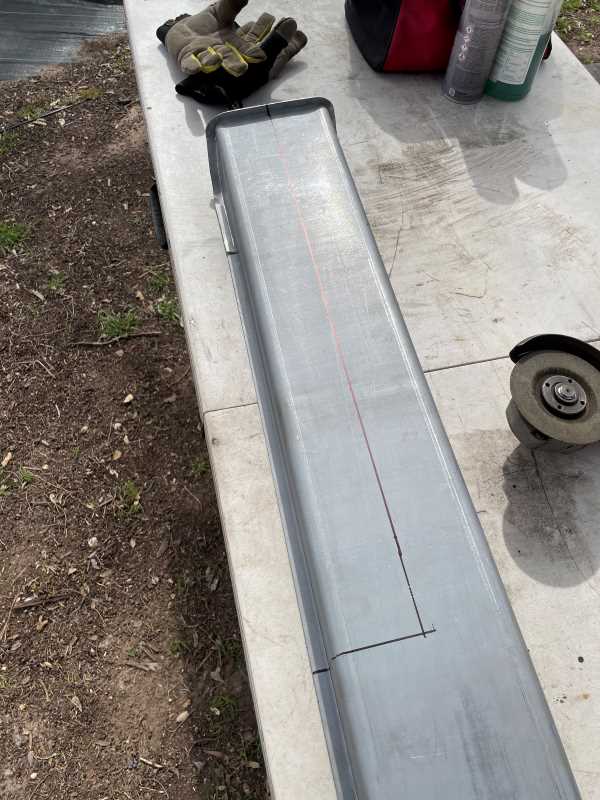 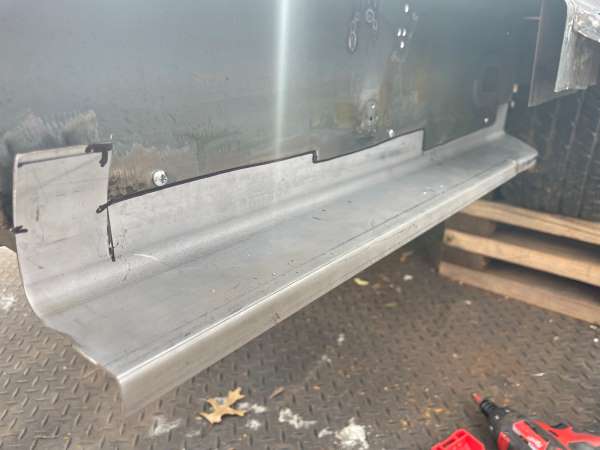 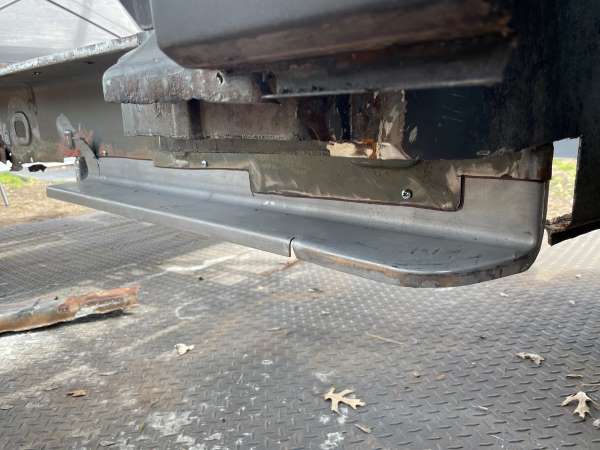 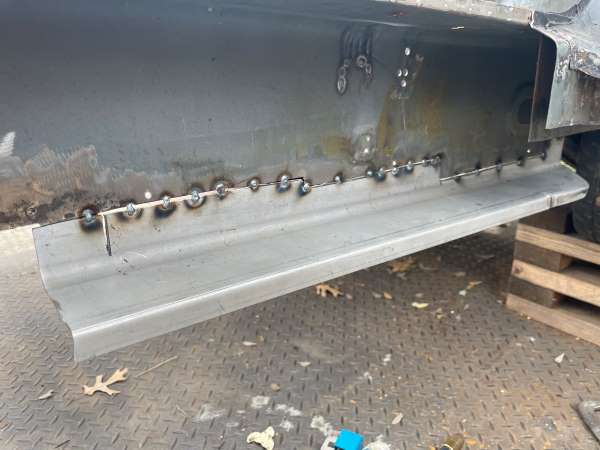 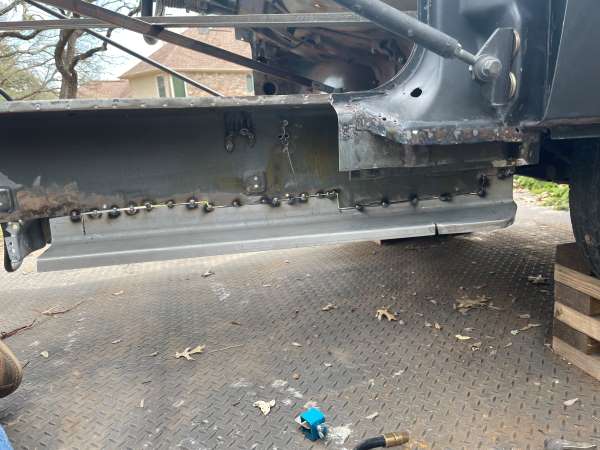 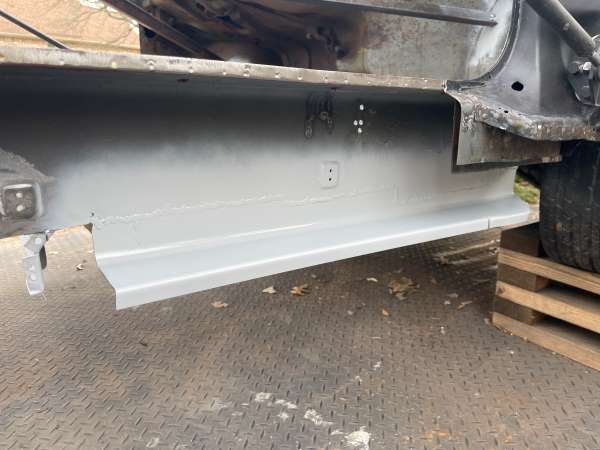 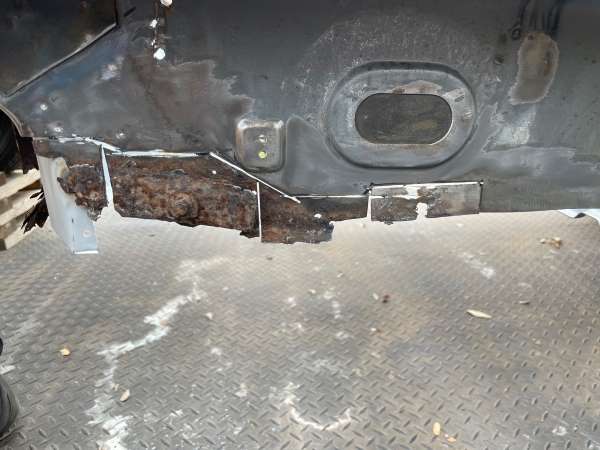 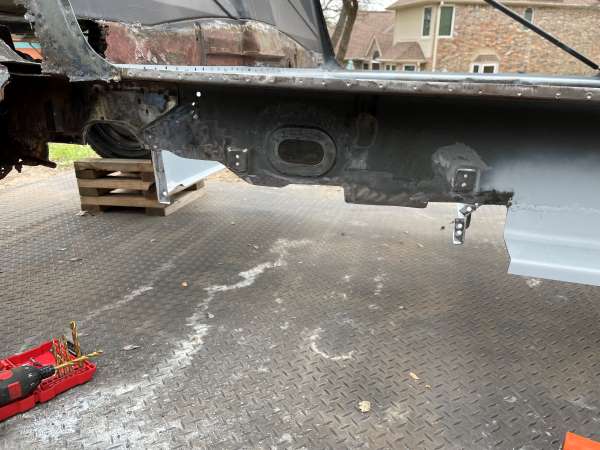 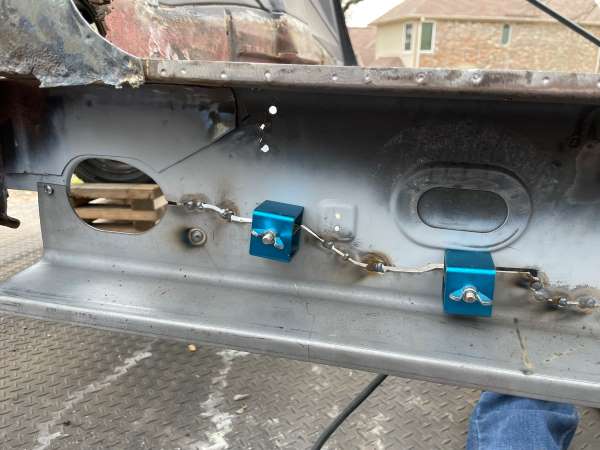  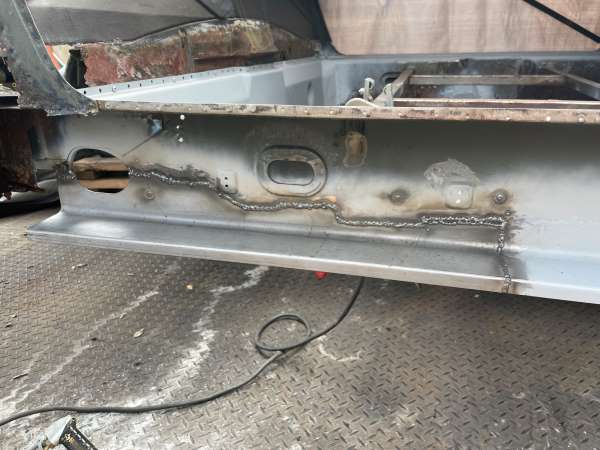 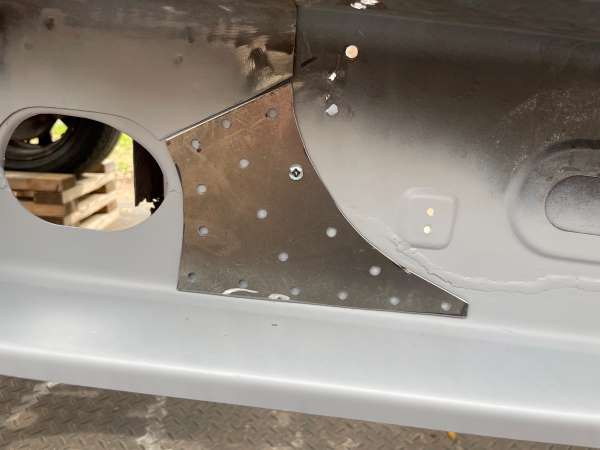 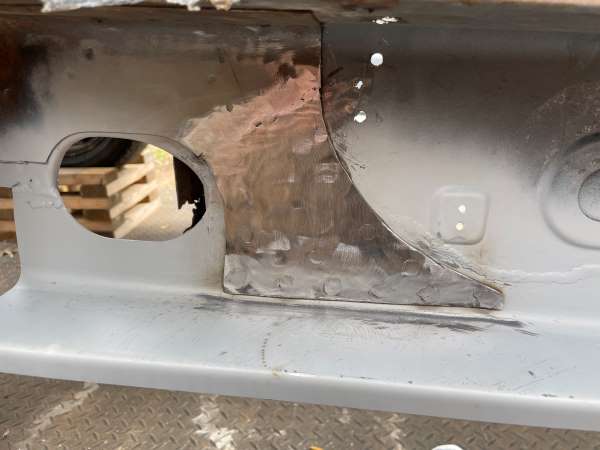 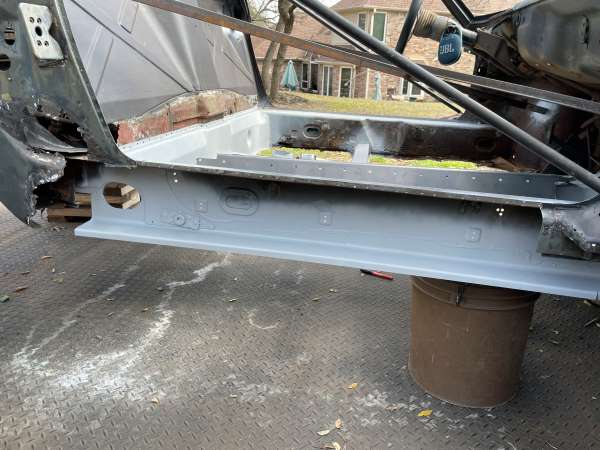 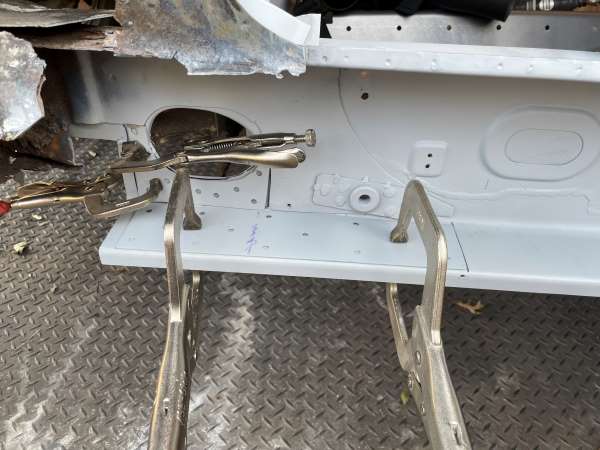 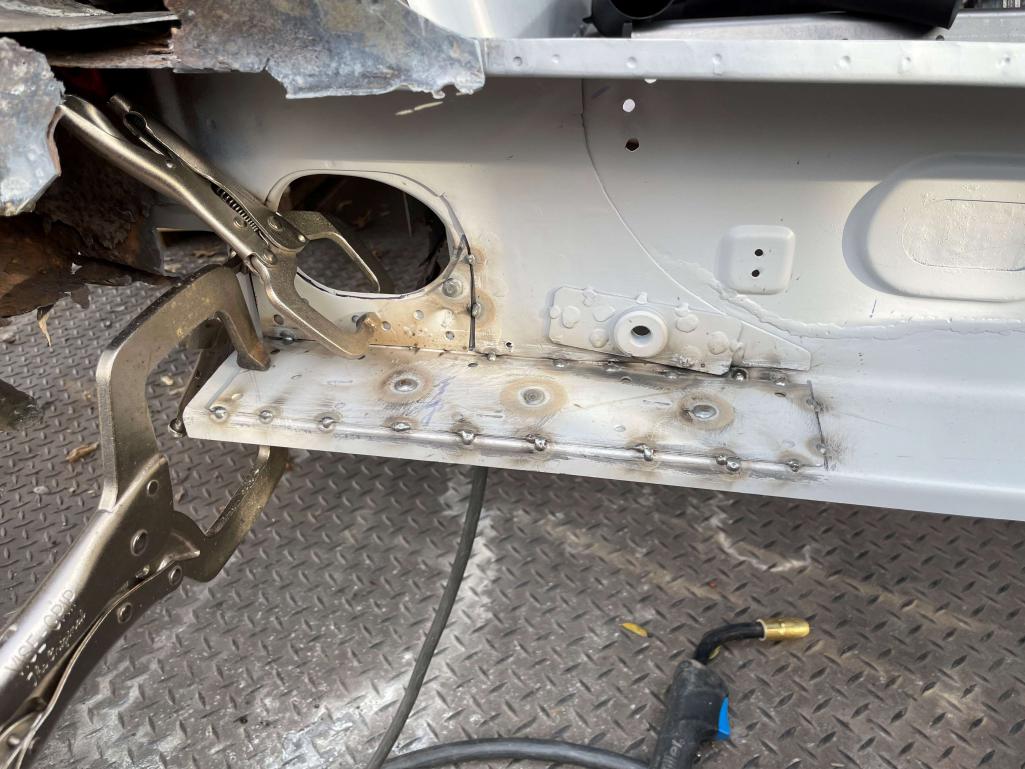 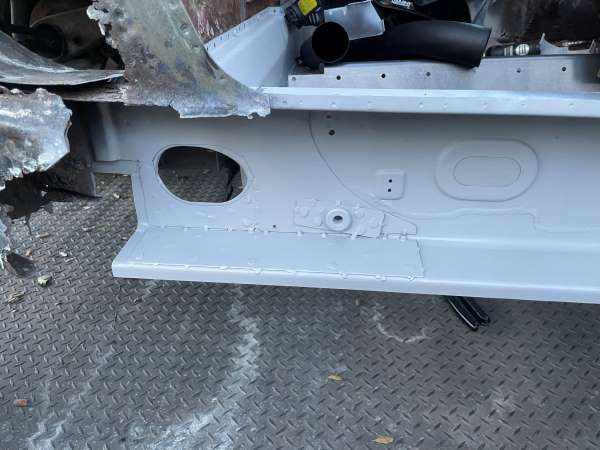 |
|
|
|
| technicalninja |
Dec 18 2023, 03:02 PM
Post
#51
|
|
Advanced Member Group: Members Posts: 2,531 Joined: 31-January 23 From: Granbury Texas Member No.: 27,135 Region Association: Southwest Region |
Wow!
Your restoration of that looks great! I haven't seen Clecos yet! https://www.amazon.com/Fastener-Deluxe-Fast...7a81bd2e5c1d6fe Were you aware of them? You'll need them soon. Temporary rivets... |
|
|
|
| friethmiller |
Dec 18 2023, 03:21 PM
Post
#52
|
|
Senior Member Group: Members Posts: 1,358 Joined: 10-February 19 From: Austin, TX Member No.: 22,863 Region Association: Southwest Region |
Yes! I have them but you are assuming I know where I put them in my shed (IMG:style_emoticons/default/av-943.gif) I typically pull them out when I'm mocking up the body panels but they would probably help me on some of this stuff. Damn it! Now, I need to find them. Thanks for mentioning this and reminding me.
|
|
|
|
| Geezer914 |
Dec 18 2023, 03:49 PM
Post
#53
|
|
Geezer914 Group: Members Posts: 2,323 Joined: 18-March 09 From: Salem, NJ Member No.: 10,179 Region Association: North East States |
Like the dog said when he back into the grind stone, "RUFF". Nice job, not something I would take on.
|
|
|
|
| friethmiller |
Dec 18 2023, 04:39 PM
Post
#54
|
|
Senior Member Group: Members Posts: 1,358 Joined: 10-February 19 From: Austin, TX Member No.: 22,863 Region Association: Southwest Region |
QUOTE(Geezer914 @ Dec 18 2023, 03:49 PM) Like the dog said when he back into the grind stone, "RUFF". Nice job, not something I would take on. @Geezer914 - just wait till I post the pics from the hell hole repair (IMG:style_emoticons/default/icon8.gif) |
|
|
|
| friethmiller |
Dec 18 2023, 08:28 PM
Post
#55
|
|
Senior Member Group: Members Posts: 1,358 Joined: 10-February 19 From: Austin, TX Member No.: 22,863 Region Association: Southwest Region |
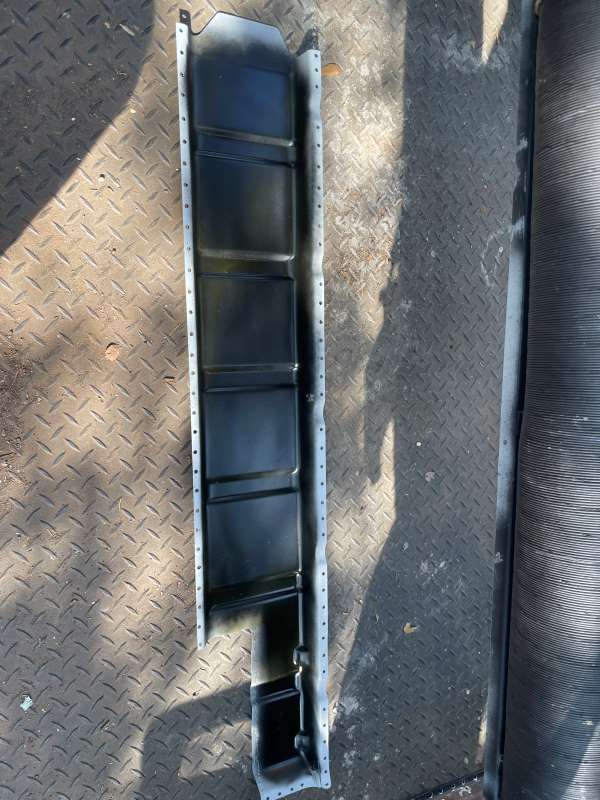
Passenger Side Longitudinal - Part 3 (3/2023): Starting on the inside of the car, I removed the surface rust and prep'd the existing metal Ospho and weld-thru primer. Next, I fitted the first of three pieces of an inner stiffing kit that I had purchased for my last restoration but didn't use (I had opted for the RD external stiffeners, instead). I think this kind of stiffener is a good option after completing this kind of repair to the bottom part of the longitudinal.
  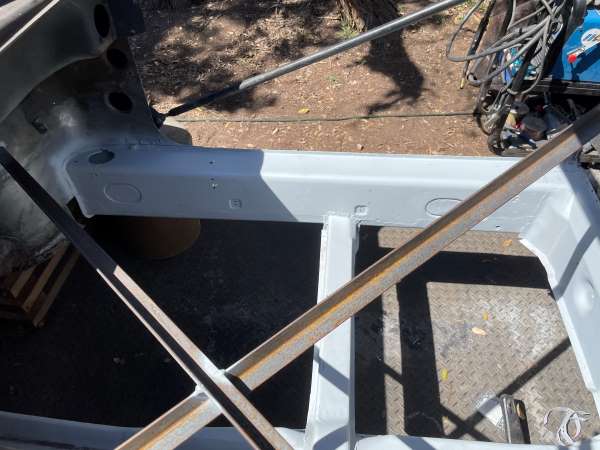   After completing the welds on the stiffener, I was then able to prep and paint the internal longitudinal and then reattach the cleaned/restored heater tube. 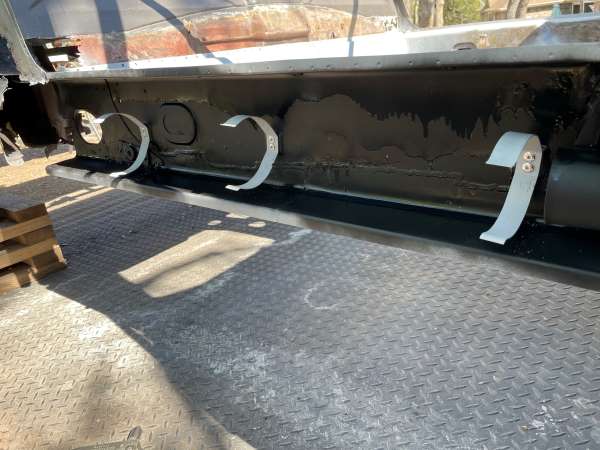 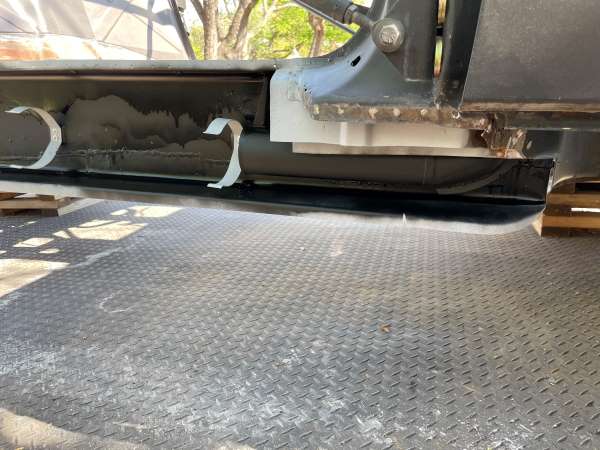 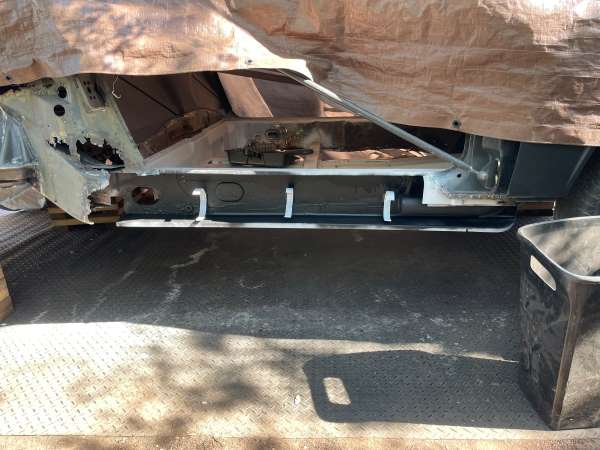 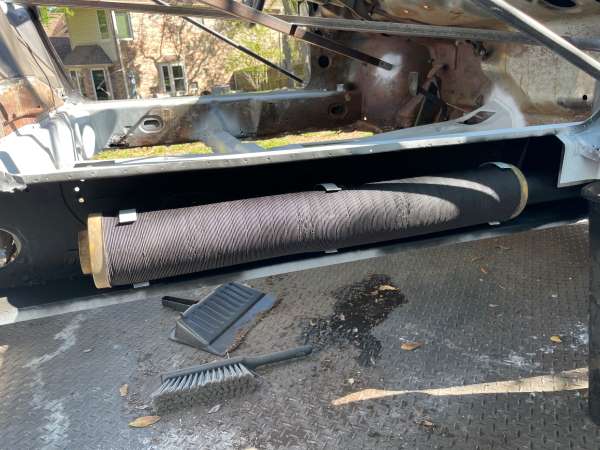 |
|
|
|
| friethmiller |
Dec 19 2023, 05:03 AM
Post
#56
|
|
Senior Member Group: Members Posts: 1,358 Joined: 10-February 19 From: Austin, TX Member No.: 22,863 Region Association: Southwest Region |
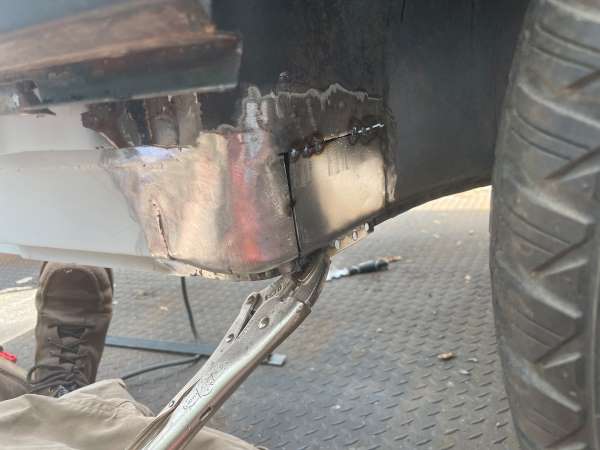
Inner Fender Replacement (3/2023): Before getting to the rocker, some tricky metal work is required to replace the section of inner front fender that extends under the rocker panel. Note: I'm welding on the first of three cuts. Working with a wheel in the way isn't fun so I'll revisit this part of the repair later when it's on the rotisserie. I like using my welding vest to protect my legs (IMG:style_emoticons/default/blink.gif)
     |
|
|
|
| friethmiller |
Dec 19 2023, 05:15 AM
Post
#57
|
|
Senior Member Group: Members Posts: 1,358 Joined: 10-February 19 From: Austin, TX Member No.: 22,863 Region Association: Southwest Region |
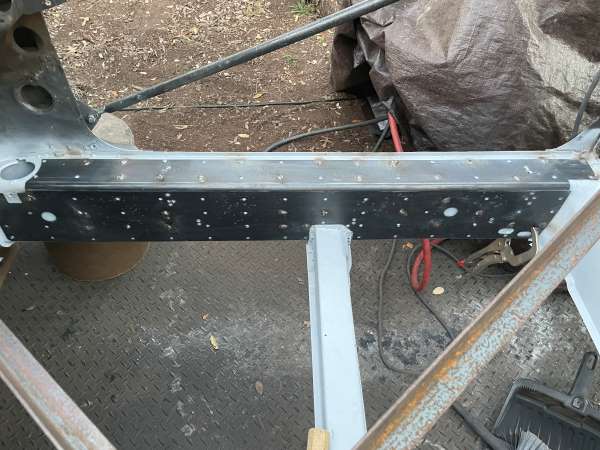
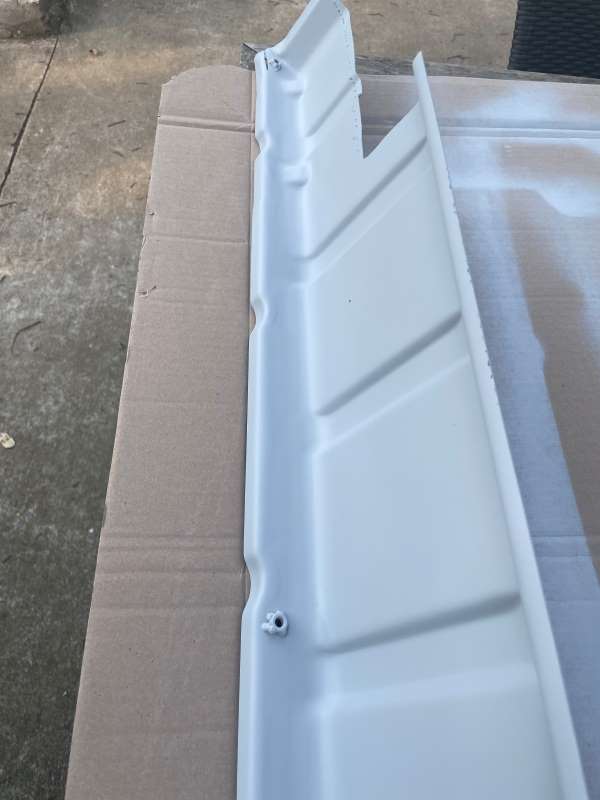
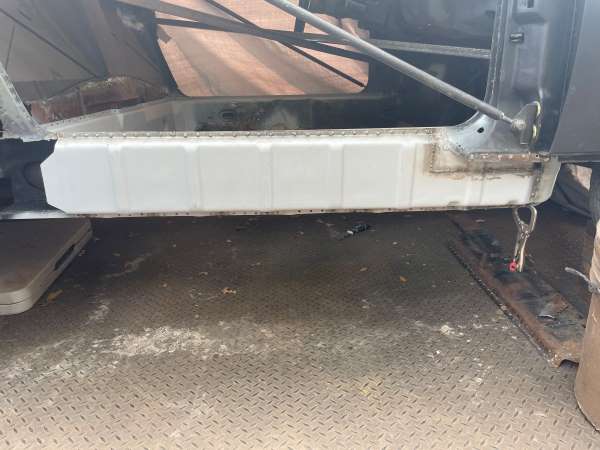
Rocker Panel Replacement (3/2023): I finally get to install the replacement rocker from Restoration Design. The first thing I had to do was measure the placement and weld in the outer rocker panel nuts onto the new panel. Next, I cut the part to match the old part of the rocker that remained below the door support. I then used weld-thru primer, internal frame paint, followed by CRC Marine spray wax to prep both the rocker and the inside of the longitudinal. After reinstalling the heater tube (critical), I welded the rocker in place.
         |
|
|
|
| 87m491 |
Dec 19 2023, 07:52 AM
Post
#58
|
|
Member Group: Members Posts: 331 Joined: 29-July 12 From: Portland, the original! Member No.: 14,731 Region Association: North East States |
delete
|
|
|
|
| friethmiller |
Dec 19 2023, 08:29 AM
Post
#59
|
|
Senior Member Group: Members Posts: 1,358 Joined: 10-February 19 From: Austin, TX Member No.: 22,863 Region Association: Southwest Region |
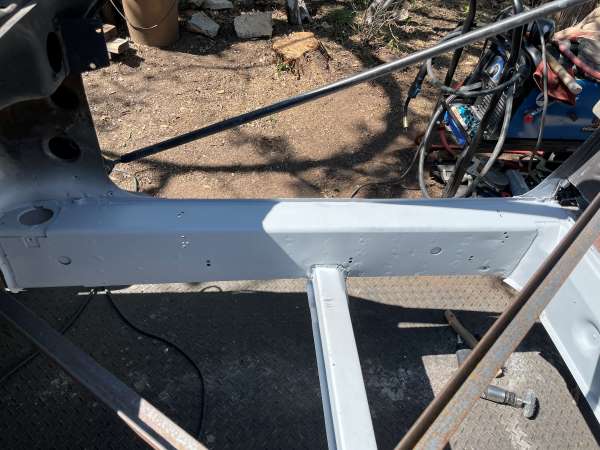
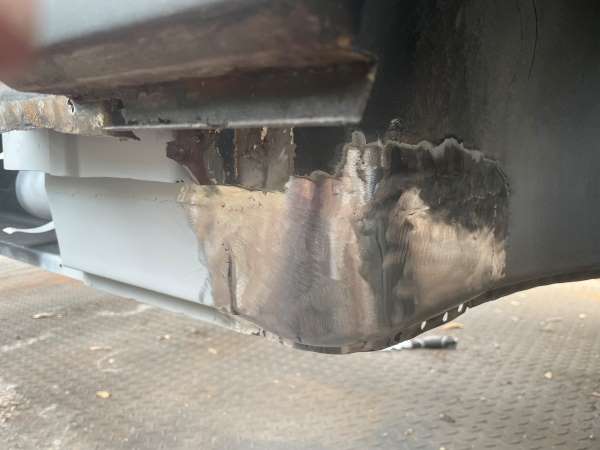
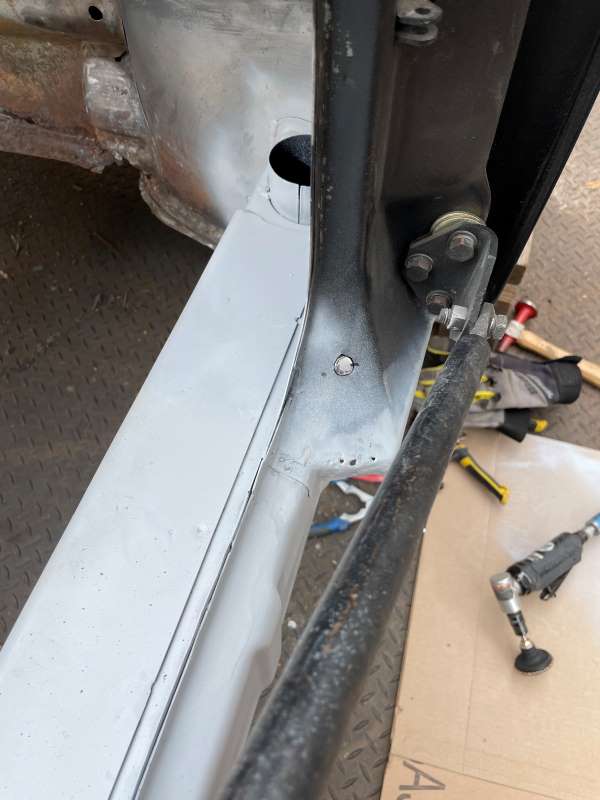
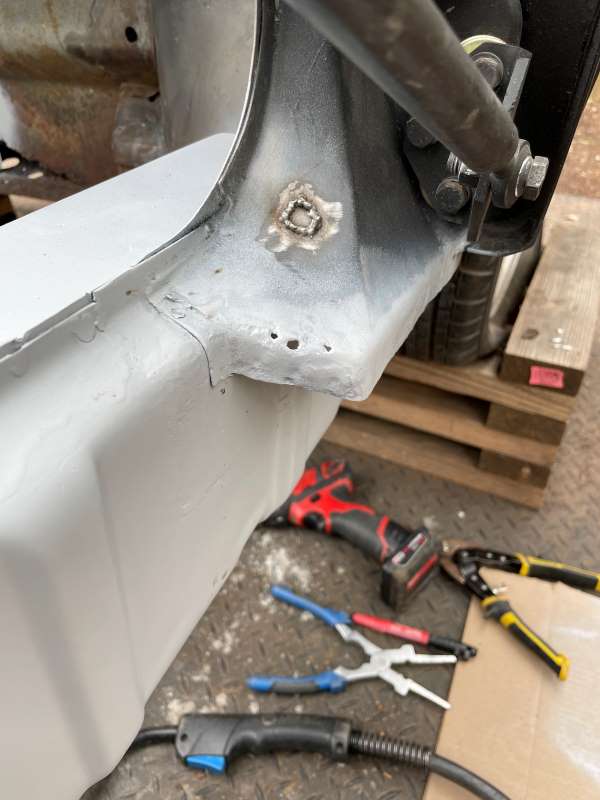
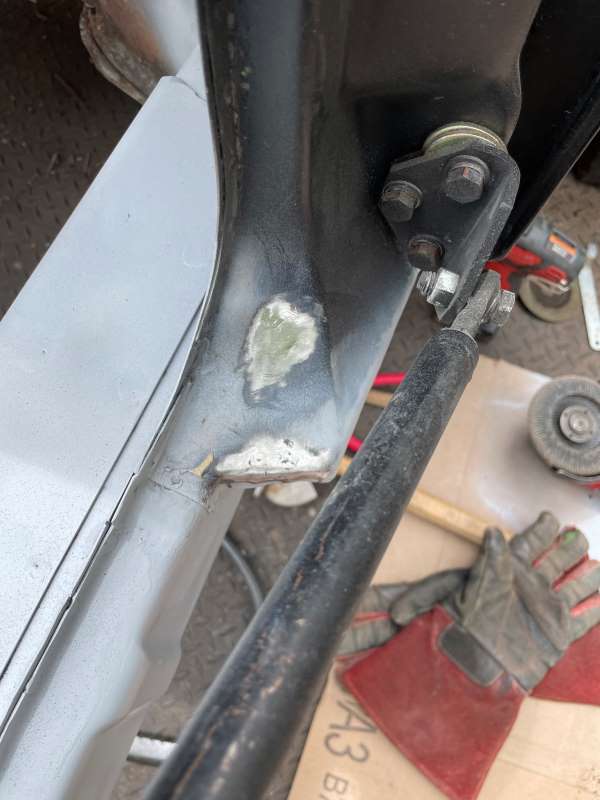
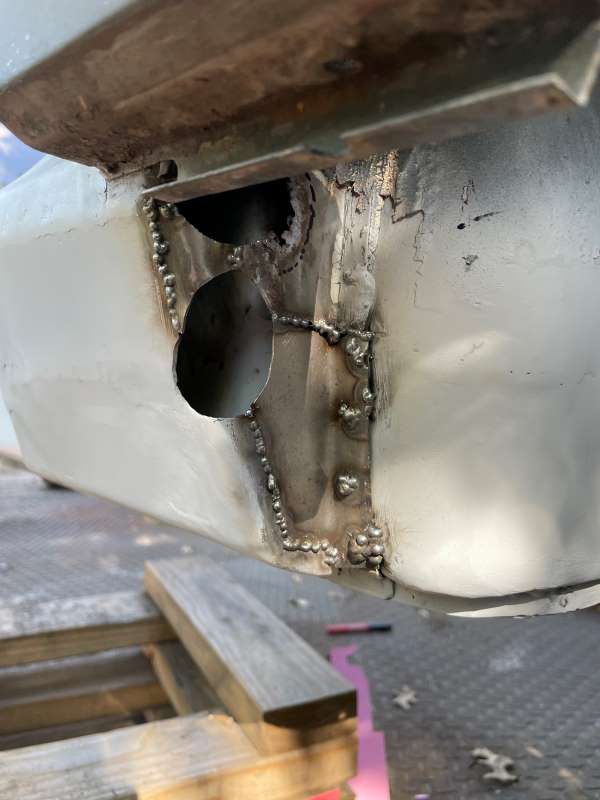
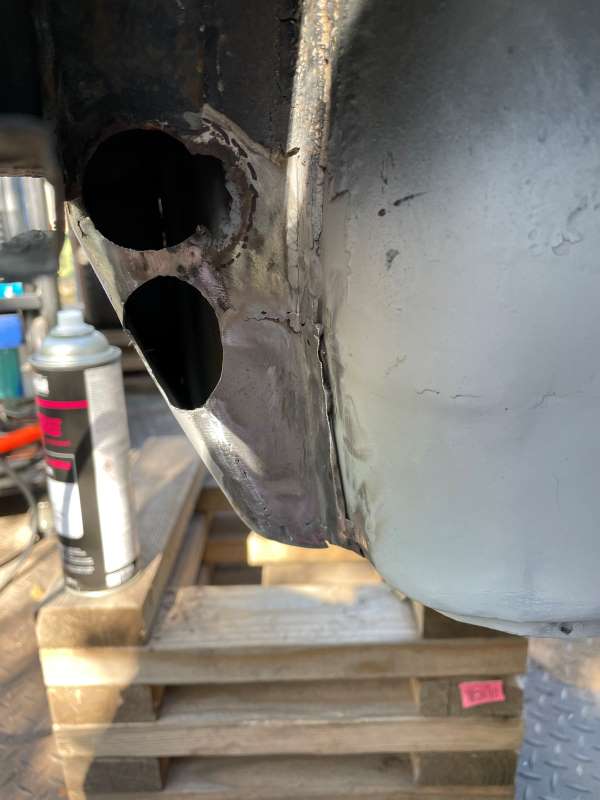
Fender Support Repair (4/2023): The final step in the longitudinal fix is to reconstruct the lower section of the hinge support bracket. I also had to fix the "unauthorized" hole [probably for speaker wires] and a few minor rust holes. With this car being an A/C car, I had to contend with the holes made through the support of the hoses. At the front, I tried to replace the rusted metal as best I could. I did leave a little of the repair for later when the car is mounted on the rotisserie. I just couldn't get a lot of access with everything else that was in the way. On the back side of the repair, I just replaced the metal, added some reinforcing metal and called it a day. I'll drill the A/C holes later before I weld in the door sill.
          |
|
|
|
| Root_Werks |
Dec 19 2023, 12:30 PM
Post
#60
|
|
Village Idiot Group: Members Posts: 9,024 Joined: 25-May 04 From: About 15NM from Canada Member No.: 2,105 Region Association: Pacific Northwest |
Really coming along! Thanks for sharing all the pics. We like following build/repair threads around here.
(IMG:style_emoticons/default/welder.gif) |
|
|
|
|
3 User(s) are reading this topic (3 Guests and 0 Anonymous Users)
0 Members:

|
Lo-Fi Version | Time is now: 4th July 2026 - 01:49 AM |
Invision Power Board
v9.1.4 © 2026 IPS, Inc.