|
|
|
Porsche, and the Porsche crest are registered trademarks of Dr. Ing. h.c. F. Porsche AG.
This site is not affiliated with Porsche in any way. Its only purpose is to provide an online forum for car enthusiasts. All other trademarks are property of their respective owners. |
|
|

  |

| rhodyguy |
 Jun 1 2020, 09:17 AM Jun 1 2020, 09:17 AM
Post
#41
|
|
Chimp Sanctuary NW. Check it out.  Group: Members Posts: 22,252 Joined: 2-March 03 From: Orion's Bell. The BELL! Member No.: 378 Region Association: Galt's Gulch |
Prop the trunk fully, FULLY, open for a lid on roller install.
|
   |

 
|
| dt4 |
Jun 1 2020, 11:27 AM
Post
#42
|
|
Senior Member Group: Members Posts: 503 Joined: 26-May 19 From: England Member No.: 23,161 Region Association: England |
defeated me today, it took plenty of effort just to get the bars installed mainly due to the threads on the studs being painted up
I gave it a bit of a go to see how to approach it and will get it done when I am re-energised (IMG:style_emoticons/default/beer3.gif) |
|
|
|
| Mikey914 |
Jun 1 2020, 11:55 AM
Post
#43
|
|
The rubber man Group: Members Posts: 12,782 Joined: 27-December 04 From: Hillsboro, OR Member No.: 3,348 Region Association: None |
We just brought on McMark's tool for doing these. If anyone needs one I will have them at $29.99 a pop
http://www.914world.com/bbs2/index.php?sho...+spring+tension Attached image(s) 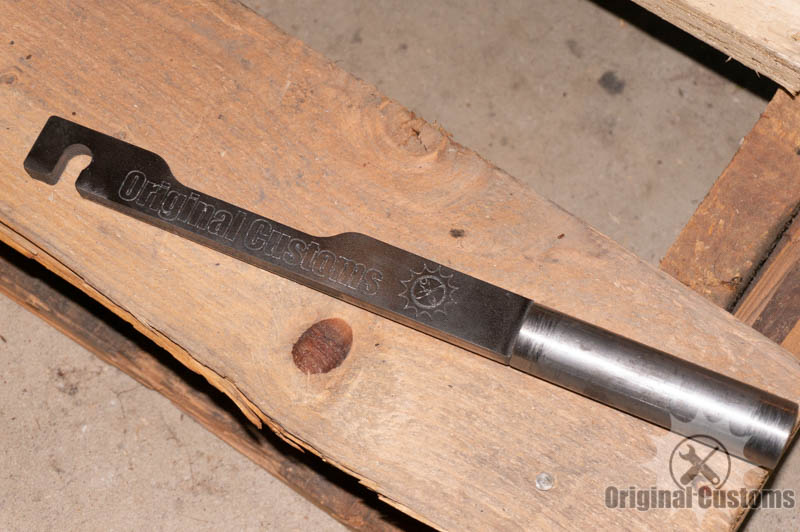
|
|
|
|
| Arno914 |
Aug 27 2020, 06:25 AM
Post
#44
|
|
Member Group: Members Posts: 233 Joined: 13-May 20 From: Southbridge, MA, USA Member No.: 24,260 Region Association: North East States |
Place some thick cushioning on the area where the torsion spring might impact in case it slips off the socket while you try to pry it over the roller pin. Otherwise it will leave a big ding on your bodyshell! (IMG:style_emoticons/default/headbang.gif)
These springs are nothing for kids... (IMG:style_emoticons/default/dry.gif) |
|
|
|
| Garland |
Sep 13 2020, 02:33 PM
Post
#45
|
|
Restoration Fanatic Group: Members Posts: 1,431 Joined: 8-January 04 From: ......Michigan...... Member No.: 1,535 Region Association: Upper MidWest |
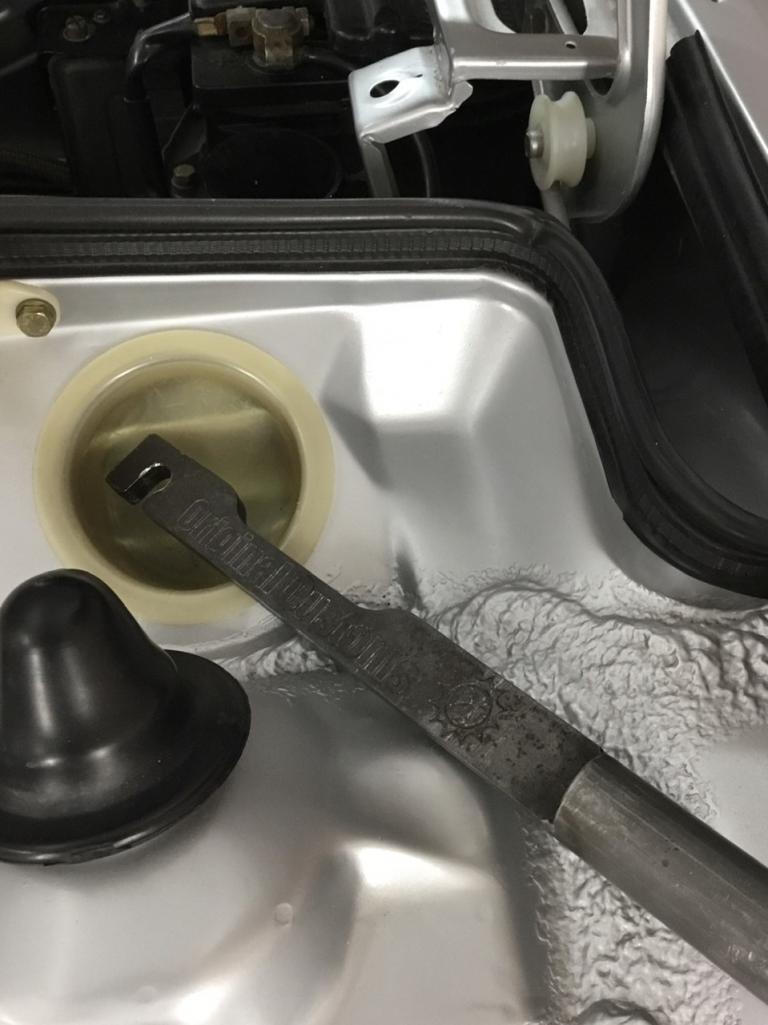
Great tool, glad these are still available, got mine last week, it was finally time. Clean install, still have 10 fingers.
 |
|
|
|
| Mikey914 |
Sep 13 2020, 06:02 PM
Post
#46
|
|
The rubber man Group: Members Posts: 12,782 Joined: 27-December 04 From: Hillsboro, OR Member No.: 3,348 Region Association: None |
Attached image(s) 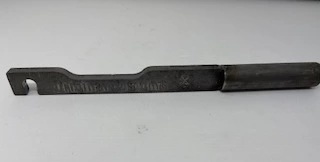
|
|
|
|
| jrmdir |
Aug 10 2021, 08:57 AM
Post
#47
|
|
Member Group: Members Posts: 224 Joined: 13-May 21 From: Central Ohio Member No.: 25,544 Region Association: Upper MidWest |
Older thread but Doug still deserves kudos for the write up and photos of the sectioned crescent wrench technique. I tried all day Saturday (and busted my a##) with a set up that I thought would work using 1/2" square steel tubing for leverage but couldn't figure out how to hold the spring up in order to get another "bite" on the end. On Sunday, a $9 Harbor Freight wrench and about 7 Dremel disks later and I was able to finish the job in about 5 min. Fantastic!
Thanks again Doug! Ron 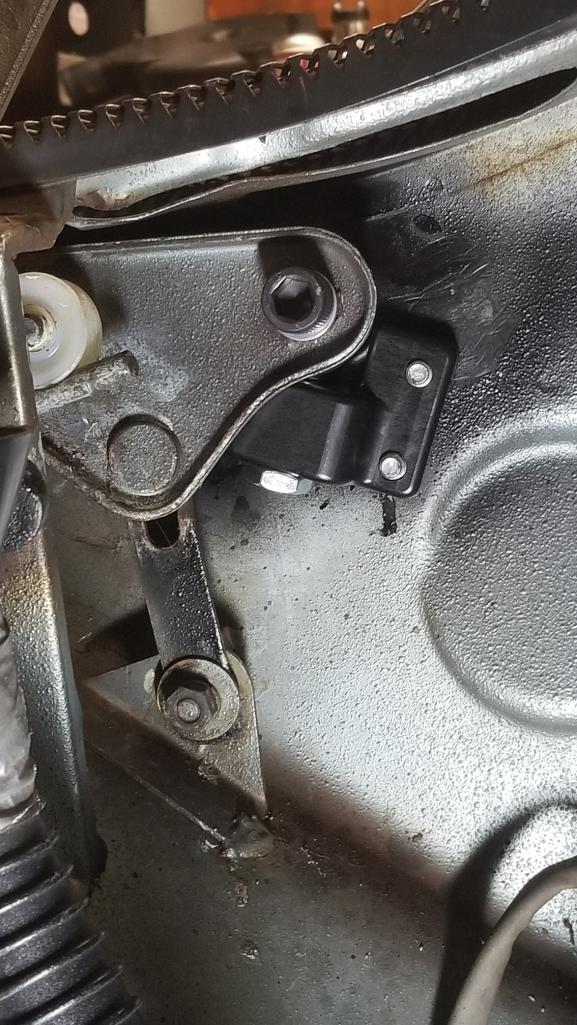 |
|
|
|
| tomh |
Aug 10 2021, 09:43 AM
Post
#48
|
|
Member Group: Members Posts: 322 Joined: 28-February 10 From: san jose Member No.: 11,412 Region Association: None |
I notched an old flat crow bar
It worked great. |
|
|
|
| NARP74 |
Aug 10 2021, 09:58 AM
Post
#49
|
|
Senior Member Group: Members Posts: 1,482 Joined: 29-July 20 From: Colorado, USA, Earth Member No.: 24,549 Region Association: Rocky Mountains |
QUOTE(jrmdir @ Aug 10 2021, 08:57 AM)  Older thread but Doug still deserves kudos for the write up and photos of the sectioned crescent wrench technique. I tried all day Saturday (and busted my a##) with a set up that I thought would work using 1/2" square steel tubing for leverage but couldn't figure out how to hold the spring up in order to get another "bite" on the end. On Sunday, a $9 Harbor Freight wrench and about 7 Dremel disks later and I was able to finish the job in about 5 min. Fantastic! Thanks again Doug! Ron How did you determine the location of the JWest brackets? I have them and the tool to do this job. Was the engine installed when you did it? |
|
|
|
| jrmdir |
Aug 10 2021, 11:19 AM
Post
#50
|
|
Member Group: Members Posts: 224 Joined: 13-May 21 From: Central Ohio Member No.: 25,544 Region Association: Upper MidWest |
[/quote]
How did you determine the location of the JWest brackets? I have them and the tool to do this job. Was the engine installed when you did it? [/quote] Yes the engine is in and I removed the trunk lid. The kit is great but the instructions about locating the right spot for the holes didn't sound easy to me: Put the lid back on and do the trial and error thing! So I figured the best thing would be to try to make sure the center of the new bolt lined up with where the prior center of the welded bracket had been. So before I ground off the spot welds, I spent some time re-forming the broken off bracket until it fit back where it was - with the broken edges lined up with the metal still on the car. Then I screwed the old mounting bolt most of the way through (see photo) put a dab of white grease on the end and set it back in place so the grease transferred to the body. Probably overkill bc there was a definite dimple stamped into the body right were the grease ended up. Not sure if this was a a factory guide point but it seemed so. I only had to to one side so I don't know if they're all like that. Next I drilled a 5/16 hole at that center point. (start with a 1/8" drill and work up because there is a 2nd layer of metal partially behind that will cause a larger drill to walk off center. AMHIK!) Finally, I found a suitable bushing to allow me to put a longer 5/16 bolt through the large rod end hole, added a thin washer and stuck it through the new hole in the body with a nut and washer on the wheel well side. So, with the pivot point theoretically right where it used to be, I was able to rotate the new bracket around to find the best clearance for the four bolts and scribe for the bolt holes. So after all this verbiage, the big disclaimer is that I've yet to reinstall the lid - but will do that today. However since I drilled larger mounting holes as suggested - for adjustment - I'm pretty confident it will work out just fine. Ron 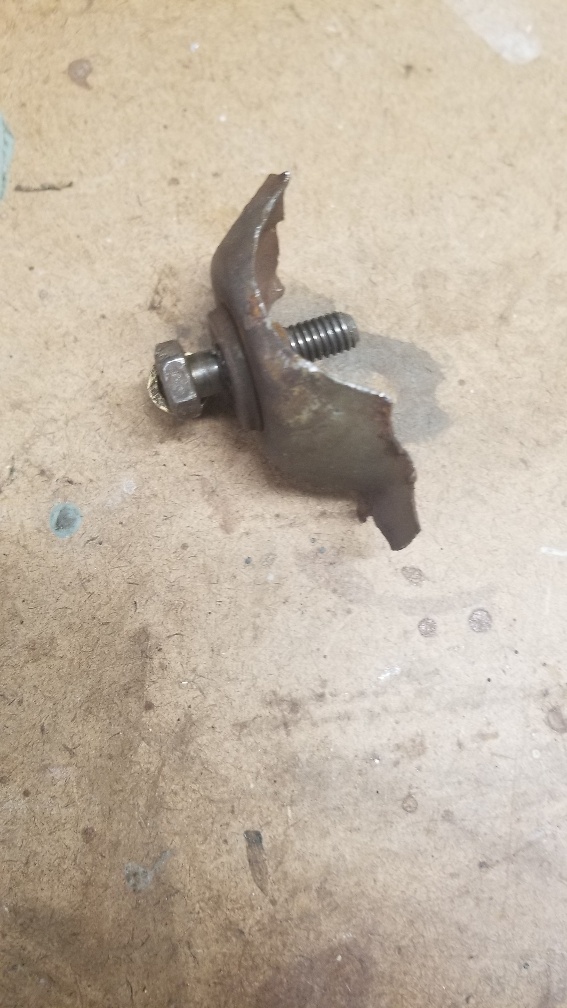 |
|
|
|
| ClayPerrine |
Aug 10 2021, 01:21 PM
Post
#51
|
|
Life's been good to me so far..... Group: Admin Posts: 16,567 Joined: 11-September 03 From: Hurst, TX. Member No.: 1,143 Region Association: NineFourteenerVille |
QUOTE(NARP74 @ Aug 10 2021, 10:58 AM) How did you determine the location of the JWest brackets? I have them and the tool to do this job. Was the engine installed when you did it? I bolt them to the hinges, and put the lid on the car. Then I mark where the brackets are on the walls. Then I take the lid back off, and line up the hinges with the marks I made. Once they are on the body, I can adjust them up and down to make the decklid fit perfect. Clay |
|
|
|
| jrmdir |
Aug 10 2021, 02:32 PM
Post
#52
|
|
Member Group: Members Posts: 224 Joined: 13-May 21 From: Central Ohio Member No.: 25,544 Region Association: Upper MidWest |
Success!
I've owned this car for over 2 months and until today have never seen it without the left side of the trunk sticking up an inch and a half! Nice Butt! Ron 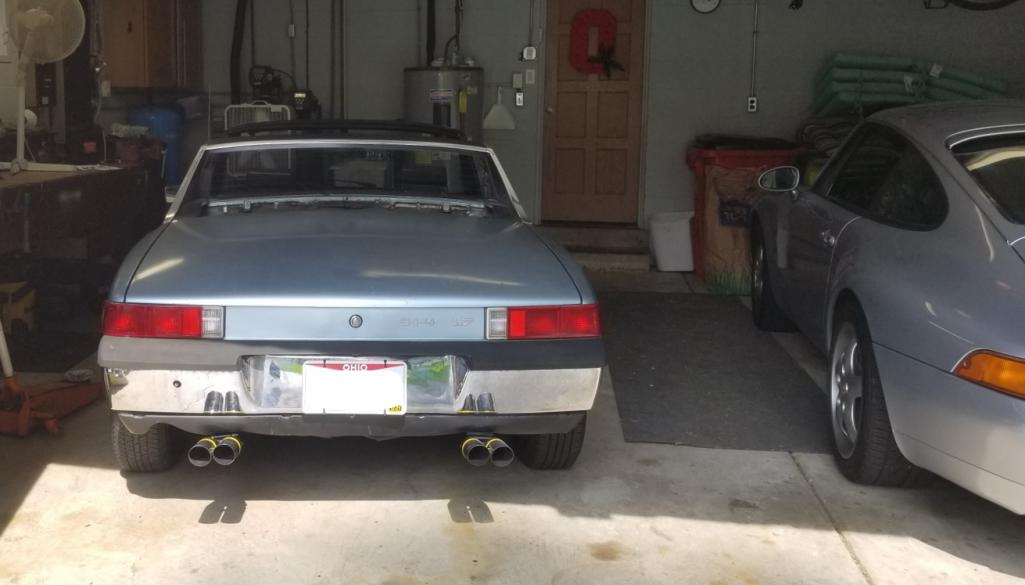 |
|
|
|
|
1 User(s) are reading this topic (1 Guests and 0 Anonymous Users)
0 Members:

|
Lo-Fi Version | Time is now: 28th July 2026 - 04:01 PM |
Invision Power Board
v9.1.4 © 2026 IPS, Inc.