|
|
|
Porsche, and the Porsche crest are registered trademarks of Dr. Ing. h.c. F. Porsche AG.
This site is not affiliated with Porsche in any way. Its only purpose is to provide an online forum for car enthusiasts. All other trademarks are property of their respective owners. |
|
|

  |

| Spoke |
 Mar 18 2007, 04:28 PM Mar 18 2007, 04:28 PM
Post
#101
|
|
Jerry  Group: Members Posts: 6,990 Joined: 29-October 04 From: Allentown, PA Member No.: 3,031 Region Association: None |
Pulled the antenna out. Won't be replacing it. I listen to CDs only so I will weld up this hole.
Attached image(s) 
|
   |

 
|
| Spoke |
Mar 18 2007, 05:59 PM
Post
#102
|
|
Jerry Group: Members Posts: 6,990 Joined: 29-October 04 From: Allentown, PA Member No.: 3,031 Region Association: None |
Wetsanded, prepped, and primered the tank and filler.
Attached image(s) 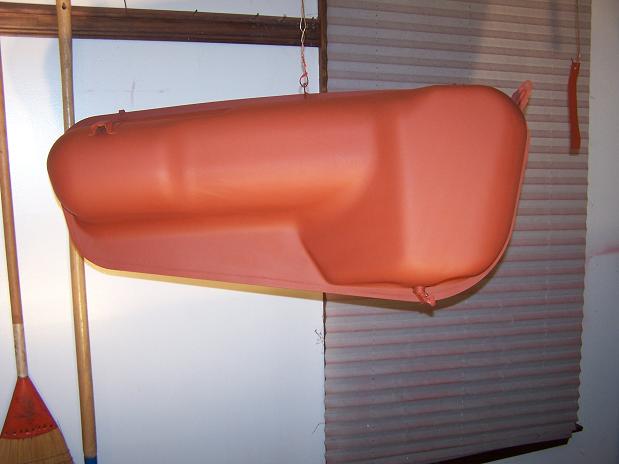 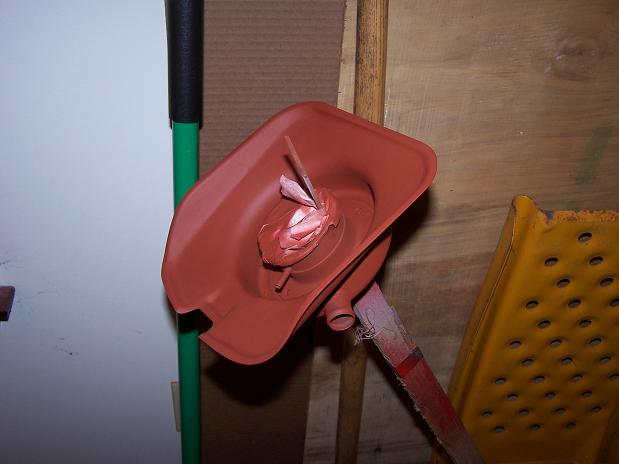
|
|
|
|
| Spoke |
Mar 18 2007, 06:03 PM
Post
#103
|
|
Jerry Group: Members Posts: 6,990 Joined: 29-October 04 From: Allentown, PA Member No.: 3,031 Region Association: None |
Painted the tank and filler assembly with Epoxy appliance paint from Home Depot. Gives a real nice sheen.
Attached image(s) 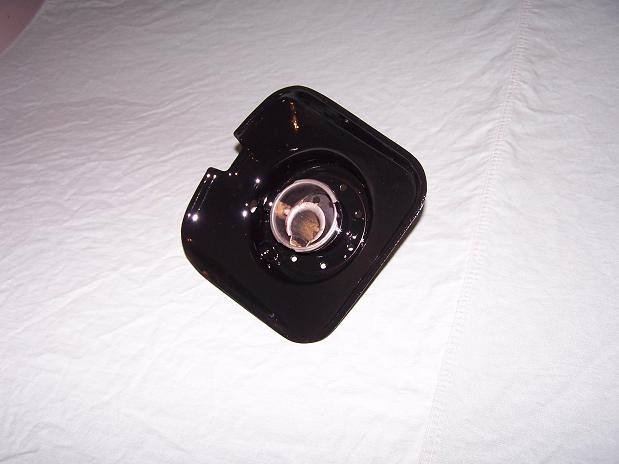 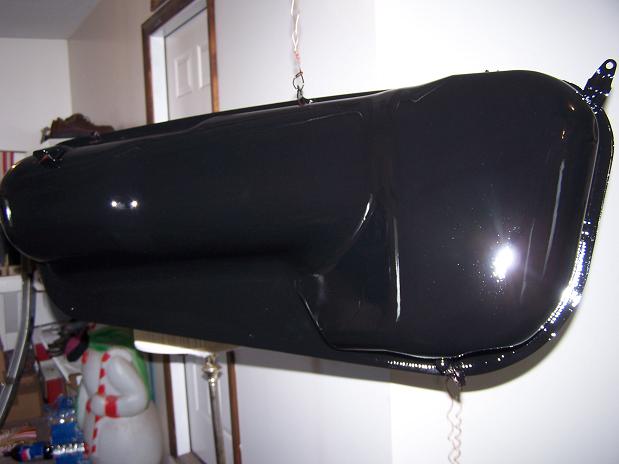 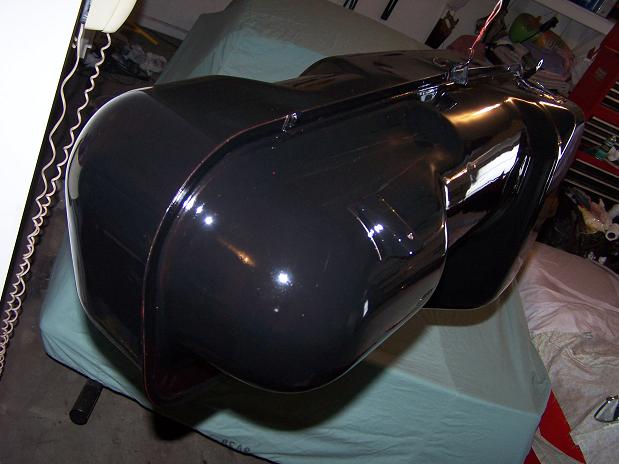 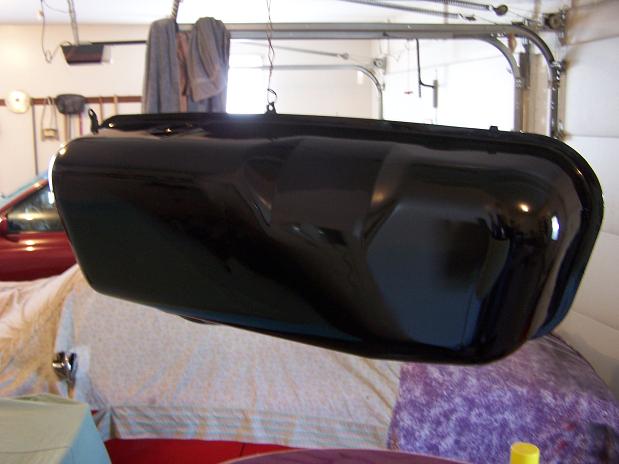
|
|
|
|
| Spoke |
Mar 24 2007, 07:06 AM
Post
#104
|
|
Jerry Group: Members Posts: 6,990 Joined: 29-October 04 From: Allentown, PA Member No.: 3,031 Region Association: None |
Pulled the front trunk rubber seal to repair the rust bubble on the passenger fender. Also will remove the antenna. No more terrestial radio for this car. The last time I listened to terrestial radio was one of Howard Stern's last shows before moving to Sirius.
Found rust holes in the channels on both sides of the car. 2 are small enough to fill with weld, one needs a little piece of metal to close the wound. Attached image(s) 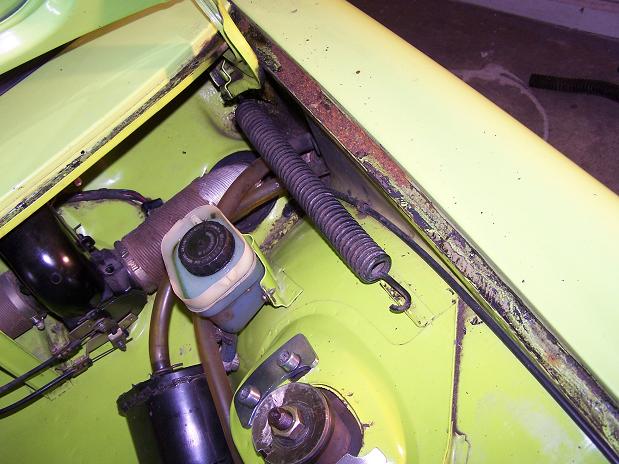 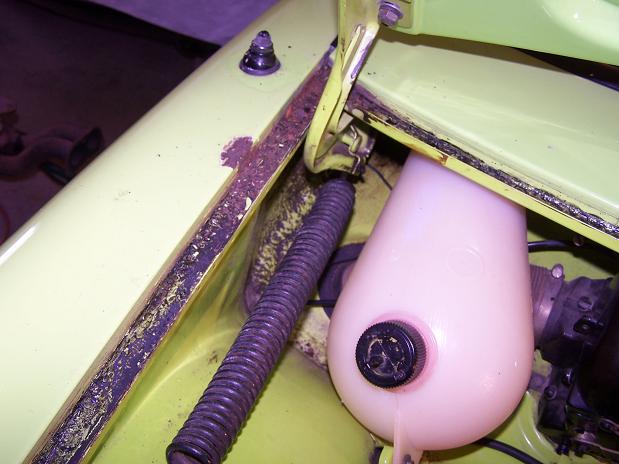  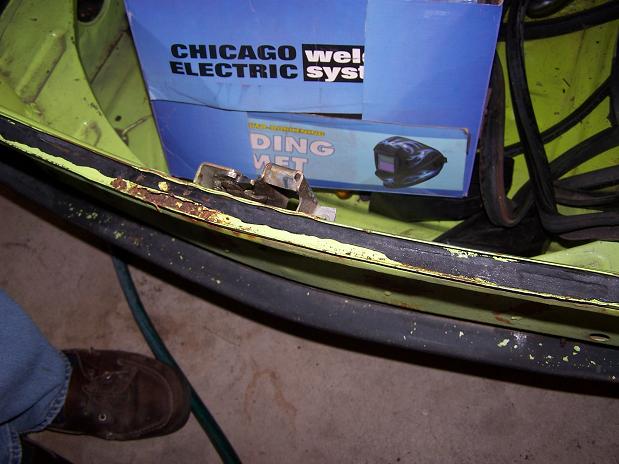 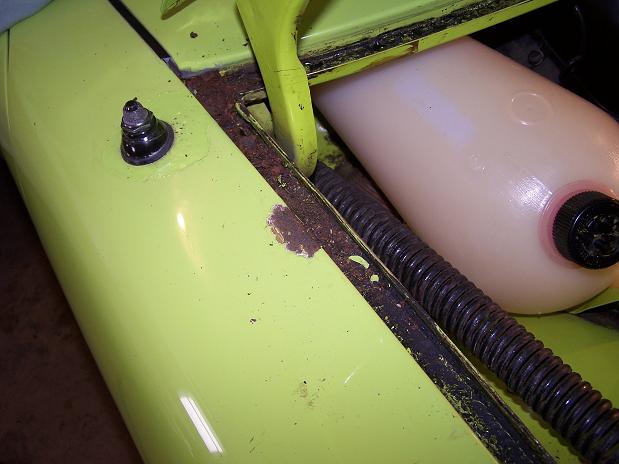 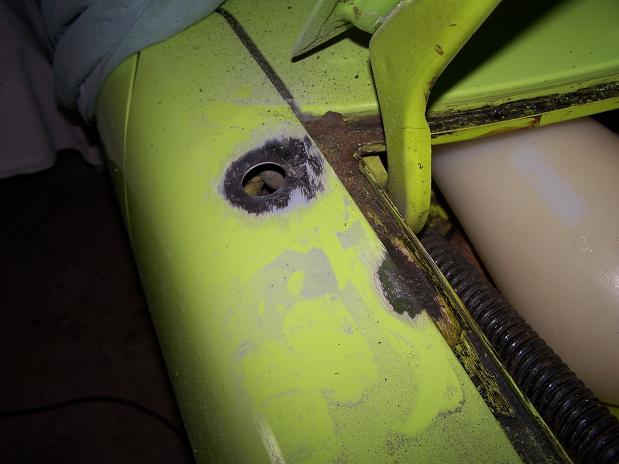
|
|
|
|
| Spoke |
Apr 1 2007, 11:57 AM
Post
#105
|
|
Jerry Group: Members Posts: 6,990 Joined: 29-October 04 From: Allentown, PA Member No.: 3,031 Region Association: None |
Got the antenna hole welded up. Rain channels also welded up.
Attached image(s) 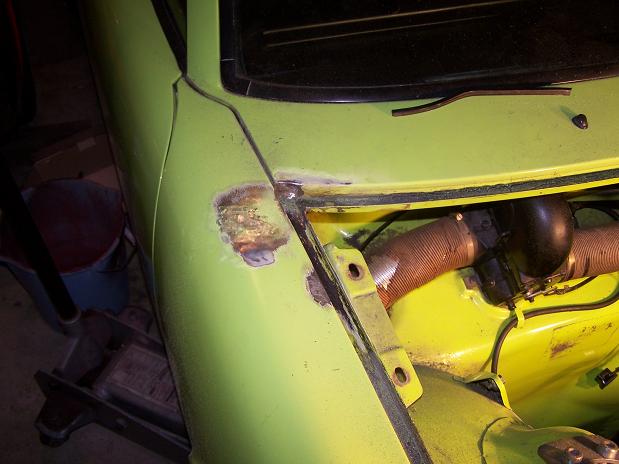 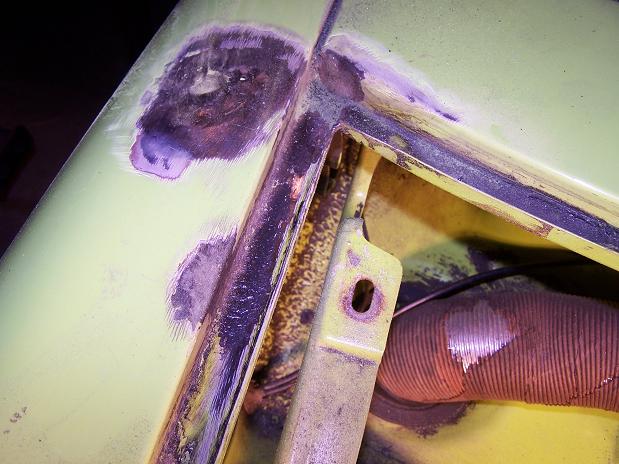 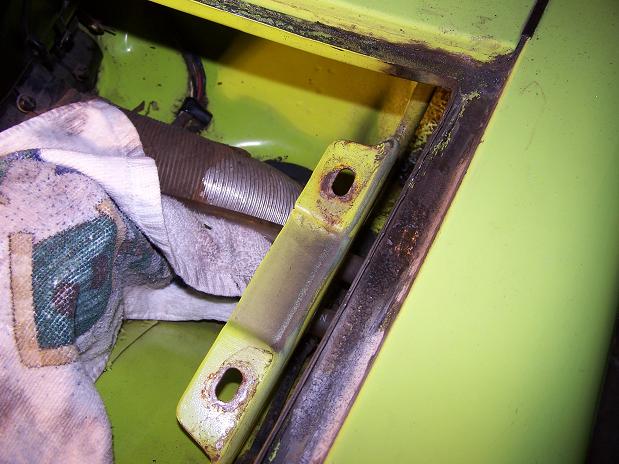
|
|
|
|
| Spoke |
Apr 1 2007, 12:02 PM
Post
#106
|
|
Jerry Group: Members Posts: 6,990 Joined: 29-October 04 From: Allentown, PA Member No.: 3,031 Region Association: None |
Fenders and rain channels primed and painted. I have about a pint of paint that came with the car. Need to use the paint sparingly as I want to paint the rear fenders after flaring.
Used my airbrush for the paint touch-up. Worked out real good using only a very small amount of paint. Very nice finish with the airbrush. The paint color looks to match very well. Attached image(s) 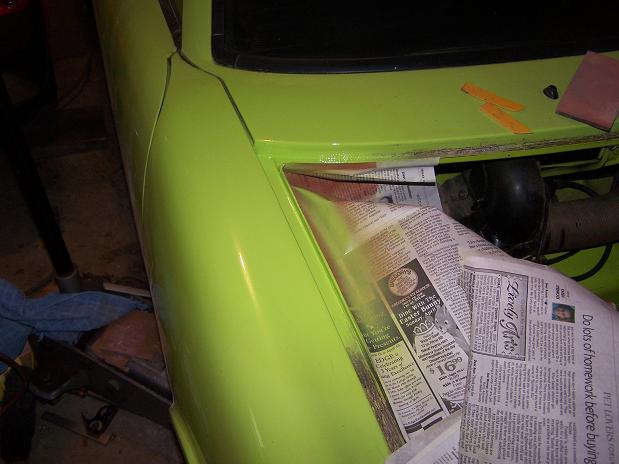 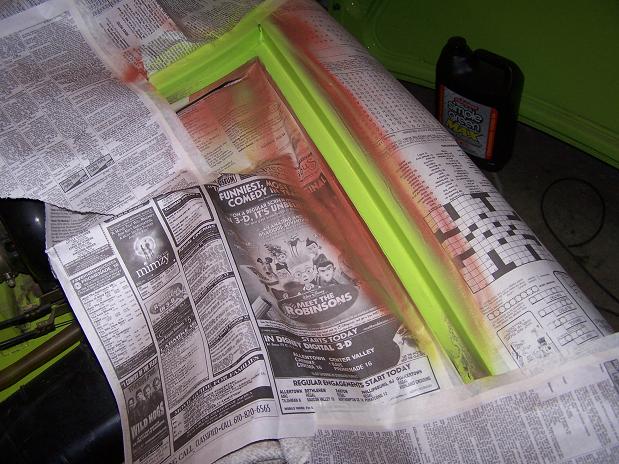 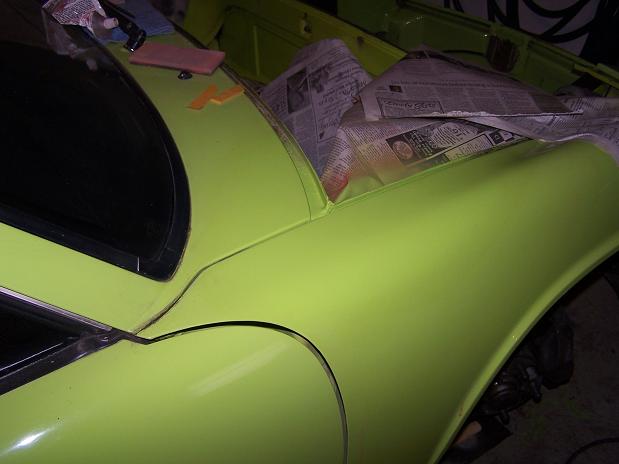 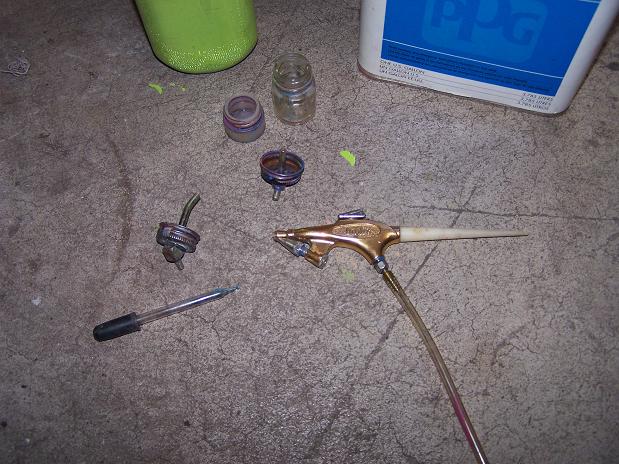
|
|
|
|
| Spoke |
Apr 5 2007, 08:28 PM
Post
#107
|
|
Jerry Group: Members Posts: 6,990 Joined: 29-October 04 From: Allentown, PA Member No.: 3,031 Region Association: None |
Fuel lines replaced, new filter, new clamps (FI type). Tested connections before lowering tank into place. Real easy to place the tank w/o the trunk lid.
Attached image(s) 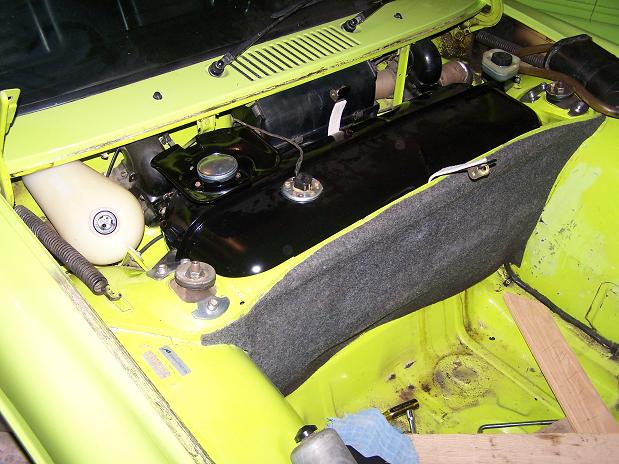 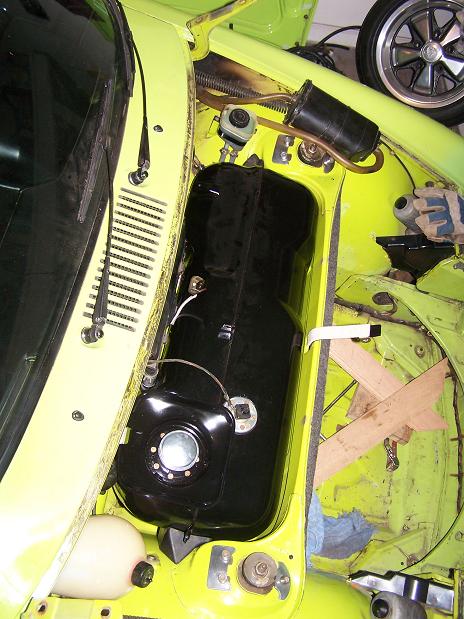 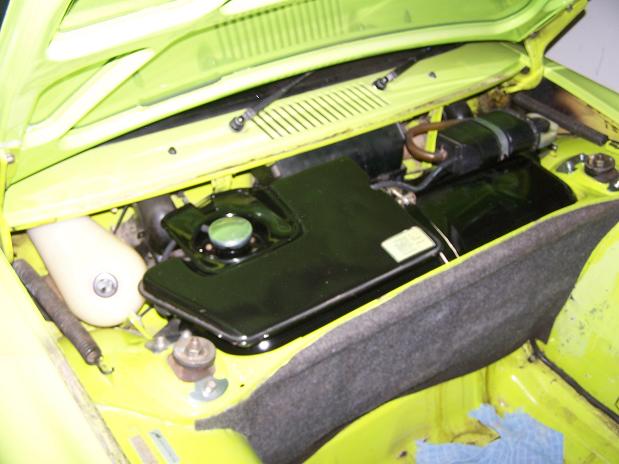
|
|
|
|
| Spoke |
Apr 5 2007, 08:31 PM
Post
#108
|
|
Jerry Group: Members Posts: 6,990 Joined: 29-October 04 From: Allentown, PA Member No.: 3,031 Region Association: None |
Replaced original broken trunk floor with MDF. Thickness is about 7/16 inch.
Attached image(s) 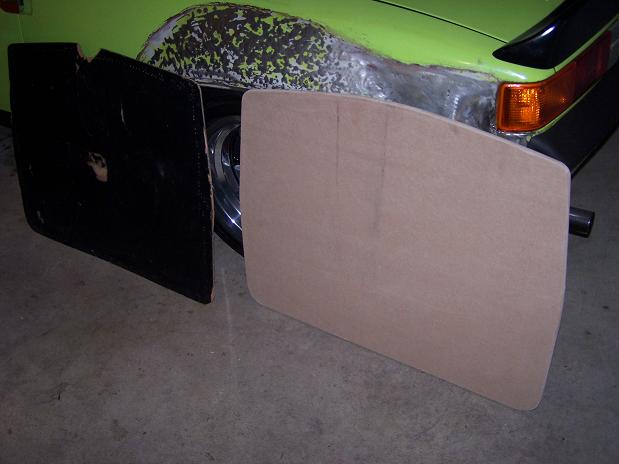 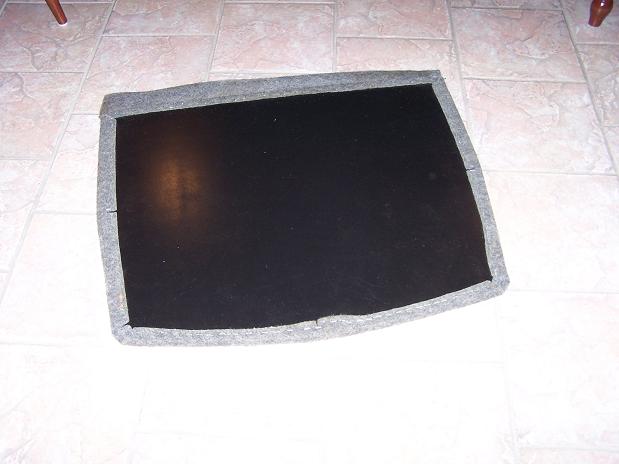
|
|
|
|
| Spoke |
Apr 5 2007, 08:38 PM
Post
#109
|
|
Jerry Group: Members Posts: 6,990 Joined: 29-October 04 From: Allentown, PA Member No.: 3,031 Region Association: None |
Installed new (to me) 180LB springs which I thought would lower the car although the current springs look to be 140/165/180 already and the same length.
Spring diameters: 74: 0.442 inch 180LB: 0.479 inch The new ones are progressive. I did lower the bottom perches by about 1/4 inch. Overall result is no lowering of the rear. Anyone need some springs? If I could determine the spring rate of the old springs, I'd sell them. Multiple jackstands to avoid a Gint-event. Attached image(s) 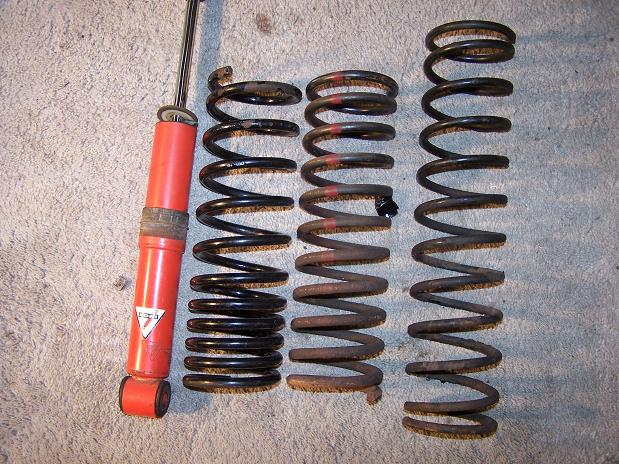 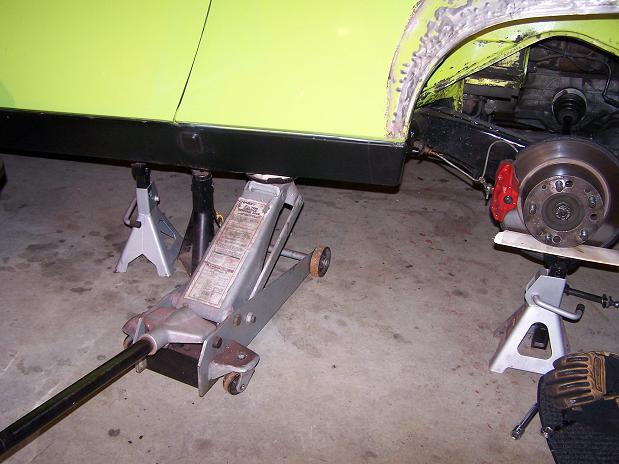 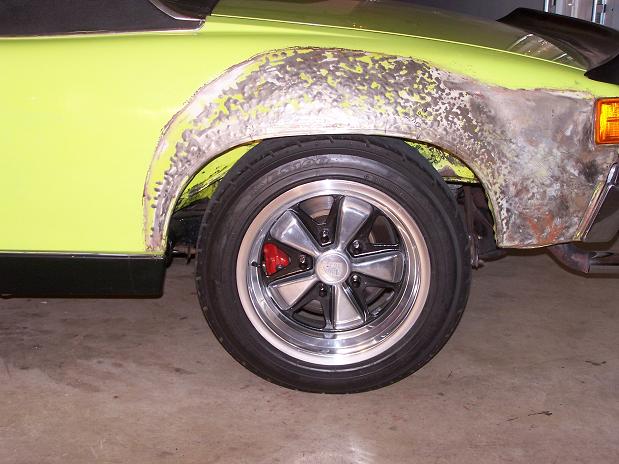
|
|
|
|
| Spoke |
Apr 7 2007, 11:13 AM
Post
#110
|
|
Jerry Group: Members Posts: 6,990 Joined: 29-October 04 From: Allentown, PA Member No.: 3,031 Region Association: None |
Chrome front bumper is on along with an excellent bumper top. Still need to pound out some ripples from where the bumperettes were. Haven't decided to put bolts in the bumperette holes yet; may just leave the holes.
I have fog lights and grills to install but the front panel behind the bumper was replaced after an accident a long time ago and the new panel doesn't have mounting bolts for the fogs. The whole front panel is a mess. The panel is in good shape, rust wise, but the welds around the front fenders on both sides have rusted as has the front part of the trunk lid gasket channel. BTW, your eyes do not decieve you, the front trunk lid and headlight covers were repainted at some point with a nasty looking puke green color. Really not even a close match to the rest of the car. Attached image(s) 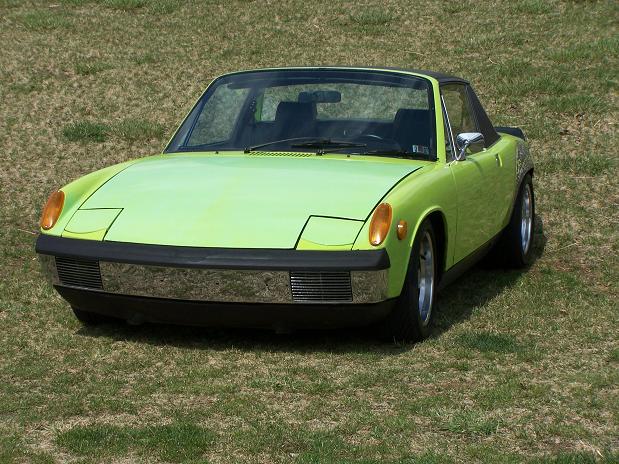 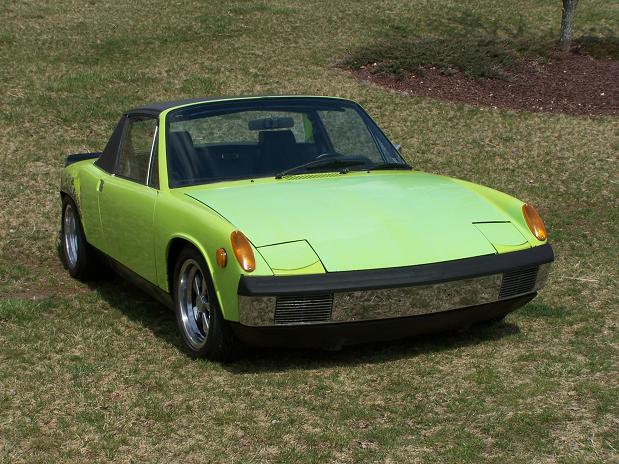
|
|
|
|
| Gint |
Apr 7 2007, 11:20 AM
Post
#111
|
|
Mike Ginter Group: Admin Posts: 16,082 Joined: 26-December 02 From: Denver CO. Member No.: 20 Region Association: Rocky Mountains |
QUOTE(Spoke @ Apr 5 2007, 07:38 PM)  Multiple jackstands to avoid a Gint-event. (IMG:style_emoticons/default/av-943.gif) It's lookin pretty good! |
|
|
|
| Spoke |
Apr 7 2007, 11:22 AM
Post
#112
|
|
Jerry Group: Members Posts: 6,990 Joined: 29-October 04 From: Allentown, PA Member No.: 3,031 Region Association: None |
I haven't put the gasket back in and the driver side of the front trunk lid does not sit flush with the front fender. The rubber bumper is much lower than the lid position so it is not stopping the lid from fitting right. The passenger side is flush.
Can I twist the trunk lid to sit right or will this damage the lid? Attached image(s) 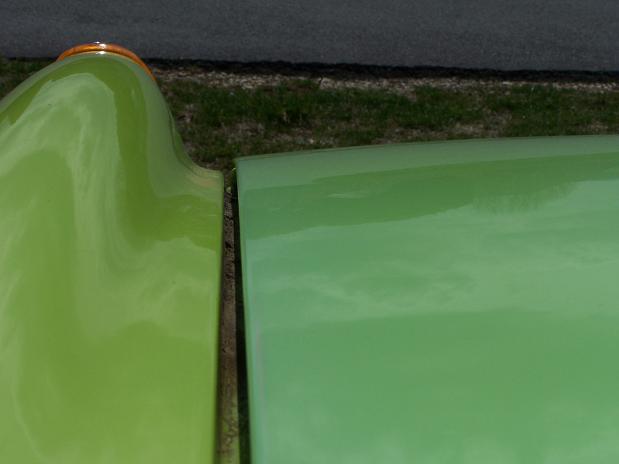
|
|
|
|
| Spoke |
Apr 28 2007, 05:37 PM
Post
#113
|
|
Jerry Group: Members Posts: 6,990 Joined: 29-October 04 From: Allentown, PA Member No.: 3,031 Region Association: None |
Still working on the rear flares, trying to get both sides to look alike.
Meanwhile, I removed the rear suspension to replace bearings and hubs. I got inspired by Eric Shea's trailing arm strengthening as well as what Chris Foley had done and Aaron's comment: "what if you ran one at a 45 degree angle.. inner right bottom to upper left top etc? oh wait... too much geometry LOL" The pics below are from Eric's thread: Glimpse of Things to Come? Eric Shea's strengthening: 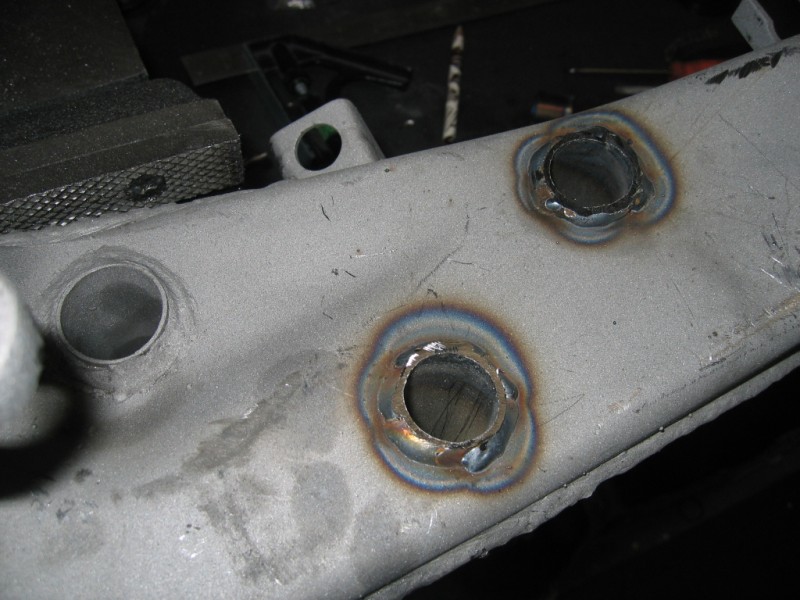 Chris Foley's strengthening: 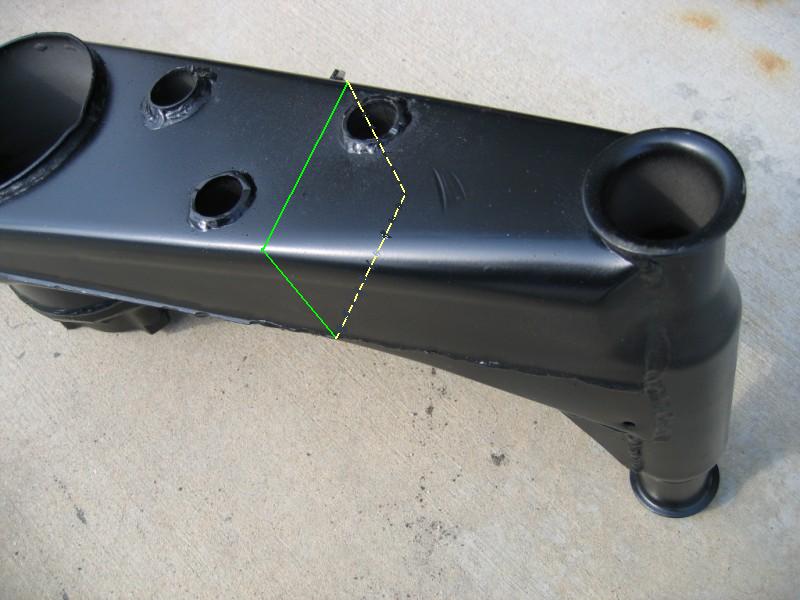 |
|
|
|
| Spoke |
Apr 28 2007, 05:52 PM
Post
#114
|
|
Jerry Group: Members Posts: 6,990 Joined: 29-October 04 From: Allentown, PA Member No.: 3,031 Region Association: None |
So combining Eric's, Chris's, and Aaron's ideas into one, I decided to use 3/8 inch steel rod at 45 degree angles in 2 pairs.
First order of business is to drill the holes. I used 4 drills starting with 1/4 inch up to 3/8 inch. Each pair of cross supports are offset as to not interfere with its mate. These pics show the steel rod and long 3/8 inch drill bit as cross-support pair. The drilling took some time but was quite easy. Eric's large diameter hole drilling comments scared me away from his tubular strengthening. Chris's cutting the arm in half to put in the plate is way out of my realm of experience and materials. Not sure how much this will strengthen the arms but it sure was fun doing it. Attached image(s) 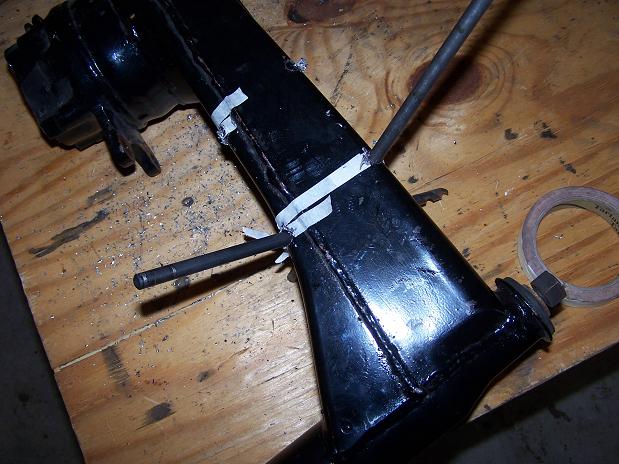 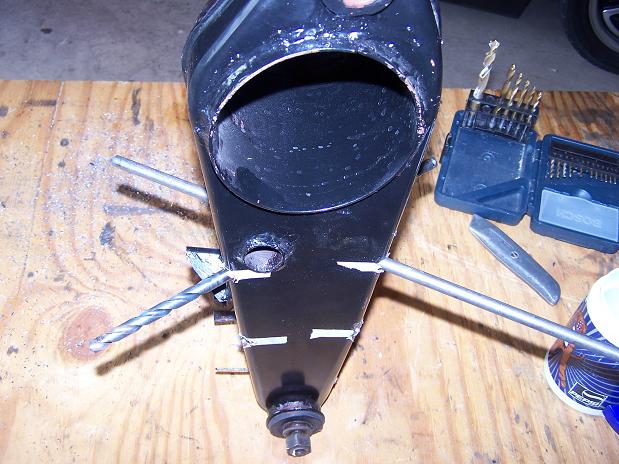
|
|
|
|
| Spoke |
Apr 28 2007, 05:58 PM
Post
#115
|
|
Jerry Group: Members Posts: 6,990 Joined: 29-October 04 From: Allentown, PA Member No.: 3,031 Region Association: None |
All holes drilled, wire wheeled the holes in prep for welding.
Welding was a breeze as the thick arm steel and 3/8 inch rod meant no blow-through like when welding on fenders. I used the Millermatic 135 on 5.5 heat setting (out of 10) and 55 wire speed (out of 100). I started with the first weld with the end of the rod barely sticking out of the hole. When the other side was welded, I cut the rod off at the desired height. This allowed me to not have to measure lengths of the rod and one 4 ft rod was all I needed for the 8 pieces. Attached image(s) 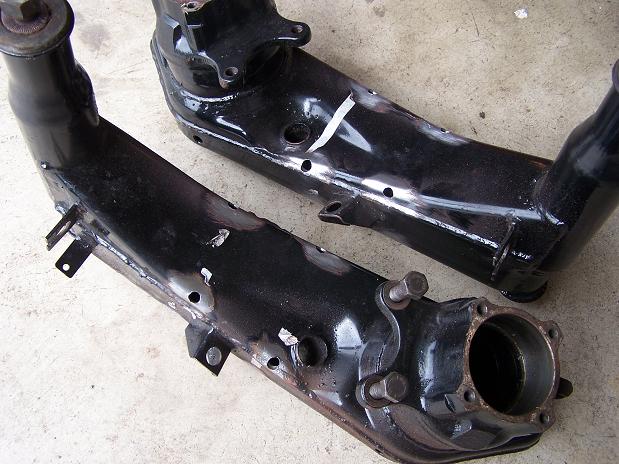 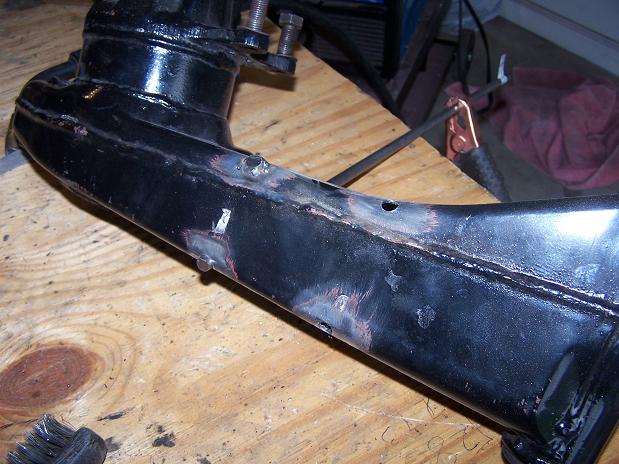
|
|
|
|
| Spoke |
Apr 28 2007, 06:04 PM
Post
#116
|
|
Jerry Group: Members Posts: 6,990 Joined: 29-October 04 From: Allentown, PA Member No.: 3,031 Region Association: None |
Nearing the end of the job. With the rod sticking out, this could very well be "Franken-Arm". I wonder if the car would go faster if I put 50000 volts on the rod? (IMG:style_emoticons/default/idea.gif)
Finally, after some grinding, the finished product. Again, not sure if I did any real strengthening, but it was a fun afternoon. Now on to putting bearings in and hubs on. Both are in the freezer. My wife thought I was mental when she saw auto parts in the chest freezer. Attached image(s) 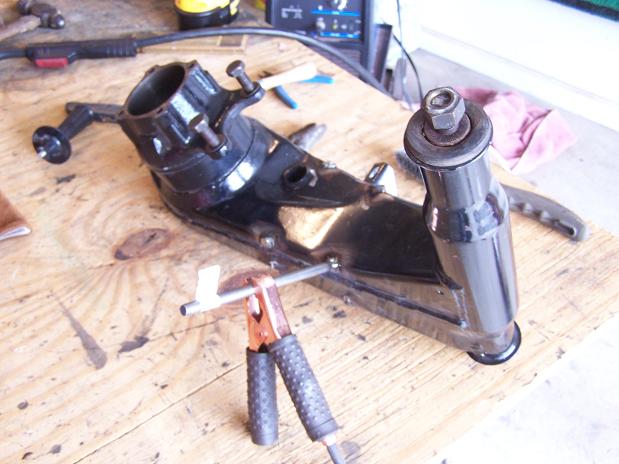 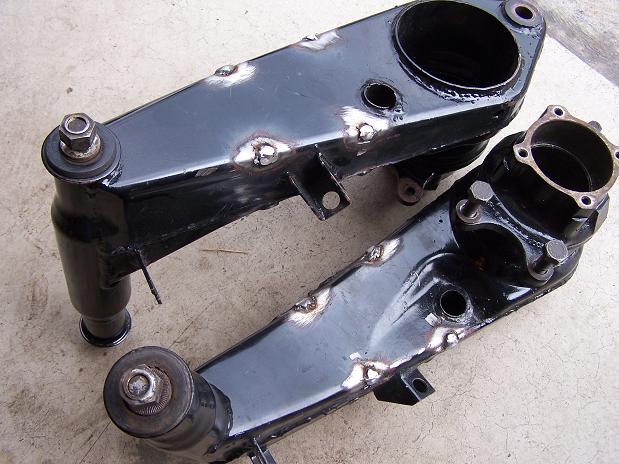
|
|
|
|
| Spoke |
Apr 29 2007, 09:37 AM
Post
#117
|
|
Jerry Group: Members Posts: 6,990 Joined: 29-October 04 From: Allentown, PA Member No.: 3,031 Region Association: None |
Bearings now installed. The first bearing needed quite a bit of coaxing to go in. Used the 1/2 inch all thread with the wood stops to pull the bearings in. The second bearing went more than half way on with gentle tapping before I needed the all thread.
I used one piece of wood in the back and one in the front with the bearing plate to buffer the bearing from the wood. The wood is 1 1/8 inch American Cherry. Not extremely hard but also not that soft. 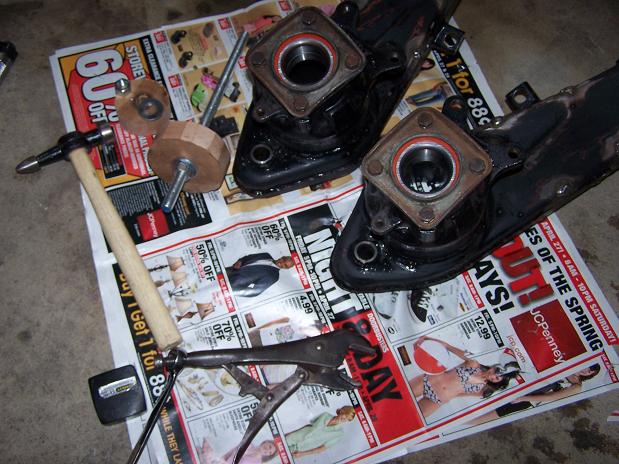 To pull the hubs on, I cut down the size of the rear piece of wood to fit on the bearing itself. The hubs went right on with moderate resistance. 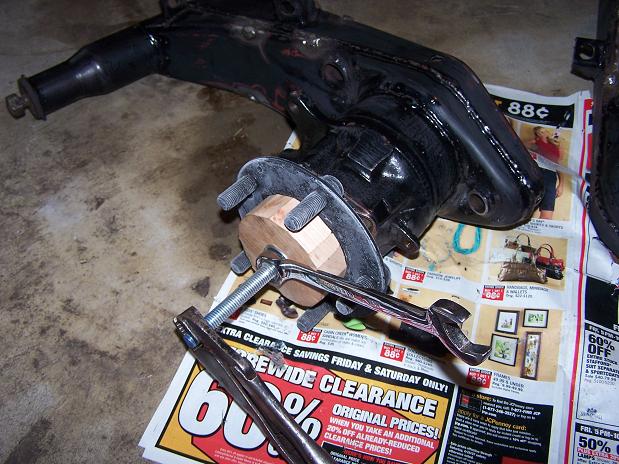 The hubs on, ready for paint. 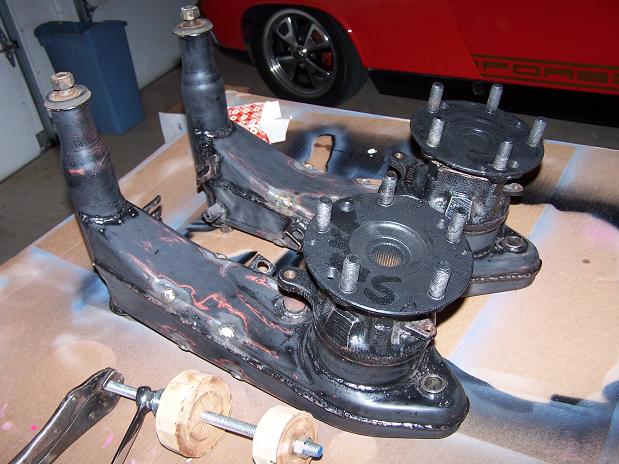 |
|
|
|
| Spoke |
May 7 2007, 09:47 PM
Post
#118
|
|
Jerry Group: Members Posts: 6,990 Joined: 29-October 04 From: Allentown, PA Member No.: 3,031 Region Association: None |
Rear arms painted gloss black.
Attached image(s) 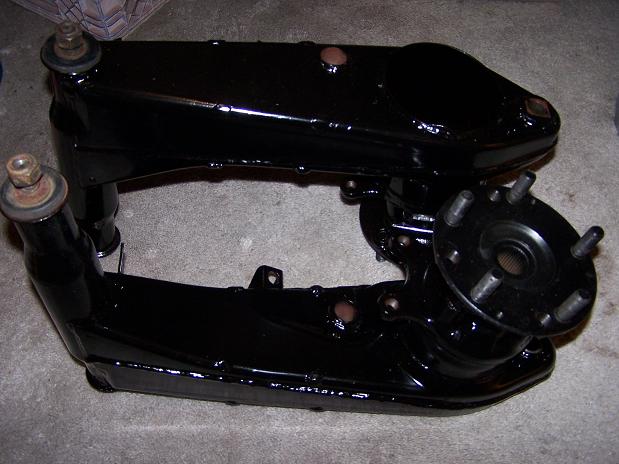 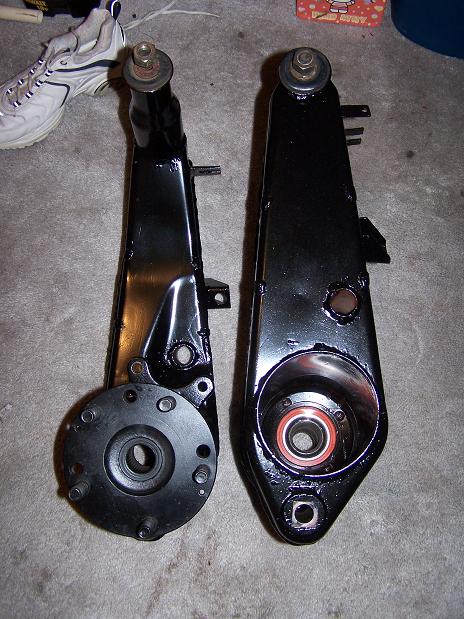
|
|
|
|
| Aaron Cox |
May 7 2007, 09:55 PM
Post
#119
|
|
Professional Lawn Dart Group: Retired Admin Posts: 24,541 Joined: 1-February 03 From: OC Member No.: 219 Region Association: Southern California |
NICE WORK!!!
|
|
|
|
| Spoke |
May 7 2007, 09:56 PM
Post
#120
|
|
Jerry Group: Members Posts: 6,990 Joined: 29-October 04 From: Allentown, PA Member No.: 3,031 Region Association: None |
WTF?
Things were going along well until I saw a little flake of paint on the passenger suspension console. After a little poking, I have found quite a bit of rust. I poked all around but didn't find any more. Will look at it later in detail. So how bad is this rust? What else should I look at? Right now I plan to cut out that entire section and weld on. How thick material should I use? Attached image(s) 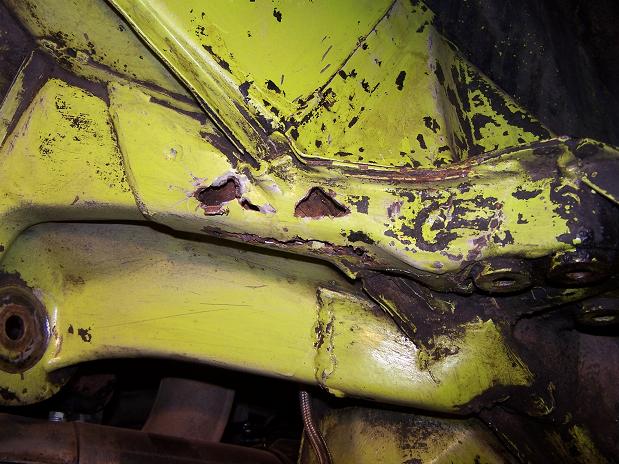 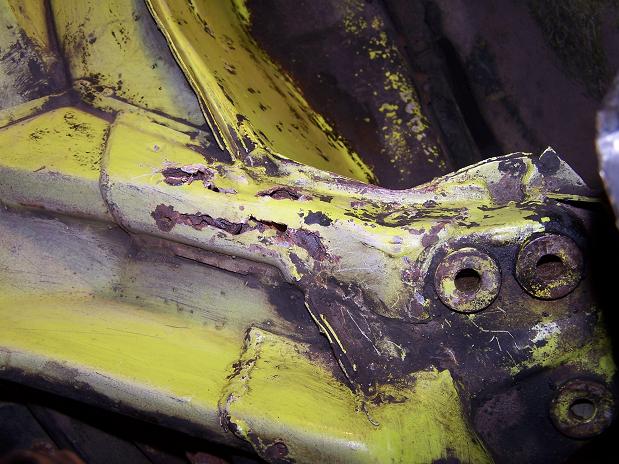 
|
|
|
|
|
1 User(s) are reading this topic (1 Guests and 0 Anonymous Users)
0 Members:

|
Lo-Fi Version | Time is now: 5th June 2024 - 04:24 PM |
Invision Power Board
v9.1.4 © 2024 IPS, Inc.