|
|
|
Porsche, and the Porsche crest are registered trademarks of Dr. Ing. h.c. F. Porsche AG.
This site is not affiliated with Porsche in any way. Its only purpose is to provide an online forum for car enthusiasts. All other trademarks are property of their respective owners. |
|
|

  |

| davesprinkle |
 Mar 12 2006, 01:18 PM Mar 12 2006, 01:18 PM
Post
#1
|
|
Senior Member  Group: Members Posts: 720 Joined: 13-October 04 From: Berkeley, CA Member No.: 2,943 Region Association: None |
What you'll need:
1. One worn door stay mechanism. If you own a 914, you probably have two. 2. A bench vise, bolted to a bench. 3. Replacement door stay and replacement rollers. (Here's the shameless plug -- I have these available for sale.) 4. Blade screwdriver for removing and replacing springs and clips. 5. Wheel bearing grease. 6. Eye protection. 7. 20 minutes. OK, the first step is to remove your door stay mechanism from the door. I won't cover this step here. It's pretty simple, but if necessary, refer to this article on the Pelican Parts website. Install the mechanism in the vise, clamping on the door stay itself. Attached image(s) 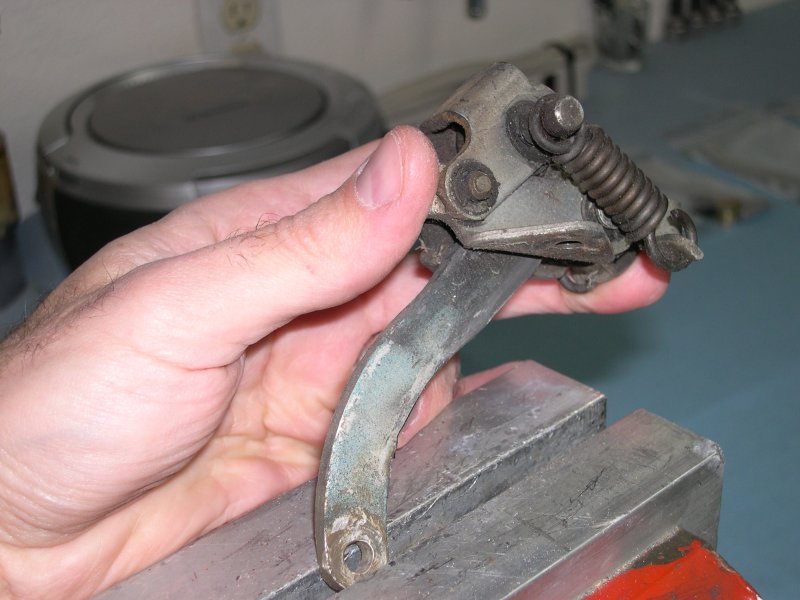
|
   |

 
|
| davesprinkle |
Mar 12 2006, 01:22 PM
Post
#2
|
|
Senior Member Group: Members Posts: 720 Joined: 13-October 04 From: Berkeley, CA Member No.: 2,943 Region Association: None |
The second step is to remove the springs from the mechanism. I don't think I need to remind you to wear eye protection for this step. Be sure to watch carefully where the spring goes when it leaps across the room.
Attached image(s) 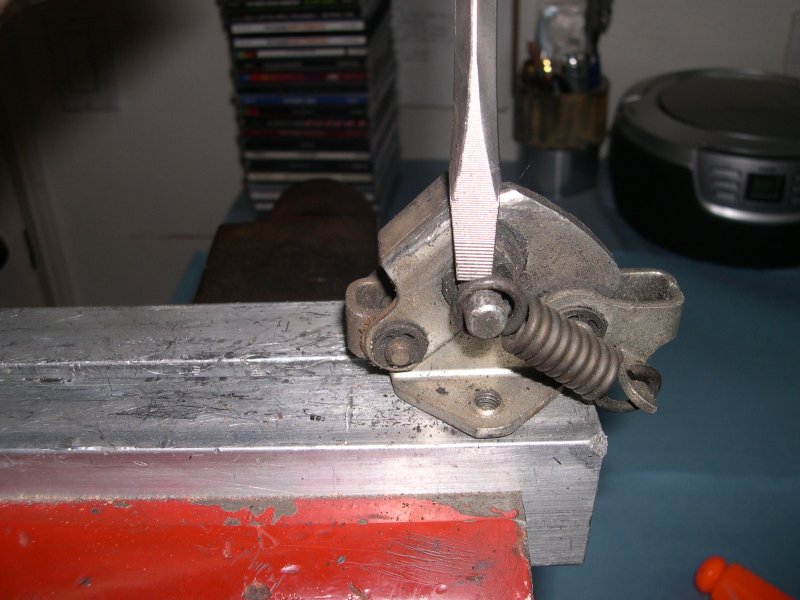
|
|
|
|
| davesprinkle |
Mar 12 2006, 01:25 PM
Post
#3
|
|
Senior Member Group: Members Posts: 720 Joined: 13-October 04 From: Berkeley, CA Member No.: 2,943 Region Association: None |
Here is a picture of the mechanism with the springs removed, still clamped in the vise. Note that the metal roller in the mechanism runs against the "bumpy" side of the door stay. The plastic roller runs against the smooth side of the door stay.
Attached image(s) 
|
|
|
|
| davesprinkle |
Mar 12 2006, 01:28 PM
Post
#4
|
|
Senior Member Group: Members Posts: 720 Joined: 13-October 04 From: Berkeley, CA Member No.: 2,943 Region Association: None |
Here is a picture of the old door stay. Compare its condition with that of the new stay in the plastic bag. Although the old stay is noticeably worn, it is not as bad as some that I've seen. In many cases, the bumps are completely worn away.
Attached image(s) 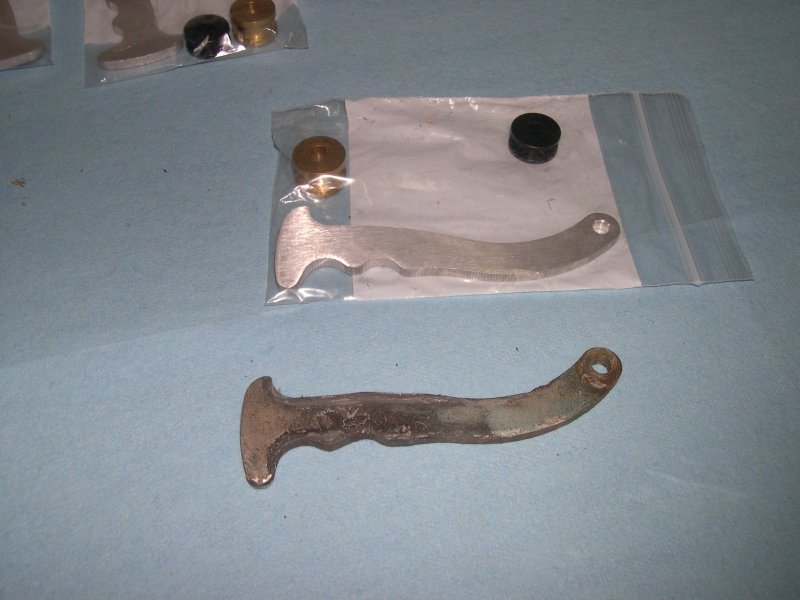
|
|
|
|
| davesprinkle |
Mar 12 2006, 01:32 PM
Post
#5
|
|
Senior Member Group: Members Posts: 720 Joined: 13-October 04 From: Berkeley, CA Member No.: 2,943 Region Association: None |
Remove the e-clips holding the roller shafts in place. Again, be sure to wear your eye protection for this part. Don't lose these!
Attached image(s) 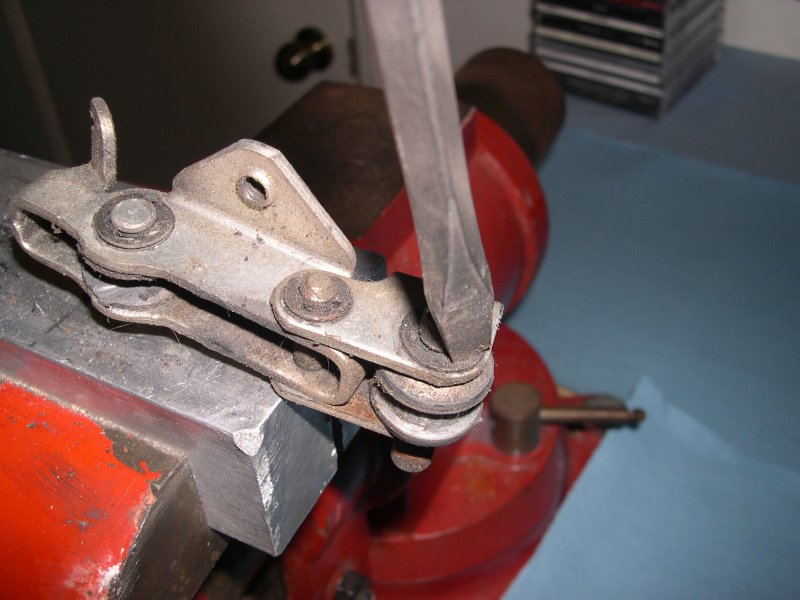
|
|
|
|
| davesprinkle |
Mar 12 2006, 01:35 PM
Post
#6
|
|
Senior Member Group: Members Posts: 720 Joined: 13-October 04 From: Berkeley, CA Member No.: 2,943 Region Association: None |
Here is the plastic roller. This roller exhibits the typical wear pattern; that is, it's completely worn through. Although it isn't shown in this picture, the aluminum roller had a severe flat spot, which again is the typical wear pattern.
Attached image(s) 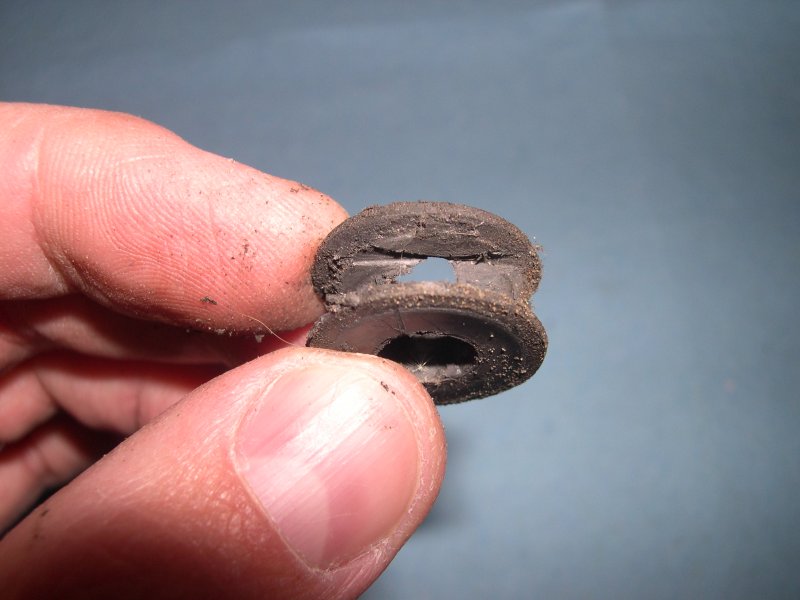
|
|
|
|
| davesprinkle |
Mar 12 2006, 01:39 PM
Post
#7
|
|
Senior Member Group: Members Posts: 720 Joined: 13-October 04 From: Berkeley, CA Member No.: 2,943 Region Association: None |
Here is a picture of the dissassembled mechanism, with the parts roughly arranged in the order in which they'll go back together. Note the new rollers.
Attached image(s) 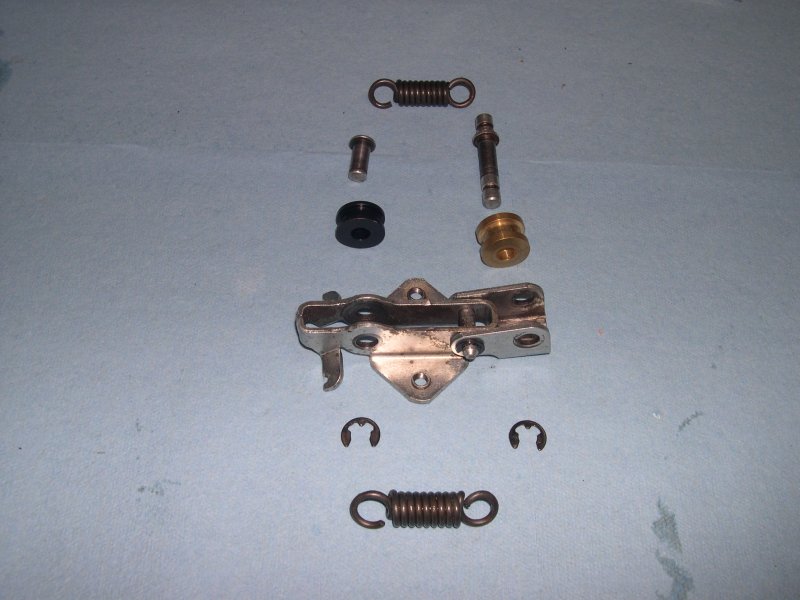
|
|
|
|
| davesprinkle |
Mar 12 2006, 01:43 PM
Post
#8
|
|
Senior Member Group: Members Posts: 720 Joined: 13-October 04 From: Berkeley, CA Member No.: 2,943 Region Association: None |
Apply a light coating of wheel bearing grease to the roller pins. Do not lubricate the exterior of the roller. You want grease on the inside of the roller, not the outside. (Think of the roller as if it were a tire -- you don't want grease on the rubber tread, do you?)
Attached image(s) 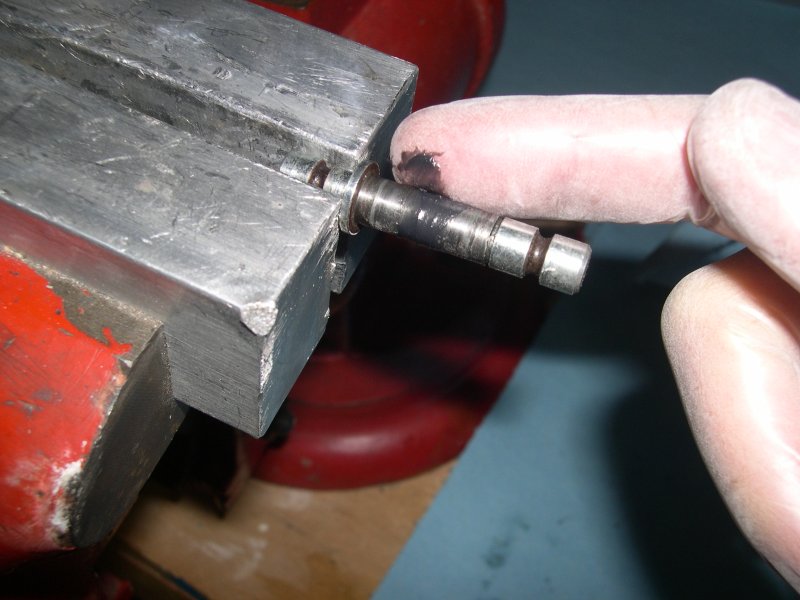
|
|
|
|
| davesprinkle |
Mar 12 2006, 01:45 PM
Post
#9
|
|
Senior Member Group: Members Posts: 720 Joined: 13-October 04 From: Berkeley, CA Member No.: 2,943 Region Association: None |
Here is a picture of the new rollers installed in the mechanism.
Attached image(s) 
|
|
|
|
| davesprinkle |
Mar 12 2006, 01:50 PM
Post
#10
|
|
Senior Member Group: Members Posts: 720 Joined: 13-October 04 From: Berkeley, CA Member No.: 2,943 Region Association: None |
Here is a picture of the new door stay in the mechanism. Note its orientation -- the side of the stay with the bumps runs against the brass roller.
Attached image(s) 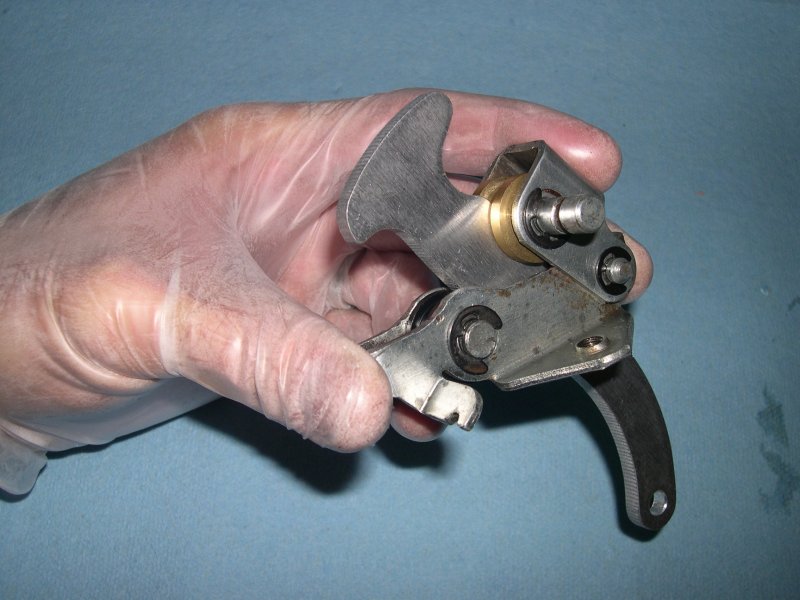
|
|
|
|
| davesprinkle |
Mar 12 2006, 01:52 PM
Post
#11
|
|
Senior Member Group: Members Posts: 720 Joined: 13-October 04 From: Berkeley, CA Member No.: 2,943 Region Association: None |
Put the mechanism back in the vise, clamping on the stay.
Attached image(s) 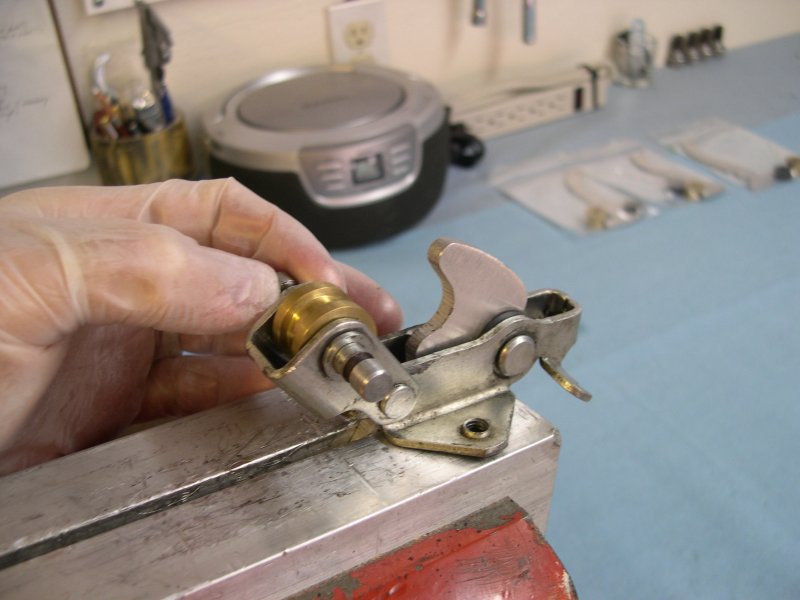
|
|
|
|
| davesprinkle |
Mar 12 2006, 01:58 PM
Post
#12
|
|
Senior Member Group: Members Posts: 720 Joined: 13-October 04 From: Berkeley, CA Member No.: 2,943 Region Association: None |
Reinstalling the springs can be a real hassle. I use a blade screwdriver with a round shank (Craftsman). Be careful and wear your safety glasses!
Attached image(s) 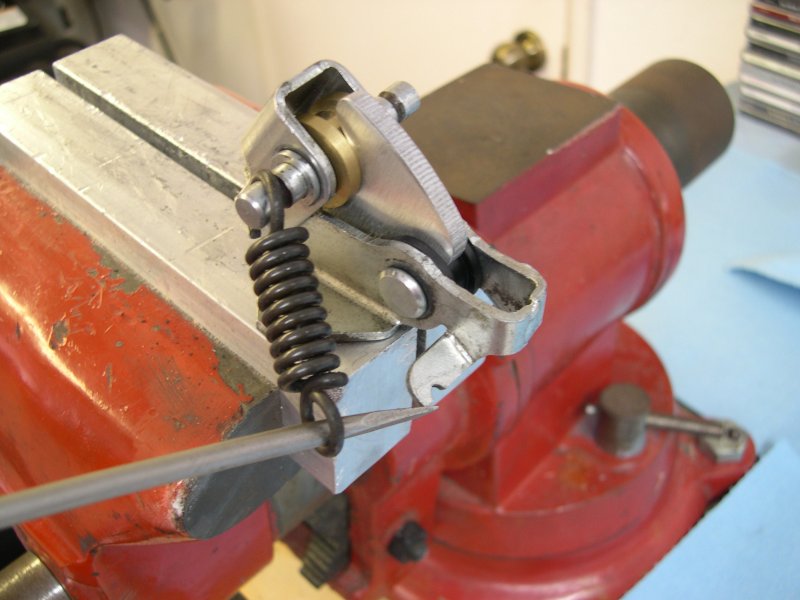
|
|
|
|
| davesprinkle |
Mar 12 2006, 02:00 PM
Post
#13
|
|
Senior Member Group: Members Posts: 720 Joined: 13-October 04 From: Berkeley, CA Member No.: 2,943 Region Association: None |
Finished! Isn't it lovely?
Attached image(s) 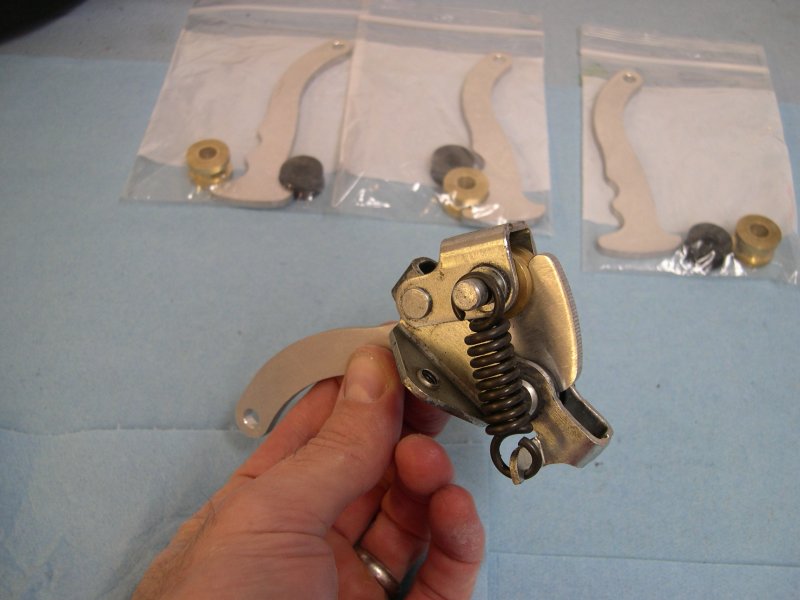
|
|
|
|
| Air_Cooled_Nut |
Mar 12 2006, 02:05 PM
Post
#14
|
|
914 Ronin - 914 owner who lost his 914club.com Group: Members Posts: 1,748 Joined: 19-April 03 From: Beaverton, Oregon Member No.: 584 Region Association: None |
What side of the car are you working on in this pictorial?
Nice work! |
|
|
|
| davesprinkle |
Mar 12 2006, 02:09 PM
Post
#15
|
||
|
Senior Member Group: Members Posts: 720 Joined: 13-October 04 From: Berkeley, CA Member No.: 2,943 Region Association: None |
Thanks for the kind words. In answer to your question, both mechanisms are identical; one is just installed upside down from the other. |
||
|
|
|
||
| turbo914v8 |
Mar 12 2006, 02:10 PM
Post
#16
|
|
Member Group: Members Posts: 373 Joined: 26-July 03 From: Canada Member No.: 952 |
I will take a set how much?
|
|
|
|
| davesprinkle |
Mar 12 2006, 02:17 PM
Post
#17
|
||
|
Senior Member Group: Members Posts: 720 Joined: 13-October 04 From: Berkeley, CA Member No.: 2,943 Region Association: None |
$43.27 delivered to your door. Includes one plastic roller, one brass roller, and one door stay. Here's a link to the products forum. |
||
|
|
|
||
| olav |
Mar 12 2006, 03:33 PM
Post
#18
|
|
Senior Member Group: Retired Members Posts: 1,107 Joined: 28-December 02 From: Los Gatos, CA. USA Member No.: 34 Region Association: None |
Check is in the mail. (IMG:http://www.914world.com/bbs2/html/emoticons/biggrin.gif)
|
|
|
|
| davesprinkle |
Mar 12 2006, 05:50 PM
Post
#19
|
||
|
Senior Member Group: Members Posts: 720 Joined: 13-October 04 From: Berkeley, CA Member No.: 2,943 Region Association: None |
Sorry, I'm not aware of a replacement source for the springs. |
||
|
|
|
||
| michel richard |
Mar 12 2006, 05:53 PM
Post
#20
|
|
Senior Member Group: Members Posts: 1,291 Joined: 22-July 03 From: Longueuil, Québec Member No.: 936 |
This is cool
|
|
|
|
|
1 User(s) are reading this topic (1 Guests and 0 Anonymous Users)
0 Members:

|
Lo-Fi Version | Time is now: 15th June 2026 - 03:09 AM |
Invision Power Board
v9.1.4 © 2026 IPS, Inc.