|
|

|
Porsche, and the Porsche crest are registered trademarks of Dr. Ing. h.c. F. Porsche AG.
This site is not affiliated with Porsche in any way. Its only purpose is to provide an online forum for car enthusiasts. All other trademarks are property of their respective owners. |
|
|
  |
| 914forme |
 Apr 23 2006, 08:05 PM Apr 23 2006, 08:05 PM
Post
#21
|
|
Times a wastin', get wrenchin'!     Group: Members Posts: 3,899 Joined: 24-July 04 From: Dayton, Ohio Member No.: 2,388 Region Association: None 
|
This is the order that the bevel comes apart.
1. Trim ring outer 2. Trim ring inner, yep there are two of them. 3. Glass or plastic, if you have plastic and a glass unit use the glass. Attached image(s) 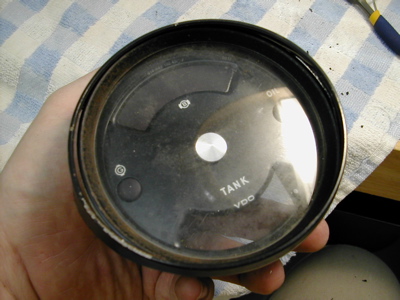 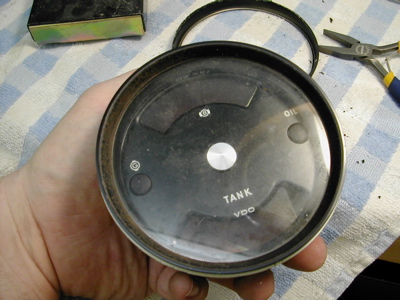 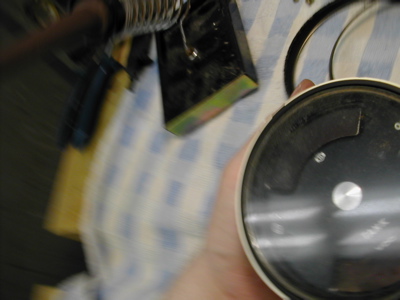
|
| 914forme |
 Apr 23 2006, 08:07 PM Apr 23 2006, 08:07 PM
Post
#22
|
|
Times a wastin', get wrenchin'!     Group: Members Posts: 3,899 Joined: 24-July 04 From: Dayton, Ohio Member No.: 2,388 Region Association: None 
|
Next up after the glass is removed, you have an inner trim ring.
After that the guage face. (IMG:style_emoticons/default/piratenanner.gif) Attached image(s) 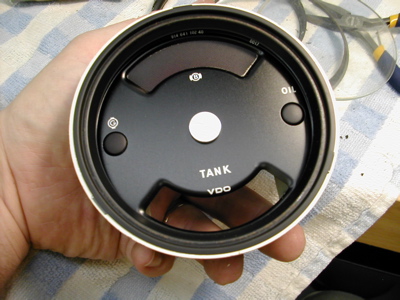 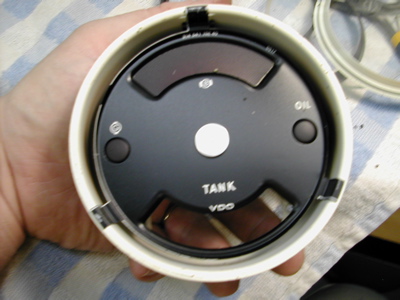
|
| 914forme |
 Apr 23 2006, 08:09 PM Apr 23 2006, 08:09 PM
Post
#23
|
|
Times a wastin', get wrenchin'!     Group: Members Posts: 3,899 Joined: 24-July 04 From: Dayton, Ohio Member No.: 2,388 Region Association: None 
|
After that we have the inner guts of the gauge. Some times the light lenses stick to the gauge face other times they stay in the gauge its self.
Attached image(s) 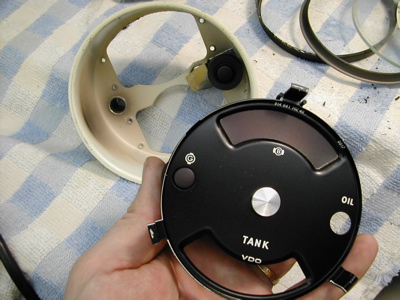
|
| 914forme |
 Apr 23 2006, 08:10 PM Apr 23 2006, 08:10 PM
Post
#24
|
|
Times a wastin', get wrenchin'!     Group: Members Posts: 3,899 Joined: 24-July 04 From: Dayton, Ohio Member No.: 2,388 Region Association: None 
|
They are easily removed with a gentle pull.
Attached image(s) 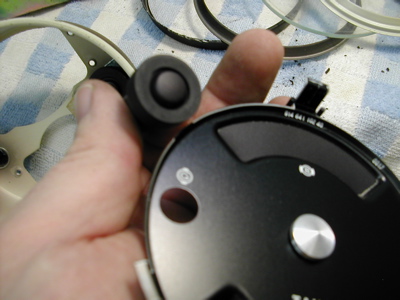 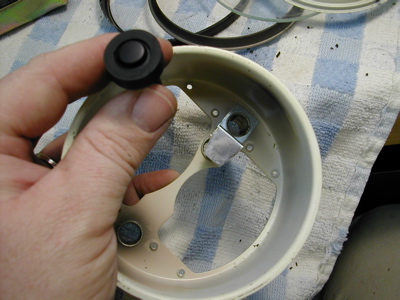
|
| 914forme |
 Apr 23 2006, 08:15 PM Apr 23 2006, 08:15 PM
Post
#25
|
|
Times a wastin', get wrenchin'!     Group: Members Posts: 3,899 Joined: 24-July 04 From: Dayton, Ohio Member No.: 2,388 Region Association: None 
|
Next up we must remove all the light bulb tube holders. If you have not removed the light bulb sockets yet now i the time. Some might be stuck after 30 odd years, just use a pair of pliers and gentle twist them to loosen them up, the pull them out.
Here is how you remove the light bulb tubes, they are held in via a crimp that we can not recreate, so you must drill the crimp off. I am using a 3/4" drill bit mounted in my drill press. You can also use a dremel, or a hand file if you want. You just need to remove the metal crimp and that is all. Attached image(s) 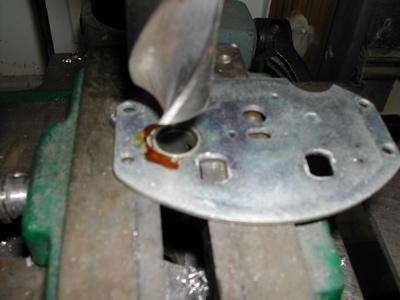 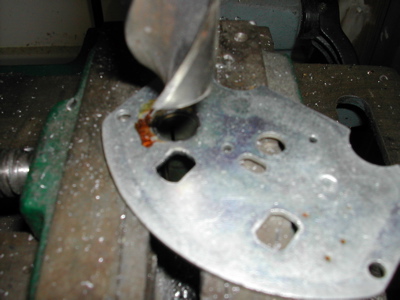
|
| 914forme |
 Apr 23 2006, 08:19 PM Apr 23 2006, 08:19 PM
Post
#26
|
|
Times a wastin', get wrenchin'!     Group: Members Posts: 3,899 Joined: 24-July 04 From: Dayton, Ohio Member No.: 2,388 Region Association: None 
|
Now you just pull them out. You must now repeat this step until all these light tubes are removed from the old donor gauges.
Attached image(s) 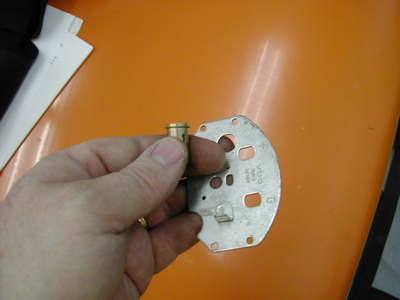
|
| 914forme |
 Apr 23 2006, 08:20 PM Apr 23 2006, 08:20 PM
Post
#27
|
|
Times a wastin', get wrenchin'!     Group: Members Posts: 3,899 Joined: 24-July 04 From: Dayton, Ohio Member No.: 2,388 Region Association: None 
|
This is a good place for me to stop for the night.
|
| 914forme |
 May 7 2006, 05:36 PM May 7 2006, 05:36 PM
Post
#28
|
|
Times a wastin', get wrenchin'!     Group: Members Posts: 3,899 Joined: 24-July 04 From: Dayton, Ohio Member No.: 2,388 Region Association: None 
|
Here is what happens when your bit grabs one of the post light thingy. Doah!!!
Attached image(s) 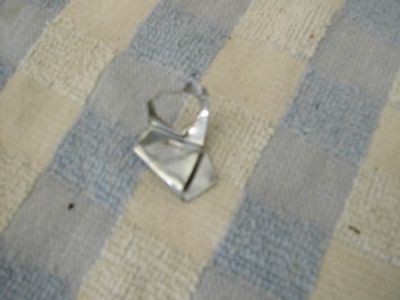
|
| 914forme |
 May 7 2006, 05:42 PM May 7 2006, 05:42 PM
Post
#29
|
|
Times a wastin', get wrenchin'!     Group: Members Posts: 3,899 Joined: 24-July 04 From: Dayton, Ohio Member No.: 2,388 Region Association: None 
|
Now onto the cutting of the rear gauge face. There are two styles of gauge backs that you can be dealing with. The first is the early style. the second one is the late style they removed the extra top window. If you are using the late style you will need to drill out 2 extra holes for the backing plate mount. You will also need to tap these with a 3mm 0.5 tap. I suggest you do this before, you cut the back off.
Attached image(s) 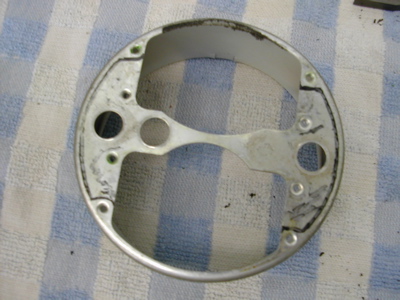 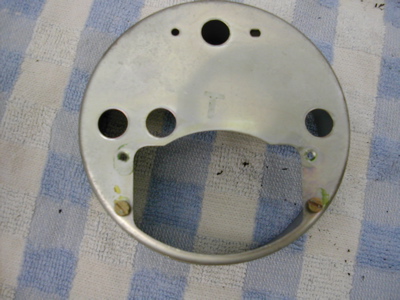
|
| 914forme |
 May 7 2006, 05:46 PM May 7 2006, 05:46 PM
Post
#30
|
|
Times a wastin', get wrenchin'!     Group: Members Posts: 3,899 Joined: 24-July 04 From: Dayton, Ohio Member No.: 2,388 Region Association: None 
|
I like to test fit the gauge kit back onto the orginal gauge back, just to make sure it all will work. Just one simple step to make sure I don't screw up. Which I can do with ease.
Attached image(s) 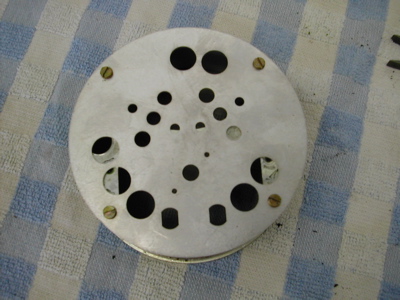
|
| 914forme |
 May 7 2006, 05:48 PM May 7 2006, 05:48 PM
Post
#31
|
|
Times a wastin', get wrenchin'!     Group: Members Posts: 3,899 Joined: 24-July 04 From: Dayton, Ohio Member No.: 2,388 Region Association: None 
|
Next you draw out your cut lines. I happen to leave just a little of the roll over in from the sides to the back. Makes the gauge stronger - thou that 16 gauge metal should not go any where. Next up Destruction!!!!!!! (IMG:style_emoticons/default/sawzall-smiley.gif)
Attached image(s) 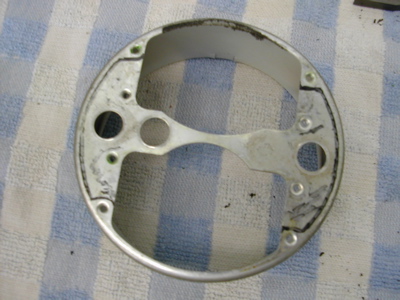
|
| 914forme |
 May 7 2006, 05:52 PM May 7 2006, 05:52 PM
Post
#32
|
|
Times a wastin', get wrenchin'!     Group: Members Posts: 3,899 Joined: 24-July 04 From: Dayton, Ohio Member No.: 2,388 Region Association: None 
|
Now it is simple you just cut away everything that is not a 904 gauge. (IMG:style_emoticons/default/av-943.gif)
I use three systems depending on my mood. First up shears. I use these to cut away the center bar. Attached image(s) 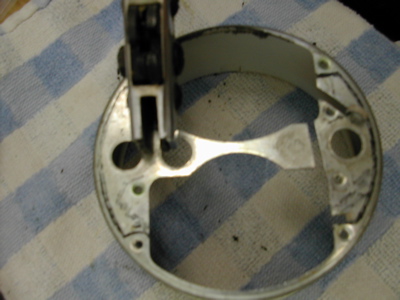 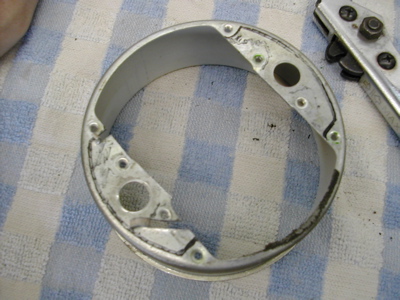
|
| 914forme |
 May 7 2006, 05:56 PM May 7 2006, 05:56 PM
Post
#33
|
|
Times a wastin', get wrenchin'!     Group: Members Posts: 3,899 Joined: 24-July 04 From: Dayton, Ohio Member No.: 2,388 Region Association: None 
|
Now I used to use a hand nibbler like this, it was hard work, a pain in the (IMG:style_emoticons/default/sheeplove.gif) I now use a simpler method. But thats because I finally got a decent saber saw. So I now put a fine tooth blade and cut them out like this, a bench vice is required, I use the wood vice for this.
Attached image(s) 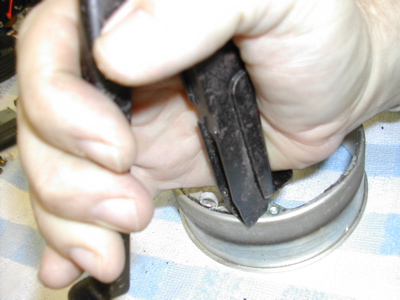 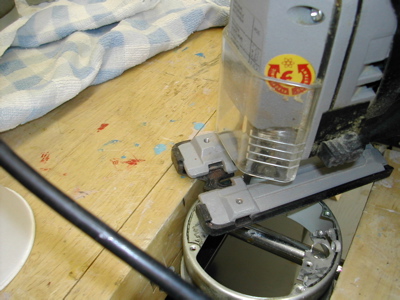
|
| 914forme |
 May 7 2006, 05:57 PM May 7 2006, 05:57 PM
Post
#34
|
|
Times a wastin', get wrenchin'!     Group: Members Posts: 3,899 Joined: 24-July 04 From: Dayton, Ohio Member No.: 2,388 Region Association: None 
|
So when your done it should look like this.
Attached image(s) 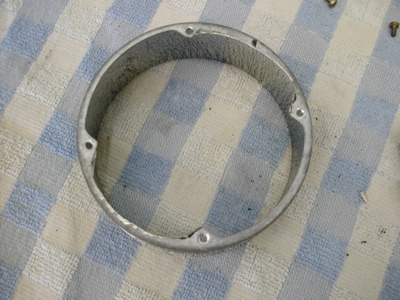
|
| 914forme |
 May 7 2006, 06:01 PM May 7 2006, 06:01 PM
Post
#35
|
|
Times a wastin', get wrenchin'!     Group: Members Posts: 3,899 Joined: 24-July 04 From: Dayton, Ohio Member No.: 2,388 Region Association: None 
|
I once again test fit the back, just to make sure I didn't screw it up. Once everything is done, I do once set here that is a good idea. I paint the inner gauge surface white. Helps get the light to bounce around the gauge and makes it so it illuminates better.
Attached image(s) 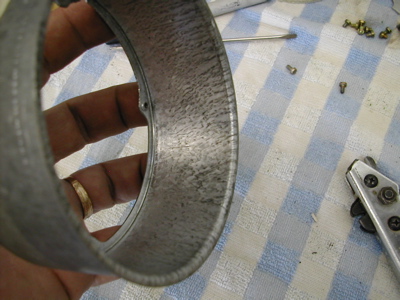 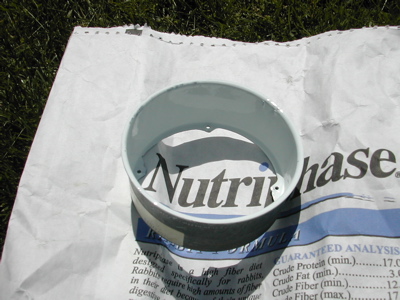
|
| 914forme |
 May 7 2006, 06:40 PM May 7 2006, 06:40 PM
Post
#36
|
|
Times a wastin', get wrenchin'!     Group: Members Posts: 3,899 Joined: 24-July 04 From: Dayton, Ohio Member No.: 2,388 Region Association: None 
|
Next if you are lucky enough to find a late style fuel gauge you will have to make a templet. to drill the 4 other holes you will need. Make the pattern and mark your holes, here I am using one of my extra backs, I have. After that you need to drill the holes. The bigger holes are 0.247" the smaller holes are 0.160" and the largest outside hole is 0.268". Mark them with a transfer punch or a Sharpie and go to town.
Attached image(s) 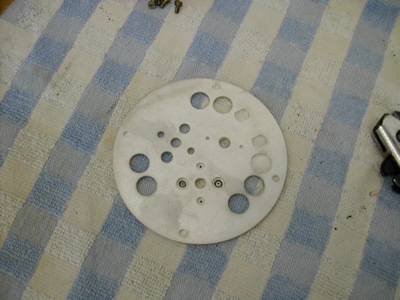 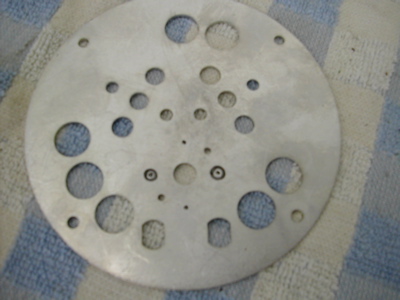
|
| 914forme |
 May 7 2006, 06:41 PM May 7 2006, 06:41 PM
Post
#37
|
|
Times a wastin', get wrenchin'!     Group: Members Posts: 3,899 Joined: 24-July 04 From: Dayton, Ohio Member No.: 2,388 Region Association: None 
|
Now you need to test fit the light tubes.
Attached image(s) 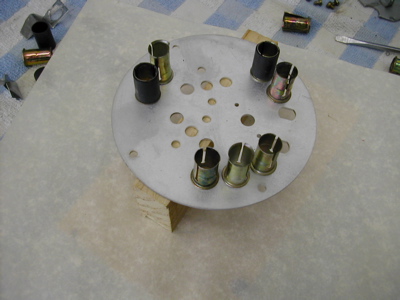
|
| 914forme |
 May 7 2006, 06:45 PM May 7 2006, 06:45 PM
Post
#38
|
|
Times a wastin', get wrenchin'!     Group: Members Posts: 3,899 Joined: 24-July 04 From: Dayton, Ohio Member No.: 2,388 Region Association: None 
|
Mix up the epoxy, mine sets in 24 - 48 hours. You can use the 10 minute type, I just had this stuff around, and don't mind waiting for it to set, as long as you don't. I spin the tubes into the epoxy up to the shoulder. I then wipe the excess off on my mixing paper.
Attached image(s) 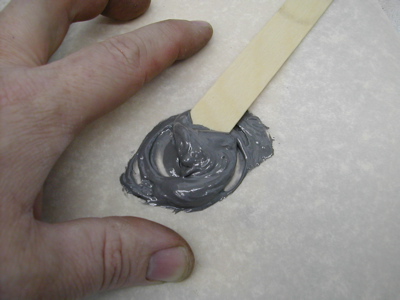 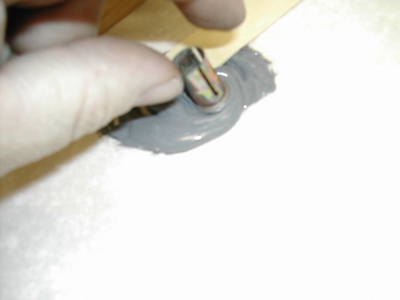 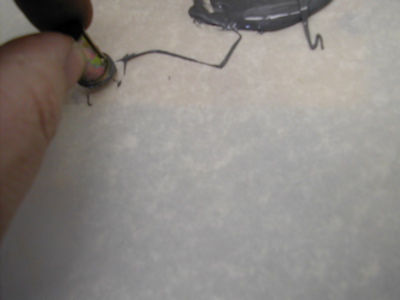
|
| 914forme |
 May 7 2006, 06:48 PM May 7 2006, 06:48 PM
Post
#39
|
|
Times a wastin', get wrenchin'!     Group: Members Posts: 3,899 Joined: 24-July 04 From: Dayton, Ohio Member No.: 2,388 Region Association: None 
|
Next I spin them into the back to make sure they make full contact. And all done, notice I did step the tubes height. This will help you pull and put in the bulbs. And tis is where I have to stop for a couple days.
Attached image(s) 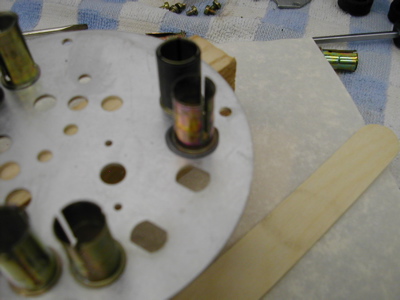 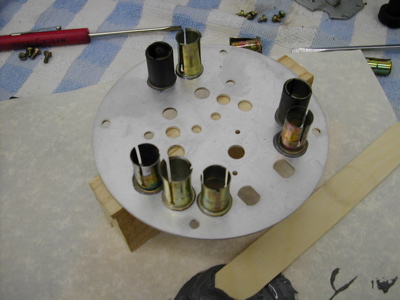
|
| 914forme |
 Aug 8 2006, 03:52 PM Aug 8 2006, 03:52 PM
Post
#40
|
|
Times a wastin', get wrenchin'!     Group: Members Posts: 3,899 Joined: 24-July 04 From: Dayton, Ohio Member No.: 2,388 Region Association: None 
|
So next is line up the gauge face with all the parts, so you know where the idiot lights go.
I mark them with a pencil on the gauge back. It just makes life easier. Attached image(s) 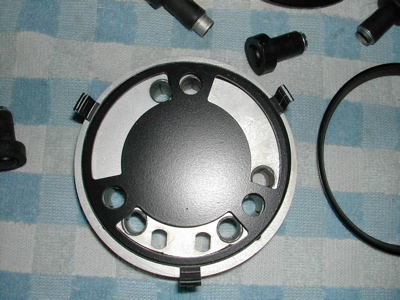
|
  |
1 User(s) are reading this topic (1 Guests and 0 Anonymous Users)
0 Members:

|
Lo-Fi Version | Time is now: 13th February 2026 - 03:45 PM |
Invision Power Board
v9.1.4 © 2026 IPS, Inc.


