|
|
|
Porsche, and the Porsche crest are registered trademarks of Dr. Ing. h.c. F. Porsche AG.
This site is not affiliated with Porsche in any way. Its only purpose is to provide an online forum for car enthusiasts. All other trademarks are property of their respective owners. |
|
|

  |

| ottox914 |
 Oct 2 2006, 04:14 PM Oct 2 2006, 04:14 PM
Post
#1
|
|
The glory that once was.  Group: Members Posts: 1,302 Joined: 15-December 03 From: Mahtomedi, MN Member No.: 1,438 Region Association: Upper MidWest |
Need to find 1/4 to 1/2 inch more clearance to the back fenders for a new wheel/tire combo. Would prefer to not destroy the paint, (wouldn't we all) but if I have take a few cracks, well, I have to. I have some rust coming back below the sail plane vinyl that needs fix'n, so there may be paint for the quarters in the picture this winter anyway. Don't want to go to GT flairs just yet, still want stock looking contours and fender line, so the sawzall is not the right tool for the job. Used our friend Mr Search, but didn't find what I was looking for. The car is a '73, so the fender lip or return is already notched out around the top of the arch. I need more than to just fold the return back against the underside of the fender, I need 1/4 to 1/2 inch or so on each side.
Anyone got photos of the technique? I've read about everything from plastic pipe to baseball bats to porta-power. Before and after shots? Been there/done that advise on what works, and what does NOT work? Oh, and I really suck at body work. Hands of stone and no eye for contours. I like rachets and wrenches, not sanding blocks and paint sprayers. |
   |

 
|
| grantsfo |
Oct 2 2006, 04:41 PM
Post
#2
|
|
Arrrrhhhh! Group: Members Posts: 4,327 Joined: 16-March 03 Member No.: 433 Region Association: None |
This is cool, but it not sure it would work for 914:
http://www.tirerack.com/accessories/tools/fenderlip.jsp |
|
|
|
| pfierb |
Oct 2 2006, 06:19 PM
Post
#3
|
|
oldest member Group: Members Posts: 606 Joined: 1-May 05 From: The sign of good government in Connecticut is to keep raising taxes Member No.: 4,008 |
QUOTE(grantsfo @ Oct 2 2006, 06:41 PM)  This is cool, but it not sure it would work for 914: http://www.tirerack.com/accessories/tools/fenderlip.jsp Eastwood sells a similar tool |
|
|
|
| JoeSharp |
Oct 2 2006, 06:42 PM
Post
#4
|
|
In Irvine, Ca. May 15-18 Group: Members Posts: 3,947 Joined: 9-July 03 From: DeLand, Florida Member No.: 898 Region Association: South East States |
They only bend the Lip. If you need to push the fender out they will not work. Joe O'brien got 225 under Liz's car with only a lip roll. But I think it was just luck. Lindas car has 3/4 of an inch on one wheel and 1/4 on the other with 205 50 16's. One inner fender well has rubbed just slightly and the other has about 3/8th clearance. I think there all different.
:PERMAGRIN: Joe |
|
|
|
| r_towle |
Oct 2 2006, 07:35 PM
Post
#5
|
|
Custom Member Group: Members Posts: 24,577 Joined: 9-January 03 From: Taxachusetts Member No.: 124 Region Association: North East States |
patience, a heat gun, a hammer, and a dolly covered in duct tape.
heat the paint. not so hot that it bubbles, but make it soft to prevent cracking. use the dolly on the outside (its covered in duct tape to prevent scratching the paint.) tap the lip of the rear fender up and try to flatten it out toards the outside of the car. Start at the front and at the rear of the lip, work towards the middle. Patience is key. stop and re-heat the paint frequently to keep it pliable. If all else fails... Start with a 1.5 inch pipe and work up to a 3 inch if needed. put car in neutral. fit pipe between tire and fender on the top front of the tire, try to hold the pipe as close to vertical as you can...it will end up being closer to 35 degrees, but the idea is to try to keep it vertical. Roll the car backwards with the pipe going for the ride along the fender Start with the small diameter, work you way up. The pipe lengths can be had at HD. heat the paint frequently. R |
|
|
|
| J P Stein |
Oct 2 2006, 07:40 PM
Post
#6
|
|
Irrelevant old fart Group: Members Posts: 8,797 Joined: 30-December 02 From: Vancouver, WA Member No.: 45 Region Association: None |
It gets even worse for an AX guy.
Both Kumho & Hoosier R specs like -2 camber. You'll find that you need a spacer to run 225s and these are considerably wider that a "normal" street tre.....bout a 7mm spacer & longer studs/bolts. .....and since low is better, the fat part of the tire is right around the lip. I couldn't get away from some serious hammer/dolly work to get 225 Hoosiers & 7 inch wheels in back. Attached image(s) 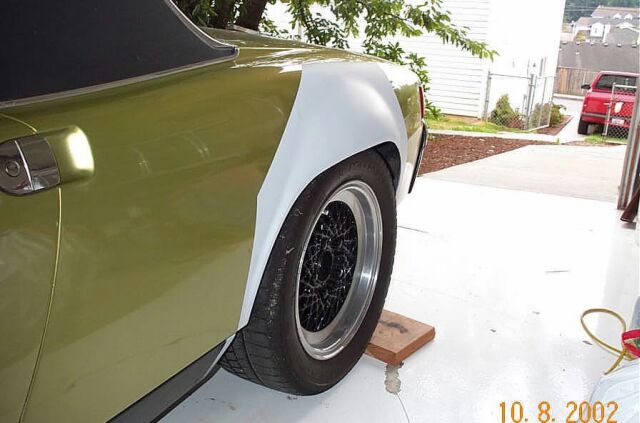
|
|
|
|
| larryp |
Oct 3 2006, 03:40 PM
Post
#7
|
|
Member Group: Members Posts: 311 Joined: 9-May 03 From: Greenwich CT Member No.: 675 |
It's easy. I have done it and there is nothing to it. Forget about heating the paint -- you'll be too busy. You can try, but you'll need a third person to hold the heat gun and they are just going to get in your way, anyway.
Go to a parking lot or a driveway. With a friend. And a wood baseball bat. Inflate your rear tires a bit more than you would drive on them (+6 to 10 psi). Have your friend get in the car and start it. As for you, take the baseball bat and stuff it at the bottom of the fender gap between the tire and the lip. It will look like it will not fit but it will - the tire will deform a bit and the fender will bow out (ergo, overinflate your tire, you want to displace more fender and less rubber). The bat will be angled but you will be holding it. With the drivers window down, have your friend ease out the clutch and you commence rolling the bat (you basically guide it; the tire does the rolling) around the fender. You can yell stop whenever you wish but you will eventually have the fat end go completely around 3-5 times. Your friend can go forward and back, forward and back. Ignore the cracking and popping; that is unknown bondo and/or old paint. Do not start this expecting not to have some minor paintwork done. You will. Now walk around the car and do the passenger side. When you are done it will easily take a 7" rim and a 205 tire. Do it more than you think you need to. Then do it again once or twice. You do not want to decide "gee, I should'a done it once more" after the car is painted. |
|
|
|
| Aaron Cox |
Oct 3 2006, 03:49 PM
Post
#8
|
|
Professional Lawn Dart Group: Retired Admin Posts: 24,541 Joined: 1-February 03 From: OC Member No.: 219 Region Association: Southern California |
QUOTE(larryp @ Oct 3 2006, 02:40 PM) It's easy. I have done it and there is nothing to it. Forget about heating the paint -- you'll be too busy. You can try, but you'll need a third person to hold the heat gun and they are just going to get in your way, anyway. Go to a parking lot or a driveway. With a friend. And a wood baseball bat. Inflate your rear tires a bit more than you would drive on them (+6 to 10 psi). Have your friend get in the car and start it. As for you, take the baseball bat and stuff it at the bottom of the fender gap between the tire and the lip. It will look like it will not fit but it will - the tire will deform a bit and the fender will bow out (ergo, overinflate your tire, you want to displace more fender and less rubber). The bat will be angled but you will be holding it. With the drivers window down, have your friend ease out the clutch and you commence rolling the bat (you basically guide it; the tire does the rolling) around the fender. You can yell stop whenever you wish but you will eventually have the fat end go completely around 3-5 times. Your friend can go forward and back, forward and back. Ignore the cracking and popping; that is unknown bondo and/or old paint. Do not start this expecting not to have some minor paintwork done. You will. Now walk around the car and do the passenger side. When you are done it will easily take a 7" rim and a 205 tire. Do it more than you think you need to. Then do it again once or twice. You do not want to decide "gee, I should'a done it once more" after the car is painted. (IMG:style_emoticons/default/agree.gif) |
|
|
|
| JPB |
Oct 3 2006, 04:41 PM
Post
#9
|
|
The Crimson Rocket smiles in your general direction. Group: Members Posts: 2,927 Joined: 12-November 05 From: Tapmahamock, Va. Member No.: 5,107 |
(IMG:style_emoticons/default/thisthreadisworthlesswithoutpics.gif)
(IMG:style_emoticons/default/beer.gif) AHHH, fender pics pricks? |
|
|
|
| jhadler |
Oct 3 2006, 05:22 PM
Post
#10
|
|
Long term tinkerer... Group: Members Posts: 1,879 Joined: 7-April 03 From: Lyons, CO Member No.: 529 |
I used a similar method, but was a little less subtle.
I took a hefty piece of lumber, shaved one end so there were no hard edges or points, and went to town... I did mine solo, with the car stationary. In gear, brake on. Lots of air in the tire, with a tire and wheel that were sturdy. Jacked the car up and raised the spring perch (I have adjustable perches), so the desired tire/wheel combo (225/50-15 on 8" wheel) no longer hit the fender lip. Inserted the "fenderizer" between the jacked up fender and tire. Slowly lowered the car on the fenderizer, and then levered the bar down till it was flat against the wheel, pulling the fender out away from the car. Did this repeatedly along the length of the fender, then lowered the spring perch about a 1/2", and did it again. I continued to do it 'till the perch was at the bottom, and I met no more resistance while leveraging the fender away from the tire. It took a while to do both fenders, and one of them had the paint crack a bit, but it came out nicely I think. Especially for the cost.... Someday, I'll get the car repainted, and fix up the cracked paint. Here's a couple pics of the (un)finished product.... -Josh2 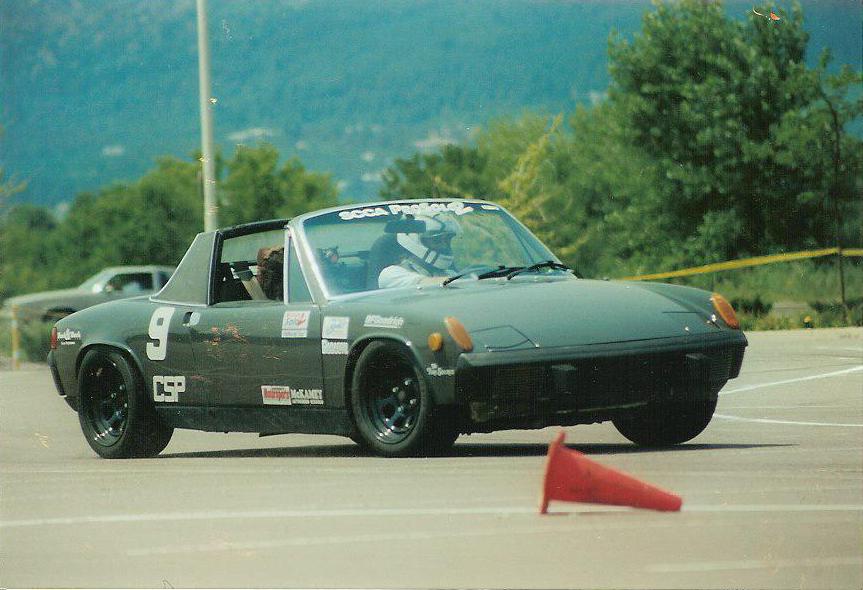 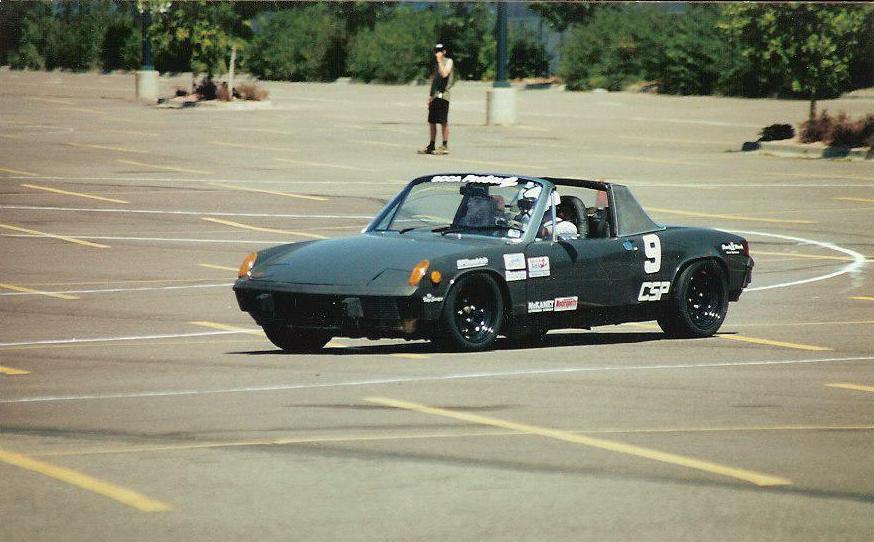 |
|
|
|
| Bleyseng |
Oct 3 2006, 05:42 PM
Post
#11
|
|
Aircooled Baby! Group: Members Posts: 13,034 Joined: 27-December 02 From: Seattle, Washington (for now) Member No.: 24 Region Association: Pacific Northwest |
I started with the wooden bat, went to a aluminum bat and finally a old boge front shock. The shock worked the best...
cracks the paint some but I got 7" cookies with 205x50's w/ Kuhmo's to fit nicely. |
|
|
|
| J P Stein |
Oct 7 2006, 09:22 PM
Post
#12
|
|
Irrelevant old fart Group: Members Posts: 8,797 Joined: 30-December 02 From: Vancouver, WA Member No.: 45 Region Association: None |
As I said, lower is better. An old pic.
The jacked up look is for drag cars & 4 X 4s. (IMG:style_emoticons/default/biggrin.gif) Just my opinion of course. (edit) an summore free advice. When seting up your car, you should check the full range of suspension travel for tiar clearance. Lock to lock in front. This means disconnectinng/removing the springs/T- bars leaving the shocks in place as those contain the bump stops..... a couple of jacks & have at it.......again, IMO. Attached image(s) 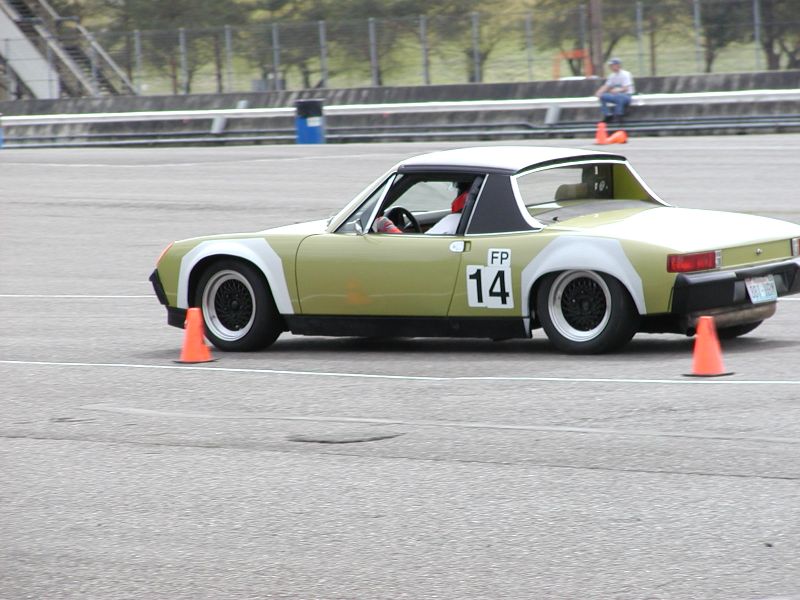
|
|
|
|
| ottox914 |
Oct 7 2006, 10:34 PM
Post
#13
|
|
The glory that once was. Group: Members Posts: 1,302 Joined: 15-December 03 From: Mahtomedi, MN Member No.: 1,438 Region Association: Upper MidWest |
Did a little bending tonight- I'll post some pics and commnets after tomorrows auto x.
|
|
|
|
| Mueller |
Oct 8 2006, 01:10 AM
Post
#14
|
|
914 Freak! Group: Members Posts: 17,146 Joined: 4-January 03 From: Antioch, CA Member No.: 87 Region Association: None |
|
|
|
|
| JPB |
Oct 8 2006, 06:02 AM
Post
#15
|
|
The Crimson Rocket smiles in your general direction. Group: Members Posts: 2,927 Joined: 12-November 05 From: Tapmahamock, Va. Member No.: 5,107 |
Nice work fellas. Wish I would have seen this a few months ago.
(IMG:style_emoticons/default/beer.gif) |
|
|
|
| John Kelly |
Oct 8 2006, 08:51 AM
Post
#16
|
|
Senior Member Group: Members Posts: 692 Joined: 1-May 03 From: Moclips WA. Member No.: 640 |
Hi Mike,
Doesn't look like you are staying up away from the wheel opening detail when stretching? If you stretch anywhere within 2" of the opening, you are in danger of losing the detail or making it more shallow in just the area where you stretch the most. Unless that is the look you want? John www.ghiaspecialties.com |
|
|
|
| ottox914 |
Oct 9 2006, 09:25 PM
Post
#17
|
|
The glory that once was. Group: Members Posts: 1,302 Joined: 15-December 03 From: Mahtomedi, MN Member No.: 1,438 Region Association: Upper MidWest |
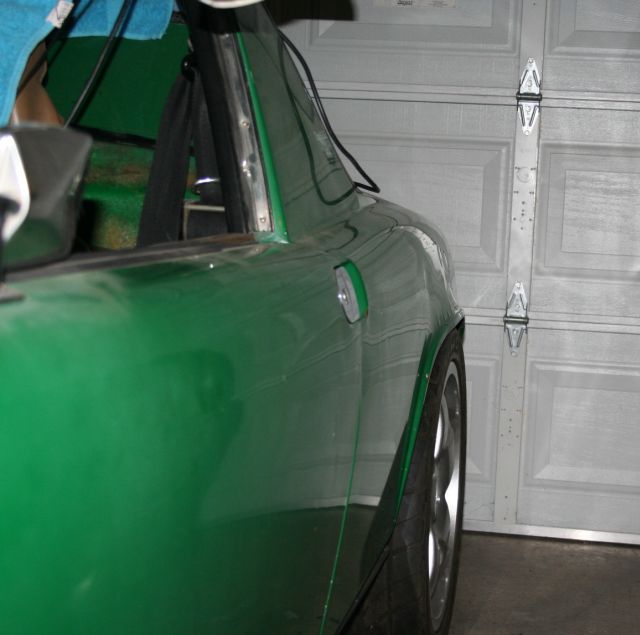
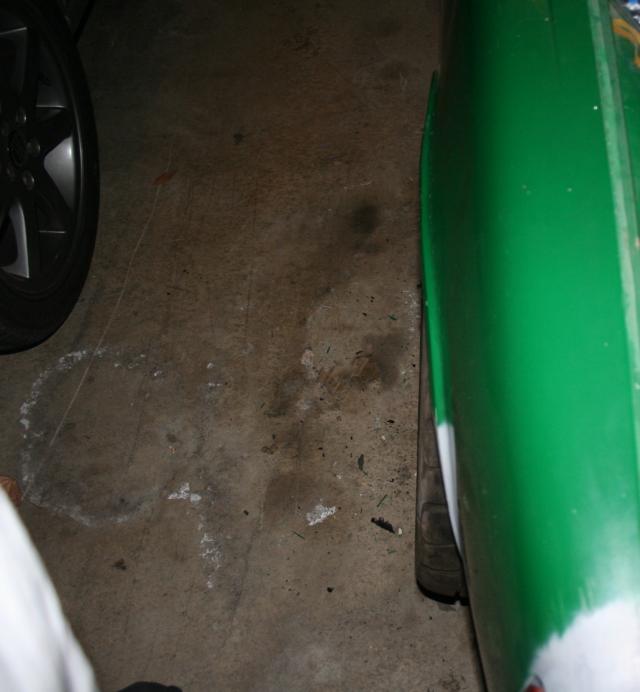
Here's what I ended up doing. Put the keizers and 205-50 710's on. Grabbed a 1" pvc pipe, and jammed it up between the wheel and fender. Rather than rolling the car, I just grabbed the pipe and turned it, which served to flatten the lip, and pull the fender. The lip flattening was probably 95% of the result, the fender pulling was maybe 5%. As expected, one side was tighter than the other, in my case, the driver side was a tighter fit than the passinger side. Camera batteries were dead, so no pics of this. Some paint was damaged. All this happened on saturday. We test fit the race rubber, had a quick spin around the block, drove some figure 8"s in the local high school lot, and seemed to have no rubbing. So far, so good.
Sunday was an auto cross. I put 2 test markings on the back tires, as the fronts were never a problem to rub. On each tire, I placed a single strip of duct tape, from the tread to the rim, and in a second spot, layered 2 strips of tape. No rubbing on the passinger side, the layered test strip on the driver side was tore up, the single strip was a little cut, but not enough to get to the rubber. So I was able to fit 15 x 7, 5" backspace keizers with 710's on the front and rear of the car, with 1/2" spacers in the front, none in the rear, no rubbing in the front, and really, no rubbing in the rear, with just bending the lip, or fender return, up a little. Keep in mind the margin of clearance was measured in the thickness of duct tape... The next step in the plan, was to find a friend who does this- and has tools like this. Attached image(s)  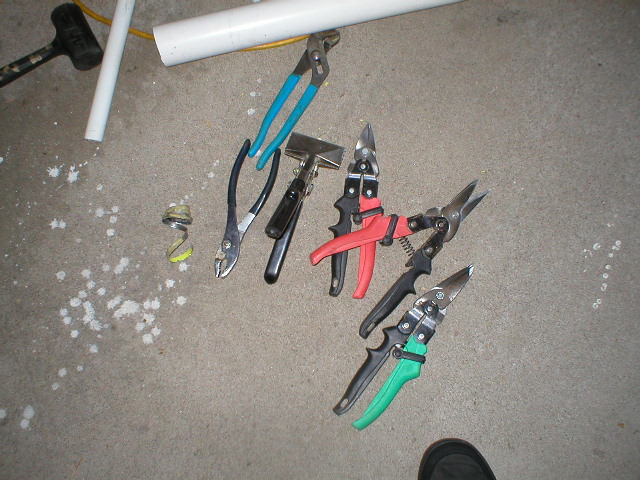
|
|
|
|
| ottox914 |
Oct 9 2006, 09:28 PM
Post
#18
|
|
The glory that once was. Group: Members Posts: 1,302 Joined: 15-December 03 From: Mahtomedi, MN Member No.: 1,438 Region Association: Upper MidWest |
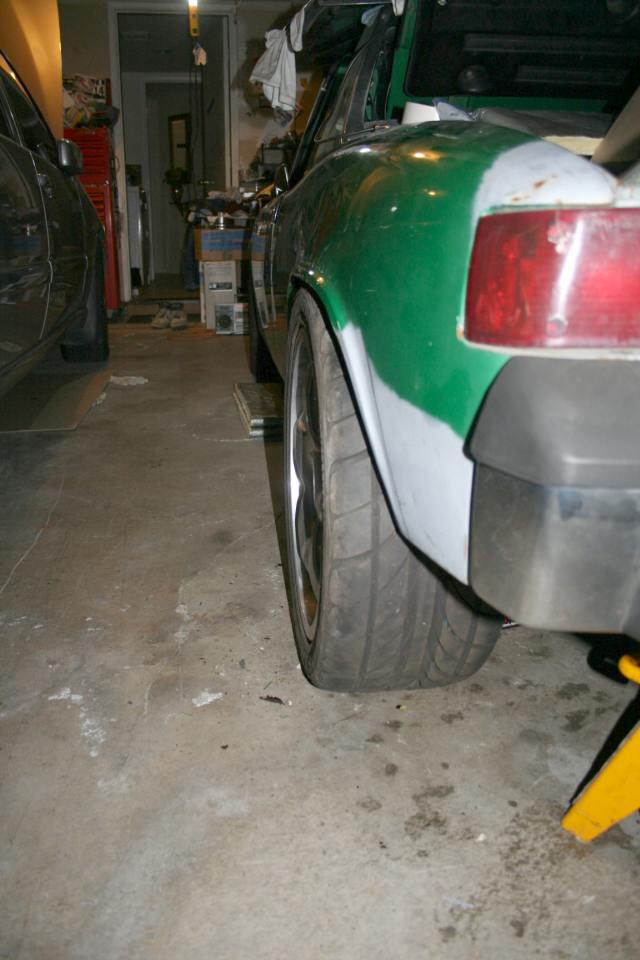
then you ask him to do this-
and end up with this. Attached image(s) 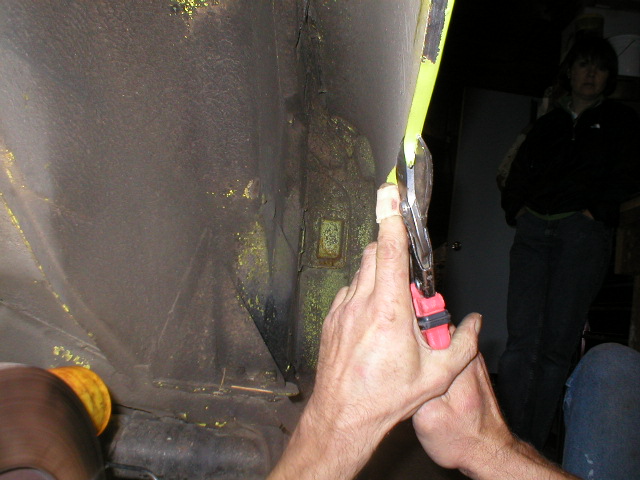 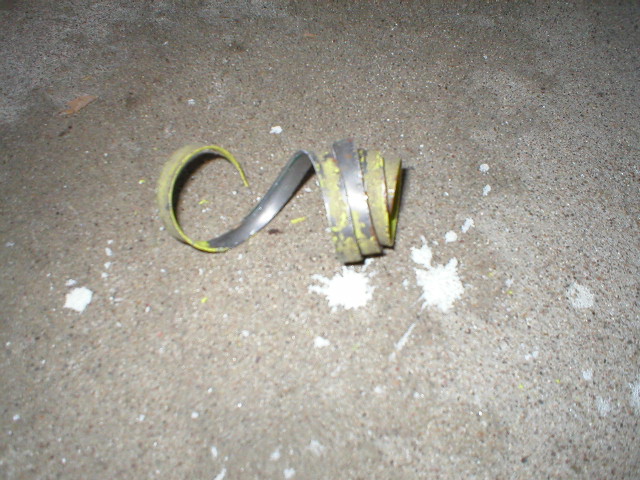 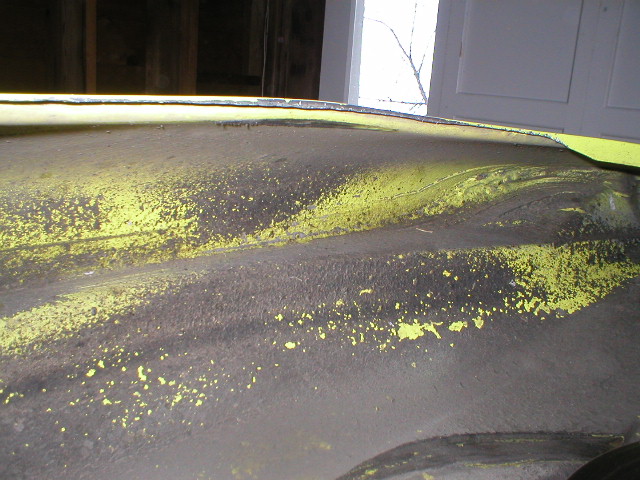
|
|
|
|
| Mueller |
Oct 9 2006, 09:29 PM
Post
#19
|
|
914 Freak! Group: Members Posts: 17,146 Joined: 4-January 03 From: Antioch, CA Member No.: 87 Region Association: None |
QUOTE(ottox914 @ Oct 9 2006, 08:25 PM) The next step in the plan, was to find a friend who does this- and has tools like this. I hope you have a lot of band-aids....... |
|
|
|
| ottox914 |
Oct 9 2006, 09:30 PM
Post
#20
|
|
The glory that once was. Group: Members Posts: 1,302 Joined: 15-December 03 From: Mahtomedi, MN Member No.: 1,438 Region Association: Upper MidWest |
then you do some of this-
and end up with tires that fit. There is still more to be done. I plan to use a block of wood and a jack to try to push the fenders out just a little more. I've got maybe an 1/8th at the most, but thats more than 1 thickness of duct tape. Don't have any photos of how they fit after the cutting, but will try to shoot some and add to the thread. Dave-O has some pics of the car and rims/skins from the auto cross, if he remembers to add them to this post. Recall that was with the lips folded back, and I've probably doubled or more the clearance with the cutting. The rest of the job will include- final sanding of the bent metal to remove any burrs prior to a splash of paint. For now I may try just to tape off the top of the edge of the fender detail, and spray a little around that 1/2" or so of fender, and of course spray the inside edge and back side. Attached image(s) 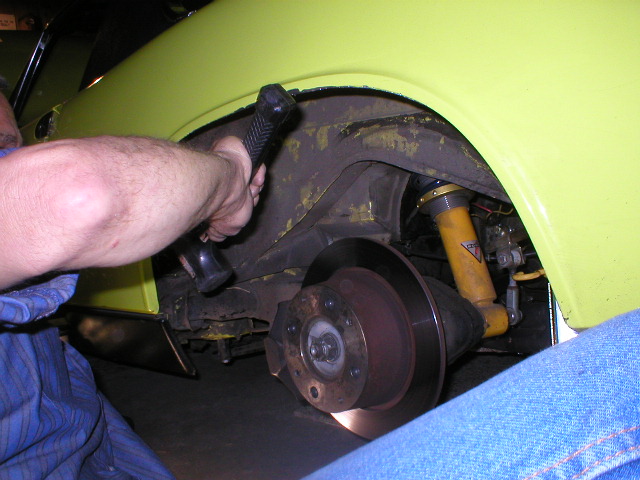
|
|
|
|
|
1 User(s) are reading this topic (1 Guests and 0 Anonymous Users)
0 Members:

|
Lo-Fi Version | Time is now: 21st May 2024 - 10:09 AM |
Invision Power Board
v9.1.4 © 2024 IPS, Inc.