|
|
|
Porsche, and the Porsche crest are registered trademarks of Dr. Ing. h.c. F. Porsche AG.
This site is not affiliated with Porsche in any way. Its only purpose is to provide an online forum for car enthusiasts. All other trademarks are property of their respective owners. |
|
|

  |

| Carlitos Way |
 Nov 7 2006, 11:34 PM Nov 7 2006, 11:34 PM
Post
#1
|
|
I did it MY WAY  Group: Members Posts: 1,337 Joined: 14-September 04 From: Simi Valley, CA Member No.: 2,757 Region Association: Southern California |
This is the engine I want to build up. The engine came from a 2.0 1976 912E. According to the PO, the engine was rebuilt around 100k miles, and the engine may have a total of close to 300k miles altogether. My initial thought was to just throw pistons and rings, but I've decided against that. So I'm taking it apart... piece by piece, my first engine tear down ever. The real trick will be putting it back together... and figuring out what to change, what to add, and what to remove.
|
   |

 
|
| bottomend |
Nov 7 2006, 11:43 PM
Post
#2
|
|
Member Group: Members Posts: 180 Joined: 27-August 05 From: LA,Ca Member No.: 4,683 |
lots of options to consider.... I'm trying to figure out what I want to build next too. I've built a few engines and they have bassically been stock with a little more omph. Now its time to strech.
since this is your first, maybe go with somethign simple as far as configuuation is concerned. Just getting the circlips out of the pistons will give you brain damage if you've never done it before! Baby steps.... |
|
|
|
| Carlitos Way |
Nov 7 2006, 11:45 PM
Post
#3
|
|
I did it MY WAY Group: Members Posts: 1,337 Joined: 14-September 04 From: Simi Valley, CA Member No.: 2,757 Region Association: Southern California |
As she arrived from Swap Meet
Attached image(s) 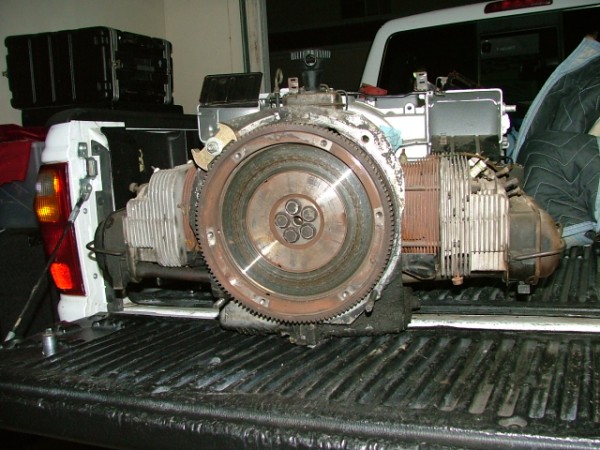
|
|
|
|
| Carlitos Way |
Nov 7 2006, 11:48 PM
Post
#4
|
|
I did it MY WAY Group: Members Posts: 1,337 Joined: 14-September 04 From: Simi Valley, CA Member No.: 2,757 Region Association: Southern California |
Removing the Flywheel... notice my little helper. He's 8!!!
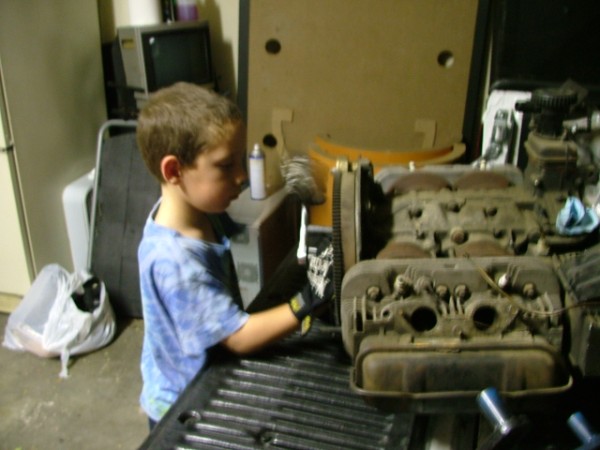 Attached image(s)  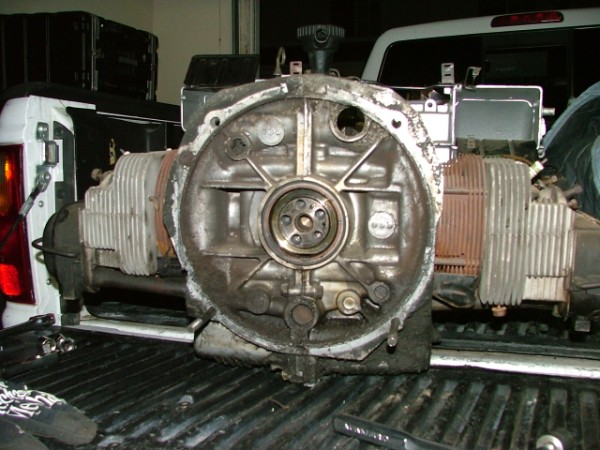
|
|
|
|
| Carlitos Way |
Nov 7 2006, 11:49 PM
Post
#5
|
|
I did it MY WAY Group: Members Posts: 1,337 Joined: 14-September 04 From: Simi Valley, CA Member No.: 2,757 Region Association: Southern California |
This is what my garage looked like BEFORE taking things apart. Don't ask my GF what it looks like now... she'll kick my A$$!!!!
Attached image(s) 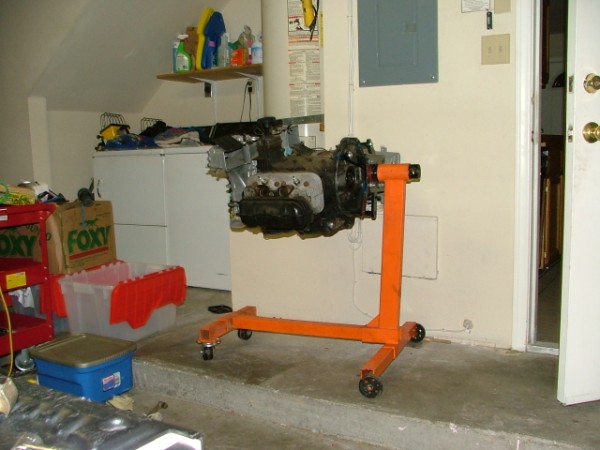
|
|
|
|
| So.Cal.914 |
Nov 7 2006, 11:49 PM
Post
#6
|
|
"...And it has a front trunk too." Group: Members Posts: 6,588 Joined: 15-February 04 From: Low Desert, CA./ Hills of N.J. Member No.: 1,658 Region Association: None |
You will do fine, if you are uncomfortable I hear Jake makes a really good
assembly video. Have Fun. |
|
|
|
| Carlitos Way |
Nov 7 2006, 11:52 PM
Post
#7
|
|
I did it MY WAY Group: Members Posts: 1,337 Joined: 14-September 04 From: Simi Valley, CA Member No.: 2,757 Region Association: Southern California |
OOOPS, Battery died on camera. I'll have to post more tomorrow.
|
|
|
|
| Jake Raby |
Nov 8 2006, 09:39 AM
Post
#8
|
|
Engine Surgeon Group: Members Posts: 9,394 Joined: 31-August 03 From: Lost Member No.: 1,095 Region Association: South East States |
You REALLY need my video.. One missed bolt on tear down can cost more to repair than the video costs to buy! I go over every single teardown fastener and build it back up too- all very simple for the first timer!
|
|
|
|
| type47 |
Nov 8 2006, 09:43 AM
Post
#9
|
|
Viermeister Group: Members Posts: 4,254 Joined: 7-August 03 From: Vienna, VA Member No.: 994 Region Association: MidAtlantic Region |
QUOTE(Jake Raby @ Nov 8 2006, 07:39 AM)  You REALLY need my video.. One missed bolt on tear down can cost more to repair than the video costs to buy! I go over every single teardown fastener and build it back up too- all very simple for the first timer! does it include discussion/instruction on deck height and rocker arm geometry? if it does, i want one. |
|
|
|
| Jake Raby |
Nov 8 2006, 09:46 AM
Post
#10
|
|
Engine Surgeon Group: Members Posts: 9,394 Joined: 31-August 03 From: Lost Member No.: 1,095 Region Association: South East States |
Not directly as it is made to keep the process very stock and general.
I am working on more advanced videos that will individually cover those aspects that will be used as video supplements.. I have posted a 9000 word Valve train geometry procedure article on my new forums- become a member and take advantage of it and many more like it as well, for free.. |
|
|
|
| Carlitos Way |
Nov 8 2006, 12:24 PM
Post
#11
|
|
I did it MY WAY Group: Members Posts: 1,337 Joined: 14-September 04 From: Simi Valley, CA Member No.: 2,757 Region Association: Southern California |
Thanks Jake,
This is definitely something I plan on doing... I appreciate the input. C:> |
|
|
|
| Joe Ricard |
Nov 8 2006, 12:36 PM
Post
#12
|
|
CUMONIWANNARACEU Group: Members Posts: 6,811 Joined: 5-January 03 From: Gautier, MS Member No.: 92 |
If the case does not fall apart by it self there is a nut still holding it.
DO NOT use a screw driver to pry the halves apart. Maybe a slight bump witha rubber hammer but not much more. |
|
|
|
| McMark |
Nov 8 2006, 01:20 PM
Post
#13
|
|
914 Freak! Group: Retired Admin Posts: 20,179 Joined: 13-March 03 From: Grand Rapids, MI Member No.: 419 Region Association: None |
QUOTE(Joe Ricard @ Nov 8 2006, 10:36 AM) If the case does not fall apart by it self there is a nut still holding it. Or the dowel pins are rusty, or had glue put on them. I've had plenty of cases that are very hard to separate. I posted a Where Are The Case Nuts? thread in the classics as well. |
|
|
|
| Carlitos Way |
Nov 8 2006, 01:45 PM
Post
#14
|
|
I did it MY WAY Group: Members Posts: 1,337 Joined: 14-September 04 From: Simi Valley, CA Member No.: 2,757 Region Association: Southern California |
I actually saw that thread (on case bolts).. and I was planning on using it when I'm ready to split the case. Right now I've gotten 2 of the circlips and their corresponding cylinders off. Hopefully tomorrow (I have to work tonight) I will be able to finish taking the pistons off. Then I have to clear the work cart, and I will have to remove from the engine stand to split the case. Unless someone else has a better suggestion.
So far things are going WAY TOO SMOOTh... so I'm almost scared that I'm overlooking something. |
|
|
|
| So.Cal.914 |
Nov 8 2006, 02:08 PM
Post
#15
|
|
"...And it has a front trunk too." Group: Members Posts: 6,588 Joined: 15-February 04 From: Low Desert, CA./ Hills of N.J. Member No.: 1,658 Region Association: None |
I would strip the engine and then put the case on a bench and split it there. You
might have to rap on it a little with a rubber mallet to convince it to split. I than put one half back on the stand for assembly and lower the other half on after you install everything. If you need to, take pic's or video as you disassemble your engine as referance. When you start to put the case back together pay close attention to the torc specs on the case bolts, there is a small one that holds the oil pick up in place and something real bad can happen if you over tighten it. It's a blast have fun with it. (IMG:style_emoticons/default/thumb3d.gif) |
|
|
|
| Chris Pincetich |
Nov 8 2006, 03:42 PM
Post
#16
|
|
B-) Group: Members Posts: 2,082 Joined: 3-October 05 From: Point Reyes Station, CA Member No.: 4,907 Region Association: Northern California |
I watched McMark tear down an engine at his BBQ in about 30 minutes. IT CAN be a very smooth process. He then split the case with lots of pounding from the rubber mallet, while it was still on the stand. Not sure details of how it was on the stand...but it was clear the dowel pins were rusty. I hope to do this some day...good luck! (IMG:style_emoticons/default/beerchug.gif)
|
|
|
|
| Carlitos Way |
Nov 8 2006, 04:19 PM
Post
#17
|
|
I did it MY WAY Group: Members Posts: 1,337 Joined: 14-September 04 From: Simi Valley, CA Member No.: 2,757 Region Association: Southern California |
QUOTE(ChrisNPDrider @ Nov 8 2006, 01:42 PM) I watched McMark tear down an engine at his BBQ in about 30 minutes. IT CAN be a very smooth process. He then split the case with lots of pounding from the rubber mallet, while it was still on the stand. Not sure details of how it was on the stand...but it was clear the dowel pins were rusty. I hope to do this some day...good luck! (IMG:style_emoticons/default/beerchug.gif) So far, I really haven't put THAT much effort into it... it's been a week's worth of "progress" and with a full time job, a part time business and a full-time relationship, I only get a few hours here and there. Being my first time, I'd say I've got a total of about 3-4 hours into tearing it down. But I'm also trying to stay organized and labeling rods, pushrod tubes, cylinders, cleaning as I go (a big portion of the time spent on not getting TOO dirty), etc. I've also wasted some time finding and buying the right tools (i.e. to remove the circlips). I can see how someone with more mechanical ability and experience could knock this out in no time... it's not that hard to take apart. Putting it together, on the other hand... I think that's gonna take a while!!! C:> |
|
|
|
| Jake Raby |
Nov 8 2006, 05:45 PM
Post
#18
|
|
Engine Surgeon Group: Members Posts: 9,394 Joined: 31-August 03 From: Lost Member No.: 1,095 Region Association: South East States |
I have torn an entire engine apart in 20 minutes with air tools when it failed on the dyno and needed repair ASAP..
When I pulled the crank out it was still so hot that I had to use gloves.. It was back together and running on the dyno in 2 hours- then it won 3 regionals in a row :-) |
|
|
|
| Carlitos Way |
Nov 8 2006, 05:53 PM
Post
#19
|
|
I did it MY WAY Group: Members Posts: 1,337 Joined: 14-September 04 From: Simi Valley, CA Member No.: 2,757 Region Association: Southern California |
QUOTE(Jake Raby @ Nov 8 2006, 03:45 PM) I have torn an entire engine apart in 20 minutes with air tools when it failed on the dyno and needed repair ASAP.. When I pulled the crank out it was still so hot that I had to use gloves.. It was back together and running on the dyno in 2 hours- then it won 3 regionals in a row :-) unfortunately I don't have your knowledge, expertise, air tools or a convenient workbench. Then again, I do have gloves for my surgeon-like hands... But I'm trying!!!! |
|
|
|
| dmenche914 |
Nov 8 2006, 06:52 PM
Post
#20
|
|
Senior Member Group: Members Posts: 1,212 Joined: 27-February 03 From: California Member No.: 366 |
first timer Becareful, the hidden case bolt willalways getyou, you pound too hard,a dn you break the case!!! it should come apart pretty easy IF YOU GOT ALL THE BOLTS OUT.
you need to remove the pistons before splitting the case. aand go easy on the head and cylinder fins, they can snap off, very fragile. the pistons dent or chip easy, treat them like you would fine china. use a soft wood drift to remove the wrist pins if they don't slip out on therir own (after snap ring removal, get a snap ring tool) if you need a drift to push out the piston pins, hold the piston in your hand, don't let it bang on the head studs, it can dent them. l;abel and number everything, lifters, pushrods, pistons etc... you wanto know where they came from. use plenty of plastic bags and boxes for an organizedinventory of parts don't toss the fragile pistons, heads, cylnders, cases around, pack them safely away until ready durieng assembly, KEEP THINGS SUPER CLEAN. one chip of metal or grit of sand in the engine can ruin the rebuild you will want to clean up every thing. never ever ever pry the engine case halves, cylinders, nor heads off at the seams. a screw driver is tempting to use to pry the case halfs apart, but you will damage teh sealing surface. once it is all apart, you eaither send the parts out to be checked, or do it yourself. you'll need to measure the case bearing bores to determine the correct outer diameter of the bearings and make sure the bores are still really round, you will also need to measure the crank and rod bearing surfaces, to determine which inner size bearing to use (they may have been re-ground already, or may need re-grinding) you don't just want to buy new bearings, and hope they fit, you can seize teh motor, or suffer low oil pressure if you are not lucky. bearing are sold in over bore sizes as needed. cam selection may depend on if you run FI, or want ot switch to carbs. the cylinders need to be checked for diameter, too big and you will burn oil, they should not have a ridge on the inside, they can be honed to fix the finish (which helps rings reseal. you need to measure the ring gaps, and ring groove thivkness,a dn make sure that is in tolerance. connecting rods may need balanceing, endi to end, and the whole crank, flywheel fan , pressure plate should be balanced. the pistons should be matched in wieght. rocker geometery need to be check, can be adjusted by changing push rod length. make sure they are straight. oil pump need be check, the gears have aback lash tolerane,a dn need the corect hieght, too much and you have low pressure = short life. you will want ot check the heads for cracks, loose seats, excessive guide clearance, the heads should be cc'd,a dn deck hight figure to give the desired compression ratio for teh fuel, and induction system you pick. a good valve grind is needed., they should be lapped into t he seats. the list goes on. yes you can ignore this stuff, slap some parts together,a dn end up with a hand grenade motor, a smoker, or a dud, you might get lucky, adn it will run ok. Keep this list up to date on your progress, there is plenty of good advioce out here. Buy a VW rebuild book, most are for the Type I motor, but many of the concepts are transferable to the type IV motor. take your time, as this is your fisrt motor . figure to do it right, allow at least four times the time you thought it will take, you will need to wait to measure things, have machine work done, wait for parts, and trial assemble,/disassemble again and again to get everthing right. Best of luck on this project. let us all know how it goes. |
|
|
|
|
1 User(s) are reading this topic (1 Guests and 0 Anonymous Users)
0 Members:

|
Lo-Fi Version | Time is now: 17th May 2024 - 05:43 PM |
Invision Power Board
v9.1.4 © 2024 IPS, Inc.