|
|
|
Porsche, and the Porsche crest are registered trademarks of Dr. Ing. h.c. F. Porsche AG.
This site is not affiliated with Porsche in any way. Its only purpose is to provide an online forum for car enthusiasts. All other trademarks are property of their respective owners. |
|
|

  |

| McMark |
 Jun 11 2007, 01:45 AM Jun 11 2007, 01:45 AM
Post
#1
|
|
914 Freak!  Group: Retired Admin Posts: 20,180 Joined: 13-March 03 From: Grand Rapids, MI Member No.: 419 Region Association: None |
Click here for part 1.
Time to install the forward shift rod section. This is the section that goes inside the car. There is a bit of welding. But this was a pretty easy install. First we cut the stock forward shift rod just behind the welds. We will be keeping the section on the left which is what attaches to the shifter. We will need to remove the remnants of the outer tube and just keep the insert.  To remove the outer section, we used a lathe because one was available. You can also carefully grind off the welds, which would be just as easy. 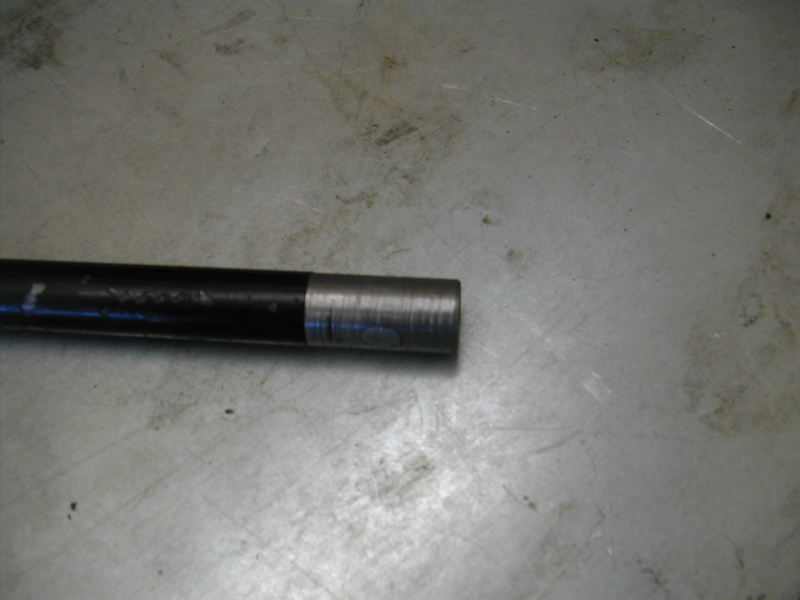 James gives a measurement for the total length of the shift rod (34 3/4" IIRC?). So this is what it will look like. I measured the rod and marked where it needed to be. The mark let me easily see if something got bumped out of place just before welding. 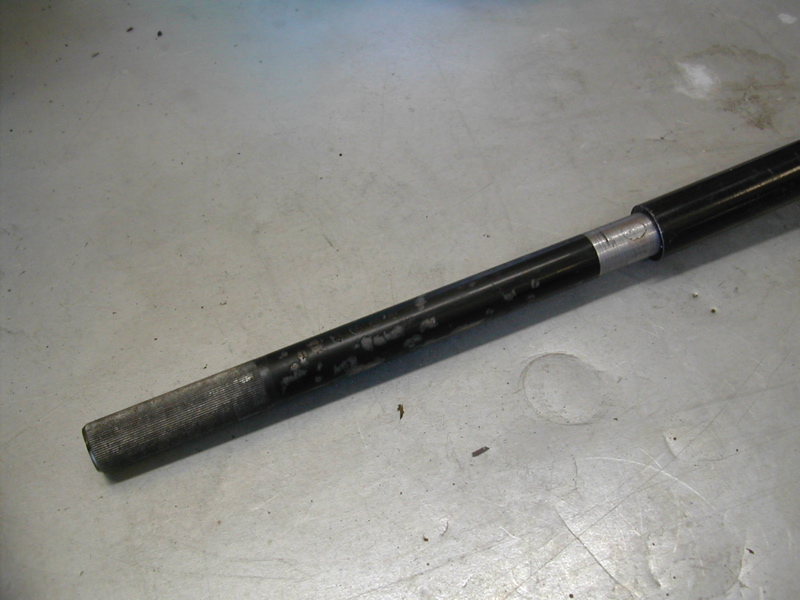 The bushing is pretty easy to install. We just held the bushing in place, marked where to drill and made some holes. A quick paint and then bolt up the bushing (there is a specific way to orient the bushing). This was an early chassis which doesn't have the circle on the firewall (it's got a big oval). So we ground that all off and used an extra piece of rubber behind the bushing to completely seal it to the body. And finally, I hopped in the car with an extendable magnet and used that to feed the bolts through the holes. Then Andy grabbed them from the engine bay so I could detach the magnet. It worked great. Then I used a long 1/4" extension to hold the bolts in place while Andy slipped the bushing over the bolts and threaded on the nuts. 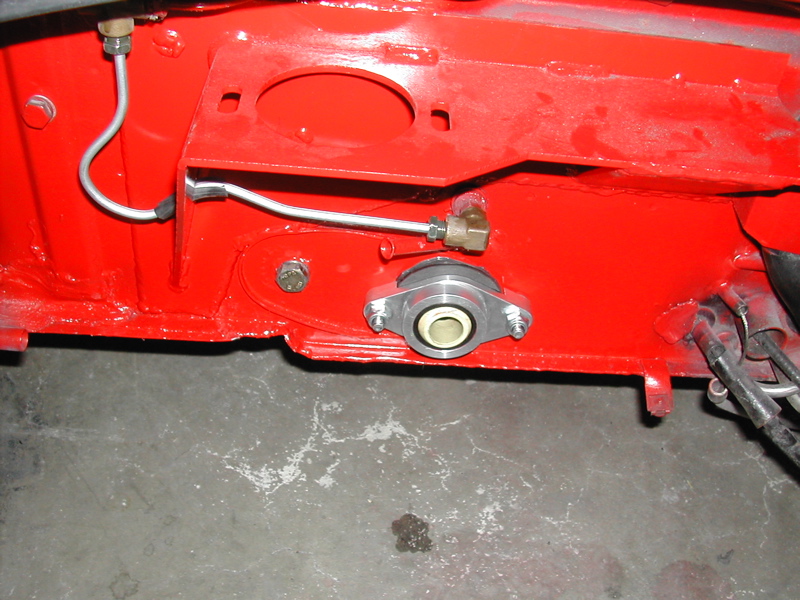 Here is the shift rod TIG welded together. A quick coat of paint to protect it and then we slid it into place. 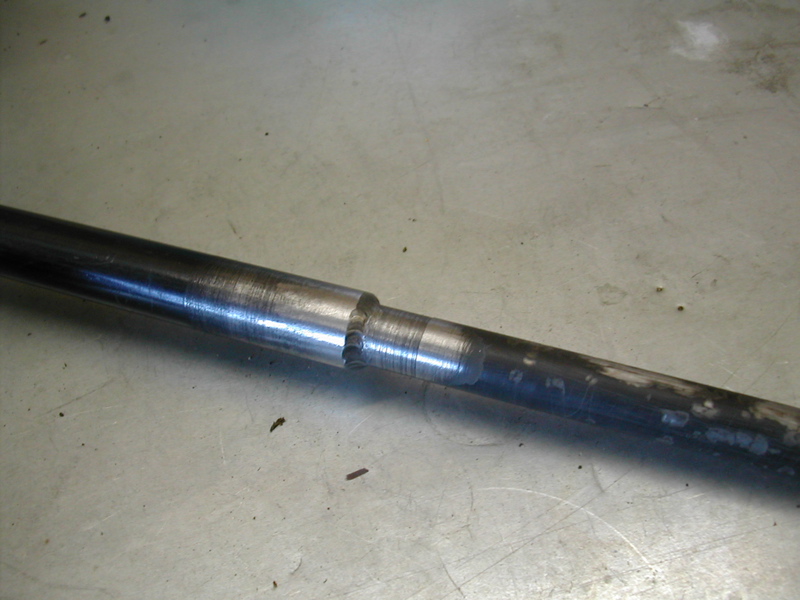 We attached the new rod to the shifter so that when you pull back as far as it will go, the shift rod just sticks out past the bushing. Then we put the univeral joint onto the end. 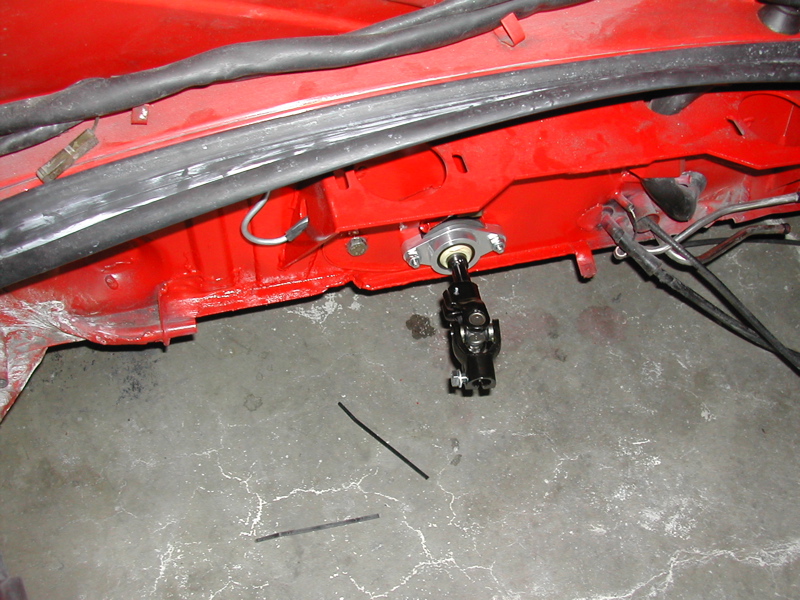 There is one more part to go. The rear shift rod section! (IMG:style_emoticons/default/wink.gif) Stay tuned later this week. |
   |

 
|
| SirAndy |
Jun 11 2007, 02:41 AM
Post
#2
|
|
Resident German Group: Admin Posts: 42,485 Joined: 21-January 03 From: Oakland, Kalifornia Member No.: 179 Region Association: Northern California |
(IMG:style_emoticons/default/smilie_pokal.gif)
a little bit of grinding involved because this is an early chassis, but otherwise, a quick and easy install ... (IMG:style_emoticons/default/cool_shades.gif) Andy |
|
|
|
| BKLA |
Nov 24 2007, 11:08 AM
Post
#3
|
|
Really old member Group: Members Posts: 1,253 Joined: 14-August 05 From: OR Member No.: 4,590 Region Association: Pacific Northwest |
Are you going to finish this Thread?!? (IMG:style_emoticons/default/biggrin.gif) I have been waiting now for months!!!!
Did you have to fabricate the center section of rod? How about pics of it once it was installed? Your opinion on how it works? Great Job ANdy and Mark! |
|
|
|
| scottb |
Nov 24 2007, 11:41 AM
Post
#4
|
|
who wants a PEZ?! Group: Members Posts: 1,993 Joined: 27-December 02 From: south-(not north)-wick, MA Member No.: 32 Region Association: North East States |
ooooohh!!
i didn't know that i needed this until just a minute ago! will be dropping the old and putting in the new over winter so this would be perfect to compliment the new plant. i too eagerly look forward to completion of this series.... cheers!! |
|
|
|
| SirAndy |
Nov 24 2007, 03:25 PM
Post
#5
|
|
Resident German Group: Admin Posts: 42,485 Joined: 21-January 03 From: Oakland, Kalifornia Member No.: 179 Region Association: Northern California |
there's more about the install in my conversion thread. see link in my signature ...
(IMG:style_emoticons/default/bye1.gif) Andy |
|
|
|
| Jeff Hail |
Nov 24 2007, 10:15 PM
Post
#6
|
|
Senior Member Group: Members Posts: 1,141 Joined: 3-May 07 From: LA/ CA Member No.: 7,712 |
QUOTE(McMark @ Jun 10 2007, 11:45 PM)  Here is the shift rod TIG welded together. A quick coat of paint to protect it and then we slid it into place. Damn nice welds on the rod. Good write up. |
|
|
|
| ConeDodger |
Nov 25 2007, 12:20 AM
Post
#7
|
|
Apex killer! Group: Members Posts: 24,488 Joined: 31-December 04 From: Tahoe Area Member No.: 3,380 Region Association: Northern California |
QUOTE(Jeff Hail @ Nov 24 2007, 08:15 PM) QUOTE(McMark @ Jun 10 2007, 11:45 PM) Here is the shift rod TIG welded together. A quick coat of paint to protect it and then we slid it into place. Damn nice welds on the rod. Good write up. It's JB Weld. Mark uses it for everything... (IMG:style_emoticons/default/shades.gif) (IMG:style_emoticons/default/av-943.gif) Sorry, Not true but Mark will appreciate it. |
|
|
|
| BKLA |
Oct 26 2011, 11:25 PM
Post
#8
|
|
Really old member Group: Members Posts: 1,253 Joined: 14-August 05 From: OR Member No.: 4,590 Region Association: Pacific Northwest |
Just wanted to add that the length of the front bar is 32 3/4" not 34 3/4". I looked it up here hoping that the number was correct as I purchased one of the remaining partial kits, and I knew this was a "keeper" thread.
34 3/4" was too long, so I emailed JWest. 32 3/4" fits perfectly. |
|
|
|
|
1 User(s) are reading this topic (1 Guests and 0 Anonymous Users)
0 Members:

|
Lo-Fi Version | Time is now: 28th June 2026 - 05:39 AM |
Invision Power Board
v9.1.4 © 2026 IPS, Inc.