|
|
|
Porsche, and the Porsche crest are registered trademarks of Dr. Ing. h.c. F. Porsche AG.
This site is not affiliated with Porsche in any way. Its only purpose is to provide an online forum for car enthusiasts. All other trademarks are property of their respective owners. |
|
|

  |

| Johny Blackstain |
 Jul 5 2007, 12:51 PM Jul 5 2007, 12:51 PM
Post
#1
|
|
Walnut Elite Stratocaster player  Group: Members Posts: 3,434 Joined: 5-December 06 From: The Shenandoah River Member No.: 7,318 Region Association: MidAtlantic Region |
I was thinking of going out & buying a nice round wooden baseball bat to cut at the right spot & use that as my custom Mahle center cap removal tool. There seems to be no way of removing them w/out damaging otherwise & don't really know if this will work either. Thoughts?
(IMG:style_emoticons/default/cool_shades.gif) |
   |

 
|
| SLITS |
Jul 5 2007, 01:12 PM
Post
#2
|
|
"This Utah shit is HARSH!" Group: Benefactors Posts: 13,602 Joined: 22-February 04 From: SoCal Mountains ... Member No.: 1,696 Region Association: None |
I believe it was a 2" piece of PVC pipe that will remove them by catching the edge. Your measurement may vary (meaning I don't remember).
|
|
|
|
| Johny Blackstain |
Jul 5 2007, 02:41 PM
Post
#3
|
|
Walnut Elite Stratocaster player Group: Members Posts: 3,434 Joined: 5-December 06 From: The Shenandoah River Member No.: 7,318 Region Association: MidAtlantic Region |
QUOTE(SLITS @ Jul 5 2007, 03:12 PM)  I believe it was a 2" piece of PVC pipe that will remove them by catching the edge. Your measurement may vary (meaning I don't remember). Don't believe anymore, know. It rocks! That & a rubber mallett sent them flying- good thing I did it over carpeting! No damage @ all. Danke! (IMG:style_emoticons/default/cool_shades.gif) Attached image(s) 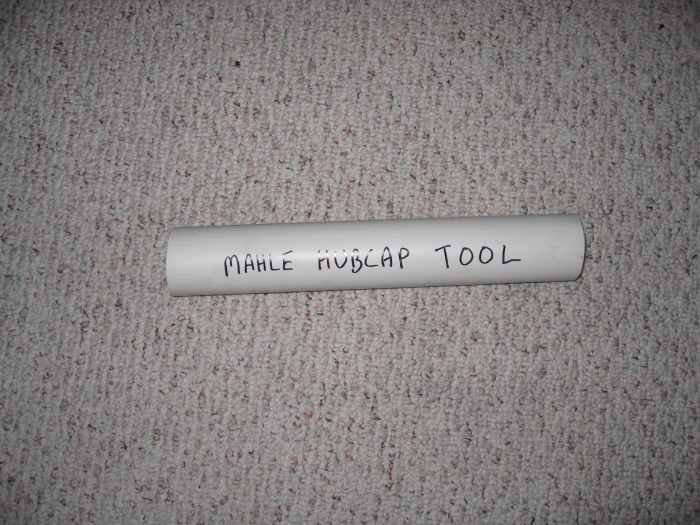
|
|
|
|
| orthobiz |
Jul 5 2007, 07:10 PM
Post
#4
|
|
Senior Member Group: Members Posts: 1,754 Joined: 8-January 07 From: Cadillac, Michigan Member No.: 7,438 Region Association: Upper MidWest |
I bought these tools from Brad Mayeur, 914 Ltd. I haven't installed my hubcaps yet (especially since I don't even have tires for my Fuchs!) but I think the concept is cool. He's at 309-694-1797. I haven't checked all the sites yet but I don't remember seeing them anywhere else. At 33 bucks a pop, those hubcaps are worth saving!
The inside of the hard rubber shorter tube that impacts the hubcap for installation has a little machined inner groove shown in the detail and fits perfectly around the hubcap. The metal tube goes through the back of the wheel and fits perfectly as the pictures show! (IMG:http://farm2.static.flickr.com/1402/732089608_f043ec81b0.jpg) A cute little unmolested hubcap. (IMG:http://farm2.static.flickr.com/1193/731233281_b534f050d0.jpg) Happy family of tools. (IMG:http://farm2.static.flickr.com/1329/732107250_e8bfd7110d.jpg) Impacting tool viewed from the striking surface. (IMG:http://farm2.static.flickr.com/1079/731223603_226846c97c.jpg) Impacting tool as viewed from the wheel. (IMG:http://farm2.static.flickr.com/1139/731238885_6225a059cd.jpg) Impacting tool has an inner groove and does not fit the other way. (IMG:http://farm2.static.flickr.com/1337/732112716_26ac5ebffc.jpg) Disimpacting tool and hubcap. Made of metal. (IMG:http://farm2.static.flickr.com/1200/732119130_e4ac90c4b1.jpg) Disimpacting tool as it would work from behind the wheel. Paul |
|
|
|
| orthobiz |
Jul 6 2007, 02:33 PM
Post
#5
|
|
Senior Member Group: Members Posts: 1,754 Joined: 8-January 07 From: Cadillac, Michigan Member No.: 7,438 Region Association: Upper MidWest |
Sorry, I spoke too soon. Brad has no more hubcap installation/removal kits, apparently the fellow who made them died!
Paul |
|
|
|
| Johny Blackstain |
Jul 6 2007, 02:57 PM
Post
#6
|
|
Walnut Elite Stratocaster player Group: Members Posts: 3,434 Joined: 5-December 06 From: The Shenandoah River Member No.: 7,318 Region Association: MidAtlantic Region |
(IMG:style_emoticons/default/thumb3d.gif) No doubt that is one fine tool & I'd rather have that than a piece of 2" PVC pipe, but it did work well, no scratches, dents, dings, etc... Unlike the tool however, PVC pipe is only good for removal & not installation. I'll have to use my palm & a rubber mallett & be careful not to dent/ding (IMG:style_emoticons/default/dry.gif) .
(IMG:style_emoticons/default/cool_shades.gif) |
|
|
|
| 914rrr |
Jul 6 2007, 07:47 PM
Post
#7
|
|
Senior Member Group: Members Posts: 1,822 Joined: 1-July 03 From: Knoxville, TN Member No.: 874 Region Association: South East States |
QUOTE(Johny Blackstain @ Jul 6 2007, 04:57 PM) (IMG:style_emoticons/default/thumb3d.gif) No doubt that is one fine tool & I'd rather have that than a piece of 2" PVC pipe, but it did work well, no scratches, dents, dings, etc... Unlike the tool however, PVC pipe is only good for removal & not installation. I'll have to use my palm & a rubber mallett & be careful not to dent/ding (IMG:style_emoticons/default/dry.gif) . (IMG:style_emoticons/default/cool_shades.gif) There is a PVC (plumbing?) fitting that will work as an installation tool, I just don't remember which one it is. I took my cap to Homer Depot and shopped around until I found the right one. |
|
|
|
| easy e |
Nov 22 2015, 10:25 PM
Post
#8
|
|
Newbie Group: Members Posts: 4 Joined: 26-October 15 From: Grover Beach, CA Member No.: 19,303 Region Association: None |
I did some measuring & didn't find a PVC pipe/fitting that would give optimal results (off the shelf). But, with a little shaving... it should be do-able with just a couple minutes of filing.
When I get the stuff... I'll report back with effectiveness/fit. I ordered some parts from www.flexpvc.com Total came to $19.74 delivered. To knock cap out of rim, I ordered: 1.5" Class 200 pipe (1 foot): OD: 1.900" wall thickness: 0.090" Product ID: CL200-015 I think I'll have to shave a fuzz off the ID... so it will sit fully in the annular ring... for knocking it out without pushing on the central flat area. (Schedule 40 or 80 pipe can be used (same OD)... but would require more shaving on the ID, to prevent pushing (at all) on the central flat area.) 1.5" cap... to tap against. Product ID: 447-015 To seat cap in rim, I ordered: 2.5" Schedule 80 pipe (1 foot): OD: (doesn't matter) ID: 2.290" Product ID: Sch80-025 I'll have to shave a little off the ID and probably bevel the bottom edge slightly, as the cap outer lip is not perfectly flat. 2.5" cap... to tap against. Product ID: 447-025 |
|
|
|
| KELTY360 |
Nov 23 2015, 12:04 AM
Post
#9
|
|
914 Neferati Group: Members Posts: 5,031 Joined: 31-December 05 From: Pt. Townsend, WA Member No.: 5,344 Region Association: Pacific Northwest |
I use an ABS adapter fitting that has a 2" id on one end and a 2 1/4 id on the other. The larger end is threaded for a cleanout plug but I glued in a thin foam to protect the center cap when installing.
The narrow end works well to tap on for removal and the larger end fits over the cap for installation. 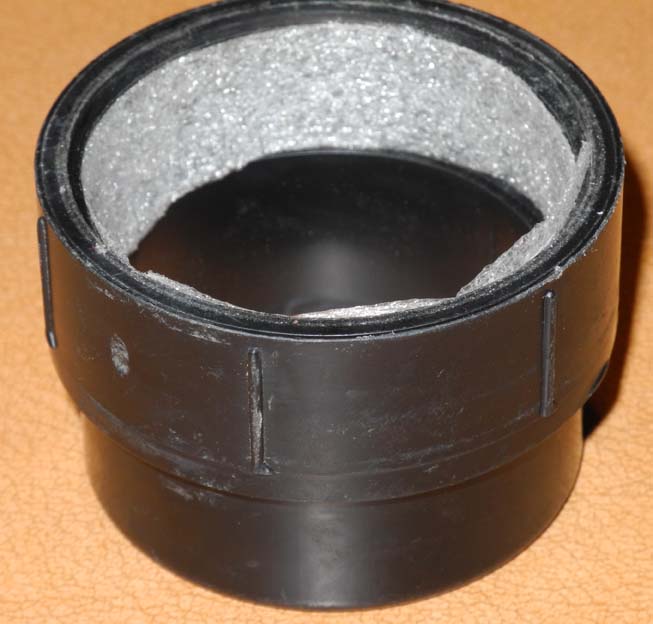 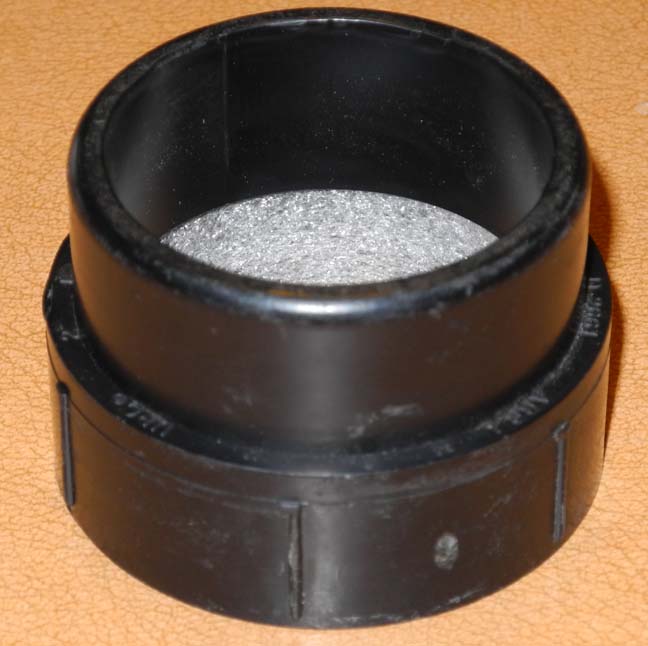 |
|
|
|
| easy e |
Nov 24 2015, 10:29 AM
Post
#10
|
|
Newbie Group: Members Posts: 4 Joined: 26-October 15 From: Grover Beach, CA Member No.: 19,303 Region Association: None |
QUOTE(KELTY360 @ Nov 22 2015, 10:04 PM) The narrow end works well to tap on for removal. I'm interested because I have a cap that is all bulged out on the side... mid-taper... like someone used a 36mm socket to whack it out from the inside... and wondering if your removal method is basically the same / or not. I've got another cap where the small outer annular ring (that is folded over and rests against the rim face) is not flat anymore and is expanded... like an accordion. Ideally... something that has the same OD as the wheel center ID could push on the very bottom of the cap... then no distortion to the visible part could ever happen. The cap wall thickness is 0.71mm... so it'd have to be pretty precise. |
|
|
|
| KELTY360 |
Nov 24 2015, 10:46 AM
Post
#11
|
|
914 Neferati Group: Members Posts: 5,031 Joined: 31-December 05 From: Pt. Townsend, WA Member No.: 5,344 Region Association: Pacific Northwest |
QUOTE(easy e @ Nov 24 2015, 08:29 AM) QUOTE(KELTY360 @ Nov 22 2015, 10:04 PM) The narrow end works well to tap on for removal. I'm interested because I have a cap that is all bulged out on the side... mid-taper... like someone used a 36mm socket to whack it out from the inside... and wondering if your removal method is basically the same / or not. I've got another cap where the small outer annular ring (that is folded over and rests against the rim face) is not flat anymore and is expanded... like an accordion. Ideally... something that has the same OD as the wheel center ID could push on the very bottom of the cap... then no distortion to the visible part could ever happen. The cap wall thickness is 0.71mm... so it'd have to be pretty precise. Yes, the narrower diameter has basically the same OD as the wheel center ID. I usually put a small block of wood against the adapter to spread the force when I tap out the center cap. |
|
|
|
| Cuda911 |
Nov 24 2015, 10:48 AM
Post
#12
|
|
Senior Member Group: Members Posts: 1,489 Joined: 20-May 14 From: Oceanside (N. San Diego County), CA Member No.: 17,376 Region Association: Southern California |
Here's a link to my thread with tools you can get at Home Depot for about $5:
http://www.914world.com/bbs2/index.php?sho...er+cap+tool+PVC |
|
|
|
| easy e |
Nov 24 2015, 11:38 AM
Post
#13
|
|
Newbie Group: Members Posts: 4 Joined: 26-October 15 From: Grover Beach, CA Member No.: 19,303 Region Association: None |
The install part of all the methods are pretty great... pretty hard to do damage... as all the previously compressed parts of the cap are still in acted on under compression.
I'm not wild about any of the 'getting it out' PVC methods so far...(besides the steel one)... since the thick wall of the PVC pushes on the flat of the cap. I have some caps where the flat is pressed out. The steel method requires machining ($$)... the PVC Class 200 method is only a little filing. With this method... the only part of the cap seeing a force in a direction not previously seen is the flat annular ring at the rim surface. It's pretty forgiving there. But... if the $5 method is tried and true... can't really argue with it. I spent $15 more... but my local store doesn't have Class 200 ... and saved a trip to the store. Relative wash... or pretty close... I'm ok with eating it. I'll still post up how it goes with the bits being shipped to me. |
|
|
|
| Mikey914 |
Nov 24 2015, 11:40 AM
Post
#14
|
|
The rubber man Group: Members Posts: 12,640 Joined: 27-December 04 From: Hillsboro, OR Member No.: 3,348 Region Association: None |
Why I never made the "special tool" much simpler to use the PVC pipe method.
|
|
|
|
| Mikey914 |
Nov 29 2015, 04:01 PM
Post
#16
|
|
The rubber man Group: Members Posts: 12,640 Joined: 27-December 04 From: Hillsboro, OR Member No.: 3,348 Region Association: None |
Very Nice.
Galvanic corrosion can really make these stick in there. |
|
|
|
|
1 User(s) are reading this topic (1 Guests and 0 Anonymous Users)
0 Members:

|
Lo-Fi Version | Time is now: 29th April 2024 - 07:06 PM |
Invision Power Board
v9.1.4 © 2024 IPS, Inc.