|
|
|
Porsche, and the Porsche crest are registered trademarks of Dr. Ing. h.c. F. Porsche AG.
This site is not affiliated with Porsche in any way. Its only purpose is to provide an online forum for car enthusiasts. All other trademarks are property of their respective owners. |
|
|


| JPB |
 Jul 8 2007, 03:25 PM Jul 8 2007, 03:25 PM
Post
#1
|
|
The Crimson Rocket smiles in your general direction.  Group: Members Posts: 2,927 Joined: 12-November 05 From: Tapmahamock, Va. Member No.: 5,107 |
With the use of this fastener combination, you can have your ducktail installed solidly. The fastener assembly is a 5/16"X3 bolt, three nuts, two oversized washers and a lil washer. You can upgrade with some lock washers or self locking nuts. Better? (IMG:style_emoticons/default/av-943.gif)
Attached image(s) 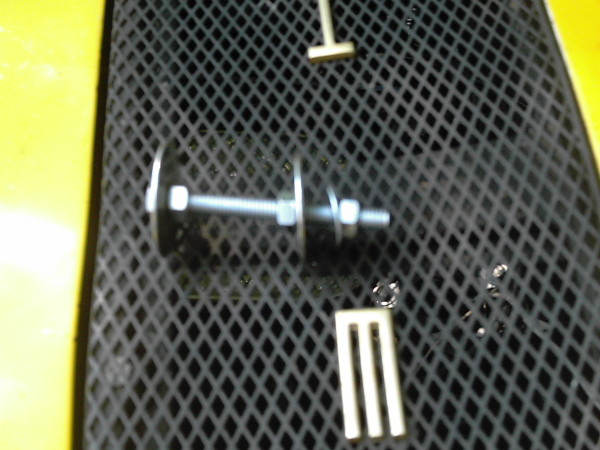
|
   |

 
|
  |
Replies(1 - 8)
| JPB |
Jul 8 2007, 03:29 PM
Post
#2
|
|
The Crimson Rocket smiles in your general direction. Group: Members Posts: 2,927 Joined: 12-November 05 From: Tapmahamock, Va. Member No.: 5,107 |
Drill holes in a stagered fashion for that tripod effect. The holes are big enough to allow the bolt heads to pass through.
Attached image(s) 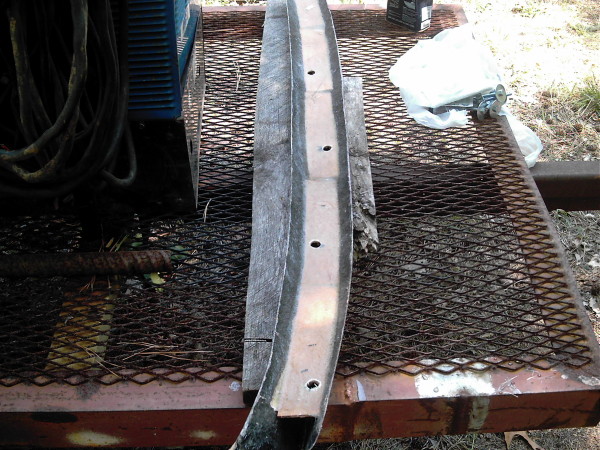
|
|
|
|
| JPB |
Jul 8 2007, 03:34 PM
Post
#3
|
|
The Crimson Rocket smiles in your general direction. Group: Members Posts: 2,927 Joined: 12-November 05 From: Tapmahamock, Va. Member No.: 5,107 |
Get all of your bolts perfectly vertical and it will save you the time to make slots or oversized holes from bolts runing at a skew. See the wasers how they have been bent with some pliars to fit the skew of the tail inside. Ida be husan letrishans tape man.
Attached image(s) 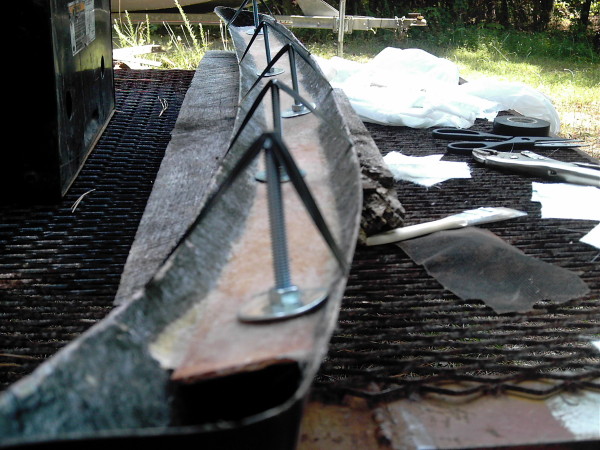
|
|
|
|
| JPB |
Jul 8 2007, 03:43 PM
Post
#4
|
|
The Crimson Rocket smiles in your general direction. Group: Members Posts: 2,927 Joined: 12-November 05 From: Tapmahamock, Va. Member No.: 5,107 |
I used some roven woving or mat and a generous amount of fiberglass resin. There is about a 3/16" or 6 layors of FG on the inside. The more you put, the stronger it will be. Don't forget to get the area roughed up with sand paper before ya start. 4o grit is the best.
Attached image(s) 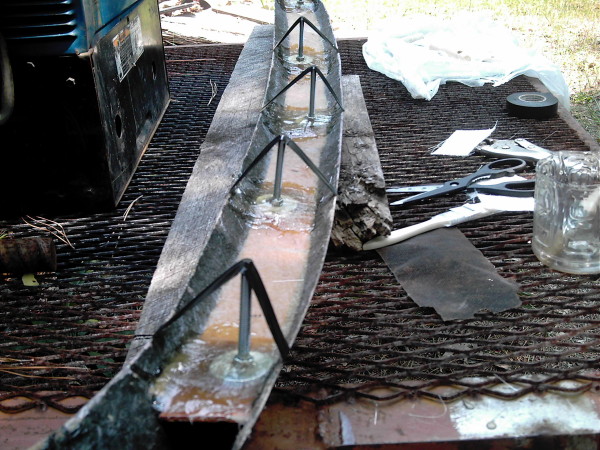
|
|
|
|
| JPB |
Jul 8 2007, 03:51 PM
Post
#5
|
|
The Crimson Rocket smiles in your general direction. Group: Members Posts: 2,927 Joined: 12-November 05 From: Tapmahamock, Va. Member No.: 5,107 |
When installing this tail, its always good to know where you want it ahead of time "as in location" so mark it out with a grease marker or something that will wipe off easily with water. I made the center bolt the logest so I can predrill where the center bolt would be and drop the tail on that hole to find where the other bolts are at for drilling. You can use masking tape to cover your trunk and make as big of a mess as you want with pencils.
The head of the bolt, the oversized washer and nut end is what you FGed inside the tail. The middle nut and oversized washers are used as adjusters to fit your tail at the desired height on top of your trunk. You can also use a rubber washer under this oversized washer to seal the hole when the bottom nut is tightened. Adhesives, caulking and tapes would also work fine for a good positive seal. The lower washer and nut is to fasten it all tightly to your trunk. Attached image(s) 
|
|
|
|
| JPB |
Jul 8 2007, 04:00 PM
Post
#6
|
|
The Crimson Rocket smiles in your general direction. Group: Members Posts: 2,927 Joined: 12-November 05 From: Tapmahamock, Va. Member No.: 5,107 |
Wasen't completely done and didn't even close the trunk since the latch mechanism was removed. The cool thing is that if your a perfectionist, you can get every wave off of the bottom of the tail to make a perfect gap all around it. Another thing I didn't consider is tall the structural parts under the trunk, ya wanna try to miss all of them or else you will have much more work to do to tighten it down. Live and learn I guess (IMG:style_emoticons/default/beer.gif)
Attached image(s) 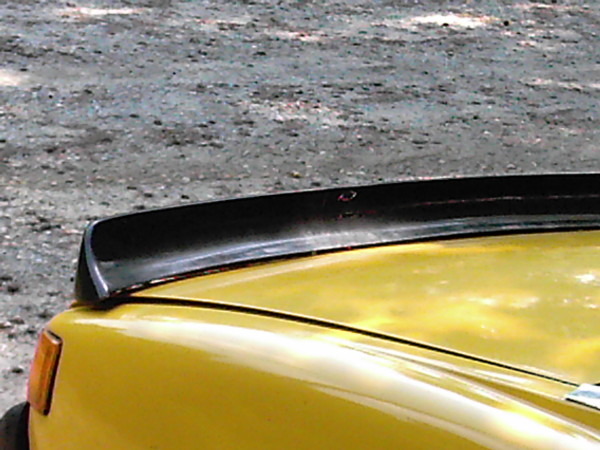
|
|
|
|
| JPB |
Jul 8 2007, 04:02 PM
Post
#7
|
|
The Crimson Rocket smiles in your general direction. Group: Members Posts: 2,927 Joined: 12-November 05 From: Tapmahamock, Va. Member No.: 5,107 |
Oh ya them 5/16" bolts made for 13mm nuts. Schwing!
Attached image(s) 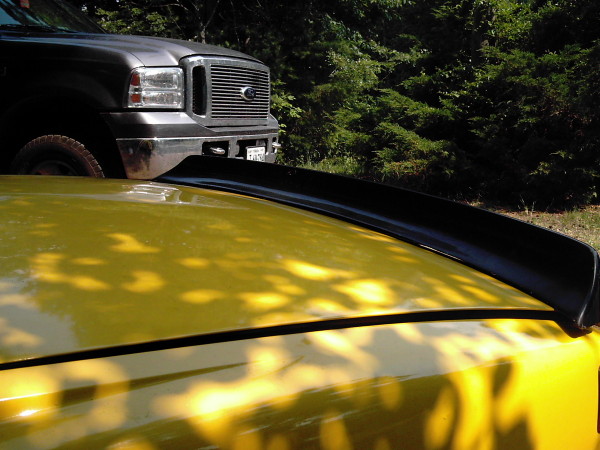
|
|
|
|
| Brando |
Jul 8 2007, 05:11 PM
Post
#8
|
|
BUY MY SPARE KIDNEY!!! Group: Members Posts: 3,935 Joined: 29-August 04 From: Santa Ana, CA Member No.: 2,648 Region Association: Southern California |
Not bad, no scratchies on the paint then (IMG:style_emoticons/default/smile.gif)
|
|
|
|
| JPB |
Jul 8 2007, 05:17 PM
Post
#9
|
|
The Crimson Rocket smiles in your general direction. Group: Members Posts: 2,927 Joined: 12-November 05 From: Tapmahamock, Va. Member No.: 5,107 |
Yup yup yup. Water tight drill holes also with big washer and sealant (IMG:style_emoticons/default/smilie_pokal.gif)
|
|
|
|
|
1 User(s) are reading this topic (1 Guests and 0 Anonymous Users)
0 Members:

|
Lo-Fi Version | Time is now: 19th May 2024 - 01:04 PM |
Invision Power Board
v9.1.4 © 2024 IPS, Inc.