|
|
|
Porsche, and the Porsche crest are registered trademarks of Dr. Ing. h.c. F. Porsche AG.
This site is not affiliated with Porsche in any way. Its only purpose is to provide an online forum for car enthusiasts. All other trademarks are property of their respective owners. |
|
|

  |

| neo914-6 |
 Jul 16 2007, 02:10 AM Jul 16 2007, 02:10 AM
Post
#1
|
|
neo life  Group: Members Posts: 5,086 Joined: 16-January 03 From: Willow Glen (San Jose) Member No.: 159 |
Introduction: Complete instructions to install the rear needle bearings (let me know if I've missed anything)
These bearings were designed and manufactured by Mike Mueller and sold direct or through Tarret Engineering. He ceased production so they are currently NLA. 736conver also made them in '05 but are NLA. SRS (Shine Racing) had the same design and sold their last bearing sets in '06 with no plans to reproduce. If you are interested in buying needle bearings, contact McMark to get on the pre-sale list. Below are some discussions or comparisons with other bushings to help you decide whether these bearings are right for you. They are a relatively expensive option and require more maintenance than bushings. They are used in most race cars. Which bushings: PolyGraph, Bronze, needle bearing,, or Delrin? Suspension Bushings, Needle vs. Bronze control arm bushings Roller bearing/poly rear bushing Suspension Rebuild, Elephant Racing Polybronze bearings? Suspension Bushings vs. Bearings, Opinions? Precision Needle Bearing Kits, who has Mueller's product installed... Suspension Bushings - Which ones? Best Bushings for my Application?, Oh noes! the choices! Are roller bearings really that great?, anyone out there with some experience? Whats the word on the self aligning control arm mounts, Do they help 914 Suspension Upgrade Spirited Street No Track?, What do you think?? Does anybody else besides me have trouble, getting keeping their NUTS tight!? trailing arm nuts Estimated time is 8 hours of removal, disassembly, bearing assembly, and installation for both sides given no problems with broken bolts or rust issues. Level of difficulty is 6 on a scale of 10. Tools and materials needed: -optional special tools -jack -good jack stands -17, 19, 22mm sockets -breaker bar -torque wrench rated up to 260 ft lbs -hammer -pickle fork or ball joint separator -Grease (Mobil 1 Synthetic, Swepco Wheel Bearing grease or Marine Grade Boat Trailer Wheel Bearing Grease) 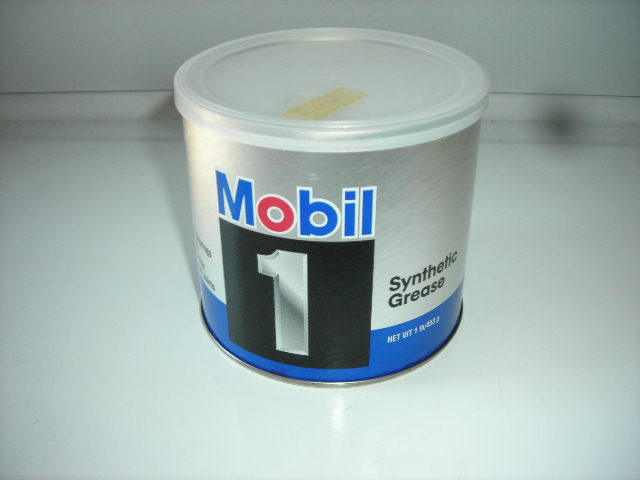 -Grease gun and cartridges -Gloves -Loctite 60905 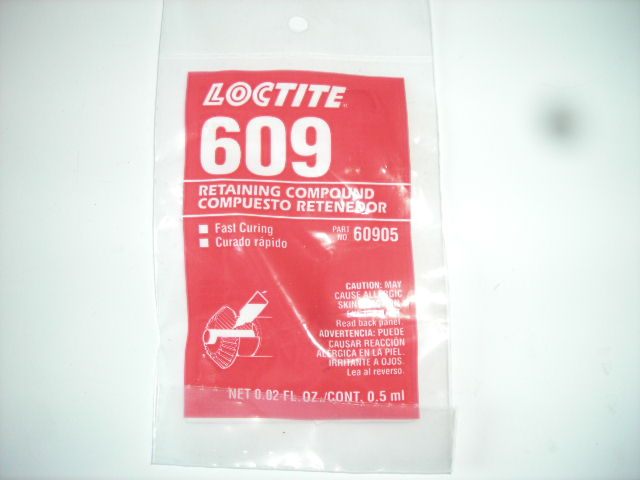 -spray lubricant -degreaser and cleanser -spray paint (optional) Nomenclature: trailing arm = control arm control arm bearing = pivot bracket = cup bearing Housing = cad plated tube = bearing race body ear = tab (inner pivot) 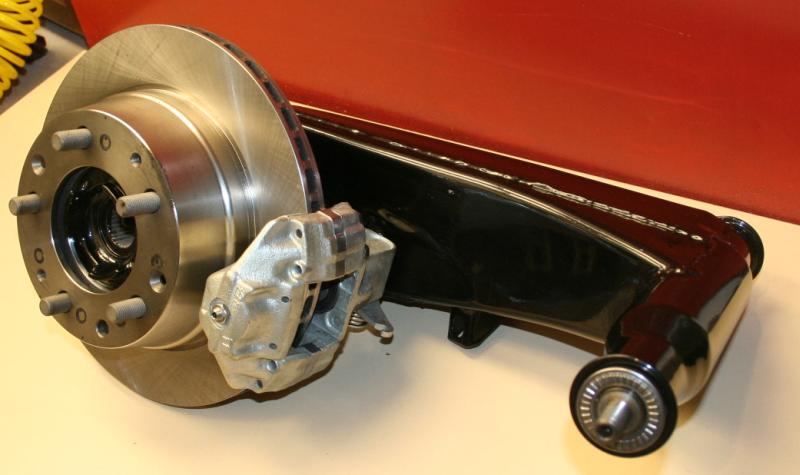 I had both Shine Racing (from a group buy) and Mueller's Design Werks rear bearings but used Mikes because he already sold me his last set and was also fitting the PMB v-calipers to my trailing arms. I sold the SRS rear bearings to (iamchappy) for his turbo 914. Jim (roadster fan) disassembled, powdercoated, and rebuilt these arms with new hub bearings and initially rubber bushings last year as a contribution to my neo914 project. FYI, I'm removing arms with Rich Johnson 5 lug hubs and I'm replacing them with arms I originally bought for my V8 914 on eBay. They are equipped with what appears to be 944 hubs to accept larger 944/911 CV's. At this time you may also consider upgrading to 5 lug. |
   |

 
|
| neo914-6 |
Jul 16 2007, 02:35 AM
Post
#2
|
|
neo life Group: Members Posts: 5,086 Joined: 16-January 03 From: Willow Glen (San Jose) Member No.: 159 |
Trailing arm removal:
1. Remove the axles, the nut at the stub axle may be difficult while off the car. Pelican tech article: Five-Lug Rear Conversion Procedure / Rear Wheel Bearing Replacement 2. Loosen the wheel nuts while the tires are on the ground 3. Jack up and secure the car so you can access all the hardware. Additional jacks or supports are recommended 4. Remove the wheel 5. Measure a common spot between the tranny and the back face of the arm so you will have the same Toe after the arm is replaced. 6. There are three bolts on the outer pivot mount used for toe and camber adjustment. There may be corrosion around the bolts. Lubricate the top body mount nuts the night before removal or for sufficient time (hours). You DO NOT want to snap the heads off the bolts as they are very difficult to drill and remove. If you do, here are options  7. Remove the 19mm bolts to the caliper, carefully lower and support it if you aren't going to disconnect the brake line 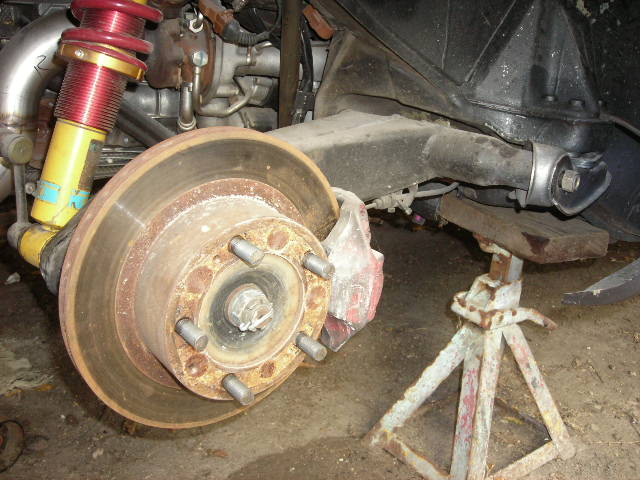 8. Remove the rotor 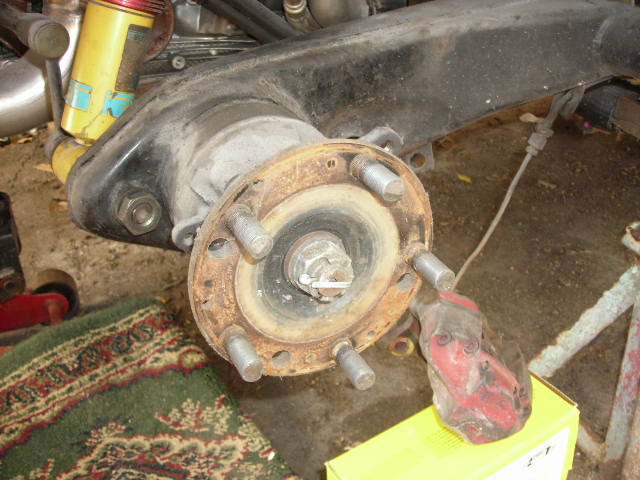 9. Disconnect the rear sway bar drop link if equipped. If you don't have a ball joint separator, an open end wrench can work 10. Remove the nut to the lower shock mount and slide out the long bolt 11. Use a 22mm socket or wrench to loosen the inner pivot nut 12. Use a 17mm socket to loosen the three pivot mount bolts VERY slowly. You may want to add more spray lubricant after a few turns. 13. Support the arm and remove. Remove the alignment shims. |
|
|
|
| neo914-6 |
Jul 16 2007, 02:54 AM
Post
#3
|
|
neo life Group: Members Posts: 5,086 Joined: 16-January 03 From: Willow Glen (San Jose) Member No.: 159 |
With trailing arms removed from car, now is a good time to inspect the suspension console, especially the inside
“tab” that the trailing arm axle attaches to, look for rust and also ensure that the through hole for the axle is in good condition and not “ovalized” 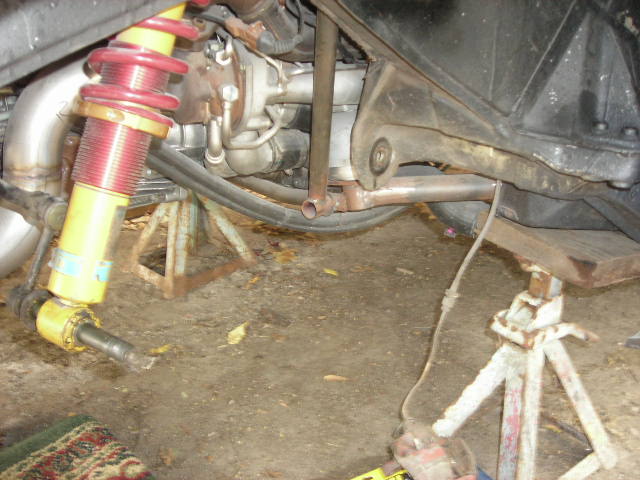 Clean the area and check for rust or cracks. No damage but the surface appeared to be primer under the grease and dirt so I spray painted it. 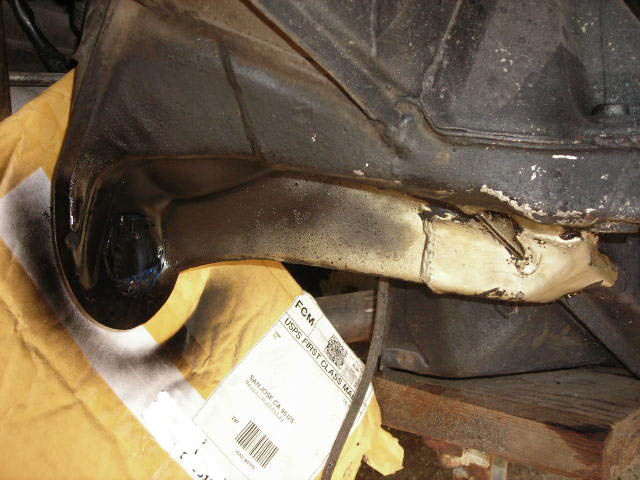 Trailing arm removed: 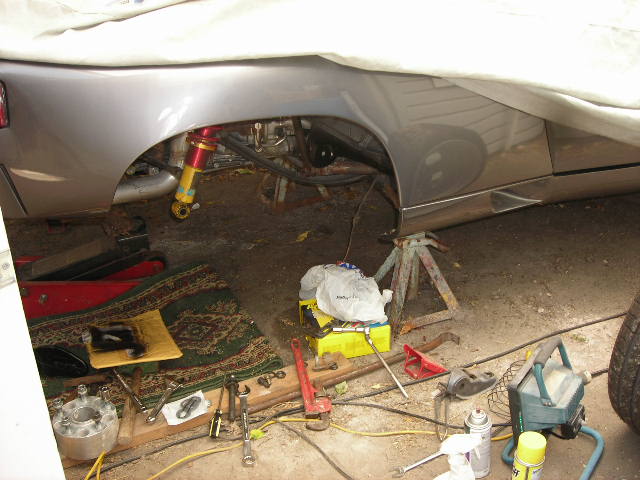 Instructions on removing the rubber bushings and cross shaft You may want to powdercoat or spray paint the arms at this point |
|
|
|
| neo914-6 |
Jul 23 2007, 02:23 AM
Post
#4
|
|
neo life Group: Members Posts: 5,086 Joined: 16-January 03 From: Willow Glen (San Jose) Member No.: 159 |
Installing the bearings in the trailing arms
Here are a combination of Mueller's and Shine Racing instructions 1. The Bearing Housing is pressed into the trailing arm, start at this end: 2. It might be necessary to ream the trailing arm to get the Bearing Housing to slip into the trailing arm. One end of the shaft is machined down more 3. Once the Bearing Housing or tube can be slipped into the trailing arm, a press is recommended to fully insert into the arm. Note: The Bearing Housing can be installed by tapping on the end as long EXTREME care is taken to ensure that the bore of the Bearing Housing is not damaged. The Needle Bearings assemblies must not be forced into the Bearing Housing, the Bearing Housing might have to be slightly filed or cleaned up to ensure the Needle Bearings fit without being forced into the Bearing Housings. Before fully pressing in the Bearing Housing, add a small amount of LOCTITE to the outside of the Bearing Housing on this end and a small amount on the inside of the trailing arm on the other end. Note: Bearing Housings can also be secured to the trailing arms by drilling a small hole in the trailing arm out near the end and tack welding once fully pressed in. Be careful not to use too much heat as this can damage the bore that the Needle Bearings reside in. 4. Press the Bearing Housing (cad plated tubes) so that it is flush with both ends or in some cases if this does not happen due to variances in the trailing arm, make sure the Bearing Housing overhang or protrusion is equal on both sides. 5. Test fit the Needle Bearings into the Housing. 6. Add small amount of Loctite, press a bearing into ONE end of the tube 7. Add grease inside the tube, on the shaft, and squeezed through the bearings as you would with wheel bearings. It will need a volume of 3.8 fl. oz. of grease (calculated) 8. Slide the new axle shaft through the tube and bearing, so it comes out the other end. 9. Slide the second bearing over the axle shaft and into the tube, again using Loctite to secure the bearing. The shaft should now rotate freely in the bearings. 10. Add RTV Silicone between and within the O-ring if equipped and Thrust Washer. 11. Install them between the trailing arm bracket and ear where they will compress to create a dust seal.  Optional: You may wish to install grease fittings in the trailing arms so the bearings can be regreased between maintenance without re-moving the arms from the car. I found 6mm x 1.0 at the local FLAPS 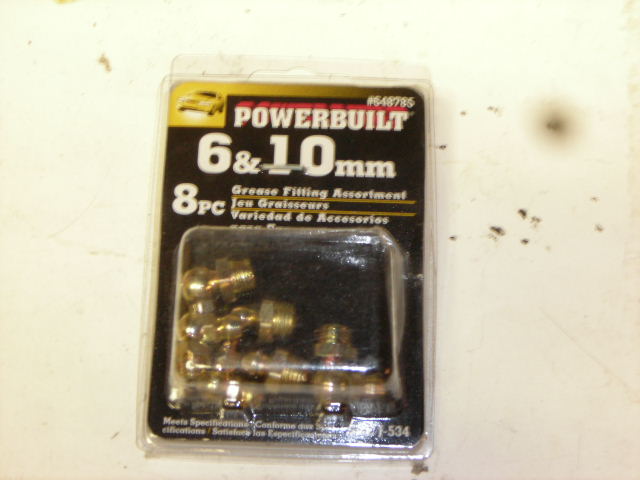 You can add one or two fittings, the grease will find the path of least resistance so one should suffice. DO NOT drill in the thick part of the trailing arm housing as there is an air gap between it and the Bearing Housing / tube. Make sure you pick an area accessible to a grease gun fitting and without interference. Drill the appropriate size hole in the arm and inner tube, TAKING CARE TO DRILL AT LEAST 3/4" FROM THE END, to avoid the bearing flange. Tap the hole and clean any shavings. Thread in the grease fitting. 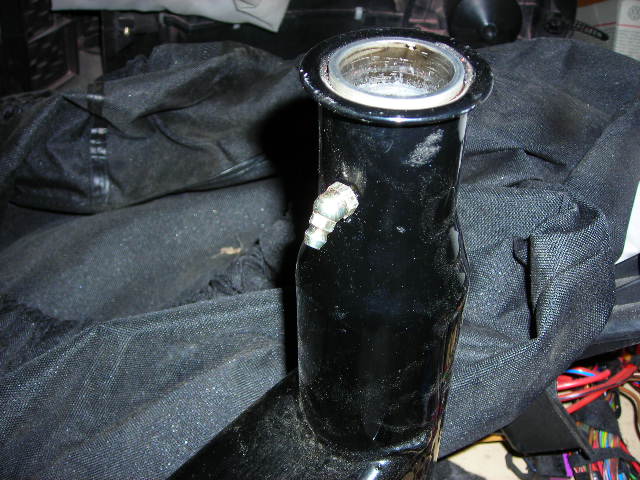 It takes a very large quantity of grease (3.8 fl. oz.) to fill up the tube the first time, so be patient and keep pumping until the grease comes out of the bearing. My calculations may have been incorrect as I used more than two 3 oz cartridges on one arm. 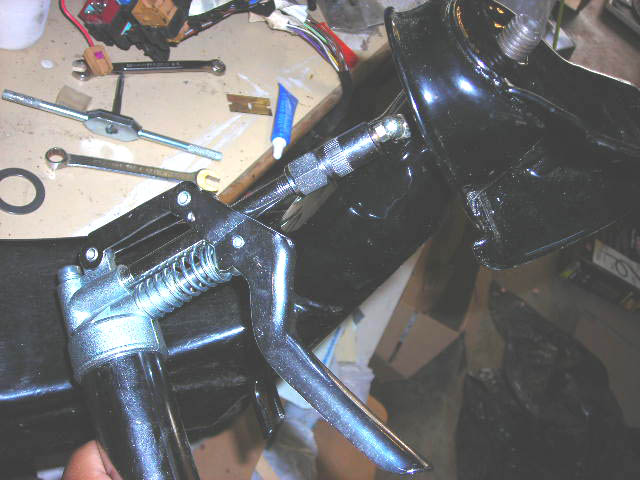 |
|
|
|
| neo914-6 |
Jul 23 2007, 02:58 AM
Post
#5
|
|
neo life Group: Members Posts: 5,086 Joined: 16-January 03 From: Willow Glen (San Jose) Member No.: 159 |
Install the rod and needle bearing. I used a large socket and gently tapped the bearing into the tube race
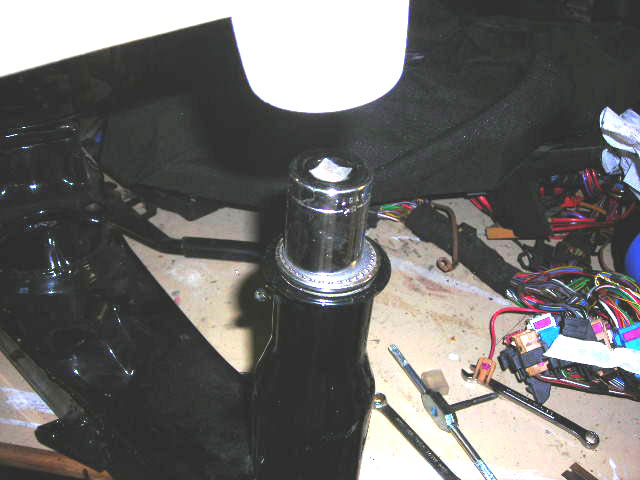 Install the thrust washer with o-ring and silicone 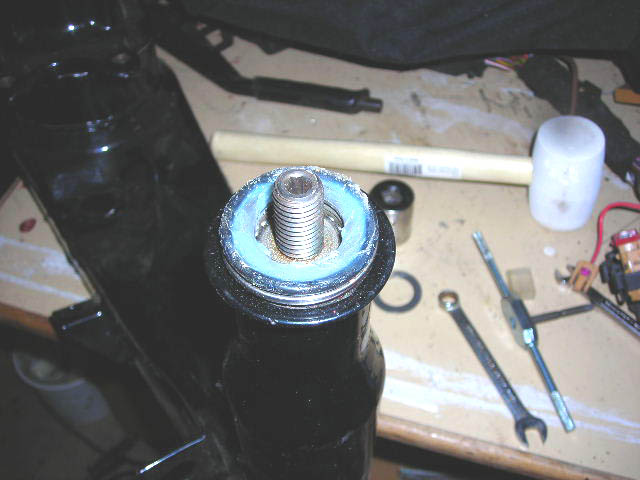 Install the end cap 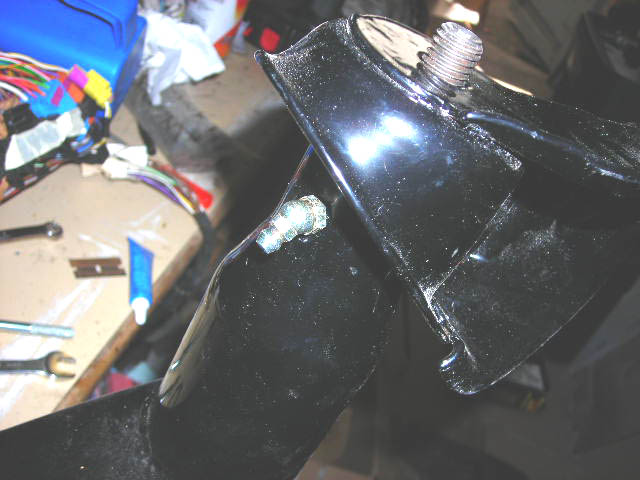 Check the shock mount bolt fit, you may need to hone the hole 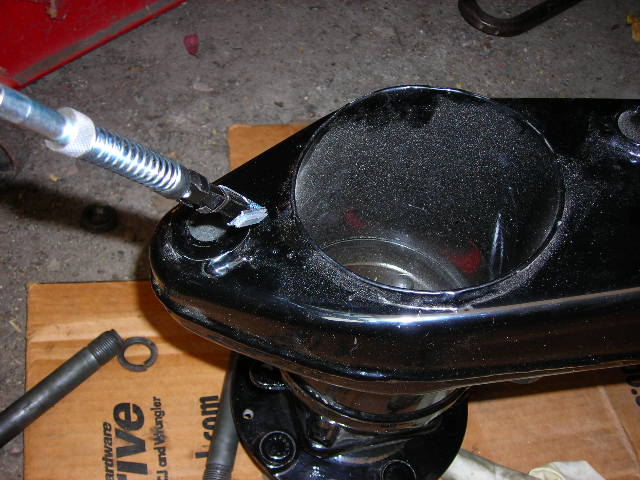 |
|
|
|
| neo914-6 |
Sep 7 2007, 03:13 PM
Post
#6
|
|
neo life Group: Members Posts: 5,086 Joined: 16-January 03 From: Willow Glen (San Jose) Member No.: 159 |
1. Once the arms and bearings are assembled, use the supplied hardened washers as a race for the thrust portion of the bearing. The number of washers will vary from car to car, try to minimize the side to side play as much as possible.
2. Install and tighten the outside nut to the outer pivot bracket that bolts to the chassis keeping the bolt plate level with the length of the arm, pictured. 3. Install one side of the assembled arm into the tab or ear on the body and install one of the 3 bolts on the pivot bracket. One them is for the hole in the shim. Install one of the other two on open slots in case you need to add more shims for camber adjustment. This holds the arm until you can get the nut installed on the ear side. Make sure to use the factory supplied washer on the outside of the inner tab. 4. Swing the control arm up in the rear and slide the shock mount bolt through the trailing arm hole and begin to tighten the nuts and bolts. 5. Use the measurements you recorded earlier to establish the same toe setting. 6. Torque: -Two Control arm bearing/control arm nuts to the stock settings @ 108 ft/lbs: -Three Control arm bearing/body 10 x 55 mm bolts @ 50 ft/lbs. -Tighten the shock bolt/nut (no specs?) 16. Recheck the bolt torque, and side to side play after run in. 6. Reinstall calipers, torque to 50 ft/lbs, bleed if hose was disconnected 7. Reinstall axles, torque bolts (see install threads) Remember to install new schnorr washers or Dr Evil's wire tie bolts 8. Reinstall rear swaybar joint if equipped 9. Install wheels, and torque wheel nuts to 94 ft/lbs or bolts to 108.5 ft/lbs. Tighten crosswise, and with ball surface lubricated with molybendum disulphide based grease. 10. Remove from jack stands, check alignment per methods below. Maintenance: 1. Remove, inspect, and regrease the needle bearings each year or two (YMMV) to protect your expensive precision upgrade. They were not fully designed to protect against dirt like the original vulcanize rubber joints. There are preventative measures like o-rings and RTV, large heat shrink tubing, a cut bicycle tube, or a planned rubber cap that is not available yet. When you remove the bearings feel for grit of sand and dirt. Clean with a good cleaner, air blast all the sand out, refresh with new grease. If you don't maintain these bearings, expect a two to three year life span from needle bearings in an exposed condition. 2. Check your rear alignment regularly. The force of wider than stock tires or sticky autocross tires can cause the rear end to get out of alignment more often. The three bolt friction joint was not designed for this excessive force. Some racers check and need to correct alignment after every autocross race. You can get it professionally aligned, purchase Smart Products "smart string" product for DIY, or make your own version. This will insure even tire wear. Here are some helpful links: Easy way to check for toe-in? Alignments done at home., Yes it is possible! DIY Alignment Rear Alignment, ... anybody have a tech article? Wheel Alignment, Procedures teener alginment, would you trust a porsche dealer ? Question about Toe Alignment Equipment., What do you use and how accurate? Alignment, where would you take your car? Low ri-der rides a little lower Rear alignment adjustments? DIY Alignment, what need? wheel alignment tricks? Pissed off: Alignment got screwed i believe, nned to talk to someone knowledgeable. Alignment, done ! next, installing front needle bearings. Here's Leo's install thread |
|
|
|
| Twystd1 |
Sep 7 2007, 04:08 PM
Post
#7
|
|
You don't want to know... really..... Group: Members Posts: 2,514 Joined: 12-September 04 From: Newport Beach, California Member No.: 2,743 |
This has to be one of the best articles I have ever seen on this subject.
Absolutely excellent. Keep it going. AND THANKS FOR YOUR TIME. Dam good show....... Carry on...... Clayton |
|
|
|
|
1 User(s) are reading this topic (1 Guests and 0 Anonymous Users)
0 Members:

|
Lo-Fi Version | Time is now: 6th May 2024 - 01:45 AM |
Invision Power Board
v9.1.4 © 2024 IPS, Inc.