|
|
|
Porsche, and the Porsche crest are registered trademarks of Dr. Ing. h.c. F. Porsche AG.
This site is not affiliated with Porsche in any way. Its only purpose is to provide an online forum for car enthusiasts. All other trademarks are property of their respective owners. |
|
|


| BravoHotel |
 Dec 16 2003, 11:09 AM Dec 16 2003, 11:09 AM
Post
#41
|
|
Member  Group: Members Posts: 153 Joined: 5-March 03 From: Columbus, MS Member No.: 399 |
I like the look (and ease of replacement) of the bolted-on GT flare. Does anyone have detailed (up-close) pics of this treatment? What size/number/type of screws or bolts were used.
Please post pics Thanks BH Attached image(s) 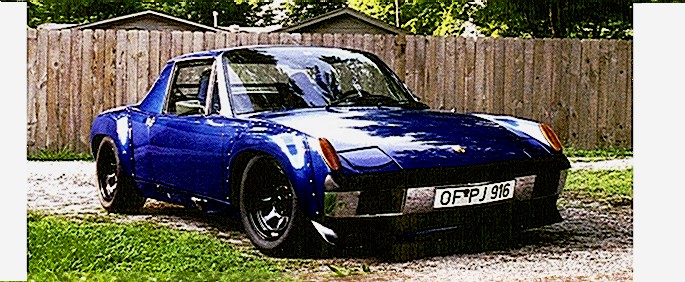
|
   |

 
|
Posts in this topic
 BravoHotel bolt-on flares Dec 16 2003, 11:09 AM
 BravoHotel BTW, that car :agree: belongs to Brett W.
Or how... Dec 16 2003, 11:10 AM Gint The white one is Scott Schroeder's car. He... Dec 16 2003, 11:15 AM BravoHotel Scott,
Can you give us details?
BH Dec 16 2003, 11:16 AM Ferg more pic's of scott's car here
http://gal... Dec 16 2003, 11:17 AM Randal I think most of what people refer to as “bolt on... Dec 16 2003, 12:28 PM john rogers I put riveted flares on my race car and learned se... Dec 16 2003, 12:52 PM BravoHotel bump....still lookin for pics Dec 16 2003, 08:38 PM Gint I'll email Scott and ask him to stop by here..... Dec 16 2003, 10:19 PM Scott Schroeder Hi All -
I unfortunately do not have pics on my of... Dec 17 2003, 11:12 AM Scott Schroeder Here is the tops - kind of a distant pic. More ton... Dec 17 2003, 11:14 AM BravoHotel
BravoHotel BTW, that car :agree: belongs to Brett W.
Or how... Dec 16 2003, 11:10 AM Gint The white one is Scott Schroeder's car. He... Dec 16 2003, 11:15 AM BravoHotel Scott,
Can you give us details?
BH Dec 16 2003, 11:16 AM Ferg more pic's of scott's car here
http://gal... Dec 16 2003, 11:17 AM Randal I think most of what people refer to as “bolt on... Dec 16 2003, 12:28 PM john rogers I put riveted flares on my race car and learned se... Dec 16 2003, 12:52 PM BravoHotel bump....still lookin for pics Dec 16 2003, 08:38 PM Gint I'll email Scott and ask him to stop by here..... Dec 16 2003, 10:19 PM Scott Schroeder Hi All -
I unfortunately do not have pics on my of... Dec 17 2003, 11:12 AM Scott Schroeder Here is the tops - kind of a distant pic. More ton... Dec 17 2003, 11:14 AM BravoHotel QUOTE
 r_towle
<!-- quoteo --><div class='quo... Apr 8 2013, 08:24 PM
r_towle
<!-- quoteo --><div class='quo... Apr 8 2013, 08:24 PM scotty b
<!-- quoteo --><div class='qu... Apr 8 2013, 09:03 PM bulitt
<!-- quoteo --><div class='quo... Apr 9 2014, 05:38 PM BravoHotel well, it sounds like w/ rennspd, you get what you ... Dec 17 2003, 03:20 PM Eric_Shea I think Mark's a little less expensive. I don... Dec 17 2003, 03:29 PM Brad Roberts Um.. I have yet to see a replica rocker that was c... Dec 18 2003, 03:00 AM joea9146 This might help
http://www.914world.com/bbs2/inde... Dec 18 2003, 10:31 AM Brandon12 Hey I just started a restoration for my father and... Jan 25 2013, 06:06 PM jsayre914 found a couple Jan 25 2013, 06:10 PM Woody I bought all of my glass from rennspeed. The front... Jan 25 2013, 06:35 PM Elliot Cannon I don't think it matters much who you buy fibe... Jan 25 2013, 07:59 PM Woody
I don't think it matters much who you buy fib... Jan 25 2013, 08:06 PM bulitt Just wanted to add a pic of Tony (cracker) car.
h... Apr 2 2013, 03:08 AM jdlmodelt Here's where we are so far. Apr 2 2013, 06:53 PM bulitt Nuther- Krieger's car
And Alex from Germany... Apr 2 2013, 09:24 PM Dasnowman This is a good thread!
http://www.914world.co... Apr 2 2013, 11:06 PM CG-914 :popcorn: Apr 3 2013, 12:44 AM bulitt Ok, so they are not bolt on...
http://www.914worl... Apr 8 2013, 04:32 PM Rand Bushwhackers are cool. Apr 8 2013, 09:05 PM Dasnowman
Bushwhackers are cool.
:rotfl: :rotfl: :rot... Apr 9 2013, 11:53 PM bulitt Bushwackers going on... :D
Scotty painted th... Apr 4 2014, 12:05 PM dlkawashima Mike Bellis
http://www.914world.com/bbs2/uploads/... Apr 4 2014, 02:05 PM Larmo63 I love the bolt/screw on look, especially with rea... Apr 4 2014, 07:05 PM The Metal Surgeon
Mike Bellis
[img]http://www.914world.com/bbs2/up... Apr 4 2014, 09:31 PM bulitt
Mike Bellis
[img]http://www.914world.com/bbs2/u... Apr 5 2014, 04:48 AM BKLA track day rivet flares - Rivets from Pegasus racin... Apr 8 2014, 05:57 PM iamchappy
track day rivet flares - Rivets from Pegasus raci... Apr 8 2014, 07:15 PM Larmo63 The flares do look good on some cars and bad on ot... Apr 8 2014, 07:09 PM Mike Bellis :)
Apr 8 2014, 09:17 PM Trekkor http://www.914world.com/bbs2/uploads_offsite/i944.... Apr 9 2014, 02:39 PM yeahmag Trekkor,
Who's flares did you install? Apr 9 2014, 03:17 PM Trekkor I don't know which flares they are. 7's an... Apr 9 2014, 06:29 PM 914werke @Chiz 914 Dec 1 2021, 09:10 PM tazz9924 I used 1/4-20 rivnuts and not pictured here some 1... Dec 1 2021, 11:44 PM waltonsm I used high strength adhesive tape and bonded stud... Dec 5 2021, 01:22 AM Shivers
I used high strength adhesive tape and bonded stu... Dec 5 2021, 02:13 AM waltonsm
[quote name='waltonsm' post='2964810' date='Dec 4... Dec 5 2021, 08:52 AM
scotty b
<!-- quoteo --><div class='qu... Apr 8 2013, 09:03 PM bulitt
<!-- quoteo --><div class='quo... Apr 9 2014, 05:38 PM BravoHotel well, it sounds like w/ rennspd, you get what you ... Dec 17 2003, 03:20 PM Eric_Shea I think Mark's a little less expensive. I don... Dec 17 2003, 03:29 PM Brad Roberts Um.. I have yet to see a replica rocker that was c... Dec 18 2003, 03:00 AM joea9146 This might help
http://www.914world.com/bbs2/inde... Dec 18 2003, 10:31 AM Brandon12 Hey I just started a restoration for my father and... Jan 25 2013, 06:06 PM jsayre914 found a couple Jan 25 2013, 06:10 PM Woody I bought all of my glass from rennspeed. The front... Jan 25 2013, 06:35 PM Elliot Cannon I don't think it matters much who you buy fibe... Jan 25 2013, 07:59 PM Woody
I don't think it matters much who you buy fib... Jan 25 2013, 08:06 PM bulitt Just wanted to add a pic of Tony (cracker) car.
h... Apr 2 2013, 03:08 AM jdlmodelt Here's where we are so far. Apr 2 2013, 06:53 PM bulitt Nuther- Krieger's car
And Alex from Germany... Apr 2 2013, 09:24 PM Dasnowman This is a good thread!
http://www.914world.co... Apr 2 2013, 11:06 PM CG-914 :popcorn: Apr 3 2013, 12:44 AM bulitt Ok, so they are not bolt on...
http://www.914worl... Apr 8 2013, 04:32 PM Rand Bushwhackers are cool. Apr 8 2013, 09:05 PM Dasnowman
Bushwhackers are cool.
:rotfl: :rotfl: :rot... Apr 9 2013, 11:53 PM bulitt Bushwackers going on... :D
Scotty painted th... Apr 4 2014, 12:05 PM dlkawashima Mike Bellis
http://www.914world.com/bbs2/uploads/... Apr 4 2014, 02:05 PM Larmo63 I love the bolt/screw on look, especially with rea... Apr 4 2014, 07:05 PM The Metal Surgeon
Mike Bellis
[img]http://www.914world.com/bbs2/up... Apr 4 2014, 09:31 PM bulitt
Mike Bellis
[img]http://www.914world.com/bbs2/u... Apr 5 2014, 04:48 AM BKLA track day rivet flares - Rivets from Pegasus racin... Apr 8 2014, 05:57 PM iamchappy
track day rivet flares - Rivets from Pegasus raci... Apr 8 2014, 07:15 PM Larmo63 The flares do look good on some cars and bad on ot... Apr 8 2014, 07:09 PM Mike Bellis :)
Apr 8 2014, 09:17 PM Trekkor http://www.914world.com/bbs2/uploads_offsite/i944.... Apr 9 2014, 02:39 PM yeahmag Trekkor,
Who's flares did you install? Apr 9 2014, 03:17 PM Trekkor I don't know which flares they are. 7's an... Apr 9 2014, 06:29 PM 914werke @Chiz 914 Dec 1 2021, 09:10 PM tazz9924 I used 1/4-20 rivnuts and not pictured here some 1... Dec 1 2021, 11:44 PM waltonsm I used high strength adhesive tape and bonded stud... Dec 5 2021, 01:22 AM Shivers
I used high strength adhesive tape and bonded stu... Dec 5 2021, 02:13 AM waltonsm
[quote name='waltonsm' post='2964810' date='Dec 4... Dec 5 2021, 08:52 AM  |
1 User(s) are reading this topic (1 Guests and 0 Anonymous Users)
0 Members:

|
Lo-Fi Version | Time is now: 2nd April 2026 - 01:01 PM |
Invision Power Board
v9.1.4 © 2026 IPS, Inc.