|
|
|
Porsche, and the Porsche crest are registered trademarks of Dr. Ing. h.c. F. Porsche AG.
This site is not affiliated with Porsche in any way. Its only purpose is to provide an online forum for car enthusiasts. All other trademarks are property of their respective owners. |
|
|

  |

| sean_v8_914 |
 Mar 23 2008, 10:27 AM Mar 23 2008, 10:27 AM
Post
#221
|
|
Chingon 601  Group: Members Posts: 4,011 Joined: 1-February 05 From: San Diego Member No.: 3,541 |
I was also thinking about fastening the battery tray and support with screws for future removal for cleaning.
|
   |

 
|
| Jeff Hail |
Mar 23 2008, 01:35 PM
Post
#222
|
|
Senior Member Group: Members Posts: 1,141 Joined: 3-May 07 From: LA/ CA Member No.: 7,712 |
Get in there with a course wire wheel to remove any loose scale and coatings.
Depending on what you find underneath you may need to do some rust repair. With the amount of pitting I see in the photo I would media blast the area, even some light blasting with sand will get rid of the rust . Refrain from grinding as that will remove/ thin the metal. The white undercoating is factory primer. You can featheredge this back until you find clean metal and work on the localized area. A new product has come to the US market about a year ago. 2k Epoxy primer available in a rattle can perfect for small spot repairs such as yours. http://www.autobodytoolmart.com/showproduc...productid=14526 http://carpaint.blogspot.com/2006/03/spray-max-primer.html Battery tray fastened with screws? Bad idea. 25-30 pounds bouncing around will tear it loose quickly. At least weld the lower bracket to the rail. Most of the battery weight is supported here. |
|
|
|
| Jeff Hail |
Mar 23 2008, 07:01 PM
Post
#223
|
|
Senior Member Group: Members Posts: 1,141 Joined: 3-May 07 From: LA/ CA Member No.: 7,712 |
Installed the rt quarter panel that I had to cut off for the wheelhouse.
Used the butt-welding clamps to secure and align the panel. Making a series of tack weld's while stopping to cool the panel with compressed air. More tacks, let cool, and many, many more tacks, let cool etc etc etc until one solid weld is complete all the way across the gap. Attached image(s) 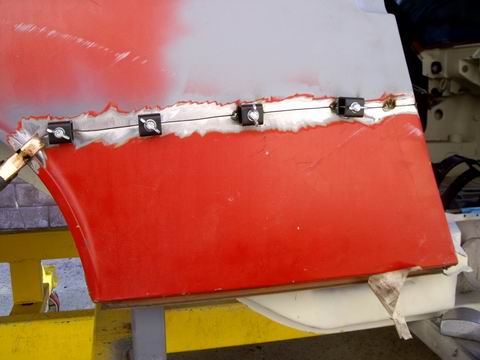  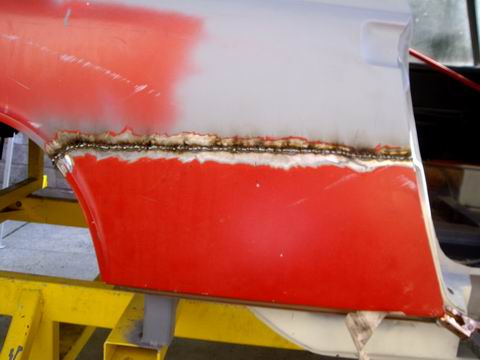
|
|
|
|
| Jeff Hail |
Mar 23 2008, 07:07 PM
Post
#224
|
|
Senior Member Group: Members Posts: 1,141 Joined: 3-May 07 From: LA/ CA Member No.: 7,712 |
When butt-welding along with good weld penetration the key is the grinding and finishing process.
I begin with a spot weld grinding disc to take the crown of the weld down to just above panel height. Move slow and let the panel cool. A grinder will warp thin sheetmetal just like overheating while welding. Then I use a 3 inch 36 grit disc on a angle die grinder to take the crown down a little more. Then I switch to a 6 inch flat flap disc and follow the crown back and forth eliminating any high spots. Attached image(s)  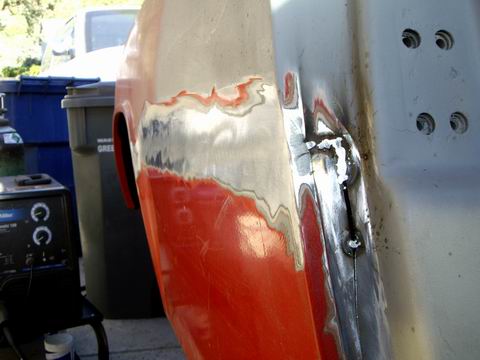 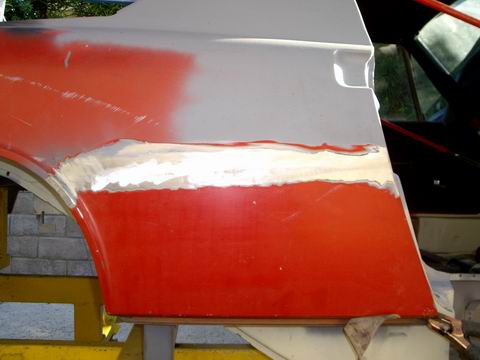 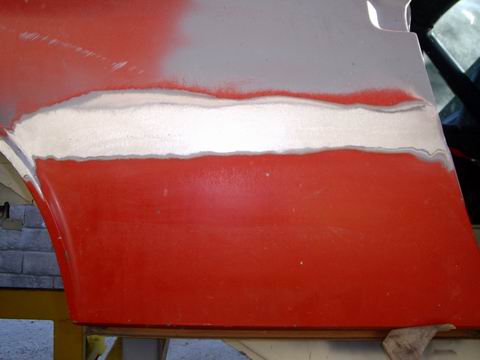
|
|
|
|
| Jeff Hail |
Mar 23 2008, 07:14 PM
Post
#225
|
|
Senior Member Group: Members Posts: 1,141 Joined: 3-May 07 From: LA/ CA Member No.: 7,712 |
At the end I then use a different type of flap disc on a straight die grinder. I follow just the butt weld crown. This will level the weld and not dig into the surrounding metal. This type of disc is like 250 grit emery cloth.
Then I take a dual action sander with 40 grit and enlarge the area of finishing. The DA really smooths the weld and surrounding area well. Switch to 80 grit paper and then 120. I then knocked down the inside of the qtr panel with 80 grit 3 inch discs and then a squirt of primer. I will let the primer dry and block sand the the panel Tuesday. No bondo. Will see after block sanding. Most likely just a skim coat of metal glaze is all it will require if that. Still need to finish the lock pillar joint but I had plans and have to run. Attached image(s) 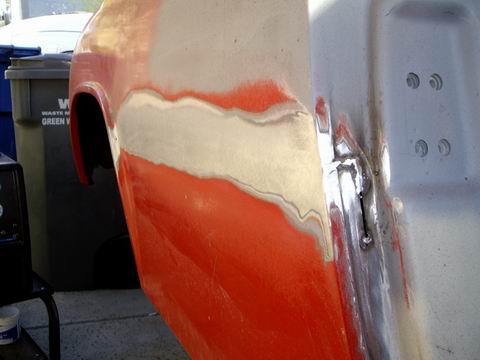  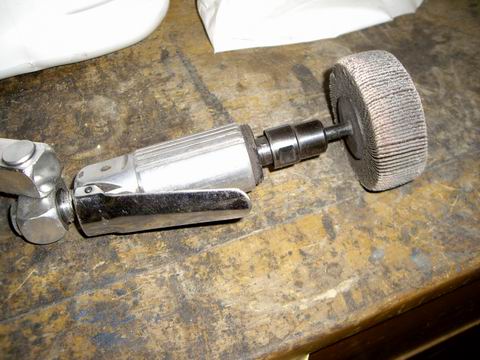
|
|
|
|
| sean_v8_914 |
Mar 23 2008, 09:08 PM
Post
#226
|
|
Chingon 601 Group: Members Posts: 4,011 Joined: 1-February 05 From: San Diego Member No.: 3,541 |
could you send me a close up of your butt weld? ...or the high res version of that photo
|
|
|
|
| type11969 |
Mar 24 2008, 05:39 AM
Post
#227
|
|
Senior Member Group: Members Posts: 1,231 Joined: 2-December 03 From: Collingswood, NJ Member No.: 1,410 Region Association: North East States |
Jeff-
I think you should take an extended vacation in Philadelphia. Bring your tools. (IMG:style_emoticons/default/biggrin.gif) -Chris |
|
|
|
| Wes V |
Mar 24 2008, 08:43 AM
Post
#228
|
|
Member Group: Members Posts: 482 Joined: 11-October 07 From: Los angeles Member No.: 8,211 |
Dang Jeff, I'm confused about the sequence on how you are doing this!!
In your last entry, you are welding the fender back in place. And yet it doesn't look like you have welded the outer suspension bracket back on!!! I know (from reading this string a lot) that you are planning on installing the Tangerine Racing (CFR) suspension relocation set-up, but from what I've been able to figure out, you will need that fender partially removed to weld everything in place! (the gusset plates in particular) So, did you already install that and didn't say anything or what? Are you planning on installing metal flares and feel confident that the opening for the flare (prior to welding in place) will allow you to weld in the suspension? Wes V |
|
|
|
| Jeff Hail |
Mar 24 2008, 08:15 PM
Post
#229
|
|
Senior Member Group: Members Posts: 1,141 Joined: 3-May 07 From: LA/ CA Member No.: 7,712 |
QUOTE(sean_v8_914 @ Mar 23 2008, 08:08 PM)  could you send me a close up of your butt weld? ...or the high res version of that photo Lets see how large a file the site will let me post. I always reduce them out of courtesy to the site owner. Someone is paying for web space. Attached thumbnail(s) 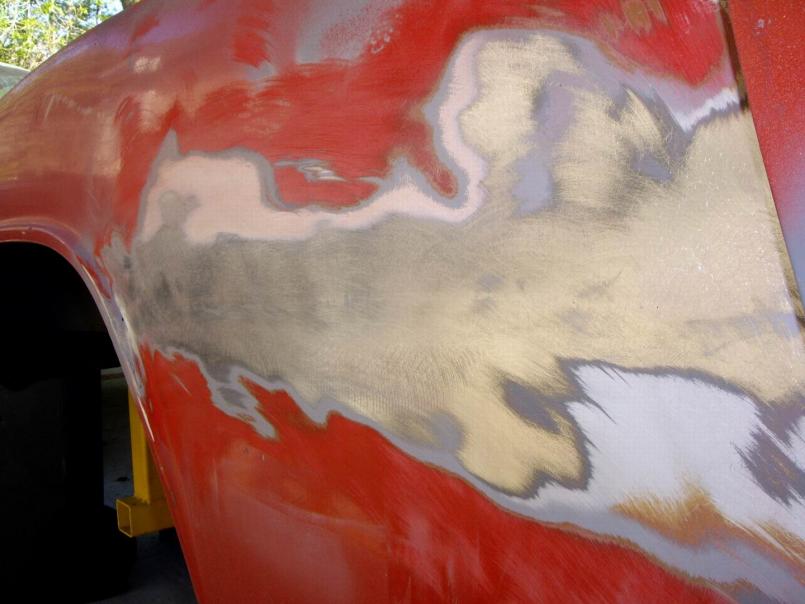
|
|
|
|
| Jeff Hail |
Mar 24 2008, 09:04 PM
Post
#230
|
|
Senior Member Group: Members Posts: 1,141 Joined: 3-May 07 From: LA/ CA Member No.: 7,712 |
I started blocking the primer today and ran into 2 prior repairs above the weld line.
Pink filler and yellow filler. Get out the "Mud Hog". Oh well it's only a little primer wasted. The pink filler is below the color coat (copper) and yellow on top of old color where it shouldnt be. Hard to featheredge when it is like that. 6 coats of paint and primer I counted not including filler. The old filler is very thin and doesnt cause any concern. The red does as it is acrylic enamel or possibly Nason synthetic enamel and it has to go away because past experience dictates it will lift or react with solvent. It will get stripped even know the substrates are in suprisingly good condition. As far as the butt weld line there are 2 small low spots (below the pink filler) and 1 more at the lock pillar that can be bumped out with a hammer and dolly or skim coated. I have a set of steel flares and most likely will go that route although I have been talking to a fiberglass supplier that is willing to do a wide street weight version of belt line qtr panels with a reinforcement in the debris impact area. We will see? Wes, Lots of room under the wheelwell to install the pickups. All I need is a 3 inch cutoff wheel, an airsaw and a angle grinder. Attached image(s) 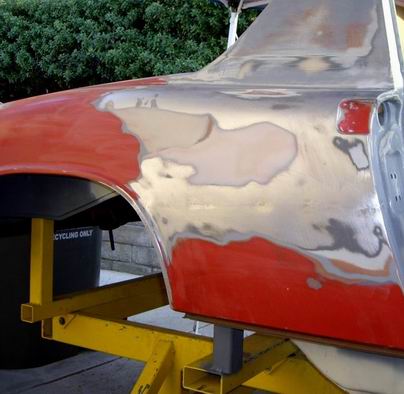
|
|
|
|
| Jeff Hail |
Mar 24 2008, 09:11 PM
Post
#231
|
|
Senior Member Group: Members Posts: 1,141 Joined: 3-May 07 From: LA/ CA Member No.: 7,712 |
As close up as I can get of the butt weld line blended in
Attached thumbnail(s) 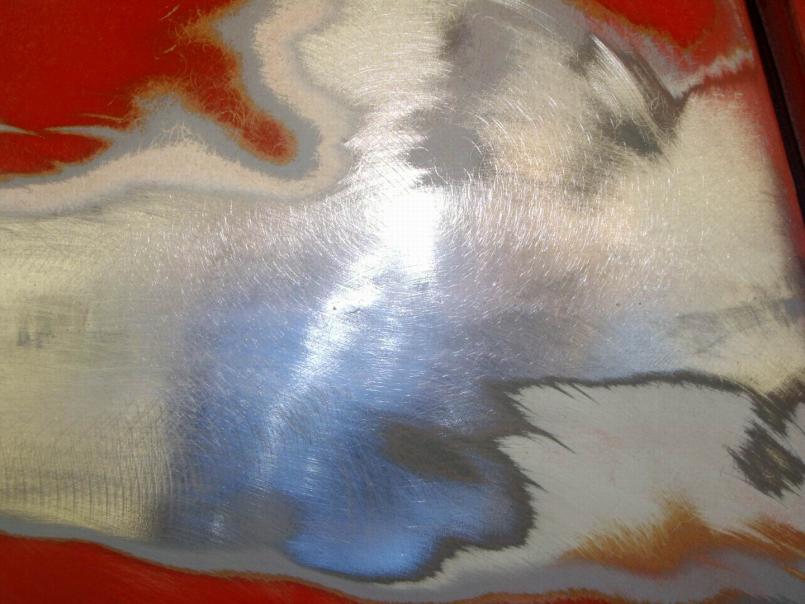
|
|
|
|
| 1970 Neun vierzehn |
Mar 24 2008, 09:22 PM
Post
#232
|
|
Advanced Member Group: Members Posts: 3,199 Joined: 16-March 06 From: cincinnati, ohio Member No.: 5,727 |
The title of this thread should read......
Carrozzeria Hail High accolades are in order here, not only for your craftsmanship, but also for selecting a 914 to be on the receiving end of your obvious skill and talent. (IMG:style_emoticons/default/clap56.gif) (IMG:style_emoticons/default/pray.gif) Paul |
|
|
|
| Jeff Hail |
Apr 10 2008, 09:22 PM
Post
#233
|
|
Senior Member Group: Members Posts: 1,141 Joined: 3-May 07 From: LA/ CA Member No.: 7,712 |
Few days off from "work"........time for play
Fitted the heater tubes. I repaired the passenger side muffler. Was a bit chewed up and falling apart on the rear end of the can . Some resin and mat should keep it together. Sprayed with high temp paint. Never to be seen again. Have not decided if I am going to run heat or not....better safe than sorry. Welded in the Heater-J tube. Cannot install this later with the firewall on. I tried everyway possible but I really want to get the rocker done and closed up. Decided in the end it would be easier to cut a slit on the firewall and bend it back around the tube. One important thing. The heater tube exit hole on the replacement inner long does not come flared. This is a load bearing member and flaring the hole is vital to safety. The hole needs to be radiused and the edges flared. I do not have a 2-1/2 inch punch flare so I had to get creative. Ever wonder why aircraft windows are not perfect squares? If they had squared corners they will fatigue and crack. If you round them and flare (chamfer) the opening they will simply flex. Besides the flare adds strength where the metal has been removed. Attached image(s) 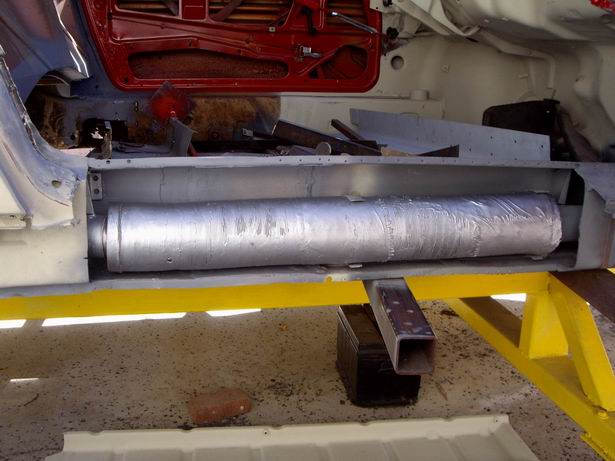 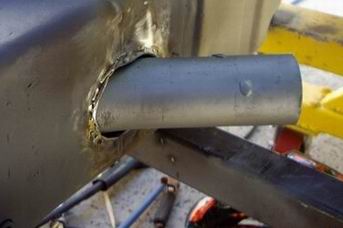
|
|
|
|
| Jeff Hail |
Apr 10 2008, 09:31 PM
Post
#234
|
|
Senior Member Group: Members Posts: 1,141 Joined: 3-May 07 From: LA/ CA Member No.: 7,712 |
Mocked up the firewall and lower reinforcements again (actually before I welded the heater -J tube in). Pays to recheck fit as you go. Small adjustments are easier then big ones that aren't expected.
Clutch and throttle cable conduits lined up perfect. These will be cut to proper length when the time comes. Attached image(s)  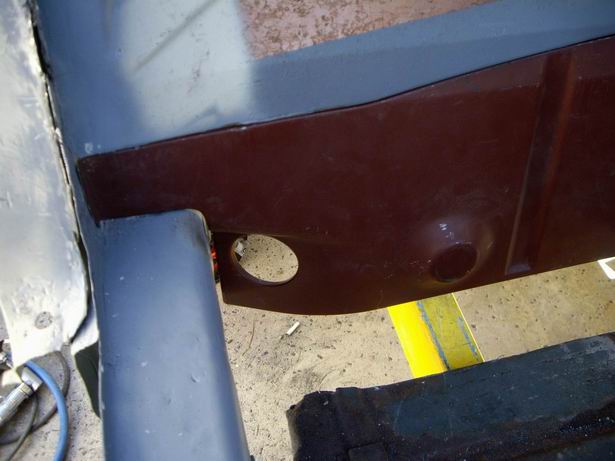 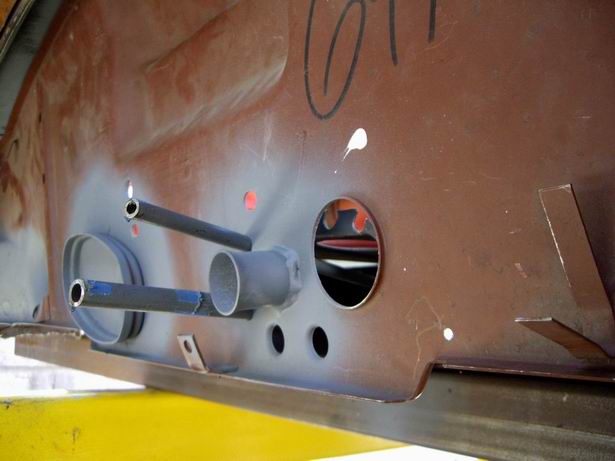 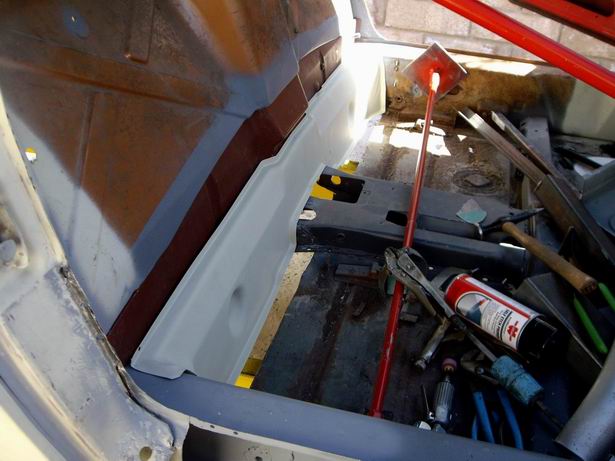
|
|
|
|
| Jeff Hail |
Apr 10 2008, 09:49 PM
Post
#235
|
|
Senior Member Group: Members Posts: 1,141 Joined: 3-May 07 From: LA/ CA Member No.: 7,712 |
Cut and trimmed the new outer rocker panel to fit (I call the outer bolt on part a rocker molding).
At the rear where it fits the wheelhouse was tight so I had to bust a few welds top and bottom to get it to slide in all the way. It was hitting the inner reinforcement. Tried shoehorning it with a body spoon to persuade it but it wasn't moving back where it needed to be. Added a backer plate at the front which will provide a clean butt weld and something to burn into. The backer is a piece of the new part that was trimmed off. Final fit and trim..........and ran out of daylight. Tomorrow I will punch all the holes and get this piece welded up..... Attached image(s) 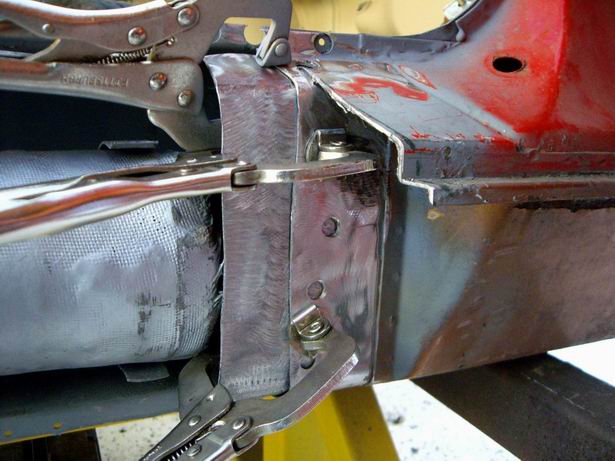 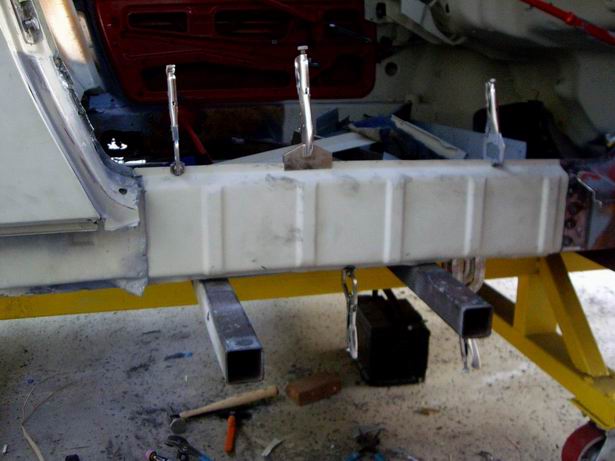 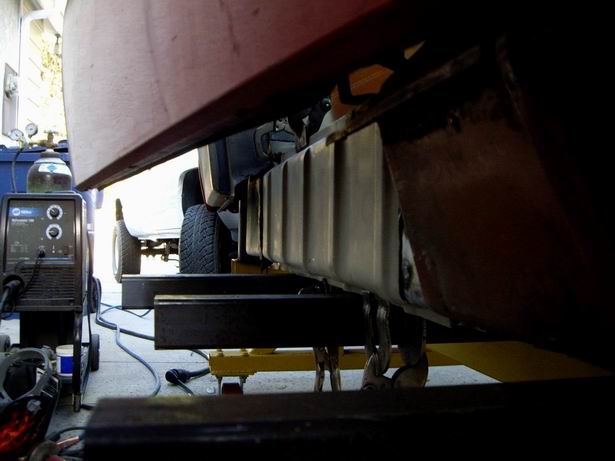
|
|
|
|
| craig downs |
Apr 11 2008, 12:29 AM
Post
#236
|
|
Senior Member Group: Members Posts: 770 Joined: 25-November 05 From: mira loma ca. Member No.: 5,189 Region Association: Southern California |
Its just incredible what you have done to save this car. Anybody else would have just cut it up.
|
|
|
|
| Jeff Hail |
Apr 11 2008, 01:57 AM
Post
#237
|
|
Senior Member Group: Members Posts: 1,141 Joined: 3-May 07 From: LA/ CA Member No.: 7,712 |
QUOTE(craig downs @ Apr 10 2008, 11:29 PM) Its just incredible what you have done to save this car. Anybody else would have just cut it up. All this because an Exige S pissed me off and a friend said take the 914, its free! |
|
|
|
| tdgray |
Apr 11 2008, 08:39 AM
Post
#238
|
|
Thank God Nemo is not here to see this Group: Members Posts: 9,706 Joined: 5-August 03 From: Akron, OH Member No.: 984 Region Association: None |
Great Job Jeff.... keep it up.
|
|
|
|
| KELTY360 |
Apr 11 2008, 10:30 AM
Post
#239
|
|
914 Neferati Group: Members Posts: 5,190 Joined: 31-December 05 From: Pt. Townsend, WA Member No.: 5,344 Region Association: Pacific Northwest |
QUOTE(craig downs @ Apr 10 2008, 11:29 PM) Its just incredible what you have done to save this car. Anybody else would have just cut it up. Well actually, he has cut it up......and now he's putting it back together. (IMG:style_emoticons/default/sawzall-smiley.gif) (IMG:style_emoticons/default/welder.gif) (IMG:style_emoticons/default/beer.gif) Amazing work Jeff. |
|
|
|
| Jeff Hail |
Apr 11 2008, 09:07 PM
Post
#240
|
|
Senior Member Group: Members Posts: 1,141 Joined: 3-May 07 From: LA/ CA Member No.: 7,712 |
QUOTE(tdgray @ Apr 11 2008, 07:39 AM) Great Job Jeff.... keep it up. Todd, You made me laugh my ass off with: "ass-hat (adj)- One whose head is so far up their rear end it could pass for a hat; used to describe a person who is stubborn, cruel, or otherwise unpleasant to be around". Thats a great one! Thanks |
|
|
|
|
2 User(s) are reading this topic (2 Guests and 0 Anonymous Users)
0 Members:

|
Lo-Fi Version | Time is now: 4th July 2026 - 06:07 AM |
Invision Power Board
v9.1.4 © 2026 IPS, Inc.