|
|
|
Porsche, and the Porsche crest are registered trademarks of Dr. Ing. h.c. F. Porsche AG.
This site is not affiliated with Porsche in any way. Its only purpose is to provide an online forum for car enthusiasts. All other trademarks are property of their respective owners. |
|
|

  |

| Jeff Hail |
 Jan 1 2009, 02:59 AM Jan 1 2009, 02:59 AM
Post
#381
|
|
Senior Member  Group: Members Posts: 1,141 Joined: 3-May 07 From: LA/ CA Member No.: 7,712 |
A few posts ago (many- somewhere on the site). I provided a glimpse on a center pull/ tunnel mounted E Brake using a 993 E brake assembly. A few reasons......get rid of the rinky dink left side E Brake and improve the system in the process. Using two right side 914 cables of equal length and relocating it to the tunnel. Full adjustment at the lever and cables from inside the car. Here you go completed product. No modifications to the cables needed. Yup Shea....freak of nature. Dr. FP would be proud! Quote:Sarah Conner from the movie Terminator. "Men like you thought it up. You think you're so creative. You don't know what it's like to really create something". Quote: Jeff Hail "Sarah be quiet- you are annoying me. Go to your room " Happy freak'in New Year!!!!!!!!!!!!!!!!!!!!!!!!!!!!!!!!!!!![size=3] Attached image(s) 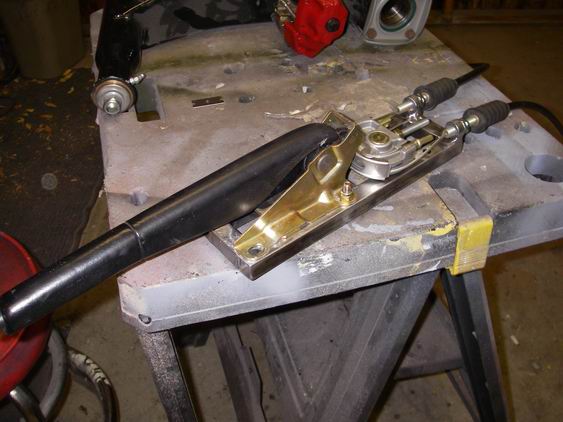 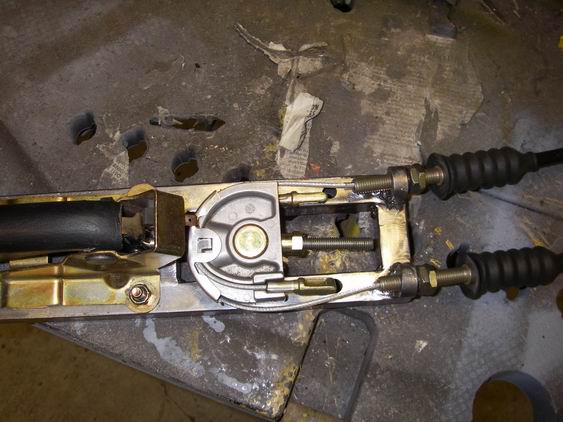 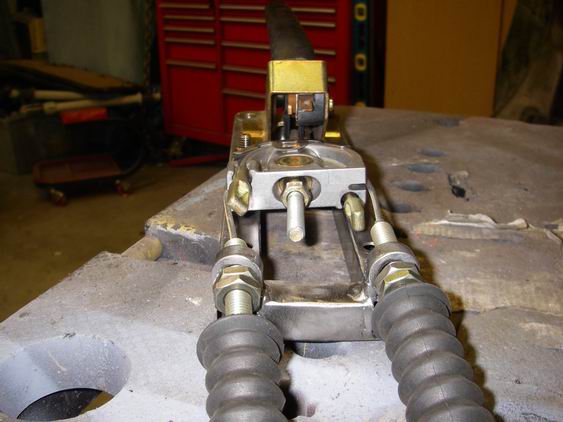
|
   |

 
|
| Jeff Hail |
Jan 2 2009, 12:36 PM
Post
#382
|
|
Senior Member Group: Members Posts: 1,141 Joined: 3-May 07 From: LA/ CA Member No.: 7,712 |
Front floor officially done
Cut out the area that had some rust for the access cover and fabbed a square piece to insert. Attached image(s) 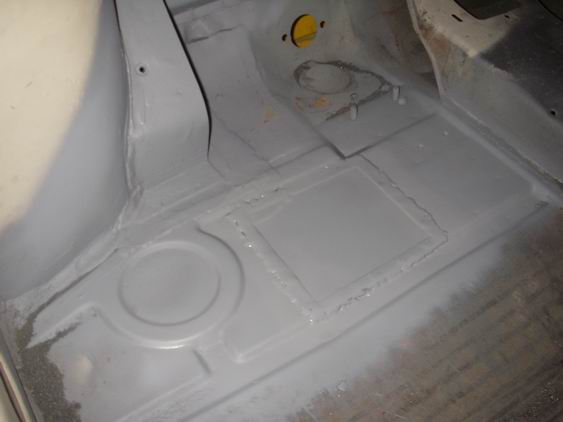
|
|
|
|
| Eric_Shea |
Jan 2 2009, 02:47 PM
Post
#383
|
|
PMB Performance Group: Admin Posts: 19,304 Joined: 3-September 03 From: Salt Lake City, UT Member No.: 1,110 Region Association: Rocky Mountains |
|
|
|
|
| Jeff Hail |
Jan 11 2009, 07:21 PM
Post
#384
|
|
Senior Member Group: Members Posts: 1,141 Joined: 3-May 07 From: LA/ CA Member No.: 7,712 |
Final coat of epoxy primer on the front floor/ pedal box. Nice and pretty.
........and yes that is a dent in the floor just to the left of the cut in the trans tunnel. Didnt notice it until after I primed it. It will easily be corrected with a piece of 4x4 and a floor jack. Few hits with a rubber mallet to raise the low area. Attached image(s) 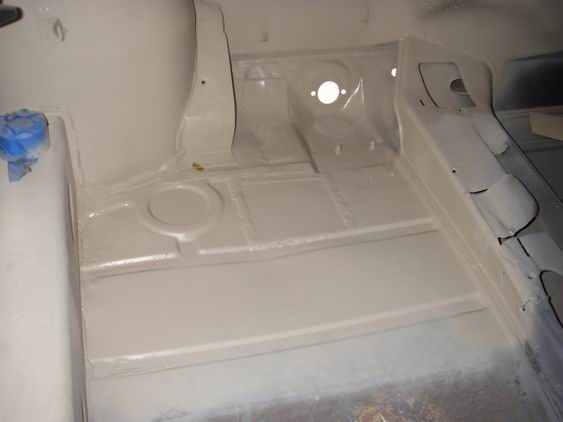
|
|
|
|
| Jeff Hail |
Jan 11 2009, 07:24 PM
Post
#385
|
|
Senior Member Group: Members Posts: 1,141 Joined: 3-May 07 From: LA/ CA Member No.: 7,712 |
The left side cowl is as expected. Evaluate and start cutting out the bad metal.
Attached image(s) 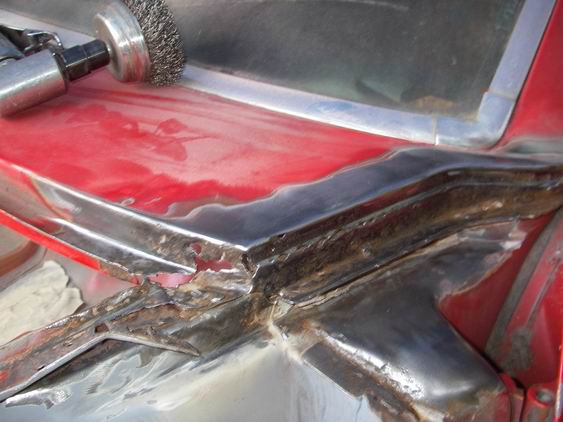 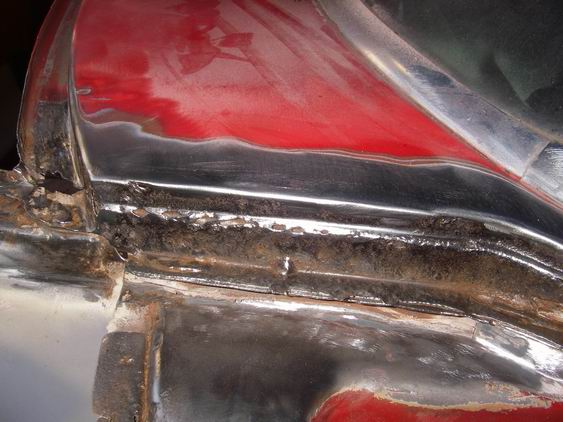 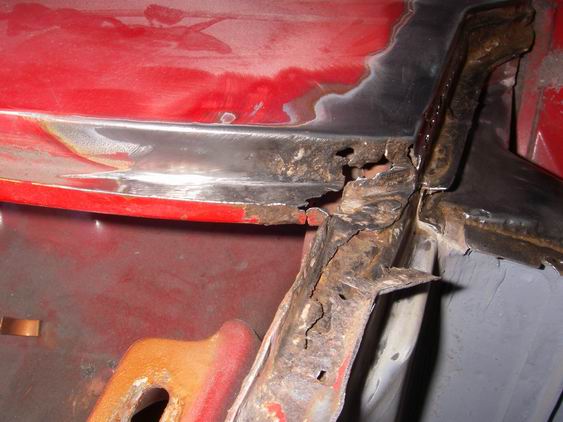 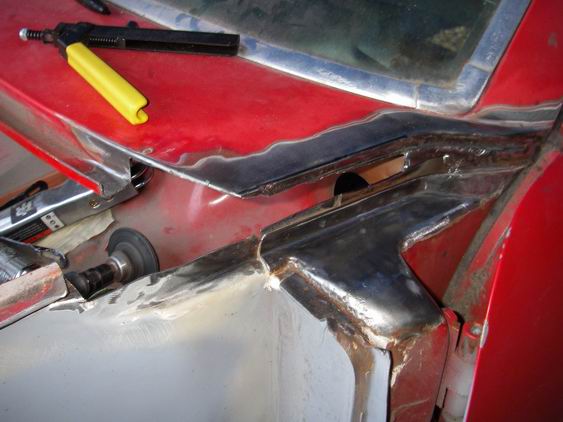 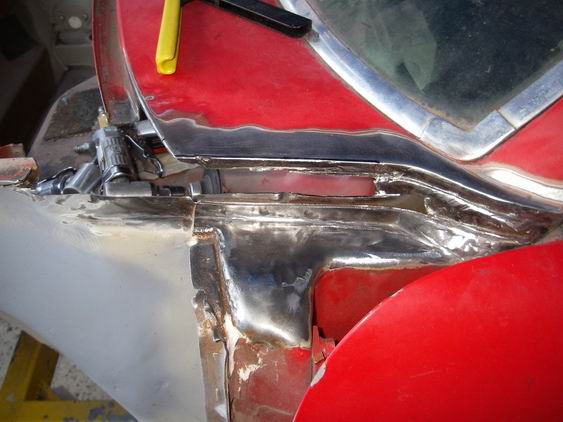
|
|
|
|
| Jeff Hail |
Jan 11 2009, 07:28 PM
Post
#386
|
|
Senior Member Group: Members Posts: 1,141 Joined: 3-May 07 From: LA/ CA Member No.: 7,712 |
Made a backer to go behind and underneath the cowl. Three reasons: First to set the cowl height to the hood. Second with all the heat it will minimize distortion during welding. Third I can get some heat in this area without burn through (cowl top is thin).
Getting dark. Til next time! Attached image(s) 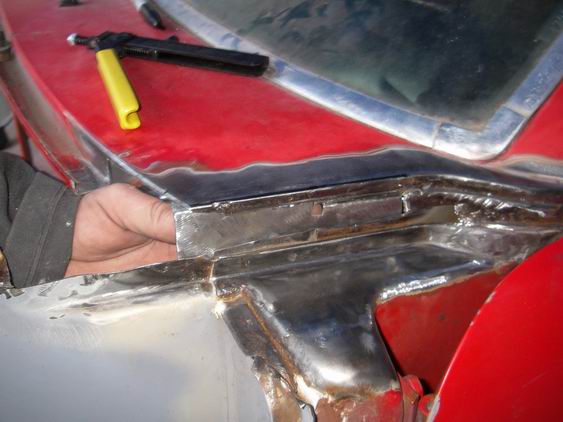 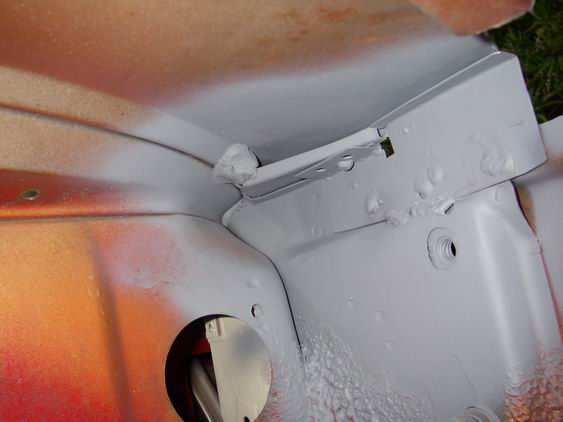
|
|
|
|
| Jeff Hail |
Jan 11 2009, 09:06 PM
Post
#387
|
|
Senior Member Group: Members Posts: 1,141 Joined: 3-May 07 From: LA/ CA Member No.: 7,712 |
A good friend who happens to be a full time welder asked me to design a new business card and logo for him. He's having a mid life crisis as he just turned 50 years old.
His request went something like this "it has to have fire and a skull since that's been my trademark for twenty five years. It needs to make a bold statement when I am on site and EVERYONE needs to know it's me. The rest I will leave to your imagination Jeff" Hum? My imagination? A big burly guy who's into fire and skulls, Harleys, huge BBQ's and tat's wants to make a statement because you are having a mid-life crisis. This is you pal! Attached image(s) 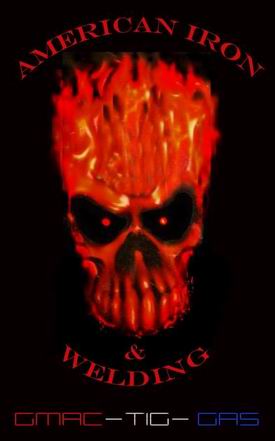
|
|
|
|
| heavydriver |
Jan 15 2009, 05:02 PM
Post
#388
|
|
Member Group: Members Posts: 158 Joined: 7-August 04 From: Orlando, Fl. Member No.: 2,470 |
If you were to replace the firewalls as well as the floor what would you do first ?
Specifically structural or ease of work considerations. Any helpful advise would be appreciated (IMG:style_emoticons/default/driving.gif) |
|
|
|
| Jeff Hail |
Jan 16 2009, 09:04 PM
Post
#389
|
|
Senior Member Group: Members Posts: 1,141 Joined: 3-May 07 From: LA/ CA Member No.: 7,712 |
QUOTE(heavydriver @ Jan 15 2009, 03:02 PM)  If you were to replace the firewalls as well as the floor what would you do first ? Specifically structural or ease of work considerations. Any helpful advise would be appreciated (IMG:style_emoticons/default/driving.gif) Good question. It all depends on how the car (any car) is constructed. If I was just replacing a floor pan and a lower firewall it would be fairly simple on a 914. Remove damaged/ rusted panels and then one critical issue comes up.....The floor has to be correctly aligned to the lower firewall at welding time. Even more critical if you are installing a six mount. I would tack the lower firewall to the upper firewall and let it just swing (leaving the sides and lower loose). I would then fit the floor pan/ cut to length/ tack at the forward floor seam (lap/ few plug welds to secure). Add a few plug welds to the sides for position only. Check everything for fit and then plug the lower firewall to the floor. I would then chase the perimeter with the remaining plug welds. Finally returning to the floor seam section. I would plug and fillet weld the seam overlap completely (both sides). One hint that a few people forget when sectioning any lower panels (floor's especially), trunks etc ALWAYS postion the forward panel below the rear panel section. The reason for this is two fold. You dont want a leading edge facing forward ever. This will allow road splash/ debris to to stream past the bottom edge of the joint and not strike the joint head on. If you don't follow this rule the joint will rust/ corode due to being blasted by what ever impacts it. Second just picture in you mind a leading edge hitting something (example:high centering a low car in a driveway or running over an object at speed). The joint can be easily torn wide open. I recall years ago IMSA would not pass a car in tech inspection if they saw a floor that had been sectioned with the rear panel leading edge exposed underneath. In the collision repair industry its called blaphemous butchery. On with the fun! Attached image(s) 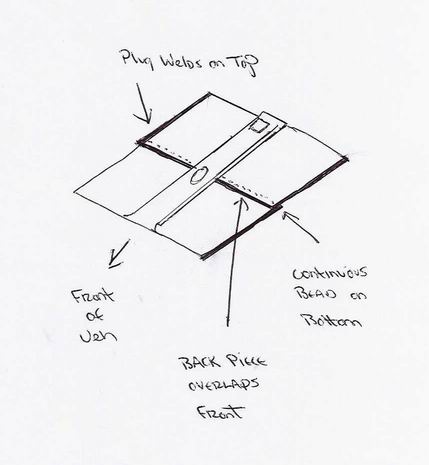
|
|
|
|
| heavydriver |
Jan 17 2009, 07:25 AM
Post
#390
|
|
Member Group: Members Posts: 158 Joined: 7-August 04 From: Orlando, Fl. Member No.: 2,470 |
Thanks for the response. Based on what I have seen being done by those with more skills I will do the following......
Put her up on a jig (I will build one like yours) and fix the hell hole first then the firewalls followed by the floor. Whew, is that a good plan or should I punt ? |
|
|
|
| Cairo94507 |
Jan 17 2009, 08:34 AM
Post
#391
|
|
Michael Group: Members Posts: 10,706 Joined: 1-November 08 From: Auburn, CA Member No.: 9,712 Region Association: Northern California |
I am absolutely in awe of your skills; you are the Holy Grail of metal work. As I was reading your thread and watching the progress all I could think of was how lucky is that 914 to have this kind of skillful repair work. Love the thread; can't wait to see more. (IMG:style_emoticons/default/popcorn[1].gif)
|
|
|
|
| Jeff Hail |
Jan 31 2009, 07:06 PM
Post
#392
|
|
Senior Member Group: Members Posts: 1,141 Joined: 3-May 07 From: LA/ CA Member No.: 7,712 |
The tub is off the front jig. Prepped, primed and a thin coat of SKS in the crossmember tunnel and left front wheelhouse. It will get primed again later.
Attached image(s) 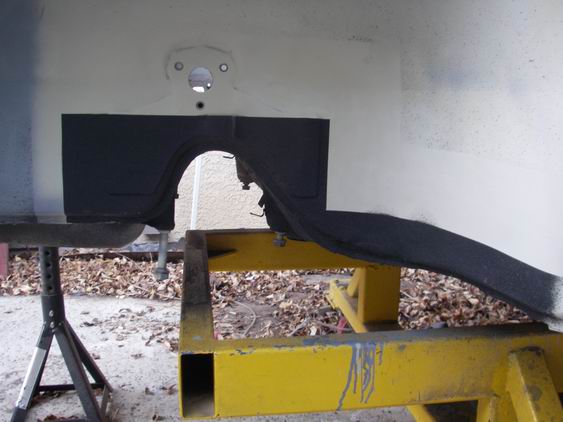
|
|
|
|
| Jeff Hail |
Jan 31 2009, 07:10 PM
Post
#393
|
|
Senior Member Group: Members Posts: 1,141 Joined: 3-May 07 From: LA/ CA Member No.: 7,712 |
Back to the driver side cowl. Fabbed all the little pieces. Only 2 actually.....and burned them in (the gutter and the side piece) Rough metal work done.
Attached image(s) 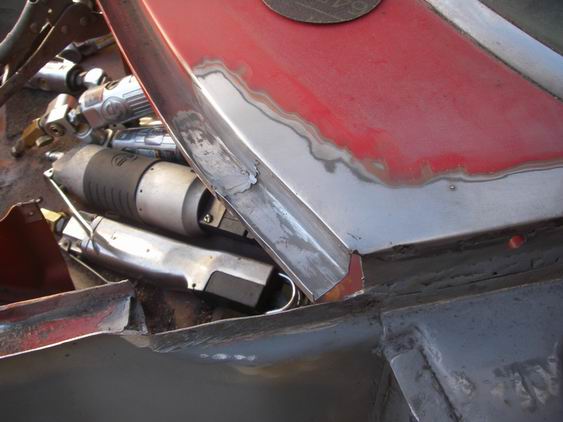 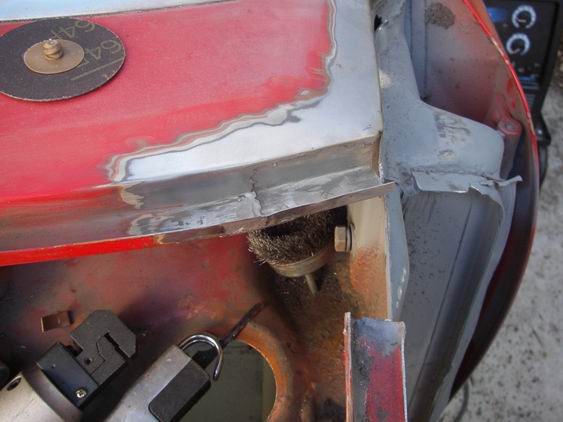 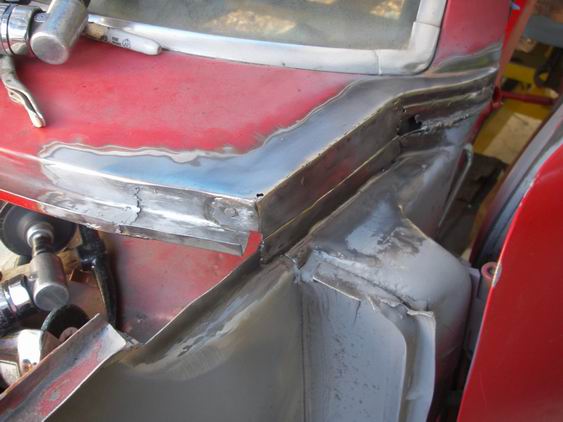
|
|
|
|
| Jeff Hail |
Jan 31 2009, 07:12 PM
Post
#394
|
|
Senior Member Group: Members Posts: 1,141 Joined: 3-May 07 From: LA/ CA Member No.: 7,712 |
I removed what was left of the fender gutter at the apron.
Folded down the tab on the cowl gutter to make a smooth transition and set the hieght. Fabbed piece #3 to close the apron to the cowl gutter. More burning. Attached image(s) 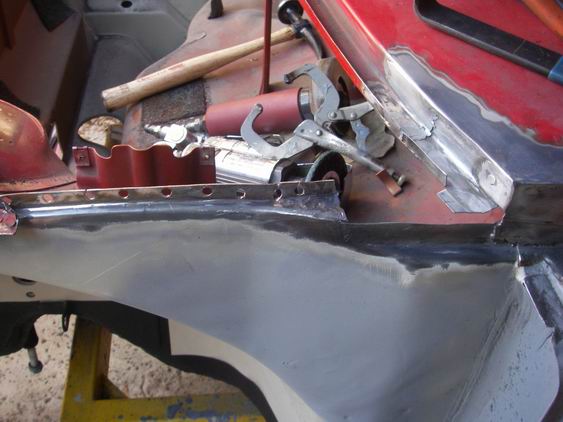 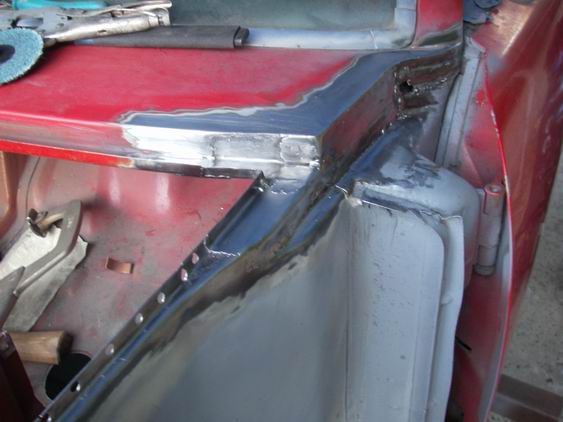
|
|
|
|
| Jeff Hail |
Jan 31 2009, 07:17 PM
Post
#395
|
|
Senior Member Group: Members Posts: 1,141 Joined: 3-May 07 From: LA/ CA Member No.: 7,712 |
Lots of grinding and shaping
and more grinding and shaping........ Attached image(s) 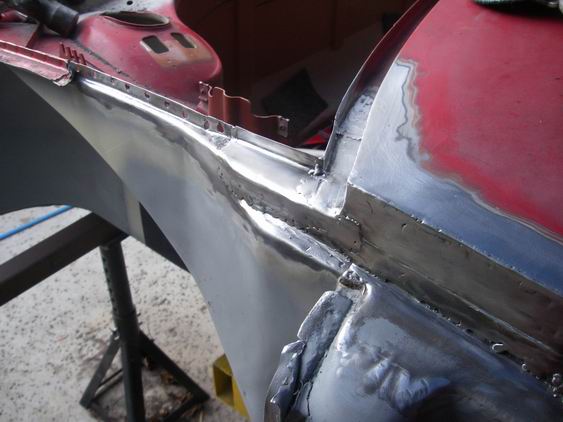 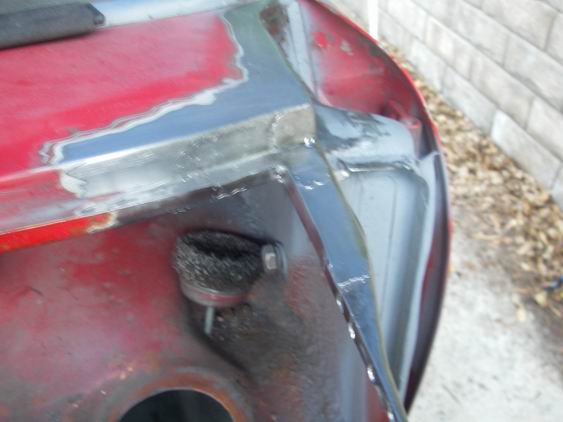
|
|
|
|
| 914Mike |
Feb 1 2009, 03:03 AM
Post
#396
|
|
Member Group: Members Posts: 330 Joined: 27-January 03 From: San Jose, CA Member No.: 198 |
QUOTE(Jeff Hail @ Jan 31 2009, 06:17 PM) Lots of grinding and shaping and more grinding and shaping........ I did a similar repair to my '74, and word to the wise, now is the time to check the fit of the hood. The side view looks a little bit forward on the corner of the cowl, like the corner of the hood may have a bit less gap than the center, which is exactly what happened to me... (IMG:style_emoticons/default/headbang.gif) Nice work! (IMG:style_emoticons/default/welder.gif) |
|
|
|
| Jeff Hail |
Mar 21 2009, 02:09 AM
Post
#397
|
|
Senior Member Group: Members Posts: 1,141 Joined: 3-May 07 From: LA/ CA Member No.: 7,712 |
I've been quiet and for good reason.
#1: I am moving and have been packing up the home & shop which has been quite daunting. Home easy, shop not so easy. My garage is full of equipment and attic is a time capsule of rat holed Porsche and racing parts for some 23 years. I have been packing things I didn't even know I had. Some of these will go into the 914 which will be unveiled later. Surprise, surprise AND no none of it is for sale! Once I had everything out in the open I realized its a damn 401k in the making. My escrow closes 3-26-2009 so lots to do between now and then. It's a good thing for me. Bigger, better and about the same price which in todays economic times and market is a blessing. Change is good. #2: I am a multi-tasker (aka A.D.D (IMG:style_emoticons/default/smile.gif)...always have more than one project going on simultaniously. I just completed a huge undertaking that started in November 2008 that exceeded all expectations. It was a rush request and I couldn't say no to it. I cannot elaborate at this time but it was worth it. #3: New home will need to have shop organized and outfitted. So this means I will be OFFLINE for a bit. Once I am back on line the 914 becomes #1 priority from here on out. Later for now.... |
|
|
|
| type11969 |
Mar 21 2009, 10:36 AM
Post
#398
|
|
Senior Member Group: Members Posts: 1,231 Joined: 2-December 03 From: Collingswood, NJ Member No.: 1,410 Region Association: North East States |
Good luck with everything Jeff, looking forward to updates once you get back into it
|
|
|
|
| flippa |
Mar 21 2009, 10:42 AM
Post
#399
|
|
Advanced Member Group: Members Posts: 3,184 Joined: 7-May 07 From: Boston, MA Member No.: 7,720 Region Association: North East States |
ADD is a blessing; I would be out of buisness without it. i don't understand why they surpress it with drugs!
Congrats & good Luck with the move. Looking forward to see the next installment |
|
|
|
| Jeff Hail |
Jun 16 2009, 11:45 PM
Post
#400
|
|
Senior Member Group: Members Posts: 1,141 Joined: 3-May 07 From: LA/ CA Member No.: 7,712 |
Don't count me out until you see the box going into the ground!!!!!
Move completed. Dealing with house things now. Garage is secondary at the moment. |
|
|
|
|
1 User(s) are reading this topic (1 Guests and 0 Anonymous Users)
0 Members:

|
Lo-Fi Version | Time is now: 18th July 2026 - 01:03 AM |
Invision Power Board
v9.1.4 © 2026 IPS, Inc.