|
|
|
Porsche, and the Porsche crest are registered trademarks of Dr. Ing. h.c. F. Porsche AG.
This site is not affiliated with Porsche in any way. Its only purpose is to provide an online forum for car enthusiasts. All other trademarks are property of their respective owners. |
|
|

  |

| Eric_Shea |
 Mar 11 2014, 08:51 PM Mar 11 2014, 08:51 PM
Post
#606
|
|
PMB Performance  Group: Admin Posts: 19,304 Joined: 3-September 03 From: Salt Lake City, UT Member No.: 1,110 Region Association: Rocky Mountains |
What the hell did I miss here? Jeff turned a pressure cooker into an oil tank? (IMG:style_emoticons/default/ohmy.gif)
|
   |

 
|
| Jeff Hail |
Mar 16 2014, 08:56 PM
Post
#607
|
|
Senior Member Group: Members Posts: 1,141 Joined: 3-May 07 From: LA/ CA Member No.: 7,712 |
43 Plymouth dash? Nope! Attached image(s) 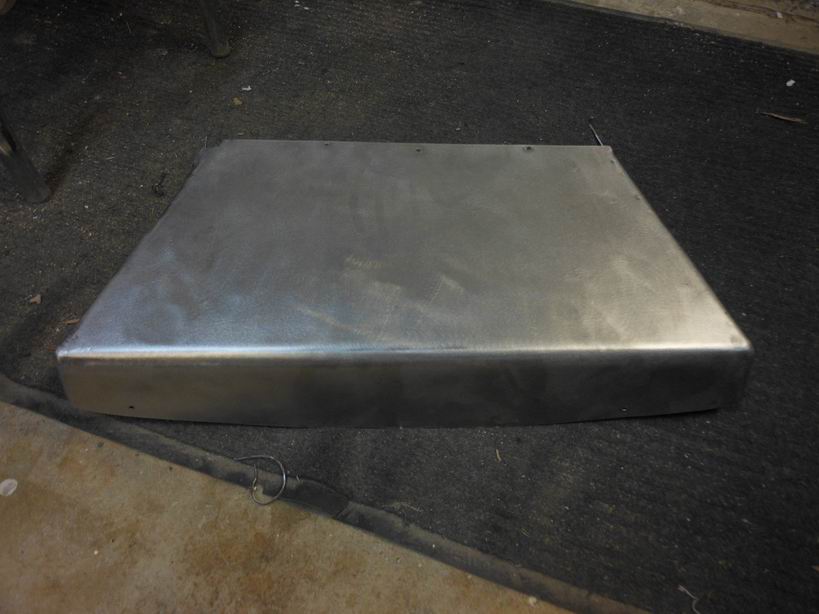
|
|
|
|
| Jeff Hail |
Mar 16 2014, 08:58 PM
Post
#608
|
|
Senior Member Group: Members Posts: 1,141 Joined: 3-May 07 From: LA/ CA Member No.: 7,712 |
Got to make some room.
Thought about putting a Carrera front spoiler oil cooler but those things are really long at 21+ inches. Would not follow the body contour and would interfere with the bumper fit. Standard Carrera fender oil cooler tipped on its side. They flow that way anyways. The core is 13 x 7 x 2.5 which provides a lot of heat throw. I will shroud the bottom of the cooler and leave an exit behind and under it since it has plenty of room on the backside of the cooler. Its 2 inches above the bottom of the floor well so it wont bottom on anything. More welding and grinding to finish it off but you get the idea. Never liked the idea of weather or oil cooler exhaust air going into the trunk. Attached image(s) 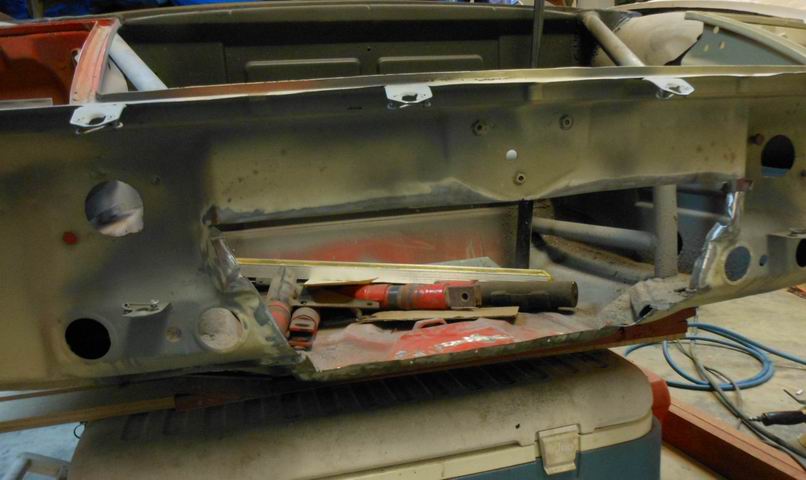 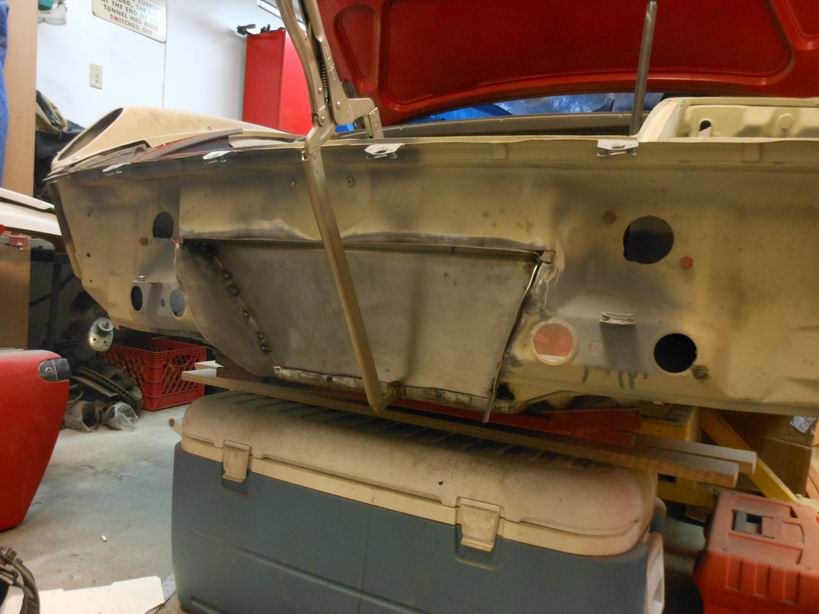  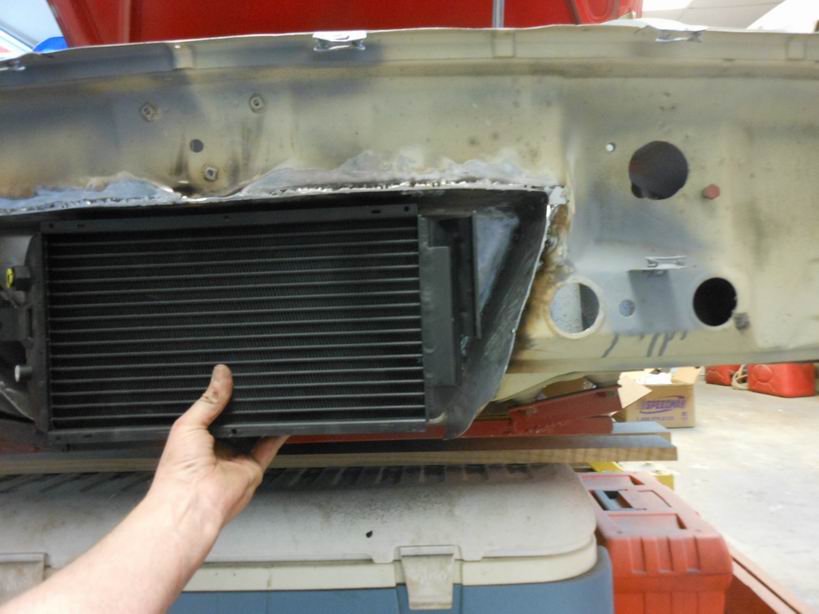 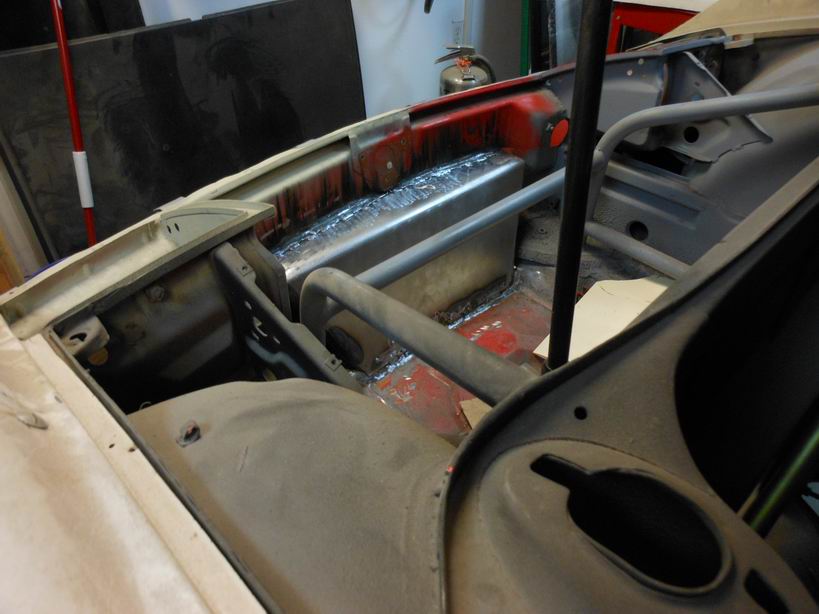
|
|
|
|
| Jeff Hail |
Mar 16 2014, 09:43 PM
Post
#609
|
|
Senior Member Group: Members Posts: 1,141 Joined: 3-May 07 From: LA/ CA Member No.: 7,712 |
The metal I used is 16 gauge. Would like to have a little bit of strength considering what was removed. Its tied into the floor where it rolls upward and across to each control arm reinforcement to just below the latch.
Funny I used to be able to grab the nose just above the hood latch and it would flex a little. Not anymore. That area is plenty stout now, Attached image(s) 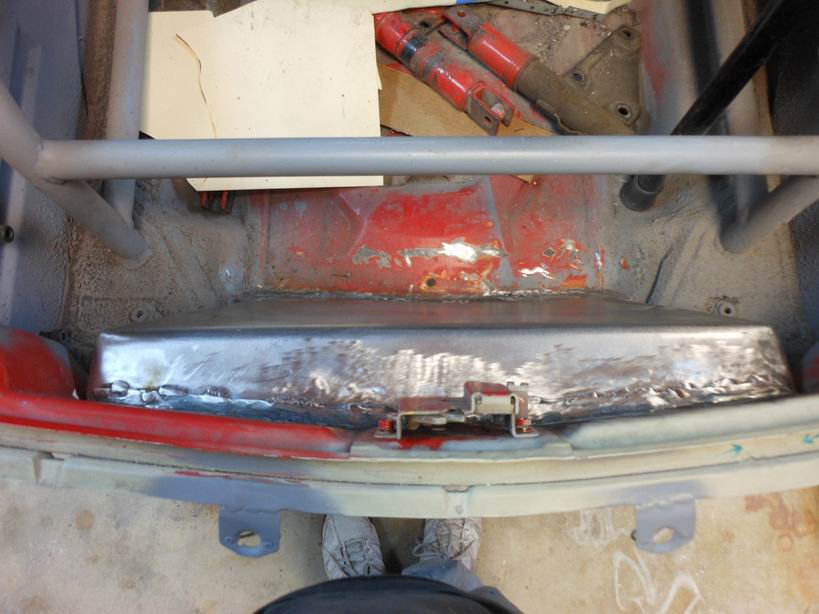
|
|
|
|
| Jeff Hail |
Mar 20 2014, 11:29 PM
Post
#610
|
|
Senior Member Group: Members Posts: 1,141 Joined: 3-May 07 From: LA/ CA Member No.: 7,712 |
Hey its got a front end again. A little "R" styling for the oil cooler inlets. Will need to modify the spoiler ends to fit the flairs better later.
Attached image(s) 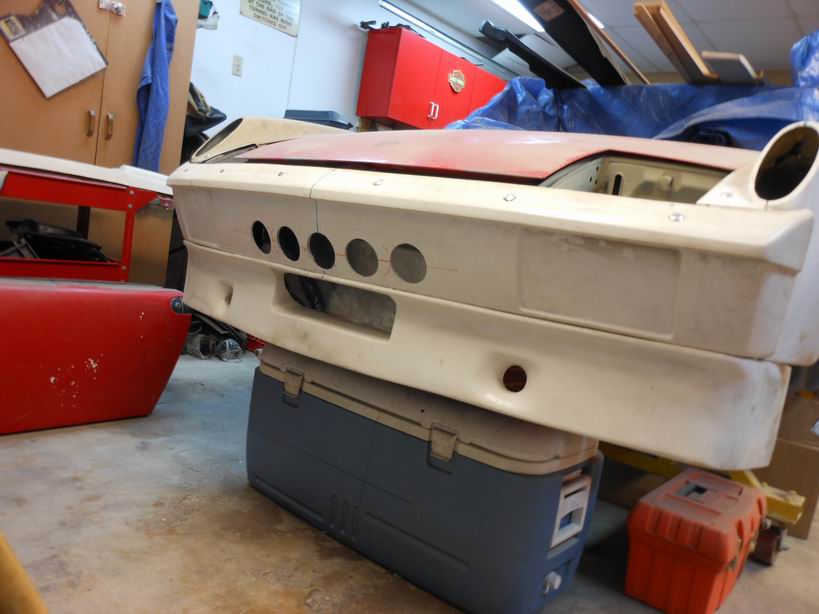
|
|
|
|
| Jeff Hail |
Mar 20 2014, 11:35 PM
Post
#611
|
|
Senior Member Group: Members Posts: 1,141 Joined: 3-May 07 From: LA/ CA Member No.: 7,712 |
It has a rear end to ! Lots of work to do here.
Attached thumbnail(s) 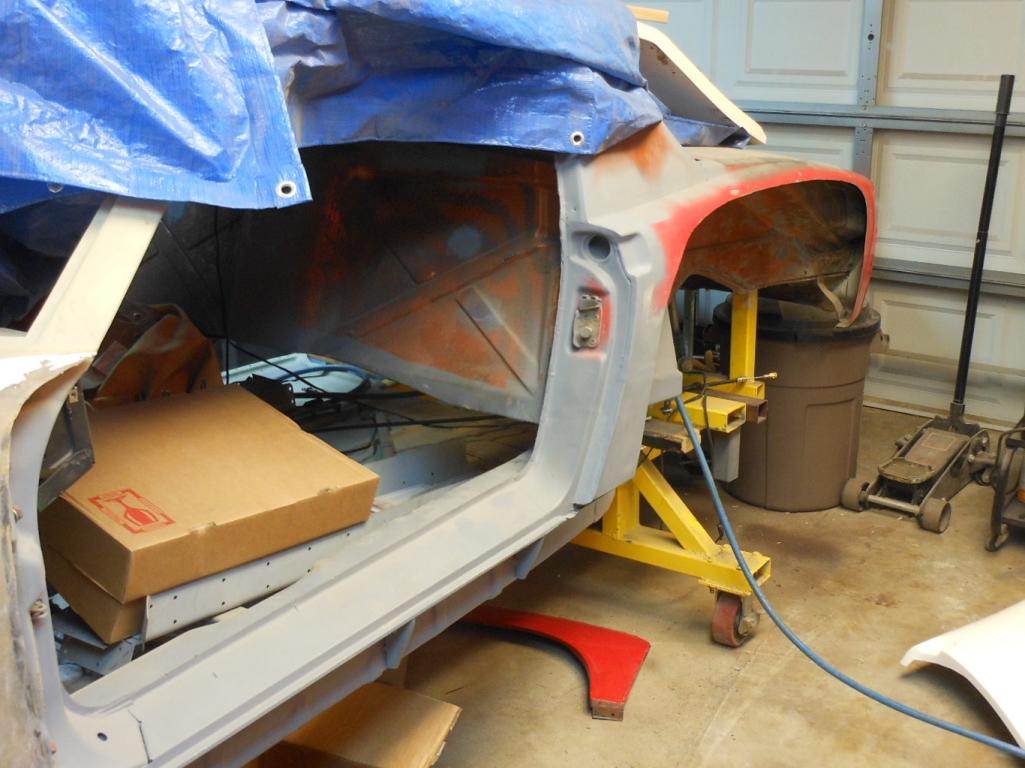 Attached image(s) 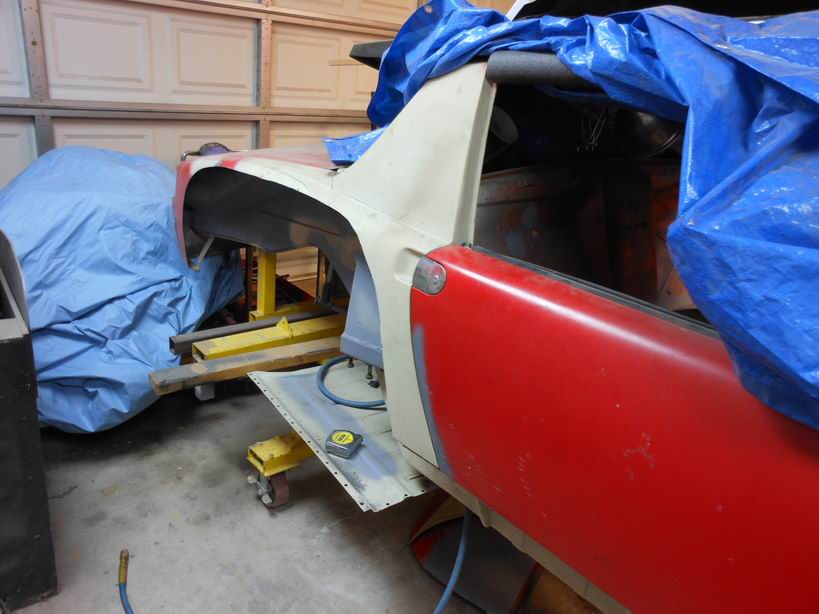 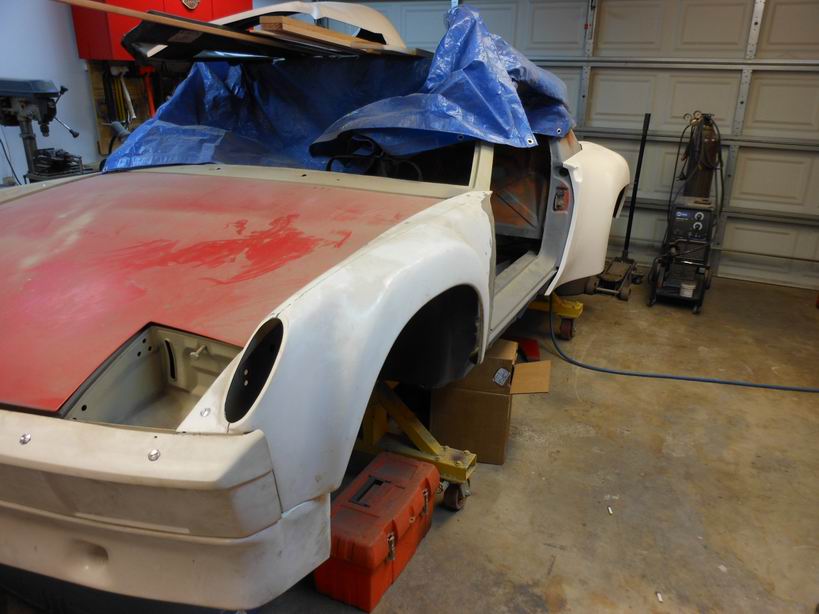 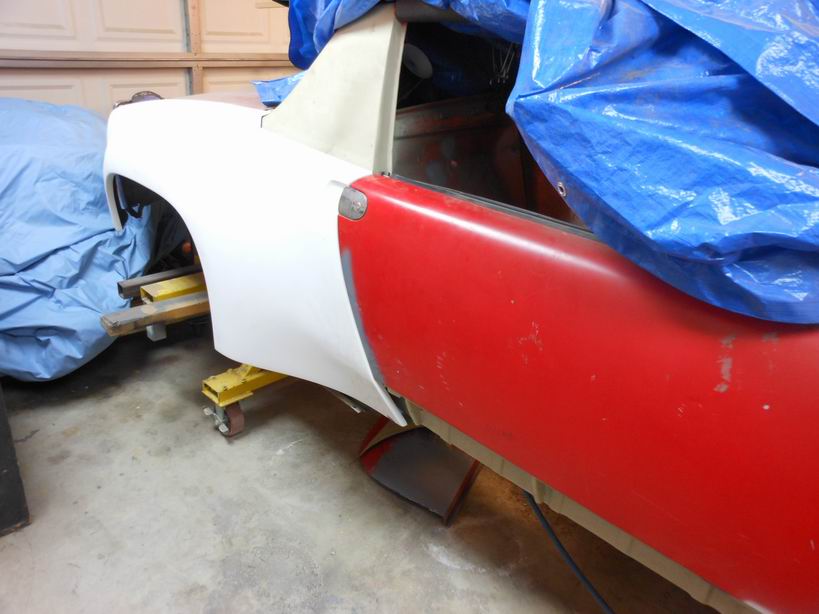
|
|
|
|
| Jeff Hail |
Mar 23 2014, 12:41 AM
Post
#612
|
|
Senior Member Group: Members Posts: 1,141 Joined: 3-May 07 From: LA/ CA Member No.: 7,712 |
Rear lighting. Bases painted and assembled.
Attached thumbnail(s) 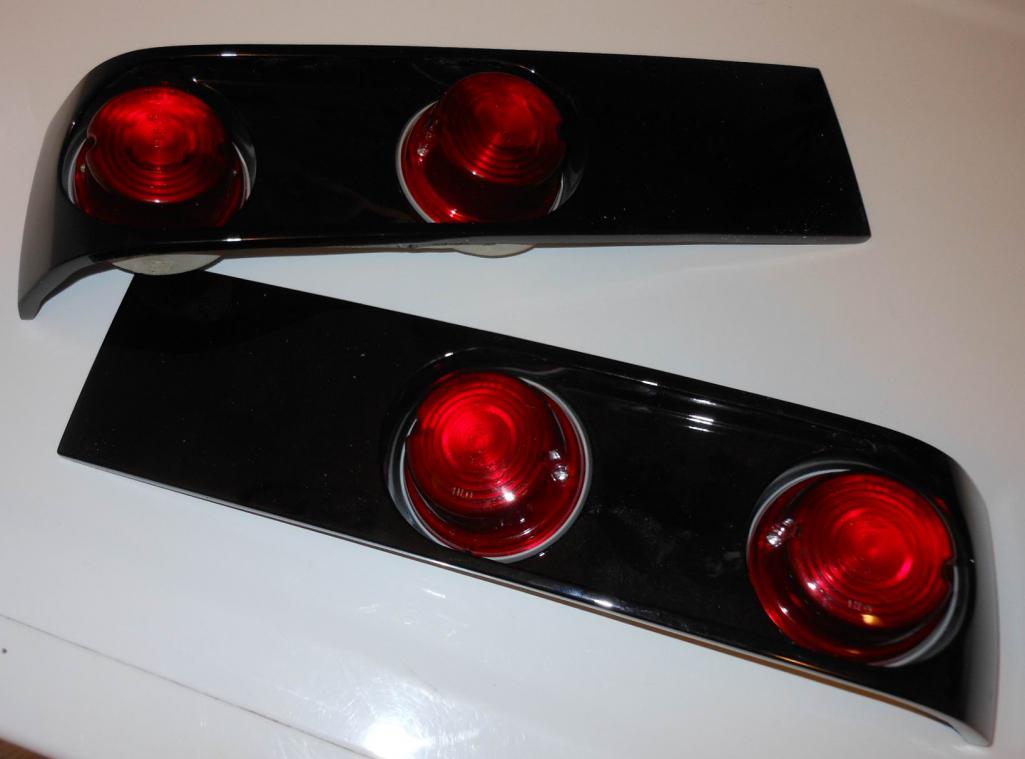
|
|
|
|
| jaxdream |
Apr 3 2014, 05:45 PM
Post
#613
|
|
Senior Member Group: Members Posts: 974 Joined: 8-July 08 From: North Central Tennessee Member No.: 9,270 Region Association: South East States |
QUOTE(Jeff Hail @ Jun 4 2008, 10:28 PM)  QUOTE(Eric_Shea @ Jun 3 2008, 09:24 PM) Tip your bartenders and waitresses... Word has it around here you are a class act (IMG:style_emoticons/default/piratenanner.gif) Are you tending bar tonight or the host? To back up a bit to last weeks intimate conversation. Here are the spacers for using the late Carrera hubs (one inner, one outer on each side of the 914 wheel bearing). Easy enough? Rotors are also Carrera. Depending on going 20mm or 24 mm appropriate caliper half spacers required. By the way you spelled Carrera incorrectly. Two "R's always come before the single "R". I just wanted to point that out you know. I am sure the bartender or host will volley back with a good jab just for fun. Thats getting back for the Kings Lad thing. Jeff please explain the second spacer that appears to go on the backside of the bearing/ SC hub ?? I got and installed the 5mm spacer that goes on the front side / wheel side of the hub to use up against the bearing to use the wider bearing SC hub . Thanks for any info on this setup. Jack |
|
|
|
| Jeff Hail |
Apr 3 2014, 10:12 PM
Post
#614
|
|
Senior Member Group: Members Posts: 1,141 Joined: 3-May 07 From: LA/ CA Member No.: 7,712 |
QUOTE(jaxdream @ Apr 3 2014, 04:45 PM) QUOTE(Jeff Hail @ Jun 4 2008, 10:28 PM) QUOTE(Eric_Shea @ Jun 3 2008, 09:24 PM) Tip your bartenders and waitresses... Word has it around here you are a class act (IMG:style_emoticons/default/piratenanner.gif) Are you tending bar tonight or the host? To back up a bit to last weeks intimate conversation. Here are the spacers for using the late Carrera hubs (one inner, one outer on each side of the 914 wheel bearing). Easy enough? Rotors are also Carrera. Depending on going 20mm or 24 mm appropriate caliper half spacers required. By the way you spelled Carrera incorrectly. Two "R's always come before the single "R". I just wanted to point that out you know. I am sure the bartender or host will volley back with a good jab just for fun. Thats getting back for the Kings Lad thing. Jeff please explain the second spacer that appears to go on the backside of the bearing/ SC hub ?? I got and installed the 5mm spacer that goes on the front side / wheel side of the hub to use up against the bearing to use the wider bearing SC hub . Thanks for any info on this setup. Jack Easiest way to explain: Using Carrera hubs and axels. The late 911 stuff uses a wider bearing. To use the 914 cartridge bearing the spacers simply make up the difference in width on each side to match the 911 bearing. The spacers are sized accordingly to properly space the hub in the trailing arm. Boils down to making the bearing cones wider while retaining the dimension of the 914 bearing at the race so as to not modify the 914 trailing arm at the bearing carrier. If you are going with Carrera axels you will need both spacers. The rotors are a matter of choice and really depend on the calipers being used. I just swapped a buddy my Carrera rotors for SC rotors because Shea will bust my balls about the weight difference. Maybe he wont because he is so cool. When I decided to go with Boxster calipers can use either rotor. I just went through some parts and have everything out. Let me see if I can take some photos to show the differences. Will add shortly. |
|
|
|
| Jeff Hail |
Apr 3 2014, 11:01 PM
Post
#615
|
|
Senior Member Group: Members Posts: 1,141 Joined: 3-May 07 From: LA/ CA Member No.: 7,712 |
Carrera axel and lug centric hub on the left with spacers installed.
914 bearing 914 axel on the right. As you can see the axel stub shank is the same length for both the 911 and the 914. The shank is the same diameter on both. The splines are different (one course, one fine). The Carrera axel stub has a more defined step on the shank where the bearing butts up against it. The spacers are chamfered to accommodate this. With the bearing and hub installed the offset would be incorrect. The spacers correct that issue to center the hub face so the rotors center with the caliper mouth. Attached thumbnail(s) 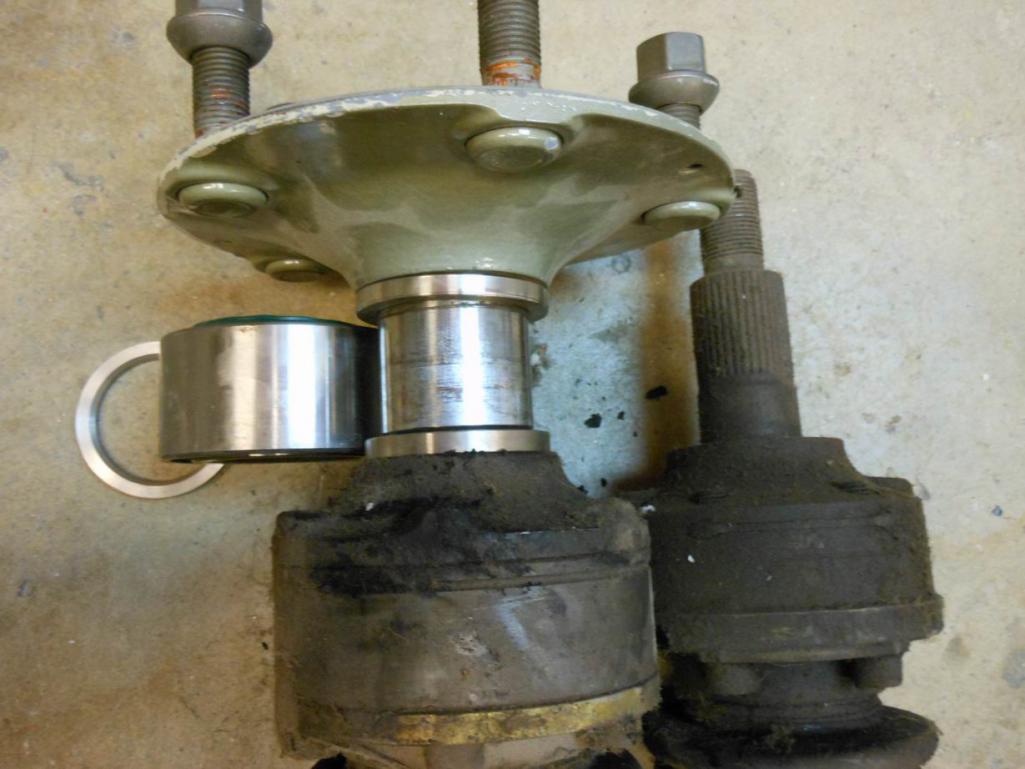 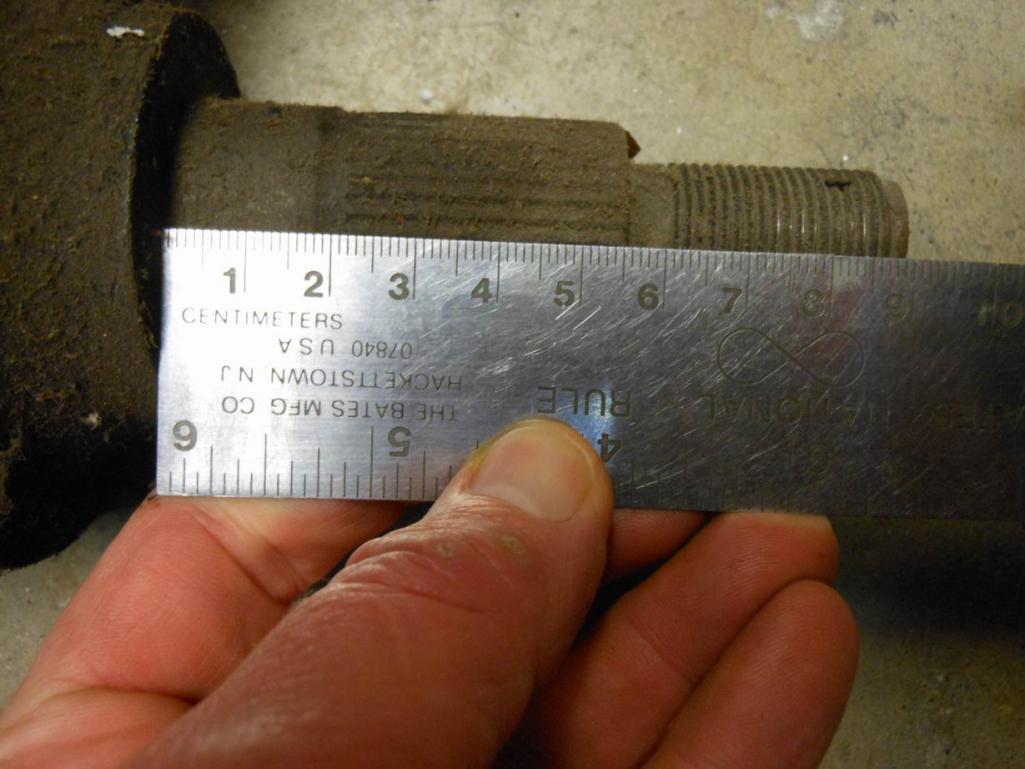 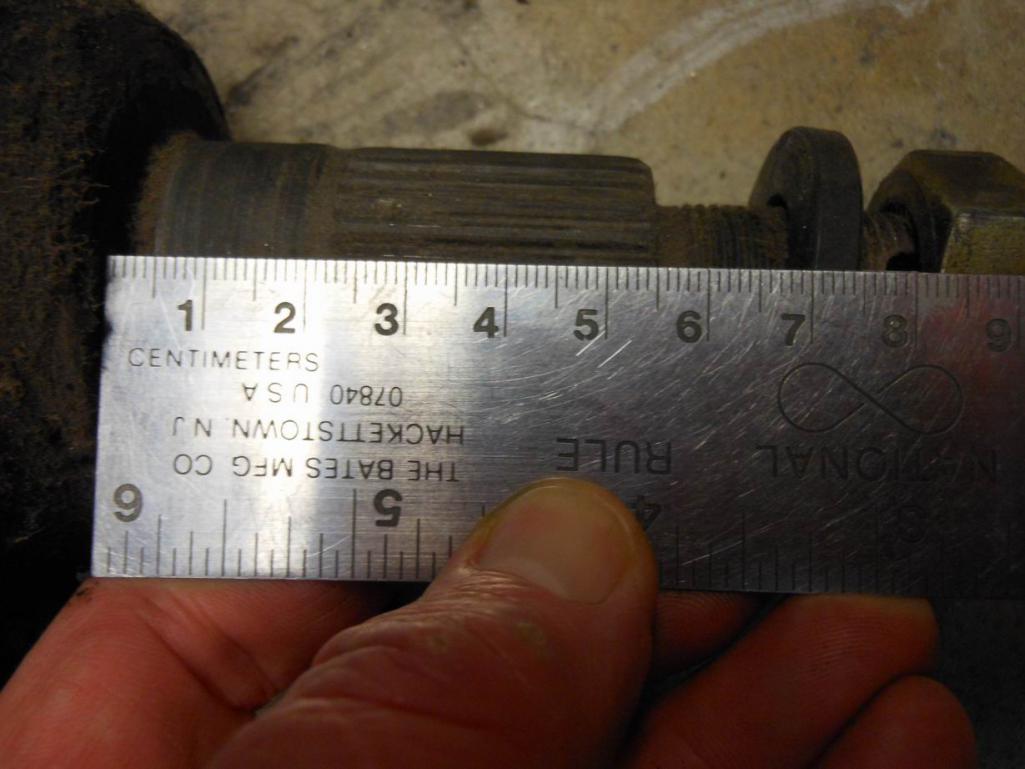
|
|
|
|
| jaxdream |
Apr 4 2014, 07:49 AM
Post
#616
|
|
Senior Member Group: Members Posts: 974 Joined: 8-July 08 From: North Central Tennessee Member No.: 9,270 Region Association: South East States |
Ok I gottcha , you are centering the Carrera hub in the bearing and using Carrera axles also. It seems a matter of getting the right parts with spacers to work around the 914 bearing size . Nice that these are available to source for differing setups. Thanks again for the info, somthing to ponder.
Jack |
|
|
|
| Jeff Hail |
Apr 13 2014, 02:21 PM
Post
#617
|
|
Senior Member Group: Members Posts: 1,141 Joined: 3-May 07 From: LA/ CA Member No.: 7,712 |
Unhappy with factory lighting and unsatisfied with the bulb output of the Hella R tailites had to take this to another level.
Sourced some dual output (running, brake) LED clusters. They were the brightest I could locate using red LEDS. Red LEDS with red lenses were the obvious solution since white LED washes the color. Attached image(s) 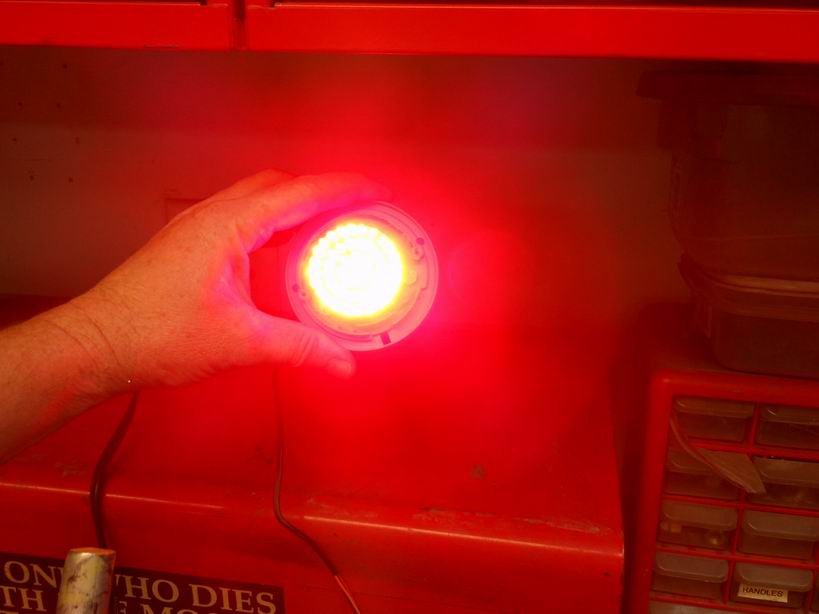 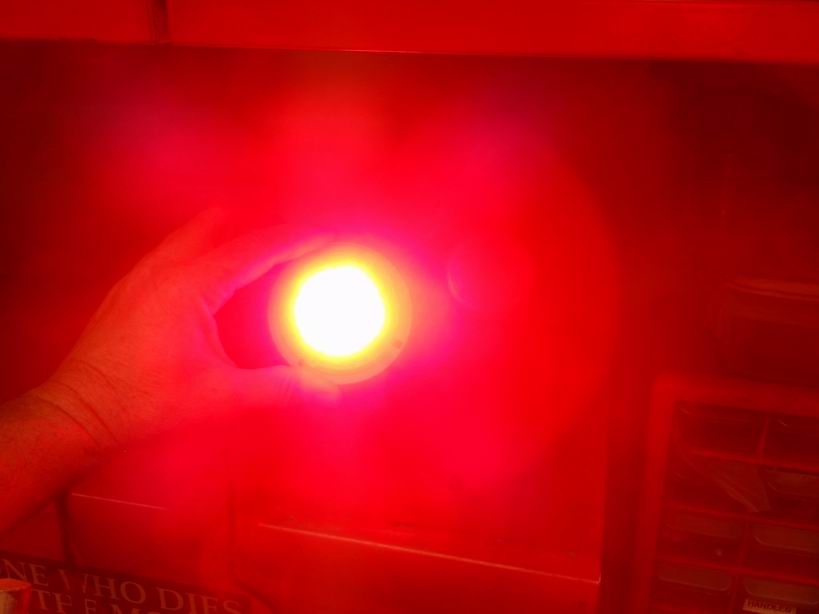
|
|
|
|
| Jeff Hail |
Apr 13 2014, 02:25 PM
Post
#618
|
|
Senior Member Group: Members Posts: 1,141 Joined: 3-May 07 From: LA/ CA Member No.: 7,712 |
Modified the Hella bulb housings and installed some standoffs to bring the cluster close to the lens. Because there is no side marker I needed the cluster to illuminate the lens from all angles.
The clusters are waterproof since they are dipped in epoxy. I let these run for 1 hour straight and they do not get hot at all. In fact they don't even get warm. Attached image(s) 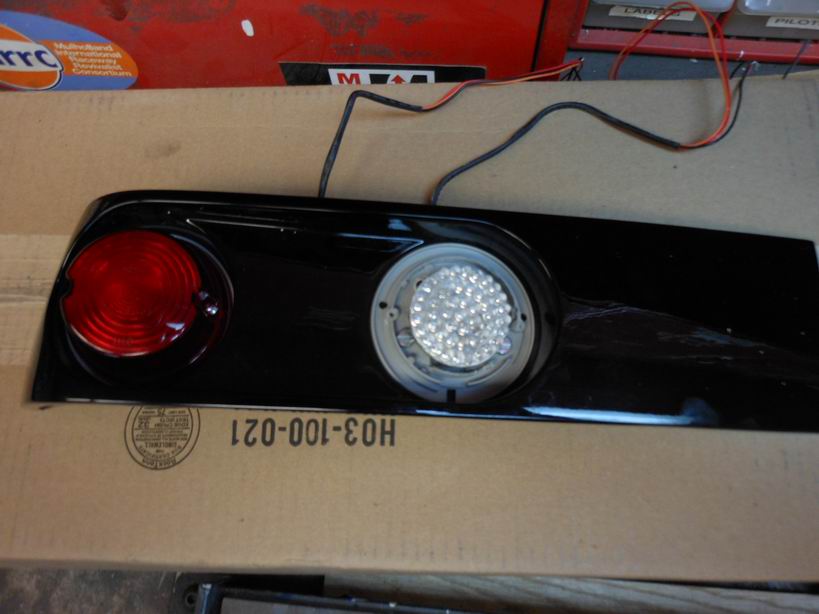 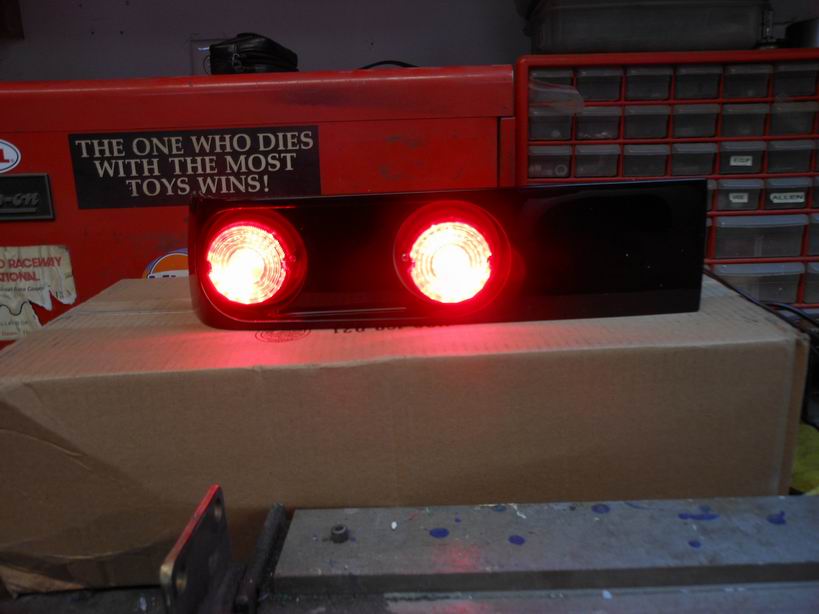 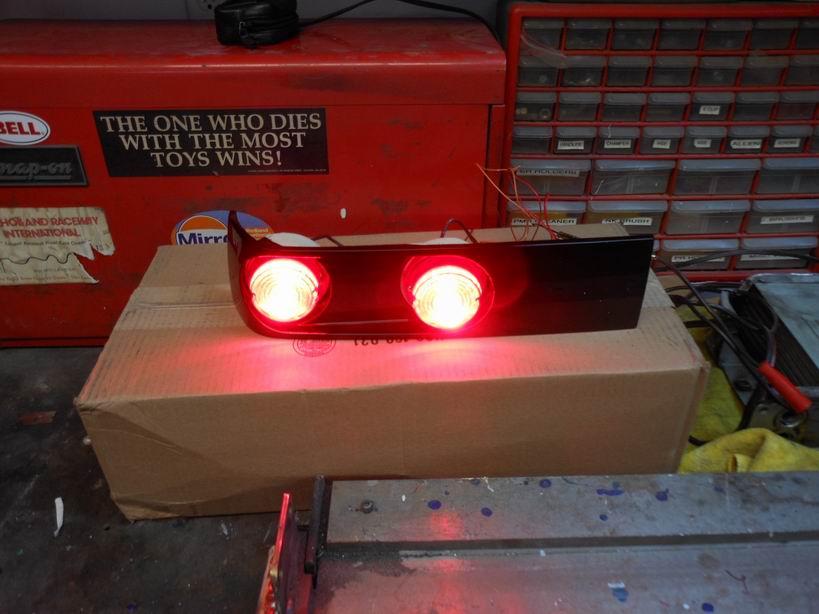 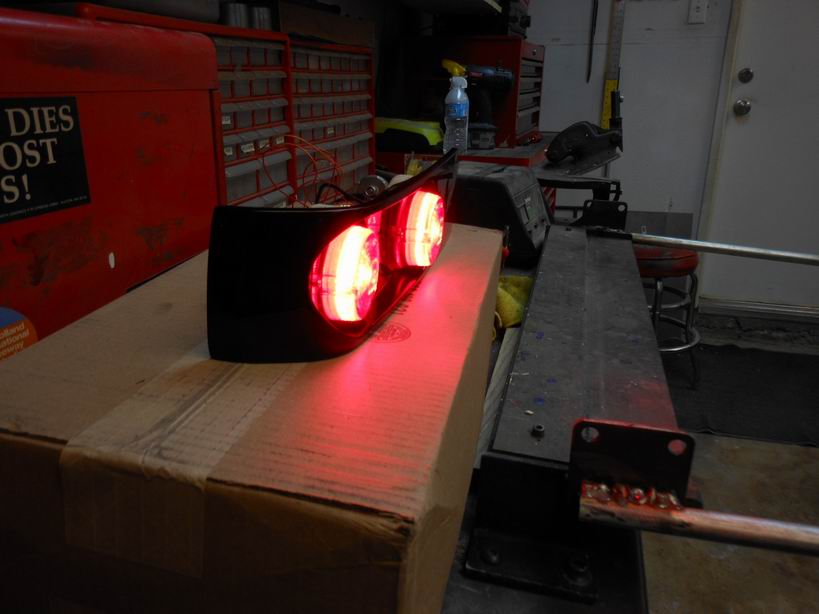
|
|
|
|
| Jeff Hail |
Apr 13 2014, 02:30 PM
Post
#619
|
|
Senior Member Group: Members Posts: 1,141 Joined: 3-May 07 From: LA/ CA Member No.: 7,712 |
With the lights in the garage out these are really bright on both the run and stop modes.
The last photo is of the ceiling to show how much output these give off. Lit up the whole garage. This was a test with a single lamp on. Very bright and I am satisfied. Attached image(s) 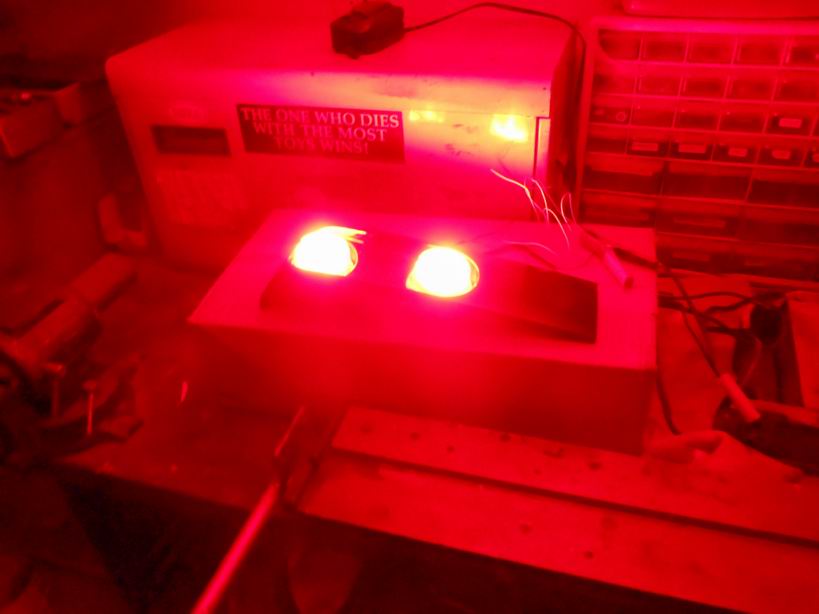 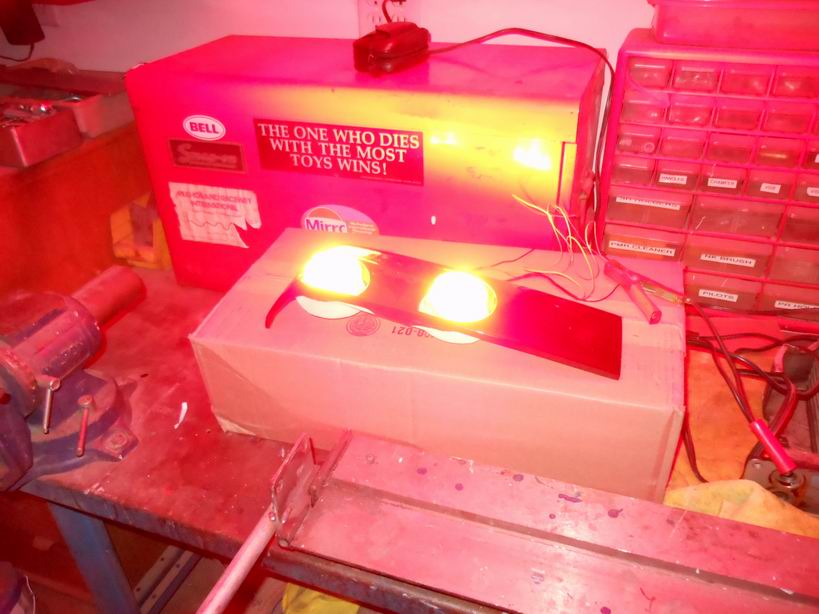 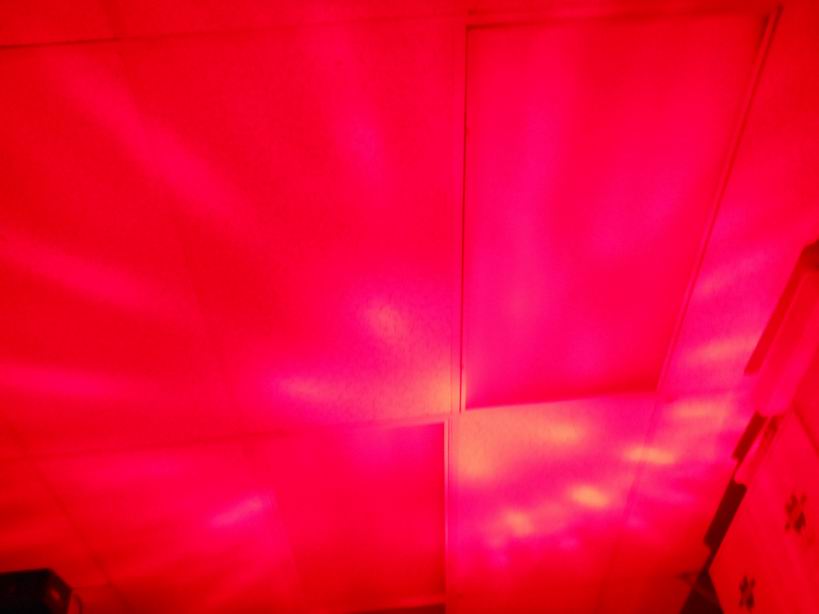
|
|
|
|
| Eric_Shea |
Apr 13 2014, 06:14 PM
Post
#620
|
|
PMB Performance Group: Admin Posts: 19,304 Joined: 3-September 03 From: Salt Lake City, UT Member No.: 1,110 Region Association: Rocky Mountains |
(IMG:style_emoticons/default/smilie_pokal.gif) Nice work Jeff. Nice to see some skin on it!
QUOTE I just swapped a buddy my Carrera rotors for SC rotors because Shea will bust my balls about the weight difference (you can install as many flywheels on your car as ye see fit. I'm just an innocent bystander) (IMG:style_emoticons/default/wink.gif) |
|
|
|
| Maltese Falcon |
Apr 13 2014, 06:18 PM
Post
#621
|
|
914 Guru Group: Members Posts: 5,316 Joined: 14-September 04 From: Mulholland SoCal Member No.: 2,755 Region Association: None |
Jeff, I'll need to source some of the hub-to-bearing spacers soon.
Are you still parking the chop top 911 in your front rec-room? (IMG:style_emoticons/default/biggrin.gif) Marty |
 |
|
| Maltese Falcon |
May 15 2014, 11:31 PM
Post
#622
|
|
914 Guru Group: Members Posts: 5,316 Joined: 14-September 04 From: Mulholland SoCal Member No.: 2,755 Region Association: None |
Jeff...any updates on your build ?
Hope your shoulder+ hand are doing better...I joined the sheet metal lacerated finger brigade as well (IMG:style_emoticons/default/blink.gif) Marty |
|
|
|
| 76-914 |
May 16 2014, 09:02 AM
Post
#623
|
|
Repeat Offender & Resident Subaru Antagonist Group: Members Posts: 13,902 Joined: 23-January 09 From: Temecula, CA Member No.: 9,964 Region Association: Southern California |
QUOTE(Jeff Hail @ Mar 22 2014, 11:41 PM) Rear lighting. Bases painted and assembled. Jeff, I've seen this style tail light assm in 2 other builds. Are they available aftermarket? Looks good! |
|
|
|
| Jeff Hail |
May 16 2014, 11:52 PM
Post
#624
|
|
Senior Member Group: Members Posts: 1,141 Joined: 3-May 07 From: LA/ CA Member No.: 7,712 |
QUOTE(Maltese Falcon @ May 15 2014, 10:31 PM) Jeff...any updates on your build ? Hope your shoulder+ hand are doing better...I joined the sheet metal lacerated finger brigade as well (IMG:style_emoticons/default/blink.gif) Marty Been working on the 14 just have not been taking photos. |
|
|
|
| Jeff Hail |
May 16 2014, 11:57 PM
Post
#625
|
|
Senior Member Group: Members Posts: 1,141 Joined: 3-May 07 From: LA/ CA Member No.: 7,712 |
QUOTE(76-914 @ May 16 2014, 08:02 AM) QUOTE(Jeff Hail @ Mar 22 2014, 11:41 PM) Rear lighting. Bases painted and assembled. Jeff, I've seen this style tail light assm in 2 other builds. Are they available aftermarket? Looks good! Honestly they are a pain in the ass to make. No aftermarket because I own the molds and masters. Attached thumbnail(s) 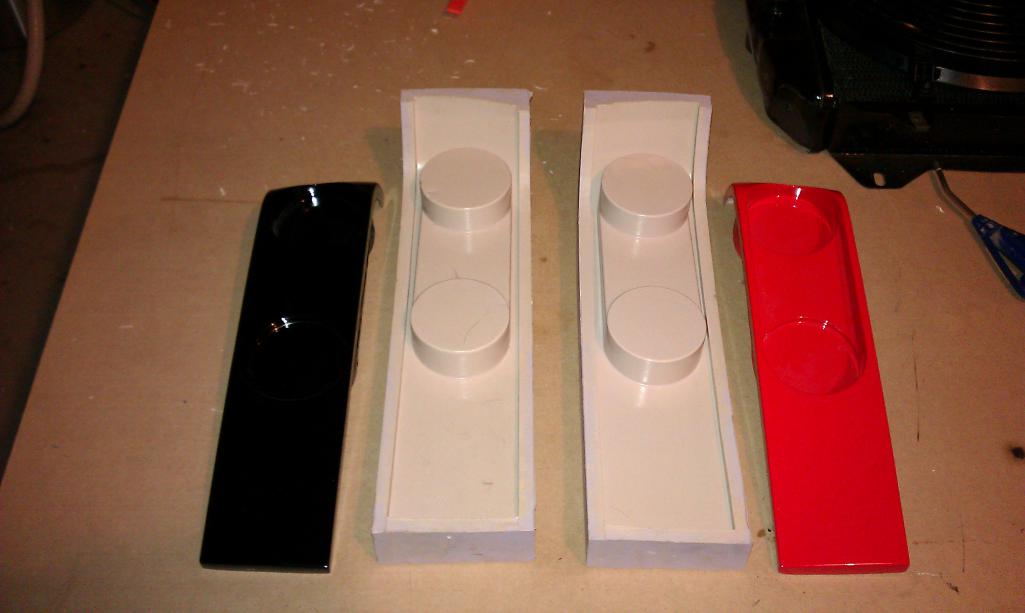 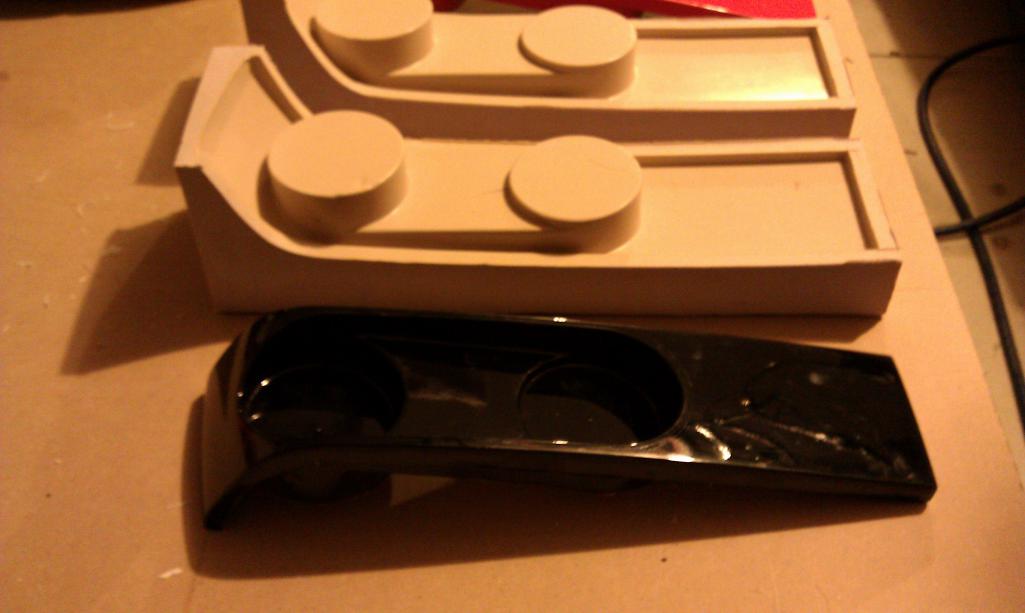
|
|
|
|
|
1 User(s) are reading this topic (1 Guests and 0 Anonymous Users)
0 Members:

|
Lo-Fi Version | Time is now: 23rd June 2026 - 11:53 AM |
Invision Power Board
v9.1.4 © 2026 IPS, Inc.