|
|
|
Porsche, and the Porsche crest are registered trademarks of Dr. Ing. h.c. F. Porsche AG.
This site is not affiliated with Porsche in any way. Its only purpose is to provide an online forum for car enthusiasts. All other trademarks are property of their respective owners. |
|
|

  |

| DNHunt |
 Oct 31 2007, 05:37 PM Oct 31 2007, 05:37 PM
Post
#1
|
|
914 Wizard? No way. I got too much to learn.  Group: Members Posts: 4,099 Joined: 21-April 03 From: Gig Harbor, WA Member No.: 598 |
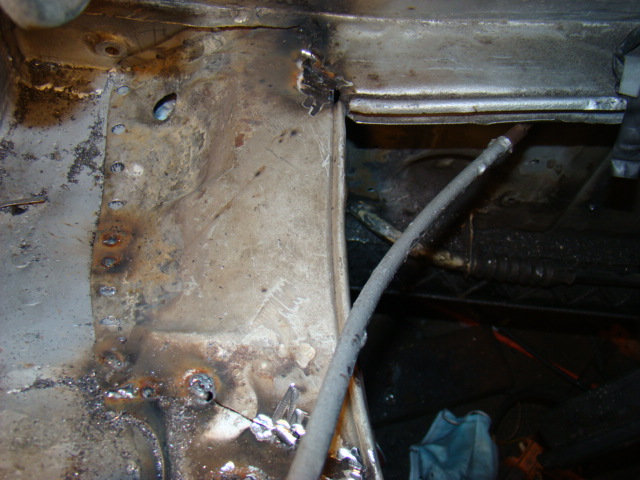
This wasn't quite what I expected. I really thought I would find much more rust. The door gap was closed and it was sagging some. But it really isn't much more than dirt and a little surface rust which I think I can convert. The problem is I have to reverse engineer it I can scab plates behind the inner layerI think I'll add some cross bracing between the ridges on the inner layer. Looks like a couple months of work .
Dave Attached image(s) 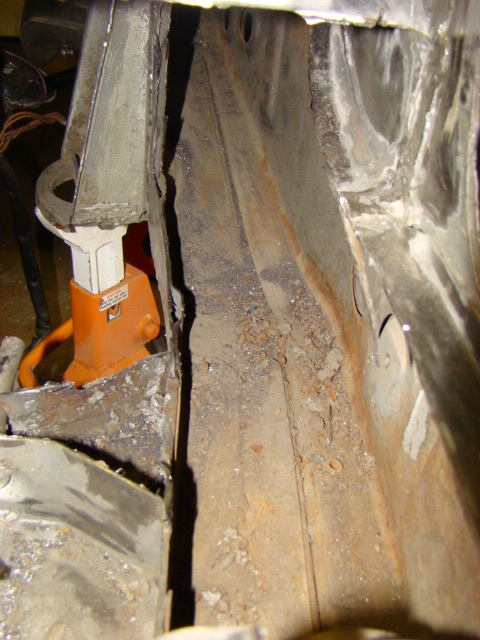 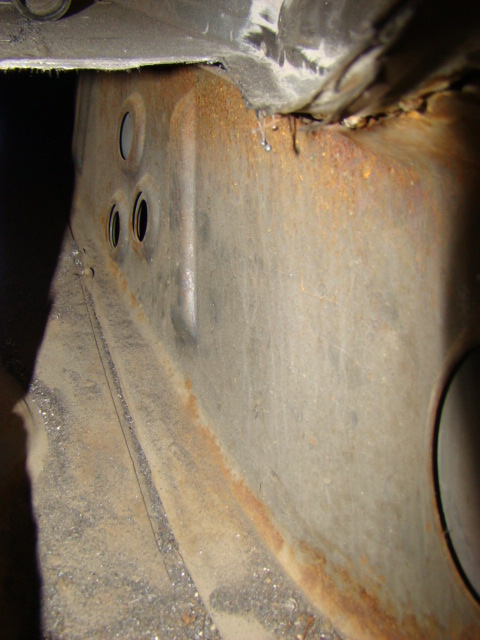 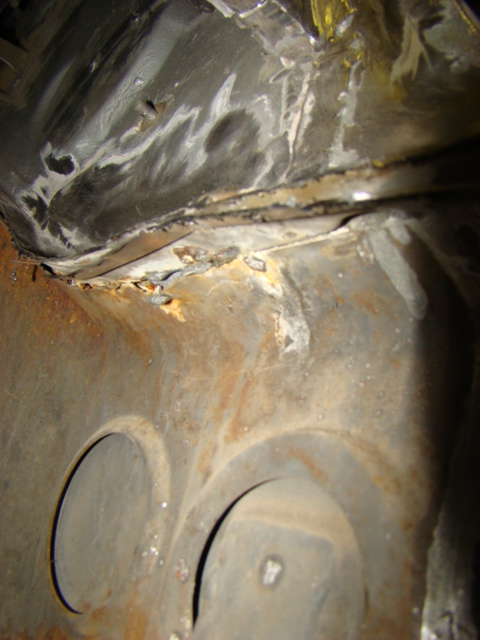
|
   |

 
|
| freezing14 |
Oct 31 2007, 06:29 PM
Post
#2
|
|
freezing14 Group: Members Posts: 435 Joined: 21-June 04 From: brockville , Ontario, Canada Member No.: 2,233 |
thats a piece of cake to fix 2 week end and your done,, you dont even need to repaint the car , it looks scary at first but you you commit to starting it , it goes fast ,, YOU CAN DO IT
|
|
|
|
| DNHunt |
Oct 31 2007, 07:16 PM
Post
#3
|
|
914 Wizard? No way. I got too much to learn. Group: Members Posts: 4,099 Joined: 21-April 03 From: Gig Harbor, WA Member No.: 598 |
I know I can do it. The issue is I tend to dink with stuff. Also, time off to ponder. Then, there are the lost (mislaid) tools. Gotta watch a little football, time for family and oh ya, I have to work some.
It'll get done in it's own time. Dave |
|
|
|
| rhodyguy |
Oct 31 2007, 07:16 PM
Post
#4
|
|
Chimp Sanctuary NW. Check it out. Group: Members Posts: 22,080 Joined: 2-March 03 From: Orion's Bell. The BELL! Member No.: 378 Region Association: Galt's Gulch |
shall i call betsy and tell her you want an engman kit for christmas?
k |
|
|
|
| Gint |
Oct 31 2007, 07:29 PM
Post
#5
|
|
Mike Ginter Group: Admin Posts: 16,075 Joined: 26-December 02 From: Denver CO. Member No.: 20 Region Association: Rocky Mountains |
QUOTE(DNHunt @ Oct 31 2007, 06:16 PM)  I know I can do it. The issue is I tend to dink with stuff. Also, time off to ponder. Then, there are the lost (mislaid) tools. Gotta watch a little football, time for family and oh ya, I have to work some. It'll get done in it's own time. Dave |
|
|
|
| John |
Oct 31 2007, 09:52 PM
Post
#6
|
|
member? what's a member? Group: Members Posts: 3,393 Joined: 30-January 04 From: Evansville, IN (SIRPCA) Member No.: 1,615 Region Association: None |
Send it to Jake's place and have him discipline (motivate) you into getting it done in short order. You did it with your engine....
Some words of advice. Jack the door gap slightly larger than you want and weld it back together with as little heat in the longs as possible (and check the door gap many times along the way). You will reach a point where you won't easily be able to move the door gap and at that point you will want it to be right. (don't ask me how I know) The BEST method would be to put the car on a jig, but most of us don't have access, so take careful measurements and get it as close as you can. Good luck with it and don't get in a rush. You can do it. |
|
|
|
| dinomium |
Oct 31 2007, 09:59 PM
Post
#7
|
|
Git on a chair son, all the good stuff is goin over yer head! Group: Benefactors Posts: 2,777 Joined: 2-January 03 From: Bremerton, WA Member No.: 74 Region Association: Pacific Northwest |
It will be autocross season in 4 months! ESPN has football highlights at 11!
LOL You will probably still beat me back to the road! |
|
|
|
| DNHunt |
Nov 1 2007, 08:02 AM
Post
#8
|
|
914 Wizard? No way. I got too much to learn. Group: Members Posts: 4,099 Joined: 21-April 03 From: Gig Harbor, WA Member No.: 598 |
Engman's kit is already here.
The only dimension I'm not sure of is the distance between the inner suspension consoles. I think mine was a little narrow mainly but I'd like to confirm that. My guess is the car was bending up and rotating a bit so that the inner suspension ear was up and toward the midline. That could account for the loss of negative camber. I plan on monitoring the door gap, trunk gap and distance between the suspension ears as I go. I just need a starting point. Dave |
|
|
|
| DNHunt |
Nov 7 2007, 05:54 PM
Post
#9
|
|
914 Wizard? No way. I got too much to learn. Group: Members Posts: 4,099 Joined: 21-April 03 From: Gig Harbor, WA Member No.: 598 |
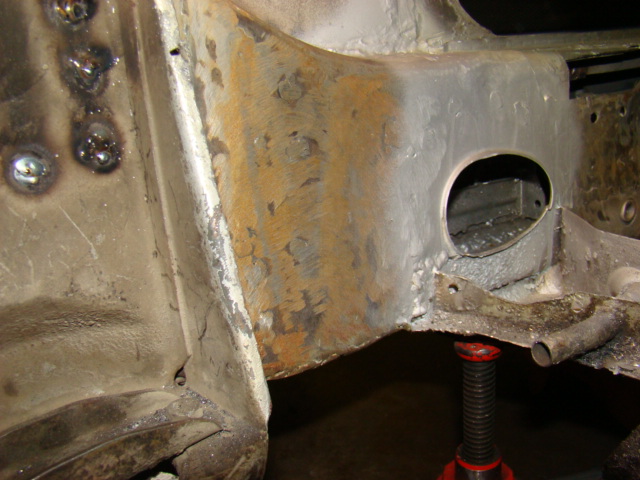
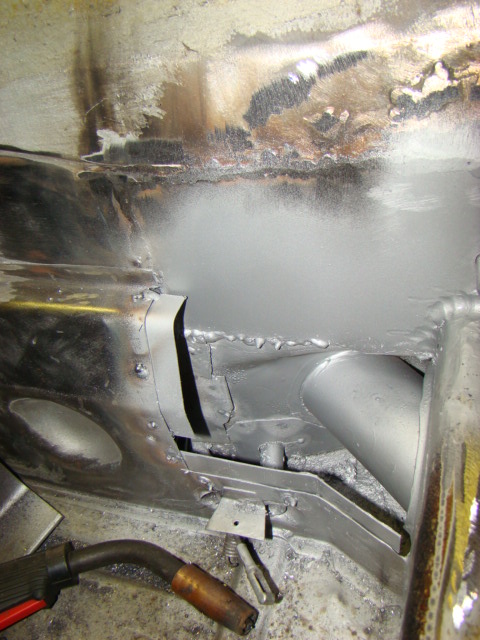
Time for an update
Rust was neutralized with Metal Ready and Coated with Por 15. I added a little stiffening including a T shaped reinforement. The inner part of the long is welded. 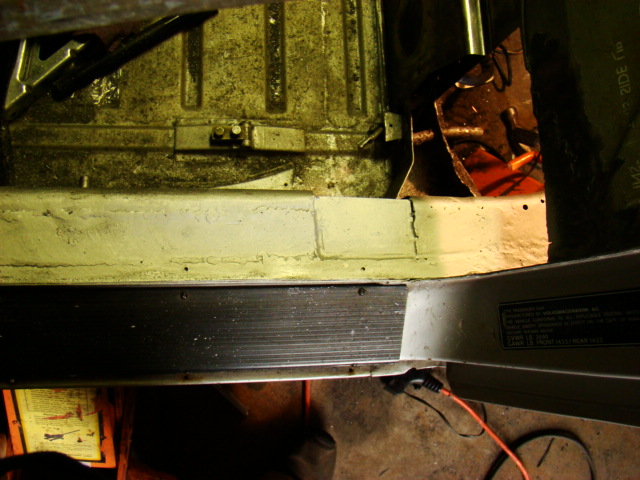 Attached image(s) 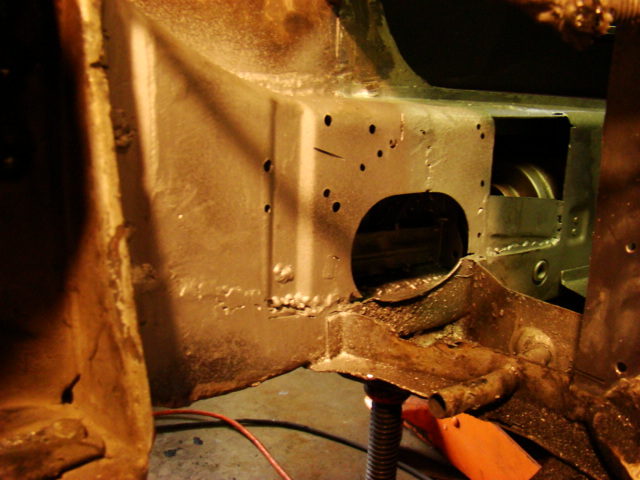
|
|
|
|
| flesburg |
Nov 7 2007, 07:45 PM
Post
#10
|
|
Senior Member Group: Members Posts: 506 Joined: 22-November 04 From: Pontiac, IL Member No.: 3,162 |
On a car we are working on, we filled the hole where the heater tube entered the long, and then plated (reinforced) from where (Engmans) inner long reinforcement ends, all the way up to the shock mount. You have noticed by now that the heater tube hole lines up right with the jack point and creates a very weak "hinge".
Probably the one design flaw in the 914 tub. The heater tube should have entered somewhere else. |
|
|
|
| DNHunt |
Nov 8 2007, 09:27 AM
Post
#11
|
|
914 Wizard? No way. I got too much to learn. Group: Members Posts: 4,099 Joined: 21-April 03 From: Gig Harbor, WA Member No.: 598 |
QUOTE(flesburg @ Nov 7 2007, 06:45 PM) On a car we are working on, we filled the hole where the heater tube entered the long, and then plated (reinforced) from where (Engmans) inner long reinforcement ends, all the way up to the shock mount. You have noticed by now that the heater tube hole lines up right with the jack point and creates a very weak "hinge". Probably the one design flaw in the 914 tub. The heater tube should have entered somewhere else. You are right. I'm sure they must have considered it. I believe that they never thought these cars would last anyway so why bother. The switch back to standard time has been great. I get a bunch of work done in the morning. Dave |
|
|
|
| DNHunt |
Nov 17 2007, 07:11 PM
Post
#12
|
|
914 Wizard? No way. I got too much to learn. Group: Members Posts: 4,099 Joined: 21-April 03 From: Gig Harbor, WA Member No.: 598 |
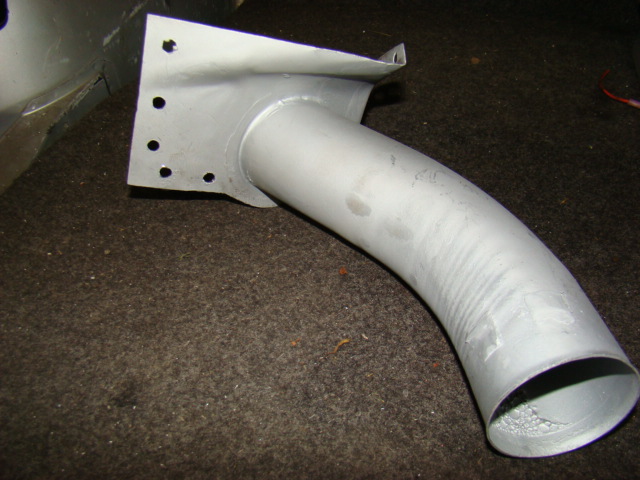
I've accomplished quite a bit. I added the outside layer of the inner long from a good piece off of another car
 This was plug welded and the edges were stitch welded. 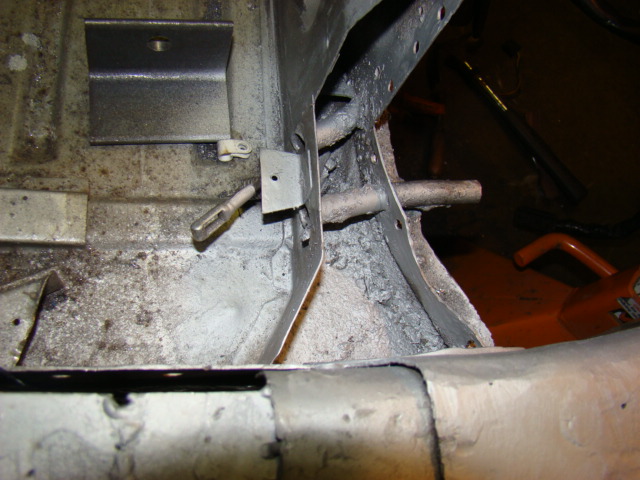 Here is the patch for the outer lower firewall with the heater tube welded in. 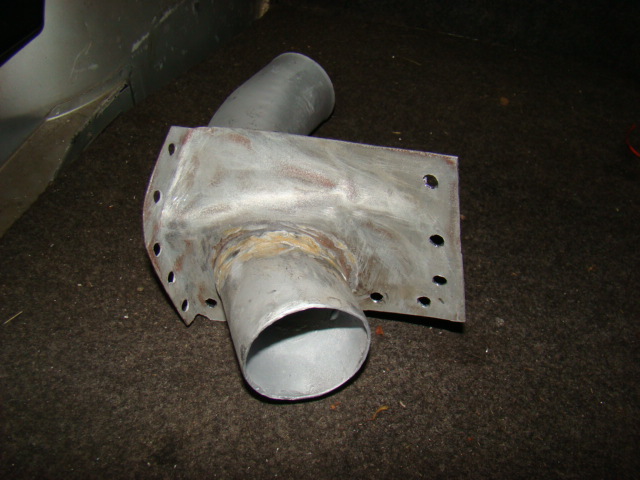 |
|
|
|
| DNHunt |
Nov 17 2007, 07:16 PM
Post
#13
|
|
914 Wizard? No way. I got too much to learn. Group: Members Posts: 4,099 Joined: 21-April 03 From: Gig Harbor, WA Member No.: 598 |
The inside of the patch. This was cut from a lower outside firewall fromm AA. Nice piece!
 Here it is inserting it. I doubt the piece of firewall coulbe much bigger and rotate in. Interference would come from the long and the engine shelf. 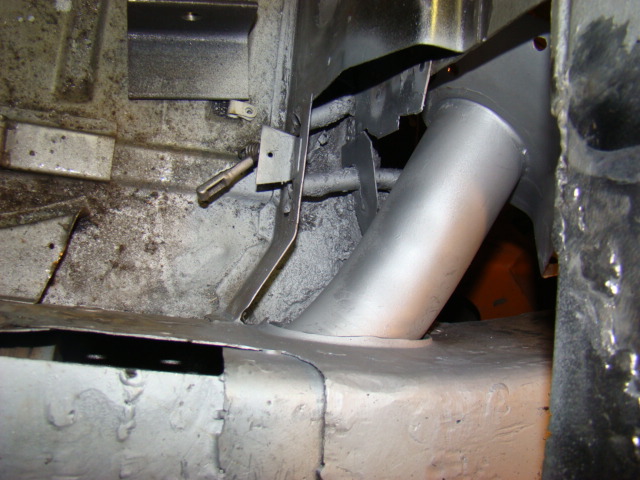 I had to rotate and fudger it in. BFH necessary! 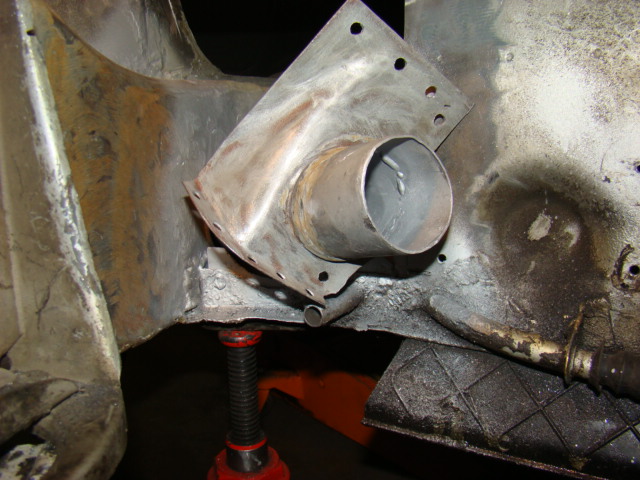 |
|
|
|
| DNHunt |
Nov 17 2007, 07:22 PM
Post
#14
|
|
914 Wizard? No way. I got too much to learn. Group: Members Posts: 4,099 Joined: 21-April 03 From: Gig Harbor, WA Member No.: 598 |
That piece tacted in.
 I left an opening to make sure that I got the heater tube home. Nice snug fit although there is no support in the long like the factory provided. 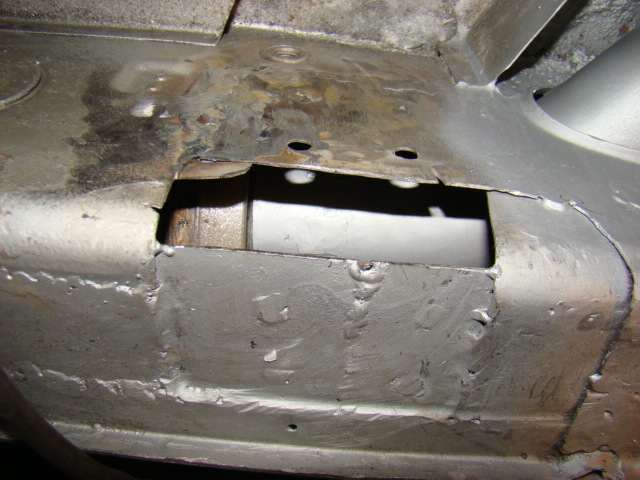 I plugwelded backing for the patches. I'm just not good enough with butt welds so I needed the help.  |
|
|
|
| DNHunt |
Nov 17 2007, 07:28 PM
Post
#15
|
|
914 Wizard? No way. I got too much to learn. Group: Members Posts: 4,099 Joined: 21-April 03 From: Gig Harbor, WA Member No.: 598 |
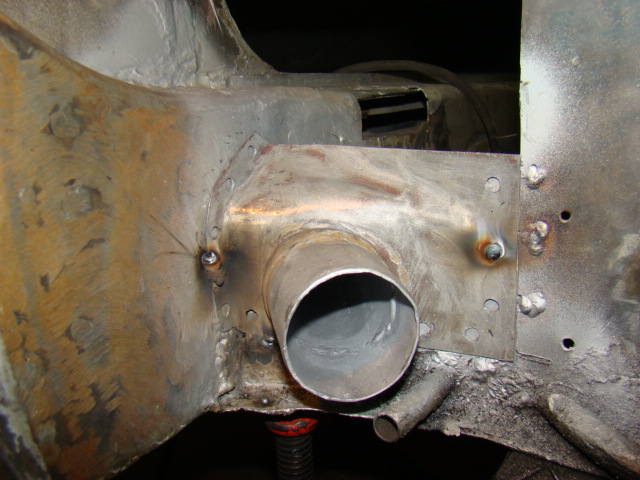
Here is the backing for the inner firewall.
 Plug welded in 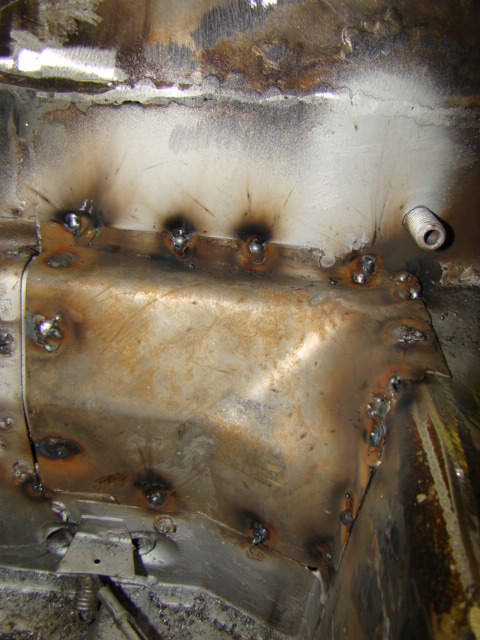 Closed up. Not pretty but stuck! 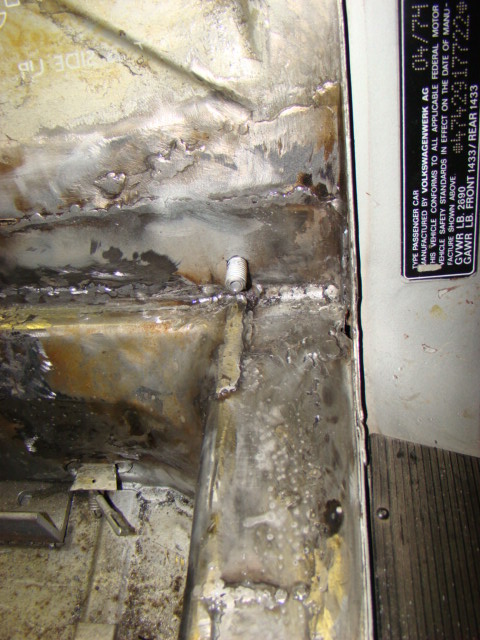 Dave |
|
|
|
| dinomium |
Nov 17 2007, 08:39 PM
Post
#16
|
|
Git on a chair son, all the good stuff is goin over yer head! Group: Benefactors Posts: 2,777 Joined: 2-January 03 From: Bremerton, WA Member No.: 74 Region Association: Pacific Northwest |
|
|
|
|
| greenie |
Nov 17 2007, 09:38 PM
Post
#17
|
|
Senior Member Group: Members Posts: 873 Joined: 26-October 04 From: Trinidad Member No.: 3,013 Region Association: Pacific Northwest |
Hi Dave,
How's then "sun burn" healing? Have you described the benefits of a welding helmut? (IMG:style_emoticons/default/welder.gif) You are doing very good work! Greenie |
|
|
|
| Root_Werks |
Nov 17 2007, 10:19 PM
Post
#18
|
|
Village Idiot Group: Members Posts: 8,321 Joined: 25-May 04 From: About 5NM from Canada Member No.: 2,105 Region Association: Pacific Northwest |
You know your 914 is trying really hard to recycle itself Dave. (IMG:style_emoticons/default/biggrin.gif) And there you go foiling its plans! (IMG:style_emoticons/default/welder.gif)
|
|
|
|
| McMark |
Nov 18 2007, 02:09 PM
Post
#19
|
|
914 Freak! Group: Retired Admin Posts: 20,179 Joined: 13-March 03 From: Grand Rapids, MI Member No.: 419 Region Association: None |
Looks great Dave! I hadn't seen that technique before. Welding in a backing plate first. I like it. (IMG:style_emoticons/default/thumb3d.gif)
Nice work! |
|
|
|
| DNHunt |
Nov 18 2007, 08:35 PM
Post
#20
|
|
914 Wizard? No way. I got too much to learn. Group: Members Posts: 4,099 Joined: 21-April 03 From: Gig Harbor, WA Member No.: 598 |
I started off the morning tacking in the engine shelf
 Finished it by stich welding the edges and butt welding in the cut across the shelf. Mark the reason I use that backing is it makes butt welds much easier and stronger I hope. 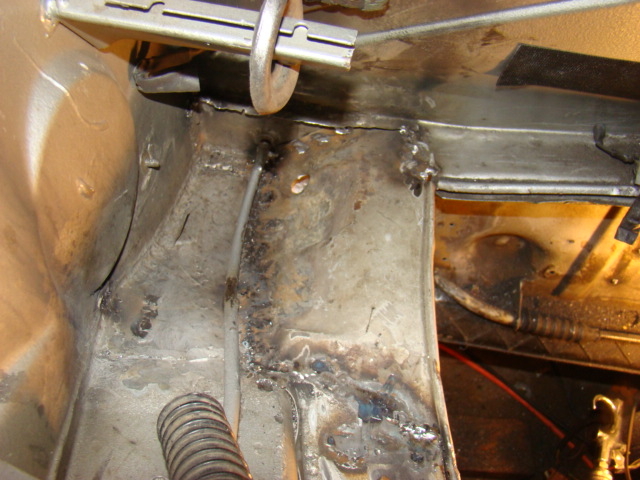 Added back in the triangle support and doughnut. 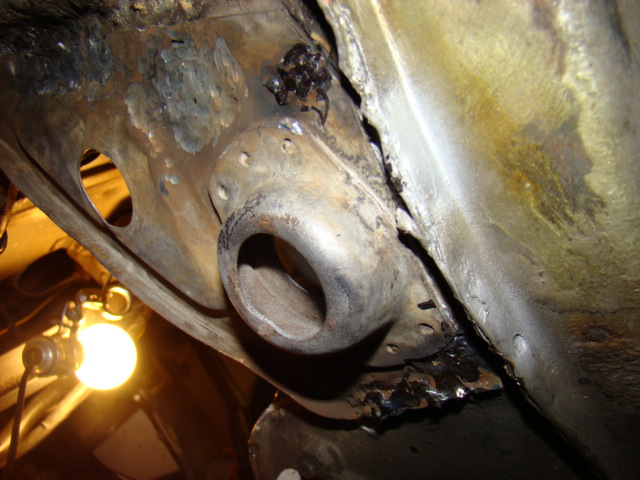 |
|
|
|
|
1 User(s) are reading this topic (1 Guests and 0 Anonymous Users)
0 Members:

|
Lo-Fi Version | Time is now: 18th May 2024 - 08:31 AM |
Invision Power Board
v9.1.4 © 2024 IPS, Inc.