|
|
|
Porsche, and the Porsche crest are registered trademarks of Dr. Ing. h.c. F. Porsche AG.
This site is not affiliated with Porsche in any way. Its only purpose is to provide an online forum for car enthusiasts. All other trademarks are property of their respective owners. |
|
|

  |

| Richard Casto |
 Jan 17 2009, 07:48 PM Jan 17 2009, 07:48 PM
Post
#81
|
|
Blue Sky Motorsports, LLC  Group: Members Posts: 1,465 Joined: 2-August 05 From: Durham, NC Member No.: 4,523 Region Association: South East States |
QUOTE(Gint @ Jan 17 2009, 10:13 AM)  Very nice work. How's that diff cover coming along? Thats a good question. It has been hanging outside for a few months. I will try to take a few photos of it tomorrow or Monday and post them. I will say that the "CRC Heavy Duty Corrosion Inhibitor" looks to be doing pretty good while "Gibbs Brand Penetrating Oil/Lubricant" is only doing so-so. |
   |

 
|
| Gint |
Jan 17 2009, 09:41 PM
Post
#82
|
|
Mike Ginter Group: Admin Posts: 16,108 Joined: 26-December 02 From: Denver CO. Member No.: 20 Region Association: Rocky Mountains |
That's what I was curious about. I bought some (Gibbs) a while back but haven't had a chance to use it for much.
|
|
|
|
| Richard Casto |
Jan 21 2009, 09:51 AM
Post
#83
|
|
Blue Sky Motorsports, LLC Group: Members Posts: 1,465 Joined: 2-August 05 From: Durham, NC Member No.: 4,523 Region Association: South East States |
Here are the photos of the diff cover. It sat in my garage for about two months and then outside hanging under my back porch for about six months. Roughly in these photos the top 1/2 are untreated. The bottom half are Gibbs, CRC Heavy Duty Corrosion Inhibitor (waxy "Tectyl" like coating) or a mix of the two. Around 3 and 9 o'clock are Gibbs + CRC. Just below that is Gibbs alone and at the very bottom is CRC alone.
Observations...
My conclusion so far are...
 outside 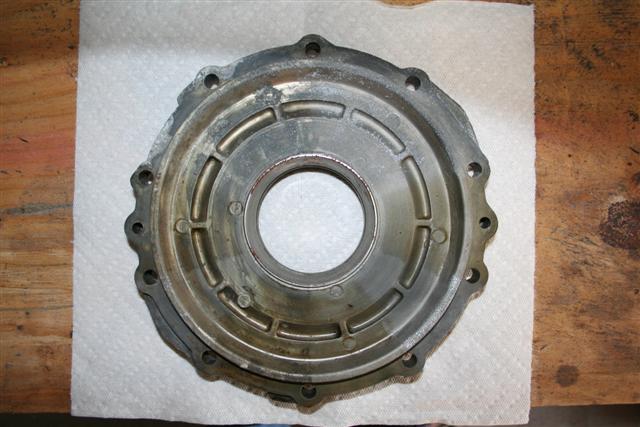 inside |
|
|
|
| Richard Casto |
Jan 21 2009, 09:55 AM
Post
#84
|
|
Blue Sky Motorsports, LLC Group: Members Posts: 1,465 Joined: 2-August 05 From: Durham, NC Member No.: 4,523 Region Association: South East States |
It may be hard to see the corrosion from the last six months in the photos above, but if you want to download 8 MP images you can find those at the following link on my site...
Repair and Restoration - Part 14 - Transmission Just click on each thumbnail image to open up the larger image. |
|
|
|
| Richard Casto |
Jan 21 2009, 10:46 AM
Post
#85
|
|
Blue Sky Motorsports, LLC Group: Members Posts: 1,465 Joined: 2-August 05 From: Durham, NC Member No.: 4,523 Region Association: South East States |
Ok, back to fabrication and welding!!
Now I need to work on putting the metal heater tubes back in. First I need to fabricate replacement brackets. I created a template based upon the remnants of the original rusted brackets. The same template works for both the front and rear bracket. However both have the "tabs" folded in a different direction. 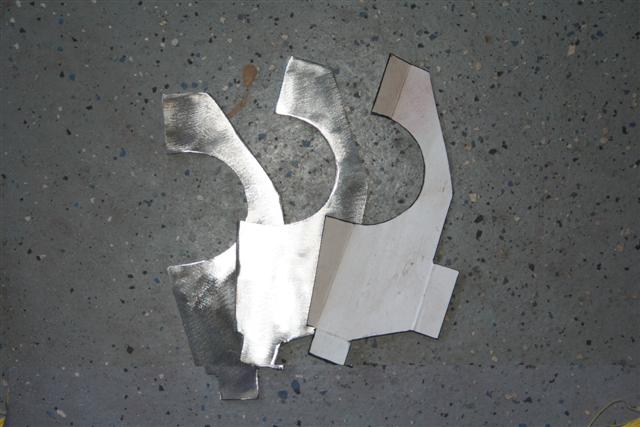 Paper template plus two brackets cut out.  With tabs bent |
|
|
|
| Richard Casto |
Jan 21 2009, 10:49 AM
Post
#86
|
|
Blue Sky Motorsports, LLC Group: Members Posts: 1,465 Joined: 2-August 05 From: Durham, NC Member No.: 4,523 Region Association: South East States |
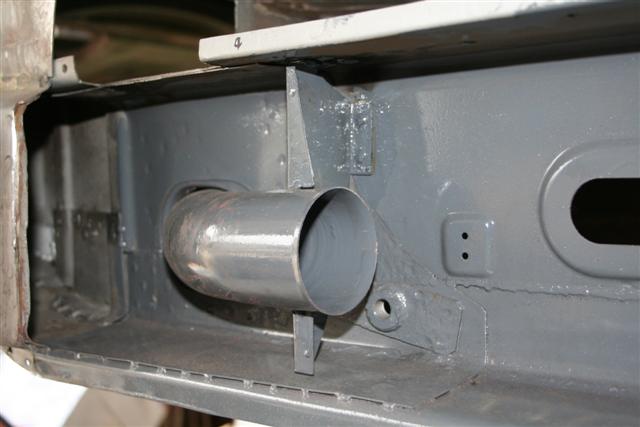
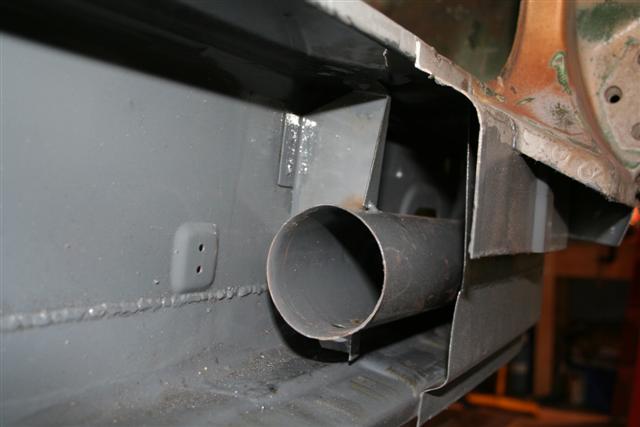
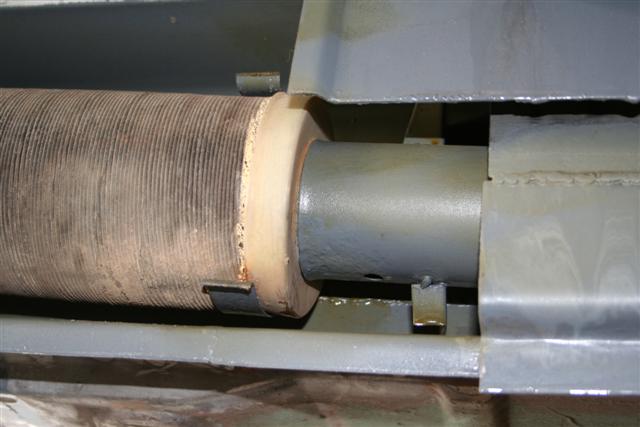
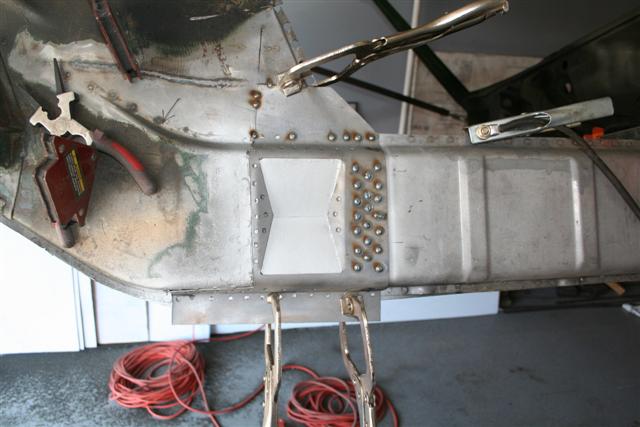
Brackets and the metal heater tubes all welded into place. Everything has been painted in POR-15. It all went together pretty well. I have test fitted the actual heater tube and it fits fine. I have the three "U clips" that hold the tube in place ready to go. Those are riveted into place. However before I put them on, I want to finish some welding on the interior side of the longitudinals. Those welds will burn through some of the POR-15 and I want to touch that up before I close this section up.
  |
|
|
|
| Richard Casto |
Jan 21 2009, 10:57 AM
Post
#87
|
|
Blue Sky Motorsports, LLC Group: Members Posts: 1,465 Joined: 2-August 05 From: Durham, NC Member No.: 4,523 Region Association: South East States |
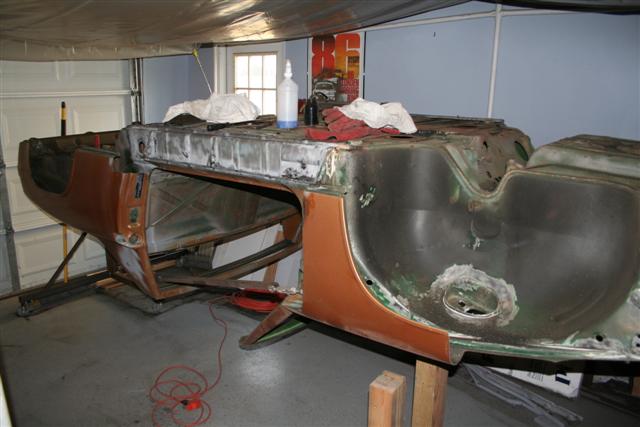
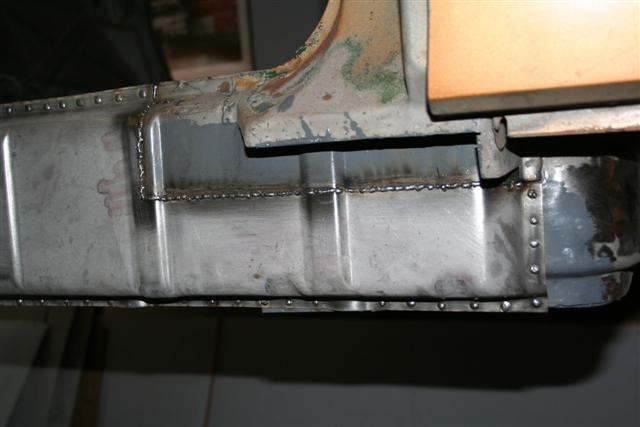
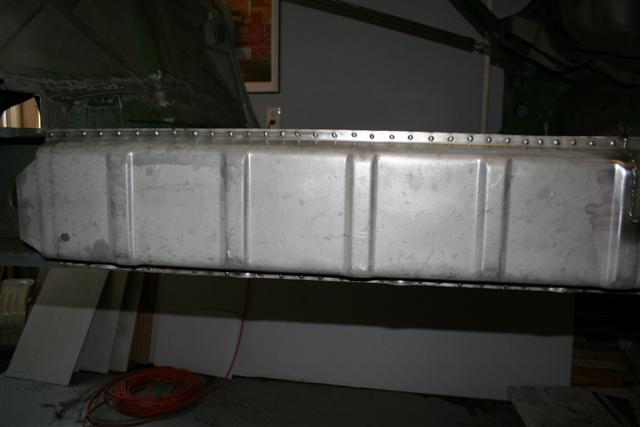
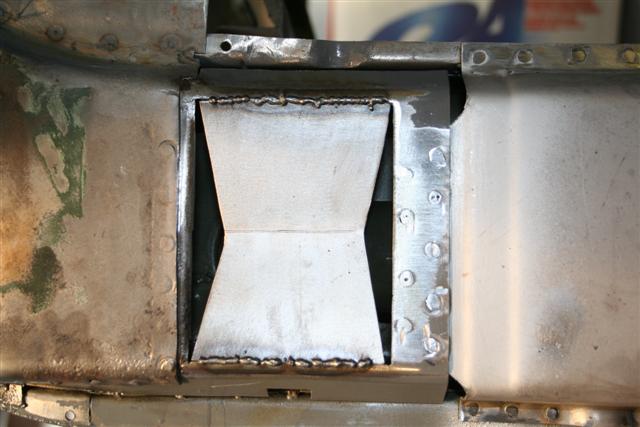
It's hard to believe that it's been nearly a year since I created the replacement floor section, but it is now welded in.
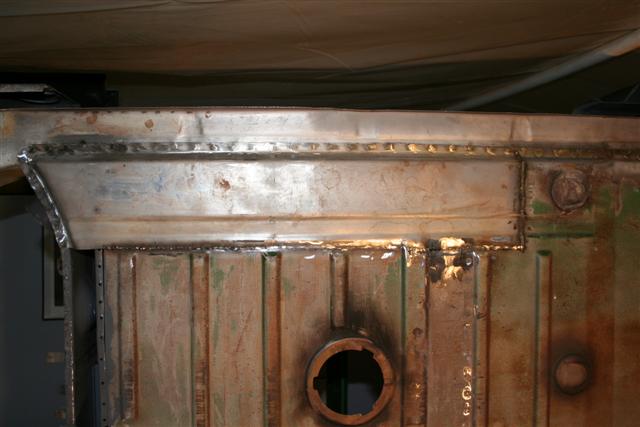 After welding, but before I finished grinding down the welds 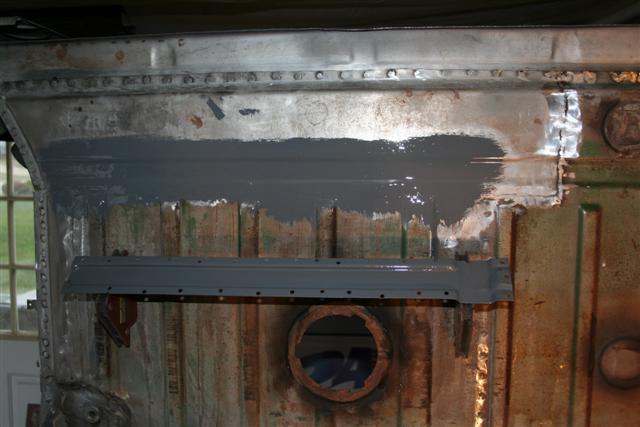 Welds grinded flush, treated with Metal Ready and POR-15. I also removed the factory "U channel" reinforcement from the old floor. It was in pretty good shape. I media blasted it, treated with Metal Ready and POR-15. It just needs to be welded. When I test fit, I mark the locations that the plug welds will be done and then grind the POR-15 off a small circle so I am getting a good weld. You can't weld through POR-15. You can also see that I welded in the last floor patch on the passenger side right under the firewall bulkhead. 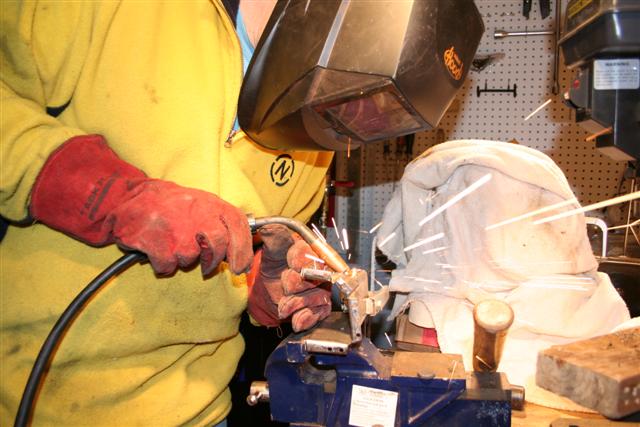 Action shot of me working on fabricating the small section of the cross member that is on the interior of the car. This is the box section that runs left to right. I had to cut out the passenger side as it was swiss cheese and could not be repaired. 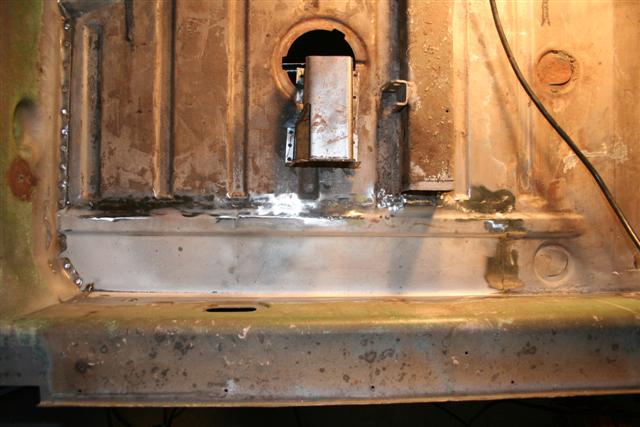 Here is a top view of the replacement floor section and the replacement end for the box section (it still needed work) Well, that's it for now. I hope to finish up much of the interior of the passenger longitudinal in the very near future. Then I need to work on recreating the section right under the jack receiver tube. I have the replacement tube and pyramid, but I need to fabricate the section below that. Comments and questions are welcome! |
|
|
|
| FourBlades |
Jan 21 2009, 11:21 AM
Post
#88
|
|
From Wreck to Rockin Group: Members Posts: 2,056 Joined: 3-December 07 From: Brevard, FL Member No.: 8,414 Region Association: South East States |
Its looking good man! (IMG:style_emoticons/default/piratenanner.gif) Did you say the metal heater tubes would be welded on all joints? You would hate to develop any play where they could clank every time you hit a bump. John |
|
|
|
| Richard Casto |
Jan 21 2009, 11:30 AM
Post
#89
|
|
Blue Sky Motorsports, LLC Group: Members Posts: 1,465 Joined: 2-August 05 From: Durham, NC Member No.: 4,523 Region Association: South East States |
QUOTE(FourBlades @ Jan 21 2009, 12:21 PM) Its looking good man! (IMG:style_emoticons/default/piratenanner.gif) Did you say the metal heater tubes would be welded on all joints? You would hate to develop any play where they could clank every time you hit a bump. John Thanks! (IMG:style_emoticons/default/beerchug.gif) When I removed the pipes, they seemed to be welded in place on both end. For the front, there was two small stick weld beads run (total pain to grind so I could remove the pipe) where the pipe enters the passenger area as well as two on the brackets. Actually the pipe to bracket connection were brazed and not arc welded at the factory. For the rear it was a similar thing. Two or three small arc weld beads in the engine compartment area and one or two on the bracket. I have the front welded in place 100%. I actually haven't welded the rear in the engine compartment area, but it's on my to-do list. (IMG:style_emoticons/default/smile.gif) The brackets themselves are attached in two places. On the side and top of the longitudinal. It's all pretty solid. |
|
|
|
| Richard Casto |
Mar 31 2009, 07:14 PM
Post
#90
|
|
Blue Sky Motorsports, LLC Group: Members Posts: 1,465 Joined: 2-August 05 From: Durham, NC Member No.: 4,523 Region Association: South East States |
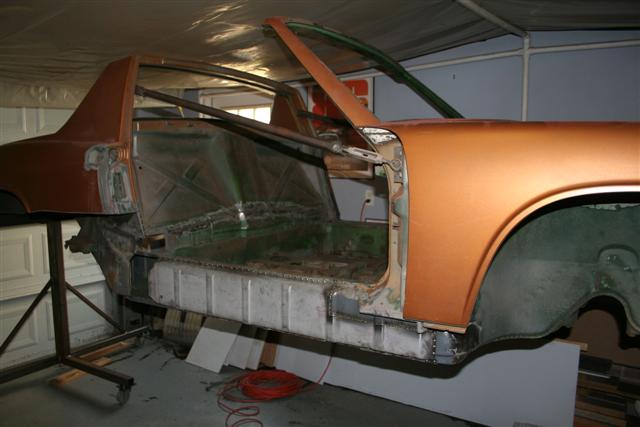
Ok, it's been months since I have updated this. Instead of going into a lot of details on how and what I am doing, I will just point you to my 914 blog instead...
http://motorsport.zyyz.com/project_914_Blog.htm I think that tonight I am just going to post a bunch of photos. I always enjoy other people's progress threads when they have lots of photos. So here it goes... |
|
|
|
| Richard Casto |
Mar 31 2009, 07:19 PM
Post
#91
|
|
Blue Sky Motorsports, LLC Group: Members Posts: 1,465 Joined: 2-August 05 From: Durham, NC Member No.: 4,523 Region Association: South East States |
Car is upside down so this is driver side...
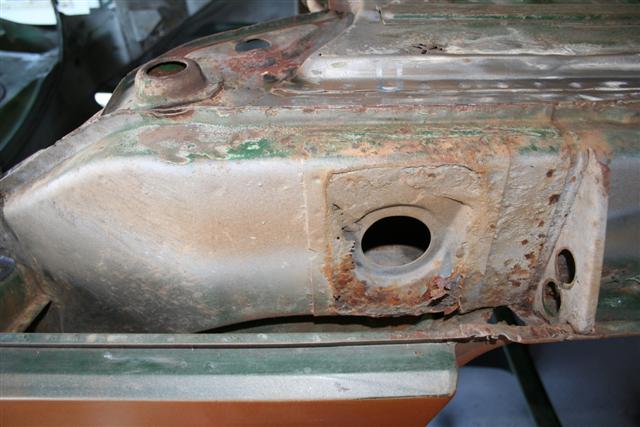 PO removed most of jack point tube and pyramid 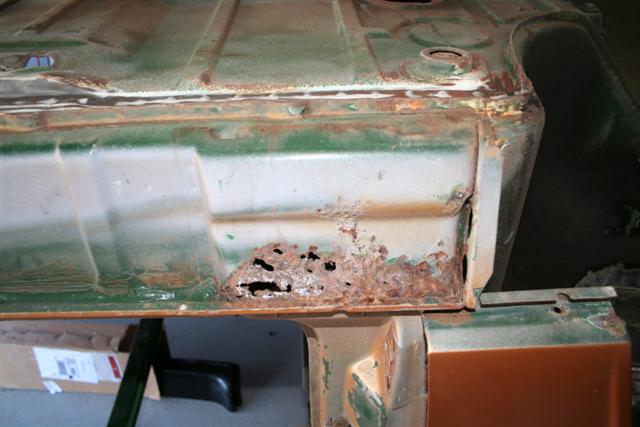 Gotta fix the front as well 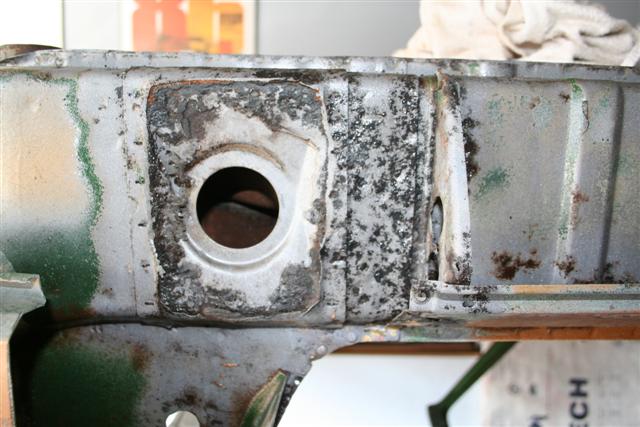 Quick media blasting to see extend of damage. 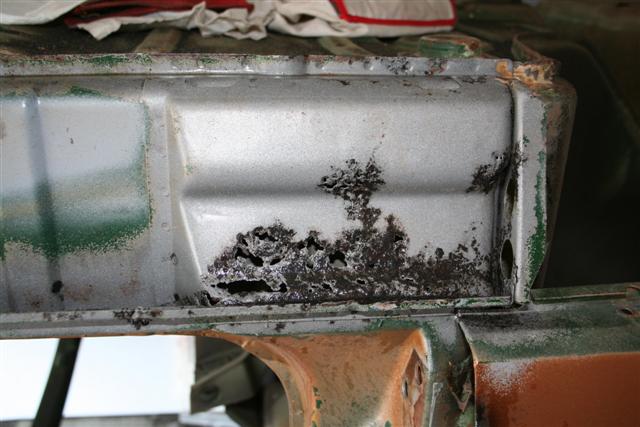 Same for front 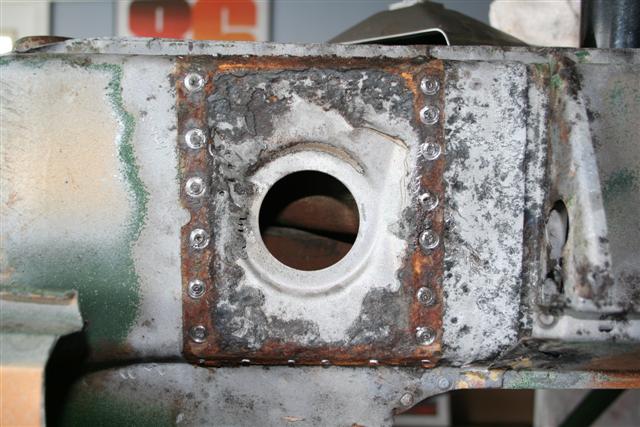 Drill out spot welds of whats left of the pyramid 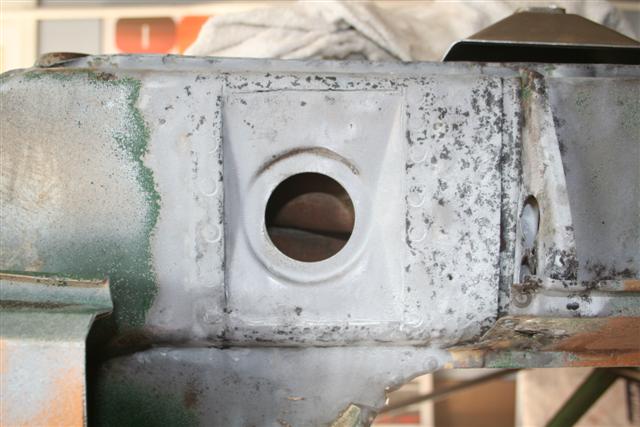 More media blasting |
|
|
|
| Richard Casto |
Mar 31 2009, 07:24 PM
Post
#92
|
|
Blue Sky Motorsports, LLC Group: Members Posts: 1,465 Joined: 2-August 05 From: Durham, NC Member No.: 4,523 Region Association: South East States |
 Media blasted and treated with Metal Ready. I have decided at this point I am going to remove and replace the driver side sill.  POR-15 on the inside of where I am welding back my crossmember on the passenger side. 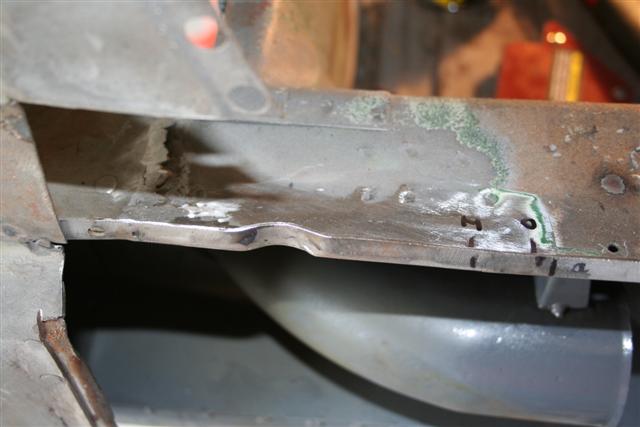 Replicated the half-moon bump out. Getting ready to weld outside of longitudinal back into place 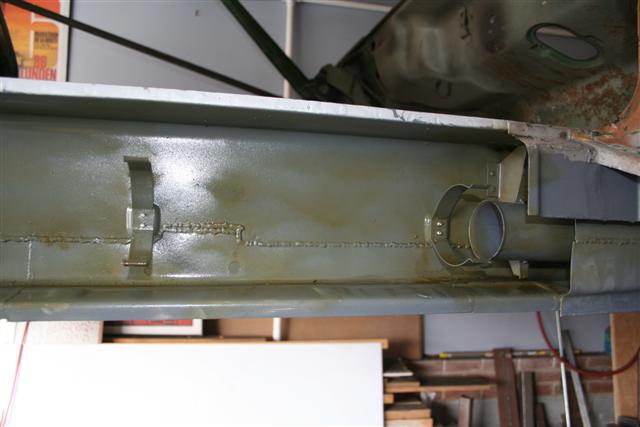 Spray inside with CRC anti-corrosion. I will probably go back and do a proper cavity wax at some point. 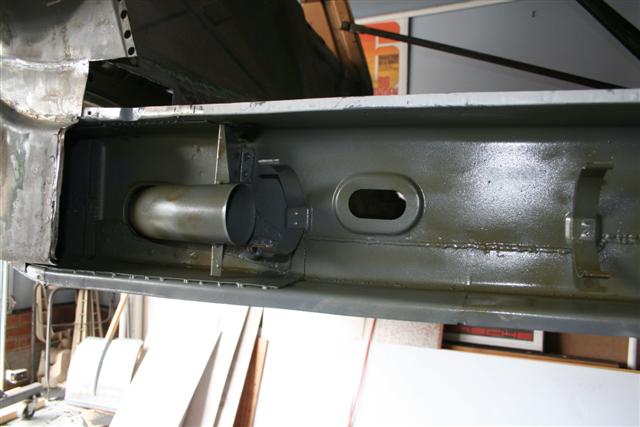 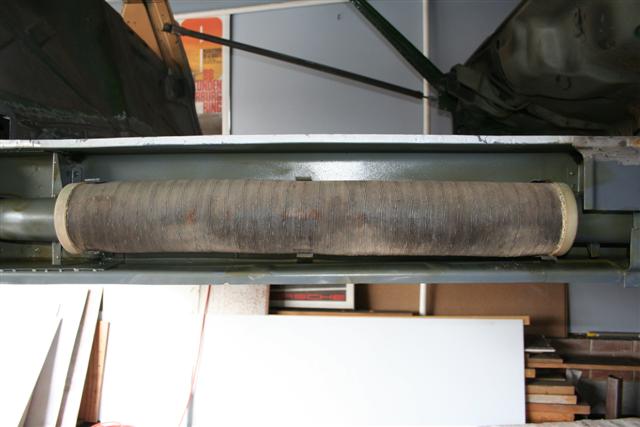 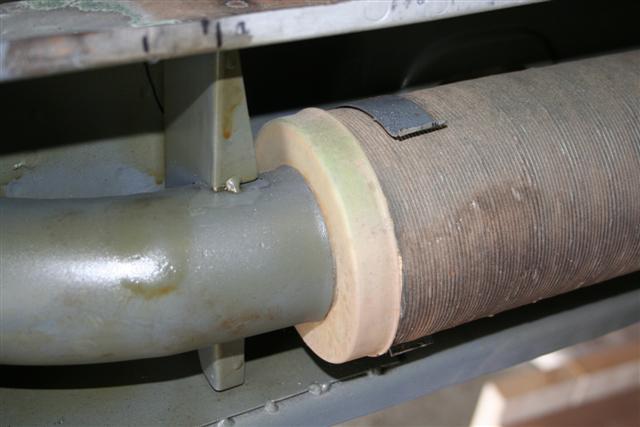 Heater tube back in place. |
|
|
|
| Richard Casto |
Mar 31 2009, 07:29 PM
Post
#93
|
|
Blue Sky Motorsports, LLC Group: Members Posts: 1,465 Joined: 2-August 05 From: Durham, NC Member No.: 4,523 Region Association: South East States |
    All welded on. Fabrication takes a lot of time. Welding it together goes quick! 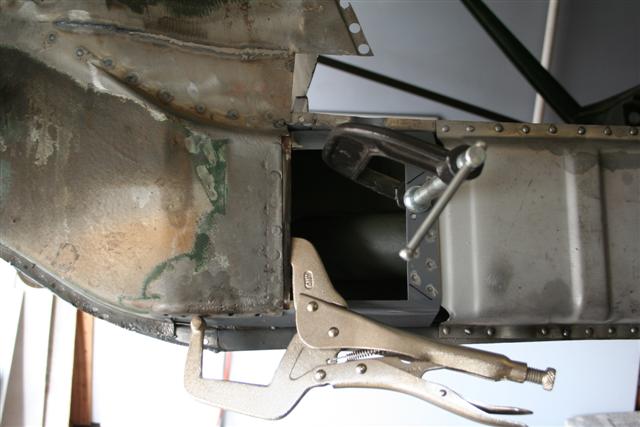 Now for the double wall section where the jack receiver is located. 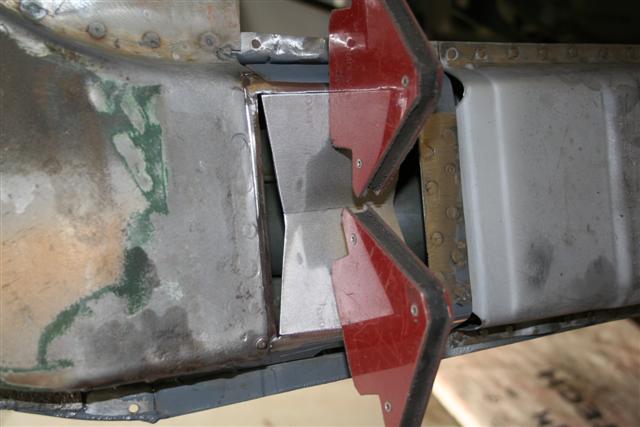 Replicate the bump in recess for the receiver tube. This is just the inner layer of the double wall |
|
|
|
| Richard Casto |
Mar 31 2009, 07:35 PM
Post
#94
|
|
Blue Sky Motorsports, LLC Group: Members Posts: 1,465 Joined: 2-August 05 From: Durham, NC Member No.: 4,523 Region Association: South East States |
 Just need to grind down the welds and add in the rest of the inner layer 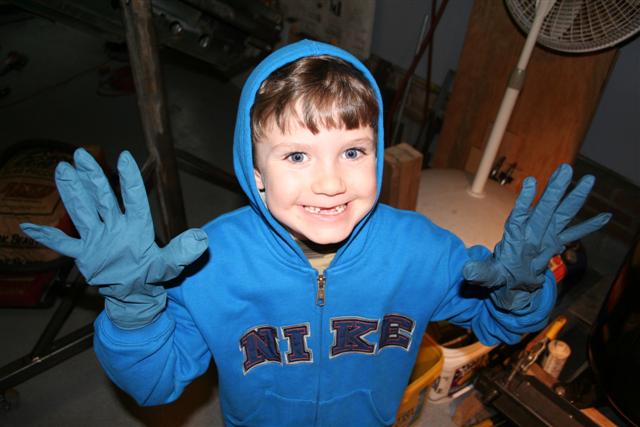 My son wanted help. He can't really help with the welding yet, so we decided to work on taking apart the rear swing arms. All he wants for Christmas is his two front teeth. (IMG:style_emoticons/default/wink.gif) 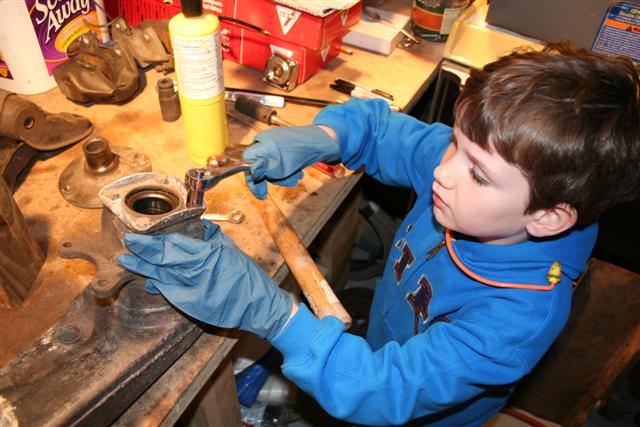 He used the impact wrench right before this. I wish I had a picture of that. 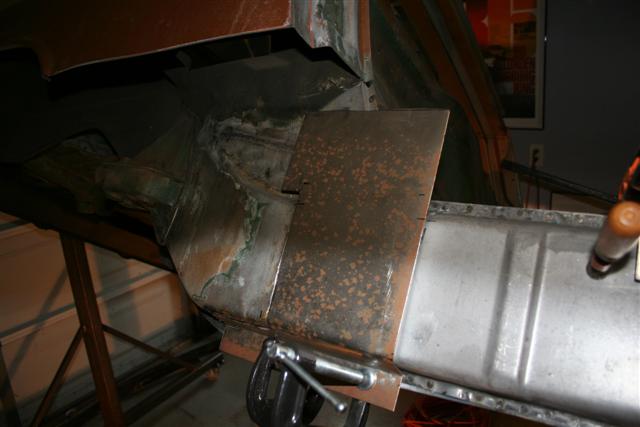 First two bends on the fabrication of the outside layer 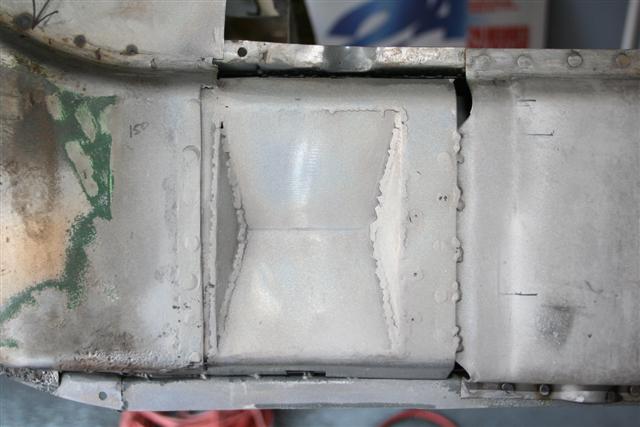 Inside layer just about all ready to go. I painted it with weldable primer right after this. 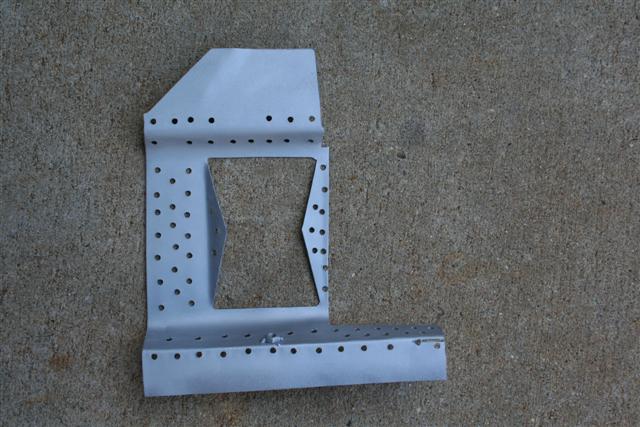 Here is the main section for the outside. It's ready and painted. Just need to weld. |
|
|
|
| Richard Casto |
Mar 31 2009, 07:41 PM
Post
#95
|
|
Blue Sky Motorsports, LLC Group: Members Posts: 1,465 Joined: 2-August 05 From: Durham, NC Member No.: 4,523 Region Association: South East States |
 About 1/2 done with my welding. 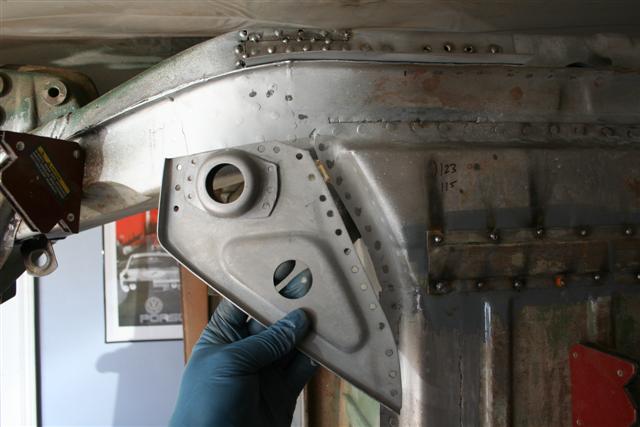 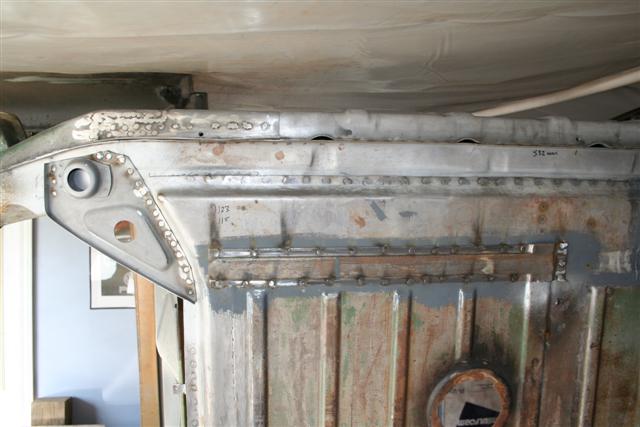 While the car was rotated to get at the bottom of the stuff above, I decided it was a good time to put on the replacement donut and triangle 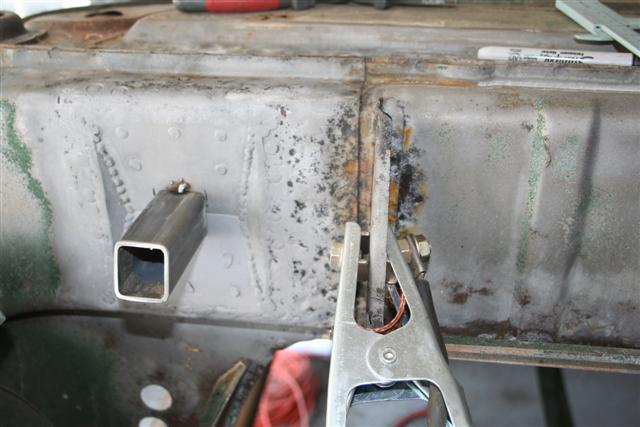 Jumping ahead a bit, I have prepared both the driver and passenger side for the receiver tube. I measured (based upon location of previous pyramid) and tacked into place.  Double check that it's in the right place and then... 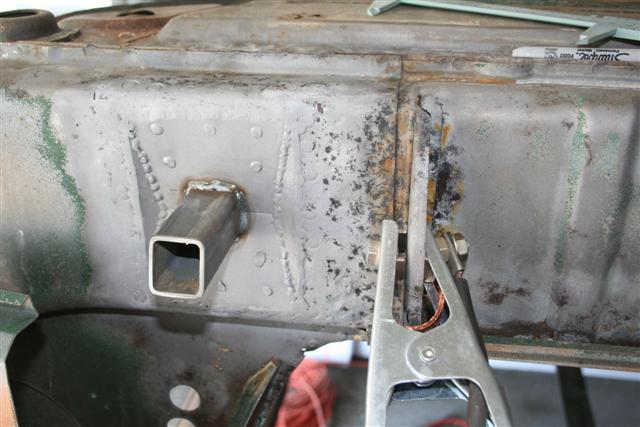 Finish welding the tube |
|
|
|
| Richard Casto |
Mar 31 2009, 07:46 PM
Post
#96
|
|
Blue Sky Motorsports, LLC Group: Members Posts: 1,465 Joined: 2-August 05 From: Durham, NC Member No.: 4,523 Region Association: South East States |
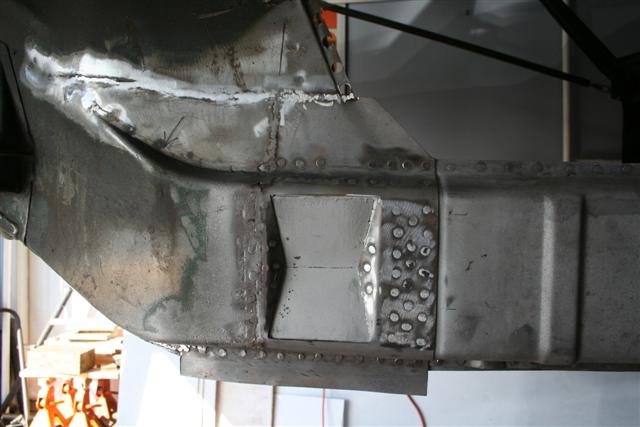 Mostly welded and about 90% ground down. Just missing the bow-tie. Note this is not a perfect replica of the shape of the factory stamping. They have a flat spot that you weld the tub to. I decided it was going to be too difficut to replace that flat spot and was not going to be seen anyhow. 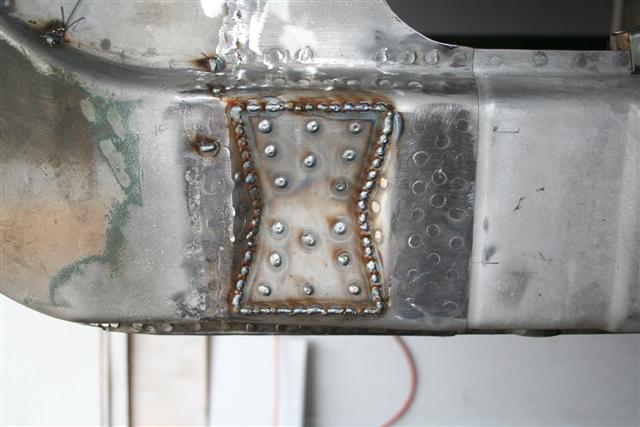 Bow-tie in place. This is the reverse pyramid that creates about a 13mm recess for the receiver tube. 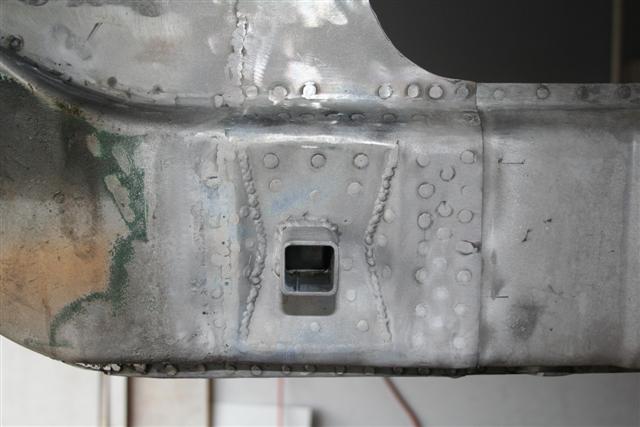 Tube welded in, welds ground down, media blasted and treated with Metal Ready. 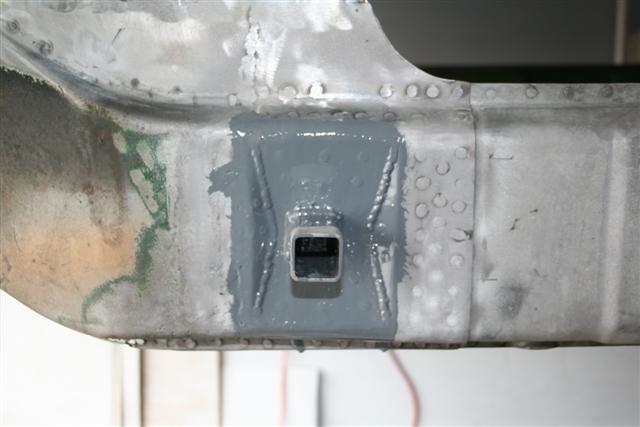 POR-15 on the inside. I will grind off some of the POR-15 for my rosette welds on the pyramid 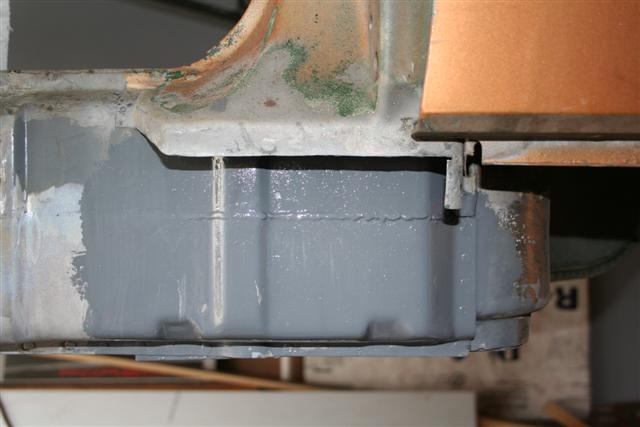 Same for the front. I need to fabricate the section that covers this. |
|
|
|
| Richard Casto |
Mar 31 2009, 07:50 PM
Post
#97
|
|
Blue Sky Motorsports, LLC Group: Members Posts: 1,465 Joined: 2-August 05 From: Durham, NC Member No.: 4,523 Region Association: South East States |
Well that is it for now. I am going to continue to focus on the passenger and driver side longitudinal. I had tried to order the sill plates from Restoration Design, but Bill was out of them. That's unfortunate as his price is very good on those. Alternative is AA. They probably have them in stock, but they are pricey if you compare to RD. I am kicking myself that I didn't know this prior to the AA Valentine Day sale. Budget continues to be tight, but I am just going to bite the bullet and order them from AA. Bill said it may be months before he gets to doing the sills. (IMG:style_emoticons/default/sad.gif)
Questions and comments are welcome! Enjoy the photos! |
|
|
|
| veltror |
Apr 1 2009, 05:34 PM
Post
#98
|
|
Senior Member Group: Members Posts: 930 Joined: 27-April 08 From: Potters Bar Herts UK Member No.: 8,978 Region Association: None |
Excellent work, it really is encouraging to see this sort of stuff, i still have a long way to go on mine.
|
|
|
|
| FourBlades |
Apr 1 2009, 07:19 PM
Post
#99
|
|
From Wreck to Rockin Group: Members Posts: 2,056 Joined: 3-December 07 From: Brevard, FL Member No.: 8,414 Region Association: South East States |
Really nice quality work Richard! (IMG:style_emoticons/default/piratenanner.gif) (IMG:style_emoticons/default/smilie_pokal.gif) Thanks for all the great pictures too, it is always educational to see how someone approaches repairs like that. I don't think I have seen anyone reconstruct the inside of the jacking point so thoroughly, that looks like the best way to do it...I can't remember now what I did, but I am sure it was a hack job compared to yours... Keep it up, you are on a roll now. John |
|
|
|
| dlo914 |
Apr 1 2009, 09:38 PM
Post
#100
|
|
Whatchu' lookin' at?!?! Group: Members Posts: 3,433 Joined: 6-September 04 From: San Gabriel, CA Member No.: 2,697 |
Nice welds! (IMG:style_emoticons/default/smile.gif) ...what are you using? I'm so glad the longs the 75 project only has one rust area on the passenger side jack pyramid. We ended up deleting the pyramid since we're not gonna use it. And probably also weld up the hole on the rocker panel.
|
|
|
|
|
1 User(s) are reading this topic (1 Guests and 0 Anonymous Users)
0 Members:

|
Lo-Fi Version | Time is now: 11th June 2026 - 05:39 PM |
Invision Power Board
v9.1.4 © 2026 IPS, Inc.