|
|
|
Porsche, and the Porsche crest are registered trademarks of Dr. Ing. h.c. F. Porsche AG.
This site is not affiliated with Porsche in any way. Its only purpose is to provide an online forum for car enthusiasts. All other trademarks are property of their respective owners. |
|
|

  |

| my928s4 |
 Jan 12 2012, 08:29 AM Jan 12 2012, 08:29 AM
Post
#201
|
|
Member  Group: Members Posts: 349 Joined: 18-August 07 From: Spokane, WA Member No.: 8,018 Region Association: Pacific Northwest |
QUOTE(Lennies914 @ Jan 7 2012, 07:55 PM)  The one mystery connector in the trunk was for the 02 sensor. That makes sense and then the interior connector was for the O2 counter. |
   |

 
|
| my928s4 |
Jan 12 2012, 08:36 AM
Post
#202
|
|
Member Group: Members Posts: 349 Joined: 18-August 07 From: Spokane, WA Member No.: 8,018 Region Association: Pacific Northwest |
QUOTE(OllieG @ Jan 12 2012, 01:30 AM) This is a great thread...really useful for novices like me, thanks alot! I'm in the early stages of a 6cyl resto/conversion, about to strip the underside, and will also be welding flares on shortly. The epoxy primer you used for the underside - is that a 2pk epoxy? If so, what breathing mask did you use? I've read for 2pk paints you really need an air fed respirator..what do you think? You said in an earlier post that you made a mistake with one of the flares by fixing the bottoms first and working up from both sides - what went wrong when you did it this way? How did you do it in the end so it worked out...? Cheers. (IMG:style_emoticons/default/welcome.png) Glad you found the thread useful, there is a lot of data here which has proved invaluable to me and if I can do my bit to help others then that is great. Yes Epoxy is 2K, the one from Eastwood which I used on the underside contained no iscyanates but even so I used a respirator although not an air fed. By starting welding at the bottom of the flares I ended up with excess material at the top, not a good situation. You should check out other posts on flare installation also, lots of good info out there. |
|
|
|
| my928s4 |
Jan 12 2012, 08:46 AM
Post
#203
|
|
Member Group: Members Posts: 349 Joined: 18-August 07 From: Spokane, WA Member No.: 8,018 Region Association: Pacific Northwest |
I have been scouring my storage bins for parts not seen for a couple of years, I want to get as much of the electrical components hooked up for testing even if this is temporary. Anyway dug out the fresh air fan assembly, full of old crud and was stiff to turn by hand, thought the motor spindle was bent ....
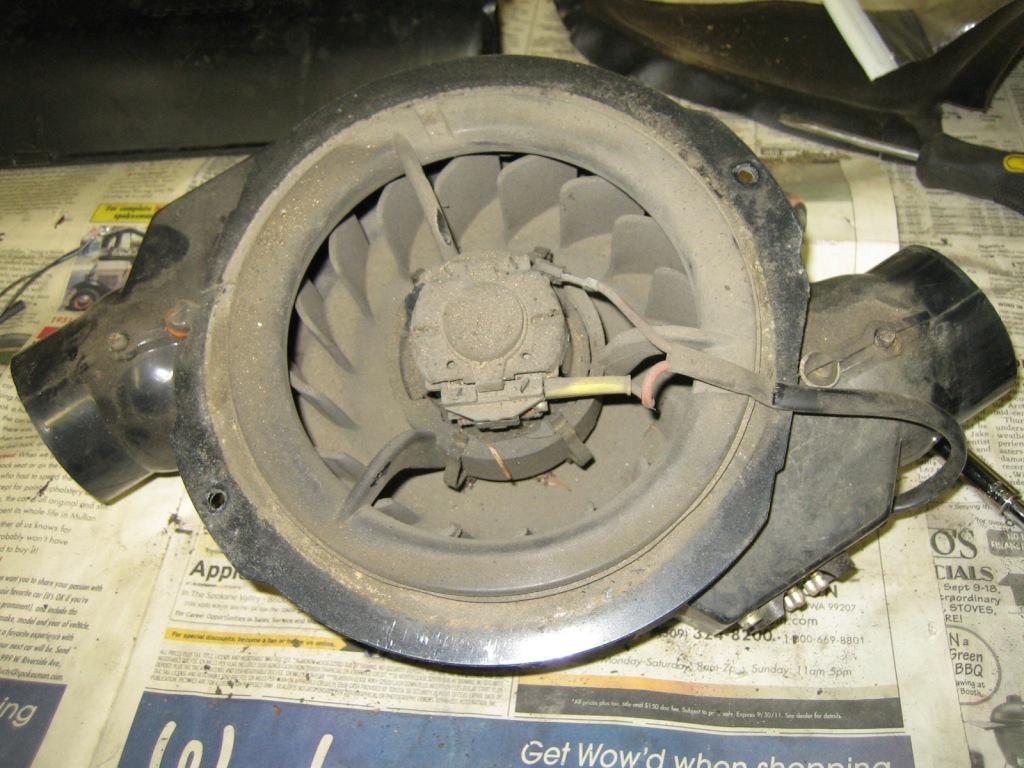 but turned out this plastic part is trashed, looks like I need to look for a new assembly. 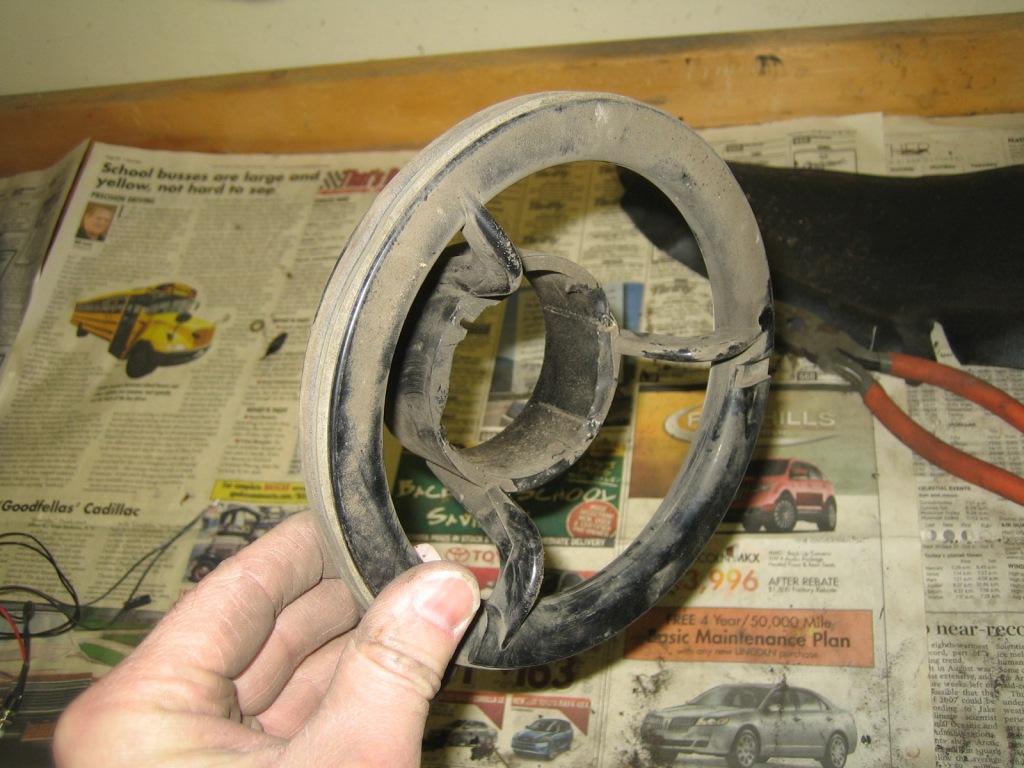 Put the instruments back in, most of the bulbs were toast, found most locally but will need to order some. Intend to get these rebuilt but they will do for now. 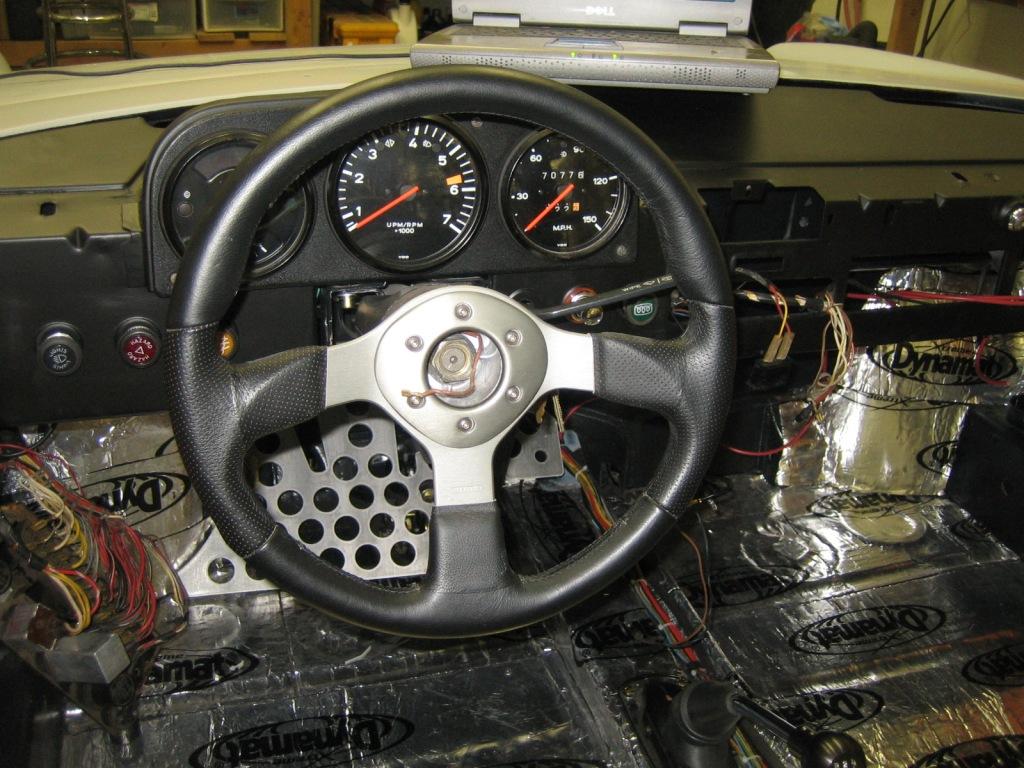 Got my Jwest fuse panel!!, despite the post office bet attempt to lose it. Wires are tight in this area and took some manipulation to get it all in order. I only needed one piggy back connector for the rear defog. 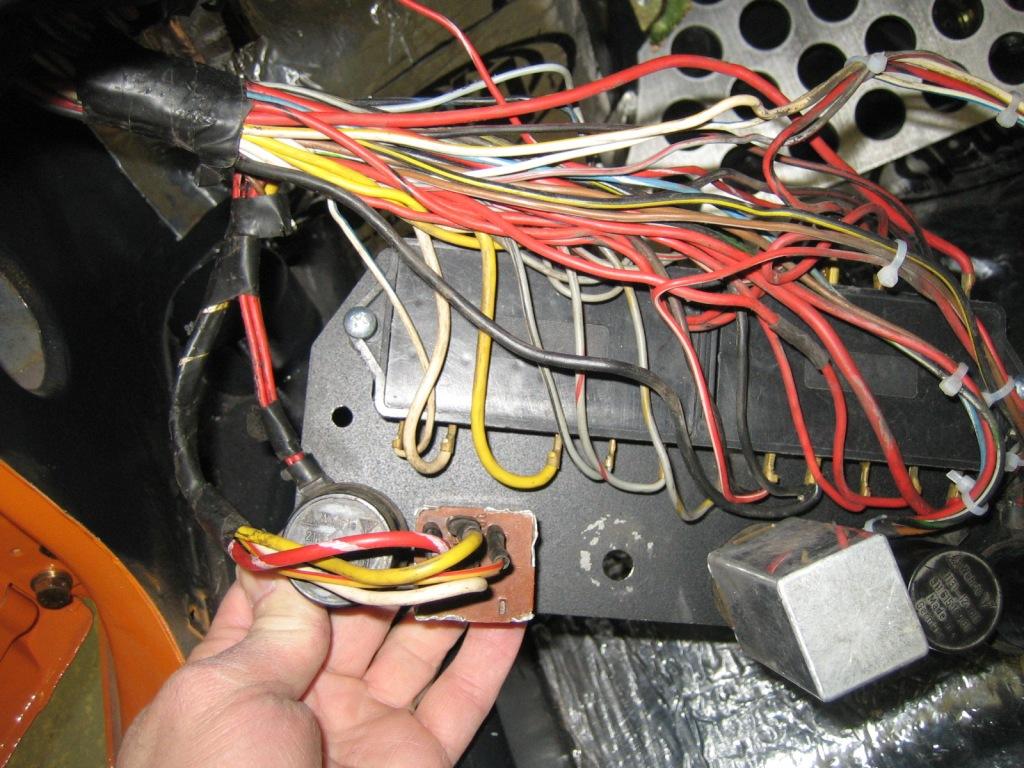 What eventually held up the panel from going in was this relay, it is not the right one and sits upright. Needs to lie on its side. 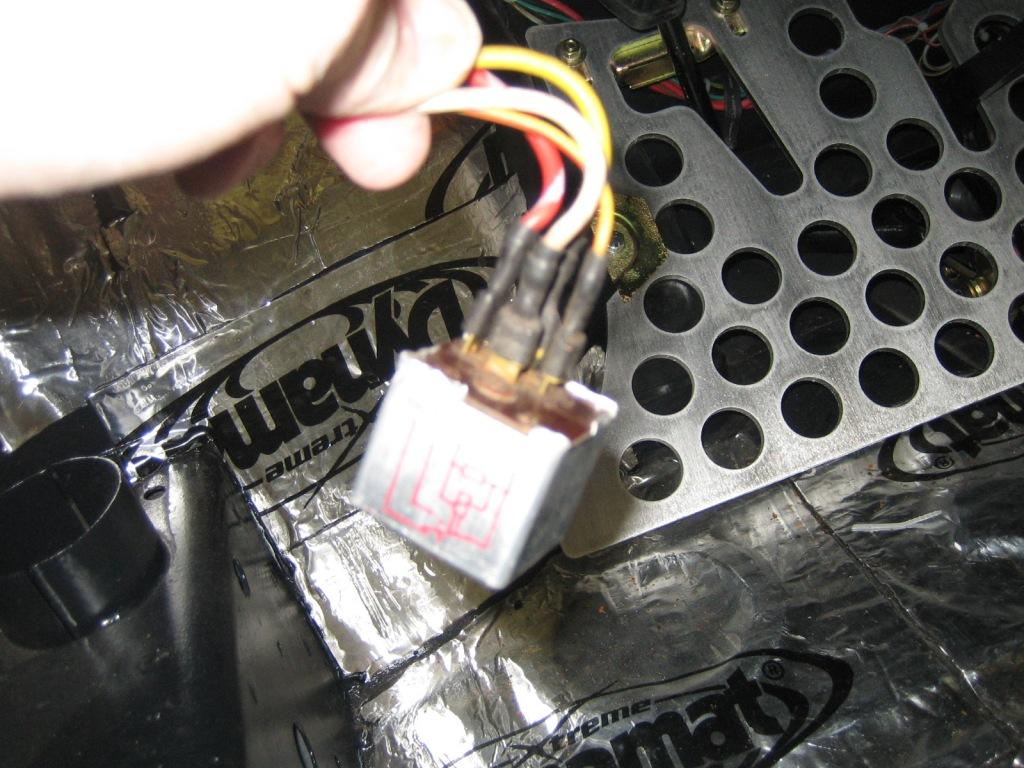 All in and looking good. 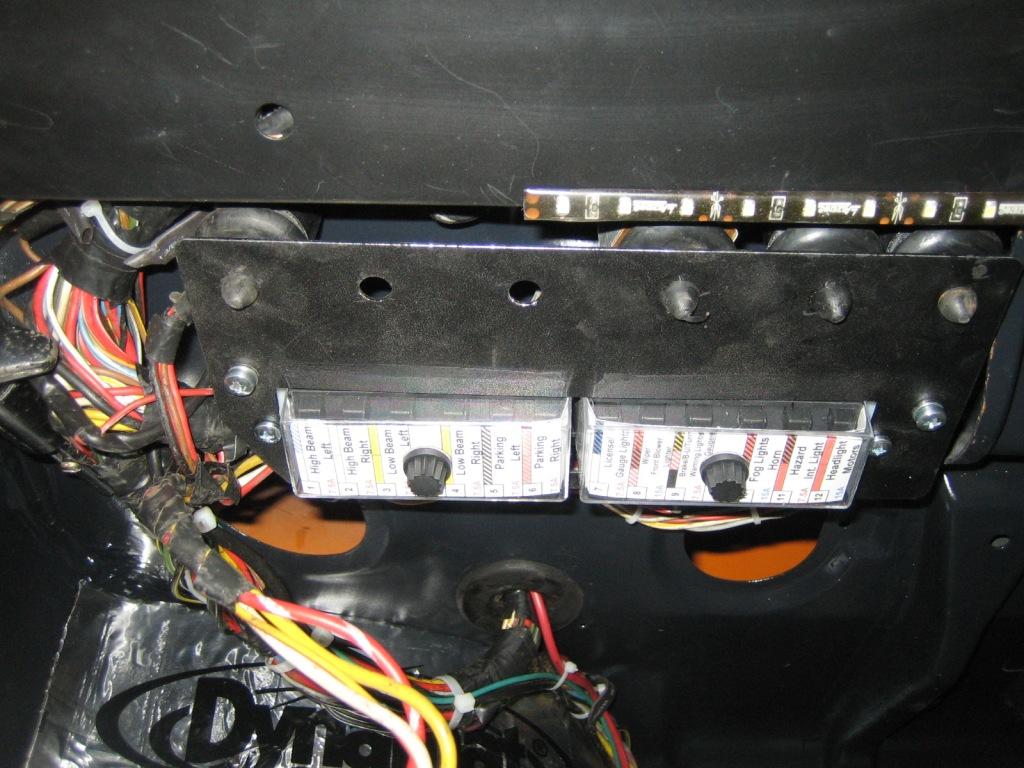 |
|
|
|
| sawtooth |
Jan 12 2012, 10:00 AM
Post
#204
|
|
Member Group: Members Posts: 297 Joined: 25-June 08 From: Boise, ID Member No.: 9,211 Region Association: Intermountain Region |
Wow Chris, nice project. Not sure how I missed this one, fantastic work. Love your decisions to go flared and suby, doesn't get any better.
|
|
|
|
| OU8AVW |
Jan 12 2012, 02:39 PM
Post
#205
|
|
Yacht Rigger Group: Members Posts: 1,806 Joined: 1-October 08 From: Granbury, TX Member No.: 9,601 Region Association: Southwest Region |
Just got my stoke on.....
Thanks Mike- |
|
|
|
| my928s4 |
Jan 15 2012, 06:11 PM
Post
#206
|
|
Member Group: Members Posts: 349 Joined: 18-August 07 From: Spokane, WA Member No.: 8,018 Region Association: Pacific Northwest |
Got the undertray back from the powder coaters, managed to re-use my old seals for now with some extra added around the cut out for the coolant pipes.
  Decided to tidy up the wiring in the front trunk and be done with it, I bought these tie-wraps to hold the loom where the old metal clips had broken off. Worked well, will use these in the engine bay also. 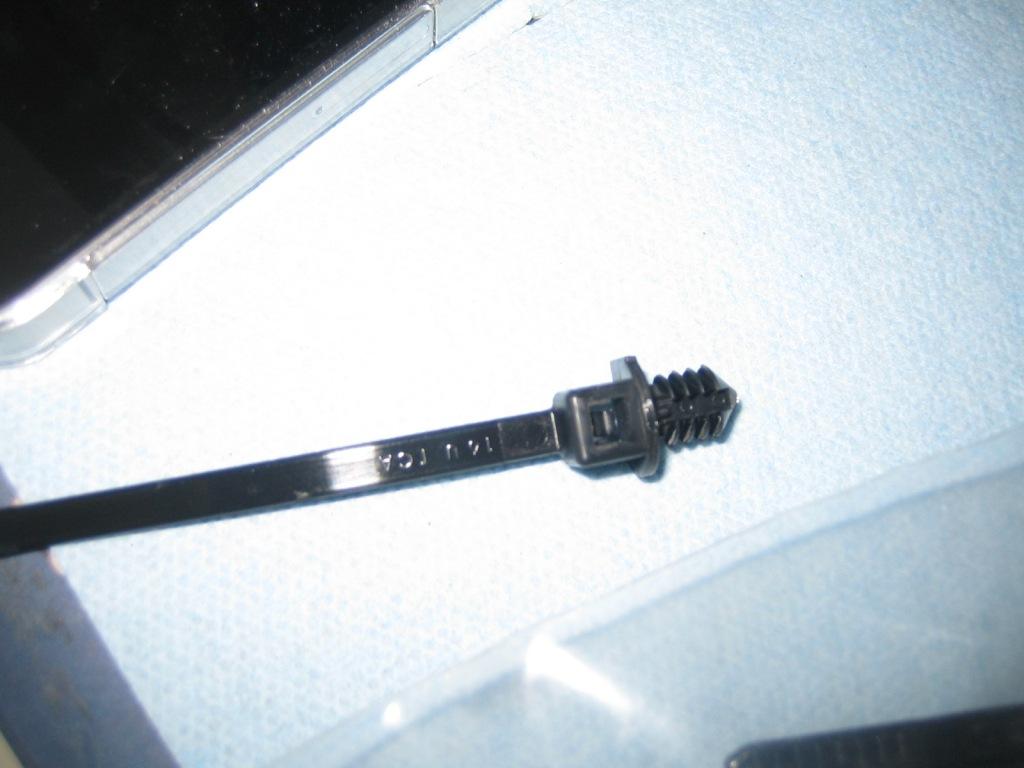 Had to remove the radiator (again) but hopefully it can stay in for a while now. Pretty pleased with how the wiring turned out, just need to add a connector for the radiator fans. 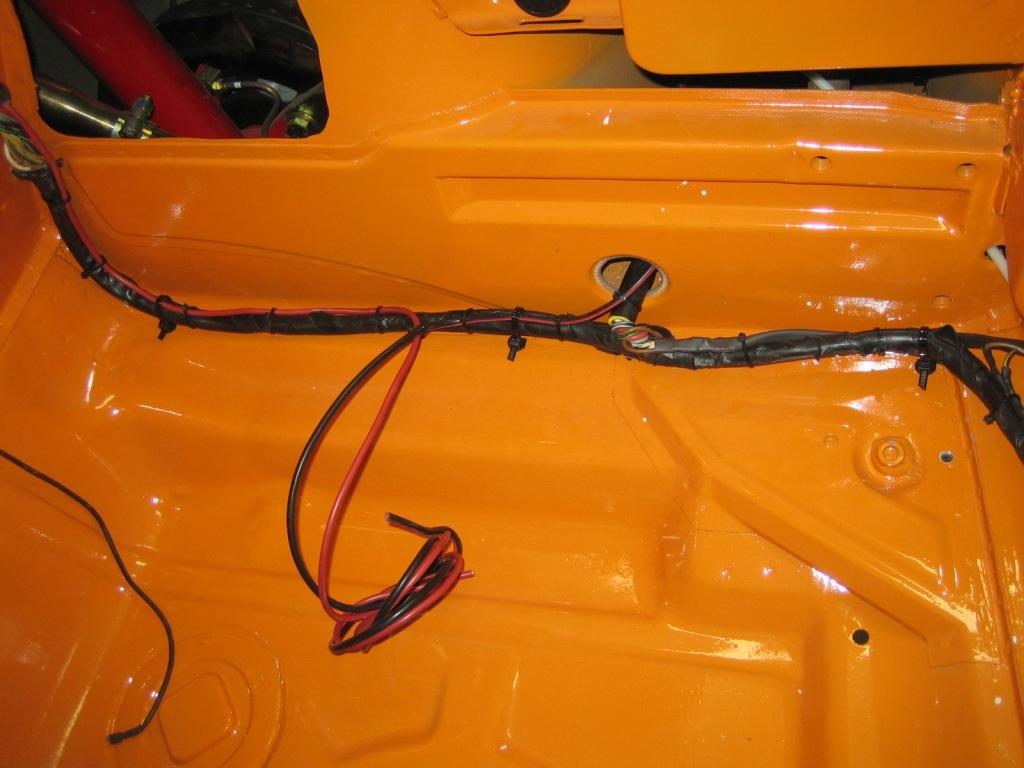 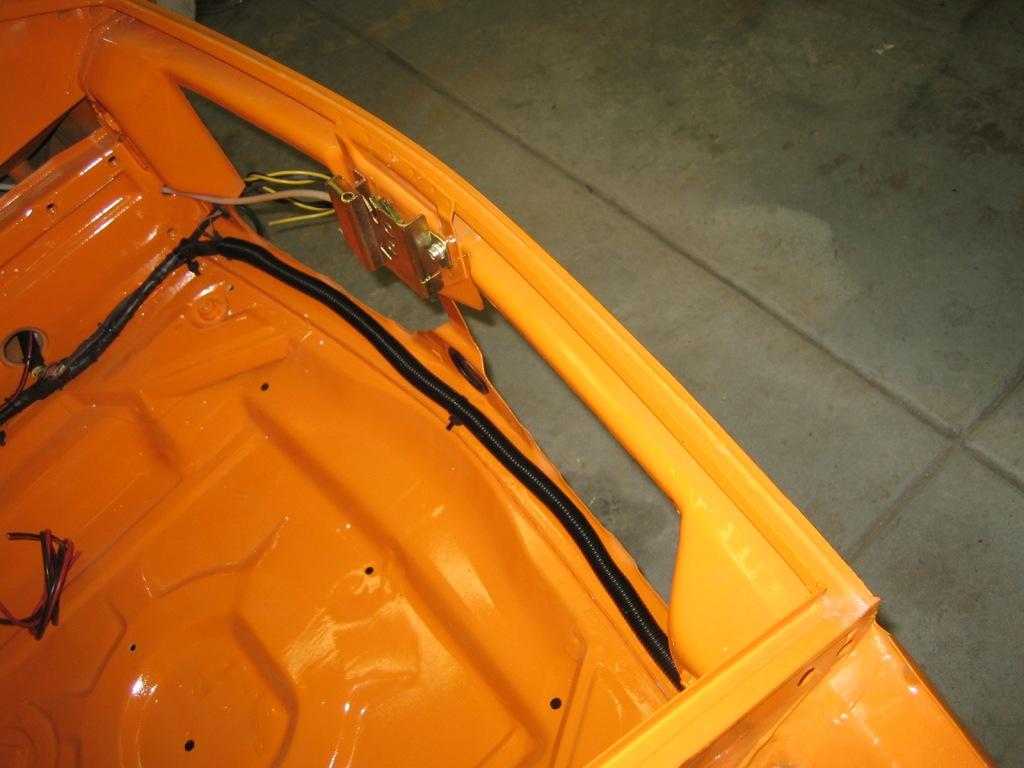 Added this just to show the wiring for the driving lights. 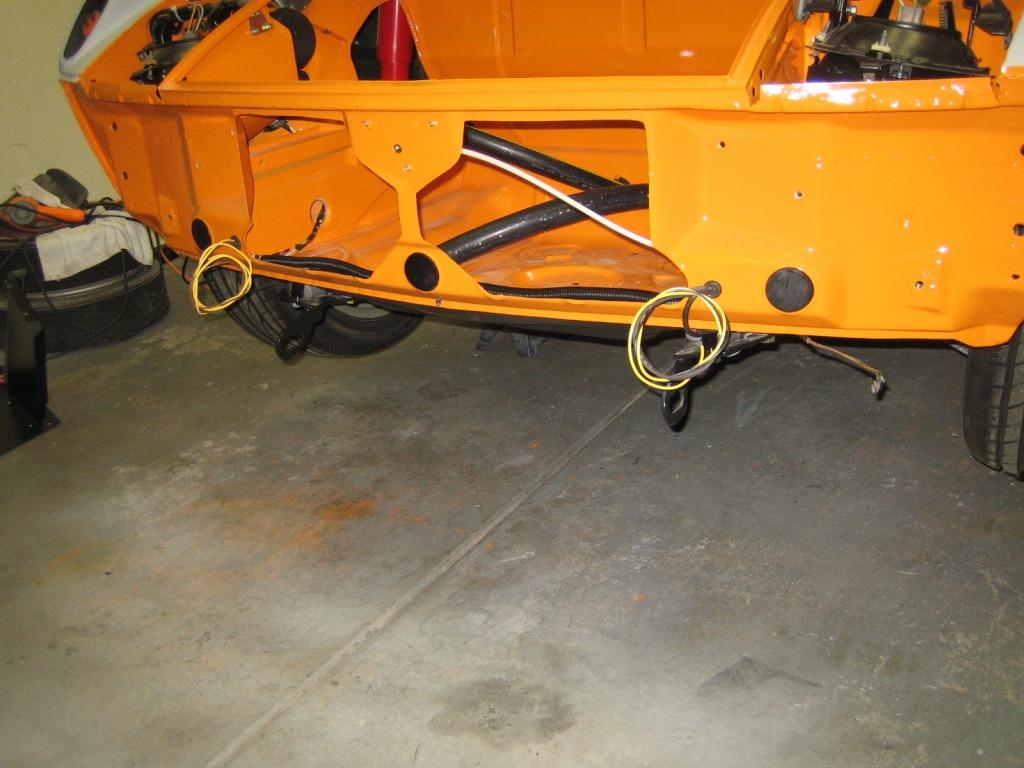 Well this is where I went backwards, have not been happy with the brackets I added for the hood shocks for a while and with my head in the trunk recently I finally had enough. They really were not up to the task, so drilled out the welds and removed, will need to touch up the paint at some point but not today. Here you can see my first attempt at a replacement, thicker metal but equally not up to the task. Served as a good template for the next candidate though. 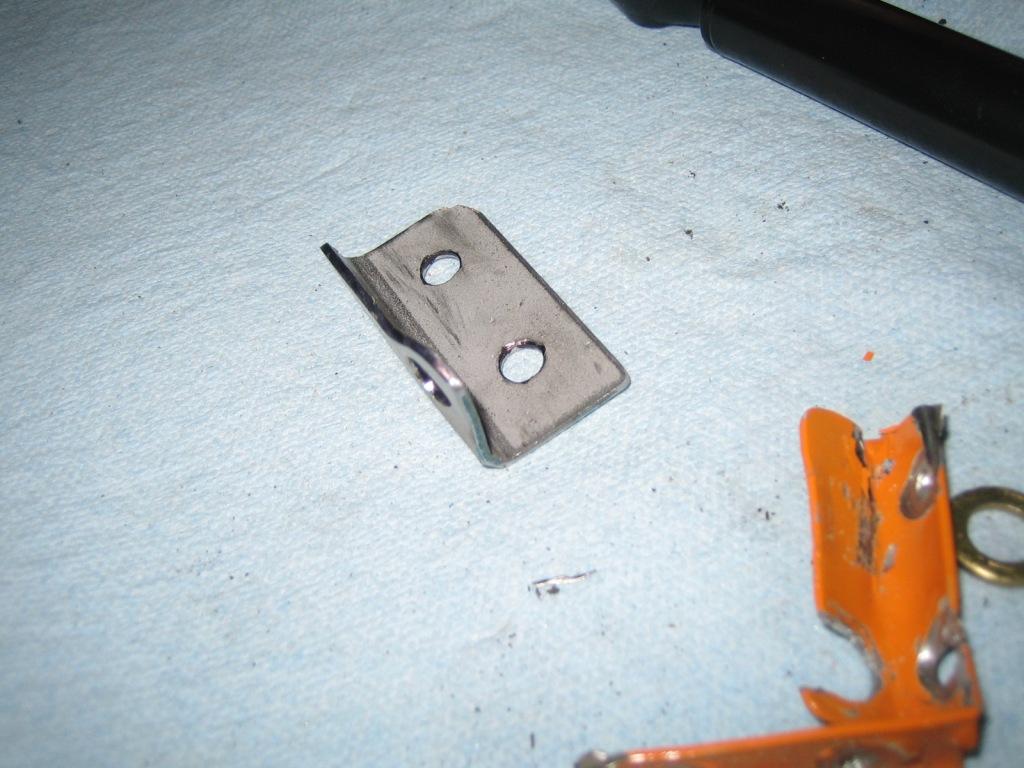 Well this angle iron ought to do the job then, you can see my original wimpy brackets next to it. 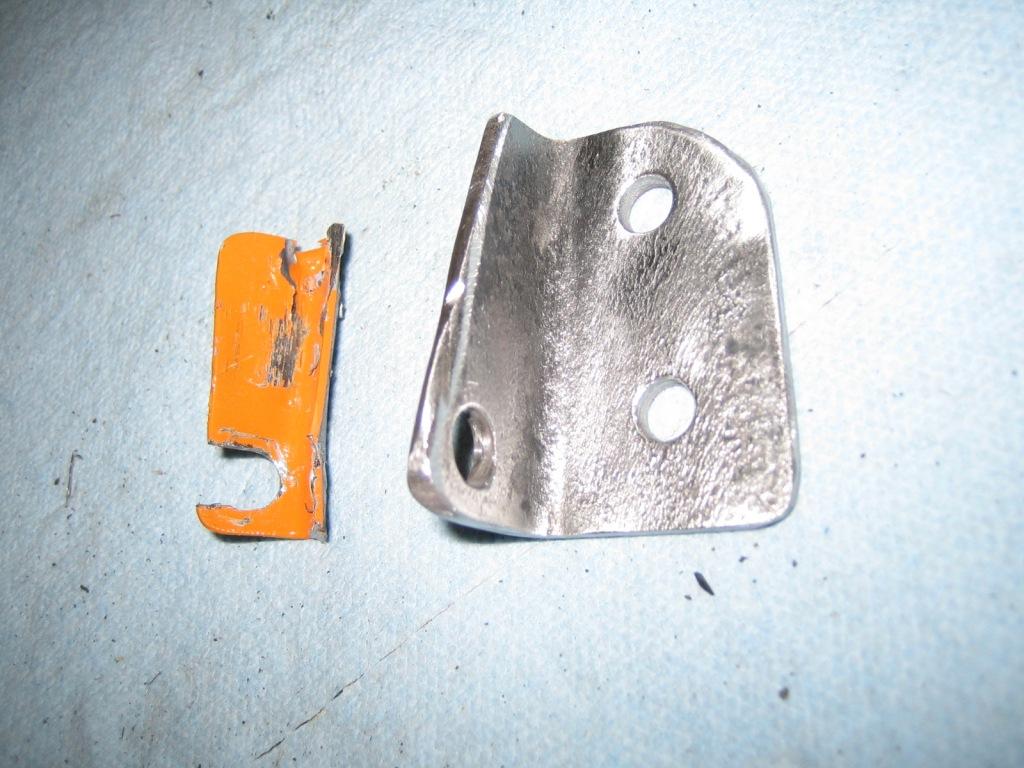 And fitted to the car, worked a treat and then did the same for the other side. 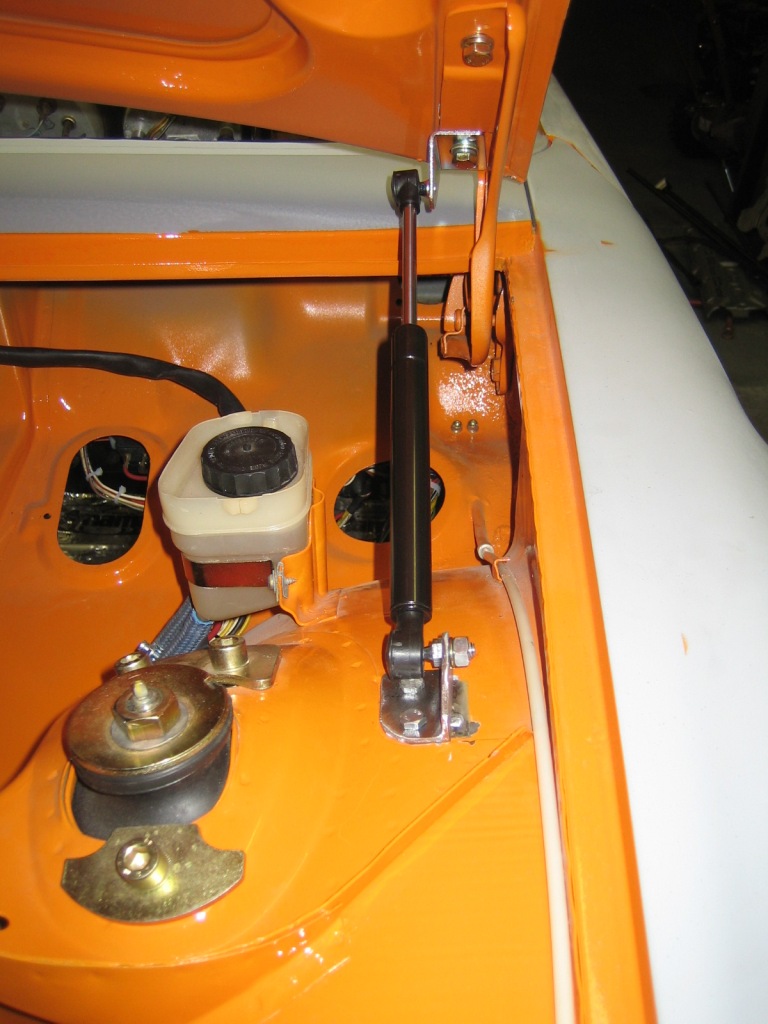 |
|
|
|
| my928s4 |
Jan 22 2012, 06:37 PM
Post
#207
|
|
Member Group: Members Posts: 349 Joined: 18-August 07 From: Spokane, WA Member No.: 8,018 Region Association: Pacific Northwest |
Friday this came on the delivery truck:
 I also ordered the welded support tray, it will get powder coated and then bolted to the trunk floor but this was good enough to start playing. So I spent the rest of the weekend debugging all of the electrics, remembering this was a roller so this is the first time it has seen voltage in my hands. I got the headlight motors adjusted but despite tracking all the wires they remained up in the off position and down when turned on so I reversed the wires at the 3 way connector and left it at that. The Headlight dimmer relay is toast and the brake warning light comes on when the handbrake is off. I am pretty sure that is related to the brake warning switch on the master cylinder but why that should be activated as it is new I have not figured out. There are two components I have not tested, the wiper and blower motors, something for next week when I get some used parts delivered. My fuel level sender was stuck, removing it showed why: 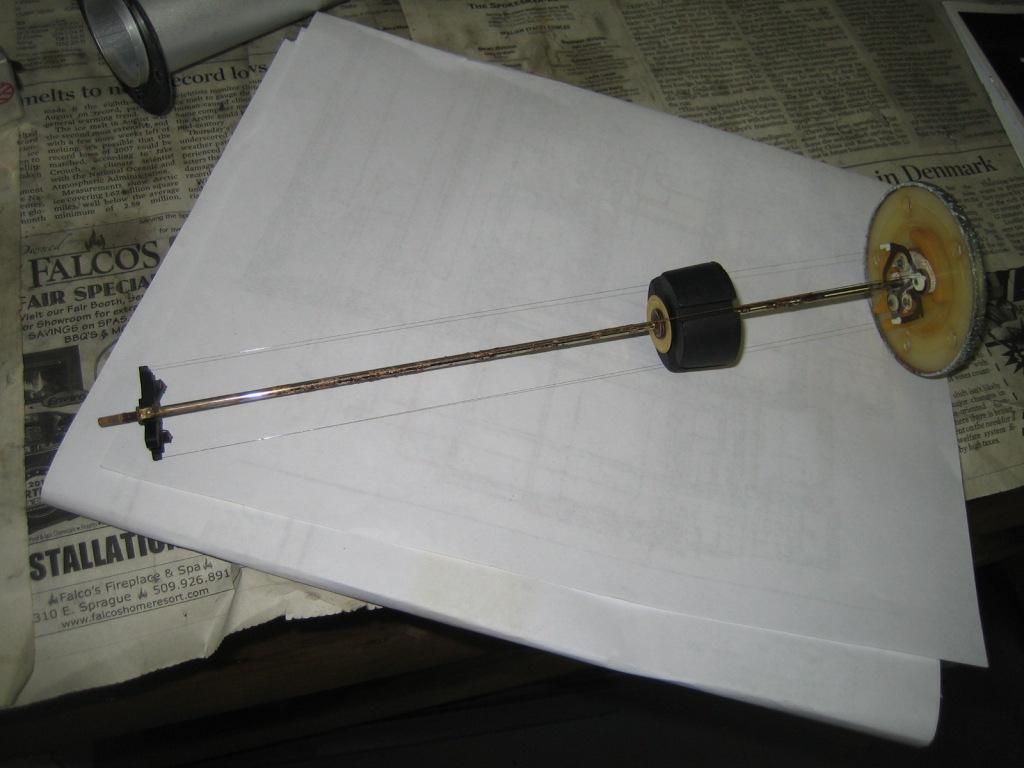 Rust on the shaft, cleaned it all up and works great. OK, some of you might get a laugh out of this, so here is the starter motor that came with the car. 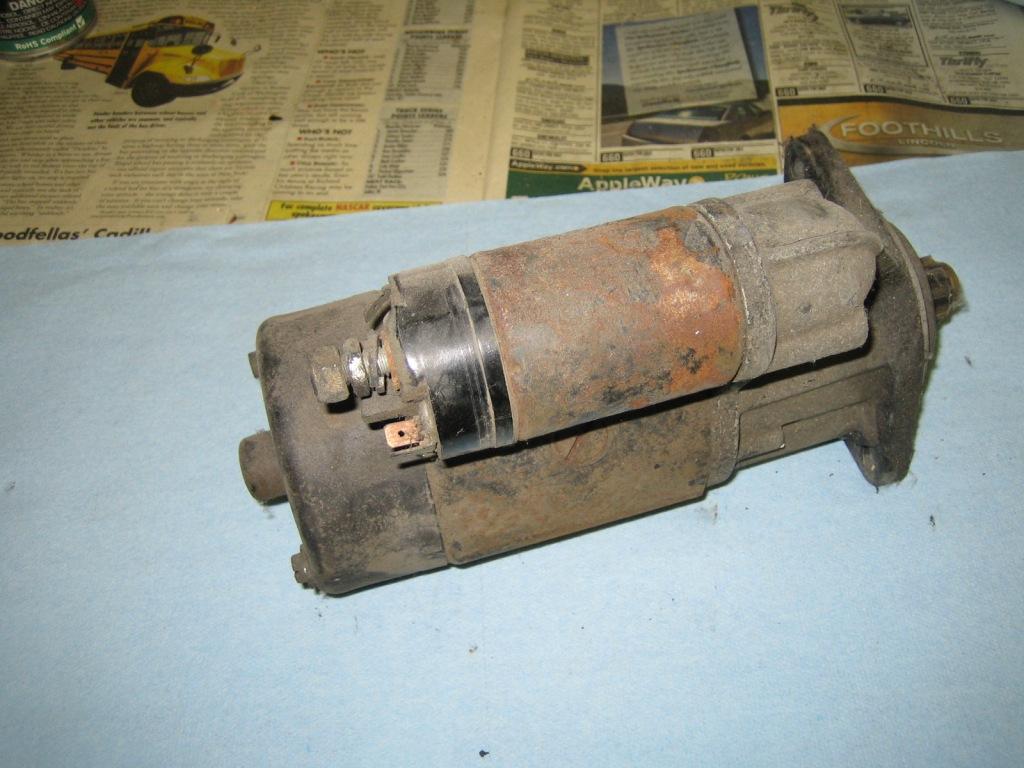 Thought it might be fun to dismantle and rebuild, well once I took it apart and looked at the cost of replacement parts ... yep forget it, just buy a new one. It had a rebuilt sticker on it anyway so it had a good life. Last thing I did today was put on the new basket weave dash face, reason for doing this was so can put all the electrical in, hopefully for good. New material (thanks Morph) covers way more than you need and when the dash top goes on should look pretty smart. 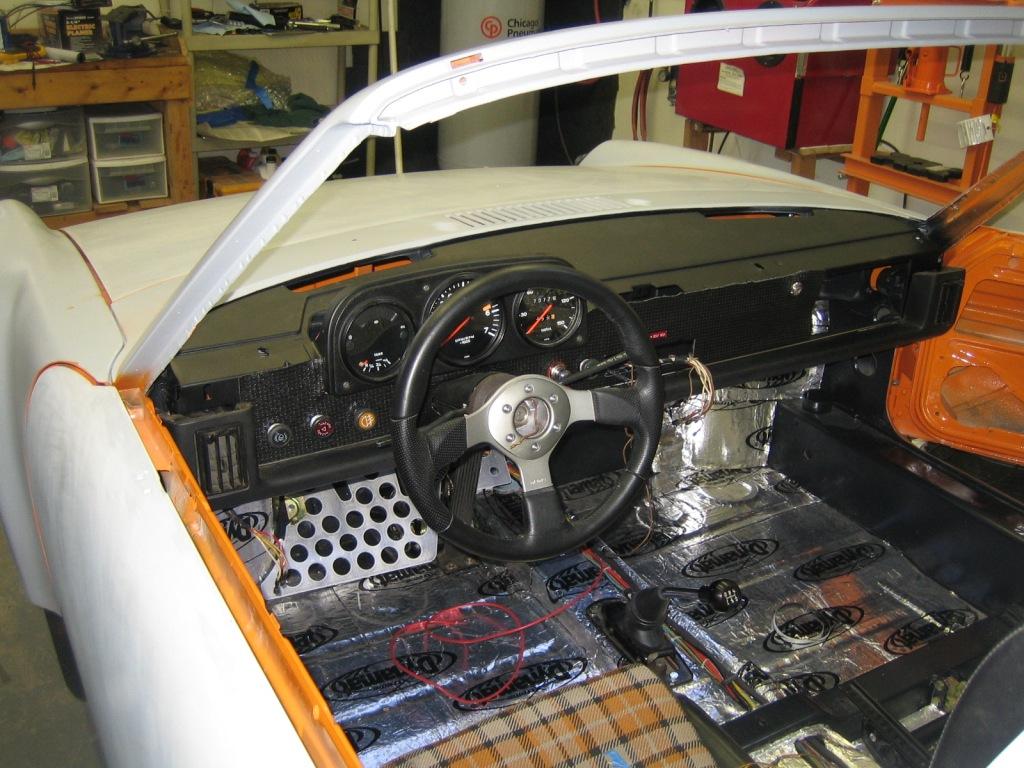 |
|
|
|
| rohar |
Jan 23 2012, 09:18 AM
Post
#208
|
|
Senior Member Group: Members Posts: 924 Joined: 25-October 08 From: spokane Member No.: 9,685 Region Association: None |
Hey Chris, I've got a couple of working starters over here that I'll never use. Yours if you want them (IMG:style_emoticons/default/smile.gif)
|
|
|
|
| rwilner |
Jan 23 2012, 09:21 AM
Post
#209
|
|
No Ghosts in the Machine Group: Members Posts: 953 Joined: 30-March 10 From: Boston, MA Member No.: 11,530 Region Association: North East States |
You gotta put a rennshift in that thing, and also Chris Foley's shift linkage!
|
|
|
|
| my928s4 |
Jan 29 2012, 06:47 PM
Post
#210
|
|
Member Group: Members Posts: 349 Joined: 18-August 07 From: Spokane, WA Member No.: 8,018 Region Association: Pacific Northwest |
QUOTE(rohar @ Jan 23 2012, 07:18 AM) Hey Chris, I've got a couple of working starters over here that I'll never use. Yours if you want them (IMG:style_emoticons/default/smile.gif) Perfect, thanks Rob I will give you a call. |
|
|
|
| my928s4 |
Jan 29 2012, 07:00 PM
Post
#211
|
|
Member Group: Members Posts: 349 Joined: 18-August 07 From: Spokane, WA Member No.: 8,018 Region Association: Pacific Northwest |
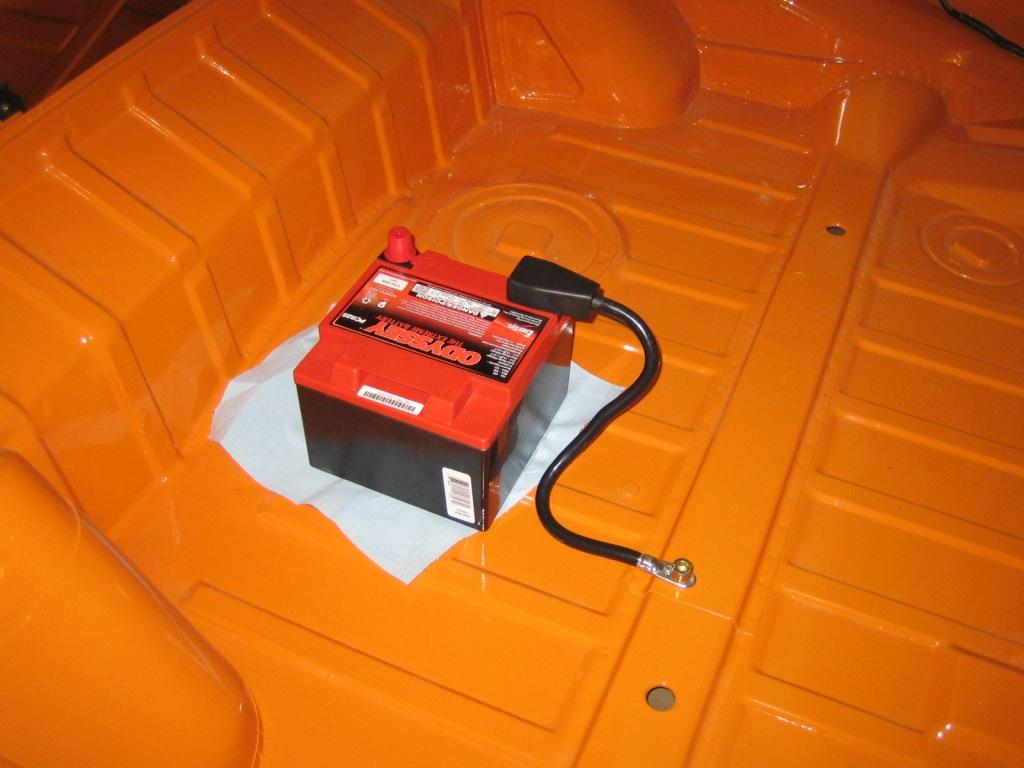
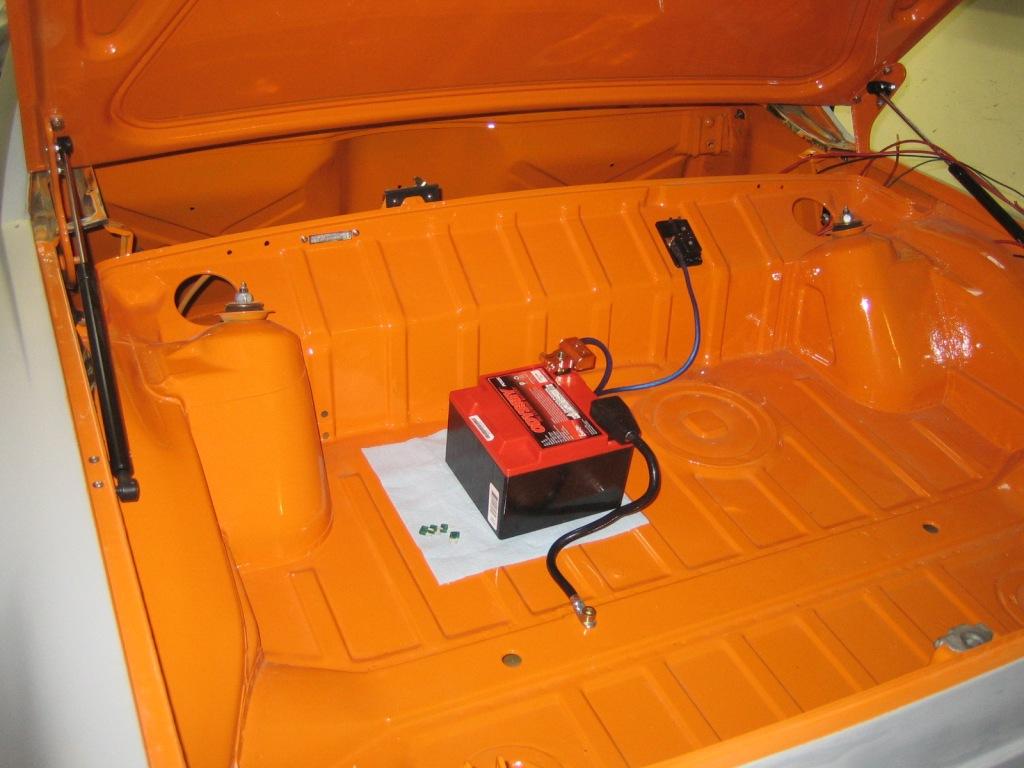
Ok so just more odds and ends, I put a remote fuse block in the trunk to feed the 12V sources for everything but the engine. I ran out of heatshrink otherwise I would have finished the routing for those power feeds.
 I wanted to get the blower motor hooked up and the fan controls installed in the dash, got some used parts in the mail including a blower assembly with a bad motor. Found the broken plastic part and swapped it over, otherwise everything else in my old assembly seemed to be in better shape. Looks presentable after a good clean. 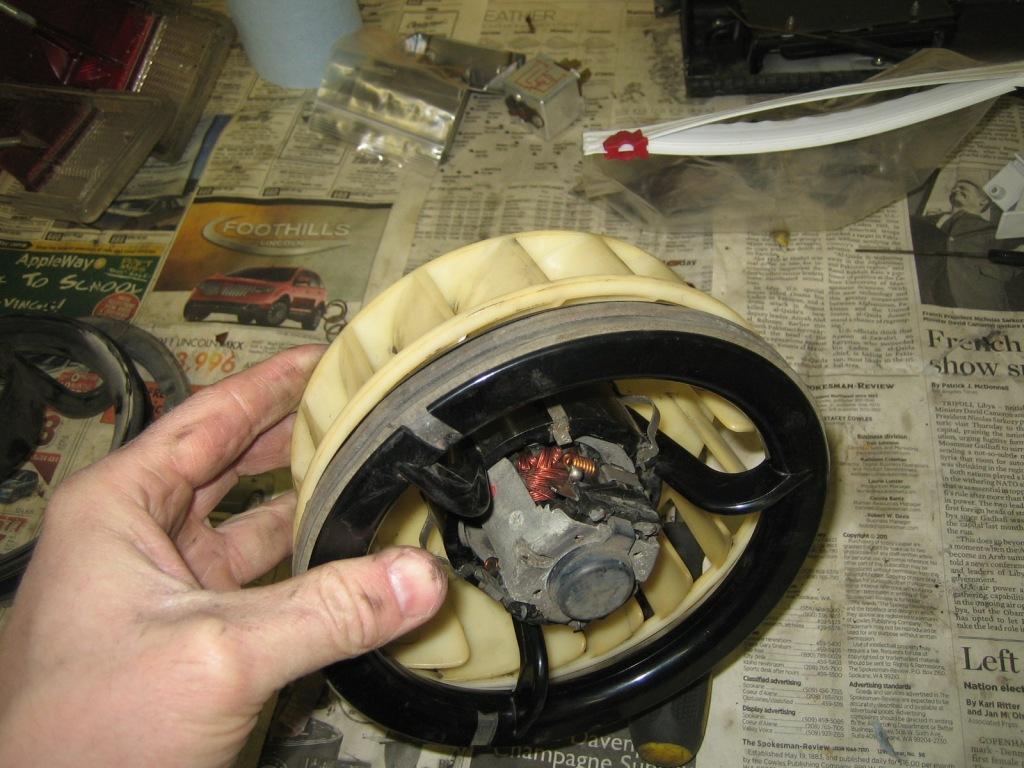 I cleaned the fan control assembly and was about to put it back in the car but could not do it. 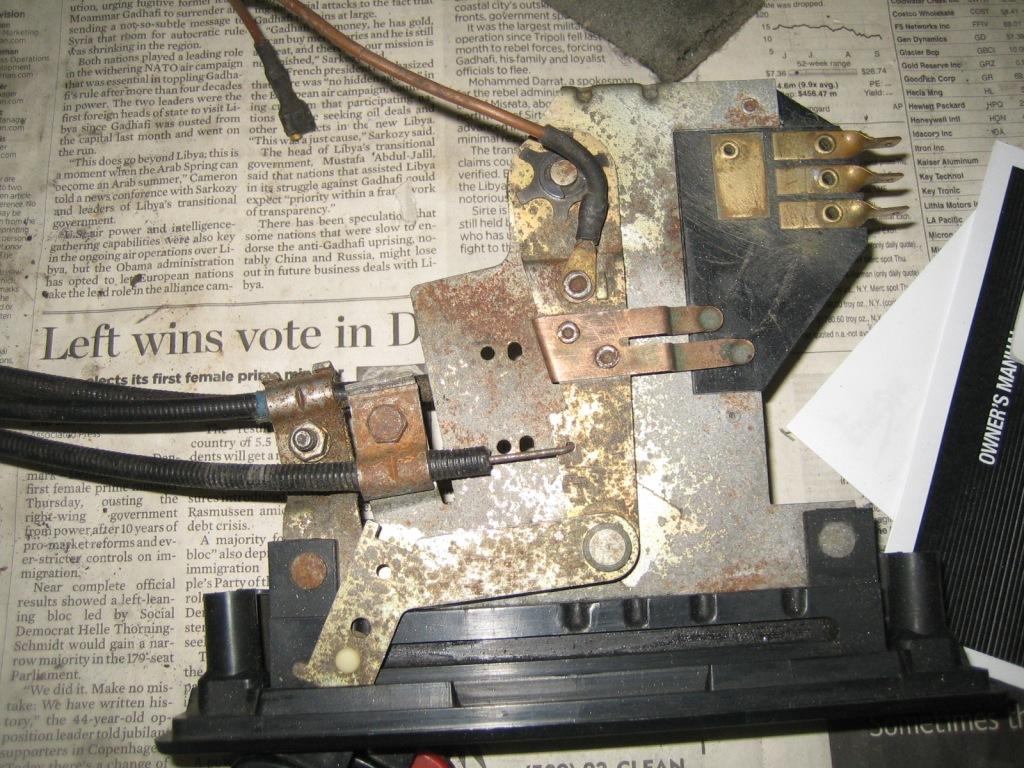 I disassembled and sand blasted off the corrosion, sure plating it would have been the best but I don't have a large batch of parts to take down so decided to paint instead. Used some etch primer and stain black. 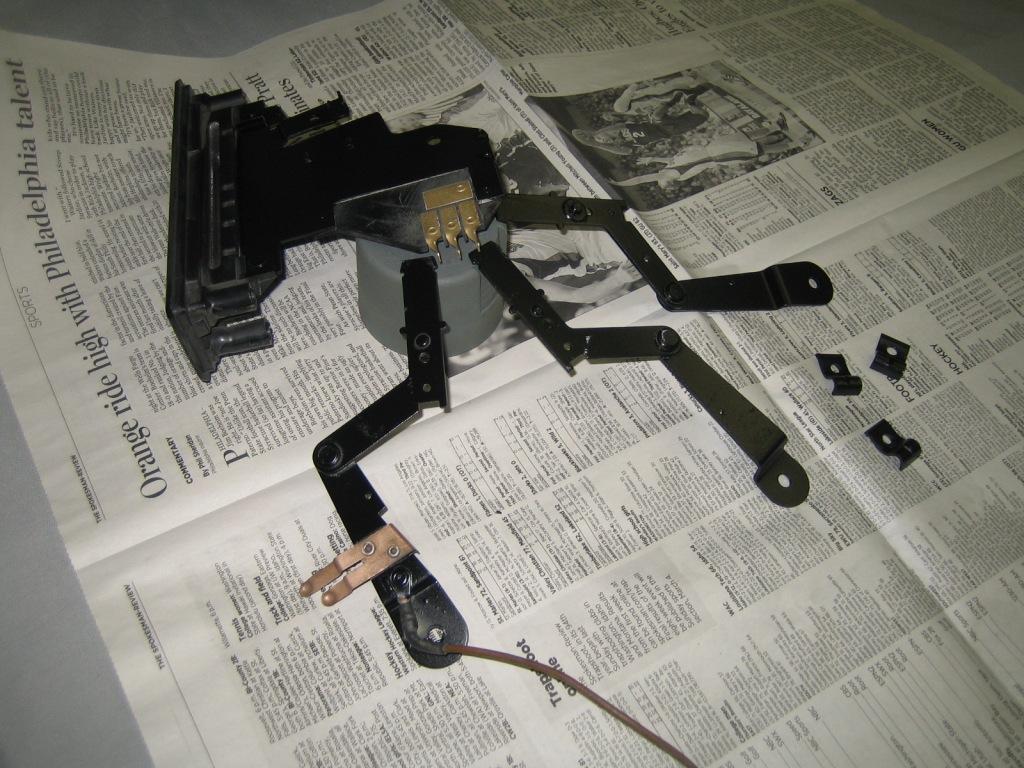 All back together, with some new grease the sliders work pretty good too. 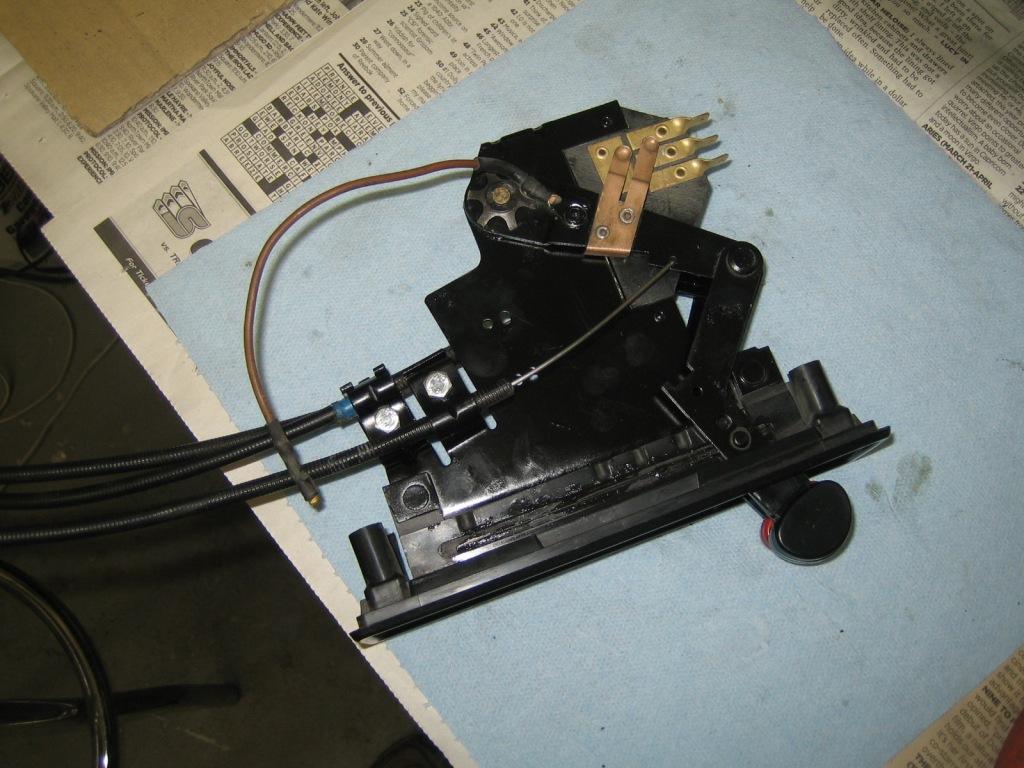 This flapper looked past its best too. 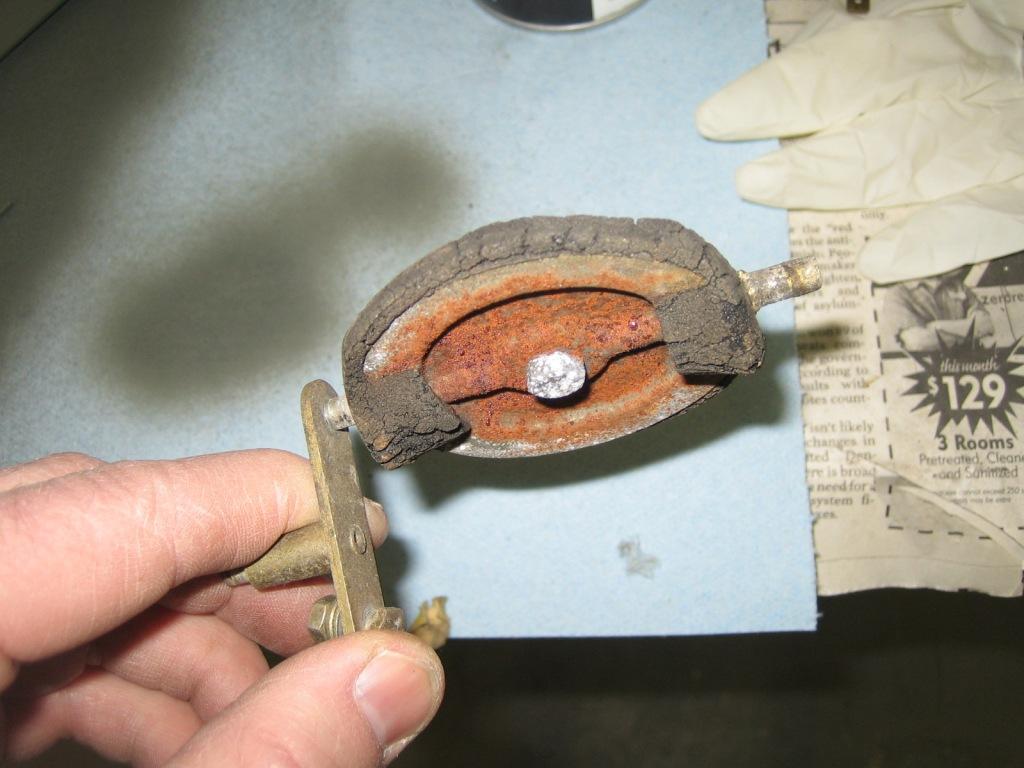 Same treatment and I made some new gaskets with some foam from the local hobby shop. 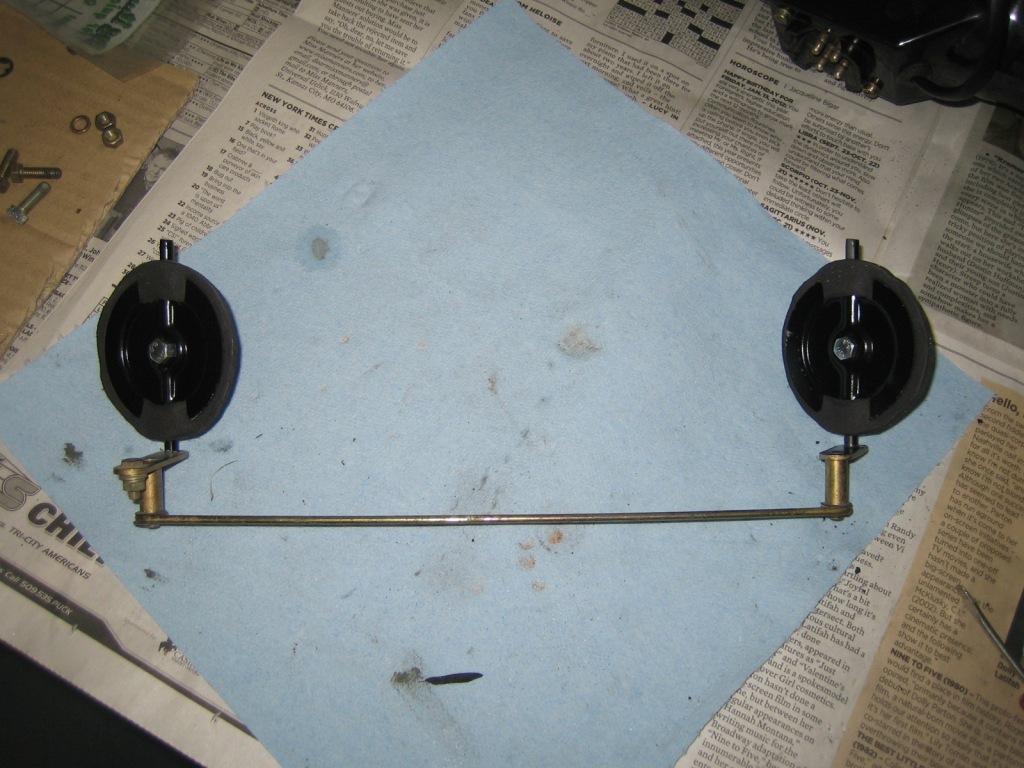 Blower motor all back together and with the controls hooked up in the dash it works just fine. Can now put away for later. 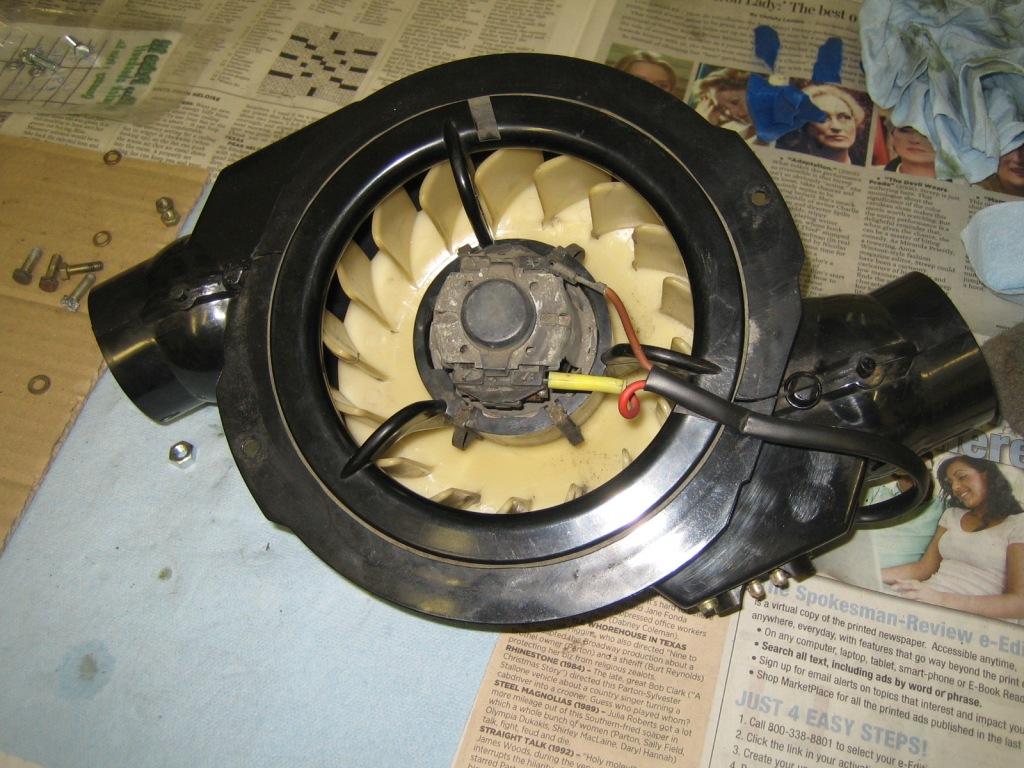 Also re-sprayed the glove box door and covered with new material. 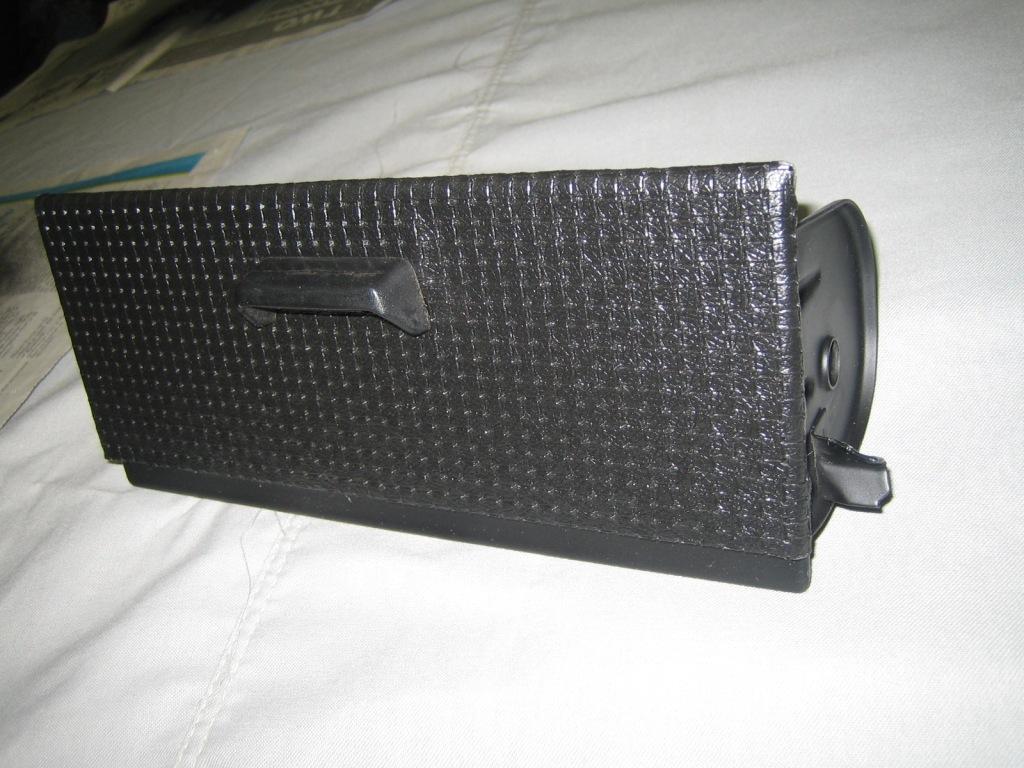 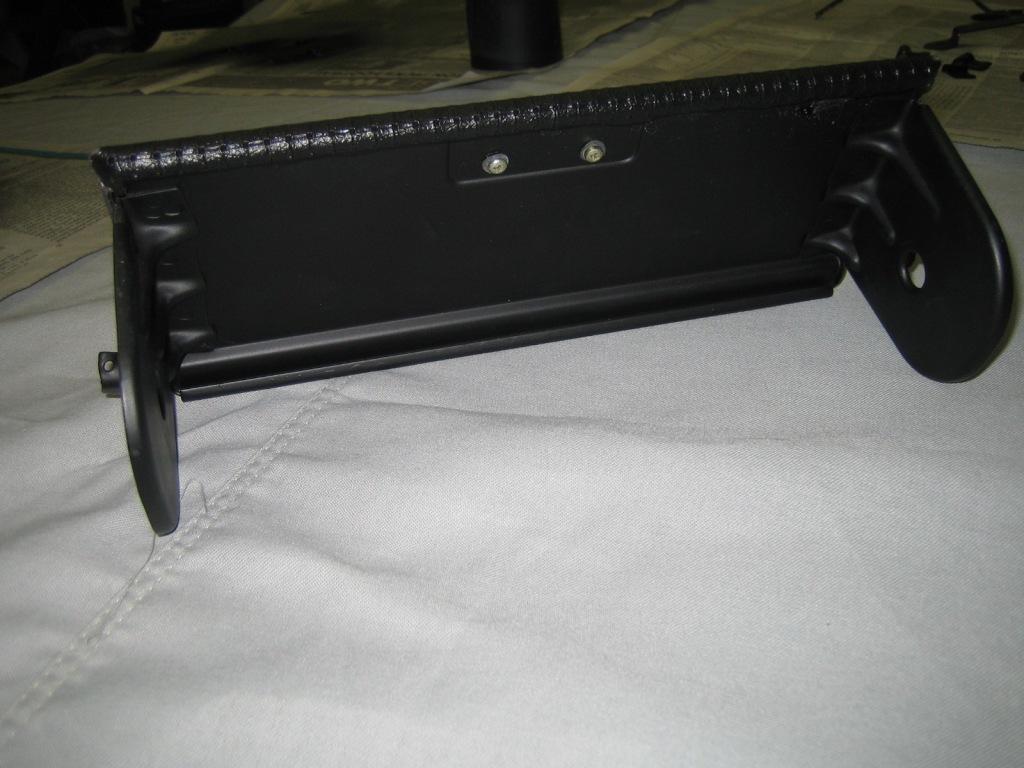 |
|
|
|
| my928s4 |
Apr 15 2012, 07:51 PM
Post
#212
|
|
Member Group: Members Posts: 349 Joined: 18-August 07 From: Spokane, WA Member No.: 8,018 Region Association: Pacific Northwest |
So last week I found an engine, decent WRX motors are hard to come by these days. 3 years ago they were everywhere, anyway hopefully be delivered next week which got me motivated to get going on other tasks.
I have had the gas tank stripped of parts and was waiting to get it cleaned at a local radiator company, however, only one place now carries out that work near me and they are a pain to get to and only open weekdays. So decided to pick up some Marine Clean and got rid of all the varnish on the inside, there is some surface rust here and there but decided not to seal the inside. Onto the outside, sanded down some rust spots and cleaned up the outside. Worst rust was where the tank rested on one of those carpet pads. 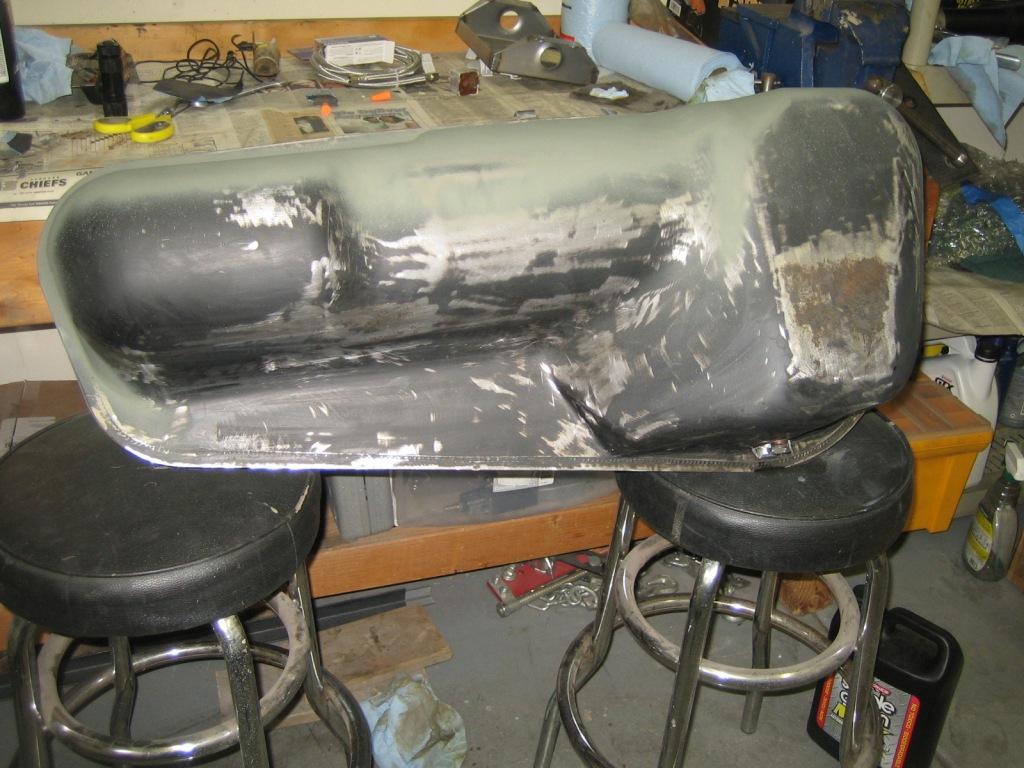 Good coat of etching primer. 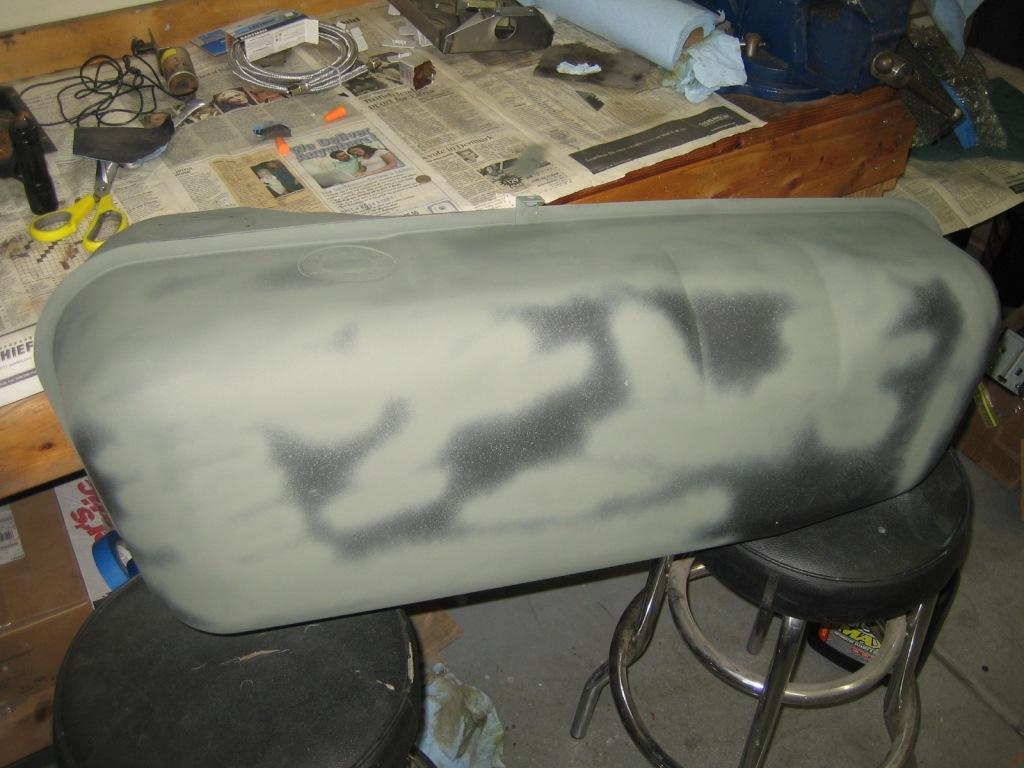 Was going to get out the paint gun but decided to rattle it, took two cans and some flattening out but came out pretty good. 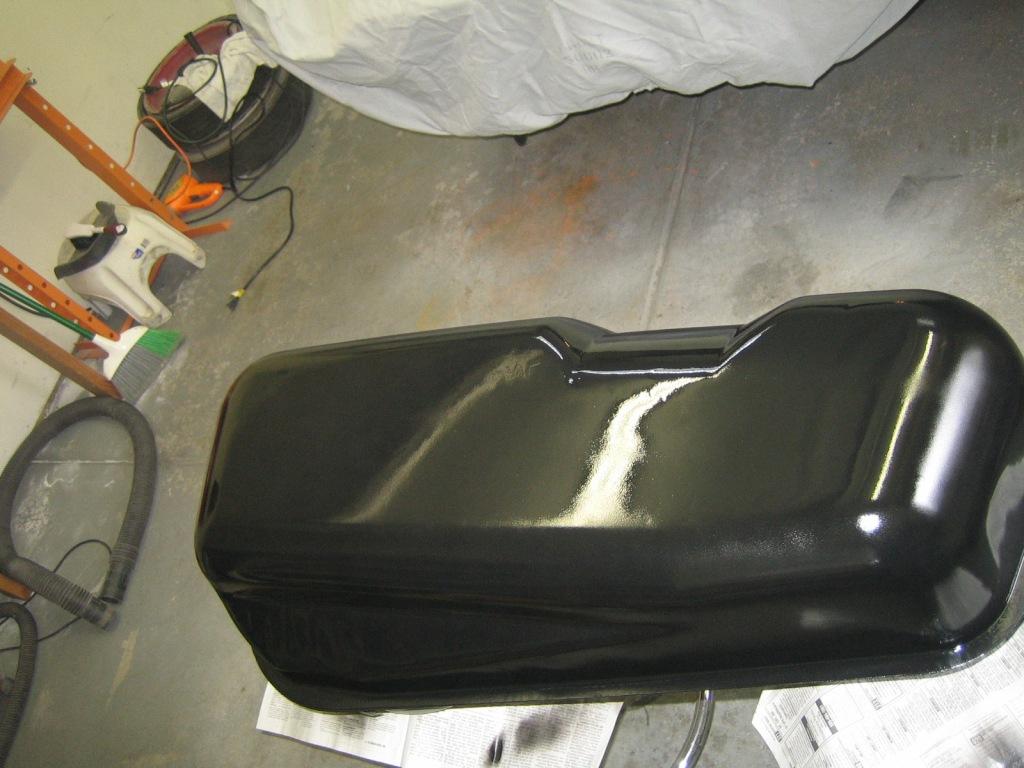 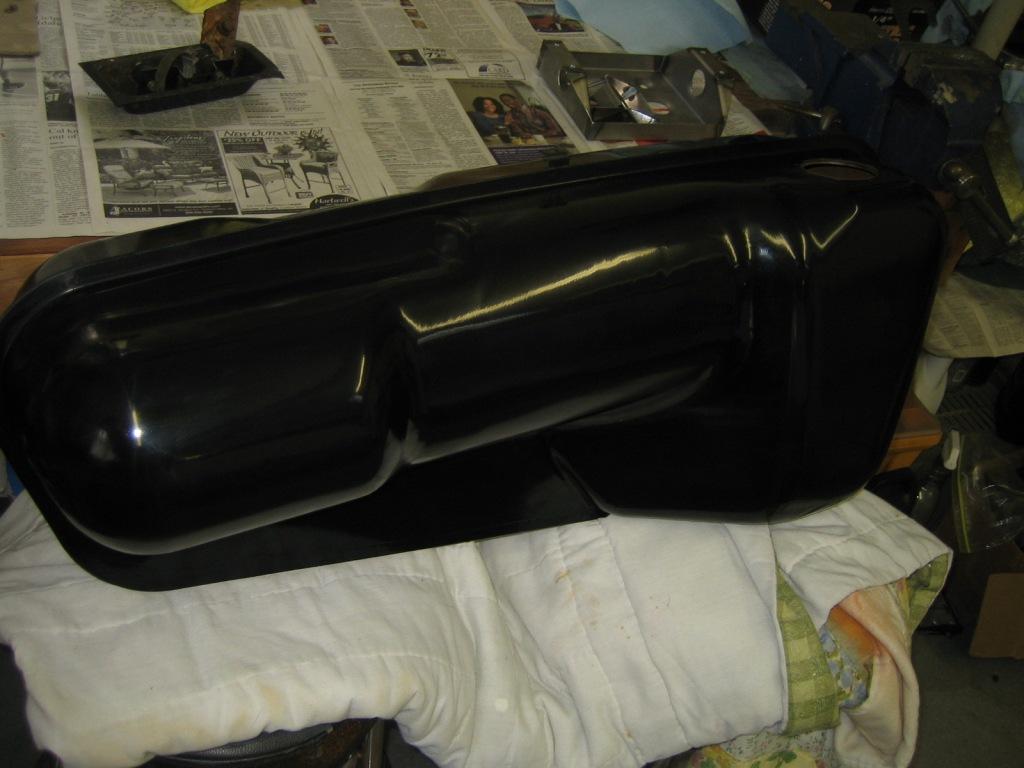 Need to order a fuel pump, hose etc ... and then this baby can go in. One less item cluttering up garage space ..... |
|
|
|
| my928s4 |
Apr 17 2012, 09:03 PM
Post
#213
|
|
Member Group: Members Posts: 349 Joined: 18-August 07 From: Spokane, WA Member No.: 8,018 Region Association: Pacific Northwest |
Nothing like a big package of car parts, just like Christmas. So here it is, a 2006 EJ205 JDM AVCS motor from a Forester. 26,000 miler.
Good news is that it has a cable not electronic throttle, less hassle. Need to get a harness and then figure out the wiring, now waiting on that cradle from Ian and we can make some serious progress! 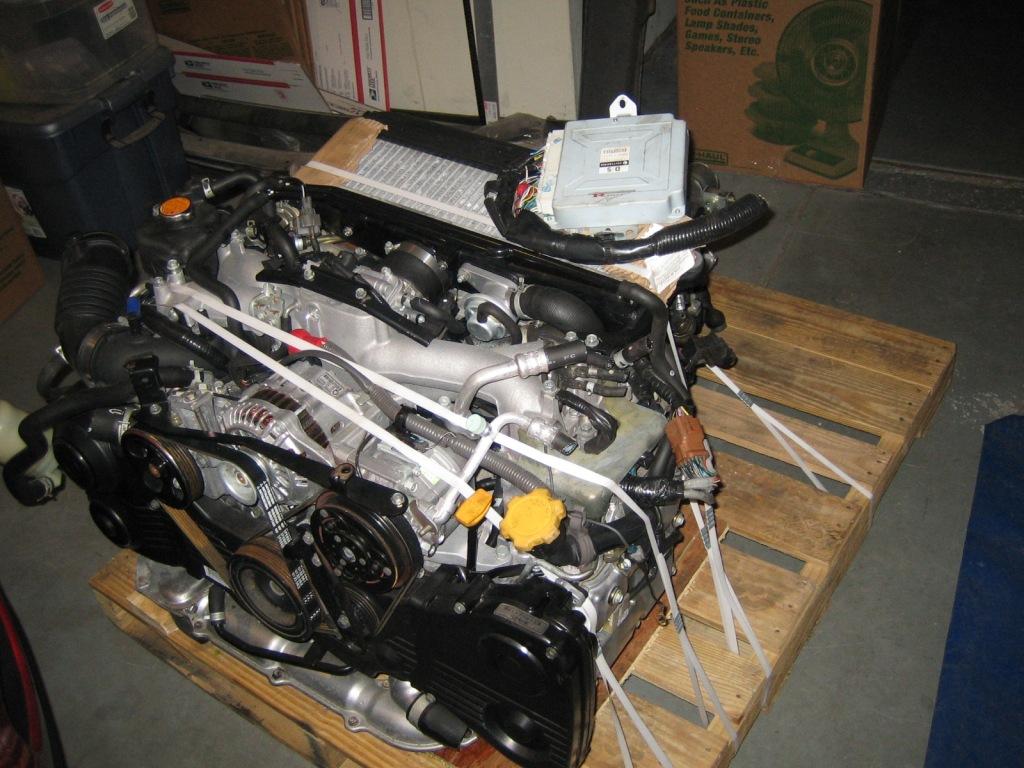  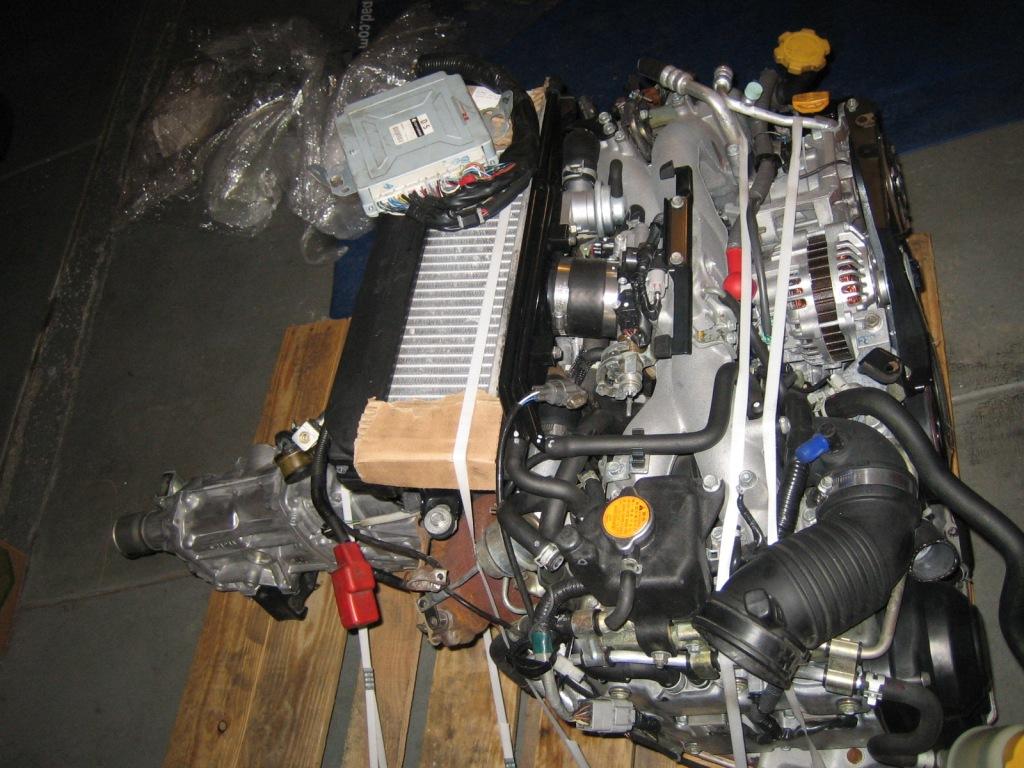 |
|
|
|
| OllieG |
Apr 18 2012, 02:35 AM
Post
#214
|
|
OllieG Group: Members Posts: 212 Joined: 6-July 11 From: UK Member No.: 13,282 Region Association: England |
Very cool...what sort of horsepower do you get out of that engine? It's the same engine as the Impreza WRX right?
I was driving a 350hp Impreza on a rally track last weekend, great fun but very front heavy and lots of understeer. Should be beautifully balanced in the 914...and ofcourse will go like an absolute rocket! Nice one.... Ollie. |
|
|
|
| my928s4 |
Jun 9 2012, 09:33 PM
Post
#215
|
|
Member Group: Members Posts: 349 Joined: 18-August 07 From: Spokane, WA Member No.: 8,018 Region Association: Pacific Northwest |
Seeing as Ian's Subaru Engine Cradle will be delayed (IMG:style_emoticons/default/sad.gif) I started work on the harness, I bought a US 2003 WRX bulkhead harness which has most of what you need except for the fuel pump controller and pigtail harness. Unfortunately when I bought the controller I forgot to ask for the pigtail ...aaaaghhhh. Learn as you go.
If you need the two main connectors to the engine harness, well they are located on the 'Front' harness. Luckily when the Japanese cut the cables removing the engine harness they cut leaving me a few inch's of cable I can use to hook up to the bulkhead harness. Also as this engine has AVCS I need to modify to support that, good new is others have been here before me and instructions are out there on the web. I am going to get the sensor board from small car performance also, however decided against their wiring diagram package although it would have come in handy. The harness is big and has lots of crap you do not need, however, removing what you don't need is a BIG frickin job. I have put way more hours in this than I thought I would need to. Here is the pile of stuff you do not need: 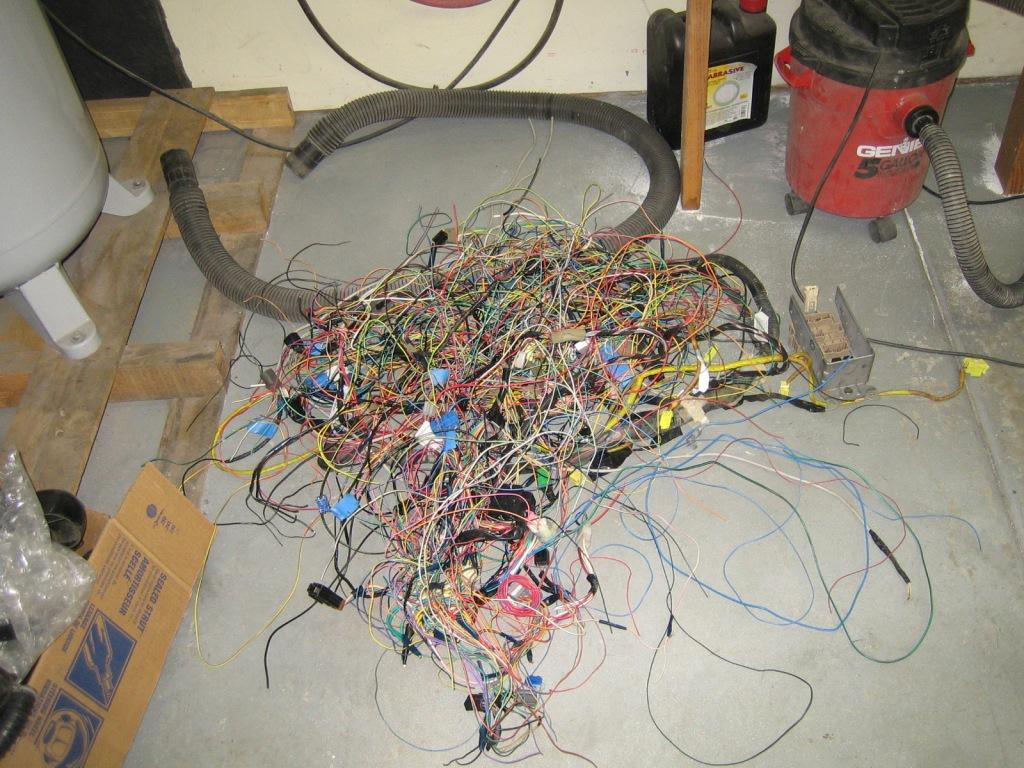 This is what I am left with, bar a couple of wires everything is labelled, now I can separate it all and start mocking up how I want it laid out, how to hook up to the 914 harness, power etc ... I am hoping this is half way there .... 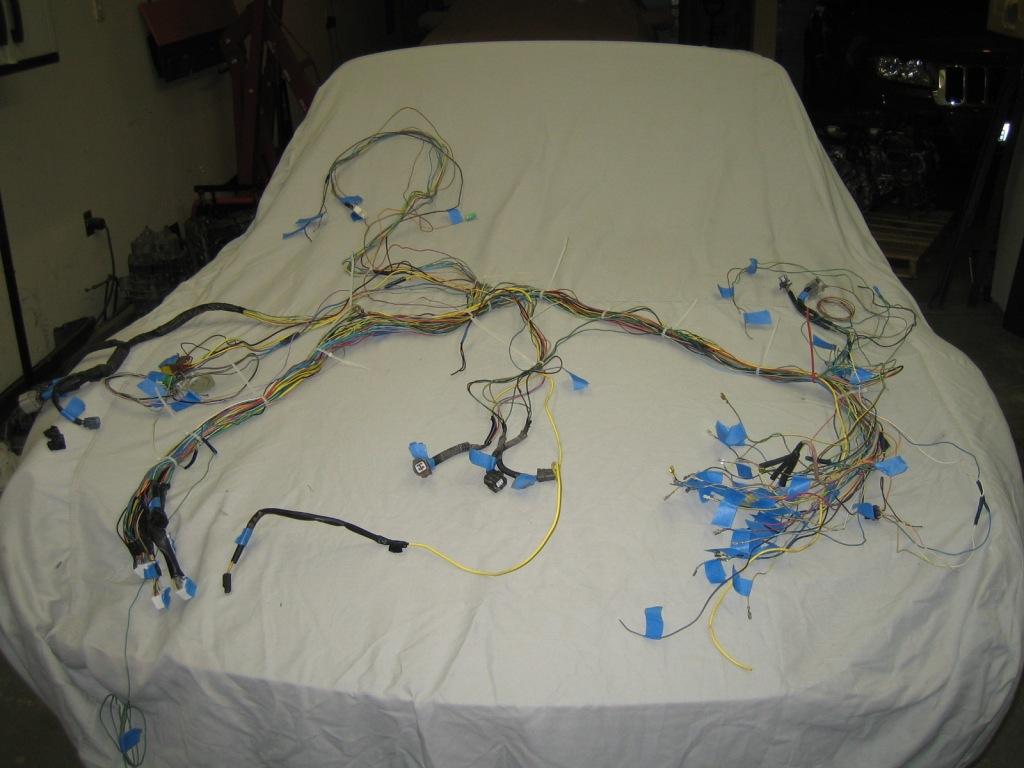 |
|
|
|
| Zaney |
Jun 9 2012, 11:05 PM
Post
#216
|
|
Deuchland en der Haus Group: Members Posts: 461 Joined: 1-March 04 From: Engine 11 Redmond, WA Member No.: 1,738 Region Association: Pacific Northwest |
Nice job! (IMG:style_emoticons/default/beerchug.gif)
I feel your pain about pairing down the Suby wiring harness! I had to troubleshoot mine a few times to get it smoothed out. But, very satisfying after it is finished! Awesome car BTW! (IMG:style_emoticons/default/driving.gif) Cheers! (IMG:style_emoticons/default/beer.gif) Nate |
|
|
|
| abnrdo |
Jun 10 2012, 05:52 AM
Post
#217
|
|
Member Group: Members Posts: 399 Joined: 24-September 04 From: Panama City, FL Member No.: 2,820 Region Association: South East States |
Just plain awesome!! More motivation to get working on mine when I get home.
I am way far behind! Before you know it you will be (IMG:style_emoticons/default/driving.gif) Great work!! Cheers, Jim |
|
|
|
| my928s4 |
Aug 3 2012, 10:13 PM
Post
#218
|
|
Member Group: Members Posts: 349 Joined: 18-August 07 From: Spokane, WA Member No.: 8,018 Region Association: Pacific Northwest |
Well looks like the engine cradle may make an appearance this month so got me motivated to digging in again inbetween other summer activities.
So I knew I needed to modify my gauges and always liked the Quad setup (see below) and other mods that NewVintage advertise, so was already to dump some wonga and get them on order. 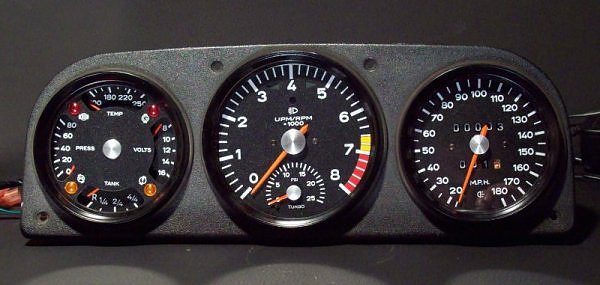 Well was told pretty promptly that they are too busy for this kind of work (IMG:style_emoticons/default/sad.gif) I know it can be hard to tie down body shops but in this day and age pretty surprised to hear that from others. Well good luck to them. So looked into doing the same mods myself and it would a) be a bunch of work and b) would cost about the same. While searching for parts to do this I came across another option, these gauges from Speedhut. Sure you lose some of the Porsche originality but I am already way down that path with other stuff anyway, I just don't want it to look tacky/cheap. So before:  And with a little cut and paste to simulate ... the after: 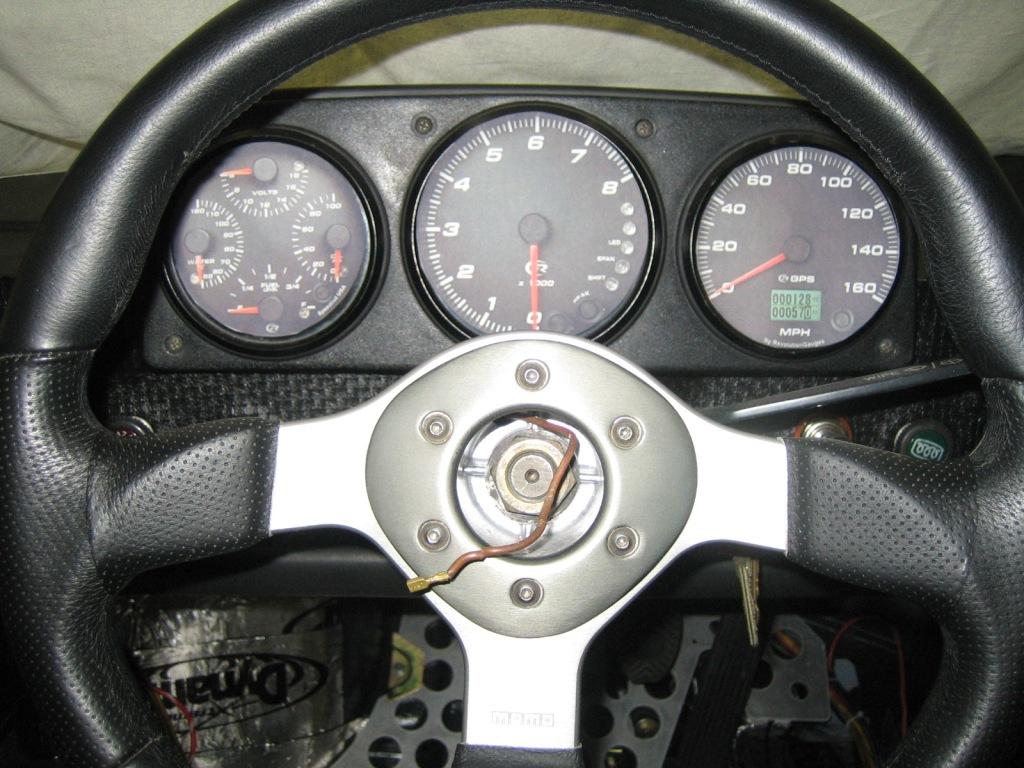 Some advantages, no speedo cable or wire to hook up. Fuel gauge will work with 914 sender unit, Water temp and oil pressure will require their sensors but then so would the VDO gauges. Nightime red back glow would look way cool. Oh and these gauges are pretty shallow freeing up some wiring room. Anyway just wondered what you guys thought, must admit I am 90% there. |
|
|
|
| Zaney |
Aug 3 2012, 10:30 PM
Post
#219
|
|
Deuchland en der Haus Group: Members Posts: 461 Joined: 1-March 04 From: Engine 11 Redmond, WA Member No.: 1,738 Region Association: Pacific Northwest |
Here is Sawtooth's car build with those exact gauges!
I will do the same in the future. (IMG:http://www.914world.com/bbs2/uploads/post-9211-1305617964.jpg) |
|
|
|
| my928s4 |
Aug 3 2012, 11:05 PM
Post
#220
|
|
Member Group: Members Posts: 349 Joined: 18-August 07 From: Spokane, WA Member No.: 8,018 Region Association: Pacific Northwest |
QUOTE(Zaney @ Aug 3 2012, 09:30 PM) Here is Sawtooth's car build with those exact gauges! I will do the same in the future. Too damn funny, well that pretty much seals it. Thanks Nate. |
|
|
|
|
1 User(s) are reading this topic (1 Guests and 0 Anonymous Users)
0 Members:

|
Lo-Fi Version | Time is now: 8th July 2026 - 02:41 PM |
Invision Power Board
v9.1.4 © 2026 IPS, Inc.