|
|
|
Porsche, and the Porsche crest are registered trademarks of Dr. Ing. h.c. F. Porsche AG.
This site is not affiliated with Porsche in any way. Its only purpose is to provide an online forum for car enthusiasts. All other trademarks are property of their respective owners. |
|
|

  |

| al weidman |
 Mar 16 2009, 09:46 PM Mar 16 2009, 09:46 PM
Post
#81
|
|
Al Weidman  Group: Members Posts: 156 Joined: 22-February 08 From: Oroville, Ca. Member No.: 8,736 Region Association: Northern California |
Chris, I also got the small vacuum system from HF and it works great. Keeps the cabinet clear and you can see what you are doing. Al. |
   |

 
|
| 914Tom |
Mar 17 2009, 03:16 AM
Post
#82
|
|
Member Group: Members Posts: 123 Joined: 11-February 07 From: Germany Member No.: 7,526 |
|
|
|
|
| nsr-jamie |
Mar 17 2009, 05:42 AM
Post
#83
|
|
914 guy in Japan Group: Members Posts: 1,182 Joined: 7-November 07 From: Nagoya, Japan Member No.: 8,305 Region Association: None |
I love this post!! Awesome!! Keep it up bro!! Love to watch the progress you are doing! Cheers
|
|
|
|
| Phoenix914 |
Mar 17 2009, 07:10 AM
Post
#84
|
|
Member Group: Members Posts: 389 Joined: 6-December 06 From: Oviedo, FL Member No.: 7,322 Region Association: South East States |
I just read through this entire thread. What a fantastic job you're doing! Very inspirational. I did a lot of work to my car, but nowhere near as involved as what you've done. Keep the pictures coming.
|
|
|
|
| my928s4 |
Mar 20 2009, 07:08 AM
Post
#85
|
|
Member Group: Members Posts: 349 Joined: 18-August 07 From: Spokane, WA Member No.: 8,018 Region Association: Pacific Northwest |
Went back to the local paint and supply shop and picked up some filler as well as some rattle can underseal.
I think this filler is a little overkill but the idea is to seal up the weld and then cover with normal filler. For that step I am going to wait and perform that operation outside, good excuse to catch somes sun (we actually saw 50F yesterday) and the dust stays outside. Also making enquiries to see if I can get someone to come around and soda blast the rest of the bodywork that I have not gotten too. This is the filler I used: 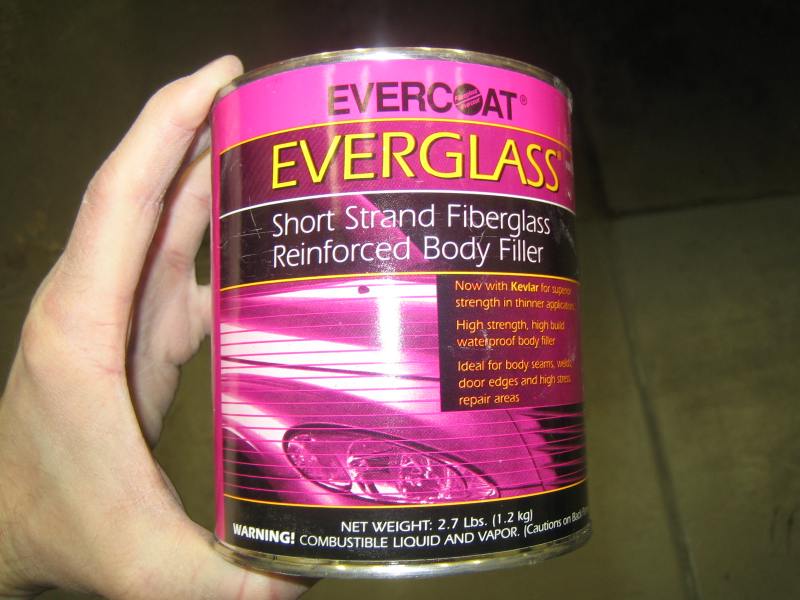 Here are the results  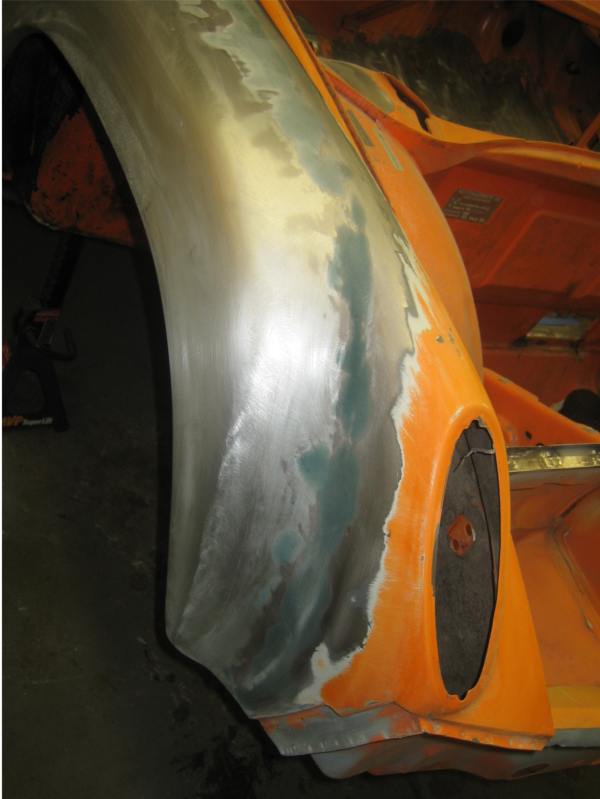 |
|
|
|
| my928s4 |
Mar 20 2009, 07:12 AM
Post
#86
|
|
Member Group: Members Posts: 349 Joined: 18-August 07 From: Spokane, WA Member No.: 8,018 Region Association: Pacific Northwest |
After the failed experiment with the Schutz I bought some 3M underseal, they did not have Schutz in a can and evidently this is nearly the same stuff ...
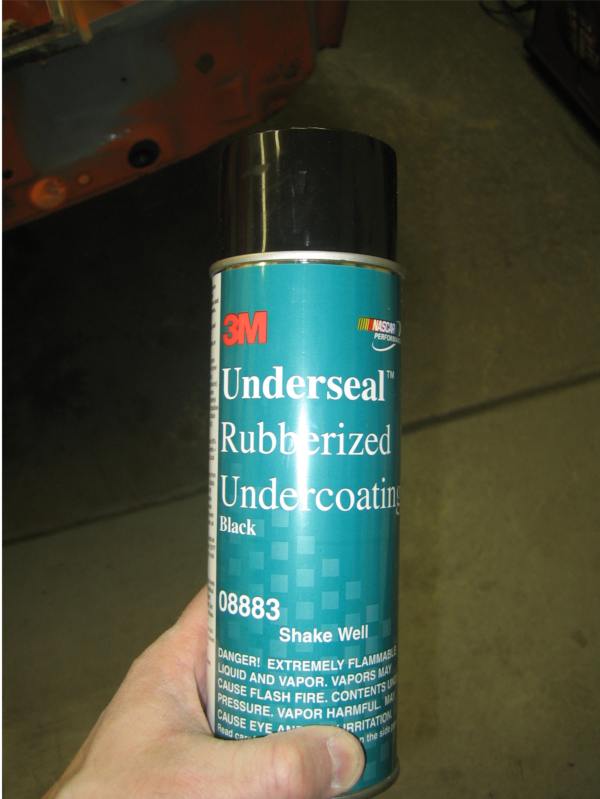 Well it went on much better but still a messy operation. I covered the floor in plastic and the key is to spray it on lightly in multilple coats, you could do it in one session but that means crawling over the mess on the floor so 3 evenings worked better.  |
|
|
|
| Kansas 914 |
Mar 20 2009, 07:20 AM
Post
#87
|
|
Advanced Member Group: Members Posts: 3,008 Joined: 1-March 03 From: Durango, Colorado Member No.: 373 Region Association: Rocky Mountains |
QUOTE(my928s4 @ Mar 20 2009, 08:12 AM)  After the failed experiment with the Schutz I bought some 3M underseal, they did not have Schutz in a can and evidently this is nearly the same stuff ... Well it went on much better but still a messy operation. I covered the floor in plastic and the key is to spray it on lightly in multilple coats, you could do it in one session but that means crawling over the mess on the floor so 3 evenings worked better. Quite the inspiration to say the least. I am following this thread and have subscribed to it. How many cans did you use to coat the underside? Do you plan on using this in the engine bay (I have seen it done recently or with LineX)? Cheers! |
|
|
|
| dakotaewing |
Mar 20 2009, 09:01 AM
Post
#88
|
|
Senior Member Group: Members Posts: 1,167 Joined: 8-July 03 From: DeSoto, Tx Member No.: 897 Region Association: Southwest Region |
I'll be doing the same with my project shortly, but I won't be using the rubberized product, as it appears to come off to easily for what I want-
|
|
|
|
| 914Tom |
Mar 20 2009, 11:05 AM
Post
#89
|
|
Member Group: Members Posts: 123 Joined: 11-February 07 From: Germany Member No.: 7,526 |
why not apply a PVC coat and paint the underside and wheelhouses in carcolor ? (orange) ...
|
|
|
|
| my928s4 |
Mar 20 2009, 11:50 AM
Post
#90
|
|
Member Group: Members Posts: 349 Joined: 18-August 07 From: Spokane, WA Member No.: 8,018 Region Association: Pacific Northwest |
QUOTE(Kansas 914 @ Mar 20 2009, 06:20 AM) How many cans did you use to coat the underside? Do you plan on using this in the engine bay (I have seen it done recently or with LineX)? Cheers! Hi Mike, it took about one can for the area you see in the photo and at that point there was more left but the can is useless as the top is pretty much gummed up. Aim is to paint the engine bay. QUOTE(dakotaewing @ Mar 20 2009, 08:01 AM) I'll be doing the same with my project shortly, but I won't be using the rubberized product, as it appears to come off to easily for what I want- Yep there are many solutions to work with, if I had the car on a rotisserie I would have gone another route. Also the car will be fair weather so I believe what I am doing should be good enough. Only time will tell. QUOTE(914Tom @ Mar 20 2009, 10:05 AM) why not apply a PVC coat and paint the underside and wheelhouses in carcolor ? (orange) ... I am not yet decided on the wheel wells but some of the old undercoating is very well adhered which will mean undercoating again. I was originally hoping to have body color on the underside and wheel wells but looking at other projects I thought the undercoat looked good. |
|
|
|
| my928s4 |
Apr 19 2009, 02:24 PM
Post
#91
|
|
Member Group: Members Posts: 349 Joined: 18-August 07 From: Spokane, WA Member No.: 8,018 Region Association: Pacific Northwest |
Well not too much to report, I took a 3 week break while we had visitors and took a vacation. I am nearly complete on welding the fenders, just another hour or so on the drivers side rear and should be done, I was going to finish yesterday and then ran out of welding wire.
I have been receiving boxes of goodies though, the re-plated calipers from Eric looked great and they also came with new rear bearings and 5 lug rear hubs. I am picking some more parts up from the powder coaters next week so I can start putting the rear arm back together. Couple of pics of the front calipers, once I have some of the small seals I can put the halves back together. Still waiting on rebuild kit for the rears but they look just as good. 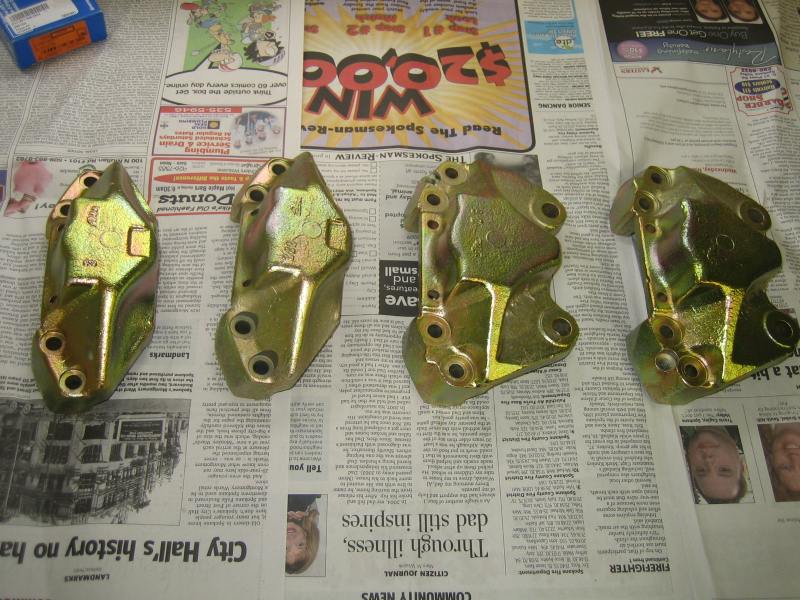 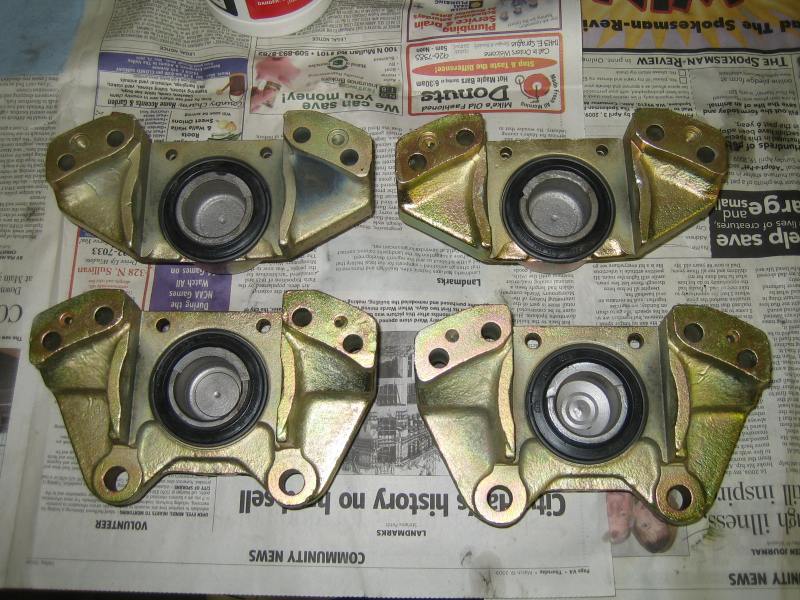 This weekend I finished the priming more of the underside. 1st coat epoxy primer 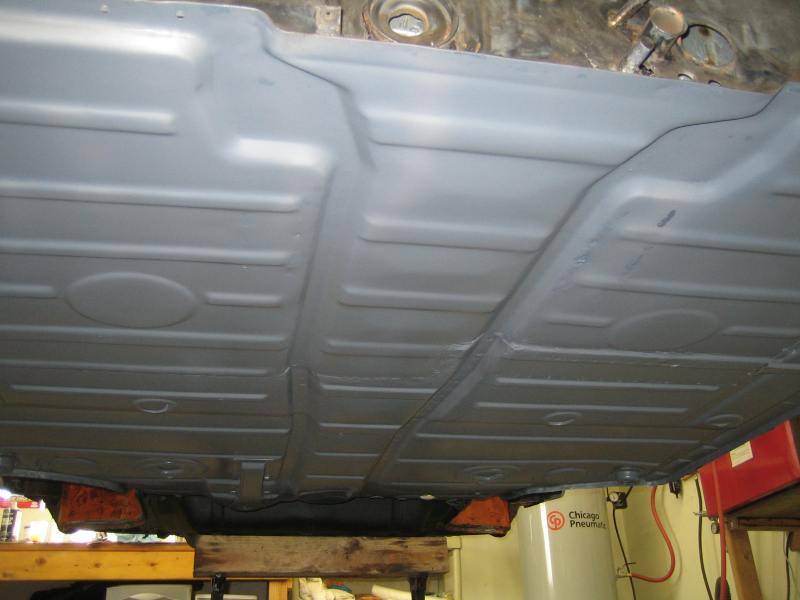 Then apply seam sealer 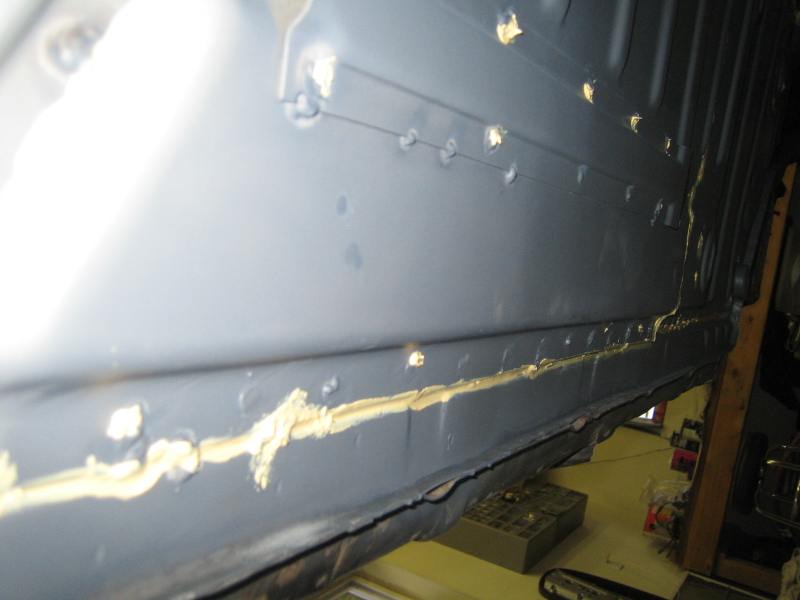 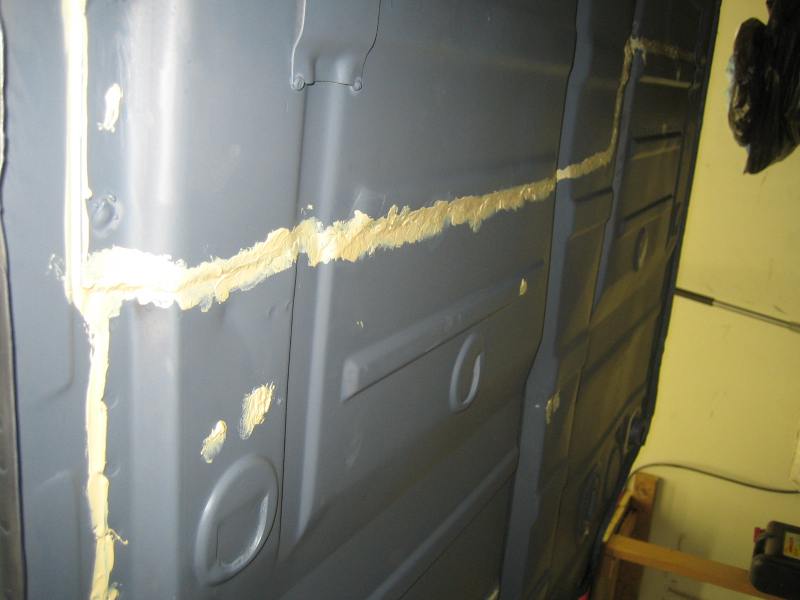 And add a second coat of Epoxy 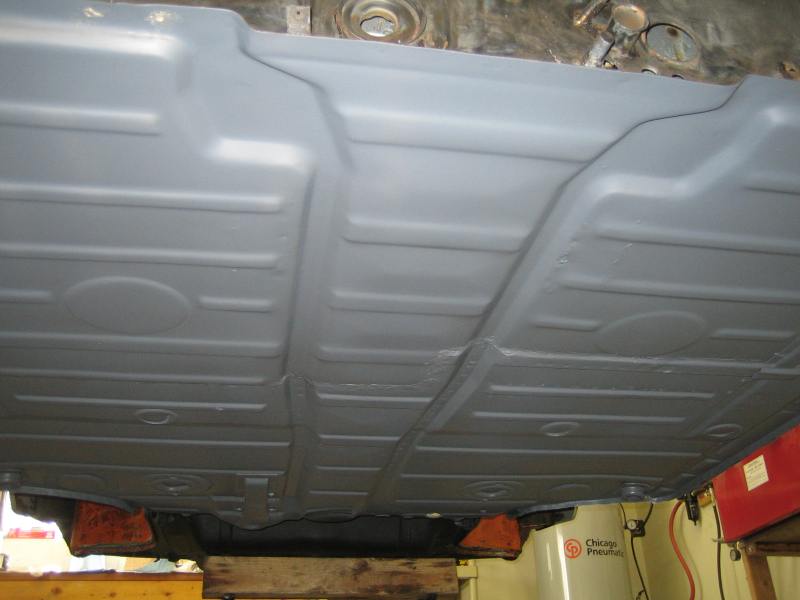 Now ready for underseal. |
|
|
|
| charliew |
Apr 19 2009, 05:19 PM
Post
#92
|
|
Advanced Member Group: Members Posts: 2,363 Joined: 31-July 07 From: Crawford, TX. Member No.: 7,958 |
You might want to check out a caliper rebuild thread. Your pistons are not positioned in the correct orientation. The missing part of the piston rim faces the incoming part of the rotor when it is mounted on it's proper side. 20 degrees is the term they use when positioning each individual side. Wes V has a good thread and I'm sure there are others.
|
|
|
|
| my928s4 |
Apr 20 2009, 09:03 AM
Post
#93
|
|
Member Group: Members Posts: 349 Joined: 18-August 07 From: Spokane, WA Member No.: 8,018 Region Association: Pacific Northwest |
QUOTE(charliew @ Apr 19 2009, 04:19 PM) You might want to check out a caliper rebuild thread. Your pistons are not positioned in the correct orientation. The missing part of the piston rim faces the incoming part of the rotor when it is mounted on it's proper side. 20 degrees is the term they use when positioning each individual side. Wes V has a good thread and I'm sure there are others. You are correct, found this pic on Pelican. 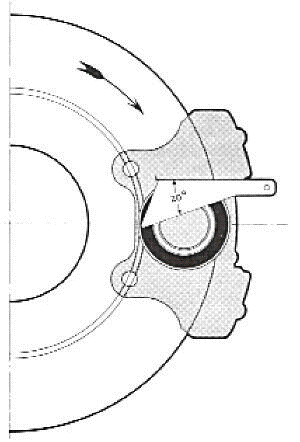 |
|
|
|
| MDG |
Apr 20 2009, 04:43 PM
Post
#94
|
|
Wolf in wolf's clothing. Group: Members Posts: 8,653 Joined: 3-February 09 From: Toronto Member No.: 10,018 Region Association: None |
Chris, just finished reading through this thread; that is some inspired work - can't wait to see more.
m. |
|
|
|
| my928s4 |
Apr 20 2009, 06:52 PM
Post
#95
|
|
Member Group: Members Posts: 349 Joined: 18-August 07 From: Spokane, WA Member No.: 8,018 Region Association: Pacific Northwest |
QUOTE(MDG @ Apr 20 2009, 03:43 PM) Chris, just finished reading through this thread; that is some inspired work - can't wait to see more. m. Thanks, inspired by brilliance or madness (IMG:style_emoticons/default/biggrin.gif) I do have to wonder at times. Anyway got these back from the powder coaters today, they did an excellent job. I had the brake protective plate done in black rather than plated like OEM, I am not after originality and the plating does not seem to hold up well on this part. 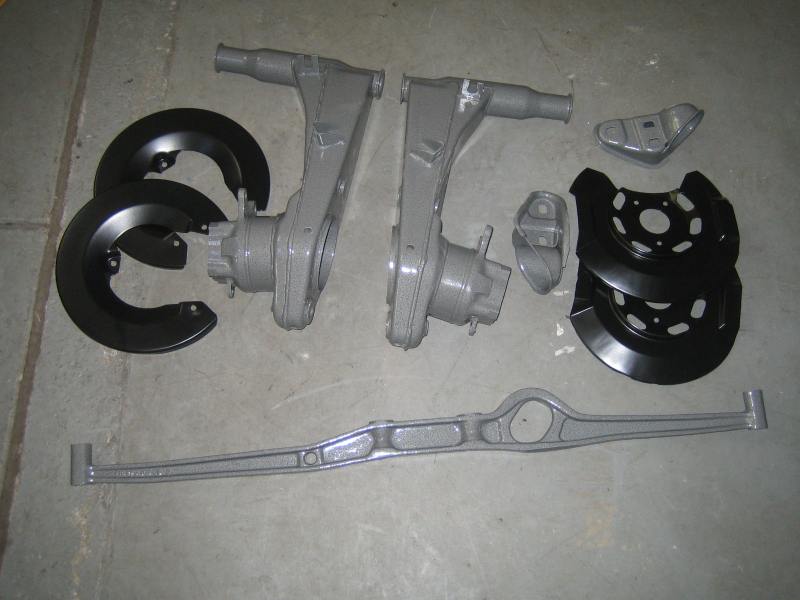 |
|
|
|
| my928s4 |
Apr 25 2009, 04:43 PM
Post
#96
|
|
Member Group: Members Posts: 349 Joined: 18-August 07 From: Spokane, WA Member No.: 8,018 Region Association: Pacific Northwest |
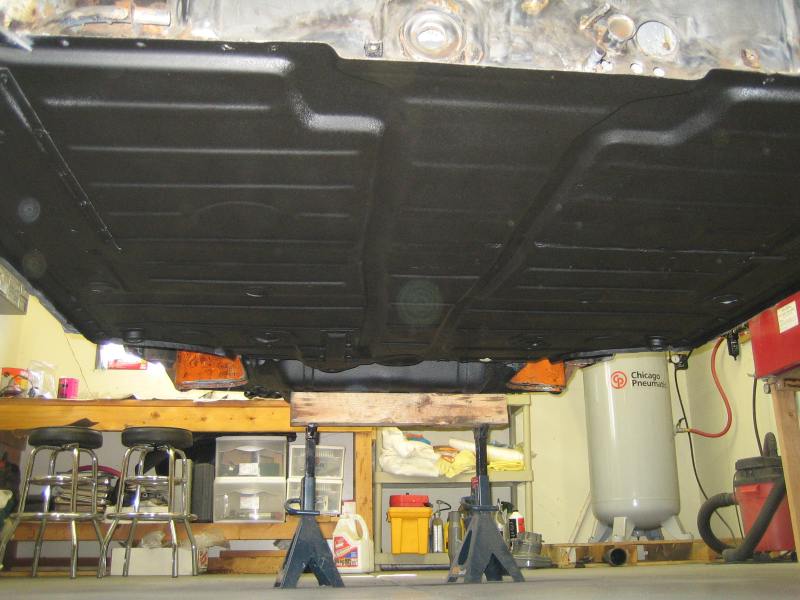
At last the lowest part of the car is done, the 2nd and 3rd can of underseal worked waaay better than the 1st, much easier to apply. Two coats and about 1.5 cans to do the floor pan.
 I added the following because someone posted and asked if this happened to others, you do your best to align everything but when you get to the finishing the bottom of the flare it doesn't align quite right. In total this happened to me twice and is no doubt because I did not pay enough care and attention and I am a novice. So the bottom was hanging maybe 3mm or so too low, first thing to do is cut off the bottom edge. 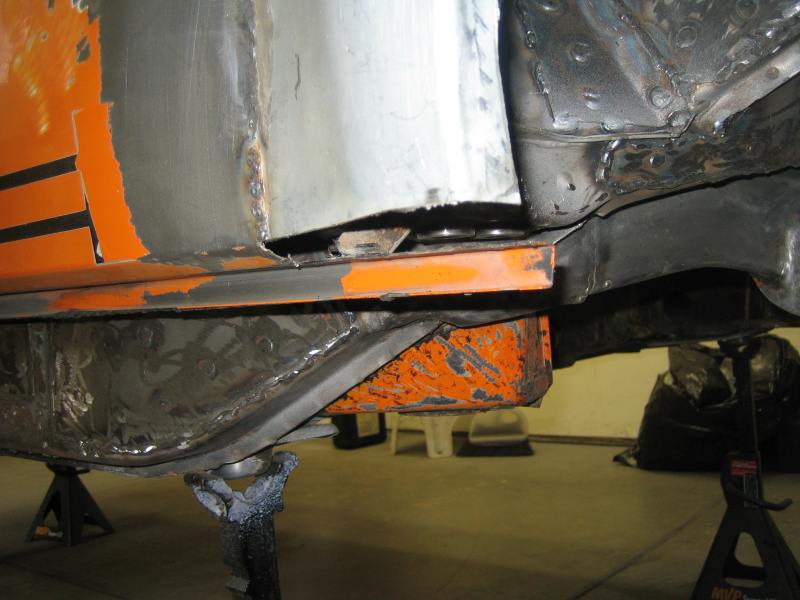 Align up the removed part to the remanents of the old fender (i.e the bottom), draw line and remove sliver of material. 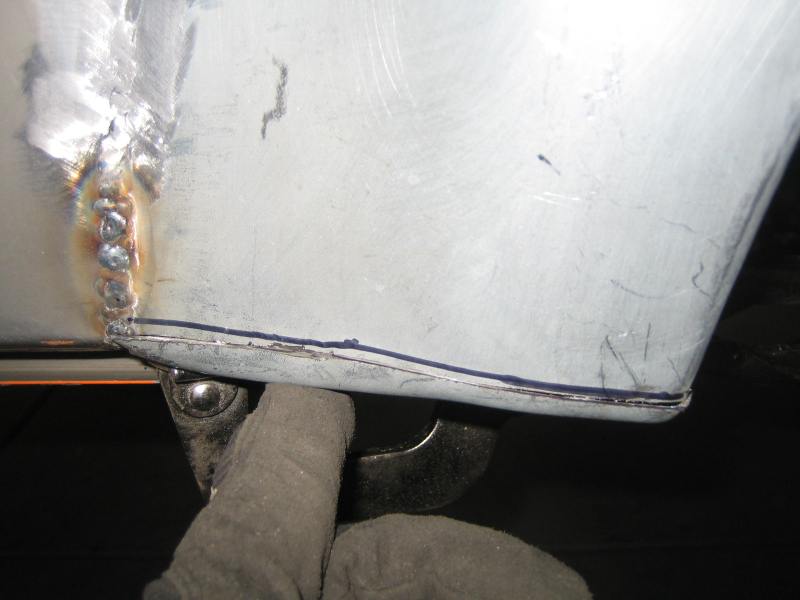 Make adjustments where needed and get the part to fit as good as possible, tack into place. 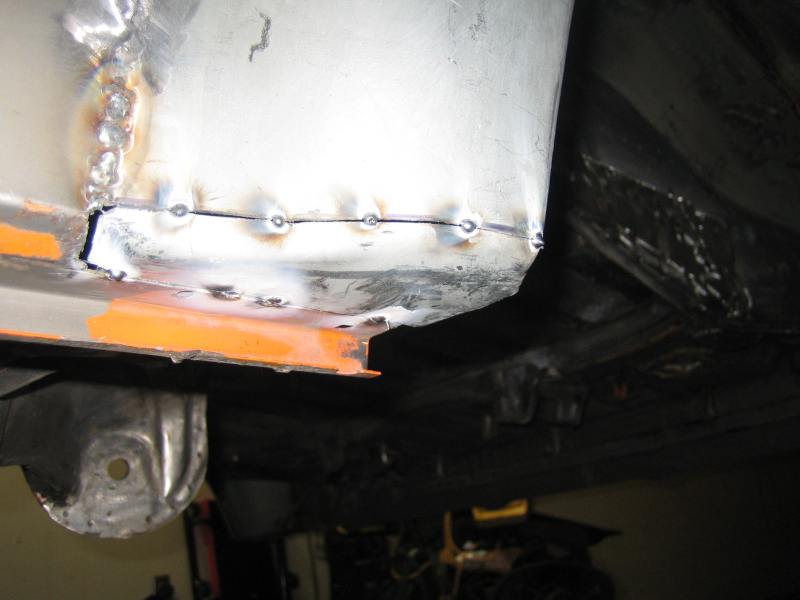 Complete welds and grind/finish.  |
|
|
|
| Lou W |
Apr 25 2009, 08:34 PM
Post
#97
|
|
"Here Kitty Kitty" my ass...... Group: Members Posts: 4,109 Joined: 9-May 04 From: Roseburg, OR. Member No.: 2,039 Region Association: Spain |
Sure looking good, very nice job. (IMG:style_emoticons/default/beerchug.gif)
|
|
|
|
| Slider |
Apr 25 2009, 10:13 PM
Post
#98
|
|
Problems are like cockroaches you find 1 and theres a 100 more Group: Members Posts: 223 Joined: 11-March 07 From: Fort Collins Colorado Member No.: 7,591 Region Association: Rocky Mountains |
Nice job Chris, keep up the good work you are an inspiration.
(IMG:style_emoticons/default/beer3.gif) Cheers! |
|
|
|
| charliew |
Apr 26 2009, 09:39 PM
Post
#99
|
|
Advanced Member Group: Members Posts: 2,363 Joined: 31-July 07 From: Crawford, TX. Member No.: 7,958 |
I held my fg rocker from aa up to my 75 body and I can't decide how to get a small gap at the joint of the flare and also work with the bevel on the bottom of the body, that seems to be a tough fit. It really looks like the fg rockers need to be straighter down more than angled in at the bottom edge.
|
|
|
|
| my928s4 |
May 5 2009, 07:01 PM
Post
#100
|
|
Member Group: Members Posts: 349 Joined: 18-August 07 From: Spokane, WA Member No.: 8,018 Region Association: Pacific Northwest |
Not too much going on but took some parts to the platers and cleaned up the garage a bit. I wanted to make the body movable so I could do some of the filler work outside, off to Homedepot for some wood which is not my best medium. Anyway made up a dolly which sits nicely on the finished underbody.
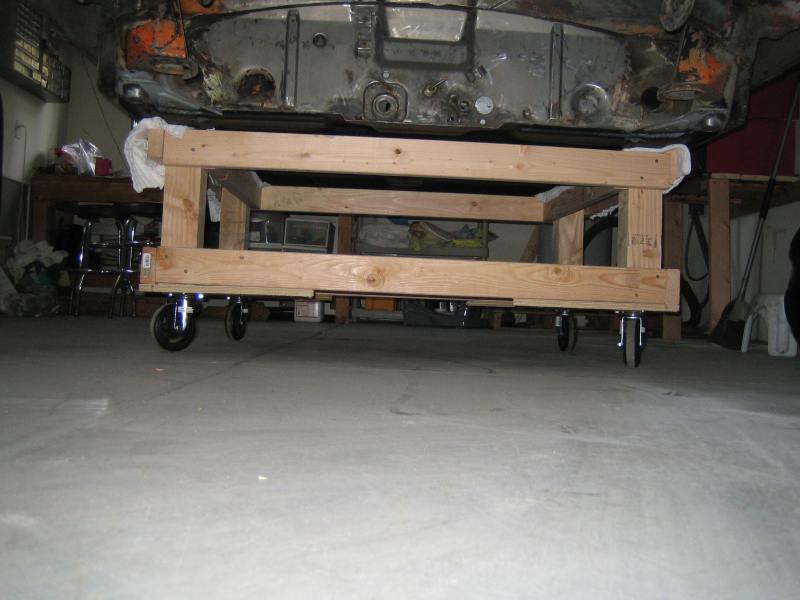 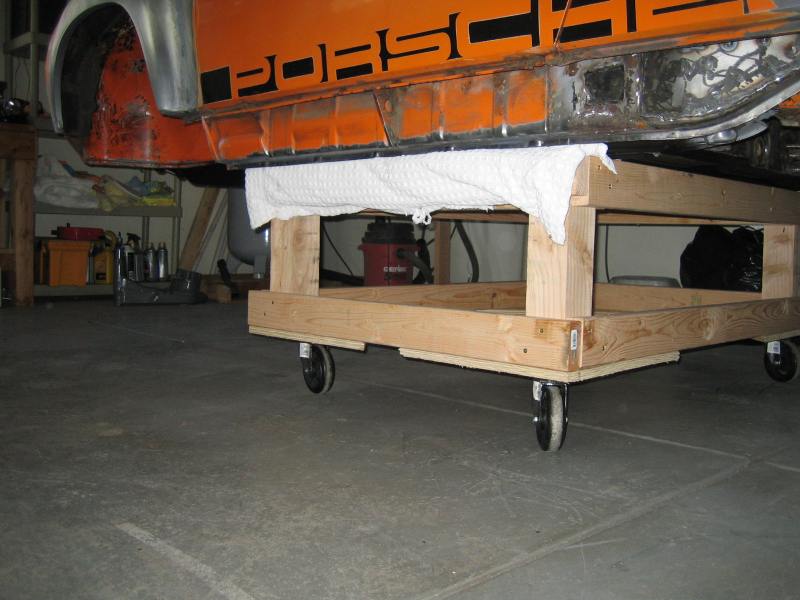 Seems to work OK and pretty stable, will see how it works in the coming weeks. Got a 928 track day this weekend and the wife wants me to refinish one of the bathrooms so May not going to be a stellar month for progress. |
|
|
|
|
1 User(s) are reading this topic (1 Guests and 0 Anonymous Users)
0 Members:

|
Lo-Fi Version | Time is now: 28th July 2026 - 02:16 AM |
Invision Power Board
v9.1.4 © 2026 IPS, Inc.