|
|
|
Porsche, and the Porsche crest are registered trademarks of Dr. Ing. h.c. F. Porsche AG.
This site is not affiliated with Porsche in any way. Its only purpose is to provide an online forum for car enthusiasts. All other trademarks are property of their respective owners. |
|
|

  |

| Spoke |
 Feb 10 2010, 09:22 PM Feb 10 2010, 09:22 PM
Post
#121
|
|
Jerry  Group: Members Posts: 7,397 Joined: 29-October 04 From: Allentown, PA Member No.: 3,031 Region Association: None |
Piece for the floor out of 18ga.
 And welded in 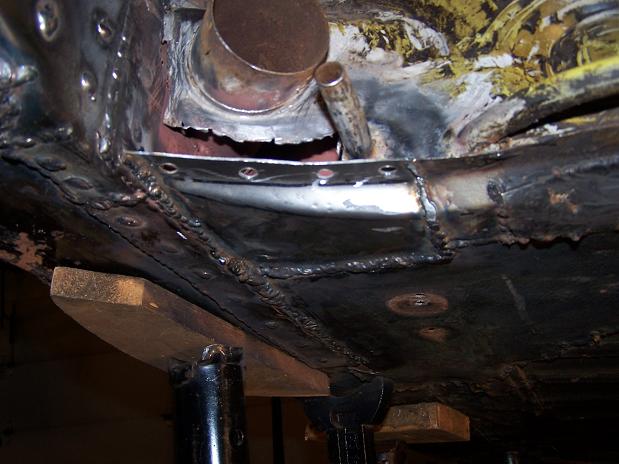 Welded up the existing floor to the new long piece. 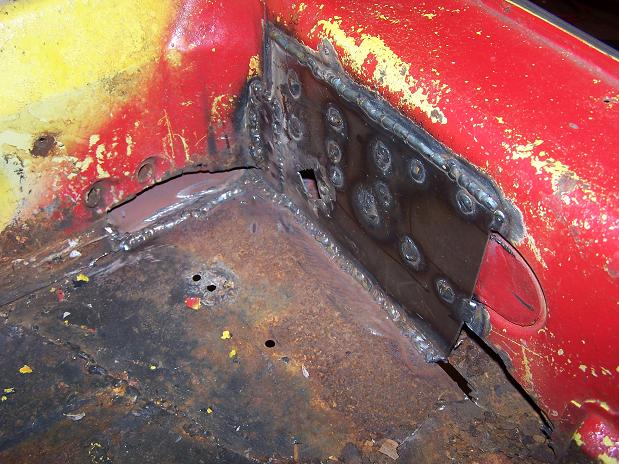 |
   |

 
|
| Spoke |
Feb 10 2010, 09:25 PM
Post
#122
|
|
Jerry Group: Members Posts: 7,397 Joined: 29-October 04 From: Allentown, PA Member No.: 3,031 Region Association: None |
Engine firewall repair piece under the driver heater tube.
 Welded in. Look Ma, no more rust holes in the engine compartment. 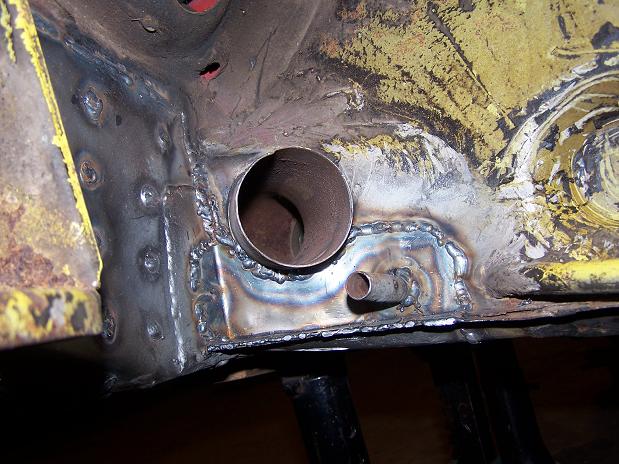 |
|
|
|
| Spoke |
Feb 10 2010, 09:27 PM
Post
#123
|
|
Jerry Group: Members Posts: 7,397 Joined: 29-October 04 From: Allentown, PA Member No.: 3,031 Region Association: None |
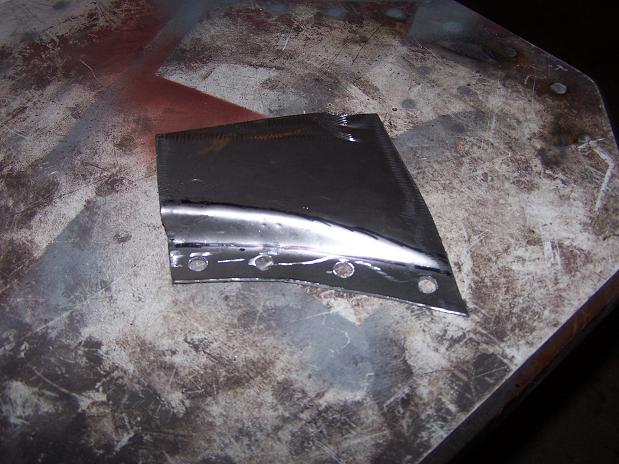
Triangle pieces by Spoke out of 16ga. Cost per piece: about $1 plus 1 beer. (IMG:style_emoticons/default/beer3.gif)
Attached image(s) 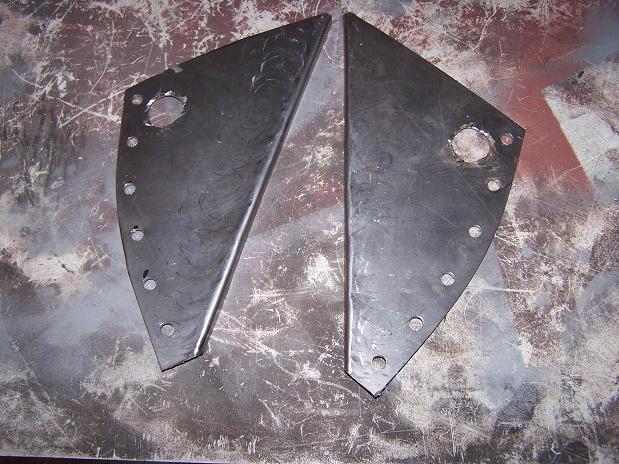
|
|
|
|
| rick 918-S |
Feb 10 2010, 11:05 PM
Post
#124
|
|
Hey nice rack! -Celette Group: Members Posts: 21,274 Joined: 30-December 02 From: Now in Superior WI Member No.: 43 Region Association: Northstar Region |
|
|
|
|
| Spoke |
May 3 2010, 06:12 PM
Post
#125
|
|
Jerry Group: Members Posts: 7,397 Joined: 29-October 04 From: Allentown, PA Member No.: 3,031 Region Association: None |
Yet another reason why I'm not working on my 914...Biz trip to Paris...Dammit (IMG:style_emoticons/default/dry.gif)
Attached image(s) 
|
|
|
|
| Spoke |
May 10 2010, 09:31 PM
Post
#126
|
|
Jerry Group: Members Posts: 7,397 Joined: 29-October 04 From: Allentown, PA Member No.: 3,031 Region Association: None |
Finally done with my Audi heater fan, other Audi timing belt, Audi rear wheel bearing, 911 rear wheel bearing, 3 trips to Europe, 1 to Detroit, 1 to San Francisco, and I just finished cutting the grass.
Now some 914 work. Got the triangle plates welded in. Had a minor safety scare. While under the car butt welding the triangles, I hit a gap and had a big splatter. I felt it come down on my head and my baseball cap protected my head but a piece found its way into my ear and I could hear my ear hair sizzling. I threw helmet and cap off and shook my head to get the weld out. Didn't have much pain but it did scare the crap out of me. I used a pair a ear plugs after that. Left Triangle 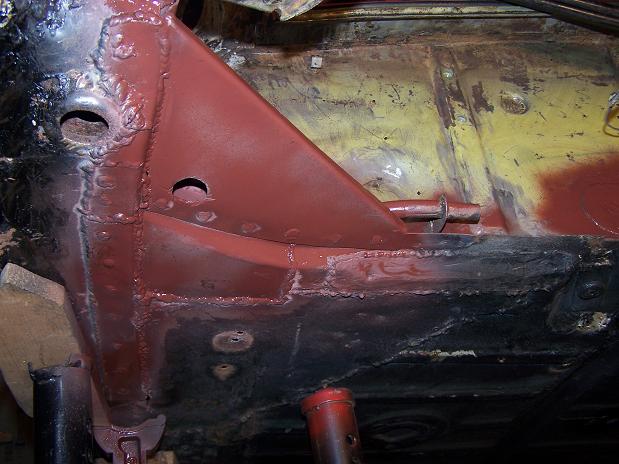 Closed up the tail shift mounting hole with a bolt. Threaded it in, cut it off, and welded shut. 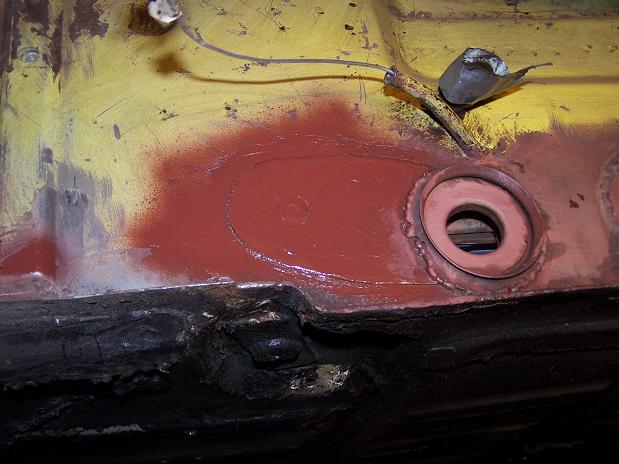 Right plate 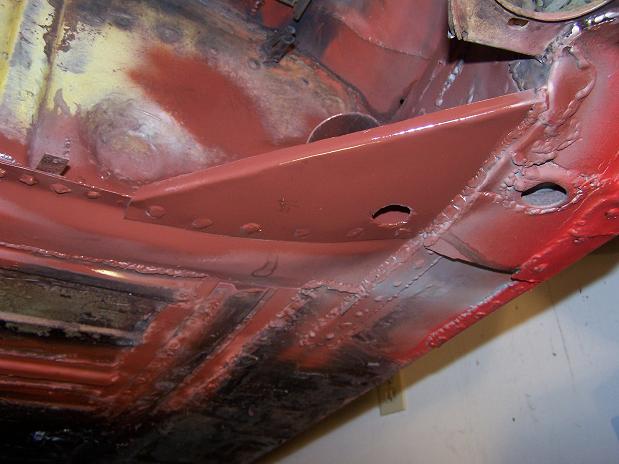 |
|
|
|
| Spoke |
May 11 2010, 09:41 PM
Post
#127
|
|
Jerry Group: Members Posts: 7,397 Joined: 29-October 04 From: Allentown, PA Member No.: 3,031 Region Association: None |
Found some rust on the engine mount. What a shock.
Attached image(s) 
|
|
|
|
| Spoke |
May 11 2010, 09:57 PM
Post
#128
|
|
Jerry Group: Members Posts: 7,397 Joined: 29-October 04 From: Allentown, PA Member No.: 3,031 Region Association: None |
Finished up the last of the welding in the engine bay. Just did a few tabs for the fuel lines, brake lines, and ebrake cables.
Attached image(s) 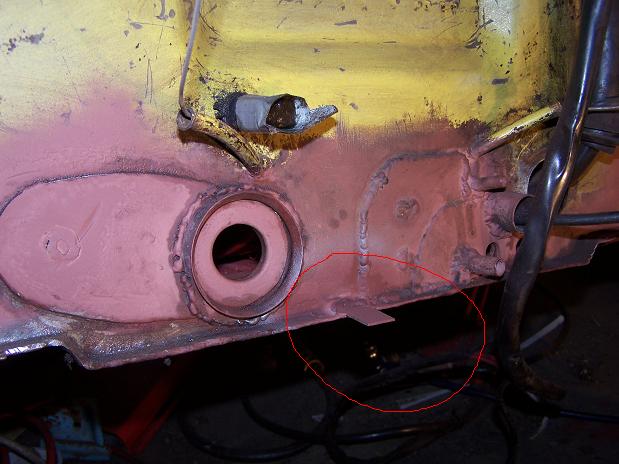 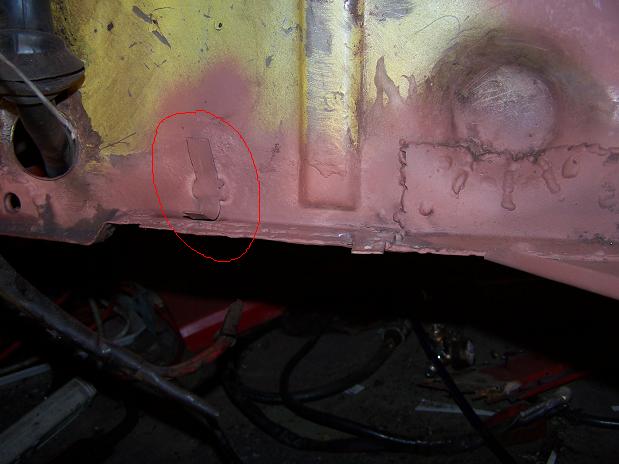 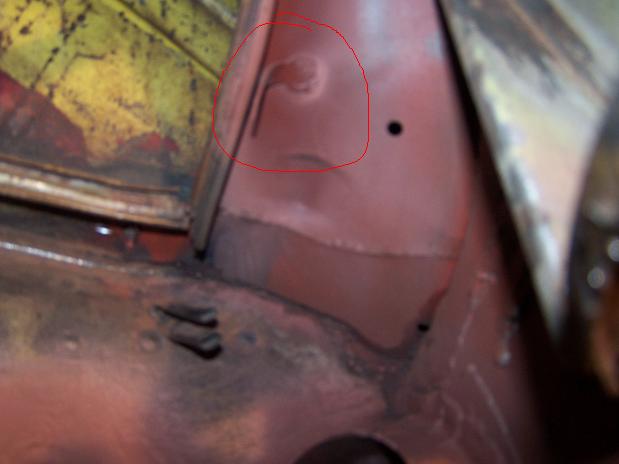
|
|
|
|
| Spoke |
May 14 2010, 10:45 PM
Post
#129
|
|
Jerry Group: Members Posts: 7,397 Joined: 29-October 04 From: Allentown, PA Member No.: 3,031 Region Association: None |
While poking the inside of the engine mount, I poked through the outside of the mount. A better man would replace the mount. That dude don't live here. Cut out the old stuff and weld in new. The top hole is just between sheets of metal. I closed that one up too.
Attached image(s) 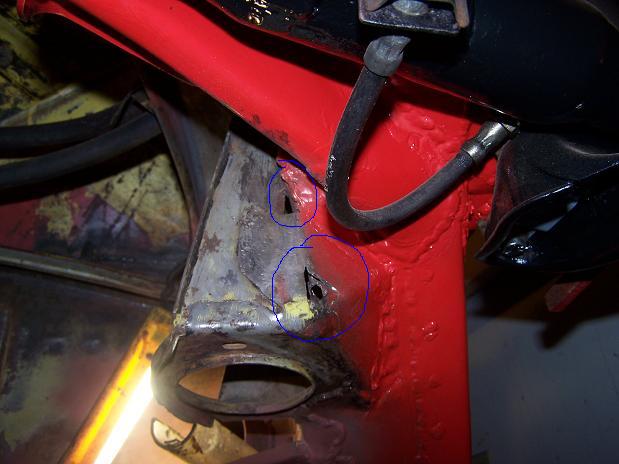 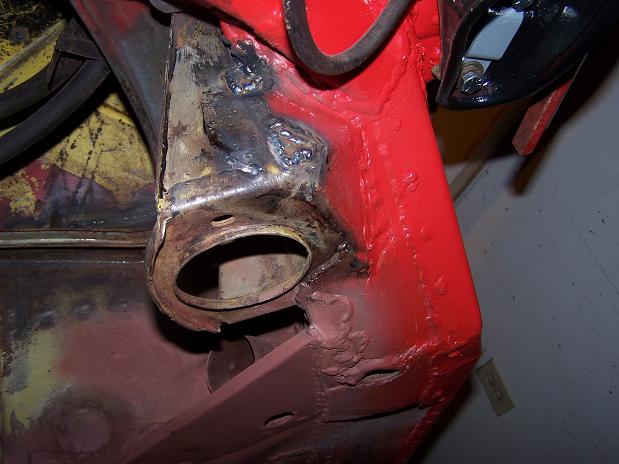
|
|
|
|
| Spoke |
May 14 2010, 11:32 PM
Post
#130
|
|
Jerry Group: Members Posts: 7,397 Joined: 29-October 04 From: Allentown, PA Member No.: 3,031 Region Association: None |
The long is gone behind the engine mount. Look Ma, no hole now.
Attached image(s) 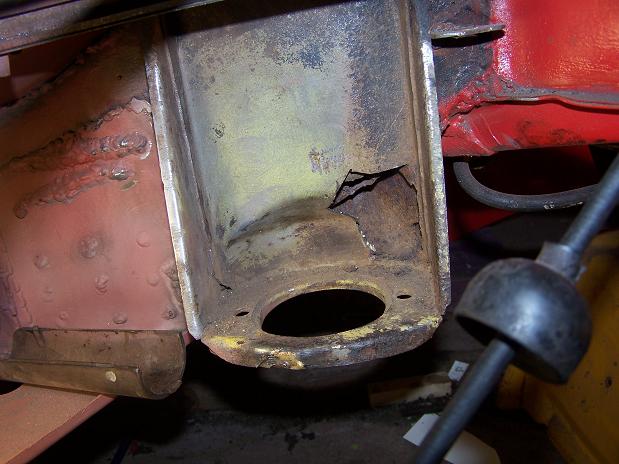 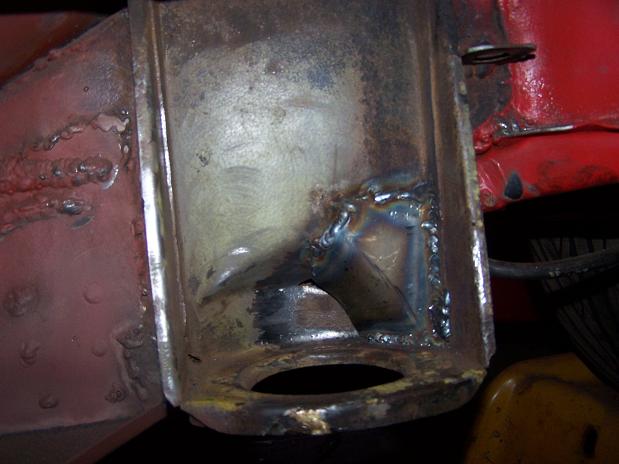
|
|
|
|
| wayne1234 |
May 15 2010, 09:28 PM
Post
#131
|
|
Member Group: Members Posts: 260 Joined: 6-April 09 From: indianapolis in Member No.: 10,238 Region Association: None |
I was in the same situations a few months ago on mine, kinda got a flash back (IMG:style_emoticons/default/biggrin.gif) .. for a while it seemed like the welding wouldn't ever end, but it did, now all I need to do is finish the interior... I had a sizzle in my ear also, but didnt learn much from it, and it happened at least 2 more times (IMG:style_emoticons/default/confused24.gif) Thats Why I say I have literally put in blood sweat and tears...
|
|
|
|
| Spoke |
May 17 2010, 09:41 PM
Post
#132
|
|
Jerry Group: Members Posts: 7,397 Joined: 29-October 04 From: Allentown, PA Member No.: 3,031 Region Association: None |
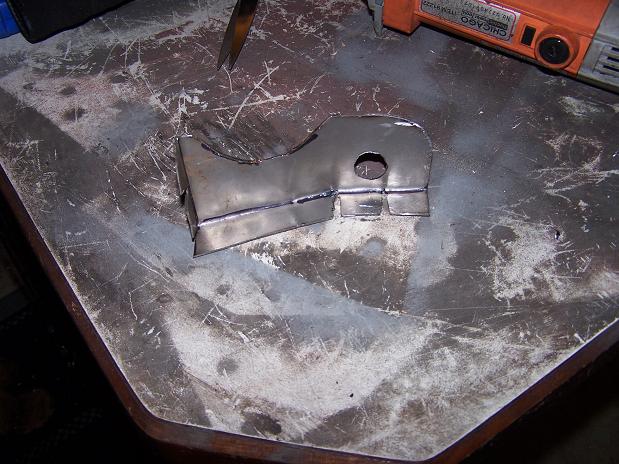
The bolts that secure the swing arm adjustment plates snapped off several years ago so I drilled out the bolts and added a nut on top to secure the swing arm.
Solution is to weld bolts to the existing support. To get more grip length I welded 2 bolts together. 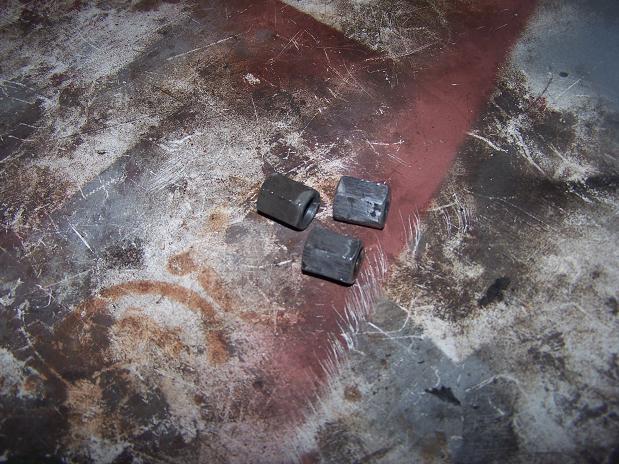 Nuts welded on. 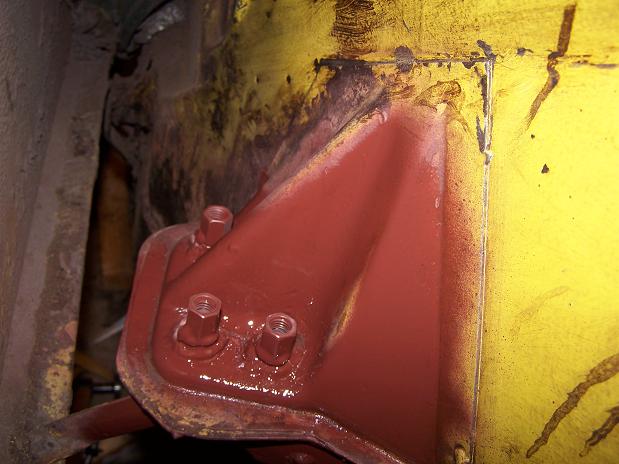 |
|
|
|
| Spoke |
May 17 2010, 09:54 PM
Post
#133
|
|
Jerry Group: Members Posts: 7,397 Joined: 29-October 04 From: Allentown, PA Member No.: 3,031 Region Association: None |
Finally finished with the engine mount.
This is the last of the welding to be done in the engine compartment. Next comes cleaning off the rest of the undercoating and tar, then wire wheel more of the rusty areas, sand, then paint. Attached image(s) 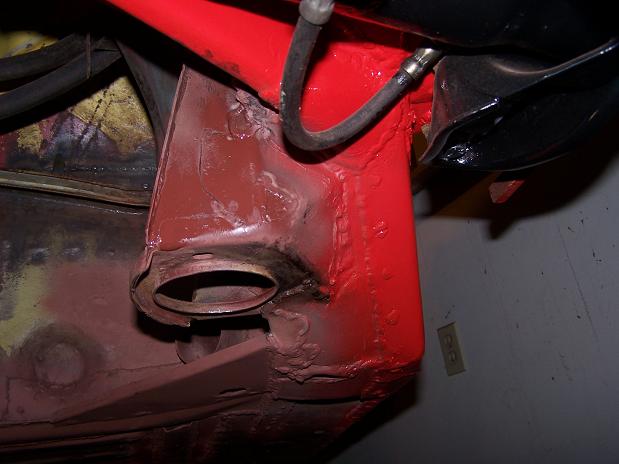 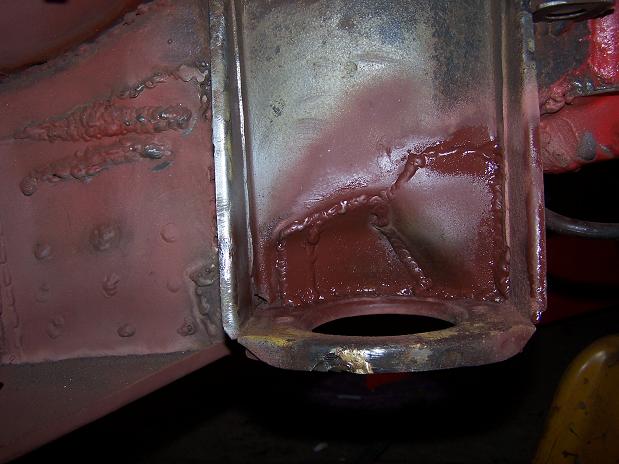
|
|
|
|
| Spoke |
May 23 2010, 04:12 PM
Post
#134
|
|
Jerry Group: Members Posts: 7,397 Joined: 29-October 04 From: Allentown, PA Member No.: 3,031 Region Association: None |
I welded a similar 16ga plate on the passenger side so decided to weld one on the driver side. Also seam welded the upper and lower firewall. Needed to weld this before prepping the engine bay for paint.
Attached image(s) 
|
|
|
|
| Spoke |
Jun 4 2010, 09:01 PM
Post
#135
|
|
Jerry Group: Members Posts: 7,397 Joined: 29-October 04 From: Allentown, PA Member No.: 3,031 Region Association: None |
Finally finished all the welding in the engine compartment.
Seam sealed all the new welding and also some old stuff that I didn't seam seal before when I repaired the trunk floor. Painted all the surfaces inside the engine compartment. Attached image(s) 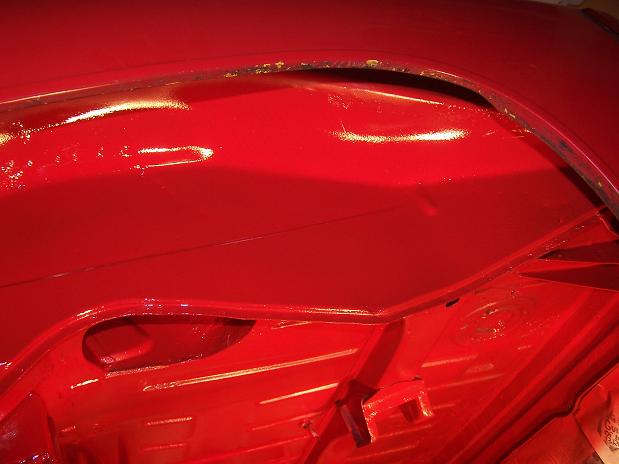 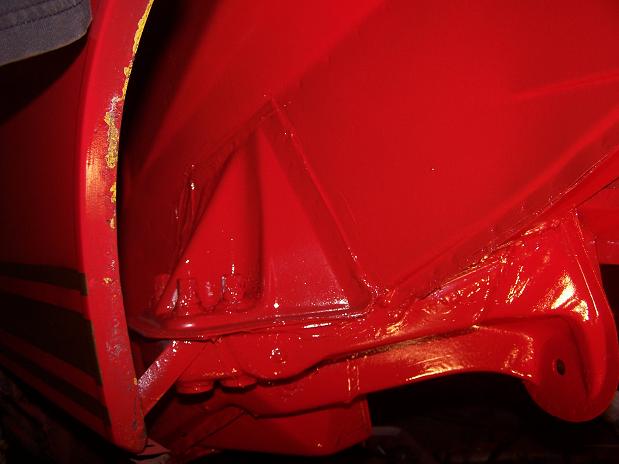 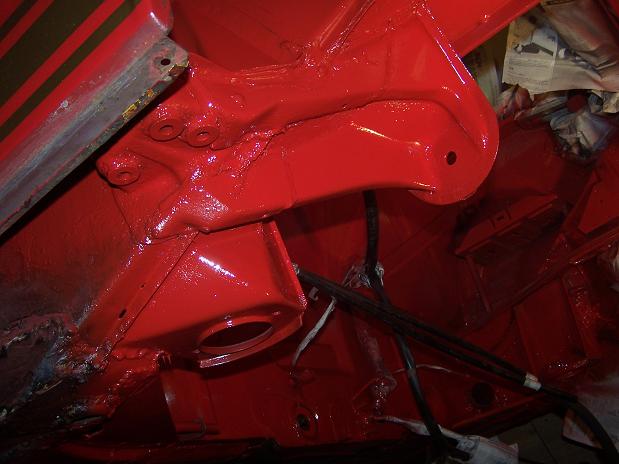
|
|
|
|
| Spoke |
Jun 4 2010, 09:32 PM
Post
#136
|
|
Jerry Group: Members Posts: 7,397 Joined: 29-October 04 From: Allentown, PA Member No.: 3,031 Region Association: None |
More Paint...
Attached image(s) 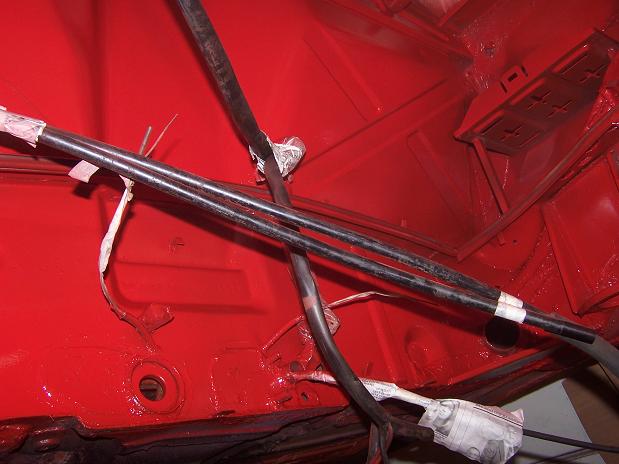 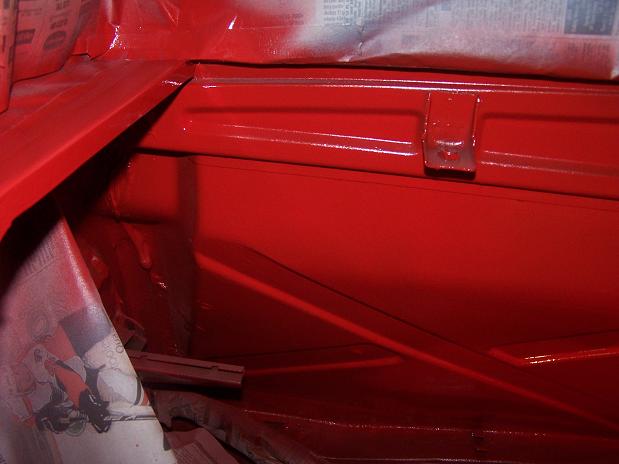 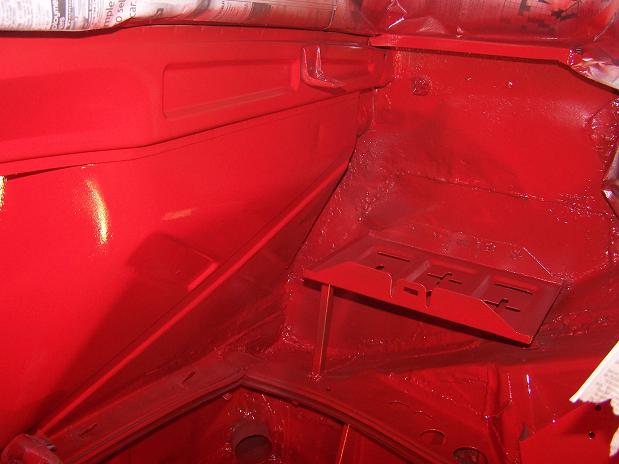
|
|
|
|
| Spoke |
Jun 4 2010, 09:34 PM
Post
#137
|
|
Jerry Group: Members Posts: 7,397 Joined: 29-October 04 From: Allentown, PA Member No.: 3,031 Region Association: None |
More paint...
Attached image(s) 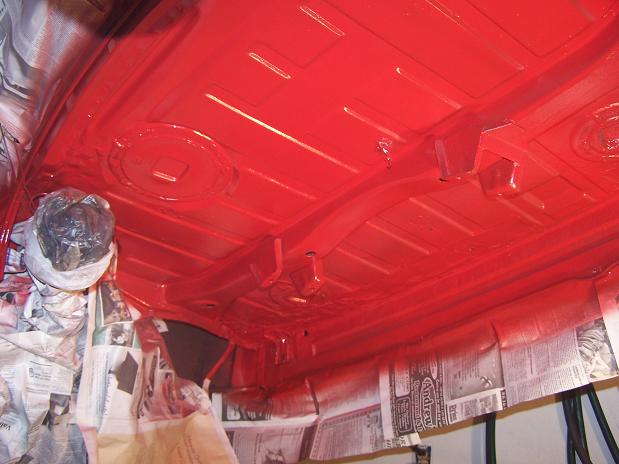 
|
|
|
|
| Spoke |
Jun 6 2010, 06:21 AM
Post
#138
|
|
Jerry Group: Members Posts: 7,397 Joined: 29-October 04 From: Allentown, PA Member No.: 3,031 Region Association: None |
Cleaned and painted the suspension pieces.
Next steps to clean up fuel tank area which will include some rust repair and painting, plumb and wire fuel pump up front, then run fuel lines. Attached image(s) 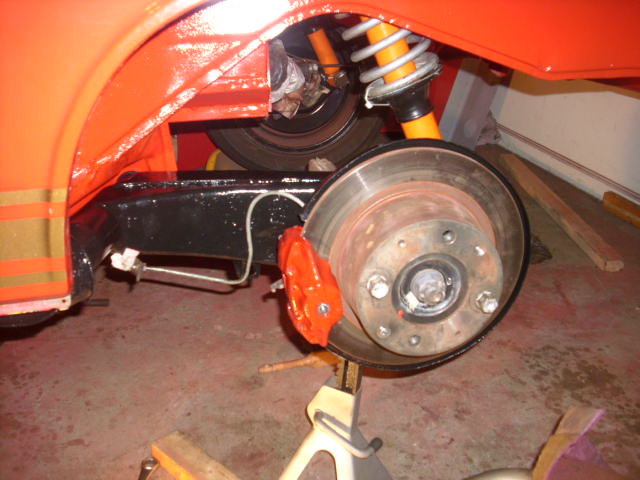 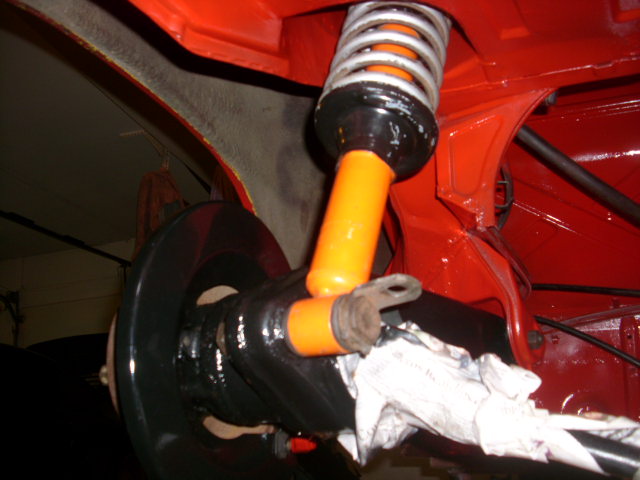
|
|
|
|
| Spoke |
Jun 7 2010, 07:30 PM
Post
#139
|
|
Jerry Group: Members Posts: 7,397 Joined: 29-October 04 From: Allentown, PA Member No.: 3,031 Region Association: None |
Finally on 4 wheels again. The jackstands are idle for the moment...
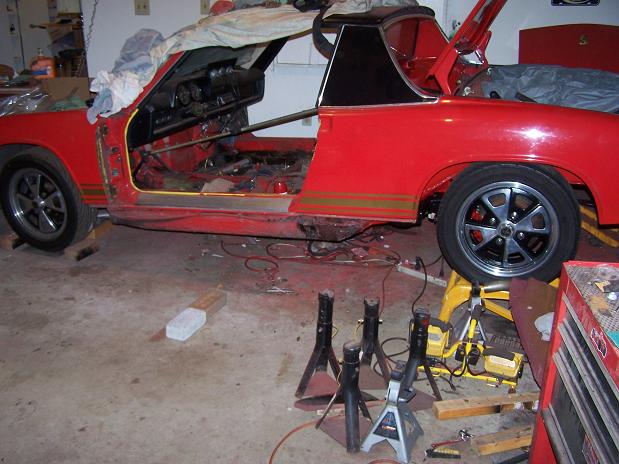 Next jobs are rust repairs in and around the gas tank. There's a rust through hole in the fender that I'm sure will grow once I start digging into it. I will also weld in an angle iron brace to support the Camp914 hood shocks. 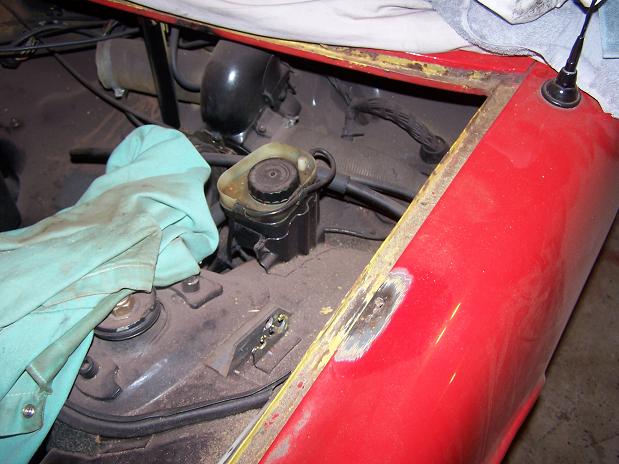 The passenger side corner was totally gone so I'll fabricate some new pieces and weld in. 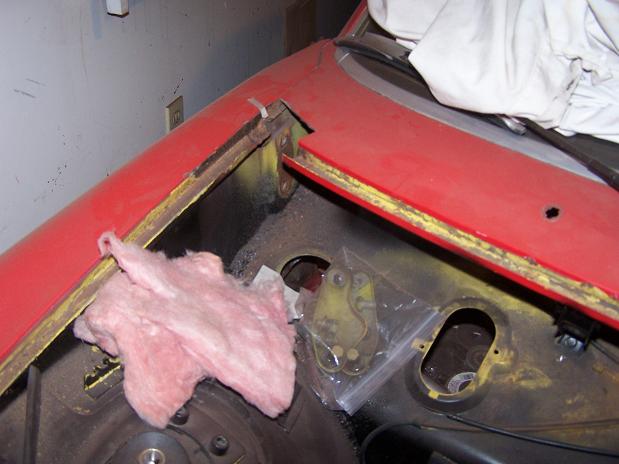 |
|
|
|
| Spoke |
Jun 18 2010, 06:55 AM
Post
#140
|
|
Jerry Group: Members Posts: 7,397 Joined: 29-October 04 From: Allentown, PA Member No.: 3,031 Region Association: None |
Welded up the hole in the fender and the weatherstrip channel.
Also welded on a piece of angle iron to strengthen the hood shock (spring) mount. When I put on the hood shock a while back, the original spring mount just bent under the stress of the shock. So I got a piece of angle iron to back it up. I didn't weld it back then as it wasn't necessary. Welded the gap between the fender and cowl too. This got real weird near the end when I got a lot of spitting and popping. I thought at first that my gas had run out, turned off, or got clogged, but I found that there was lead on top of the fender and that's what was popping and spitting. Attached image(s) 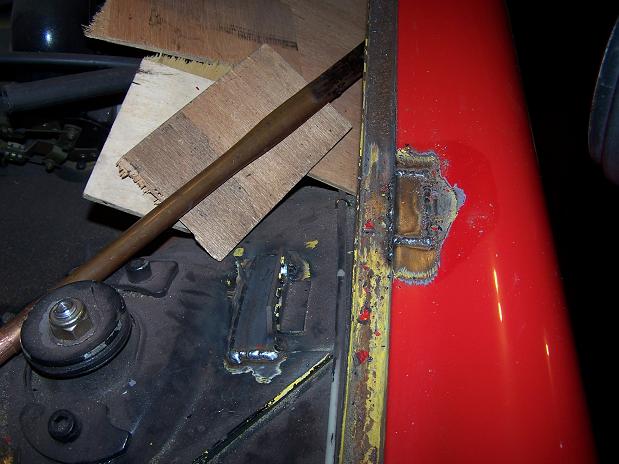 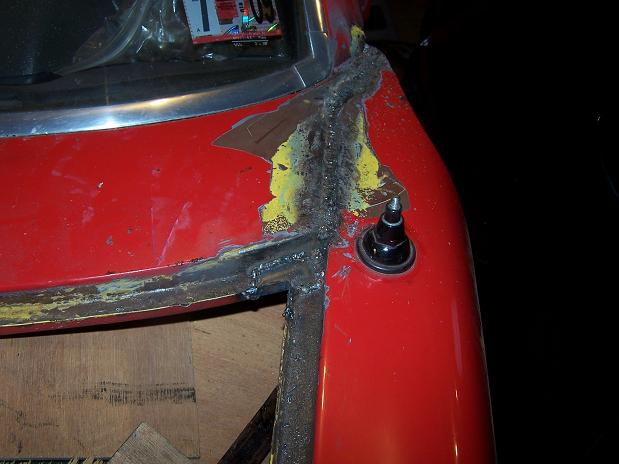
|
|
|
|
|
6 User(s) are reading this topic (6 Guests and 0 Anonymous Users)
0 Members:

|
Lo-Fi Version | Time is now: 26th May 2026 - 05:30 PM |
Invision Power Board
v9.1.4 © 2026 IPS, Inc.