|
|
|
Porsche, and the Porsche crest are registered trademarks of Dr. Ing. h.c. F. Porsche AG.
This site is not affiliated with Porsche in any way. Its only purpose is to provide an online forum for car enthusiasts. All other trademarks are property of their respective owners. |
|
|

  |

| 3d914 |
 May 21 2015, 09:04 PM May 21 2015, 09:04 PM
Post
#401
|
|
Senior Member  Group: Members Posts: 1,275 Joined: 24-September 03 From: Benson, AZ Member No.: 1,191 Region Association: Southwest Region |
Got the mods to the left reinforcement piece done this evening. I added a cutout at the forward oval section to provide access to the heater tube inside the long. This will get a metal plate to fit that I'll cement or screw on. I also scribed two lines to improve the bends for the recessed portion of the long - which provides access to the e-brake handle. And my seatbelt attachment point didn't fit centered in the slot intended for it so a notch was needed.
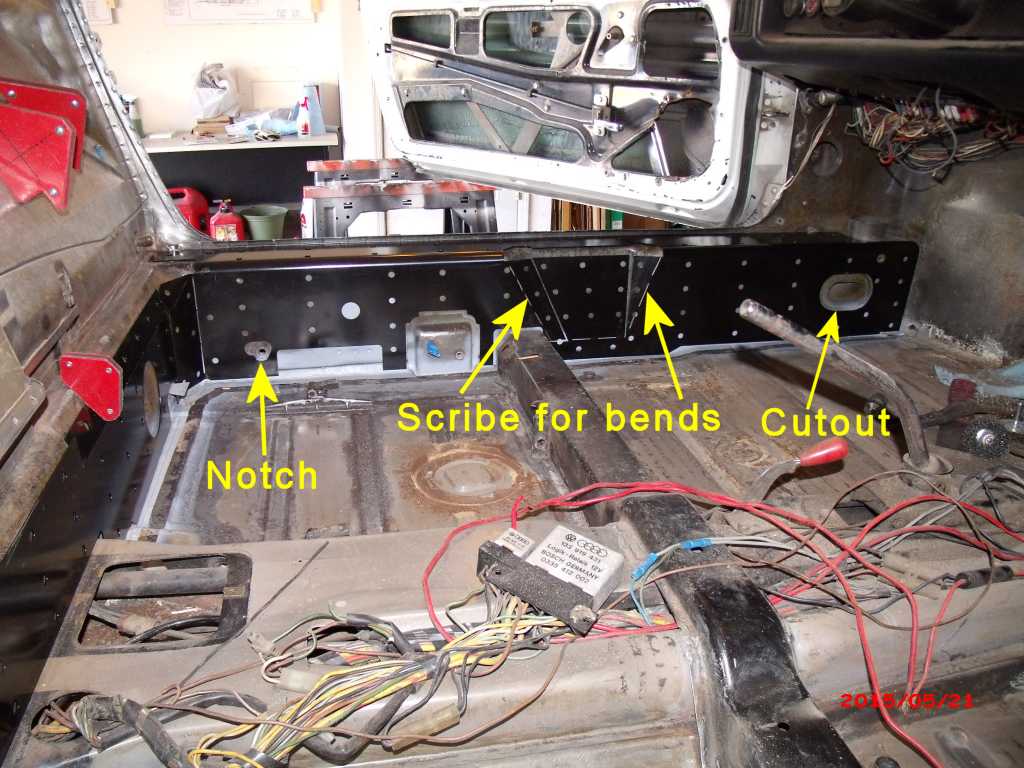 You'll notice the e-brake cable guide is missing also. I removed mine to get to the rust underneath. Turns out it had some rust also - so it will get replaced with a new one. Calling Restoration Design . . . |
   |

 
|
| 3d914 |
May 24 2015, 05:11 PM
Post
#402
|
|
Senior Member Group: Members Posts: 1,275 Joined: 24-September 03 From: Benson, AZ Member No.: 1,191 Region Association: Southwest Region |
Got about 4 hours on the 914 today. Pulled all the wiring out of the cockpit floor. Continued fitting the reinforcement panels. Marked the weld spots for the left & back piece and cleaned off the paint with a wire attachment. Also pulled the shifter and shifter bar along with the original fuel lines. These metal/plastic lines will get replaced with all metal.
I also have plenty of surface rust inside the center tunnel, so I drilled some additional holes for clean-out and to be able to apply rust treatment. I wanted to ad some holes in the forward part of the tunnel, but my drill won't fit under the dash. Like most 914's that sit for any period, little critters like to nest in this spot - and mine was full of nesting material. Perfect kindling for a possible fuel leak and subsequent fire. 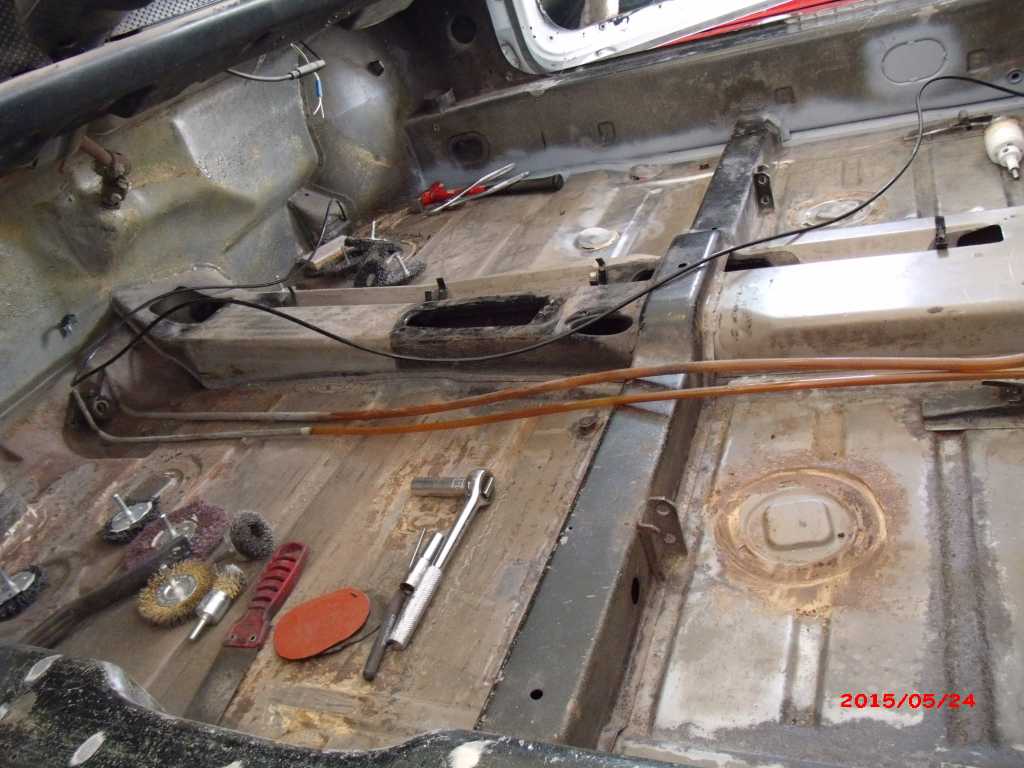  |
|
|
|
| 3d914 |
May 30 2015, 04:21 PM
Post
#403
|
|
Senior Member Group: Members Posts: 1,275 Joined: 24-September 03 From: Benson, AZ Member No.: 1,191 Region Association: Southwest Region |
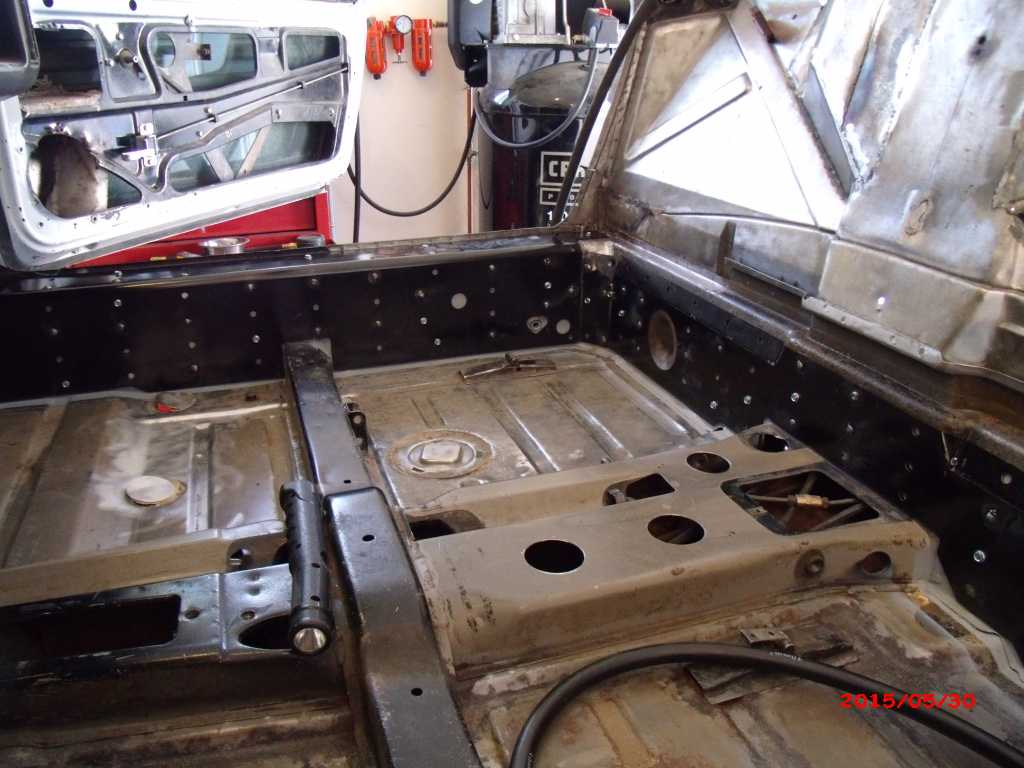
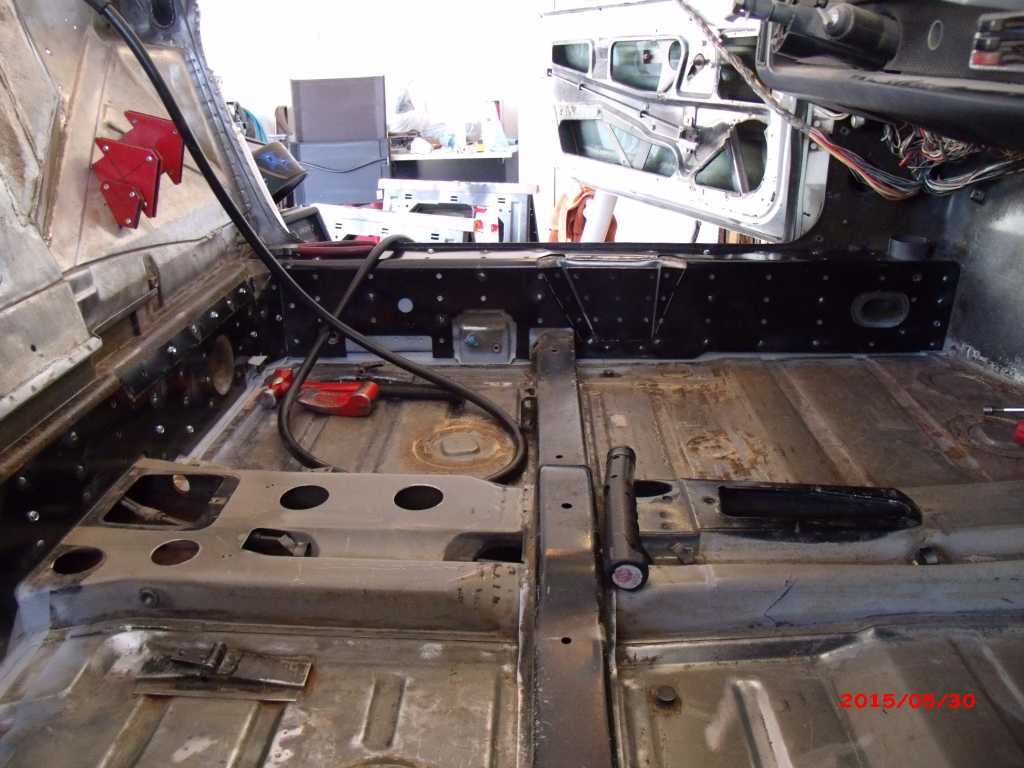
Got the mods for the right reinforcement panel finished and got some time this morning to start on the welding. I've put in over six hours but am only about a third done. Been taking long breaks between welding periods to diagnose issues on the Mini and Subaru. The welding has to go slowly so as not to warp the longitudinals. Plus it takes longer when you're down on your side - head stuck under the dash.
  |
|
|
|
| Andyrew |
May 31 2015, 04:49 PM
Post
#404
|
|
Spooling.... Please wait Group: Members Posts: 13,380 Joined: 20-January 03 From: Riverbank, Ca Member No.: 172 Region Association: Northern California |
Fitment looks good! I remember it took me 6 hours of straight welding on mine...
|
|
|
|
| 3d914 |
May 31 2015, 07:57 PM
Post
#405
|
|
Senior Member Group: Members Posts: 1,275 Joined: 24-September 03 From: Benson, AZ Member No.: 1,191 Region Association: Southwest Region |
QUOTE(Andyrew @ May 31 2015, 03:49 PM)  Fitment looks good! I remember it took me 6 hours of straight welding on mine... Thanks Andrew - Engman makes a nice kit - so part of the credit goes to him. I was hoping I could get mine done in about that time (accumulated) - but it will likely take more. Probably closer to 9 hours. Doing it on the car dolly means I can't easily walk around and get to sections to weld. I've been climbing up into the car to work from there - and of course I have to make sure all the tools I'll need are accessible from there. At 5'-4" its still awkward to climb around in there with tools, air hose, welding cable, flash-light, etc. Once these are in - then the car goes back on the rotisserie. That should make the final fixes easier. |
|
|
|
| 3d914 |
May 31 2015, 07:59 PM
Post
#406
|
|
Senior Member Group: Members Posts: 1,275 Joined: 24-September 03 From: Benson, AZ Member No.: 1,191 Region Association: Southwest Region |
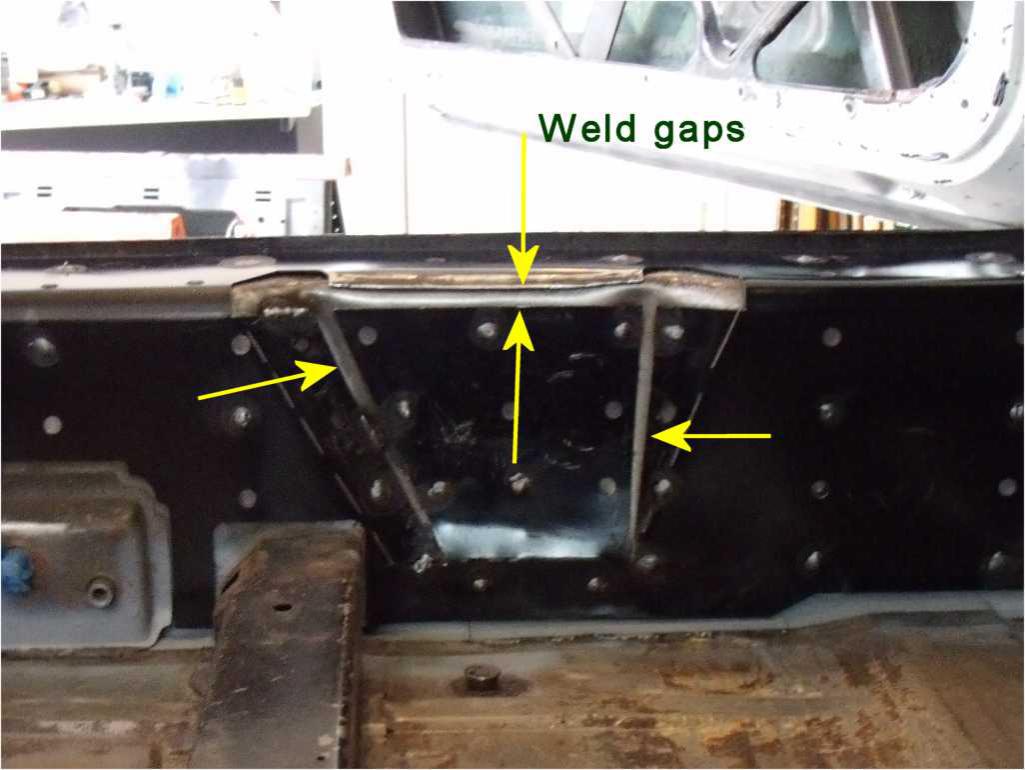
Put a few more hours in today - continuing welds around the three pieces. Spent a little extra time to get the left inset area (for the brake handle) shaped and welded in several spots. Because of the way the reinforcement is made, there is a gap on three sides of this area that I'll fill with weld. Even though carpet will go over this, I don't want any sharp corners that could work through the carpet and scrap up ones hand.
 |
|
|
|
| 76-914 |
Jun 1 2015, 08:25 AM
Post
#407
|
|
Repeat Offender & Resident Subaru Antagonist Group: Members Posts: 13,901 Joined: 23-January 09 From: Temecula, CA Member No.: 9,964 Region Association: Southern California |
Looking good. Take your time. You don't want to deal with shrinkage issues. It does take longer than you imagine it will. (IMG:style_emoticons/default/beerchug.gif)
|
 |
|
| 3d914 |
Jun 6 2015, 02:10 PM
Post
#408
|
|
Senior Member Group: Members Posts: 1,275 Joined: 24-September 03 From: Benson, AZ Member No.: 1,191 Region Association: Southwest Region |
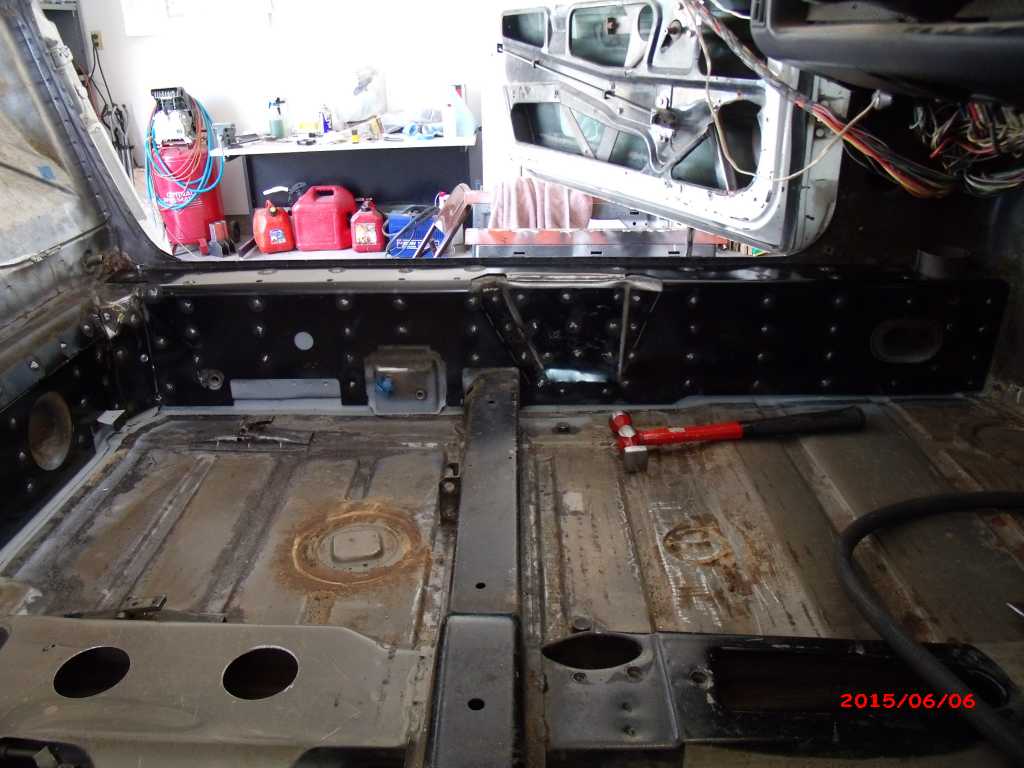
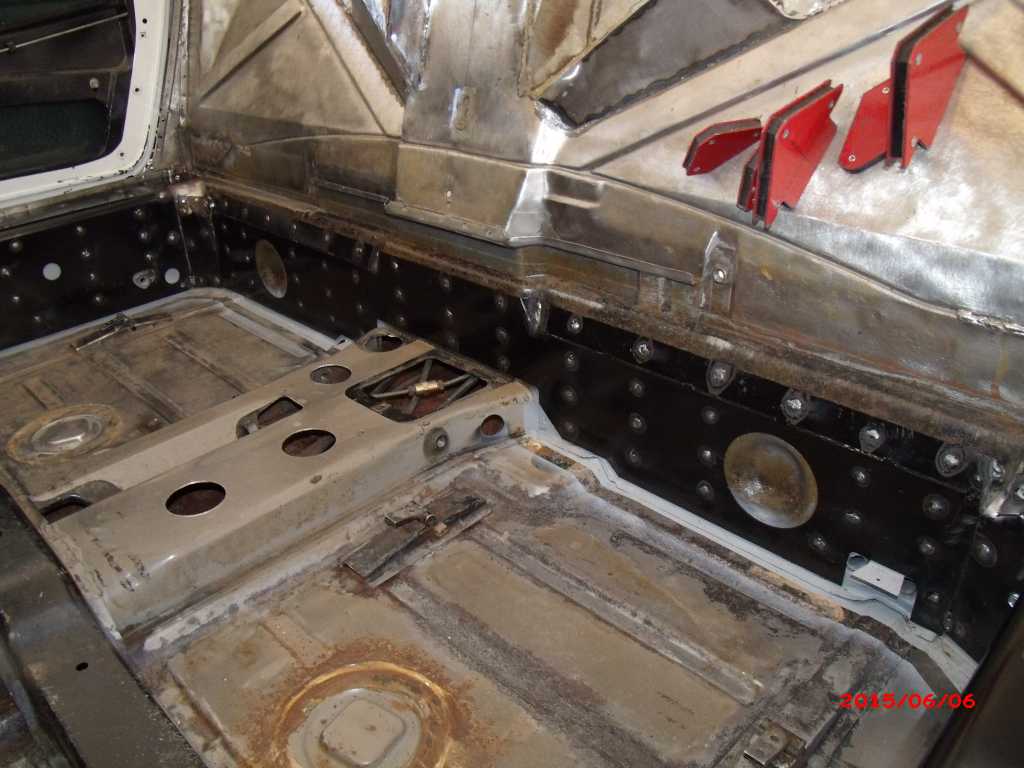
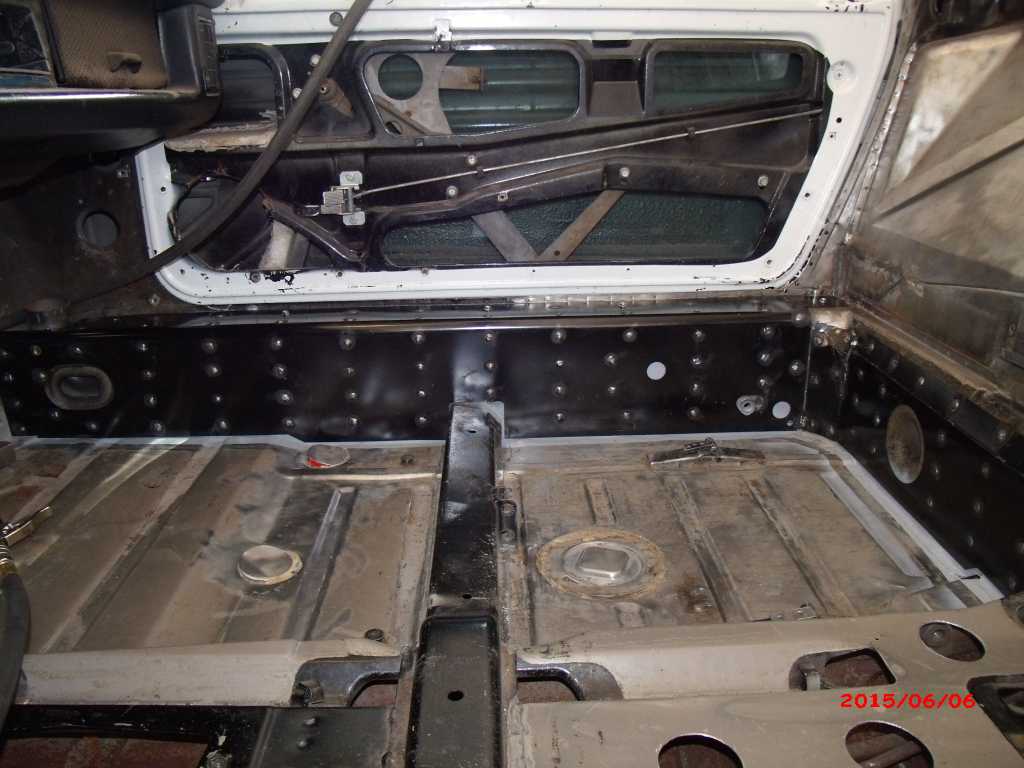
Thanks, I keep moving forward. Been at it since around 7:30 this morning, but getting too hot now and my legs are tired from all the bending. Have all but half a dozen welds along the top on R & L side, then a few seam welds to do. Not much changing visually, but here are some pics anyhow.
   |
|
|
|
| 3d914 |
Jun 7 2015, 04:30 PM
Post
#409
|
|
Senior Member Group: Members Posts: 1,275 Joined: 24-September 03 From: Benson, AZ Member No.: 1,191 Region Association: Southwest Region |
Got more welding done today until I ran out of wire. Guess I'll switch to grinding till it comes in.
|
|
|
|
| 3d914 |
Jun 14 2015, 10:41 PM
Post
#410
|
|
Senior Member Group: Members Posts: 1,275 Joined: 24-September 03 From: Benson, AZ Member No.: 1,191 Region Association: Southwest Region |
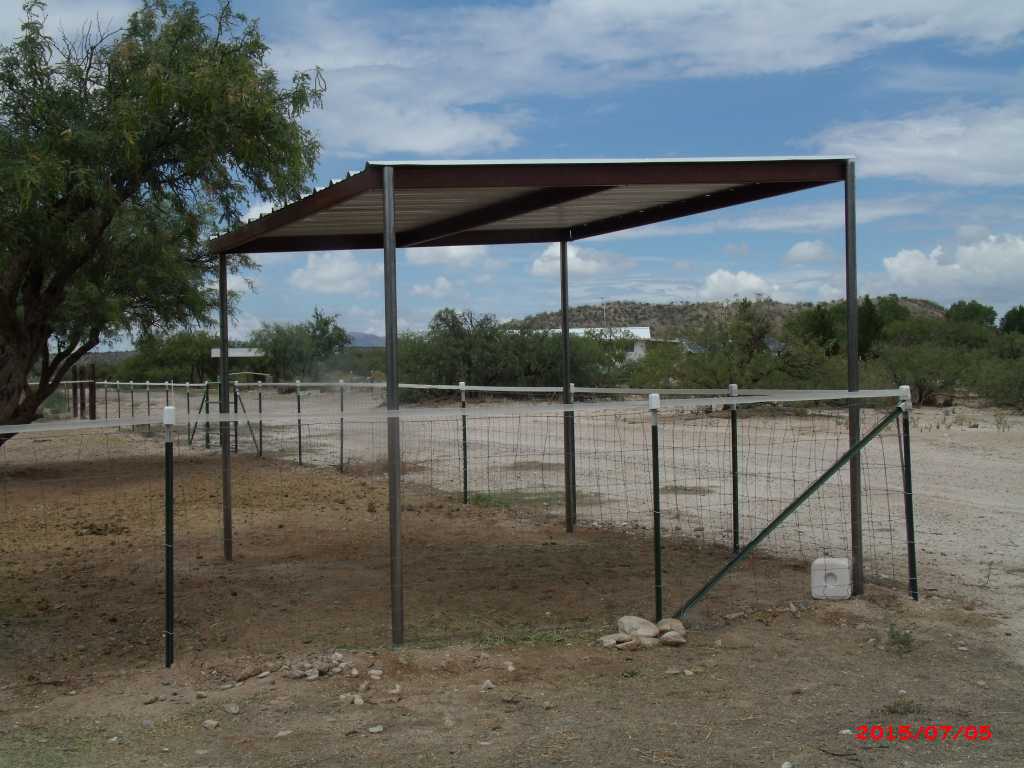
Switched gears for a while to put in a 10x12' shade area for my daughters horses. Unfortunately the daytime temps have really jumped - and working out in this heat for hours really tares me up. Gonna try shifting to early mornings before work, but if I can't swing that it'll have to wait till it cools down some. That would mean back to the 914 - darn!
|
|
|
|
| 3d914 |
Jun 21 2015, 07:30 PM
Post
#411
|
|
Senior Member Group: Members Posts: 1,275 Joined: 24-September 03 From: Benson, AZ Member No.: 1,191 Region Association: Southwest Region |
Well, been working a few mornings for a couple hours before work to get the horse shade up. Got the four posts leveled and ready last week and cemented in yesterday. Then spent this morning getting the two side channels up, leveled and attached. That is after I spent half an hour corralling the horse back in after they got out.
So next are the cross purlins and the R panels. 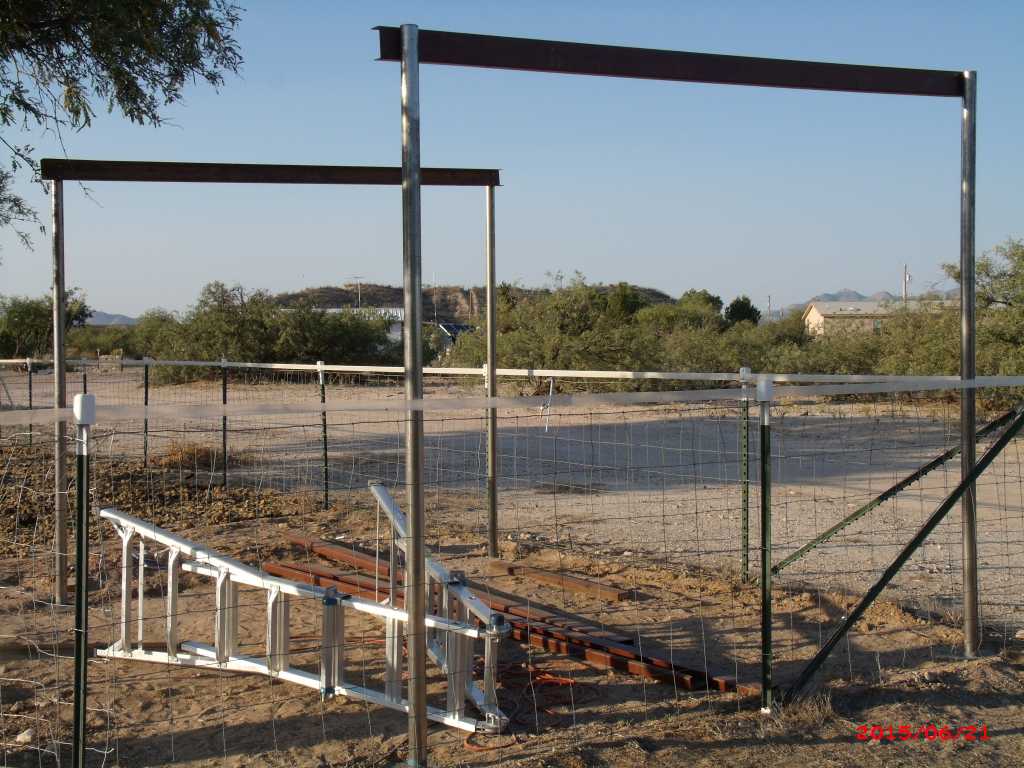 |
|
|
|
| 3d914 |
Jun 27 2015, 06:05 PM
Post
#412
|
|
Senior Member Group: Members Posts: 1,275 Joined: 24-September 03 From: Benson, AZ Member No.: 1,191 Region Association: Southwest Region |
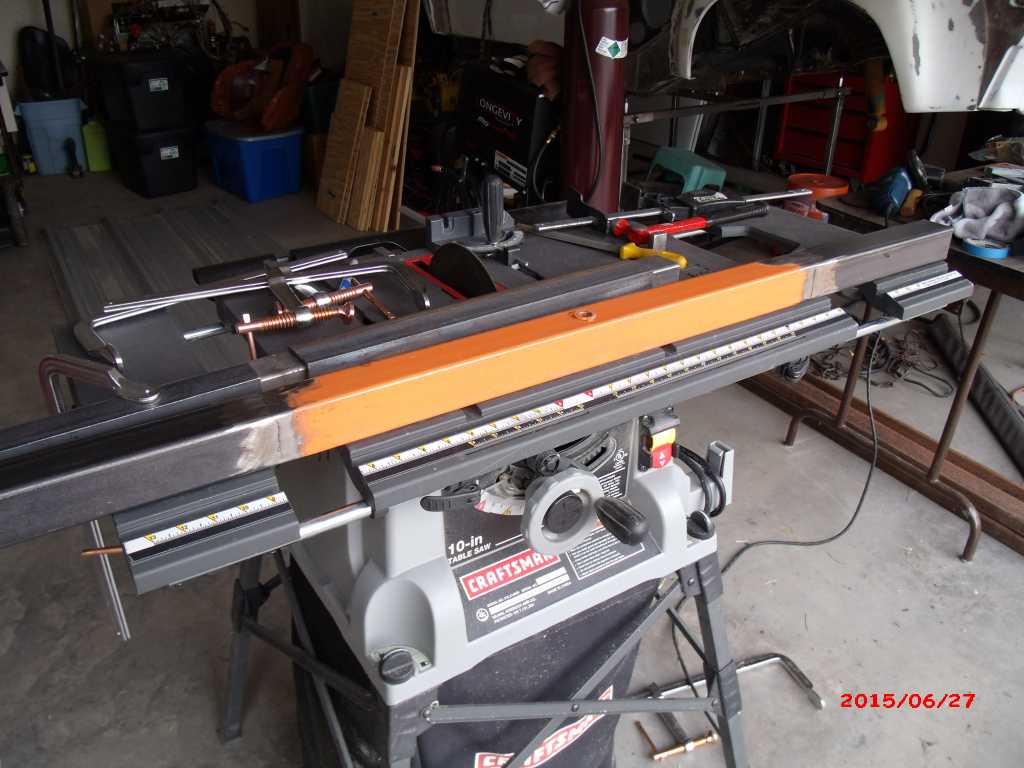
After spending most the morning in Tucson chasing my tail, I was able to get one of the rotisserie legs extended (at both ends). There's very slight difference in material dimensions, but thickness is the same. Depending on the weather tomorrow, I might get far enough to have the rotisserie done and the car up on it.
 |
|
|
|
| 3d914 |
Jun 28 2015, 05:09 PM
Post
#413
|
|
Senior Member Group: Members Posts: 1,275 Joined: 24-September 03 From: Benson, AZ Member No.: 1,191 Region Association: Southwest Region |
Got both Rotisserie stands done, but not gonna get the car moved onto it. Between a crappy nights sleep and heat in the garage - I'm pooped. Also, gotta wait for the wind to settle down before I can attempt to put up roof panels for the horses shade. I'll need the room on the floor to slide the car dolly out.
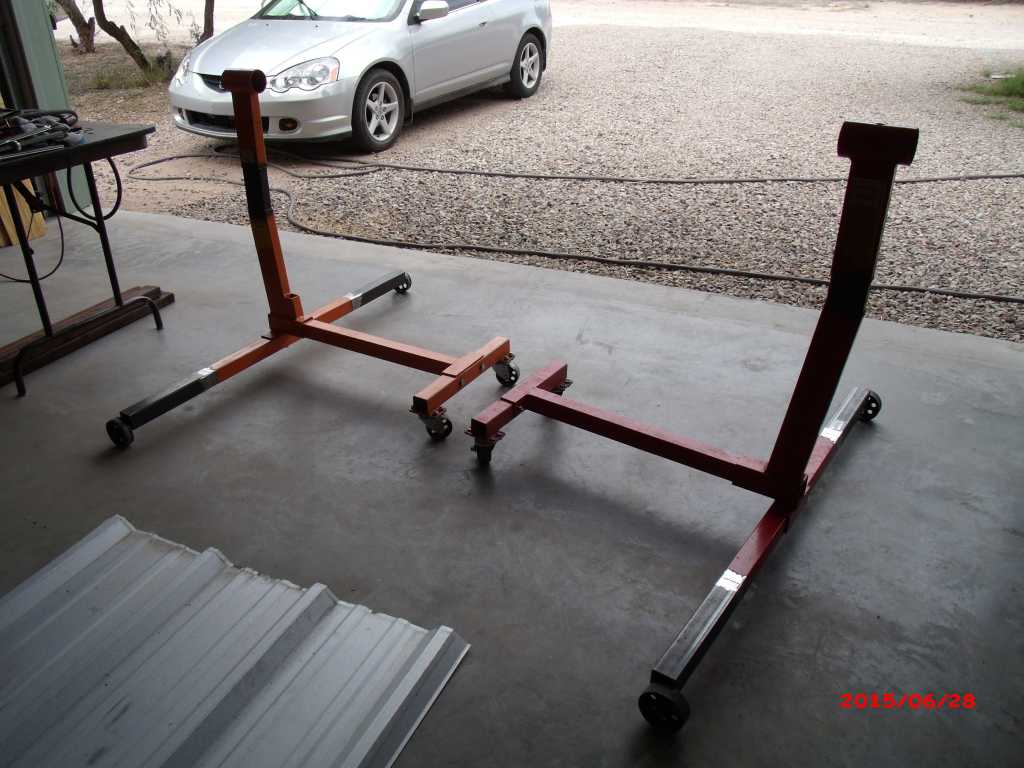 Got the stylish bumpers on also. 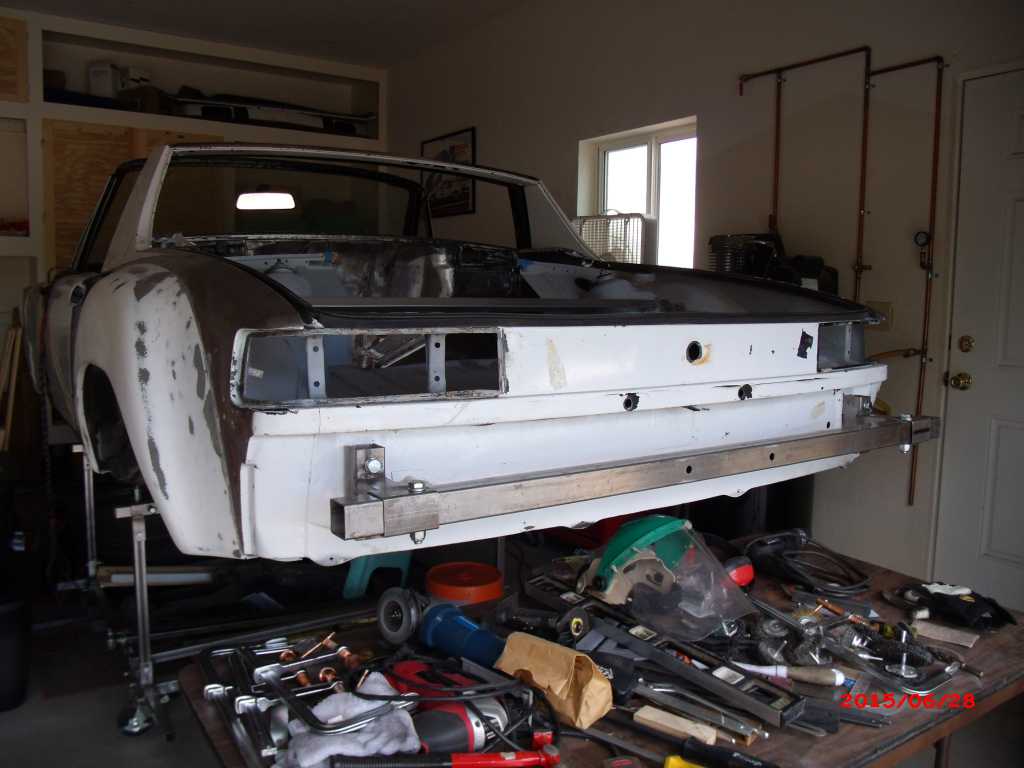 |
|
|
|
| 3d914 |
Jul 5 2015, 10:46 PM
Post
#414
|
|
Senior Member Group: Members Posts: 1,275 Joined: 24-September 03 From: Benson, AZ Member No.: 1,191 Region Association: Southwest Region |
Well, aside from some fun on the fourth & great fireworks, I was able to be a little productive on this three-day weekend. I did manage to get the roof on the horse shade, even though I was up there in the dark finishing it.
 Also got another 914 distraction earlier in the week. HF has a sale on their 4x8 trailers so I picked one up and started working on it in the garage. Here's after about an hour. 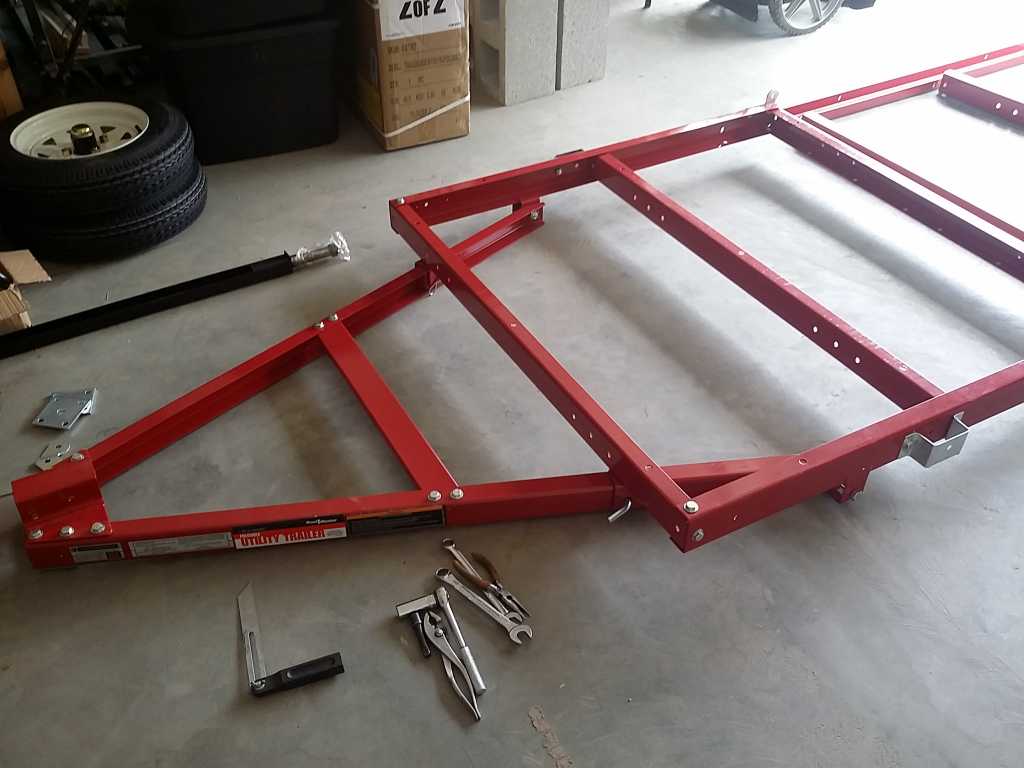 Got a few more hours in over the weekend and just have the wiring to complete. It's a nice setup. I'm surprised at the high grade hardware and decent fit. I only ran into one spot where I had to loosen some bolts so I could line up thru-holes. It should do the job for hauling hay and stuff for the horses. 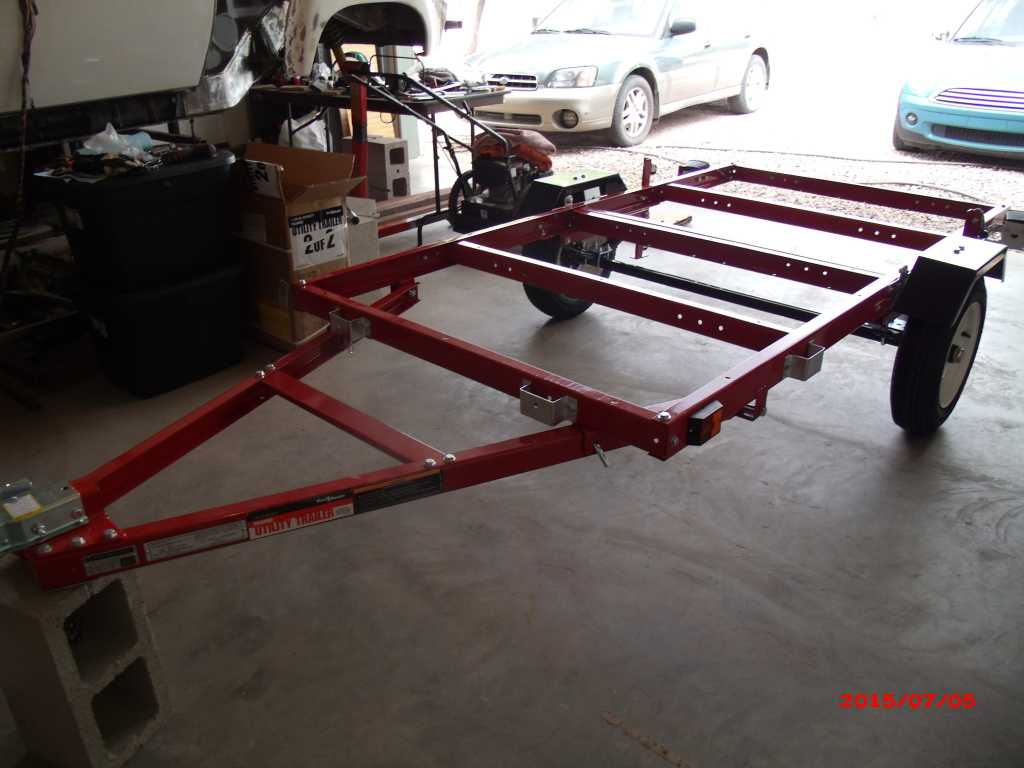 |
|
|
|
| trojanhorsepower |
Jul 6 2015, 04:39 PM
Post
#415
|
|
Senior Member Group: Members Posts: 1,051 Joined: 21-September 03 From: Marion, NC Member No.: 1,179 Region Association: None |
This is what you need to haul hay! 100 bales all loaded by me myself and I right out of the field.
Attached image(s) 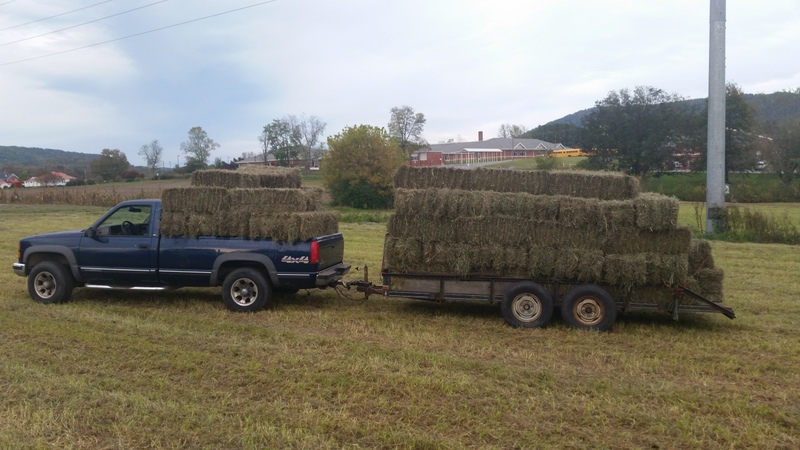
|
|
|
|
| 3d914 |
Jul 6 2015, 07:36 PM
Post
#416
|
|
Senior Member Group: Members Posts: 1,275 Joined: 24-September 03 From: Benson, AZ Member No.: 1,191 Region Association: Southwest Region |
QUOTE(trojanhorsepower @ Jul 6 2015, 03:39 PM) This is what you need to haul hay! 100 bales all loaded by me myself and I right out of the field. (IMG:style_emoticons/default/lol-2.gif) Be glad you got the energy to do all that. Shoot, if we had fields like that I wouldn't need to haul hay - just let them out to pasture. You can be sure, if it were up to my daughter, she'd love all the toys that go with horse ownership. Especially a nice big truck. |
|
|
|
| 3d914 |
Jul 19 2015, 05:58 PM
Post
#417
|
|
Senior Member Group: Members Posts: 1,275 Joined: 24-September 03 From: Benson, AZ Member No.: 1,191 Region Association: Southwest Region |
Got to take a break last weekend and make a run out to the G&R 914 Swap meet in Riverside. Was able to meet up with my son. Got to drive his Targa. Also picked up a couple of rear trunk lids from Bruce - thanks.
(IMG:http://www.914world.com/bbs2/uploads/post-1191-1425253538.jpg) You might be thinking - what do you need two for? Well to do the mods planned (see first pic) I need to cut the ribbing along the front, and I'm cutting two small openings for the NACA ducts, and a big chuck out to clear the intake tube. That will get a new piece, but I want to reinforce the underside with the same ribbing - so one trunk is for the finished lid, the other is for the ribbing. Plus I have my original white lid for ribbing also. (IMG:http://www.914world.com/bbs2/uploads/post-1191-1388622103.jpg) (IMG:http://www.914world.com/bbs2/uploads/post-1191-1388622151.jpg) I lucked out and Bruce had one that already had the duck-tail spoiler - which I was thinking about adding. Unfortunately it's got a slight tweak to it - but I thought I can fix that - so bought it with that in mind. It's in pretty good shape & I like the smooth transition from the spoiler into the lid. 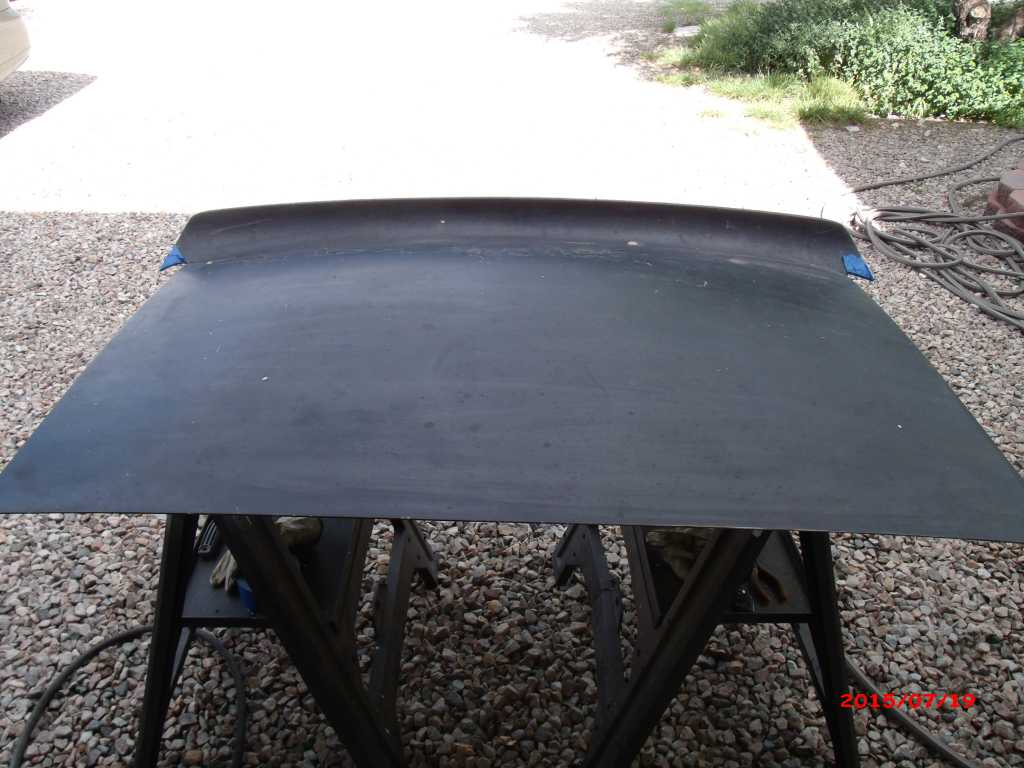 From the on-end view you can see how the right side (left in photo) doesn't curve as much as the left, and so its raised up slightly. 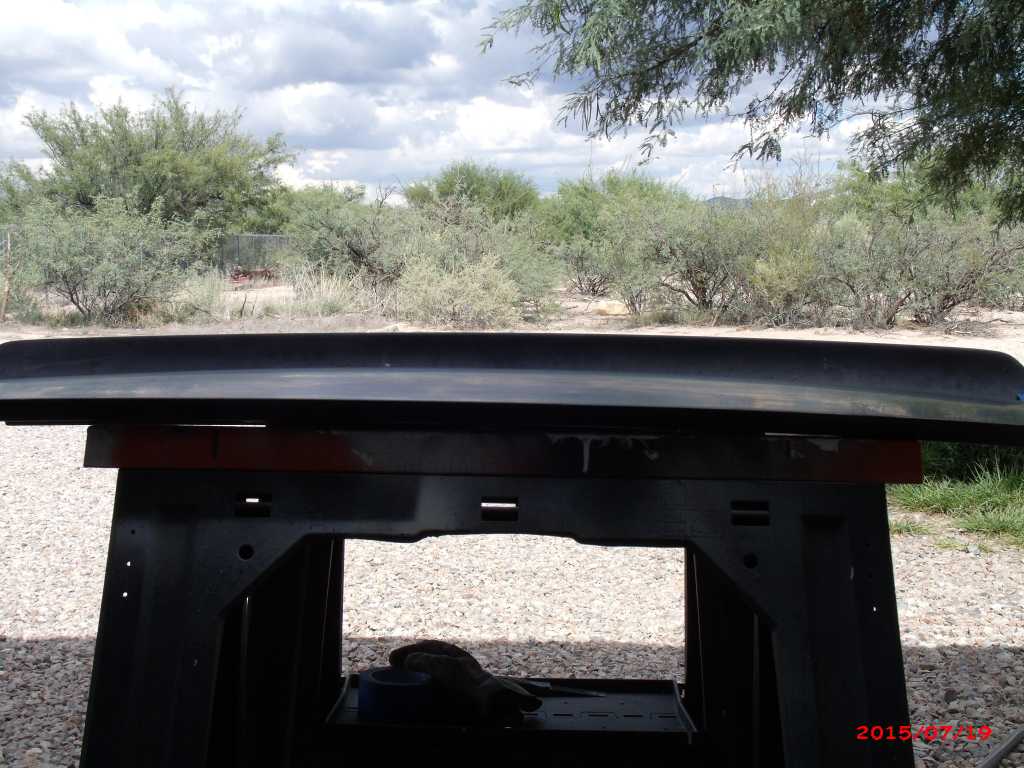 On the underside, you can see the bent rib. I'm thinking I can make a wood form of the correct curvature & use that to re-bend the lid into shape. If it doesn't work, I can use this lid for its ribbing, and use the other lid for my final one. I'll just have to add the spoiler myself. 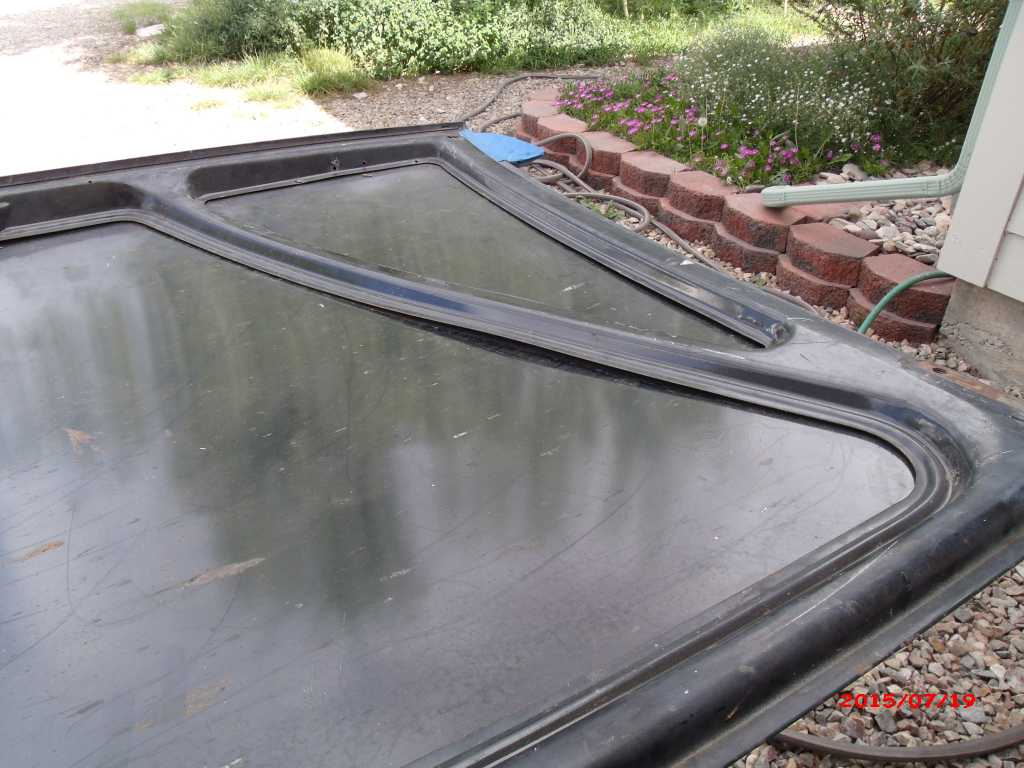 This one still needs some minor work, you can see there's some cracking under the paint. They probably used just bondo, instead of something with a little more strength. 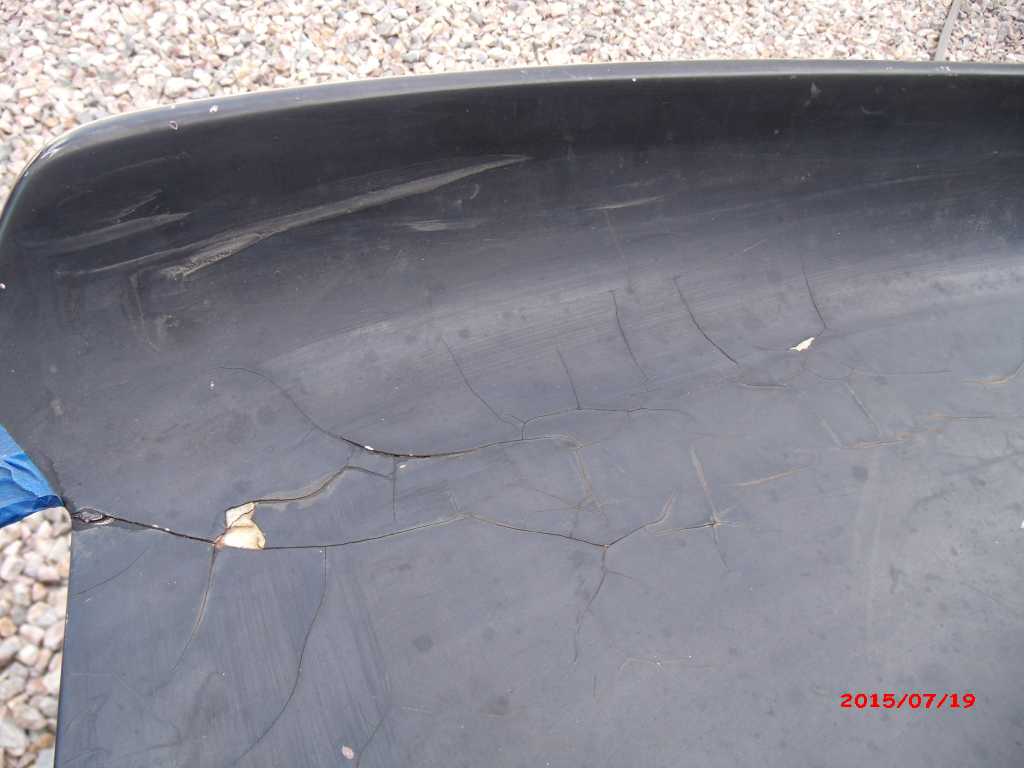 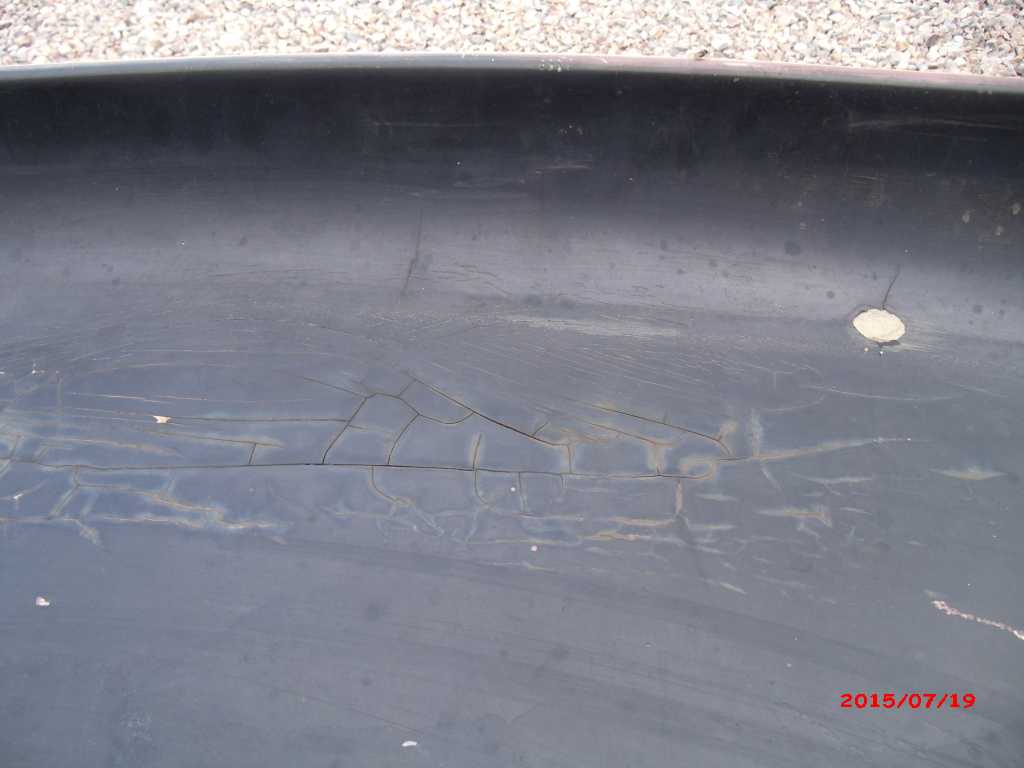 Also decided to up the height of my rotisserie stands by 7.5 inches. This will enable me to move the car right from the dolly onto the rotisserie and back onto the dolly without having to do a lot of jacking. I just have to raise the adjustable pads on the dolly to their max, connect the rotisserie, then lower the pads & slide the dolly out. Now I just have to get over to Tucson to buy the steel. |
|
|
|
| 3d914 |
Jul 26 2015, 08:29 PM
Post
#418
|
|
Senior Member Group: Members Posts: 1,275 Joined: 24-September 03 From: Benson, AZ Member No.: 1,191 Region Association: Southwest Region |
No work this weekend on the teener. Got the mini torn down for a new thermostat housing - what a bogus design. Put up some extra fencing for the horses, and replaced rear struts & springs on a neighbors Toyota.
|
|
|
|
| 3d914 |
Aug 7 2015, 10:24 PM
Post
#419
|
|
Senior Member Group: Members Posts: 1,275 Joined: 24-September 03 From: Benson, AZ Member No.: 1,191 Region Association: Southwest Region |
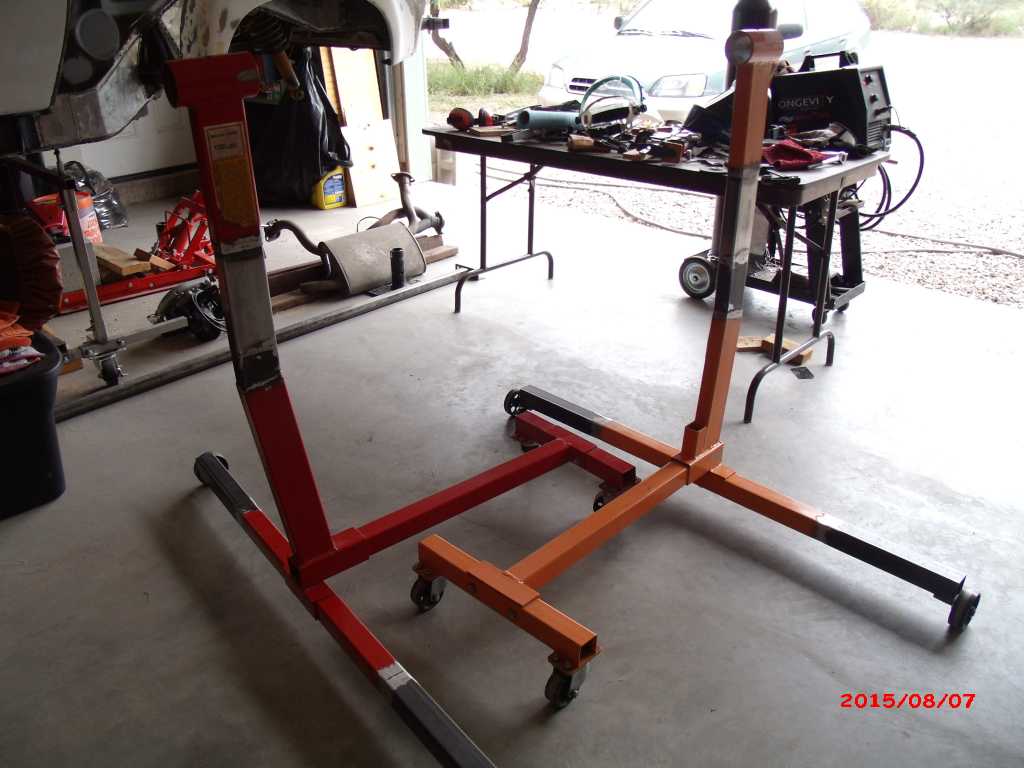
Finished work early so got to spend some time on the teener. Added almost eight inches height to each stand to match the car's position on the car dolly. I'll probably need to jack the front up a little extra to get the height I need. Probably won't get it on there until Sunday.
 |
|
|
|
| 3d914 |
Aug 9 2015, 03:28 PM
Post
#420
|
|
Senior Member Group: Members Posts: 1,275 Joined: 24-September 03 From: Benson, AZ Member No.: 1,191 Region Association: Southwest Region |
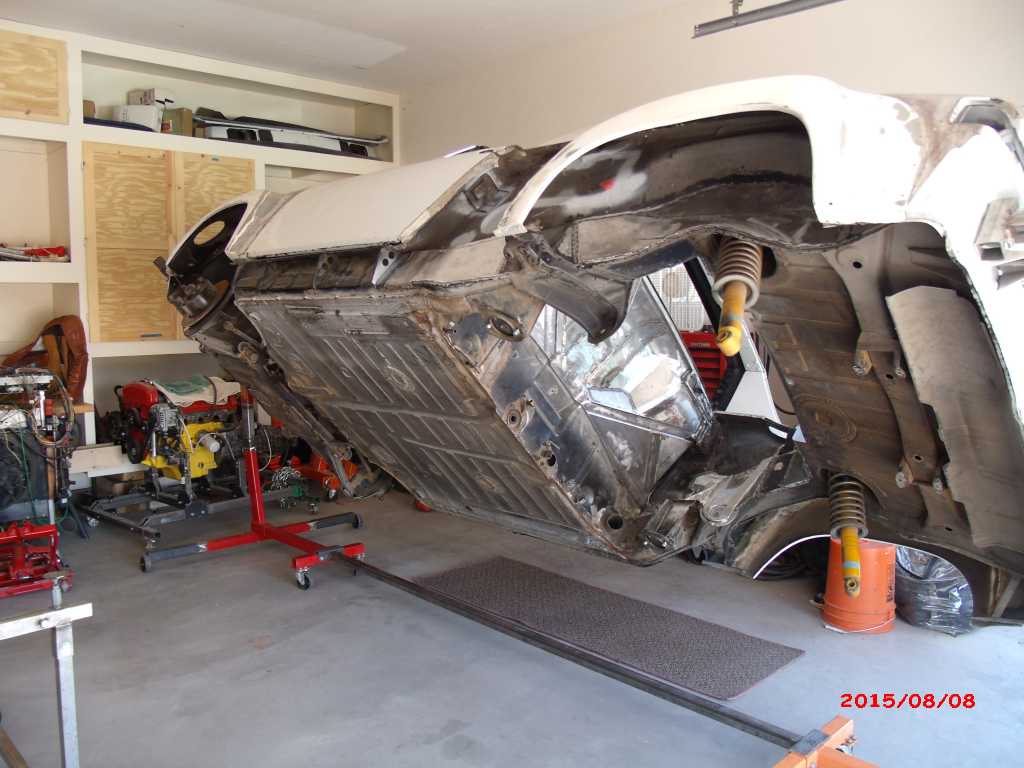
Got rained out on Saturday morning, so spent the time getting car on the rotisserie. Had just enough space to jack the front a couple of inches and fit that end of the rotisserie on. Slid jack out, then slid dolly out. Now swinging free.
 |
|
|
|
|
1 User(s) are reading this topic (1 Guests and 0 Anonymous Users)
0 Members:

|
Lo-Fi Version | Time is now: 22nd June 2026 - 08:00 AM |
Invision Power Board
v9.1.4 © 2026 IPS, Inc.