|
|
|
Porsche, and the Porsche crest are registered trademarks of Dr. Ing. h.c. F. Porsche AG.
This site is not affiliated with Porsche in any way. Its only purpose is to provide an online forum for car enthusiasts. All other trademarks are property of their respective owners. |
|
|

  |

| 3d914 |
 Feb 28 2017, 01:38 PM Feb 28 2017, 01:38 PM
Post
#521
|
|
Senior Member  Group: Members Posts: 1,275 Joined: 24-September 03 From: Benson, AZ Member No.: 1,191 Region Association: Southwest Region |
QUOTE(914forme @ Feb 26 2017, 04:08 PM)  That is looking really nice, can't wait to see it in paint. Thanks Stephen. Yours is coming along nicely also. I have some decent struts & spindles I pulled off mine if you're interested. I'll have too much HP for stock. They might be something other than stock struts - I didn't check the mfg, but they're in decent shape. Keep at it. |
   |

 
|
| Cairo94507 |
Feb 28 2017, 01:44 PM
Post
#522
|
|
Michael Group: Members Posts: 10,625 Joined: 1-November 08 From: Auburn, CA Member No.: 9,712 Region Association: Northern California |
Heck yeah! That is the way to make progress and do it right. (IMG:style_emoticons/default/aktion035.gif)
|
 |
|
| 3d914 |
Mar 3 2017, 10:15 AM
Post
#523
|
|
Senior Member Group: Members Posts: 1,275 Joined: 24-September 03 From: Benson, AZ Member No.: 1,191 Region Association: Southwest Region |
QUOTE(Cairo94507 @ Feb 28 2017, 12:44 PM) Heck yeah! That is the way to make progress and do it right. (IMG:style_emoticons/default/aktion035.gif) Thanks, Michael - but your project is a 6. (IMG:style_emoticons/default/drooley.gif) |
|
|
|
| 3d914 |
Mar 3 2017, 06:33 PM
Post
#524
|
|
Senior Member Group: Members Posts: 1,275 Joined: 24-September 03 From: Benson, AZ Member No.: 1,191 Region Association: Southwest Region |
Spent some time finishing up the heat shield. Decided to add some reinforcement to the back-side of the supports - so I could use bolt & nut. Also added reinforcement to the underside of the heat shield where the welds were.
Support reinforcement 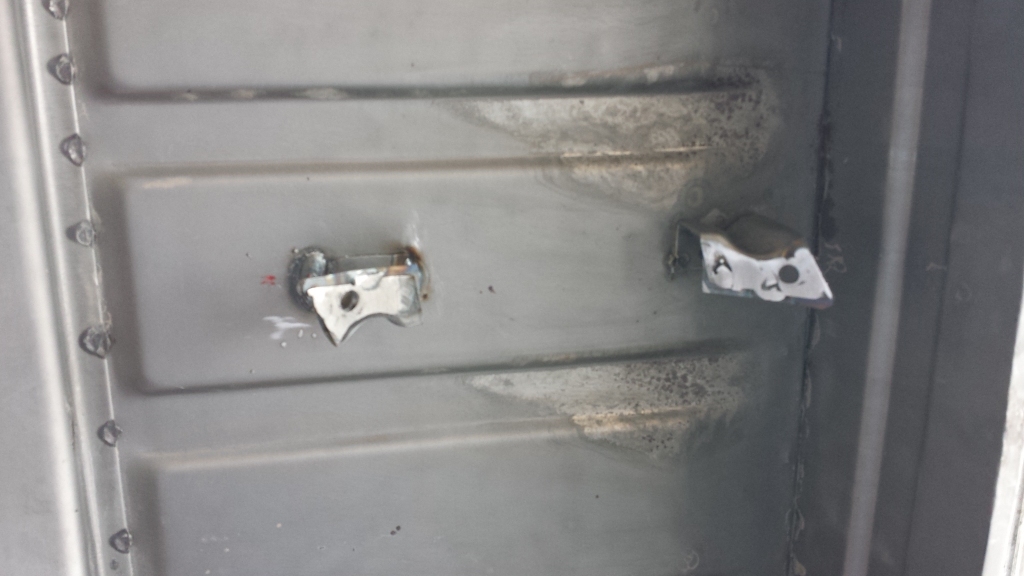 Heat shield pad reinforcement 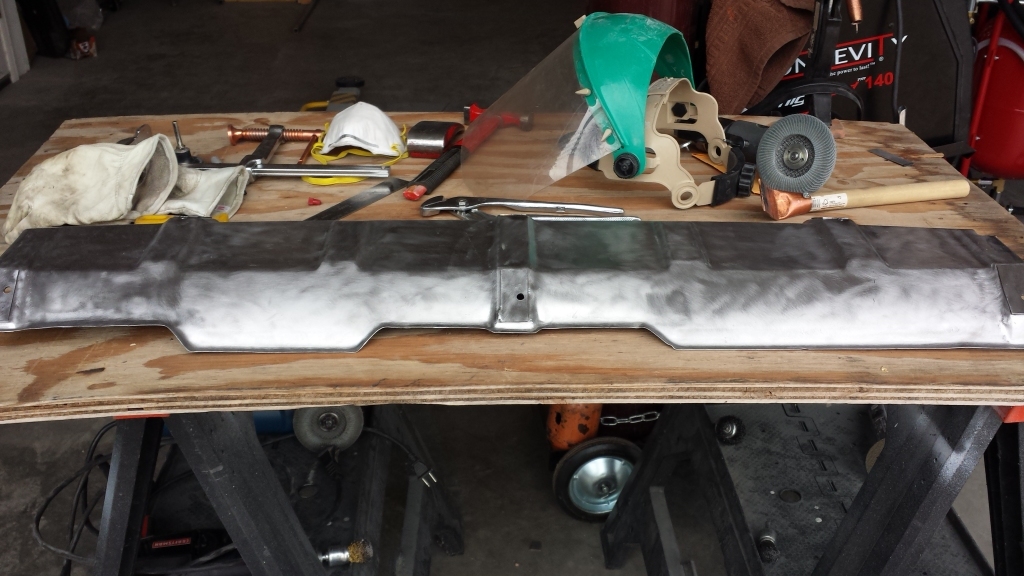 Heat shield bolted in. Since it was cool out I was able to get it primered. 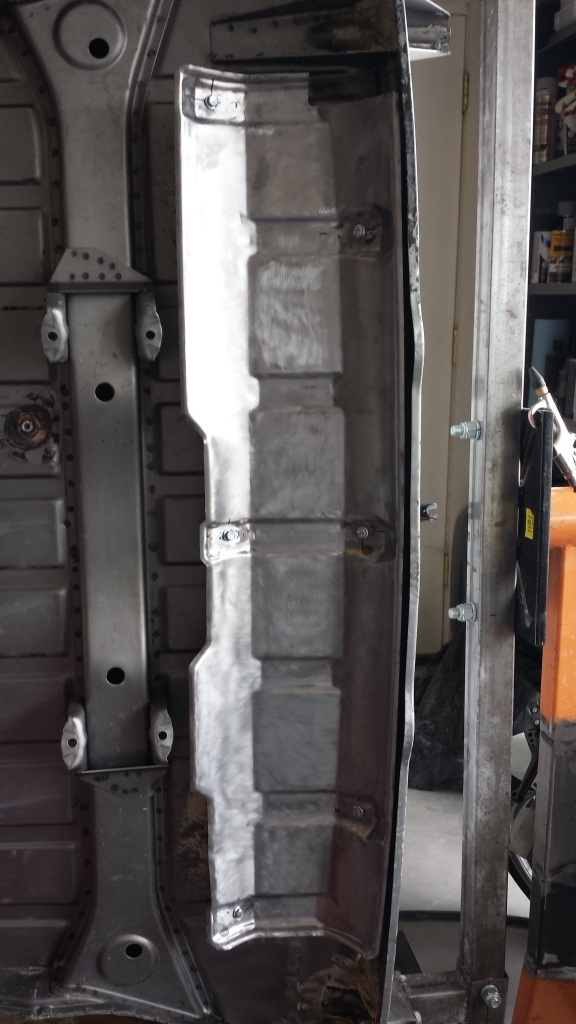 |
|
|
|
| 3d914 |
Apr 30 2017, 10:10 PM
Post
#525
|
|
Senior Member Group: Members Posts: 1,275 Joined: 24-September 03 From: Benson, AZ Member No.: 1,191 Region Association: Southwest Region |
Been slow progress this month with other projects & traveling. Did get to speak with the shop that will be doing the primer/paint work and got some guidance on materials.
Also was able to get a form built to guide the metal work on the raised portion of the trunk lid. Of course I also found that I don't have any steel of the right gauge so I'll have to run over to Tucson for that. 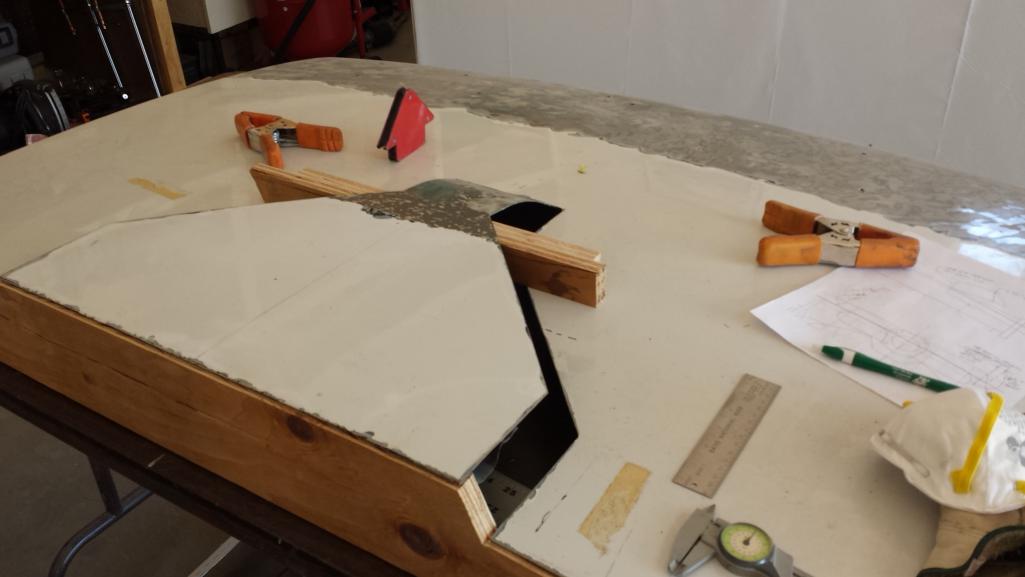 |
|
|
|
| 3d914 |
May 14 2017, 07:16 PM
Post
#526
|
|
Senior Member Group: Members Posts: 1,275 Joined: 24-September 03 From: Benson, AZ Member No.: 1,191 Region Association: Southwest Region |
Good progress this weekend. Now that I have the materials to finish all weld seams, repaired surfaces, and reblend the rear flares. Found a local shop that is assisting with prep materials. Using Durglass for reblending the rear flares. Got a good quart of All-Metal to finish weld seams before applying seam-sealer (which I also picked up).
Found a good body cement to reglue the portion of the flare to the new panel. Had to order a couple special clamps though to hold things, so looking do get that done next weekend. Also have some good finishing bondo to smooth surfaces. So bulk of work now is to get ready for primer. I still have a lot of body paint to remove (via media blasting) but focus for now is finish all repair work areas first. Picked up a small piece of 18ga steel to finish off the rear trunk mods. (See previous post). So spent the bulk of my time finishing grinding & sanding repairs. All under body & engine bay soda blasting was also completed this weekend. Left panel: 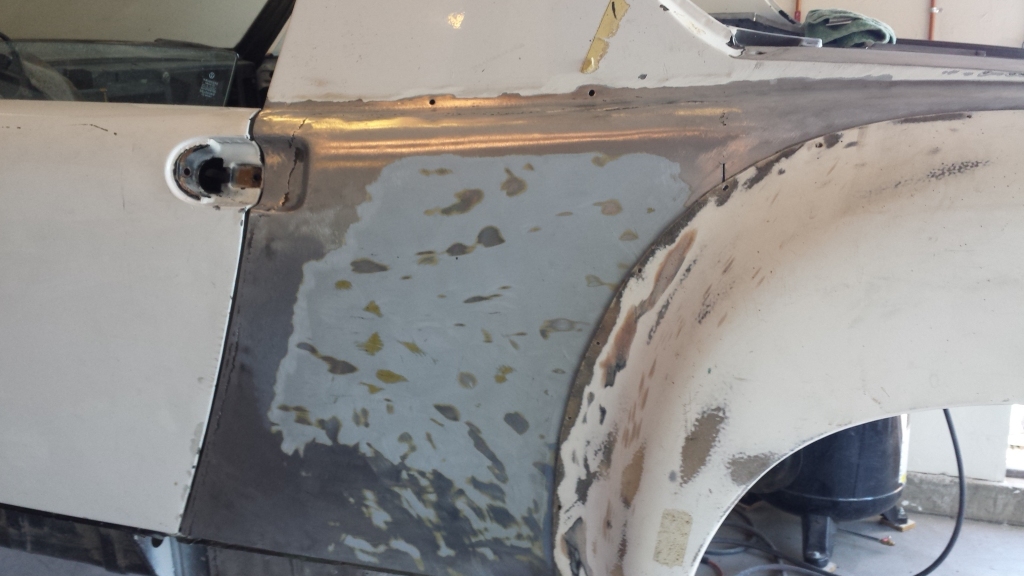 Right panel & door jam: 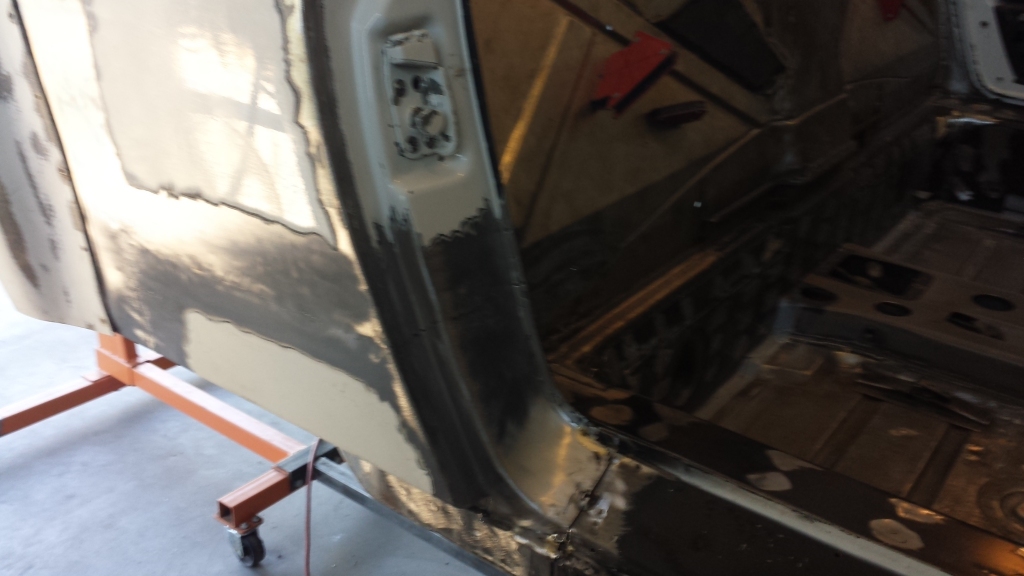 |
|
|
|
| 3d914 |
May 20 2017, 05:15 PM
Post
#527
|
|
Senior Member Group: Members Posts: 1,275 Joined: 24-September 03 From: Benson, AZ Member No.: 1,191 Region Association: Southwest Region |
Had Thursday to work on the car so I spent the day prepping repair areas so that I could get them all finished. In doing so I realized I had some minor issues with the forward firewall in the engine bay. I had some minor issues because when I butt-welded these I didn't leave enough gap between a couple of the pieces.
I just made a single thru-cut over top the seam, reclamped it and rewelded. This was necessary in a couple of places, but it really made the difference. Now panels have no buckling/flexing in the slightest. Real happy with the results. |
|
|
|
| 3d914 |
May 20 2017, 05:27 PM
Post
#528
|
|
Senior Member Group: Members Posts: 1,275 Joined: 24-September 03 From: Benson, AZ Member No.: 1,191 Region Association: Southwest Region |
Spent today doing the rest of the prep work over welds. I'm using All-Metal as a surface filler over the weld seams to fill pinholes and blend. This seems better suited than Duraglass or Bondo since neither of them is watertight where All-Metal is.
It's a challenge to work with only in that you have to use only enough that you can cover in a couple of minutes. It sets up real quick. So it ends up taking time to mix up all these small batches. But the results will be worth it. First areas were the front & back side of the main firewall. 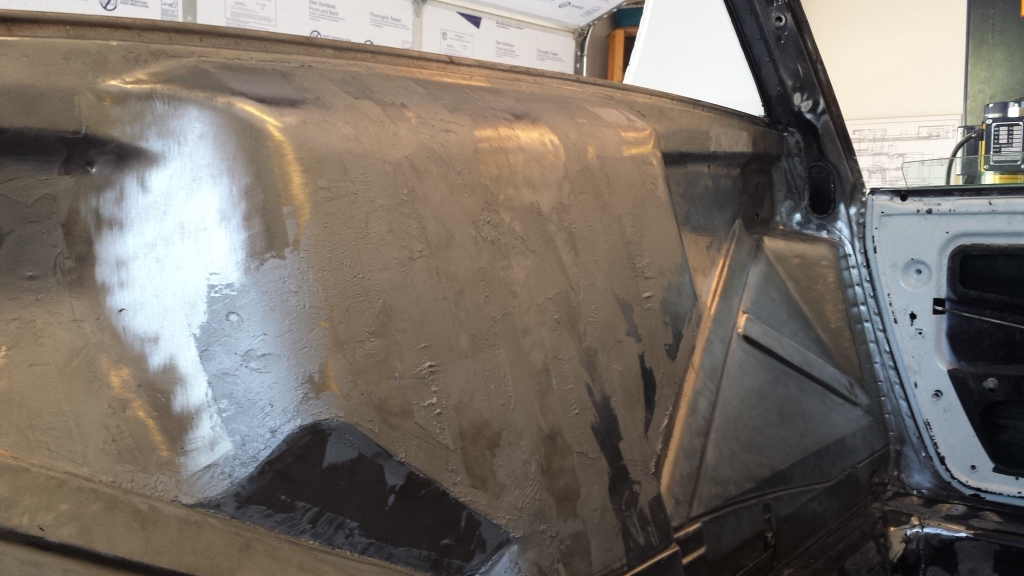 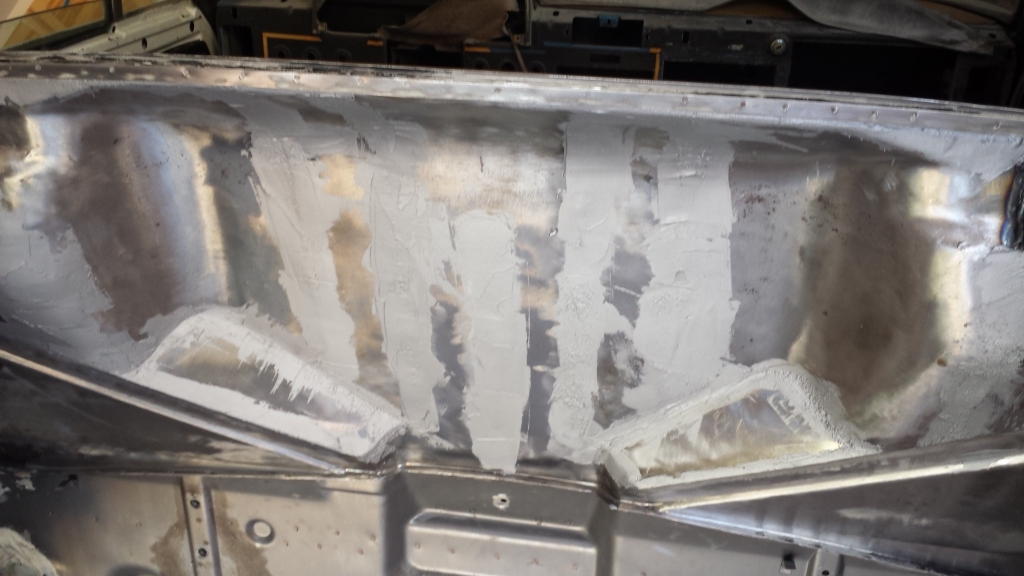 The left panel  And the right panel/door jam 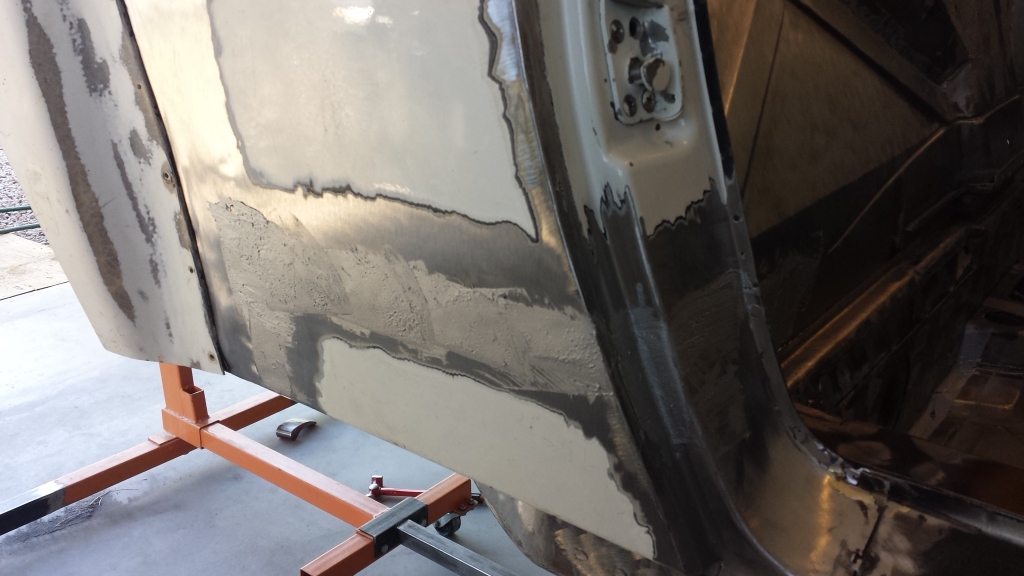 I also went ahead and covered the rear portion of the trunk. This had some surface rust that's been treated, but rather than leave the rough texture, I decided I'd cover it with the All-Metal and sand it smooth. This should provide some additional protection as well. 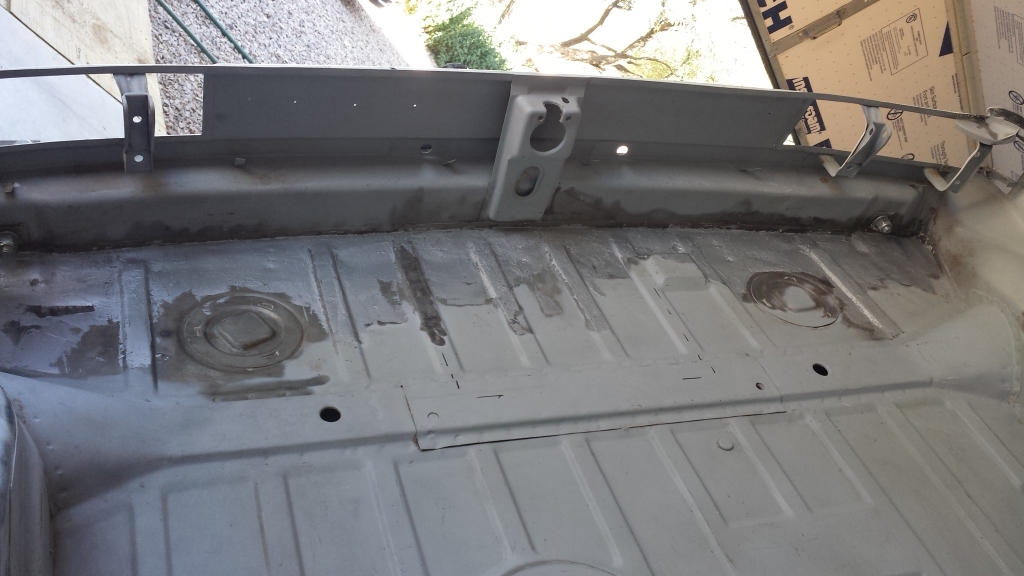 |
|
|
|
| 3d914 |
May 27 2017, 08:06 PM
Post
#529
|
|
Senior Member Group: Members Posts: 1,275 Joined: 24-September 03 From: Benson, AZ Member No.: 1,191 Region Association: Southwest Region |
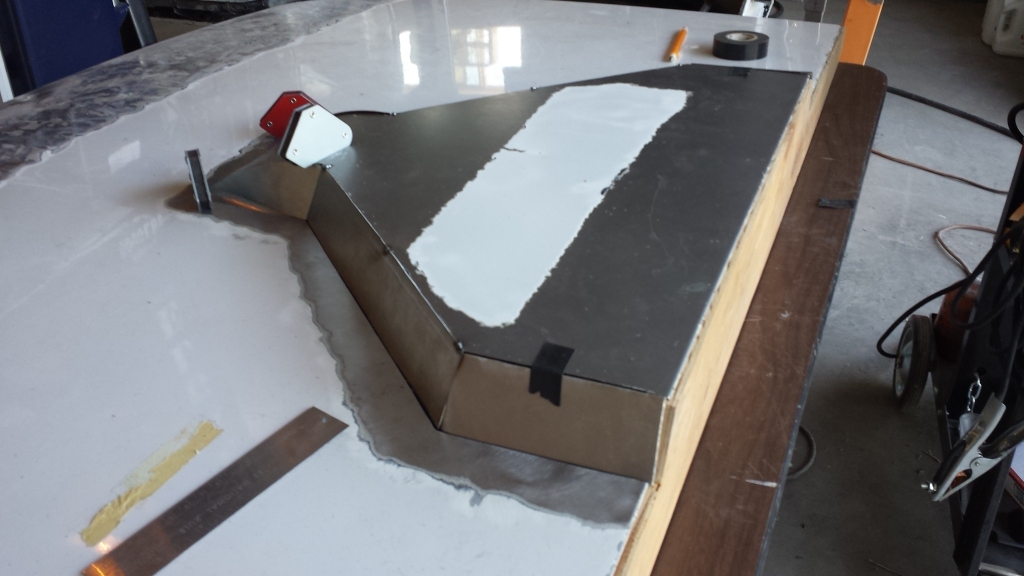
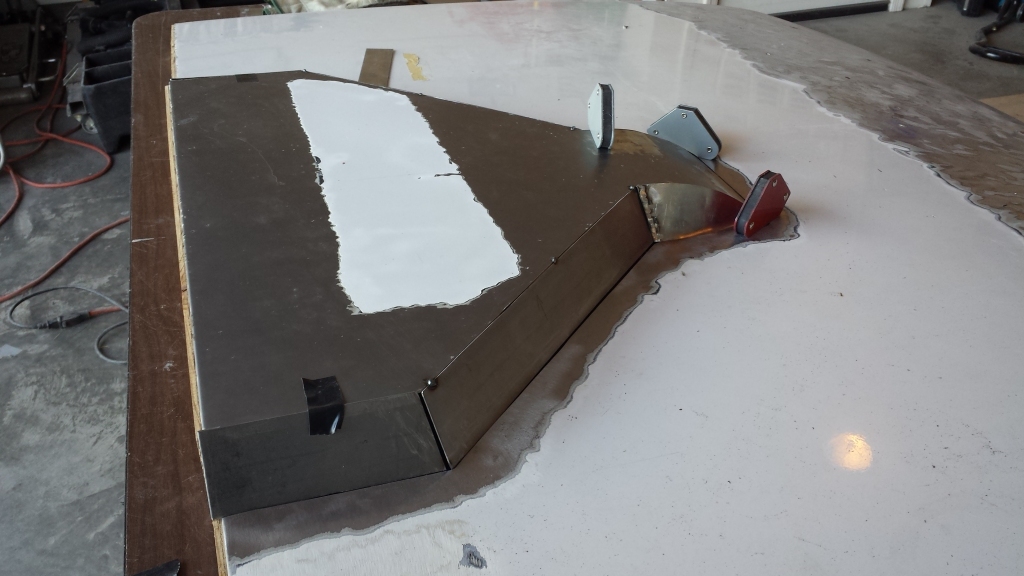
Spent more than six hours on the trunk lid riser section. Because of the curve along the length of the trunk each piece had to be curved accordingly and fit. My back is sore from all the bending over the substitute bench (folding table), but at least the pieces are all cut and mostly fit. I'll spend some time Monday doing some more spot welding to locate everything from above, then I have to add the bracing underneath along the front.
  |
|
|
|
| 3d914 |
Jun 2 2017, 06:10 PM
Post
#530
|
|
Senior Member Group: Members Posts: 1,275 Joined: 24-September 03 From: Benson, AZ Member No.: 1,191 Region Association: Southwest Region |
Been an exhausting day. Been moving a lot of earth around - even though a neighbor helped with his tractor. Trying to finish up the planters I promised the wife.
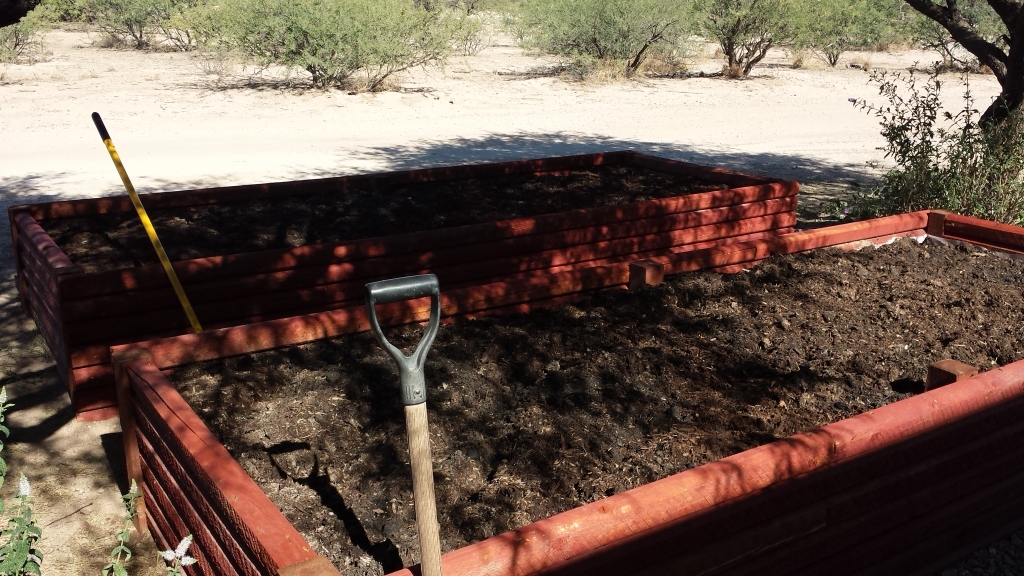 Did get some time to work on the 914 though. Still working on the trunk lid riser section. Wanted to add reinforcement at the front edge consistent with factory. Plus it will be needed to keep things strong. Unfortunately I failed to cut the trunk side at an angle - which would make fitting much easier. But I'll add a wedge piece & get er done. 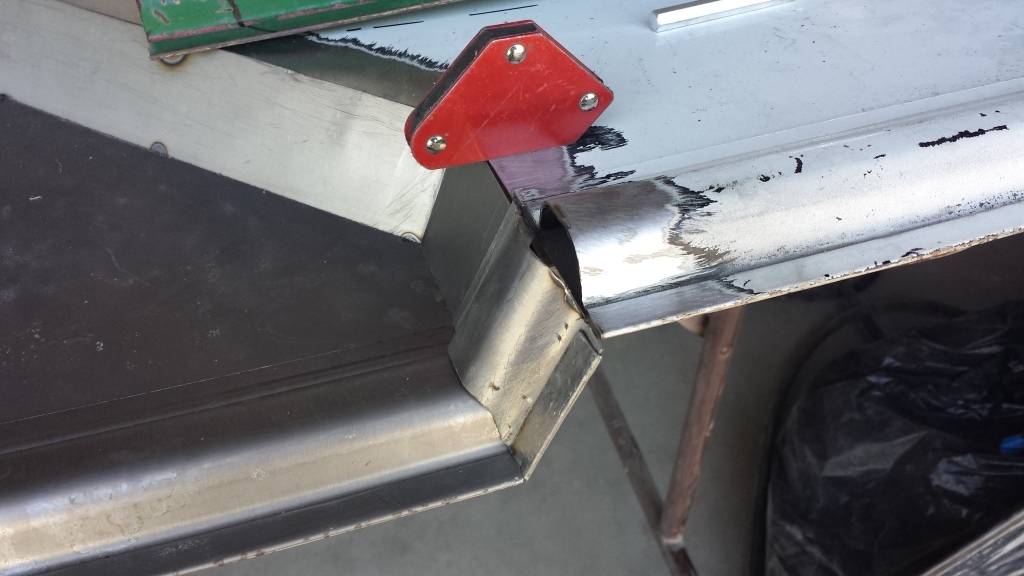 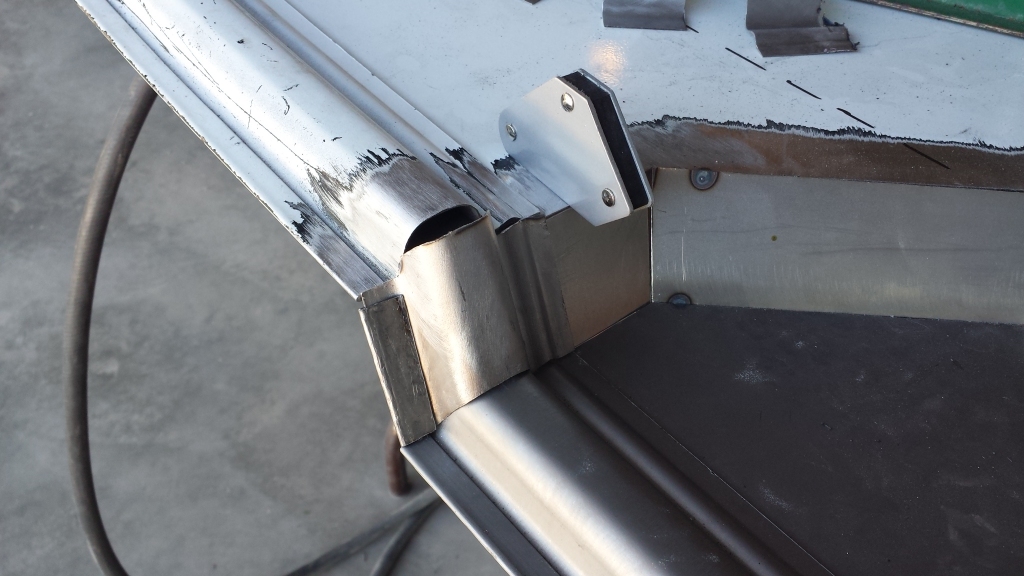 |
|
|
|
| 3d914 |
Jun 11 2017, 11:12 PM
Post
#531
|
|
Senior Member Group: Members Posts: 1,275 Joined: 24-September 03 From: Benson, AZ Member No.: 1,191 Region Association: Southwest Region |
Did get some time on the teener this weekend. More sanding and filler on welded parts.
Spent more time finishing the fit of the front support ribs on the trunk lid. Got the pieces spot-welded, now just need to close it all up. And of course I still need to media blast the trunk lid, add the horizontal mid-support ribs, cut the holes for the NACA ducts, etc, . . . I'm sure I'll be done one of these years . . . 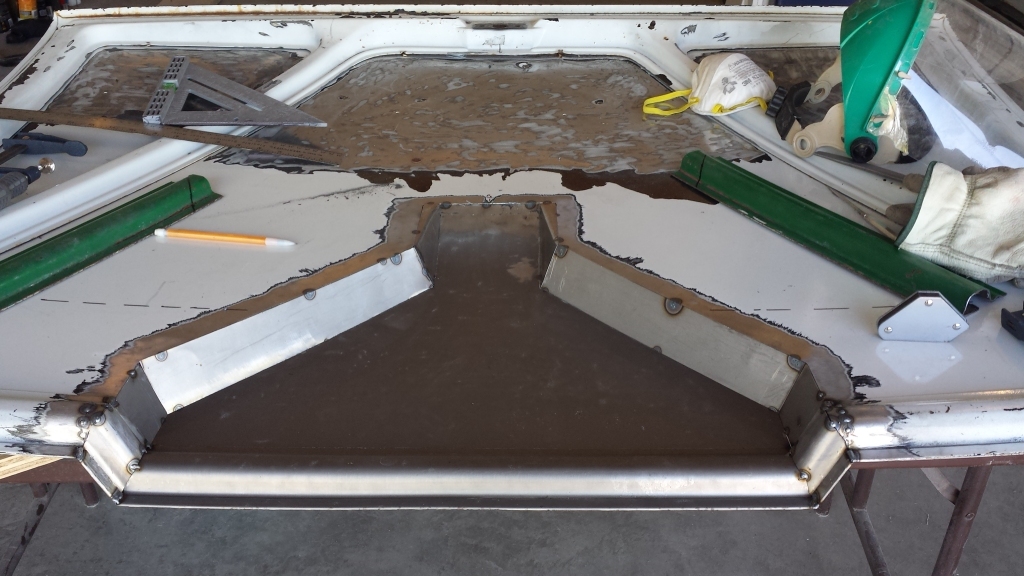 |
|
|
|
| 3d914 |
Jun 17 2017, 09:07 AM
Post
#532
|
|
Senior Member Group: Members Posts: 1,275 Joined: 24-September 03 From: Benson, AZ Member No.: 1,191 Region Association: Southwest Region |
Made some good progress on the riser portion of the trunk lid. Managed to get most the outer and inner stitch welding done and grinding finished. I was actually surprised by the results. Working with this thin metal has turned out to be much easier when doing it on the bench - as opposed to doing it on the car. At least on the bench I can clamp things in place so they can be fitted and welded better with less movement.
Outer trunk lid 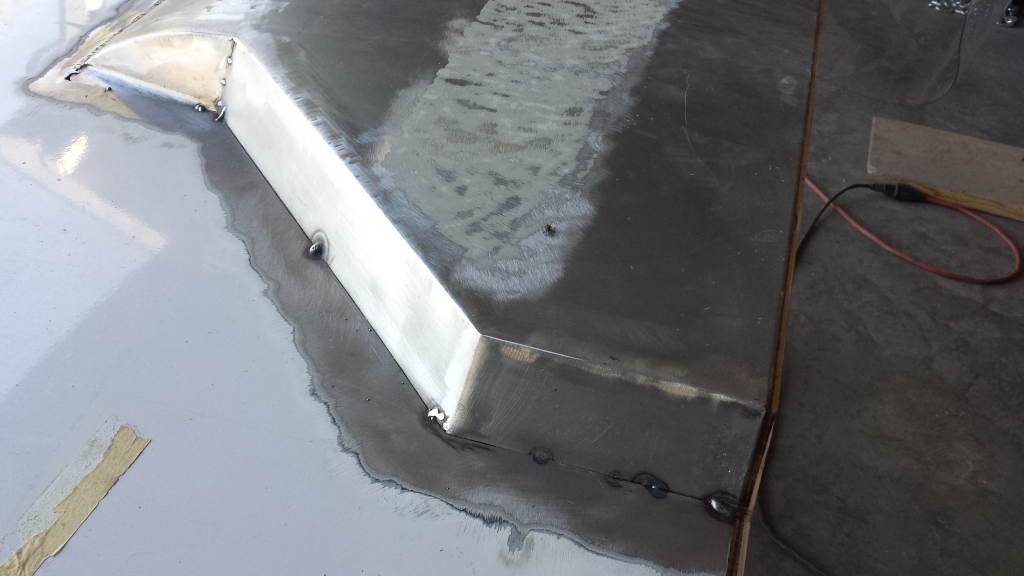 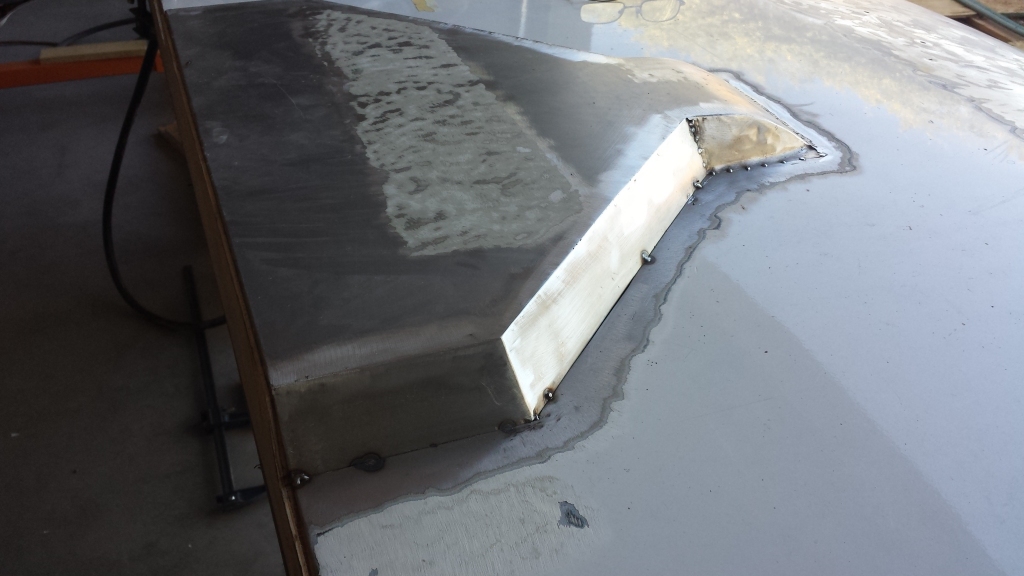 Inner trunk lid 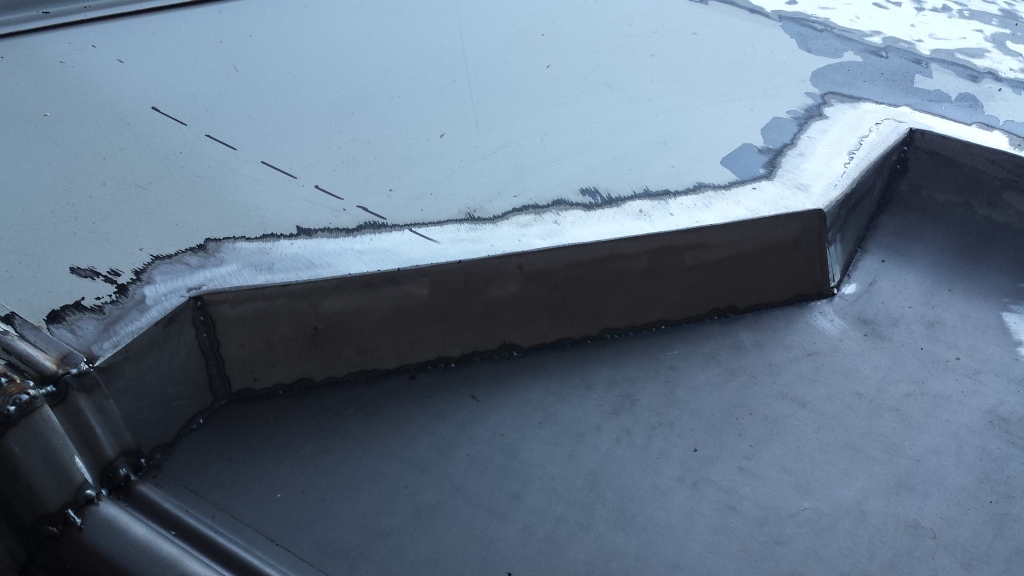 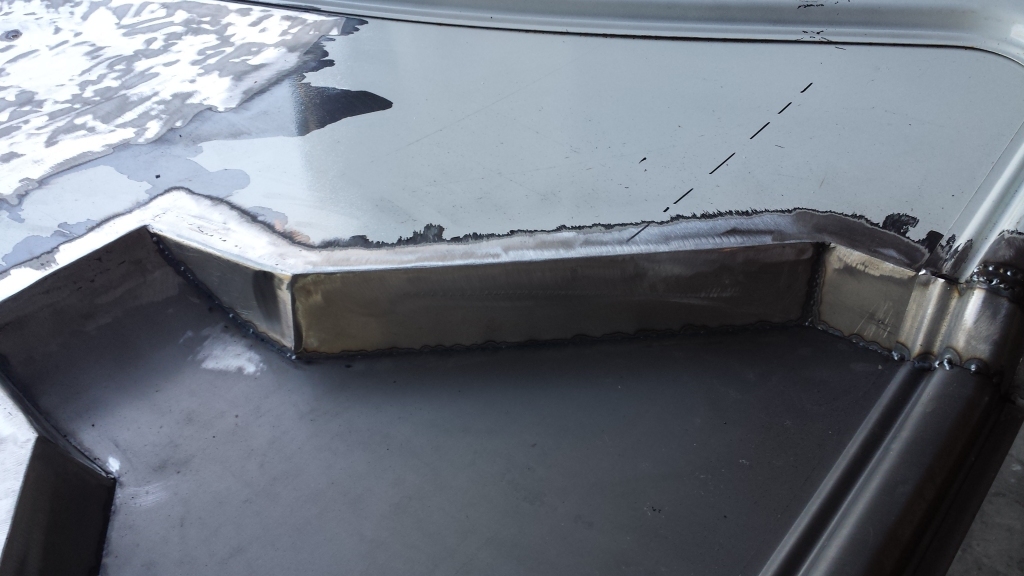 |
|
|
|
| 914GT |
Jun 17 2017, 09:18 AM
Post
#533
|
|
Senior Member Group: Members Posts: 1,101 Joined: 11-October 04 From: Tucson Member No.: 2,923 Region Association: Southwest Region |
Some nice metalworking Gerard. Looking forward to seeing the finished project.
|
|
|
|
| 3d914 |
Jul 13 2017, 05:33 PM
Post
#534
|
|
Senior Member Group: Members Posts: 1,275 Joined: 24-September 03 From: Benson, AZ Member No.: 1,191 Region Association: Southwest Region |
QUOTE(914GT @ Jun 17 2017, 08:18 AM) Some nice metalworking Gerard. Looking forward to seeing the finished project. Thanks, Guy. That means a lot coming from you. Doesn't look like I'm going to make the level of progress I had planned. My son's 996 has been on the lift for more weeks than I can count - trying to complete an IMS bearing update. It's turning into one of those jobs where things are not as expected - mostly because he has a newer motor than the car's year. Indications are now that we need to split the case to update it on this motor. (IMG:style_emoticons/default/headbang.gif) |
|
|
|
| 3d914 |
Oct 4 2017, 01:53 PM
Post
#535
|
|
Senior Member Group: Members Posts: 1,275 Joined: 24-September 03 From: Benson, AZ Member No.: 1,191 Region Association: Southwest Region |
Well focus keeps getting shifted to other things. Daughters MR2 sprung a leak at the oil pressure sensor (another plastic part) and dumped most the oil before she could shut it down. She now has one bent rod and a hole in the case. Looks like we're going to give up on the 1ZZ motors and try a 2ZZ some time in the future. In the meantime she replaced it with an 03 350Z. It's a very nice car but showed a P0300 right out of the chute. Started digging into it and looks like one of the two cats is completely gutted - just a few pieces rattling around. The other, surprisingly is in pristine shape. Somebody must have miswired something on that bank to cause just that one cat to go bad.
Anyhow, you can guess what I'll be working on for at least the next couple of weekends. |
|
|
|
| 3d914 |
Oct 7 2017, 04:48 PM
Post
#536
|
|
Senior Member Group: Members Posts: 1,275 Joined: 24-September 03 From: Benson, AZ Member No.: 1,191 Region Association: Southwest Region |
Continuing to work on the trunk lid - to finish up the welding and seams. Then will get the reinforcements added before cutting out the NACA ducts.
Keepin at it. |
|
|
|
| 3d914 |
Oct 21 2017, 02:01 PM
Post
#537
|
|
Senior Member Group: Members Posts: 1,275 Joined: 24-September 03 From: Benson, AZ Member No.: 1,191 Region Association: Southwest Region |
OK, still working on trunk mods; NACA ducts, support frame (for new hinge), and finish work for raised section.
I was able to cut up some spare trunk lids for ribs, although they will require some slight rebending but nothing drastic. This of course needs to be coordinated with the placement of the hinge supports and hinges in the trunk and the air box. 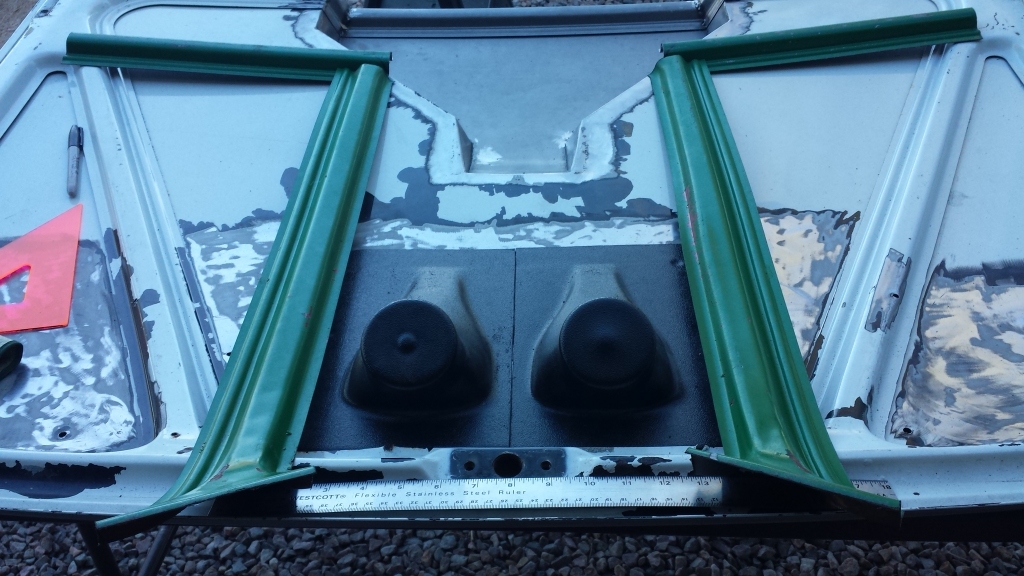 I've trimmed the plastic NACA ducts on a couple sides to center them up and get their longitudinal dimension from the rear edge of the lid. Right NACA duct: 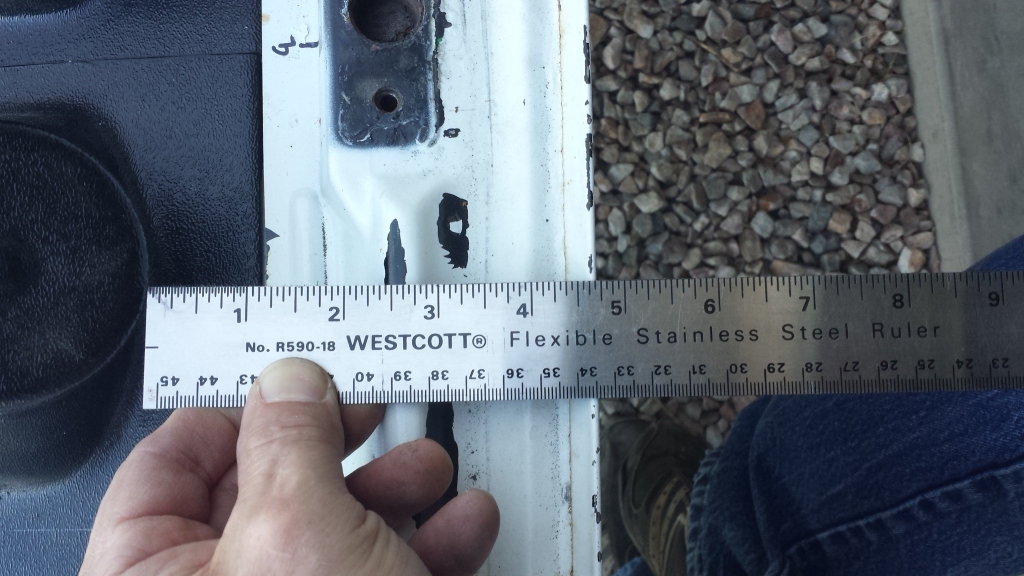 Left NACA duct: 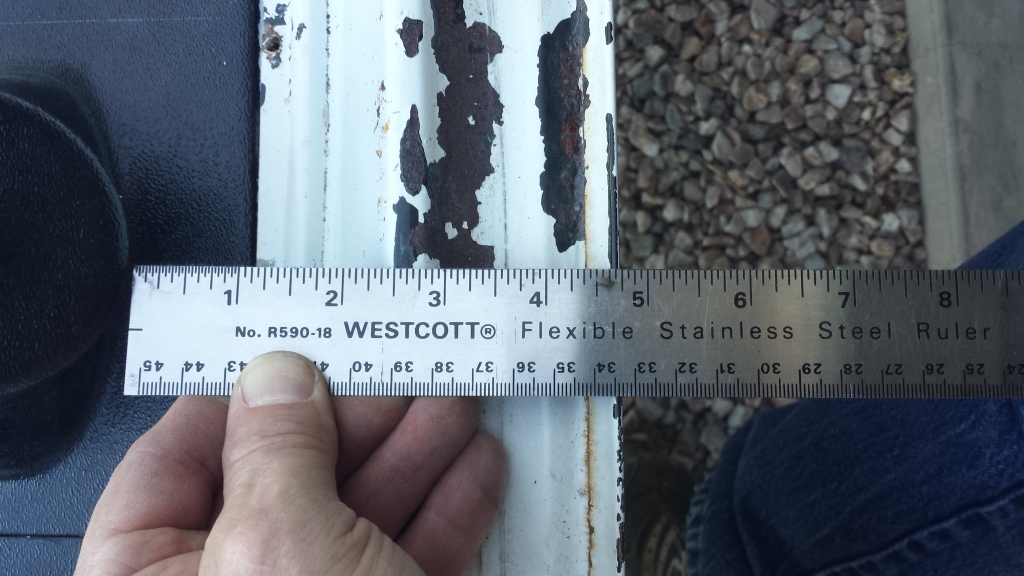 |
|
|
|
| 3d914 |
Mar 14 2018, 01:05 PM
Post
#538
|
|
Senior Member Group: Members Posts: 1,275 Joined: 24-September 03 From: Benson, AZ Member No.: 1,191 Region Association: Southwest Region |
Just an update since I haven't been out here in a while. The 914-SHO is currently in storage. My daughter wants to complete a 2ZZ engine swap in her MR2 to replace the failed 1ZZ motor. So for the few months this might take (also doing other upgrades) I needed the extra garage space. Be back soon.
|
|
|
|
| 3d914 |
Aug 5 2018, 07:28 PM
Post
#539
|
|
Senior Member Group: Members Posts: 1,275 Joined: 24-September 03 From: Benson, AZ Member No.: 1,191 Region Association: Southwest Region |
Haven't been out here for a while, but did get the 2ZZ motor in. It's been running over a month now and doing great. Here's a couple of pics at the end stages. The swap required an ECU change and some rewiring in the cars harness. It also required the fabrication of a custom 2zz/1zz exhaust manifold so the old exhaust could be merged to the 2zz flange.
All worked out well and oil consumption is now a thing of the past.  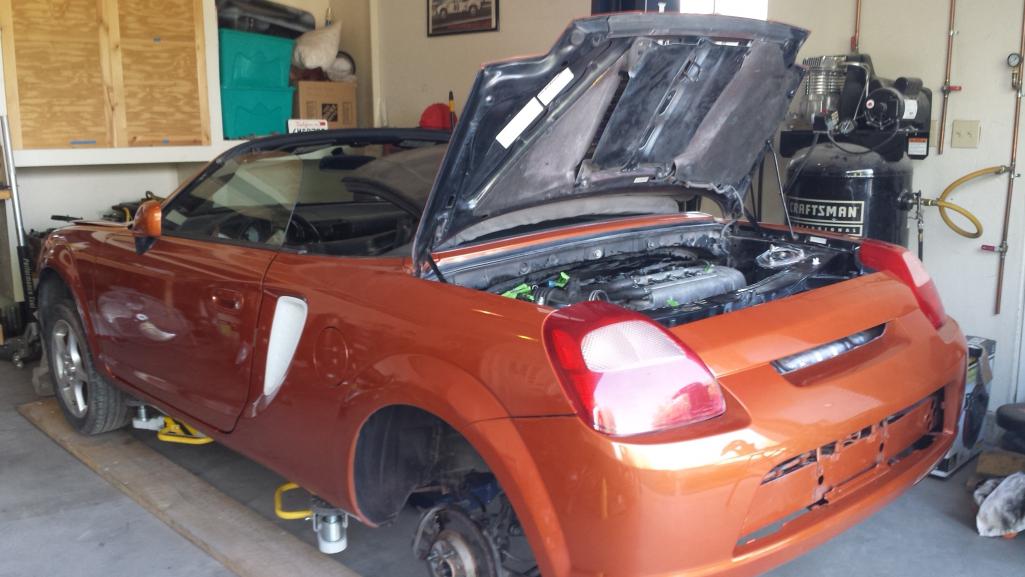 |
|
|
|
| 3d914 |
Aug 5 2018, 07:41 PM
Post
#540
|
|
Senior Member Group: Members Posts: 1,275 Joined: 24-September 03 From: Benson, AZ Member No.: 1,191 Region Association: Southwest Region |
For June & July, I've been doing a JDM motor swap for the 350Z. Even though this is just a direct engine swap, there have been some issues since the motor came out of an automatic and a different model. Motor mounts, A/C bracket, and Alternator turned out to be completely different. The motor mounts I caught before the motor went in. The others differences were so subtle I didn't notice until after the motor was in and the components wouldn't fit.
Still finishing up wiring, reassemle the front end, add fluids, etc. Hope to have it running next weekend. This motor (minus tranny) 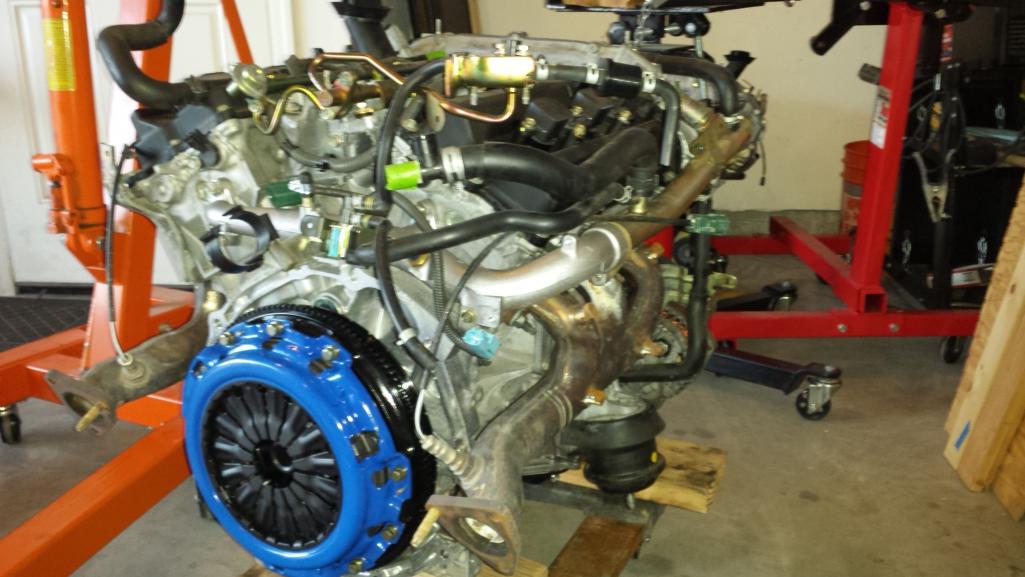 In this Z  Almost there . . . 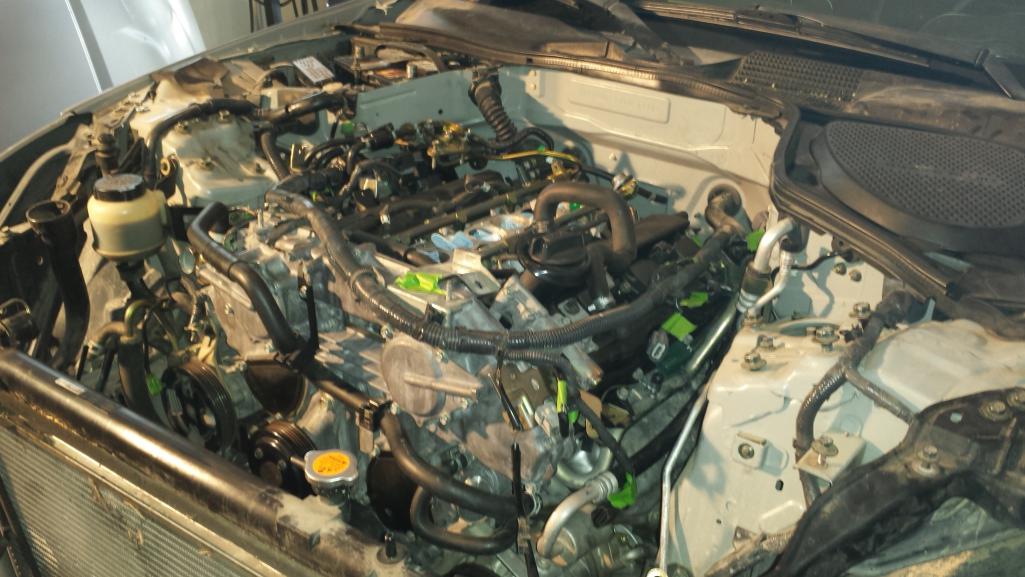 |
|
|
|
|
1 User(s) are reading this topic (1 Guests and 0 Anonymous Users)
0 Members:

|
Lo-Fi Version | Time is now: 7th May 2026 - 06:08 PM |
Invision Power Board
v9.1.4 © 2026 IPS, Inc.