|
|
|
Porsche, and the Porsche crest are registered trademarks of Dr. Ing. h.c. F. Porsche AG.
This site is not affiliated with Porsche in any way. Its only purpose is to provide an online forum for car enthusiasts. All other trademarks are property of their respective owners. |
|
|

  |

| boxstr |
 Jan 21 2004, 07:36 PM Jan 21 2004, 07:36 PM
Post
#21
|
|
MEMBER:PACIFIC NORTHWEST REGION  Group: Members Posts: 7,522 Joined: 25-December 02 From: OREGON Member No.: 12 Region Association: Pacific Northwest |
Pic 8
Attached image(s) 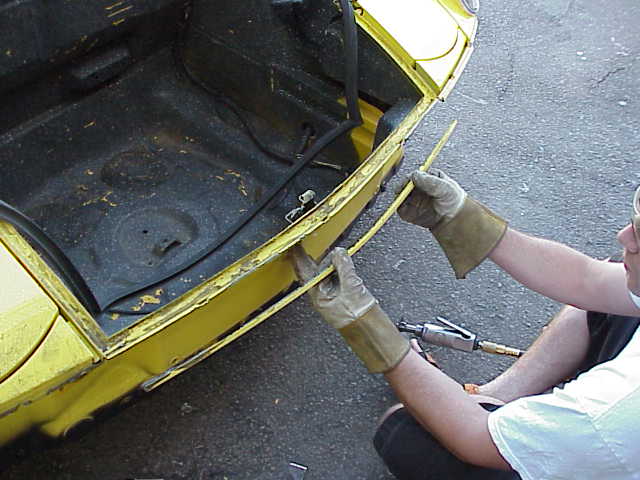
|
   |

 
|
| boxstr |
Jan 21 2004, 07:37 PM
Post
#22
|
|
MEMBER:PACIFIC NORTHWEST REGION Group: Members Posts: 7,522 Joined: 25-December 02 From: OREGON Member No.: 12 Region Association: Pacific Northwest |
Pic 9
Attached image(s) 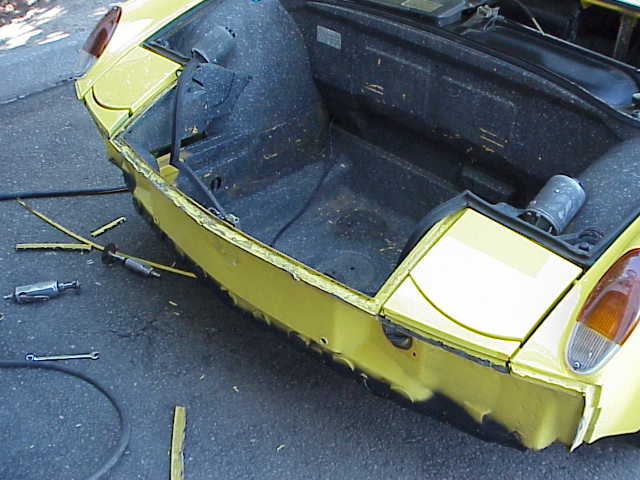
|
|
|
|
| boxstr |
Jan 21 2004, 07:38 PM
Post
#23
|
|
MEMBER:PACIFIC NORTHWEST REGION Group: Members Posts: 7,522 Joined: 25-December 02 From: OREGON Member No.: 12 Region Association: Pacific Northwest |
Pic 10
Attached image(s) 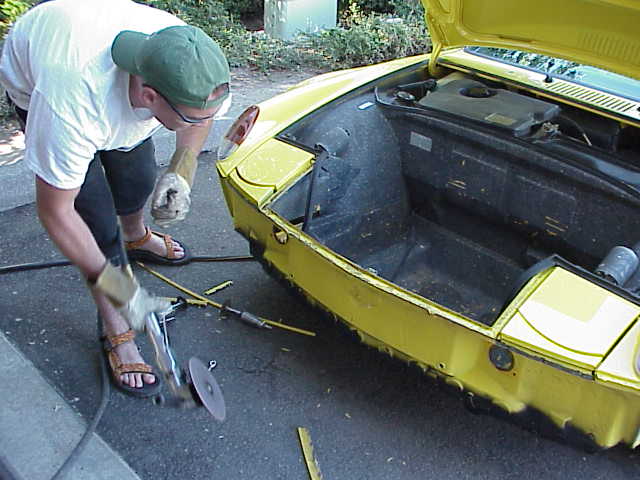
|
|
|
|
| boxstr |
Jan 21 2004, 07:38 PM
Post
#24
|
|
MEMBER:PACIFIC NORTHWEST REGION Group: Members Posts: 7,522 Joined: 25-December 02 From: OREGON Member No.: 12 Region Association: Pacific Northwest |
Pic 11
Attached image(s) 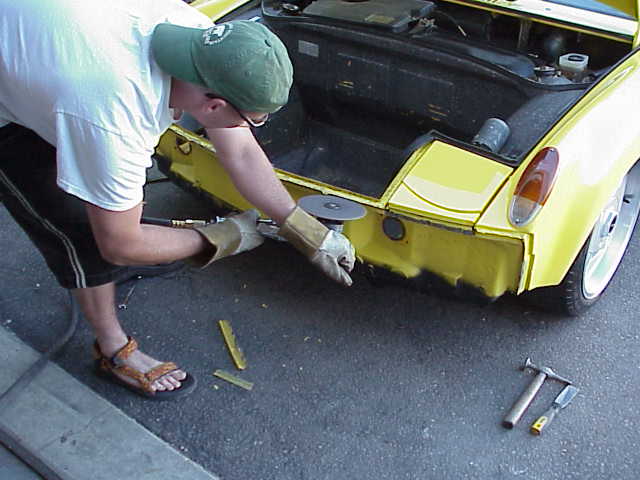
|
|
|
|
| boxstr |
Jan 21 2004, 07:39 PM
Post
#25
|
|
MEMBER:PACIFIC NORTHWEST REGION Group: Members Posts: 7,522 Joined: 25-December 02 From: OREGON Member No.: 12 Region Association: Pacific Northwest |
Pic 12
Attached image(s) 
|
|
|
|
| boxstr |
Jan 21 2004, 07:40 PM
Post
#26
|
|
MEMBER:PACIFIC NORTHWEST REGION Group: Members Posts: 7,522 Joined: 25-December 02 From: OREGON Member No.: 12 Region Association: Pacific Northwest |
Pic 13
Attached image(s) 
|
|
|
|
| boxstr |
Jan 21 2004, 07:41 PM
Post
#27
|
|
MEMBER:PACIFIC NORTHWEST REGION Group: Members Posts: 7,522 Joined: 25-December 02 From: OREGON Member No.: 12 Region Association: Pacific Northwest |
Pic 14
Attached image(s) 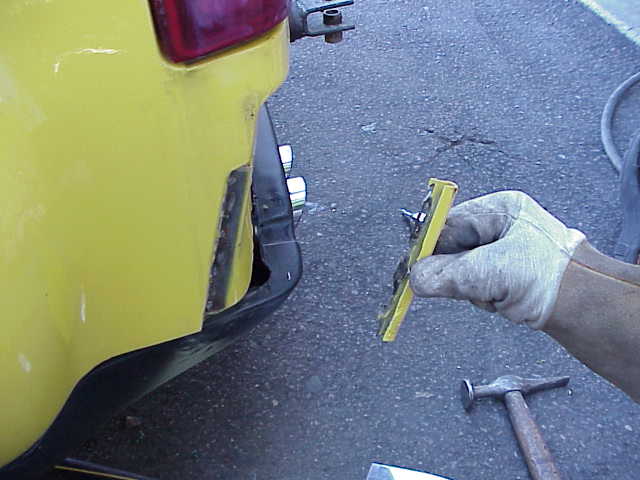
|
|
|
|
| redshift |
Jan 21 2004, 07:47 PM
Post
#28
|
|
Bless the Hell out of you! Group: Members Posts: 10,926 Joined: 29-June 03 Member No.: 869 |
QUOTE(vsg914 @ Jan 21 2004, 06:07 PM) Another thought (I feel like Miles). Funny, I do too. What the hell is it with people? M |
|
|
|
| boxstr |
Jan 21 2004, 07:55 PM
Post
#29
|
|
MEMBER:PACIFIC NORTHWEST REGION Group: Members Posts: 7,522 Joined: 25-December 02 From: OREGON Member No.: 12 Region Association: Pacific Northwest |
Sorry a couple of pics were out of sequence. One thing you need are the "dogbones" those are the rubber spacers for the front and rear bumpers. These will give you a guide where the holes that you need to drill are going to be located.
Also touchup paint is needed as you can see from the pictures. After you have the holes drilled, get a longer bolt that will fit in the bumper and use it to hold the bumper(front ) in place while you put in the stock type bolts. Also get new bolts and washers, I use stainless steel, just because I would prefer them not to rust in place. Another thing when fitting the bumpers in either the front or rear,. Put tape of some kind on the areas that the bumper may touch and might scratch the body. In the photos you will see that the front trunk seal needs to have the bodywork bent up to form a channel for the seal. You do not have to do this , but I don't. Plus I do not glue the front trunk seals in place. You should remove them and clean the channel out, of any glue or dirt or rust, touch up with paint and wax the channel so that fluids do not collect and corrode the bodywork. Just so you have an idea, the bumpers (triple chrome,filling lic.plate holes),and top rubbers and all hardware, totaled, $1500. on JLO Any questions I will be happy to answer. CCLINBUMPERSAREUS |
|
|
|
| Bleyseng |
Jan 21 2004, 08:07 PM
Post
#30
|
|
Aircooled Baby! Group: Members Posts: 13,037 Joined: 27-December 02 From: Seattle, Washington (for now) Member No.: 24 Region Association: Pacific Northwest |
Yep, its pretty easy to do as Craig showed. Fabing the rear rubber support piece takes abit of doing but its not hard.
I have $250 into the used early chrome bumpers,fogs,good rubber tops. Still need to finish the painting as I found some rust under the late bumper covers. Geoff Attached thumbnail(s) 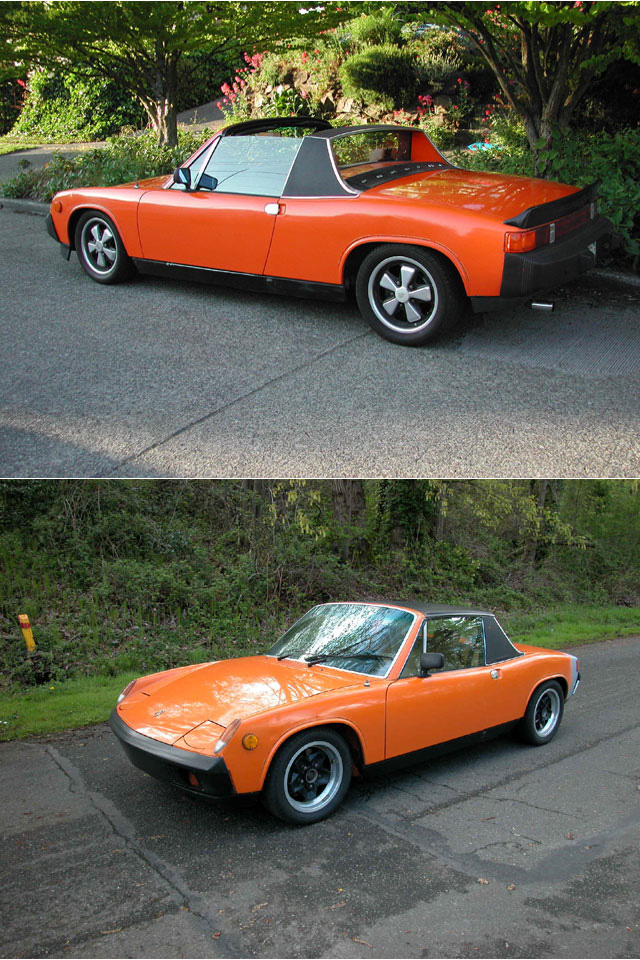
|
|
|
|
| RustyWa |
Jan 22 2004, 12:18 AM
Post
#31
|
|
Working Member Group: Members Posts: 610 Joined: 2-January 03 From: Kent, WA Member No.: 72 |
Very nice photos.
If you are going with the round fogs up front, don't you need to fab a bracket also? |
|
|
|
| boxstr |
Jan 22 2004, 12:37 AM
Post
#32
|
|
MEMBER:PACIFIC NORTHWEST REGION Group: Members Posts: 7,522 Joined: 25-December 02 From: OREGON Member No.: 12 Region Association: Pacific Northwest |
Round fogs, ahh another problem. I have found a stainless steel nut that I drill a hole in the front area where fog lights mount on the early bumper cars. It has a flange around it with three small holes that I enlarge slightly and then I pop rivet them into place. Takes two, one on each side. The stock allen bolt for the fog lights fits perfect.
I just went out to take a pic of one, I am out. Guess I better figure out where I got those. CCLINCHOKEFULLONUTZ |
|
|
|
| Neal |
Jan 22 2004, 08:20 AM
Post
#33
|
|
Member Group: Members Posts: 300 Joined: 23-April 03 From: Sammamish, Washington Member No.: 605 |
Bleyseng, when you say fabbing the rear supports what do you mean ?
Neal |
|
|
|
| maf914 |
Jan 22 2004, 08:35 AM
Post
#34
|
|
Not a Guru! Group: Members Posts: 3,049 Joined: 30-April 03 From: Central Florida Member No.: 632 Region Association: None |
Craig and Geoff,
Thanks for the great photos and info. I have a 76 so I know what its metalwork looks like, but could you explain what is needed to support the early type rubber tops, front and rear? Geoff mentions support pieces. Thanks. Mike |
|
|
|
| boxstr |
Jan 22 2004, 08:42 AM
Post
#35
|
|
MEMBER:PACIFIC NORTHWEST REGION Group: Members Posts: 7,522 Joined: 25-December 02 From: OREGON Member No.: 12 Region Association: Pacific Northwest |
Good morning guys, The front bumpers have no real supports like the rear. The rear bumper has a small support that sticks out from the body just above where the lic plate is located. The rear top bumper rubber has a threaded stud sticking out of it that fits into that support. I have not had a problem with the center support not being present on the cars that I have retro fitted. The four bolts that you secure into the chrome bumpers are what hold the bumper on. The center support is only for the top bumper rubber and unless you have one that has no inner steel( you can't see it so don't worry about it) then it will stay in place.
CCLINRETROBUMPERS |
|
|
|
| kafermeister |
Jan 22 2004, 08:54 AM
Post
#36
|
|
Senior Member Group: Members Posts: 778 Joined: 20-January 03 From: Cincinnati/Northern KY Member No.: 174 |
Thanks for posting the photos. I don't have access to any whole early cars. I found this picture on all914.com. I've circled the bracket.
Attached image(s) 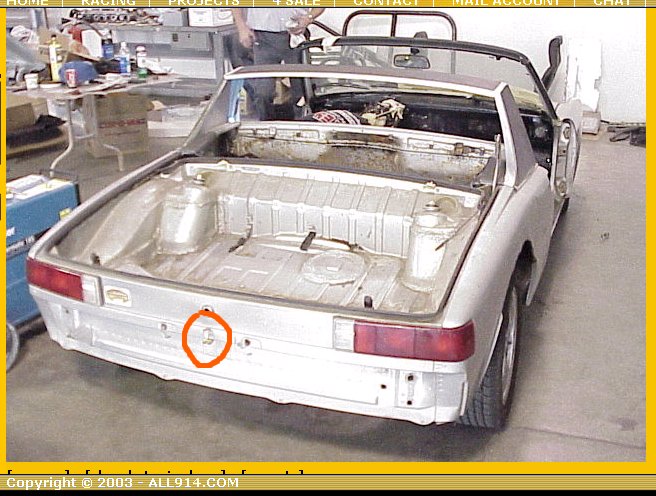
|
|
|
|
| maf914 |
Jan 22 2004, 09:34 AM
Post
#37
|
|
Not a Guru! Group: Members Posts: 3,049 Joined: 30-April 03 From: Central Florida Member No.: 632 Region Association: None |
Now I see.
Thanks Craig and Kafermeister. Mike |
|
|
|
| Bleyseng |
Jan 22 2004, 09:46 AM
Post
#38
|
|
Aircooled Baby! Group: Members Posts: 13,037 Joined: 27-December 02 From: Seattle, Washington (for now) Member No.: 24 Region Association: Pacific Northwest |
For the early fogs I used a blind nut which is the right size to accept the allen bolt. You drill the hole, in push it in and then tighten it up with this gizmo. I expands and locks into place just like the OEM one except its not welded in place.
Geoff |
|
|
|
| boxstr |
Jan 22 2004, 05:59 PM
Post
#39
|
|
MEMBER:PACIFIC NORTHWEST REGION Group: Members Posts: 7,522 Joined: 25-December 02 From: OREGON Member No.: 12 Region Association: Pacific Northwest |
Here is a pic of the "tee nuts" that I use for the foglights, along with a new allen allen bolt. You will also wnat to add a flat washer and a lock washer. All items are stainless steel.
CCLINNUTZANDBOLTZ Attached image(s) 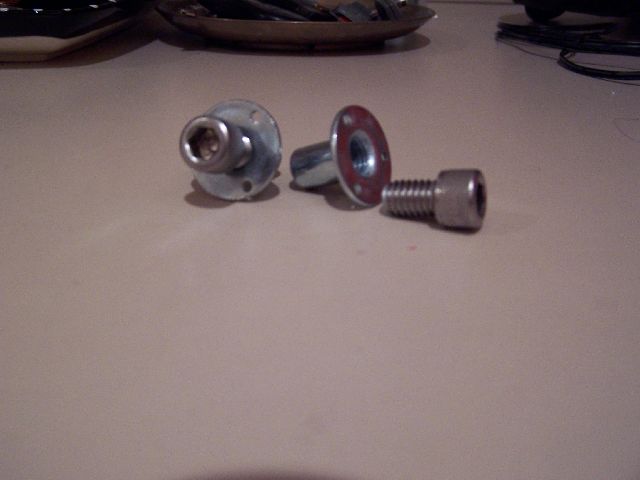
|
|
|
|
| Gint |
Jan 22 2004, 07:46 PM
Post
#40
|
|
Mike Ginter Group: Admin Posts: 16,108 Joined: 26-December 02 From: Denver CO. Member No.: 20 Region Association: Rocky Mountains |
QUOTE For the early fogs I used a blind nut which is the right size to accept the allen bolt. You drill the hole, in push it in and then tighten it up with this gizmo. I expands and locks into place just like the OEM one except its not welded in place. Geoff Whaaaa!?!?! Pics please. Thanks Geoff. |
|
|
|
|
1 User(s) are reading this topic (1 Guests and 0 Anonymous Users)
0 Members:

|
Lo-Fi Version | Time is now: 6th June 2026 - 08:21 AM |
Invision Power Board
v9.1.4 © 2026 IPS, Inc.