|
|
|
Porsche, and the Porsche crest are registered trademarks of Dr. Ing. h.c. F. Porsche AG.
This site is not affiliated with Porsche in any way. Its only purpose is to provide an online forum for car enthusiasts. All other trademarks are property of their respective owners. |
|
|


| computers4kids |
 May 28 2008, 10:21 AM May 28 2008, 10:21 AM
Post
#21
|
|
Love these little cars!  Group: Members Posts: 2,443 Joined: 11-June 05 From: Port Townsend, WA Member No.: 4,253 Region Association: None |
I'm installing a chevy 305 with a renegage kit and I have a few questions.
There seems to be plenty of room to leave the battery tray in the OEM position, why do many move the location to the trunk? I have the Renegade wiring harness but no diagram...can someone send me a copy? The exhaust is headers with twin turbo exhaust. Do you remove the stock exhaust heat sheild...it fits either way. Is it good to leave it or remove it? Where do you source your power for the front 'dual fan radiator?' From what I have read it needs to be powered all the time, not switched. Is there a source to tap into in the front trunk or do you run a dedicated line...if so how heavy? I would really love to see pictures of your V-8 914 front end so see what kind of setup you did for valance and cutting the bumper! I'm good on the fender cuts. Stupid Question: The renegade recommends using #8 1/2 metal screws to attach the brackets that hold the coolant hoses to the bottom of the car. It mentions to be careful not to puncture the fuel lines in the tunnel. How can you tell if your'e going to hit a fuel line or not? ...other than just hoping and guessing? Sorry for all the questions... Mark Edited.....thought I would add some before and a after picture since this thread has evolved into a v-8 install/restore/modify thread. The story begins....  Attached image(s) 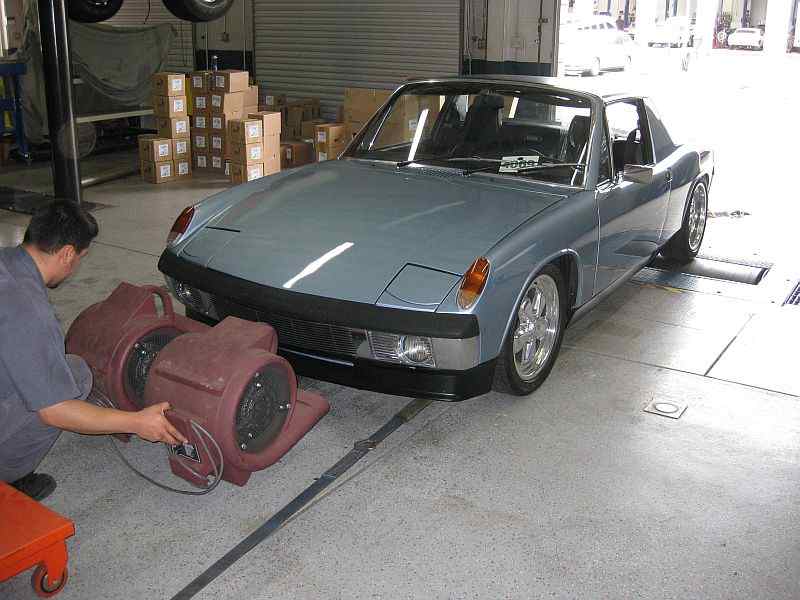
|
   |

 
|
Posts in this topic
computers4kids Installing a V-8...a few questions May 28 2008, 10:21 AM michaelt55 Mark;
Heres a photo of my radiator setup... I hav... May 28 2008, 10:50 AM andys Mark,
If your stock headers have heat shields, I ... May 28 2008, 10:55 AM plymouth37
When I worked at Renegade I used rivets to attac... May 28 2008, 11:06 AM marks914 Here is how I did my front trunk.
Why did I move m... May 28 2008, 12:00 PM dbgriffith75 This just blows my mind...
I mean, I understand i... May 28 2008, 02:26 PM
michaelt55 Mark;
Heres a photo of my radiator setup... I hav... May 28 2008, 10:50 AM andys Mark,
If your stock headers have heat shields, I ... May 28 2008, 10:55 AM plymouth37
When I worked at Renegade I used rivets to attac... May 28 2008, 11:06 AM marks914 Here is how I did my front trunk.
Why did I move m... May 28 2008, 12:00 PM dbgriffith75 This just blows my mind...
I mean, I understand i... May 28 2008, 02:26 PM plymouth37
Is there a lot of butchering that has to be done?... May 28 2008, 02:38 PM
plymouth37
Is there a lot of butchering that has to be done?... May 28 2008, 02:38 PM marks914
This just blows my mind...
I mean, I understand ... May 28 2008, 09:01 PM cobra94563 Stock location is fine if tray is solid.
Something... May 28 2008, 02:44 PM dbgriffith75
I don't know about easy to maintain... don... May 29 2008, 08:31 AM computers4kids
Are joo sure? :D
There is more room to work ... May 29 2008, 08:41 AM computers4kids
The exhaust is headers with twin turbo exhaust. ... May 29 2008, 08:57 AM dakotaewing Here are some pics I have of various cars... May 29 2008, 08:59 AM michaelt55
Here are some pics I have of various cars...
H... May 29 2008, 10:47 AM wes42 I just saw your thread.....Good Luck with your ins... May 29 2008, 09:21 AM wes42
I just saw your thread.....Good Luck with your in... May 29 2008, 09:29 AM wes42
[quote name='wes42' post='1038074' date='May 29 2... May 29 2008, 09:31 AM turboman808
Oh man that is so sick. Jun 12 2008, 12:24 AM dakotaewing MAS May 29 2008, 09:37 AM plymouth37 Here is my front end. With Renegades lower valence... May 29 2008, 11:48 AM michaelt55 Just a question...are those jackstands sitting on ... May 29 2008, 12:47 PM jimkelly throttle cables - what are you guys using - stock ... May 29 2008, 04:57 PM marks914 Here is mine, an extended terry cable, it came wit... May 29 2008, 05:15 PM cobra94563 I currently using the STOCK throttle cable pulling... May 29 2008, 07:11 PM computers4kids Well, I came home tonight after work and felt like... May 29 2008, 11:38 PM jmmotorsports
Well, I came home tonight after work and felt lik... May 30 2008, 08:51 AM plymouth37 If I remember correctly the gasket you need is off... May 29 2008, 11:50 PM BIGKAT_83 The stock cable works fine if mounted correct. I d... May 30 2008, 02:05 PM computers4kids More progress...installed exhaust, prepped the fro... Jun 1 2008, 10:04 AM computers4kids After cooking breakfast and some family time...I h... Jun 2 2008, 12:45 AM computers4kids radiator lines & front trunk compartment (gas ... Jun 2 2008, 12:46 AM rhodyguy which one of the cars in your signature is that? n... Jun 2 2008, 12:55 AM computers4kids
which one of the cars in your signature is that? ... Jun 2 2008, 01:15 AM rhodyguy does your engine require premium fuel? nice to hav... Jun 2 2008, 01:19 AM computers4kids
does your engine require premium fuel? nice to ha... Jun 2 2008, 08:21 AM computers4kids Moving along...
Took all the brakes off and gettin... Jun 5 2008, 09:03 AM JRust Don't ruin a nice early front bumper! Find... Jun 6 2008, 09:47 AM computers4kids
Don't ruin a nice early front bumper! Fin... Jun 9 2008, 05:52 PM JRust
Don't ruin a nice early front bumper! Fi... Jun 9 2008, 09:53 PM computers4kids A little more progress today...the focus was bumpe... Jun 10 2008, 09:26 PM JRust Looking good Mark! What color are you planning... Jun 10 2008, 10:19 PM TC 914-8 Lots of great pictures, I have a Rod Simpsin kit a... Jun 11 2008, 01:18 AM TC 914-8 I re-ran the factory cable from two tight turns in... Jun 11 2008, 01:31 AM computers4kids
I re-ran the factory cable from two tight turns i... Jun 11 2008, 08:33 AM Jeffs9146
This is my favorite V8 conversion and it shows t... Jun 11 2008, 07:41 AM computers4kids Today I started installing the Renegade wiring har... Jun 11 2008, 10:23 PM computers4kids last question Jun 11 2008, 10:23 PM cobra94563 your progress is much faster That I ever got thing... Jun 12 2008, 01:05 AM JRust Mark is kind of like diaria with his car. You hold... Jun 12 2008, 02:34 PM jimkelly got a custom cable from terry cable - 18 inches lo... Jun 12 2008, 03:20 PM computers4kids The latest...
I removed the support brace from the... Jun 18 2008, 08:53 AM computers4kids In the engine compartment I added a wide mesh stee... Jun 18 2008, 08:55 AM computers4kids The steel bumpers were off my 74, so I went ahead ... Jun 18 2008, 08:59 AM rhodyguy it'll look swell. that's one slick carb th... Jun 18 2008, 09:06 AM computers4kids Well, the saga continues...
Brakes are all bled an... Jun 20 2008, 08:26 AM computers4kids The previous owner of my project car is/was a bit ... Jun 21 2008, 11:47 AM jimkelly make sure your brakes work - stock or 911 - make s... Jun 21 2008, 02:17 PM computers4kids
make sure your brakes work - stock or 911 - make ... Jun 21 2008, 05:48 PM JRust Just pull the drivtrain & time it out of the c... Jun 21 2008, 02:32 PM computers4kids
Just pull the drivtrain & time it out of the ... Jun 21 2008, 05:51 PM LvSteveH I agree, don't time it by ear.
If you use a ... Jun 21 2008, 03:41 PM computers4kids
If you use a piston stop you can establish perfec... Jun 21 2008, 06:09 PM Dr. Roger <What do you think...am I on the right track?... Jun 21 2008, 10:13 PM Dr. Roger applicable thread...
http://www.914world.com/bbs2... Jun 21 2008, 10:18 PM computers4kids
applicable thread...
http://www.914world.com/bbs... Jun 22 2008, 12:14 AM computers4kids The car can now be timed from the driver's whe... Jun 22 2008, 02:39 PM computers4kids More progress...
Today, I painted the interior ... Jun 29 2008, 11:38 PM computers4kids I've begun installing the interior of the car.... Jul 2 2008, 11:21 PM JRust Looking good Mark! I got your air cleaner out ... Jul 3 2008, 01:16 AM computers4kids Doors went back on today...alignment was a piece o... Jul 4 2008, 12:16 AM Dr. Roger Momentum is building. the end is in sight. :Qa... Jul 4 2008, 12:31 AM computers4kids
Momentum is building. the end is in sight. :Q... Jul 4 2008, 01:24 AM JRust I've got a rear valance that would work. It is... Jul 4 2008, 01:49 AM computers4kids
I've got a rear valance that would work. It i... Jul 4 2008, 12:30 PM type47fan Lookin' good, Mark.
I modified a '72 vala... Jul 5 2008, 12:30 AM computers4kids Let's see...
Installed the rest of interior li... Jul 7 2008, 06:18 PM computers4kids Well, took a couple of weeks off and travled up to... Jul 18 2008, 09:34 PM JRust I kind of like the flatter & wider ovaled pipe... Jul 19 2008, 02:17 PM computers4kids Installing the ghetty dash took much longer than I... Jul 20 2008, 09:40 PM JRust Yes just pull the cover & loosen the one bolt.... Jul 20 2008, 09:59 PM computers4kids It's official...the 75 is off its rollers. I ... Jul 21 2008, 09:52 PM JRust Absolutely sweeeeeeeet! :driving: :headbanger... Jul 21 2008, 10:16 PM computers4kids
Absolutely sweeeeeeeet! :driving: :headbange... Jul 21 2008, 11:39 PM neo914-6 :beer2: great job! :driving: Jul 22 2008, 04:02 AM michaelt55 Great looking car! I love the interior and wo... Jul 22 2008, 03:50 PM computers4kids
Great looking car! I love the interior and w... Jul 22 2008, 09:24 PM JRust Although I have not ridden in Mark's I will go... Jul 22 2008, 08:55 PM computers4kids
I blew a...
What did you blow? This is a family... Jul 22 2008, 09:19 PM JRust
I blew a...
What did you blow? This is a famil... Jul 22 2008, 11:40 PM Wilhelm
[quote name='computers4kids' post='1059580' date=... Jul 26 2008, 05:53 AM computers4kids Now I know why GT grills are so expensive...they... Jul 23 2008, 12:48 AM TC 914-8 Mark,
Great install and progress thread.
Some d... Jul 26 2008, 12:21 AM computers4kids
Mark,
Great install and progress thread.
Some ... Jul 26 2008, 12:40 AM computers4kids Back to our regular scheduled program...
Added som... Jul 26 2008, 12:43 AM michaelt55 "Added some Camp914 bling to the cabin today.... Jul 30 2008, 05:00 PM computers4kids Also in the mail today from Craig, came the beadin... Jul 26 2008, 12:47 AM computers4kids Thanks to Nick, his almost new BMW front calipers ... Jul 29 2008, 11:34 PM computers4kids A little more progress...
I took...no, "I dro... Aug 1 2008, 06:12 PM computers4kids After the muffler shop, drove it down to this high... Aug 1 2008, 06:38 PM JRust Sounds good Mark! Dual tips fill it perfectly.... Aug 2 2008, 12:30 AM
marks914
This just blows my mind...
I mean, I understand ... May 28 2008, 09:01 PM cobra94563 Stock location is fine if tray is solid.
Something... May 28 2008, 02:44 PM dbgriffith75
I don't know about easy to maintain... don... May 29 2008, 08:31 AM computers4kids
Are joo sure? :D
There is more room to work ... May 29 2008, 08:41 AM computers4kids
The exhaust is headers with twin turbo exhaust. ... May 29 2008, 08:57 AM dakotaewing Here are some pics I have of various cars... May 29 2008, 08:59 AM michaelt55
Here are some pics I have of various cars...
H... May 29 2008, 10:47 AM wes42 I just saw your thread.....Good Luck with your ins... May 29 2008, 09:21 AM wes42
I just saw your thread.....Good Luck with your in... May 29 2008, 09:29 AM wes42
[quote name='wes42' post='1038074' date='May 29 2... May 29 2008, 09:31 AM turboman808
Oh man that is so sick. Jun 12 2008, 12:24 AM dakotaewing MAS May 29 2008, 09:37 AM plymouth37 Here is my front end. With Renegades lower valence... May 29 2008, 11:48 AM michaelt55 Just a question...are those jackstands sitting on ... May 29 2008, 12:47 PM jimkelly throttle cables - what are you guys using - stock ... May 29 2008, 04:57 PM marks914 Here is mine, an extended terry cable, it came wit... May 29 2008, 05:15 PM cobra94563 I currently using the STOCK throttle cable pulling... May 29 2008, 07:11 PM computers4kids Well, I came home tonight after work and felt like... May 29 2008, 11:38 PM jmmotorsports
Well, I came home tonight after work and felt lik... May 30 2008, 08:51 AM plymouth37 If I remember correctly the gasket you need is off... May 29 2008, 11:50 PM BIGKAT_83 The stock cable works fine if mounted correct. I d... May 30 2008, 02:05 PM computers4kids More progress...installed exhaust, prepped the fro... Jun 1 2008, 10:04 AM computers4kids After cooking breakfast and some family time...I h... Jun 2 2008, 12:45 AM computers4kids radiator lines & front trunk compartment (gas ... Jun 2 2008, 12:46 AM rhodyguy which one of the cars in your signature is that? n... Jun 2 2008, 12:55 AM computers4kids
which one of the cars in your signature is that? ... Jun 2 2008, 01:15 AM rhodyguy does your engine require premium fuel? nice to hav... Jun 2 2008, 01:19 AM computers4kids
does your engine require premium fuel? nice to ha... Jun 2 2008, 08:21 AM computers4kids Moving along...
Took all the brakes off and gettin... Jun 5 2008, 09:03 AM JRust Don't ruin a nice early front bumper! Find... Jun 6 2008, 09:47 AM computers4kids
Don't ruin a nice early front bumper! Fin... Jun 9 2008, 05:52 PM JRust
Don't ruin a nice early front bumper! Fi... Jun 9 2008, 09:53 PM computers4kids A little more progress today...the focus was bumpe... Jun 10 2008, 09:26 PM JRust Looking good Mark! What color are you planning... Jun 10 2008, 10:19 PM TC 914-8 Lots of great pictures, I have a Rod Simpsin kit a... Jun 11 2008, 01:18 AM TC 914-8 I re-ran the factory cable from two tight turns in... Jun 11 2008, 01:31 AM computers4kids
I re-ran the factory cable from two tight turns i... Jun 11 2008, 08:33 AM Jeffs9146
This is my favorite V8 conversion and it shows t... Jun 11 2008, 07:41 AM computers4kids Today I started installing the Renegade wiring har... Jun 11 2008, 10:23 PM computers4kids last question Jun 11 2008, 10:23 PM cobra94563 your progress is much faster That I ever got thing... Jun 12 2008, 01:05 AM JRust Mark is kind of like diaria with his car. You hold... Jun 12 2008, 02:34 PM jimkelly got a custom cable from terry cable - 18 inches lo... Jun 12 2008, 03:20 PM computers4kids The latest...
I removed the support brace from the... Jun 18 2008, 08:53 AM computers4kids In the engine compartment I added a wide mesh stee... Jun 18 2008, 08:55 AM computers4kids The steel bumpers were off my 74, so I went ahead ... Jun 18 2008, 08:59 AM rhodyguy it'll look swell. that's one slick carb th... Jun 18 2008, 09:06 AM computers4kids Well, the saga continues...
Brakes are all bled an... Jun 20 2008, 08:26 AM computers4kids The previous owner of my project car is/was a bit ... Jun 21 2008, 11:47 AM jimkelly make sure your brakes work - stock or 911 - make s... Jun 21 2008, 02:17 PM computers4kids
make sure your brakes work - stock or 911 - make ... Jun 21 2008, 05:48 PM JRust Just pull the drivtrain & time it out of the c... Jun 21 2008, 02:32 PM computers4kids
Just pull the drivtrain & time it out of the ... Jun 21 2008, 05:51 PM LvSteveH I agree, don't time it by ear.
If you use a ... Jun 21 2008, 03:41 PM computers4kids
If you use a piston stop you can establish perfec... Jun 21 2008, 06:09 PM Dr. Roger <What do you think...am I on the right track?... Jun 21 2008, 10:13 PM Dr. Roger applicable thread...
http://www.914world.com/bbs2... Jun 21 2008, 10:18 PM computers4kids
applicable thread...
http://www.914world.com/bbs... Jun 22 2008, 12:14 AM computers4kids The car can now be timed from the driver's whe... Jun 22 2008, 02:39 PM computers4kids More progress...
Today, I painted the interior ... Jun 29 2008, 11:38 PM computers4kids I've begun installing the interior of the car.... Jul 2 2008, 11:21 PM JRust Looking good Mark! I got your air cleaner out ... Jul 3 2008, 01:16 AM computers4kids Doors went back on today...alignment was a piece o... Jul 4 2008, 12:16 AM Dr. Roger Momentum is building. the end is in sight. :Qa... Jul 4 2008, 12:31 AM computers4kids
Momentum is building. the end is in sight. :Q... Jul 4 2008, 01:24 AM JRust I've got a rear valance that would work. It is... Jul 4 2008, 01:49 AM computers4kids
I've got a rear valance that would work. It i... Jul 4 2008, 12:30 PM type47fan Lookin' good, Mark.
I modified a '72 vala... Jul 5 2008, 12:30 AM computers4kids Let's see...
Installed the rest of interior li... Jul 7 2008, 06:18 PM computers4kids Well, took a couple of weeks off and travled up to... Jul 18 2008, 09:34 PM JRust I kind of like the flatter & wider ovaled pipe... Jul 19 2008, 02:17 PM computers4kids Installing the ghetty dash took much longer than I... Jul 20 2008, 09:40 PM JRust Yes just pull the cover & loosen the one bolt.... Jul 20 2008, 09:59 PM computers4kids It's official...the 75 is off its rollers. I ... Jul 21 2008, 09:52 PM JRust Absolutely sweeeeeeeet! :driving: :headbanger... Jul 21 2008, 10:16 PM computers4kids
Absolutely sweeeeeeeet! :driving: :headbange... Jul 21 2008, 11:39 PM neo914-6 :beer2: great job! :driving: Jul 22 2008, 04:02 AM michaelt55 Great looking car! I love the interior and wo... Jul 22 2008, 03:50 PM computers4kids
Great looking car! I love the interior and w... Jul 22 2008, 09:24 PM JRust Although I have not ridden in Mark's I will go... Jul 22 2008, 08:55 PM computers4kids
I blew a...
What did you blow? This is a family... Jul 22 2008, 09:19 PM JRust
I blew a...
What did you blow? This is a famil... Jul 22 2008, 11:40 PM Wilhelm
[quote name='computers4kids' post='1059580' date=... Jul 26 2008, 05:53 AM computers4kids Now I know why GT grills are so expensive...they... Jul 23 2008, 12:48 AM TC 914-8 Mark,
Great install and progress thread.
Some d... Jul 26 2008, 12:21 AM computers4kids
Mark,
Great install and progress thread.
Some ... Jul 26 2008, 12:40 AM computers4kids Back to our regular scheduled program...
Added som... Jul 26 2008, 12:43 AM michaelt55 "Added some Camp914 bling to the cabin today.... Jul 30 2008, 05:00 PM computers4kids Also in the mail today from Craig, came the beadin... Jul 26 2008, 12:47 AM computers4kids Thanks to Nick, his almost new BMW front calipers ... Jul 29 2008, 11:34 PM computers4kids A little more progress...
I took...no, "I dro... Aug 1 2008, 06:12 PM computers4kids After the muffler shop, drove it down to this high... Aug 1 2008, 06:38 PM JRust Sounds good Mark! Dual tips fill it perfectly.... Aug 2 2008, 12:30 AM  |
1 User(s) are reading this topic (1 Guests and 0 Anonymous Users)
0 Members:

|
Lo-Fi Version | Time is now: 9th June 2026 - 04:44 AM |
Invision Power Board
v9.1.4 © 2026 IPS, Inc.