|
|
|
Porsche, and the Porsche crest are registered trademarks of Dr. Ing. h.c. F. Porsche AG.
This site is not affiliated with Porsche in any way. Its only purpose is to provide an online forum for car enthusiasts. All other trademarks are property of their respective owners. |
|
|

  |

| BGman |
 Jan 23 2004, 10:15 AM Jan 23 2004, 10:15 AM
Post
#1
|
|
Greg  Group: Members Posts: 87 Joined: 18-January 04 From: Owensboro, KY Member No.: 1,575 Region Association: None |
I have been reading through lots of old discussions from you all on how to do this.
It is all very interesting. You guys have some extreme set-ups. I am really wanting to keep the outside appearance very clean and stock looking. Here is what I have picked up as being the best ideas so far: 1. Repair (cut/weld) any part of the longitudinals that have been compromised. Just a small area on the passenger side- already working on it. 2. Weld in 16 guage steel along the interior of the car (inside long) from one wheel well...around the firewall...and to the other wheel well. 3. Pay particular attention to the area where this piece fits into the corner that joins the long to the rear firewall. (Add horizontal triangle bracing if possible in the corner??) 4. Weld in a small frame into the engine compartment. Square tubing across the upper part of the firewall, under the hinges of the engine lid, and downtubes that connect it to ??? How and where will the downtubes connect? The car is stock, so I cannot go all the way to the rear shock towers. What size/type of square tubing is fine for the engine bay area? Thanks. |
   |

 
|
| URY914 |
Jan 23 2004, 10:57 AM
Post
#2
|
|
I built the lightest 914 in the history of mankind. Group: Members Posts: 131,668 Joined: 3-February 03 From: Jacksonville, FL Member No.: 222 Region Association: None |
I haven't heard of #4 before.
Paul |
 |
|
| seanery |
Jan 23 2004, 11:21 AM
Post
#3
|
|
waiting to rebuild whitey! Group: Retired Admin Posts: 15,857 Joined: 7-January 03 From: Indy Member No.: 100 Region Association: None |
there was a thread somewhere where it was mentioned once, maybe twice. I can't remember where the discussion went, or who it was with.
|
|
|
|
| Jeroen |
Jan 23 2004, 11:36 AM
Post
#4
|
|
914 Guru Group: Members Posts: 7,887 Joined: 24-December 02 From: The Netherlands Member No.: 3 Region Association: Europe |
I think it was Brad who mentioned a set up like that
I'd say use about 1" square tubing If you don't want to run them all the way back to the shocktowers, tie 'em on top of the framerails (where the inner suspension ear goes down) cheers, Jeroen |
|
|
|
| d914 |
Jan 23 2004, 11:43 AM
Post
#5
|
|
Advanced Member Group: Members Posts: 2,350 Joined: 12-July 03 From: Atlanta, ga Member No.: 904 Region Association: South East States |
it was brad:
Square tube across the firewall and bracing from the down tubes of a cage to triangleate to the frame. Down tube goes to the schock tower. If that helps??? The conversation was on where the 914 actually flexes and where to brace. It might have been invovled with loosing the trunk tin.... |
|
|
|
| BGman |
Jan 23 2004, 01:06 PM
Post
#6
|
|
Greg Group: Members Posts: 87 Joined: 18-January 04 From: Owensboro, KY Member No.: 1,575 Region Association: None |
So you guys have never seen it actually done? I thought that it was discussed as a proven design.
I was hoping ya'll would say 3/4". I have some extra of that on hand. If I do it- I will post pics. |
|
|
|
| Mueller |
Jan 23 2004, 01:38 PM
Post
#7
|
|
914 Freak! Group: Members Posts: 17,155 Joined: 4-January 03 From: Antioch, CA Member No.: 87 Region Association: None |
it's been done, one person(s) went so far as to remove the heating ducts inside the longs. and replace them with 3" steel tubing with the hopes of creating a "289/427 cobra" type frame (IMG:style_emoticons/default/welder.gif) (IMG:style_emoticons/default/smash.gif)
|
|
|
|
| maf914 |
Jan 23 2004, 03:20 PM
Post
#8
|
|
Not a Guru! Group: Members Posts: 3,049 Joined: 30-April 03 From: Central Florida Member No.: 632 Region Association: None |
The Cobra chassis and other ladder type frames were never known for their rigidity. Even in its day, dedicated racing cars had tubular space frames. The 550 Syder started out with a twin tube ladder frame, which became a space frame in later Spyder models.
Mike |
|
|
|
| nebreitling |
Jan 23 2004, 04:03 PM
Post
#9
|
|
Member Emeritus Group: Members Posts: 3,314 Joined: 26-March 03 From: San Francisco Member No.: 478 |
i'm sure you have good reasons to create a super stiff chasis, but it seems like an "unreinforced" chassis (with no rust problems) would be plently stiff enough for street use. are you planning on making a race car at some point? or do you just want a badass handler? (IMG:style_emoticons/default/driving.gif)
just curious, n |
|
|
|
| BGman |
Jan 23 2004, 04:33 PM
Post
#10
|
|
Greg Group: Members Posts: 87 Joined: 18-January 04 From: Owensboro, KY Member No.: 1,575 Region Association: None |
the latter-
the engine bay is empty, it's cold outside, and I am itching to weld something.... |
|
|
|
| BGman |
Jan 27 2004, 06:57 AM
Post
#11
|
|
Greg Group: Members Posts: 87 Joined: 18-January 04 From: Owensboro, KY Member No.: 1,575 Region Association: None |
Ok, here is the passenger side all tacked into place- have to make sure that it will clear the carbs on the engine, that I can remove/install the battery, and that I can get the engine lid back in place.
I welded a piece of 1 1/2" steel el (very securely) onto the frame where the downtubes connect. Hopefully, this will give it a strong bracing point. This location was the highest point on the framerails that I could get with all of the battery/trunk hardware staying in place. -g Attached thumbnail(s) 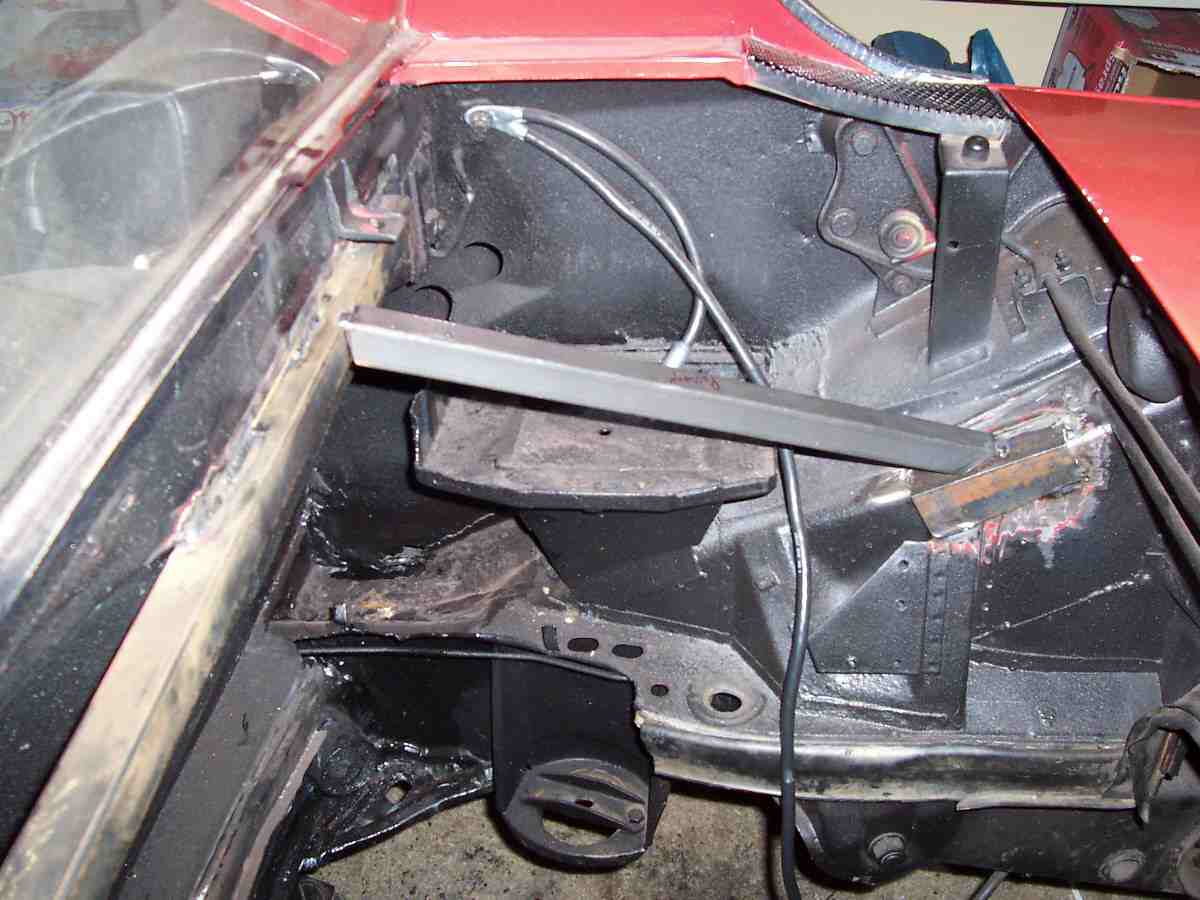
|
|
|
|
| maf914 |
Jan 27 2004, 07:52 AM
Post
#12
|
|
Not a Guru! Group: Members Posts: 3,049 Joined: 30-April 03 From: Central Florida Member No.: 632 Region Association: None |
BGman,
With carbs and the battery in the stock location, access is already fairly tight on the passenger side. I have a feeling you may be cutting it pretty close with that brace. Just a feeling... Good luck. Let us see how you do the inner long reinforcement in the cockpit. Mike |
|
|
|
| Bleyseng |
Jan 27 2004, 09:47 AM
Post
#13
|
|
Aircooled Baby! Group: Members Posts: 13,036 Joined: 27-December 02 From: Seattle, Washington (for now) Member No.: 24 Region Association: Pacific Northwest |
While you are at it, why not fix that shedded engine shelf? It would help to seal the engine compartment for better cooling.
|
|
|
|
| BGman |
Jan 27 2004, 04:57 PM
Post
#14
|
|
Greg Group: Members Posts: 87 Joined: 18-January 04 From: Owensboro, KY Member No.: 1,575 Region Association: None |
The battery fits.
I have measured and measured and eyeballed and eyeballed for the carb clearance. Everything seems to be looking OK. I may have to trial fit the engine into the bay before I do the final welding on the braces. I sure would be appreciative if any of you (who have carbs) could measure the clearance you have. I guess the measurements I need are from the firewall to the carb linkage and from the interior side of the body to the filter on the carb. I am running 44 Webers. I will still probably do a trial fit- but the measurements will let me know if it is going to be close. Bleyseng- you are right. I probably should fix it now. Trouble is, I am not sure of what the original shape of it was? I think the opening was for an AC compressor. I guess I will know if I install the engine again.... |
|
|
|
| SirAndy |
Jan 27 2004, 05:05 PM
Post
#15
|
|
Resident German Group: Admin Posts: 42,458 Joined: 21-January 03 From: Oakland, Kalifornia Member No.: 179 Region Association: Northern California |
from your pic, it looks like you won't be able to get the engine-lid back on.
the lid flange slides UNDER that hinge, then the bolt is inserted from below ... looks like a solid bracing otherwise, Andy |
|
|
|
| DNHunt |
Jan 27 2004, 06:41 PM
Post
#16
|
|
914 Wizard? No way. I got too much to learn. Group: Members Posts: 4,099 Joined: 21-April 03 From: Gig Harbor, WA Member No.: 598 |
Get a new engine shelf from Restoration Designs. They fit very well and are not too expensive. You won't regret it
Dave |
|
|
|
| TheCabinetmaker |
Jan 27 2004, 06:44 PM
Post
#17
|
|
I drive my car everyday Group: Members Posts: 8,367 Joined: 8-May 03 From: Tulsa, Ok. Member No.: 666 |
hey, where is Restoration Designs? Been trying to reach them. No email return and no phone answer. (IMG:style_emoticons/default/confused24.gif)
|
|
|
|
| mightyohm |
Jan 27 2004, 06:59 PM
Post
#18
|
|
Advanced Member Group: Benefactors Posts: 2,279 Joined: 16-January 03 From: Seattle, WA Member No.: 162 Region Association: Pacific Northwest |
Reinforcement = weight. I am thinking in 4 cylinder terms here. (IMG:style_emoticons/default/laugh.gif)
|
|
|
|
| Bleyseng |
Jan 27 2004, 07:18 PM
Post
#19
|
|
Aircooled Baby! Group: Members Posts: 13,036 Joined: 27-December 02 From: Seattle, Washington (for now) Member No.: 24 Region Association: Pacific Northwest |
I saw that too Andy,hehe... he's got some cutting to do now to get that engine lid back on.
Geoff |
|
|
|
| BGman |
Jan 27 2004, 10:47 PM
Post
#20
|
|
Greg Group: Members Posts: 87 Joined: 18-January 04 From: Owensboro, KY Member No.: 1,575 Region Association: None |
You guys had better give me a little more credit than that!!! .......although I have done plenty of things about as dumb.
The pic is deceiving. There is actually a small shelf in the sheet-metal along the upper firewall that I fit the square tubing into. It recesses the square stock slightly and allows easy access to the bolts. Attached thumbnail(s) 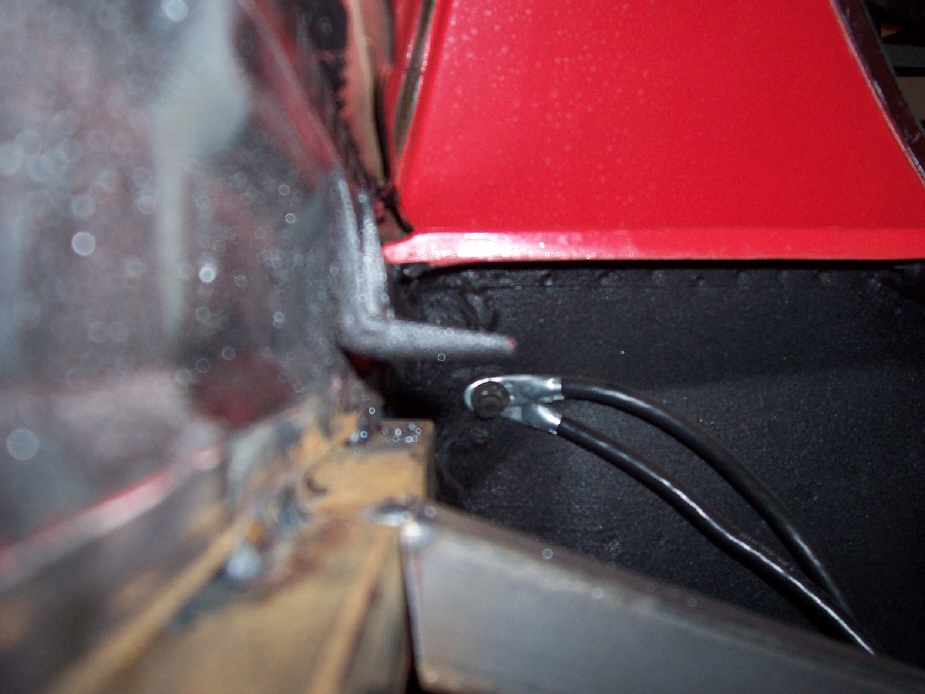
|
|
|
|
|
1 User(s) are reading this topic (1 Guests and 0 Anonymous Users)
0 Members:

|
Lo-Fi Version | Time is now: 14th March 2026 - 06:15 AM |
Invision Power Board
v9.1.4 © 2026 IPS, Inc.