|
|
|
Porsche, and the Porsche crest are registered trademarks of Dr. Ing. h.c. F. Porsche AG.
This site is not affiliated with Porsche in any way. Its only purpose is to provide an online forum for car enthusiasts. All other trademarks are property of their respective owners. |
|
|

  |

| Mueller |
 Apr 7 2020, 10:00 AM Apr 7 2020, 10:00 AM
Post
#801
|
|
914 Freak!  Group: Members Posts: 17,155 Joined: 4-January 03 From: Antioch, CA Member No.: 87 Region Association: None |
That is going to be an awesome car.
You should be able so salvage that harness, I'm thinking if you could get another harness just to use as a reference, if it was still in the reference chassis that might be better. Use Tesa tape for wiring harness, not PVC electrical tape. As a side note, I am surprised how well the insulated wire has held up on a 47 year old car. My engine swap I have hooked up the Honda ECU with the 914 harness and fuse block with no real problems. I did eliminate my relay board in the engine compartment. |
   |

 
|
| RiqueMar |
Apr 24 2020, 09:05 PM
Post
#802
|
|
Enrique Allen Mar Group: Members Posts: 2,264 Joined: 28-August 08 From: San Diego, CA Member No.: 9,478 Region Association: Southern California |
Question for those more knowledgable than I...
I've come to recognize that my car will have two wiring systems, the original 'stock' setup that controls wipers, lights, etc and the 3.6 system. My main 'struggle' is recreating the original 'loom' that goes underneath the dash, as all other connections to the turn signals, headlights, etc. are correct. Is there any significant difference between the years as it comes to wiring? I'm thinking to either 'splice in' the original harness from the black car, or swap it pout completely. If I were to splice, I would 'stager' the connections to not have a 'bulge' in any one-place. 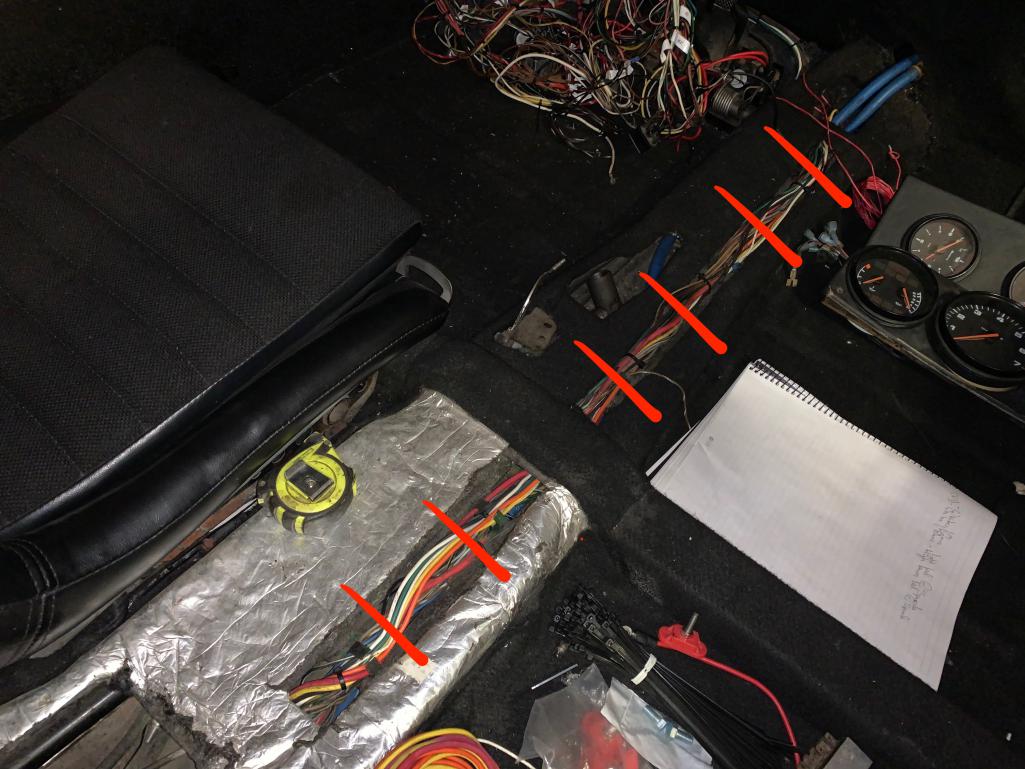 |
|
|
|
| mepstein |
Apr 24 2020, 09:37 PM
Post
#803
|
|
914-6 GT in waiting Group: Members Posts: 20,774 Joined: 19-September 09 From: Landenberg, PA/Wilmington, DE Member No.: 10,825 Region Association: MidAtlantic Region |
PMS sells a chassis harness adapter cable that connects the 3.6 engines be harness to the 914 chassis harness. There are still a couple other wires to run like fuel pump, tach, dme power but it’s a pretty clean set up.
|
 |
|
| RiqueMar |
Apr 25 2020, 08:51 PM
Post
#804
|
|
Enrique Allen Mar Group: Members Posts: 2,264 Joined: 28-August 08 From: San Diego, CA Member No.: 9,478 Region Association: Southern California |
QUOTE(mepstein @ Apr 24 2020, 08:37 PM)  PMS sells a chassis harness adapter cable that connects the 3.6 engines be harness to the 914 chassis harness. There are still a couple other wires to run like fuel pump, tach, dme power but it’s a pretty clean set up. All good on that front, and I have that harness. Funny enough, the 3.6 integration doesn't concern me, its establishing the 'loom' for the stock wiring. My main problem is finding the 'form' the harness originally had, and connecting all the stock equipment; Wipers, Hazards, etc. |
|
|
|
| mepstein |
Apr 25 2020, 09:05 PM
Post
#805
|
|
914-6 GT in waiting Group: Members Posts: 20,774 Joined: 19-September 09 From: Landenberg, PA/Wilmington, DE Member No.: 10,825 Region Association: MidAtlantic Region |
QUOTE(RiqueMar @ Apr 25 2020, 10:51 PM) QUOTE(mepstein @ Apr 24 2020, 08:37 PM) PMS sells a chassis harness adapter cable that connects the 3.6 engines be harness to the 914 chassis harness. There are still a couple other wires to run like fuel pump, tach, dme power but it’s a pretty clean set up. All good on that front, and I have that harness. Funny enough, the 3.6 integration doesn't concern me, its establishing the 'loom' for the stock wiring. My main problem is finding the 'form' the harness originally had, and connecting all the stock equipment; Wipers, Hazards, etc. I have a spare midyear harness. If you think it would help, let me know and I'll send it your way. |
|
|
|
| RiqueMar |
Apr 26 2020, 09:22 AM
Post
#806
|
|
Enrique Allen Mar Group: Members Posts: 2,264 Joined: 28-August 08 From: San Diego, CA Member No.: 9,478 Region Association: Southern California |
QUOTE(mepstein @ Apr 25 2020, 08:05 PM) QUOTE(RiqueMar @ Apr 25 2020, 10:51 PM) QUOTE(mepstein @ Apr 24 2020, 08:37 PM) PMS sells a chassis harness adapter cable that connects the 3.6 engines be harness to the 914 chassis harness. There are still a couple other wires to run like fuel pump, tach, dme power but it’s a pretty clean set up. All good on that front, and I have that harness. Funny enough, the 3.6 integration doesn't concern me, its establishing the 'loom' for the stock wiring. My main problem is finding the 'form' the harness originally had, and connecting all the stock equipment; Wipers, Hazards, etc. I have a spare midyear harness. If you think it would help, let me know and I'll send it your way. Very interested, please PM me. Gracias! (IMG:style_emoticons/default/smile.gif) |
|
|
|
| RiqueMar |
Apr 26 2020, 10:34 PM
Post
#807
|
|
Enrique Allen Mar Group: Members Posts: 2,264 Joined: 28-August 08 From: San Diego, CA Member No.: 9,478 Region Association: Southern California |
Welp... 'That-is-that'. Harness that was originally 'mated' with the 3.6 is out of the car, and I'm about halfway done cleaning and re-taping it. Using this opportunity to give it a 'deep clean' before pulling my original out and placing this one.
Shout-out to @mepstein for the off of a mid-range! 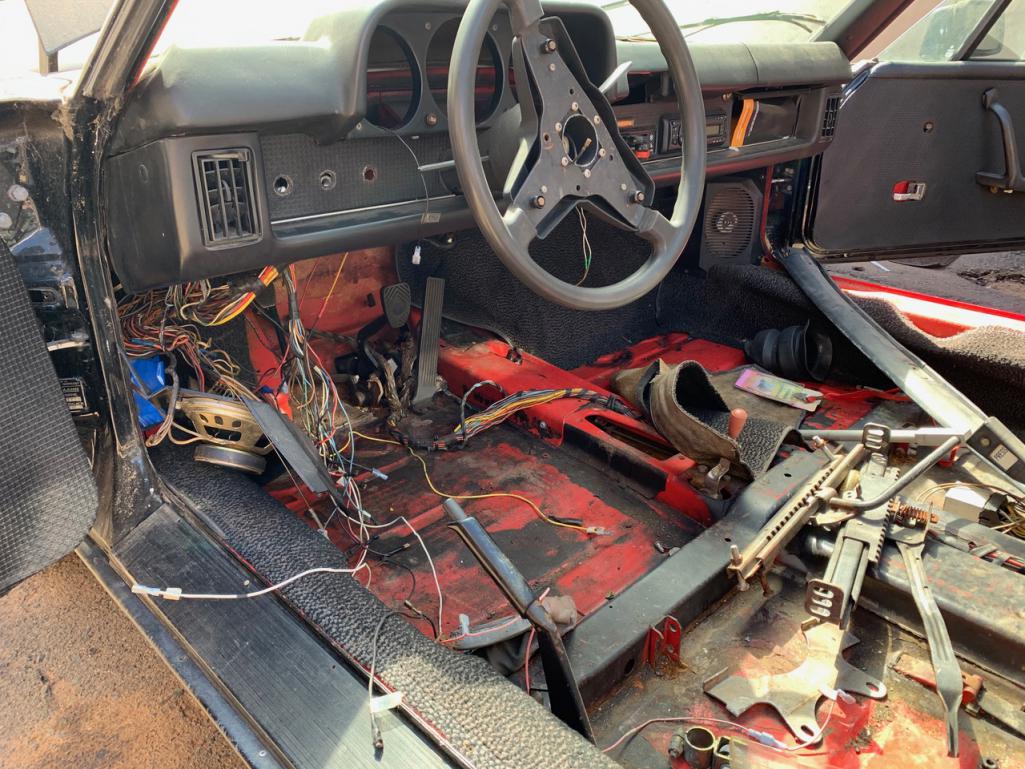 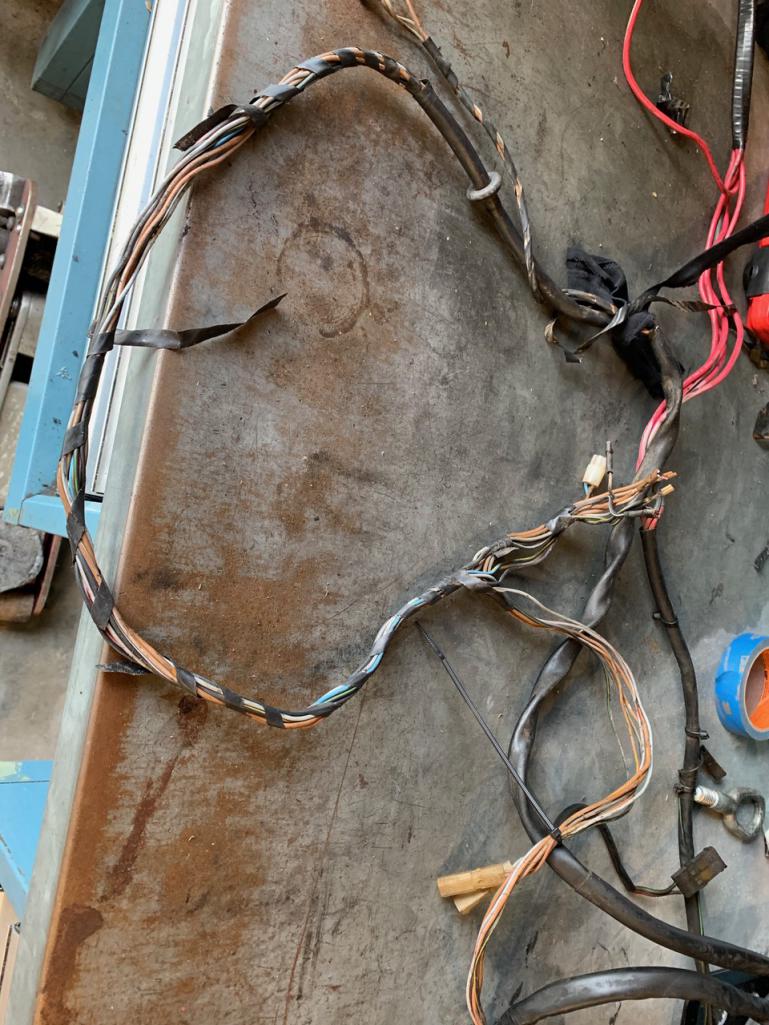 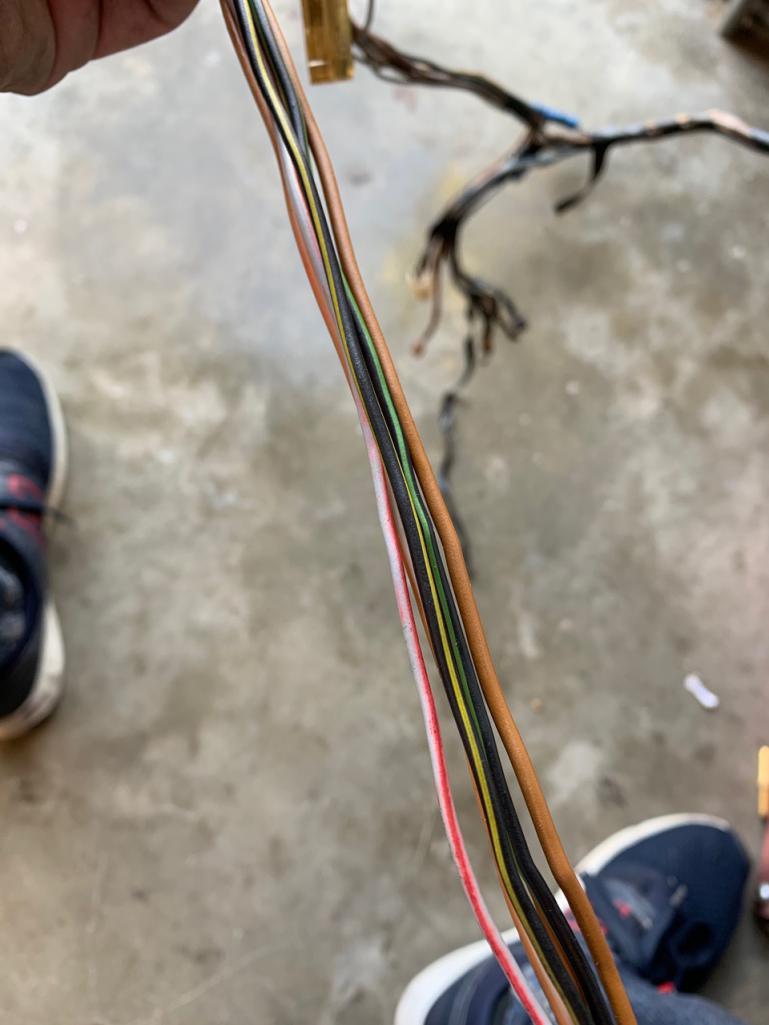 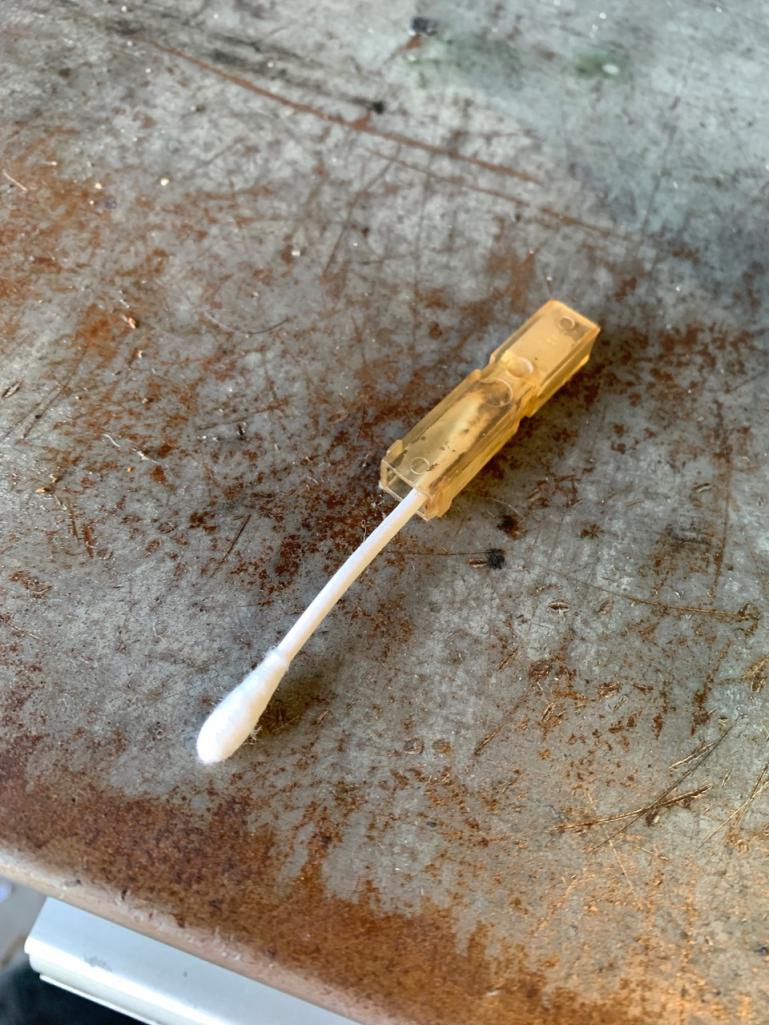 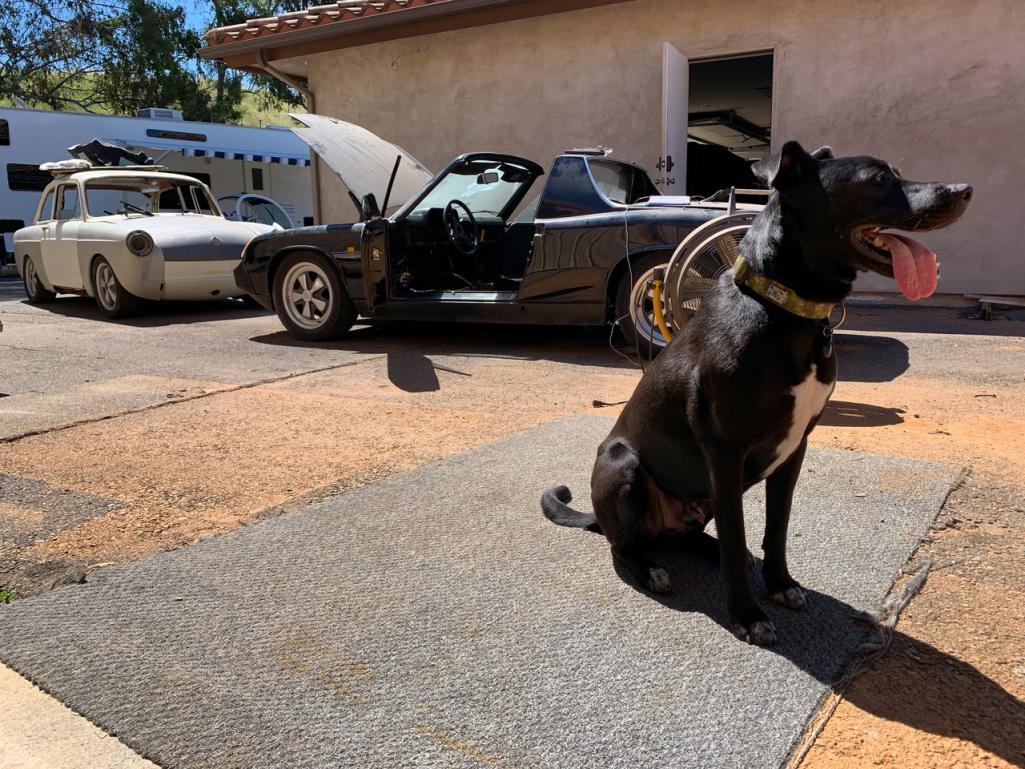 |
|
|
|
| RiqueMar |
Apr 27 2020, 10:19 AM
Post
#808
|
|
Enrique Allen Mar Group: Members Posts: 2,264 Joined: 28-August 08 From: San Diego, CA Member No.: 9,478 Region Association: Southern California |
For those following along, this is a great video from the guys at Restoration Design. Whether you are removing or installing a wiring harness.
Really can't recommend it enough.... https://youtu.be/meuFs3HaUj0 |
|
|
|
| RiqueMar |
Apr 29 2020, 10:08 AM
Post
#809
|
|
Enrique Allen Mar Group: Members Posts: 2,264 Joined: 28-August 08 From: San Diego, CA Member No.: 9,478 Region Association: Southern California |
Checking in to stay motivated and current....
Very carefully, I'm trying to restore the harness and make it as 'clean' as possible. This includes isolating the leads, shrink-tubing any hot-points, cleaning off 45-years of grit, and re-taping. I originally ordered cloth-tape from 914rubber, however this harness already had some holding it together that was in pretty good condition, so I'm using the 3M version. The cloth-like stuff will be used in the front and rear trunks, with the plan to later convert to safety sheathing. Pretty straight forward, as everything is connected, my biggest challenge is using reference photos from another thread to get it close to the stock form it once had. 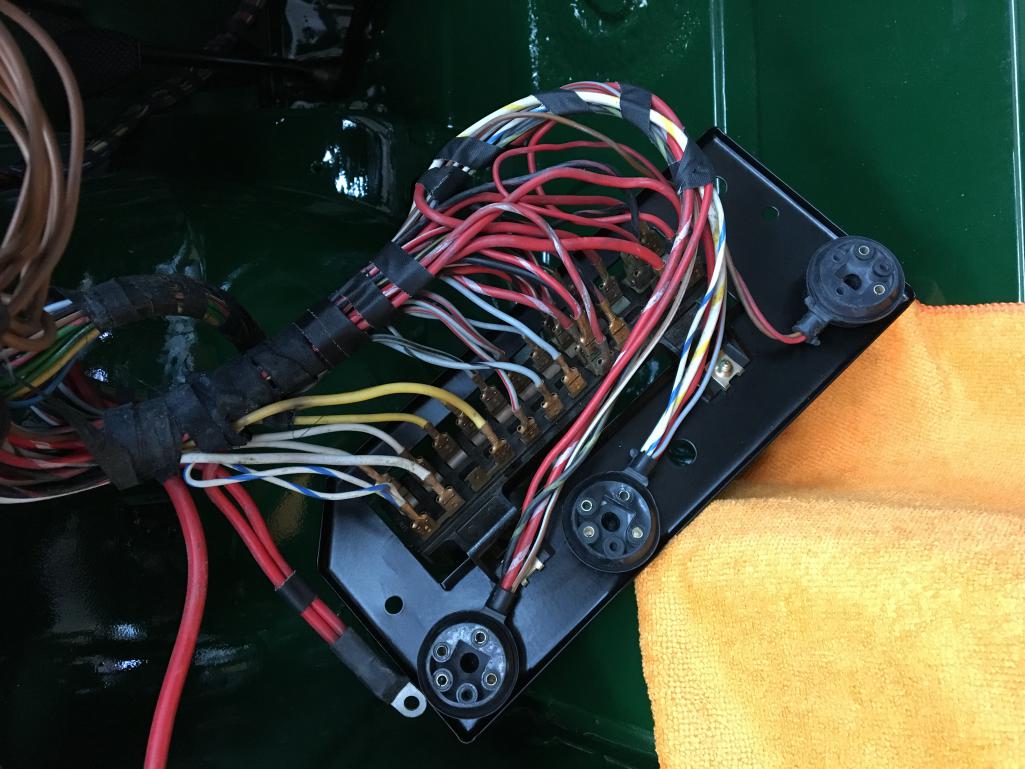 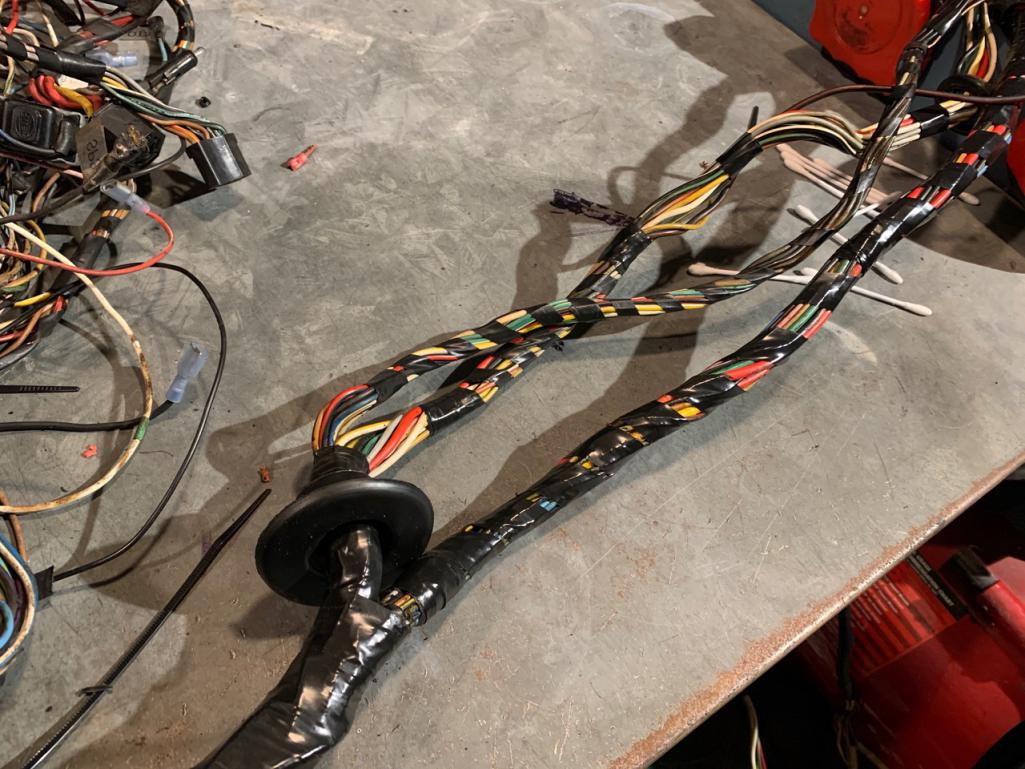 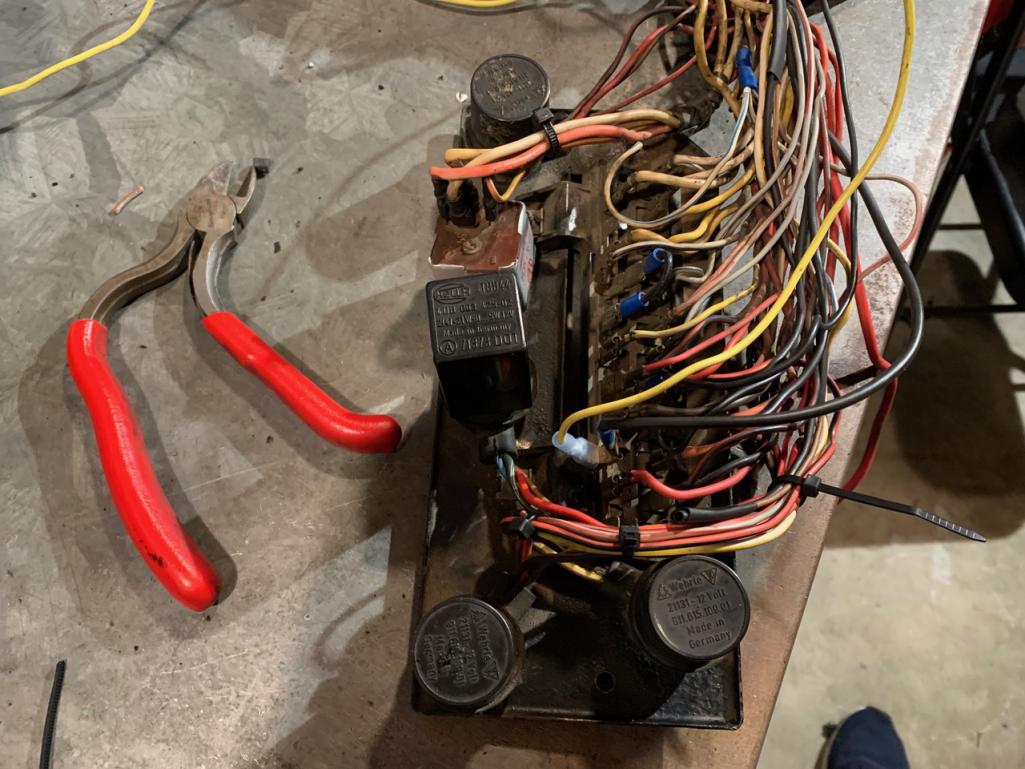 |
|
|
|
| RiqueMar |
Apr 30 2020, 11:46 PM
Post
#810
|
|
Enrique Allen Mar Group: Members Posts: 2,264 Joined: 28-August 08 From: San Diego, CA Member No.: 9,478 Region Association: Southern California |
I wish I would have done this years ago.
For all of you dealing with a wiring 'rats nest' where you don't even know where to start, find a car with an acceptable harness, and dig in. Rip it out, put it in your car, and move on. Learn from my mistake. This one cost me several years, and much frustration.  While intimidating, this only took about 3-4 hours to remove. An additional 3-4 sessions of 2-3 hours were spent cleaning and sorting wires, re-soldering and re-taping. While not completely done (going with cloth tape or safety sheathing in the front/rear trunks), this is finally at the point I can pull pout the existing harness and start running this on my own, and testing devices. 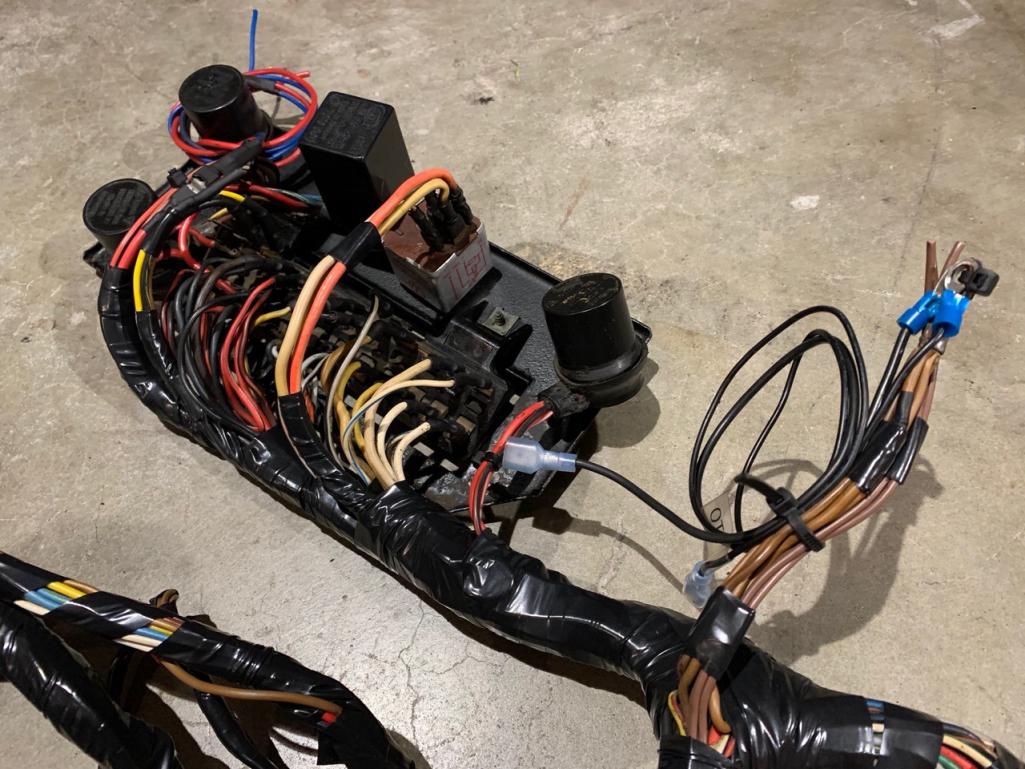 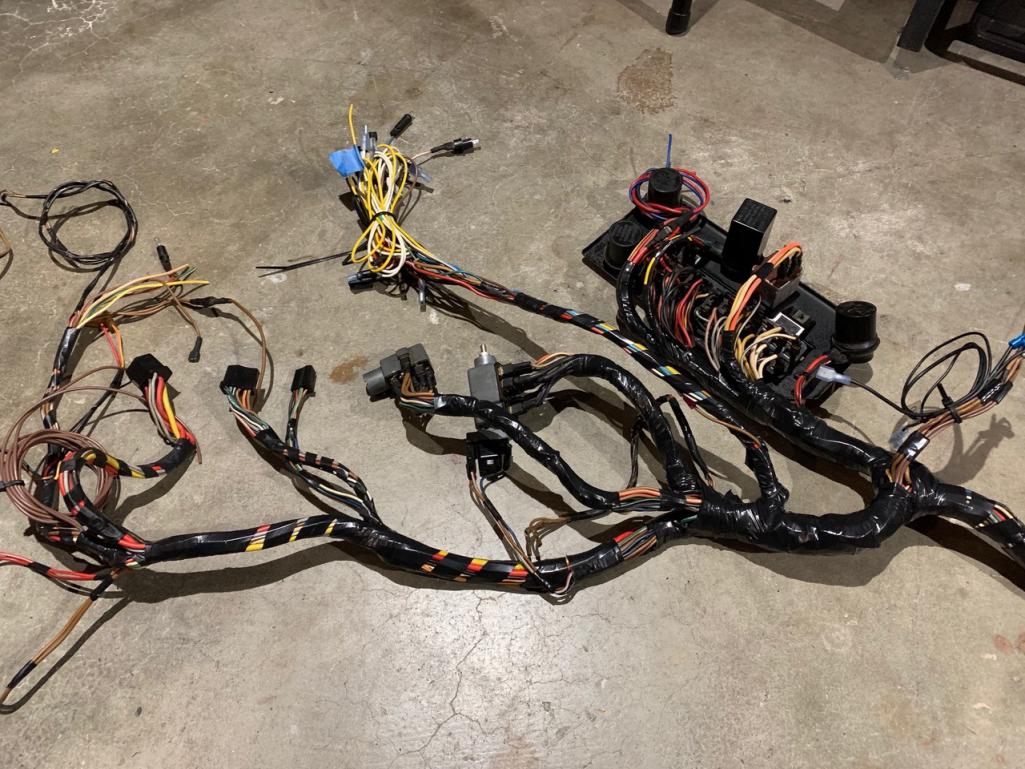 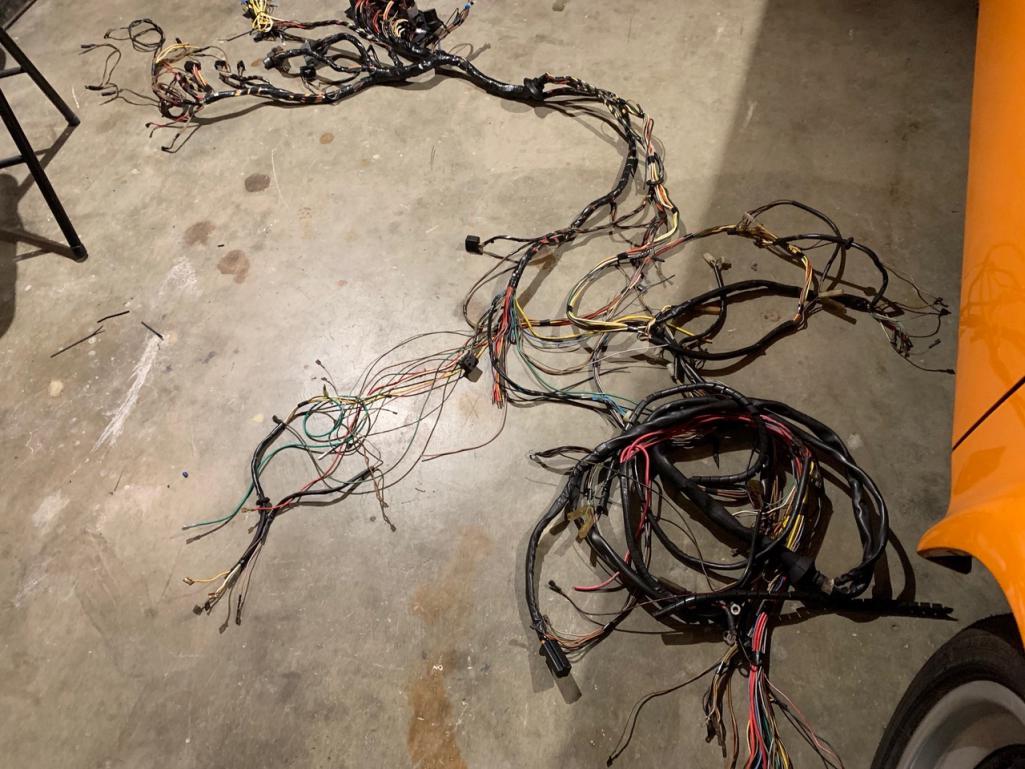 |
|
|
|
| ClayPerrine |
May 1 2020, 06:51 AM
Post
#811
|
|
Life's been good to me so far..... Group: Admin Posts: 16,545 Joined: 11-September 03 From: Hurst, TX. Member No.: 1,143 Region Association: NineFourteenerVille |
I realized that I forgot to answer your question about the DME relay.
The DME relay is the evolution of the Double Relay found on the 914 1.8 L-Jet systems. It is two relays in one box, and they are notorious for failing at the wrong time. The failure is due to vibration breaking solder joints in the relay. If you study the 964 wiring diagram long enough, you will see that the DME relay is internally wired the same way as the relays on the 914-4 relay board. The first relay turns on power to the DME unit, the injectors, and the AFM. It also supplies power to the relay coil for the second relay. The second controls the fuel pump power , and the O2 sensor. On the first relay, pin 30 gets power straight from the battery. Pin 86 is grounded. Pin 85 gets power from the ignition switch. Pin 87 is a red/white striped wire that supplies the power to the harness. It also supplies power to the second relay. The second relay gets power on pin 30 and from the first relay. Pin 85 comes from the battery, and pin 86 goes to the fuel pump and O2 sensor. Pin 87 goes to the DME fuel pump wire. When the DME sees pulses on the crank sensor, it grounds the wire hooked to pin 87, and the fuel pump runs. I am currently collecting the parts to build a brand new DME harness correctly wired for a 914. It will plug into the 914-4 relay board, and use the relays on it for the DME power. They are already wired correctly. I intend to find the guy selling refurbished relay boards and buy one. Once done, the DME wiring will be clean and easy to troubleshoot. I am even going to draw up a wiring diagram for it. :-) And after doing some research, I am going to upgrade my coils to the 993 coil pack setup. Porsche recommends it for the 964. They will be mounted in the same place as they are now. Let me know if you need anything else. Clay |
|
|
|
| RiqueMar |
May 1 2020, 09:11 AM
Post
#812
|
|
Enrique Allen Mar Group: Members Posts: 2,264 Joined: 28-August 08 From: San Diego, CA Member No.: 9,478 Region Association: Southern California |
QUOTE(ClayPerrine @ May 1 2020, 05:51 AM) I realized that I forgot to answer your question about the DME relay. The DME relay is the evolution of the Double Relay found on the 914 1.8 L-Jet systems. It is two relays in one box, and they are notorious for failing at the wrong time. The failure is due to vibration breaking solder joints in the relay. If you study the 964 wiring diagram long enough, you will see that the DME relay is internally wired the same way as the relays on the 914-4 relay board. The first relay turns on power to the DME unit, the injectors, and the AFM. It also supplies power to the relay coil for the second relay. The second controls the fuel pump power , and the O2 sensor. On the first relay, pin 30 gets power straight from the battery. Pin 86 is grounded. Pin 85 gets power from the ignition switch. Pin 87 is a red/white striped wire that supplies the power to the harness. It also supplies power to the second relay. The second relay gets power on pin 30 and from the first relay. Pin 85 comes from the battery, and pin 86 goes to the fuel pump and O2 sensor. Pin 87 goes to the DME fuel pump wire. When the DME sees pulses on the crank sensor, it grounds the wire hooked to pin 87, and the fuel pump runs. I am currently collecting the parts to build a brand new DME harness correctly wired for a 914. It will plug into the 914-4 relay board, and use the relays on it for the DME power. They are already wired correctly. I intend to find the guy selling refurbished relay boards and buy one. Once done, the DME wiring will be clean and easy to troubleshoot. I am even going to draw up a wiring diagram for it. :-) And after doing some research, I am going to upgrade my coils to the 993 coil pack setup. Porsche recommends it for the 964. They will be mounted in the same place as they are now. Let me know if you need anything else. Clay Gracias! Looking forward to it! |
|
|
|
| RiqueMar |
May 3 2020, 02:49 PM
Post
#813
|
|
Enrique Allen Mar Group: Members Posts: 2,264 Joined: 28-August 08 From: San Diego, CA Member No.: 9,478 Region Association: Southern California |
Currently running the 3.6 harness.
Goodbye and GOOD RIDDANCE to the old! 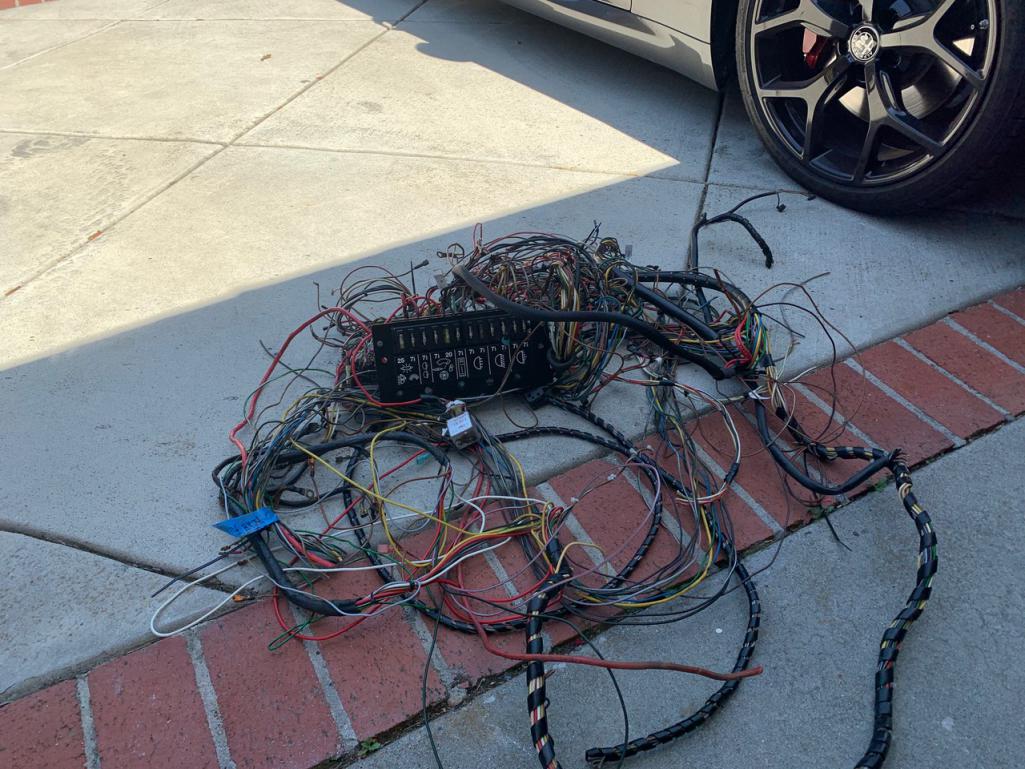 |
|
|
|
| RiqueMar |
May 3 2020, 02:58 PM
Post
#814
|
|
Enrique Allen Mar Group: Members Posts: 2,264 Joined: 28-August 08 From: San Diego, CA Member No.: 9,478 Region Association: Southern California |
Pop quiz....
Any 'Pro-Tips' for getting this grommet to fit? Main grommet located just by the board that leads to the front trunk / gas tackle area. 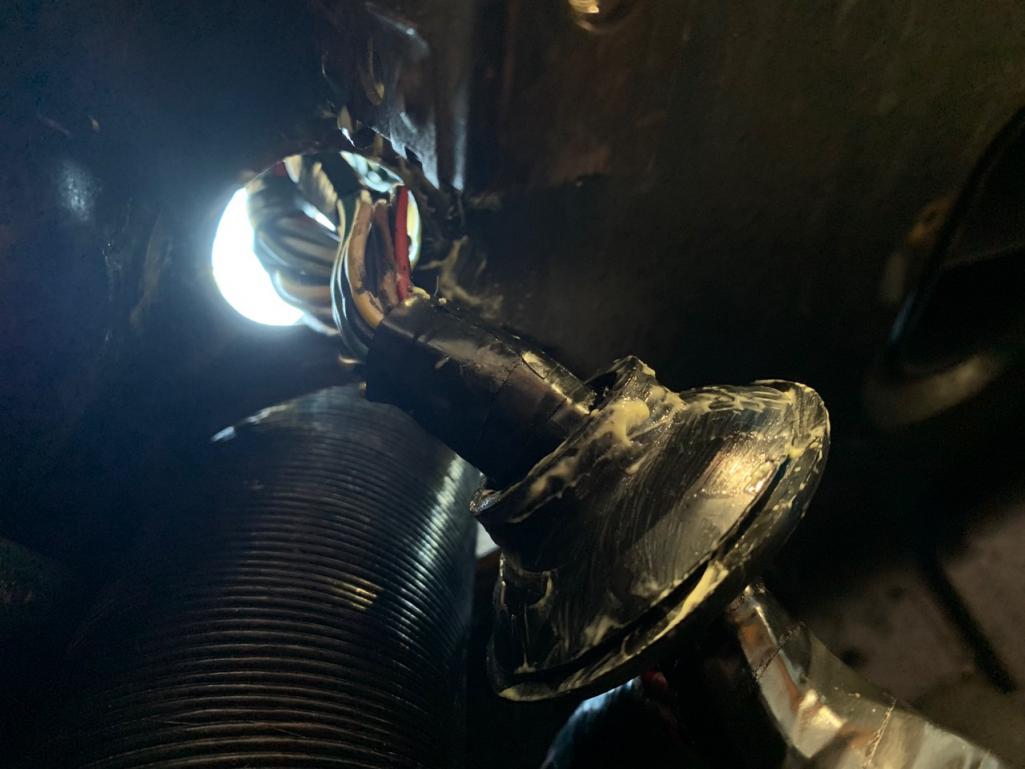 |
|
|
|
| RiqueMar |
May 4 2020, 12:26 PM
Post
#815
|
|
Enrique Allen Mar Group: Members Posts: 2,264 Joined: 28-August 08 From: San Diego, CA Member No.: 9,478 Region Association: Southern California |
Note for anyone following along, and conducting a similar swap:
Not sure of the specifics between years, but there are some differences between a late harness and an early harness. Also, some notes to keep in mind if you're replacing / refurbishing your harness. - Running the harness: The locations of the 'tabs' or clips located behind the pedals are about 2-3 inches higher on later cars than early cars. This makes the length of the harness slightly different, but most affects how the harness is loomed. You have to get creative, and be patient, around the point where the grounds are, next to the fuse board. As the harness flows differently, this area gets very tight (Trunk release, speaker pods, etc). If refurbishing, tape your harness, but do not use so much tape as to make it inflexible. I made this mistake, and it took a bit of 'massaging' to get everything to sit right. 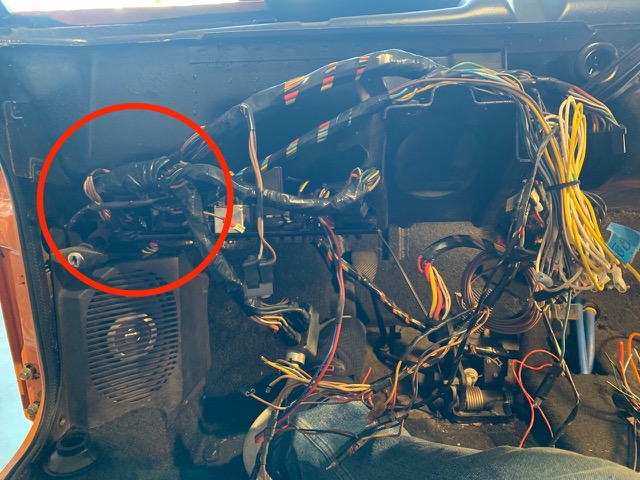  - Grommet sizes: Some small diameter differences between early and late. Picture below, a late grommet (large) vs an early. Not necessarily a big problem, however the hole to pass the grommet through is closer to the fuse-board on the early cars, whereas on the later cars, it's closer to the gas tank. I suppose you could use an early grommet on a later car, but this just won't work with a later grommet on an early car. 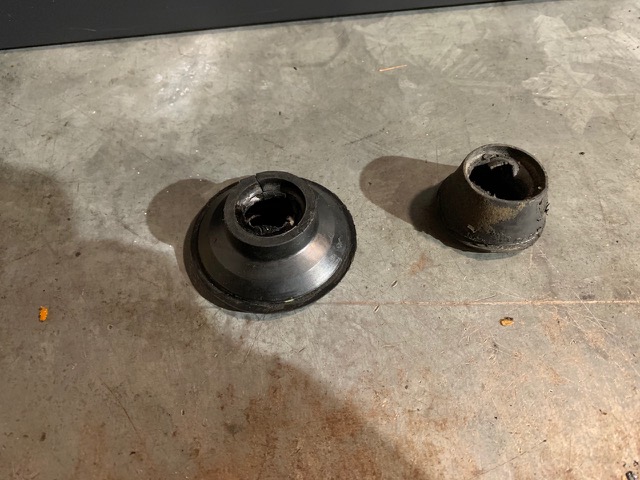 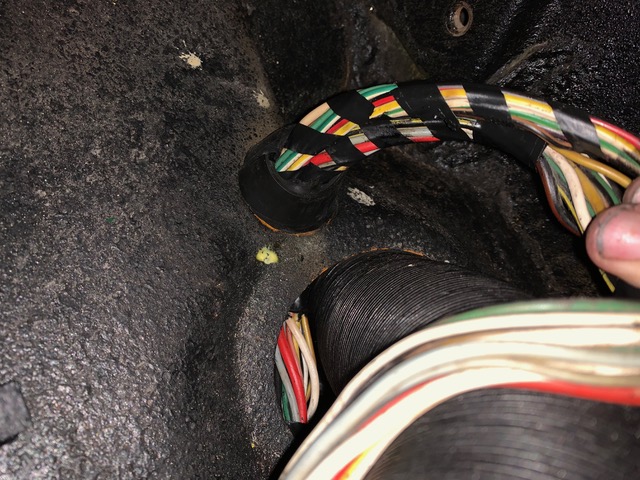 - Running the harness through the firewall: Big item... Tape your leads! Tape your leads! Tape your leads! It is very easy to get 'caught up' and snagged. Even though I taped my harness to maintain all the lengths, this happened to me, and I should have used more. I got frustrated, and starting pulling and pushing harder, and almost ruined a lot of the work I had done when organizing the harness before extracting it from the previous car. Furthermore, using lube makes it even easier for the leads and branches to 'slip out'. This oversight nearly ruined the whole conversion, and ended up costing me 1-2 hours after everything was in getting the lengths right. Additionally, take plenty of pictures, from multiple angles, before starting anything tricky. In this example, I had to do that with the pinned connector that goes in the engine bay. It needed to be removed, disassembled, and reassembled. 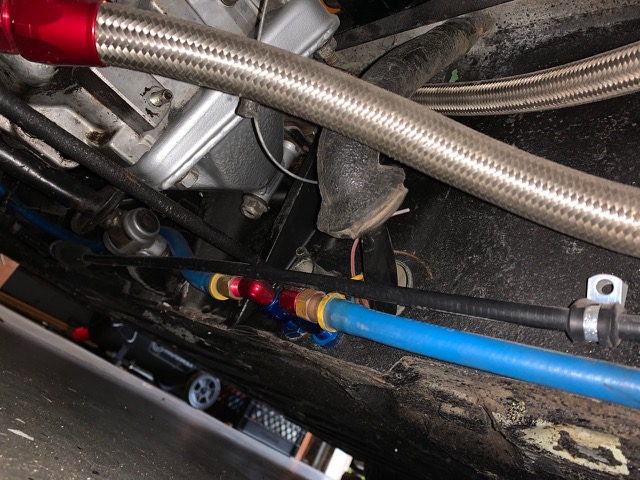 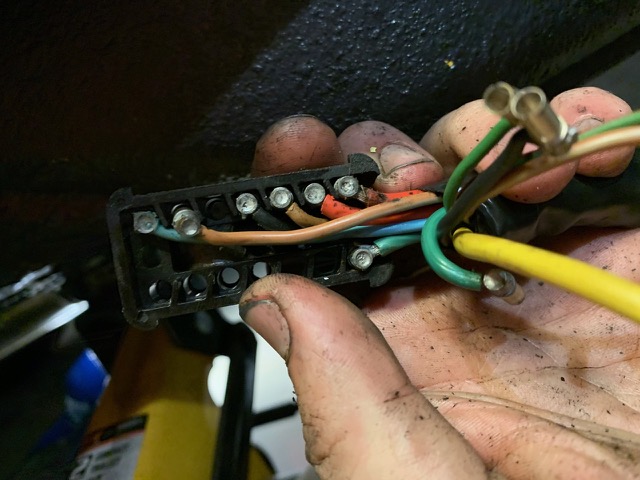 - Repairs: Once in, use this opportunity to fix any questionable or broken wires and connections. 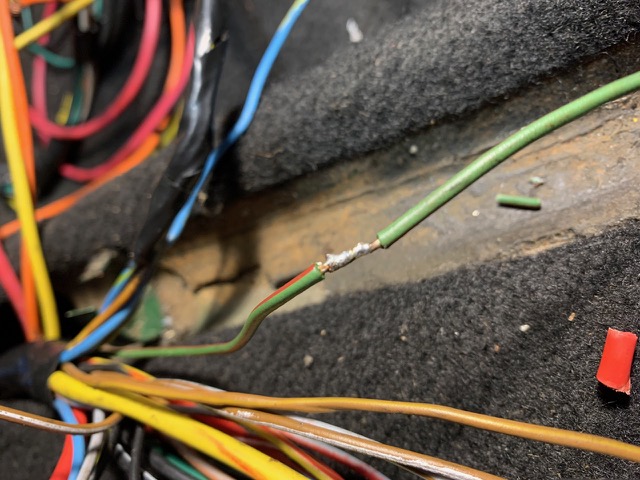 - Patience: You're going to experience some compromising and uncomfortable situations during this little exercise. Give yourself plenty of checkpoints to take a break. In some cases, walk away if you are getting frustrated, and start on another section. All-in-all, installing this harness took me about 9-12 hours, not including prep, cleaning, research and planning. |
|
|
|
| RiqueMar |
May 4 2020, 03:09 PM
Post
#816
|
|
Enrique Allen Mar Group: Members Posts: 2,264 Joined: 28-August 08 From: San Diego, CA Member No.: 9,478 Region Association: Southern California |
Finally, something else to share besides wiring...
 |
|
|
|
| RiqueMar |
May 6 2020, 04:27 PM
Post
#817
|
|
Enrique Allen Mar Group: Members Posts: 2,264 Joined: 28-August 08 From: San Diego, CA Member No.: 9,478 Region Association: Southern California |
Moving along, received a shipment from 914rubber.com! (IMG:style_emoticons/default/smilie_pokal.gif)
Hats off to Mark, as I made the mistake of not differentiating between my 'Cart' and 'Wishlist', so my order was split in-two (d'oh). (IMG:style_emoticons/default/headbang.gif) 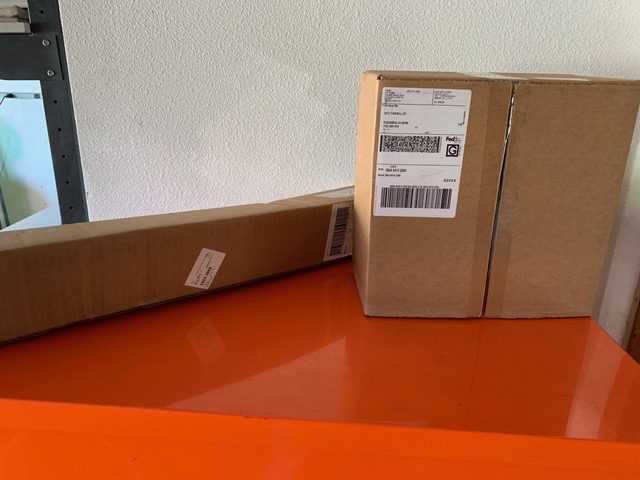 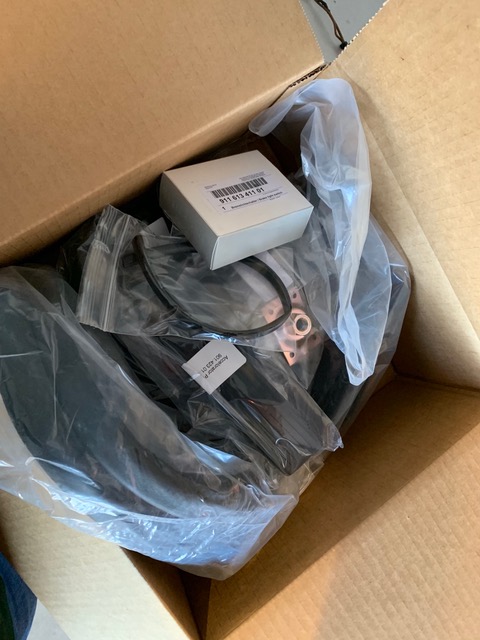 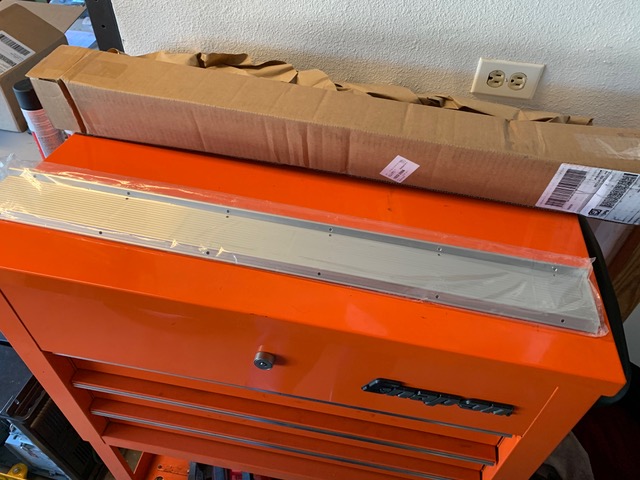 No matter, moving along with wrapping up the wiring, installing the front and rear trunk components, and cleaning up the wiring in the center tunnel. I must confess, I did use 'butt-connectors' (shame on me) for the lower gauge cables. 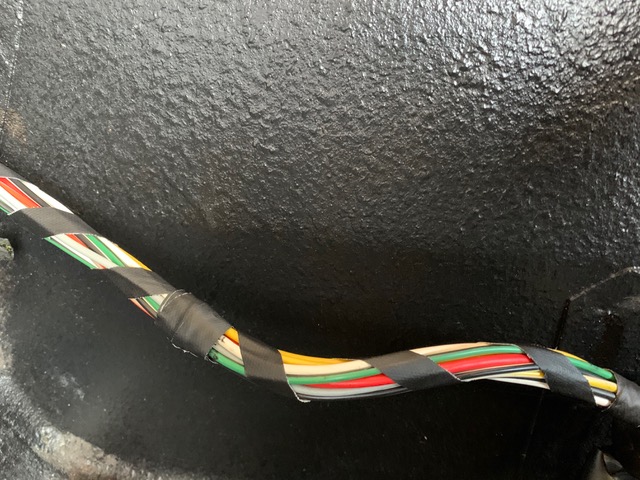  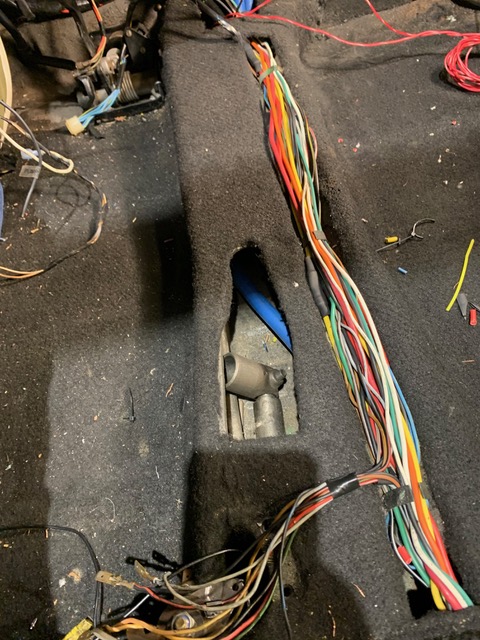 |
|
|
|
| RiqueMar |
May 6 2020, 04:32 PM
Post
#818
|
|
Enrique Allen Mar Group: Members Posts: 2,264 Joined: 28-August 08 From: San Diego, CA Member No.: 9,478 Region Association: Southern California |
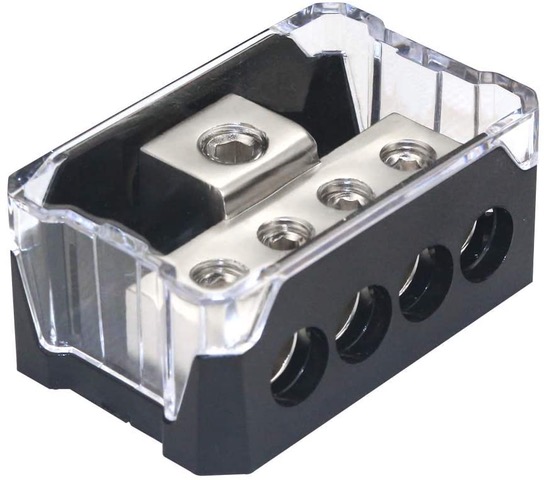
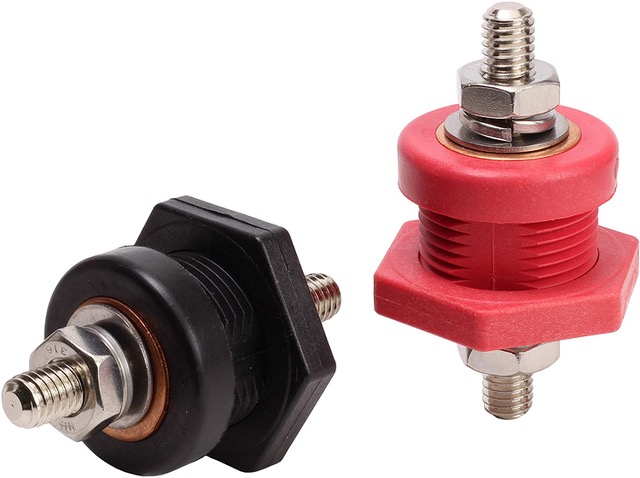
For the main power, I've sourced the below parts from Amazon for hot leads and to have a '12v Pick-up' in the front trunk. Power distribution block will be located near the battery, somewhere in the general 'hell-hole' area (suggestions welcome). The bulkhead connector will go somewhere on the front trunk bulkhead, and power equipment in front with its own dedicated line and set of fuses (Oil Cooler, Fuel-pump, possibly an amp).
  |
|
|
|
| RiqueMar |
May 9 2020, 02:16 PM
Post
#819
|
|
Enrique Allen Mar Group: Members Posts: 2,264 Joined: 28-August 08 From: San Diego, CA Member No.: 9,478 Region Association: Southern California |
New components going in! Yesterday was spent focusing on batter wiring and power distribution. Ended up installing the following with the 4-positive (+) ports, as well as running a dedicated ground cable for the ECU. Everything gets safety sheathing. Also, 2x new battery cables, each are 2-gauge @ 24" and make for a very clean install.
- 2x 10 gauge - Stock 914 wiring - 2x 10 gauge - Stock 914 wiring - 2x 10 gauge - 1 to front trunk (Oil cooler fans, fuel pump, etc.) / 1 reserve (center console). - 1x 12 gauge (Orange) - Dedicated to Bosche 3.6 ECU. - 2x 14 gauge (Brown) - Dedicated ground for the ECU. I've got the general form for the ECU wiring, just need to clean-up the former wiring, but I think you'll get the picture. From here, the cables going from the ECU to the front and dash also get safety sheathing, whereas the stock wiring will just get taped in the factory manner. Overall goal is to separate the old from the new, while still remembering the 70's methods. 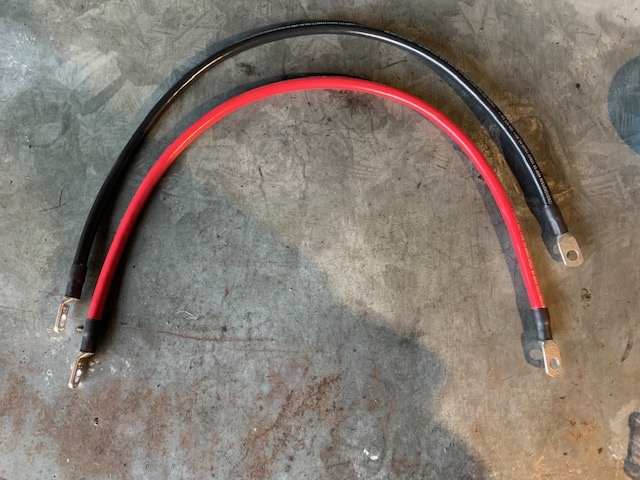 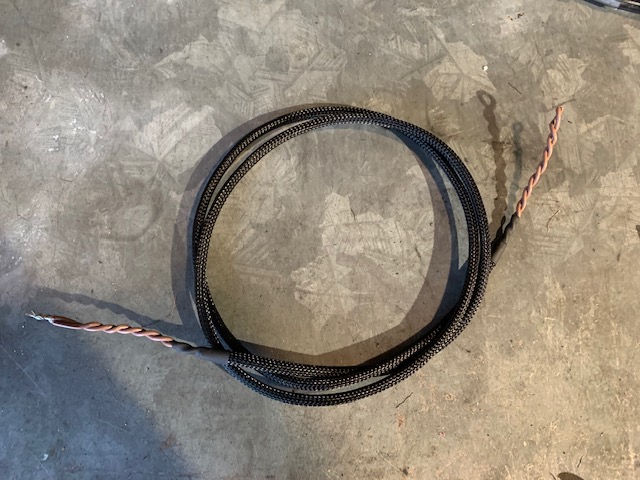 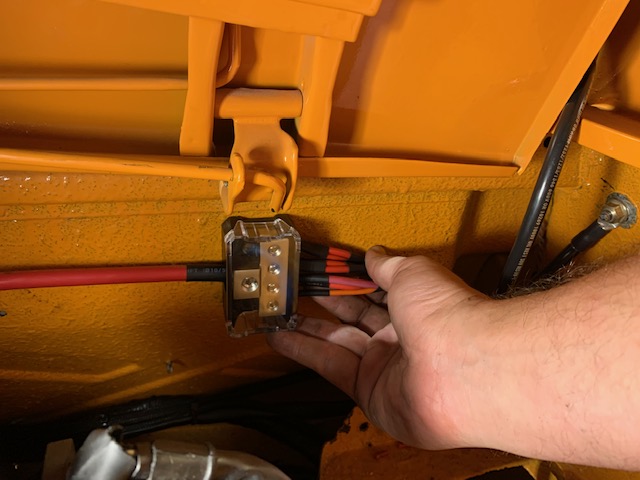 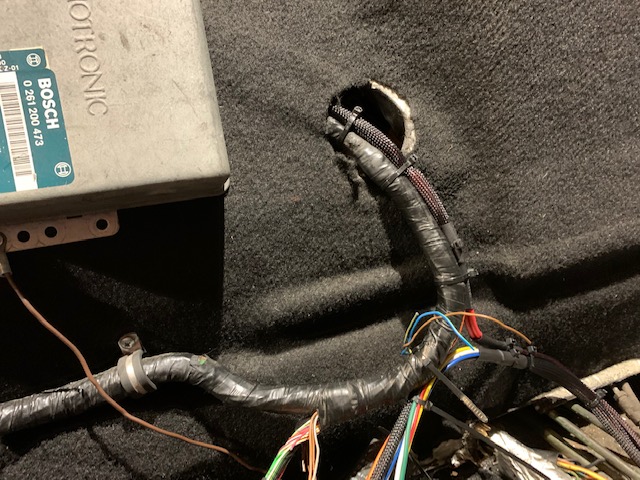 |
|
|
|
| Mueller |
May 9 2020, 04:59 PM
Post
#820
|
|
914 Freak! Group: Members Posts: 17,155 Joined: 4-January 03 From: Antioch, CA Member No.: 87 Region Association: None |
Look'n good. Man that is a lot of work!
|
|
|
|
|
1 User(s) are reading this topic (1 Guests and 0 Anonymous Users)
0 Members:

|
Lo-Fi Version | Time is now: 16th June 2026 - 03:41 AM |
Invision Power Board
v9.1.4 © 2026 IPS, Inc.