|
|
|
Porsche, and the Porsche crest are registered trademarks of Dr. Ing. h.c. F. Porsche AG.
This site is not affiliated with Porsche in any way. Its only purpose is to provide an online forum for car enthusiasts. All other trademarks are property of their respective owners. |
|
|

  |

| RiqueMar |
 May 9 2020, 07:27 PM May 9 2020, 07:27 PM
Post
#821
|
|
Enrique Allen Mar  Group: Members Posts: 2,264 Joined: 28-August 08 From: San Diego, CA Member No.: 9,478 Region Association: Southern California |
QUOTE(Mueller @ May 9 2020, 03:59 PM)  Look'n good. Man that is a lot of work! You said it! It's a bit difficult right now because as I'm installing the harness, I'm deleting connectors and runs that are not necessary or applicable to the conversion. Additionally, while I'm not an expert by any means, there was a lot of 'stitched together' wires that makes it a bit harder to decode. Though it gets tedious, I learned my lesson last time - get it operational, then route it correctly. To add to that, bringing over the original harness that was mated to the 3.6 was the best decision I made in a decade! Everything is progressing forward, and I can start unboxing all the equipment I had saved up (Switches, Lights, etc) 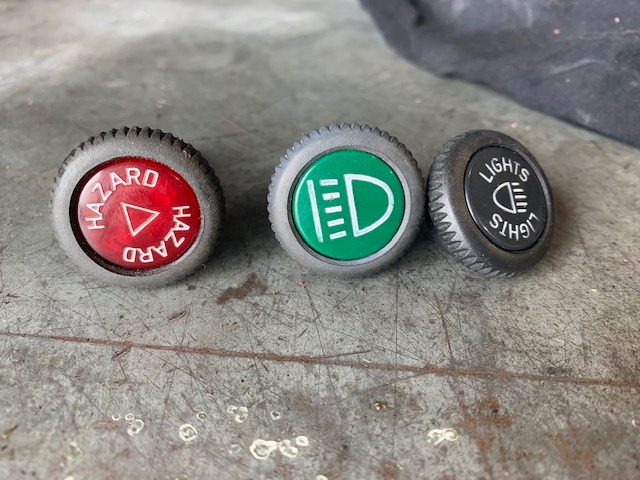 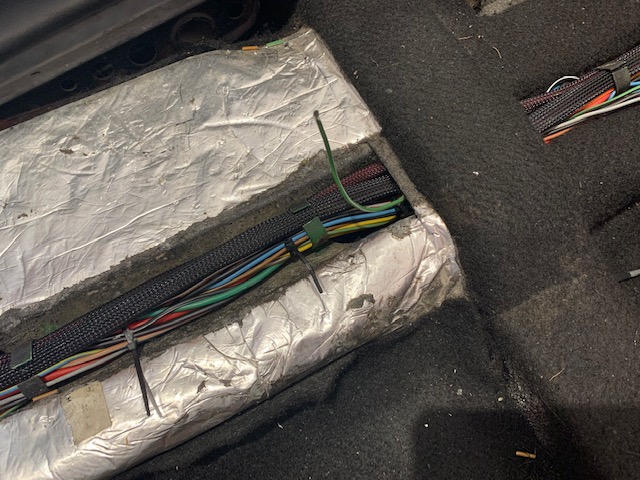 As for the rest of the days progress, I'm still cleaning up the harness and new connections with safety sheathing, and beginning to decode and clean up the wiring at the the gauges. To try to expedite, I prepped and painted the dash so that it can dry and cure as I progress on other things. Undercoating below, and a VHT product that I found for Roll bar and Chassis paint. Hopefully, curing over night will be enough, and I can start laying down dash vinyl tomorrow, and the Dash top when it gets here next week. Pro-tip: SO MUCH easier to work on the dash and vinyl while OUT of the car. 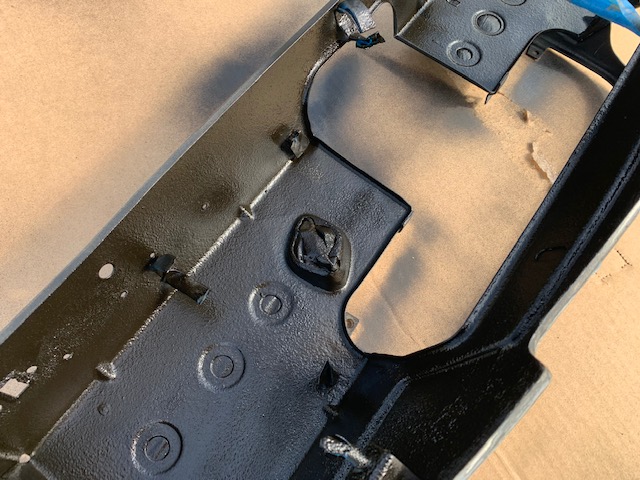 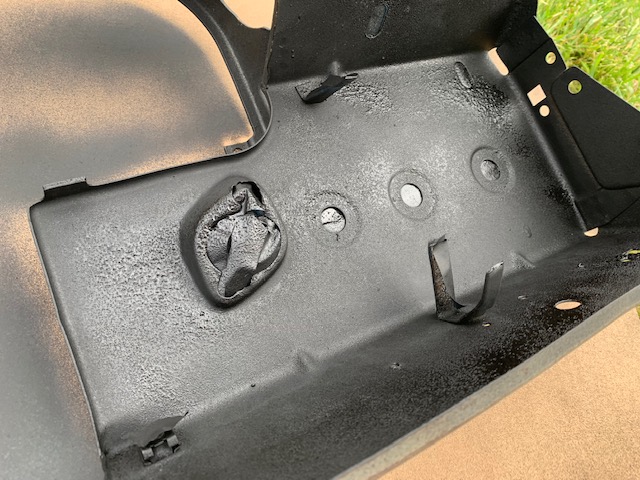 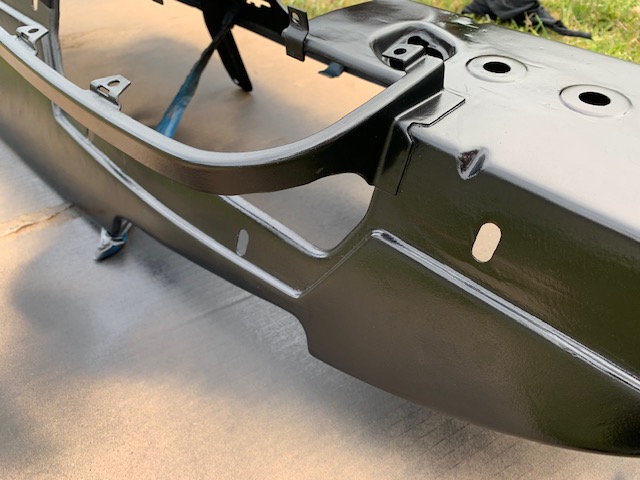 |
   |

 
|
| RiqueMar |
May 9 2020, 07:33 PM
Post
#822
|
|
Enrique Allen Mar Group: Members Posts: 2,264 Joined: 28-August 08 From: San Diego, CA Member No.: 9,478 Region Association: Southern California |
Question for the pros:
Ordered a lot of stuff from 914rubber.com (thanks to everyone there, btw). I've laid out the front trunk main seal, but I'm not sure which side is up-or-down. Also, for those that have installed this, do I need any adhesive? My memory tells me I don't however I bought some from pep-boys, and I'm thinking to put a small bead in the corners. Thanks in advance! 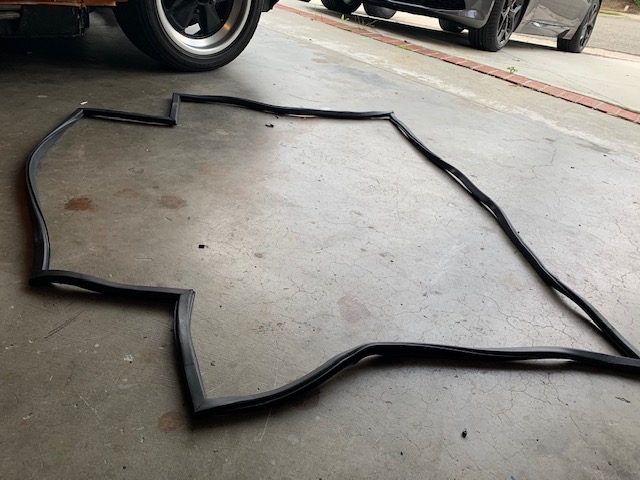 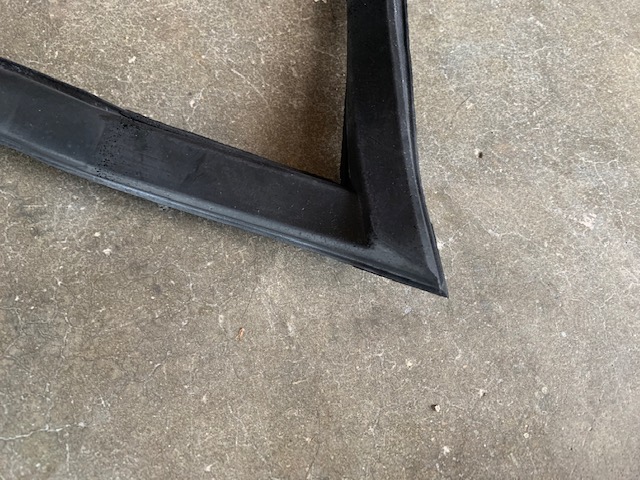 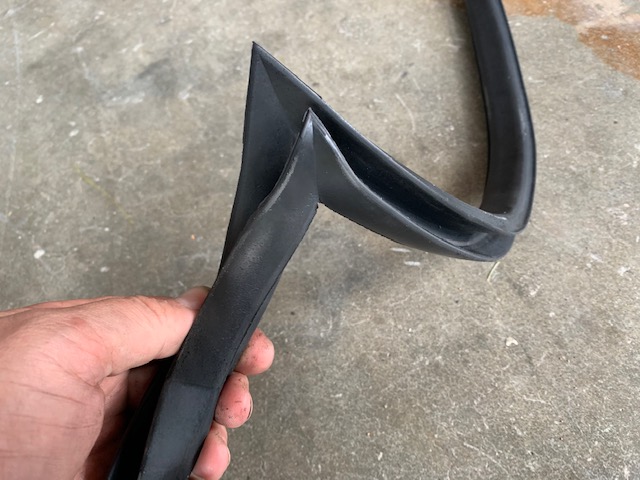 |
|
|
|
| RiqueMar |
May 12 2020, 10:52 AM
Post
#823
|
|
Enrique Allen Mar Group: Members Posts: 2,264 Joined: 28-August 08 From: San Diego, CA Member No.: 9,478 Region Association: Southern California |
QUOTE(RiqueMar @ May 9 2020, 06:33 PM) Question for the pros: Ordered a lot of stuff from 914rubber.com (thanks to everyone there, btw). I've laid out the front trunk main seal, but I'm not sure which side is up-or-down. Also, for those that have installed this, do I need any adhesive? My memory tells me I don't however I bought some from pep-boys, and I'm thinking to put a small bead in the corners. Thanks in advance! As to the last post; For reference, the 'top' of the seal is the last photo. Hope this helps with anyone reading this! |
|
|
|
| mepstein |
May 12 2020, 10:57 AM
Post
#824
|
|
914-6 GT in waiting Group: Members Posts: 20,774 Joined: 19-September 09 From: Landenberg, PA/Wilmington, DE Member No.: 10,825 Region Association: MidAtlantic Region |
E - Is your father going to complete his car?
|
|
|
|
| RiqueMar |
May 12 2020, 11:28 AM
Post
#825
|
|
Enrique Allen Mar Group: Members Posts: 2,264 Joined: 28-August 08 From: San Diego, CA Member No.: 9,478 Region Association: Southern California |
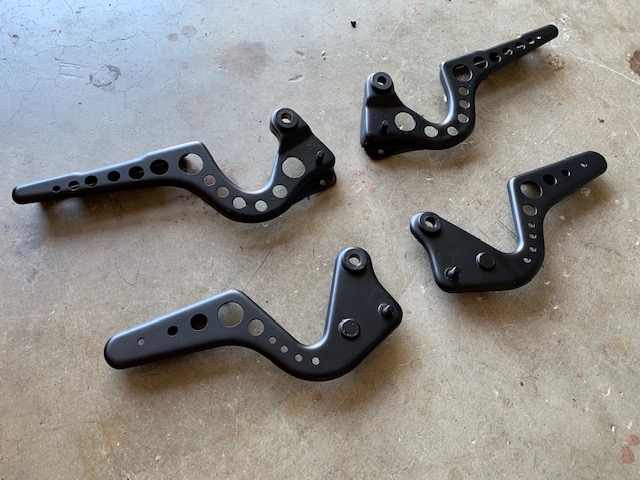
QUOTE(mepstein @ May 12 2020, 09:57 AM) E - Is your father going to complete his car? @mepstein - No plans not to! Most everything I'm doing on mine, I'm 'practicing' for his. Finishing up his 6 should be much easier; The stock wiring is there, he's going with the carb'd 2.9 seen earlier in this thread, and we have most all the parts. ----------- Spent the majority of the weekend shifting focus from the wiring, which is coming together, to the dash so that I can start verifying function, turning items 'on', and work in a bit of a cleaner manner. Top-pad for the dash expected today, thanks again to 914rubber.com, so I wanted to get the front-face completed. Researching the different methods on the site, I went with 3M Adhesive spray (level 90, in the green can). Taped off each of the areas to not get a lot of overspray, and went with a perforated micro-dot pattern. I wanted to use a single piece, as I don't like the stock look of the dash broken up in different places by the radio plate and such. Though it was intimidating, so long as you do the proper prep work (plan it out, have all tools ready, wait for the adhesive to properly 'set up') this is something that is pretty easy. Mark off your general size, spray both sides, place the material, massage it into the crevices, and trim. I'm really liking the way the micro-dot / perforated material looks on the dash face. So much so, I grabbed some spare parts to see how it will look with the components mounted. Eager to get the kit from 914rubber, and get this dash in the car today / tomorrow! (IMG:style_emoticons/default/bye1.gif) 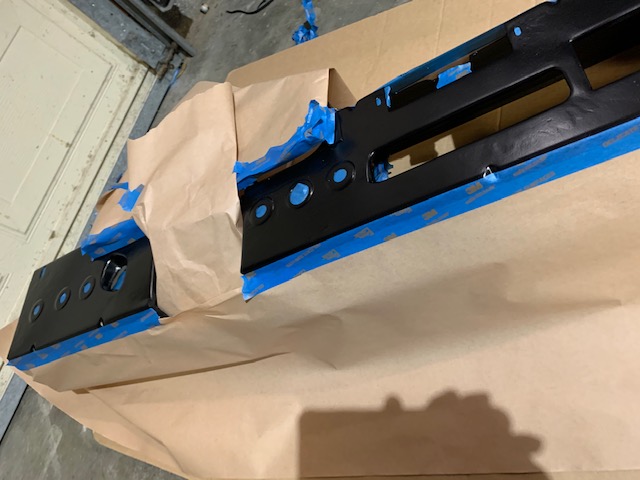 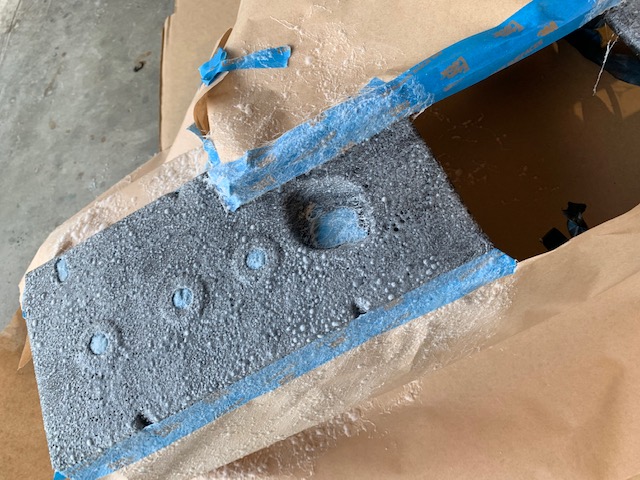 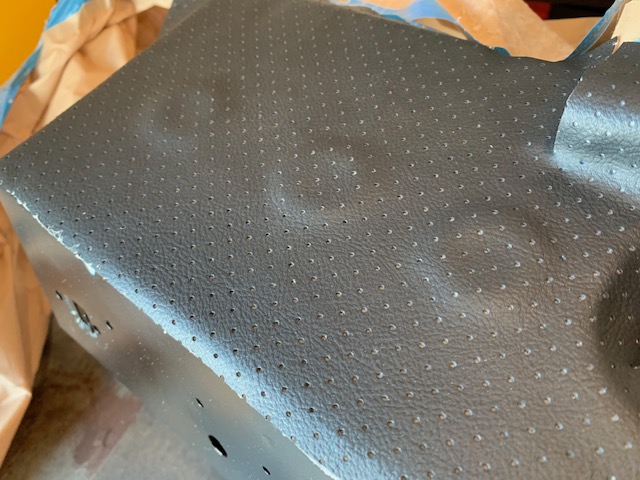 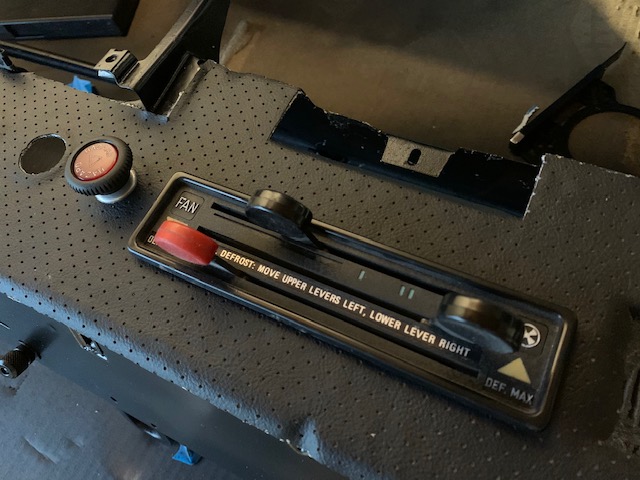 |
|
|
|
| sixnotfour |
May 12 2020, 11:31 AM
Post
#826
|
|
914 Wizard Group: Members Posts: 11,272 Joined: 12-September 04 Member No.: 2,744 Region Association: NineFourteenerVille |
|
|
|
|
| RiqueMar |
May 12 2020, 11:42 AM
Post
#827
|
|
Enrique Allen Mar Group: Members Posts: 2,264 Joined: 28-August 08 From: San Diego, CA Member No.: 9,478 Region Association: Southern California |
Prepping the fuel tank area before placing the tank, adding hose clamps and hardware to the blower motor and vents. I'm taking a 'while I'm in the area' approach, and cleaning the dust and debris that has gathered over the last 10 years of starting / stopping work. I ended up removing, and reciting the blower motor inside to be true satin black, as well as touched up the black rubberized undercoating in the front trunk.
Though this is a 'home build', I'm really trying to make everything look as immaculate and cleanly-done as possible. NOTE: While I'm here, does anyone have a diagram of how to correctly connect the wires from the heater control to the vents?  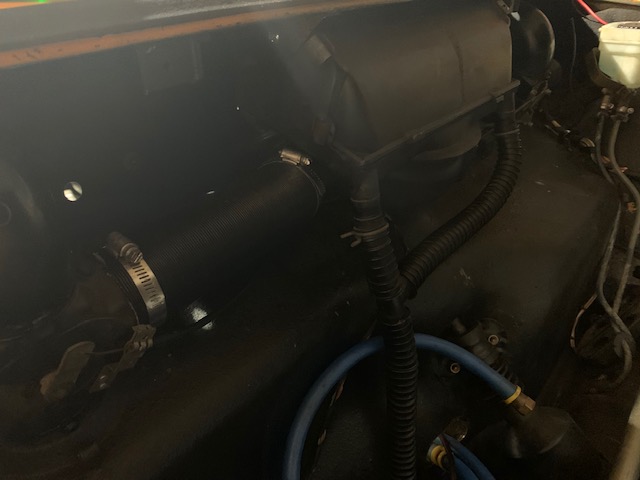 |
|
|
|
| eric9144 |
May 12 2020, 12:10 PM
Post
#828
|
|
Advanced Member Group: Members Posts: 2,796 Joined: 30-March 11 From: San Diego, CA Member No.: 12,876 Region Association: Southern California |
Awesome progress @RiqueMar (IMG:style_emoticons/default/beerchug.gif) (IMG:style_emoticons/default/first.gif)
|
|
|
|
| RiqueMar |
May 13 2020, 06:28 PM
Post
#829
|
|
Enrique Allen Mar Group: Members Posts: 2,264 Joined: 28-August 08 From: San Diego, CA Member No.: 9,478 Region Association: Southern California |
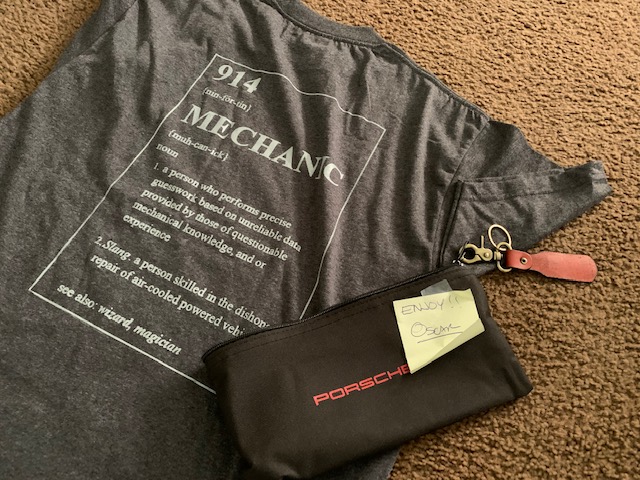
Received these today; Shout out to @ValcoOscar , cannot wait to get them on. This will be one of those little details that people and myself notice. Also, make sure to hop on over and check out his search and keychains, very cool!
  |
|
|
|
| RiqueMar |
May 14 2020, 06:10 PM
Post
#830
|
|
Enrique Allen Mar Group: Members Posts: 2,264 Joined: 28-August 08 From: San Diego, CA Member No.: 9,478 Region Association: Southern California |
Dash top-padding.... Easier than I thought. Note to all those following along, that will do a similar project, and have ordered from 914rubber.com. The black (darker) side material goes down and mates to the dash, whereas the grey (lighter) side of the material goes up, and will mate with the vinyl. The 'pad' portion goes just up to the edge of the dash and vents, whereas the finished material wraps around and over.
Really liking how this turned out, and hats off to @Mikey914 and the team at 914rubber for a very nice product. I did make one small 'knick' just behind the gauge cluster (got a bit too cavalier with 'trimming), hopefully the dash-pad will cover it! Helpful tip: I used a bit of painters tape around the edges to make sure the curved portion 'holds down' and doesn't release. Other than than, be sure to not push down too hard when setting down the material, this may create 'dimples' all over the dash top, which are super noticeable once the car is outside. 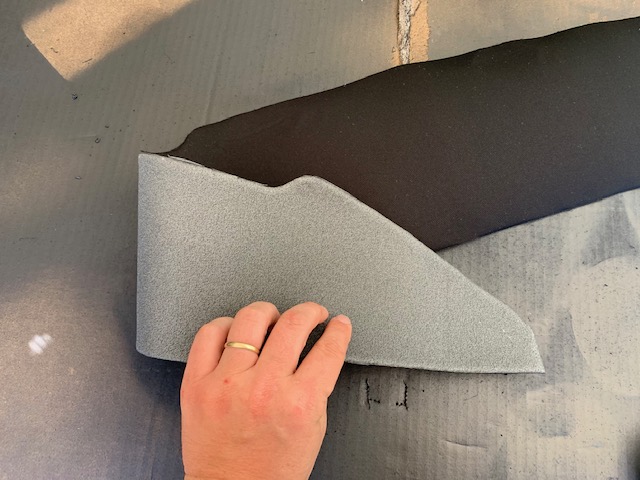 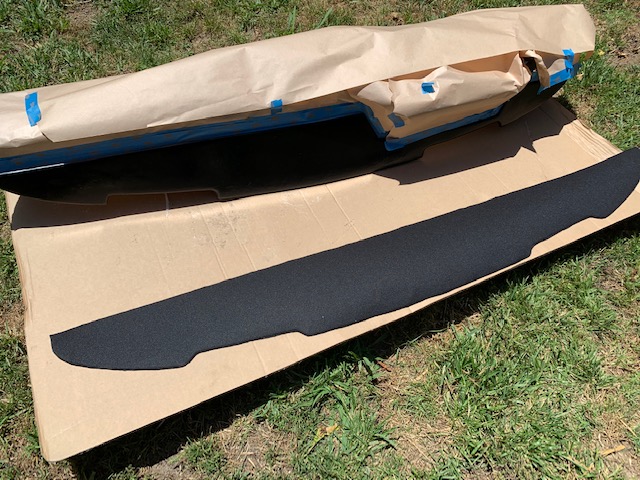 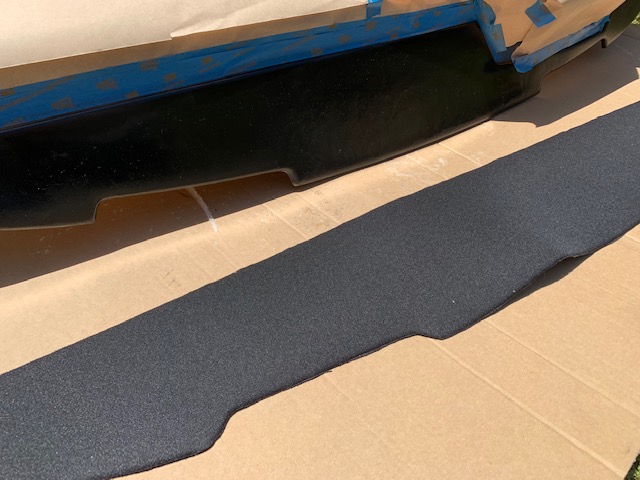 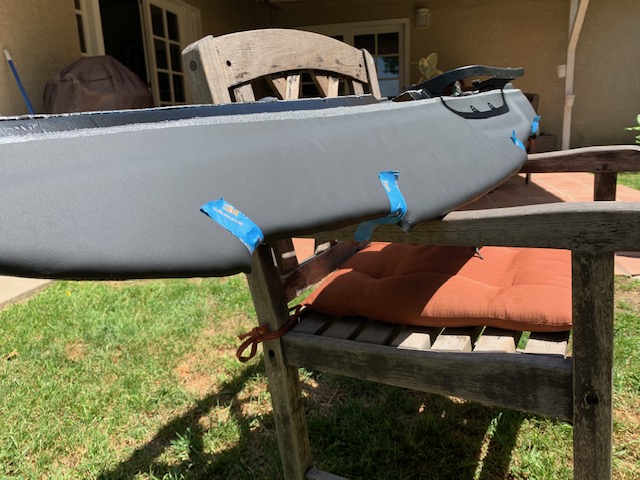 |
|
|
|
| RiqueMar |
May 14 2020, 06:19 PM
Post
#831
|
|
Enrique Allen Mar Group: Members Posts: 2,264 Joined: 28-August 08 From: San Diego, CA Member No.: 9,478 Region Association: Southern California |
Cruising through old-posts on this site to see if there were any helpful tips before putting in the dash, I did run into one that was great. Prior to setting it in, I cleaned out the defroster vents along the front windscreen (very easy is the windshield out), and sprayed with a bit of interior satin black paint to give it a fresh look (I used SEMs).
From what I understand, this is something that the factory did, and I'm glad I ran across this off-hand tip. Oh, ALSO, if you can, replace the bottom 'liner' that goes around the vents, that sits underneath the dash... you're there anyway! 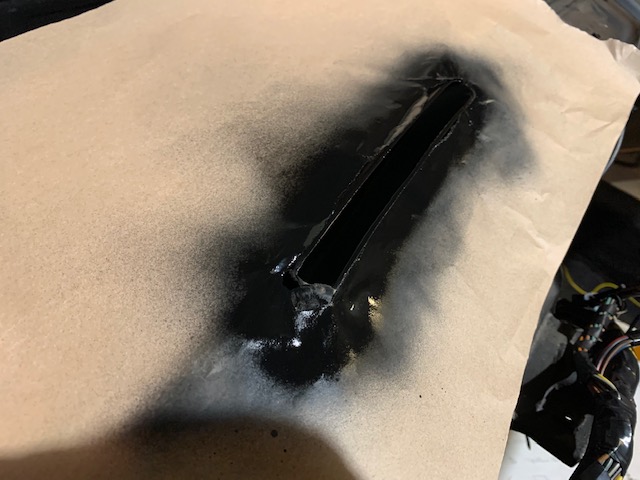 |
|
|
|
| Mikey914 |
May 14 2020, 08:19 PM
Post
#832
|
|
The rubber man Group: Members Posts: 12,782 Joined: 27-December 04 From: Hillsboro, OR Member No.: 3,348 Region Association: None |
Look'n sharp can't wait to see the completed project. You are taking your time and not rushing. That is the real key with many of these projects. It's a big project, but by taking your time and working out the details as you move forward it will show when complete. (IMG:style_emoticons/default/beerchug.gif)
|
|
|
|
| RiqueMar |
May 15 2020, 01:33 AM
Post
#833
|
|
Enrique Allen Mar Group: Members Posts: 2,264 Joined: 28-August 08 From: San Diego, CA Member No.: 9,478 Region Association: Southern California |
QUOTE(Mikey914 @ May 14 2020, 07:19 PM) Look'n sharp can't wait to see the completed project. You are taking your time and not rushing. That is the real key with many of these projects. It's a big project, but by taking your time and working out the details as you move forward it will show when complete. (IMG:style_emoticons/default/beerchug.gif) All with the help of great vendors and a great community! (IMG:style_emoticons/default/welcome.png) |
|
|
|
| RiqueMar |
May 15 2020, 01:43 AM
Post
#834
|
|
Enrique Allen Mar Group: Members Posts: 2,264 Joined: 28-August 08 From: San Diego, CA Member No.: 9,478 Region Association: Southern California |
THE. DASH. IS. IN! (IMG:style_emoticons/default/smilie_pokal.gif)
... Just as putting on the top-pad was easier than I expected, putting in the dash was HARDER than I expected. I definitely wish I had a second set of hands, because it is a lot of small adjustments, all while being carful not to push too hard on. the new vinyl and padding. My mistake to avoid; remove everything from the car interior, so it is easy to stand inside the cab and set in the dash. you do not want to step on any stray wires, equipment, parts, etc. Once in, its just a matter of securing the bolts (located in the fuel area). This is a bit difficult with a standard 10mm wrench/socket set, and I image it would be a lot easier with all the equipment (Blower, vents, hoses, etc.) out of the way. Frankly, I don't know how I could have done this patiently with the windshield installed. Once the dash is in, its a sight-to-see! I plan on running a 914/6 style steering column and cutting the column wires to match, more on that later, and two more pull-type switches to the right of the the column for seat heaters, rear defrost, manual oil cooler ON, or USB charging port. 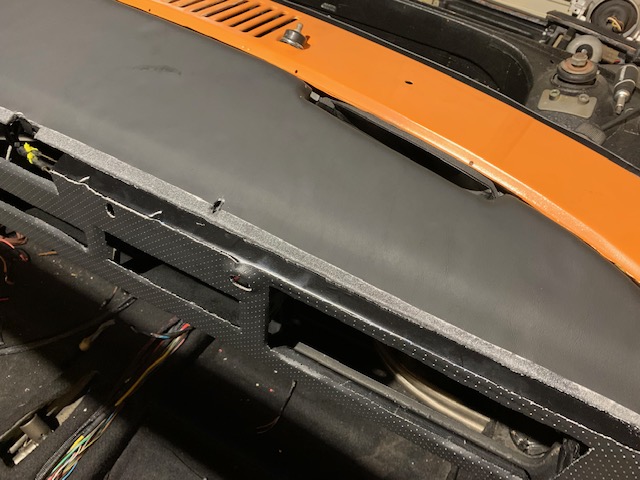 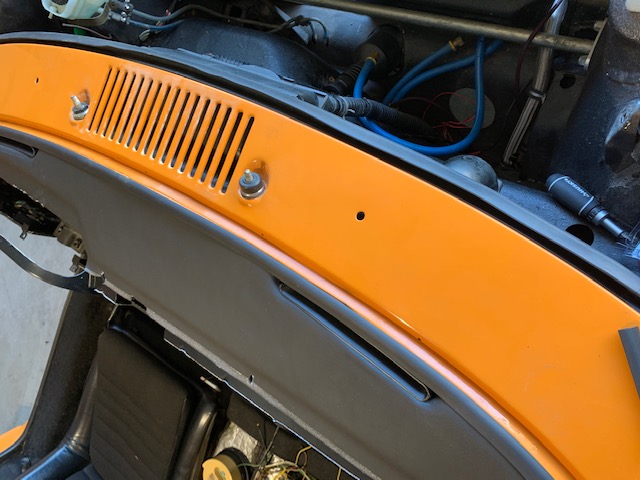 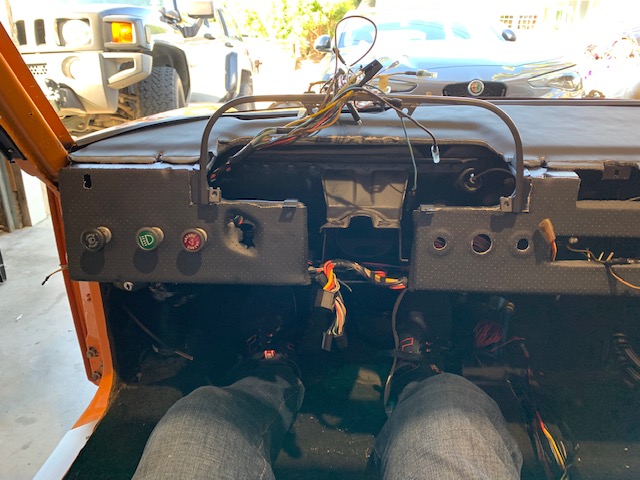 |
|
|
|
| Cairo94507 |
May 15 2020, 08:27 AM
Post
#835
|
|
Michael Group: Members Posts: 10,671 Joined: 1-November 08 From: Auburn, CA Member No.: 9,712 Region Association: Northern California |
I am so glad to see this project back on track. (IMG:style_emoticons/default/beerchug.gif)
|
|
|
|
| RiqueMar |
May 16 2020, 07:22 PM
Post
#836
|
|
Enrique Allen Mar Group: Members Posts: 2,264 Joined: 28-August 08 From: San Diego, CA Member No.: 9,478 Region Association: Southern California |
QUOTE(Cairo94507 @ May 15 2020, 07:27 AM) Just trying to hold a candle to your build @Cairo94507 ! Quick question for anyone active right now... I’m running the Camp 914 style ‘Pilot Lights’ and have long lost the paperwork. Is it recommended to connect then just as the stock fog-lights? I see there is an inline fuse on one of the legs. |
|
|
|
| racerx9146 |
May 16 2020, 11:02 PM
Post
#837
|
|
good design never goes out of date.. Group: Members Posts: 174 Joined: 1-January 04 From: Sacramento, CA Member No.: 1,483 Region Association: Northern California |
Nice job on the harness. Lots of work tracing out everything. Looks like you have it all sorted but just in car here is a diagram I made when I did mine.
Daron 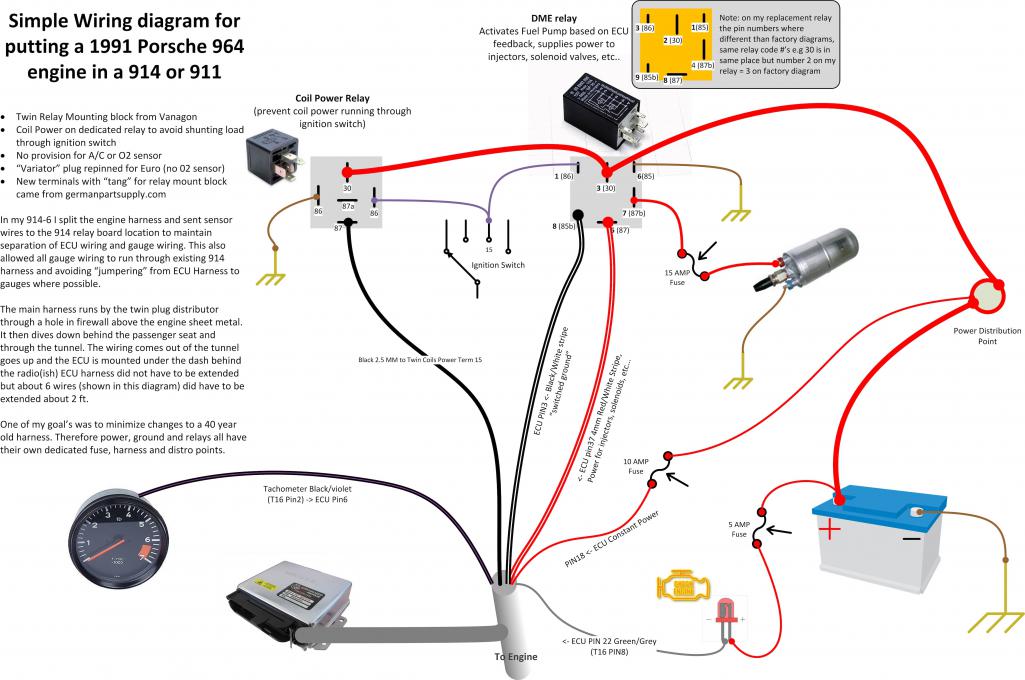 |
|
|
|
| RiqueMar |
May 18 2020, 01:23 PM
Post
#838
|
|
Enrique Allen Mar Group: Members Posts: 2,264 Joined: 28-August 08 From: San Diego, CA Member No.: 9,478 Region Association: Southern California |
|
|
|
|
| SirAndy |
May 18 2020, 01:47 PM
Post
#839
|
|
Resident German Group: Admin Posts: 42,483 Joined: 21-January 03 From: Oakland, Kalifornia Member No.: 179 Region Association: Northern California |
QUOTE(RiqueMar @ Aug 25 2019, 07:34 PM) really like what you did with the coils below the battery I mounted the coils to the fan shroud right next (above) the distributors. (IMG:style_emoticons/default/bye1.gif) (IMG:http://www.914world.com/bbs2/uploads/post-179-1202450158.jpg) |
|
|
|
| mepstein |
May 18 2020, 01:58 PM
Post
#840
|
|
914-6 GT in waiting Group: Members Posts: 20,774 Joined: 19-September 09 From: Landenberg, PA/Wilmington, DE Member No.: 10,825 Region Association: MidAtlantic Region |
QUOTE(racerx9146 @ May 17 2020, 01:02 AM) Nice job on the harness. Lots of work tracing out everything. Looks like you have it all sorted but just in car here is a diagram I made when I did mine. Daron I wish someone had made one for a 3.2. I can actually understand it. Mostly. (IMG:style_emoticons/default/beerchug.gif) @racerx914 |
|
|
|
|
2 User(s) are reading this topic (2 Guests and 0 Anonymous Users)
0 Members:

|
Lo-Fi Version | Time is now: 16th June 2026 - 04:53 AM |
Invision Power Board
v9.1.4 © 2026 IPS, Inc.