|
|
|
Porsche, and the Porsche crest are registered trademarks of Dr. Ing. h.c. F. Porsche AG.
This site is not affiliated with Porsche in any way. Its only purpose is to provide an online forum for car enthusiasts. All other trademarks are property of their respective owners. |
|
|

  |

| dlee6204 |
 Jan 14 2012, 08:38 AM Jan 14 2012, 08:38 AM
Post
#301
|
|
Howdy  Group: Members Posts: 2,162 Joined: 30-April 06 From: Burnsville, NC Member No.: 5,956 |
QUOTE(Cairo94507 @ Jan 14 2012, 09:32 AM)  I like the defroster glass and have one to go in my six. If you have it, install it. (IMG:style_emoticons/default/agree.gif) |
   |

 
|
| computers4kids |
Jan 14 2012, 11:01 AM
Post
#302
|
|
Love these little cars! Group: Members Posts: 2,443 Joined: 11-June 05 From: Port Townsend, WA Member No.: 4,253 Region Association: None |
Jamie,
Are you thinking you might "officially" put the LE up for sale? You've worked so hard on it. Mark |
|
|
|
| 914werke |
Jan 14 2012, 01:35 PM
Post
#303
|
|
"I got blisters on me fingers" Group: Members Posts: 11,606 Joined: 22-March 03 From: USofA Member No.: 453 Region Association: Pacific Northwest |
QUOTE(JRust @ Jan 13 2012, 08:54 PM) *EDIT* Anyone think it would be worth the trouble to add a rear window defrost I have in another car? It was not a stock option but some were added from the factory. Dont you mean it just wasnt as delivered on your car? It was an option, and my car does have one. (IMG:style_emoticons/default/confused24.gif) Installing the glass is easy, the tougher part is obtaining the correct harness, switch then threading it through the tunnel & eng. bay wiring loom "snorkle" to power at the relay board. (IMG:style_emoticons/default/idea.gif) |
|
|
|
| JRust |
Jan 14 2012, 05:28 PM
Post
#304
|
|
914 Guru Group: Members Posts: 6,317 Joined: 10-January 03 From: Albany Oregon Member No.: 129 Region Association: Pacific Northwest |
QUOTE(rdauenhauer @ Jan 14 2012, 11:35 AM) Dont you mean it just wasnt as delivered on your car? It was an option, and my car does have one. (IMG:style_emoticons/default/confused24.gif) Installing the glass is easy, the tougher part is obtaining the correct harness, switch then threading it through the tunnel & eng. bay wiring loom "snorkle" to power at the relay board. (IMG:style_emoticons/default/idea.gif) Well the car I pull it from should have the correct harness right? Is it part of the main wiring loom or just attached to it? I actually have it in 2 cars I could pull it from. I didn't get out to do it this morning. Turns out there was a swap meet 20 minutes from my house in albany. I needed to go to napa to get the buytl tape. So I decided to detour & go by the swap meet. It was a total redneck fest for dirt track racing stuff. Had a buddy there selling a car so really just stopped to say hey. Glad I did as my buddy says you should go by this trailer. It's a tilt bed & he's only asking $400. So I go over to check it out. Old guy selling it is just trying to get rid of stuff. I just got my enclosed trailer so wasn't looking for one. I kinda shuffled my feet while talking to him. Said I don't need it but I've got $300 with me. He says sold & held out his hand (IMG:style_emoticons/default/evilgrin.gif) . Even better is he is delivering to my house in another hour or so (IMG:style_emoticons/default/aktion035.gif) . |
|
|
|
| JRust |
Jan 22 2012, 12:23 PM
Post
#305
|
|
914 Guru Group: Members Posts: 6,317 Joined: 10-January 03 From: Albany Oregon Member No.: 129 Region Association: Pacific Northwest |
Okay I still didn't decide on the rear window. Here is a pic of my restored pedal cluster before getting covered up! My big plans for today involve watching my 49ers beat up on the Giants. On to the super bowl niners (IMG:style_emoticons/default/piratenanner.gif)
Attached image(s) 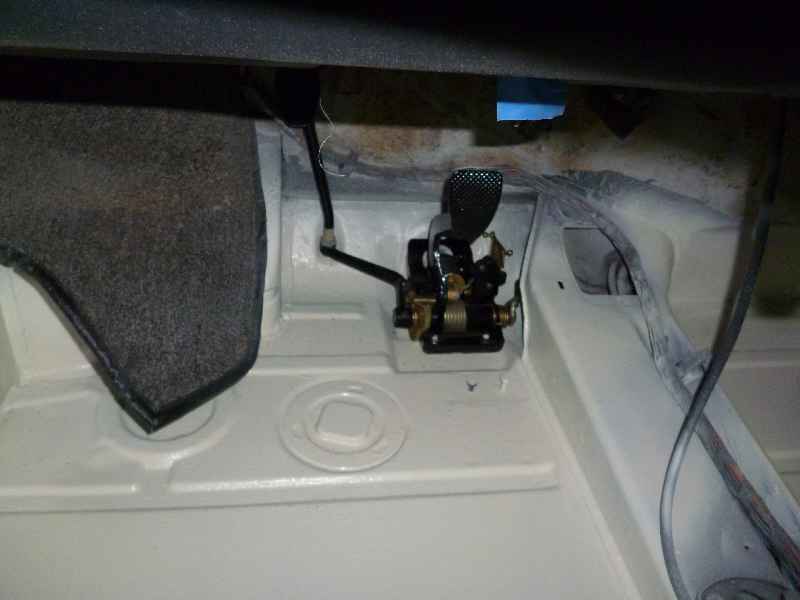
|
|
|
|
| JRust |
Feb 11 2012, 10:20 PM
Post
#306
|
|
914 Guru Group: Members Posts: 6,317 Joined: 10-January 03 From: Albany Oregon Member No.: 129 Region Association: Pacific Northwest |
QUOTE(rdauenhauer @ Jan 14 2012, 11:35 AM) Dont you mean it just wasnt as delivered on your car? It was an option, and my car does have one. (IMG:style_emoticons/default/confused24.gif) Installing the glass is easy, the tougher part is obtaining the correct harness, switch then threading it through the tunnel & eng. bay wiring loom "snorkle" to power at the relay board. (IMG:style_emoticons/default/idea.gif) Man you weren't kidding. I pulled everything I needed out of the wrecked 74 I have. IT was a serious PITA getting that wire through the sleeve in the engine bay. So while I worked on the LE a good part of the day today. I really only accomplished installing the rear window & getting the wiring run. So my rear window defrost is all done & installed. Cool to have it finished. Attached image(s) 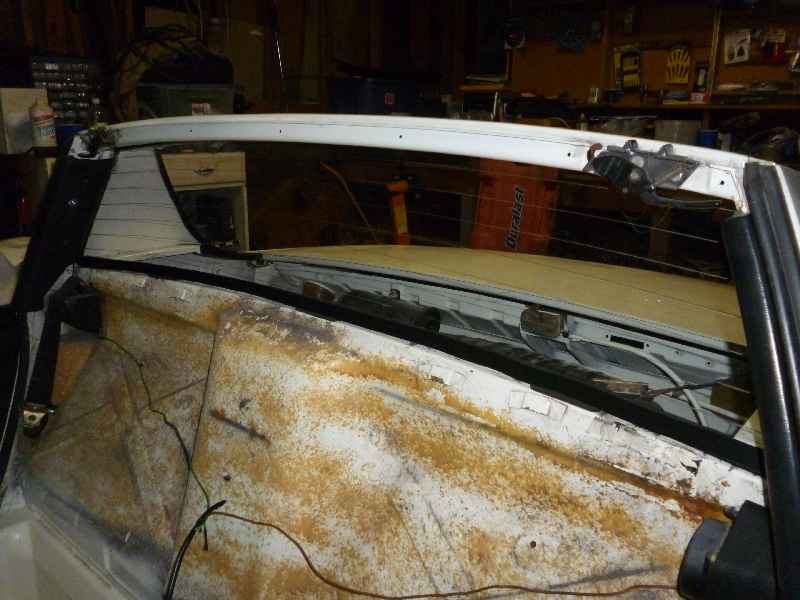 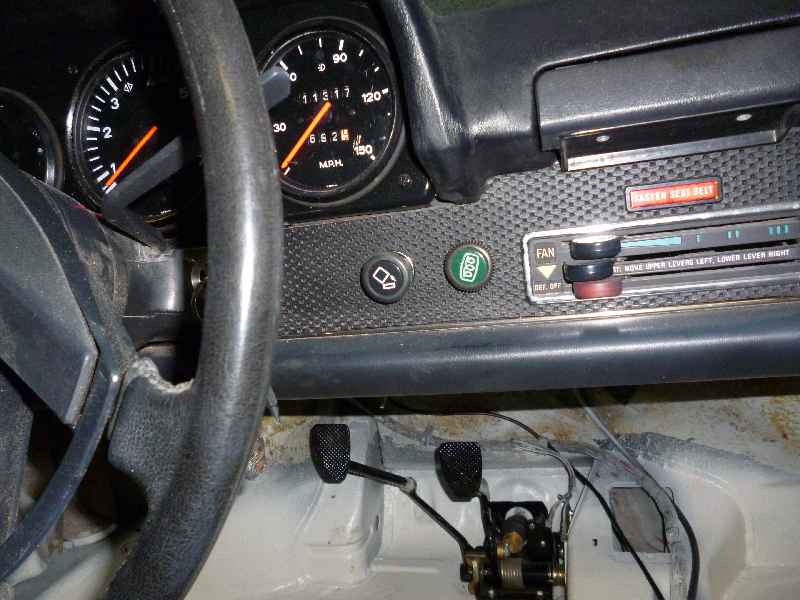 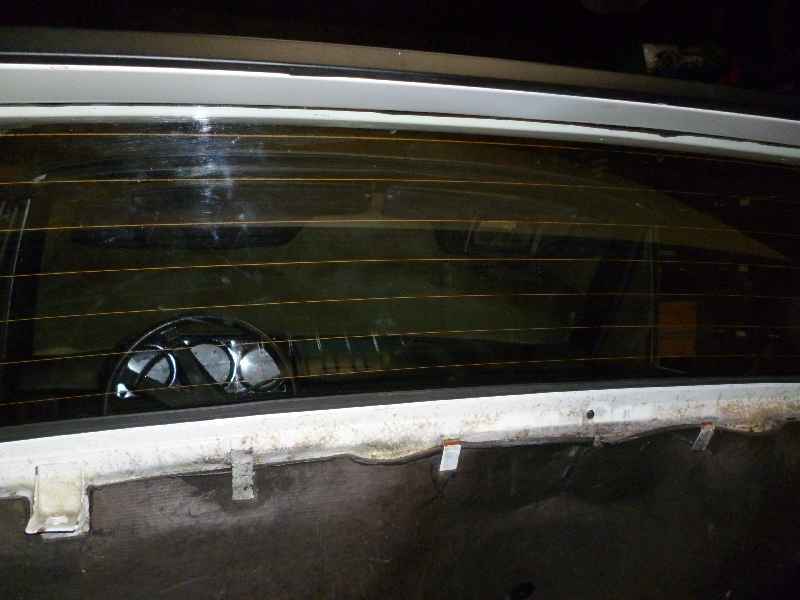
|
|
|
|
| JFJ914 |
Feb 12 2012, 03:16 PM
Post
#307
|
|
Senior Member Group: Benefactors Posts: 813 Joined: 13-June 03 From: Alpharetta, GA Member No.: 814 Region Association: South East States |
QUOTE(JRust @ Feb 11 2012, 11:20 PM) QUOTE(rdauenhauer @ Jan 14 2012, 11:35 AM) Dont you mean it just wasnt as delivered on your car? It was an option, and my car does have one. (IMG:style_emoticons/default/confused24.gif) Installing the glass is easy, the tougher part is obtaining the correct harness, switch then threading it through the tunnel & eng. bay wiring loom "snorkle" to power at the relay board. (IMG:style_emoticons/default/idea.gif) Man you weren't kidding. I pulled everything I needed out of the wrecked 74 I have. IT was a serious PITA getting that wire through the sleeve in the engine bay. So while I worked on the LE a good part of the day today. I really only accomplished installing the rear window & getting the wiring run. So my rear window defrost is all done & installed. Cool to have it finished. I have a harness I need to install in my car, can you expand on what you did to pull yours? |
|
|
|
| JRust |
Feb 12 2012, 04:51 PM
Post
#308
|
|
914 Guru Group: Members Posts: 6,317 Joined: 10-January 03 From: Albany Oregon Member No.: 129 Region Association: Pacific Northwest |
QUOTE(John Jentz @ Feb 12 2012, 01:16 PM) I have a harness I need to install in my car, can you expand on what you did to pull yours? The car I pulled mine from was no problem. I just cut the rubber sleeve in the engine bay. The install will go something like this. It is helpful to have a buddy to help feed the wire in the engine bay. 1st. Disconnect your battery!Your backpad, center console & any carpet on the center tunnel all need to be removed. You will be running wire down the tunnel with the rest of the wiring. Your car also need to be up in the air so you have access to the the main wiring. This job is easier if the motor is out but that isn't necessary. My motor was in my LE when I did the install. 2nd. Check your defrost harness for any cracks or problems. Lay it out in the interior along the center tunnel to see where it should go. Clip the end with the black plug about an inch wide. Clip the wires 1 ft below & put the clipped end by your battery. You will reattach it once you have routed your wires through. 3rd. Get under your car. Pull the rubber sleeve out of the firewall & the front of the engine shelf. There is a lip to both sides that hold it in place. Get it loose & pull the firewall (bottom end) & roll it back on itself an inch or so. This will clear the hole for you to be bale to feed your wire through to the engine bay. 4th. Pull the little square metal cover at the firewall on the center tunnel. Feed the end of the wiring you clipped through firewall following the main wiring. Once in the engine have your buddy pull through the wiring until it branches. The wiring loom splits as the wires go up to the glass. Feed through what you need to reach the relay board. Remember you still have 1 ft of wire to reattach. So take that into account. 5th. With your wire in the engine bay you need to snake it through with the main wiring through that foot long rubber sleeve. This is the biggest PITA of the project. It is fairly easy to get it started in the bottom. Feeding it through the top is not easy. You can use a coat hanger or something similar. Problem is it is so tight you may scrape your main wiring in there. Not a good idea. In the end I made one cut in the top of the rubber sleeve. Once I made that cut feeding it through became much easier. Once that is through the sleeve. Just push both ends of the sleeve back into their respective holes. Reattach your plug that connects to the relay board. 6th. Take the 2 screws holding the relay board out so you can move it. You need to connect the ground below the relay board. There is the one bolt below with a 10mm nut on it. Attach that & reinstall your relay board. You can plug the defrost into it if you are ready. 7th. Get back inside your car. Route the wiring right next to the main wiring running through the center of your car. Follow it all the way to the fuse box/board. Take the 2 screws holding your fuse box in place. Connect your ground the to bolt on the wall. Another 10mm nut sits on it. I plugged mine to the fuse box where it was plugged into the car I pulled it from. This was to the 5th spot from the right. This is to the row closest to the wall between you & the gas tank. Reinstall the fuse box. 8th. The wiring to your actual switch which branches off next to the wires you just connected to the fuse box. You will route from your fusebox under the dash over next to your radio. The defrost switch sits between your radio & your cigarette lighter. The hole is already in the metal part of the dash. Typically the basket weave will be covering it. You just need to open the hole in the basket weave & install your switch. Sorry that is really long winded. I guess I should have taken pictures as I went through the process. Didn't think of doing that though (IMG:style_emoticons/default/confused24.gif) |
|
|
|
| Cairo94507 |
Feb 13 2012, 08:19 AM
Post
#309
|
|
Michael Group: Members Posts: 10,609 Joined: 1-November 08 From: Auburn, CA Member No.: 9,712 Region Association: Northern California |
Congratulations! I have always liked the look of the defroster rear window in our cars. My 1st 914, a '73 2.0 came with it and I have a perfect defroster glass and nicely restored defroster harness and switch for my six build. So even though my car came w/o a defroster rear window, it will have one when done.
|
 |
|
| JFJ914 |
Feb 13 2012, 09:56 AM
Post
#310
|
|
Senior Member Group: Benefactors Posts: 813 Joined: 13-June 03 From: Alpharetta, GA Member No.: 814 Region Association: South East States |
Thanks for the description!
|
|
|
|
| PanelBilly |
Feb 13 2012, 07:12 PM
Post
#311
|
|
914 Guru Group: Members Posts: 5,950 Joined: 23-July 06 From: Kent, Wa Member No.: 6,488 Region Association: Pacific Northwest |
Don't forget to keep saying I love you honey, always makes it slide in easier
|
|
|
|
| JRust |
Feb 28 2012, 03:00 PM
Post
#312
|
|
914 Guru Group: Members Posts: 6,317 Joined: 10-January 03 From: Albany Oregon Member No.: 129 Region Association: Pacific Northwest |
Well I dropped off a bunch of parts to my powder coater a few weeks back. Called to check on them friday. Turns out my guy got sent out of state for work. So all my parts are locked in his shop & haven't been worked on yet (IMG:style_emoticons/default/mad.gif) . Sucks as I took all my extra seat mount/rails to get powder coated. Including the ones from my LE. I'll be lucky to get them before I leave on the 12th for Vegas. I've been holding off finishing my interior until I got those back. So I am just going to get everything else put in place this week. Worst case I will pull them out of my suby project so I have an actual seat. Still annoying as hell but my powder coater does good work & is very reasonable. So wait I will as I have a pair of 16x8 fuchs coming that go to him next.
So tonight after work I am installing the vinyl pieces that sit on the seat brace & the side of the tunnel between the seats. Then the backpad get's put back in. Although I've got a little swapping to do there. My previous uncracked backpad decided to crack on top by the seat belt on the drivers side. I was more than a little pissed as I barely leaned right there when it happened (IMG:style_emoticons/default/sad.gif) . So I need to pull that side off another pad I have to get it back to uncracked & pristine (IMG:style_emoticons/default/smile.gif) . If that all goes well I will finish installing the carpet. |
|
|
|
| JRust |
Feb 29 2012, 11:11 PM
Post
#313
|
|
914 Guru Group: Members Posts: 6,317 Joined: 10-January 03 From: Albany Oregon Member No.: 129 Region Association: Pacific Northwest |
Well I got the vinyl & carpet all done. My backpad need some work. I may just try to find a better one. I have 3 & one of them would be fairly nice. Problem is the bottom on all 3 have issues. Of course they are covered so it's not exactly obvious. I really want to have the interior perfect.
Attached thumbnail(s) 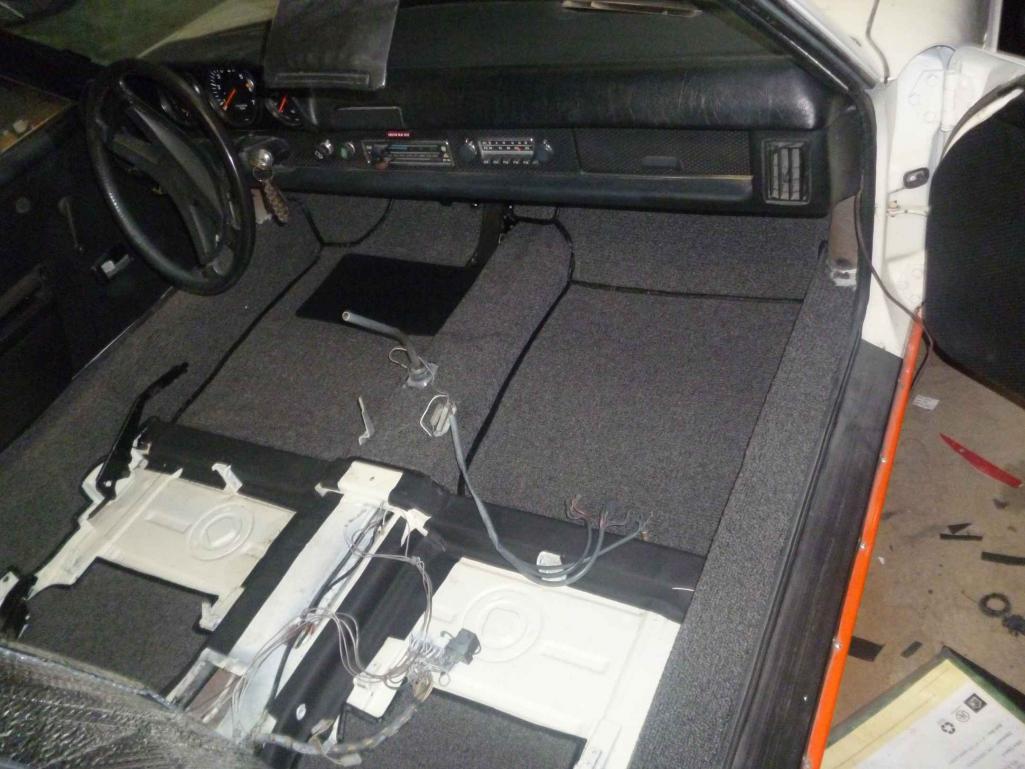
|
|
|
|
| JRust |
Mar 9 2012, 11:51 AM
Post
#314
|
|
914 Guru Group: Members Posts: 6,317 Joined: 10-January 03 From: Albany Oregon Member No.: 129 Region Association: Pacific Northwest |
I was able to piece together a good backpad from 2 of the ones I had. Had to do a little work with the vinyl on the bottoms. I have my interior all installed but kind of temporarily. My seat rails/mounts are off getting powder coated. I put some of those in so I can drive it tomorrow & give it a good shakedown. I'll be picking up my new powdercoated parts tomorrow & will drive the LE up to get them.
I also did some fiberglass work for the first time on my LE front Valance. Had one of the holes ripped out to the side. So redid that corner lip & fixed a few small cracks. Then I painted it last night. I still have a little of the orange peel look to my paint. You've got to be very close to really notice it. Plus it's a repro Valance anyway so concours shape it will never be. I'll shoot some pics tonight (IMG:style_emoticons/default/biggrin.gif) Attached image(s) 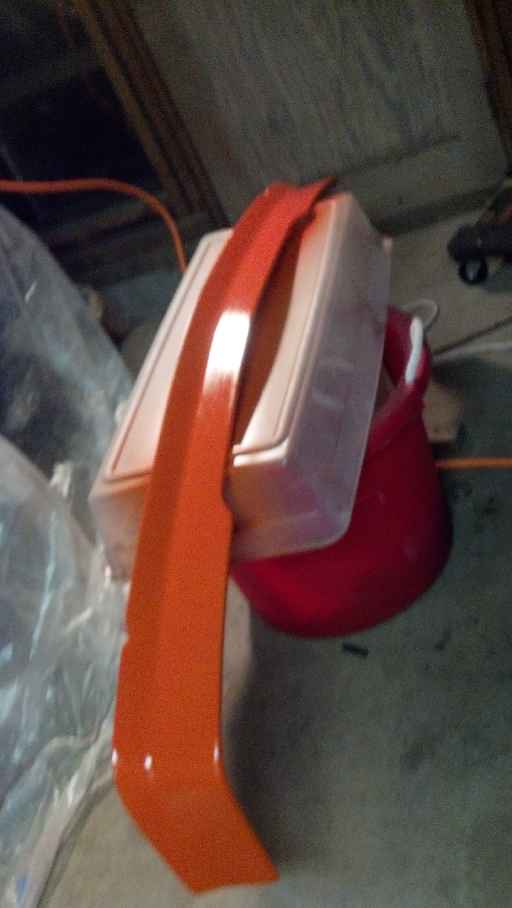
|
|
|
|
| AZ914 |
Mar 9 2012, 08:32 PM
Post
#315
|
|
914 Dumbass Group: Members Posts: 1,469 Joined: 6-January 03 From: Sunny Tucson Member No.: 98 Region Association: Southwest Region |
Awesome.. Keep it up! Rt 66 in 2 weeks!
|
|
|
|
| 6freak |
Mar 9 2012, 08:44 PM
Post
#316
|
|
MR.C Group: Members Posts: 4,740 Joined: 19-March 08 From: Tacoma WA Member No.: 8,829 Region Association: Pacific Northwest |
looks real good Jamie (IMG:style_emoticons/default/smile.gif) nice work
|
|
|
|
| McMark |
Mar 9 2012, 09:02 PM
Post
#317
|
|
914 Freak! Group: Retired Admin Posts: 20,180 Joined: 13-March 03 From: Grand Rapids, MI Member No.: 419 Region Association: None |
Don't forget that OE finish isn't mirror smooth. These are 'economy cars'. A little orange peel is period correct.
Lookin' great. (IMG:style_emoticons/default/drooley.gif) |
|
|
|
| JRust |
Mar 11 2012, 12:33 AM
Post
#318
|
|
914 Guru Group: Members Posts: 6,317 Joined: 10-January 03 From: Albany Oregon Member No.: 129 Region Association: Pacific Northwest |
I am basically finished with the LE finally. It is absolutely filthy in the pics. I am paying someone to detail it tomorrow. Give it the serious cut buff wash & wax it needs. While the carpet is all new & doesn't need cleaned. All the vinyl needs treated. The pics make the interior look much worse than it is. It is as close to pristine as I can get it. I'll go ahead & upload the pics I have. The only thing I have left to do is install the engine trunk lid. Then I drive it the 30 minutes to the detailers place. I leave it there for about 5 hours. Only thing that sucks is the weather is so crappy. By the time I drive it to vegas it will be filthy again. At least it will clean up easier after the wax.
I can't even begin to say how happy I am to have it all together & finished. (IMG:style_emoticons/default/w00t.gif) Attached image(s)  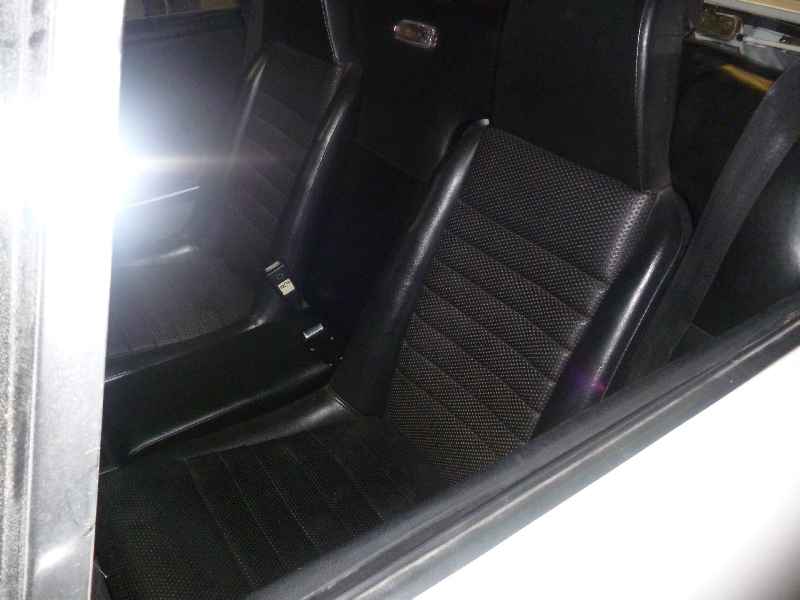 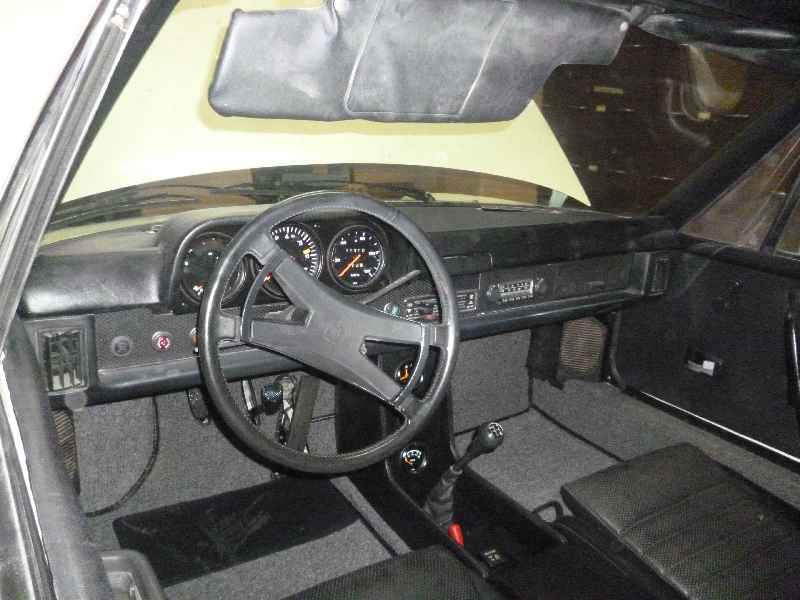 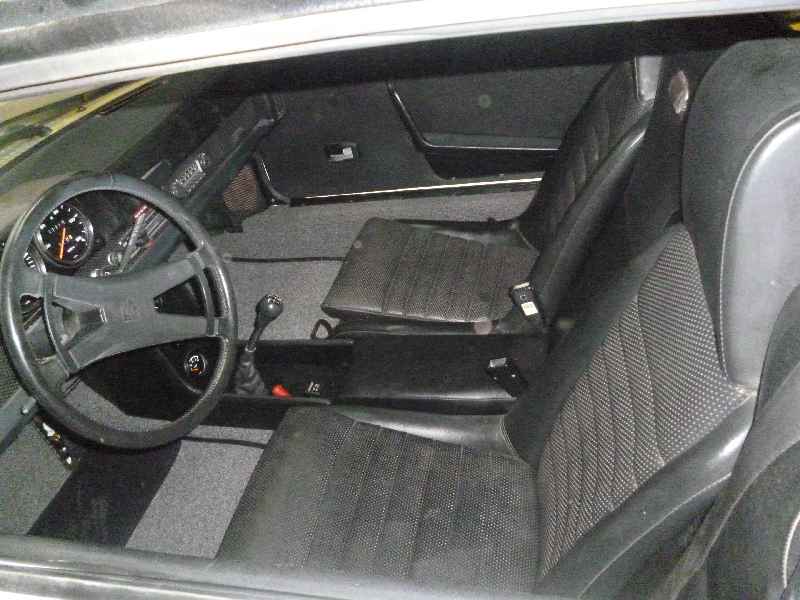 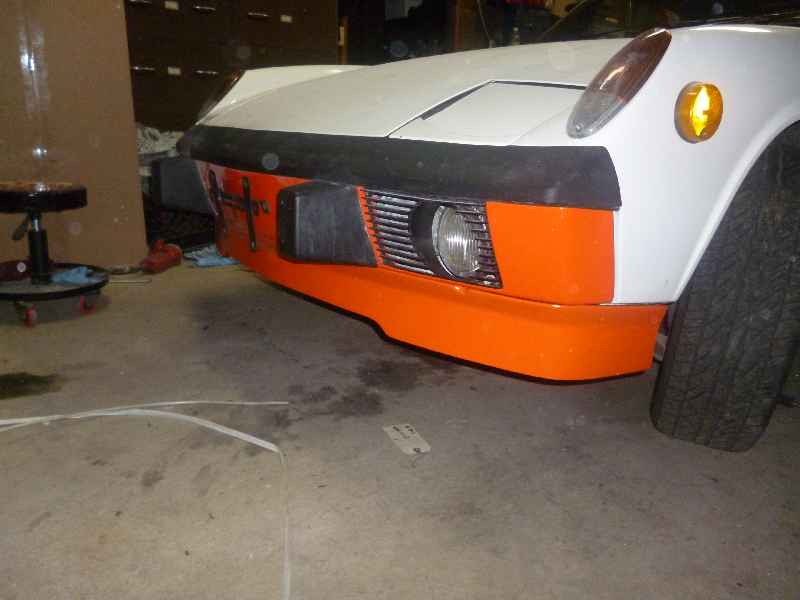 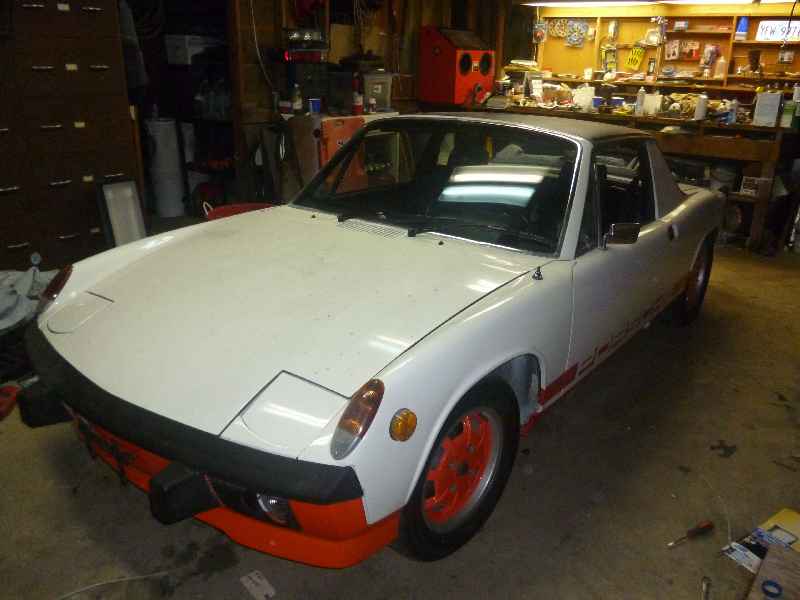
|
|
|
|
| Mike Bellis |
Mar 11 2012, 01:30 AM
Post
#319
|
|
Resident Electrician Group: Members Posts: 8,348 Joined: 22-June 09 From: Midlothian TX Member No.: 10,496 Region Association: None |
NIce!
|
|
|
|
| Cairo94507 |
Mar 11 2012, 08:27 AM
Post
#320
|
|
Michael Group: Members Posts: 10,609 Joined: 1-November 08 From: Auburn, CA Member No.: 9,712 Region Association: Northern California |
Congratulations (IMG:style_emoticons/default/beerchug.gif)
|
|
|
|
|
1 User(s) are reading this topic (1 Guests and 0 Anonymous Users)
0 Members:

|
Lo-Fi Version | Time is now: 1st April 2026 - 03:01 PM |
Invision Power Board
v9.1.4 © 2026 IPS, Inc.