|
|
|
Porsche, and the Porsche crest are registered trademarks of Dr. Ing. h.c. F. Porsche AG.
This site is not affiliated with Porsche in any way. Its only purpose is to provide an online forum for car enthusiasts. All other trademarks are property of their respective owners. |
|
|

  |

| Gint |
 Jan 30 2009, 10:12 PM Jan 30 2009, 10:12 PM
Post
#101
|
|
Mike Ginter  Group: Admin Posts: 16,108 Joined: 26-December 02 From: Denver CO. Member No.: 20 Region Association: Rocky Mountains |
That looks pretty good to me Steve!
|
   |

 
|
| charliew |
Jan 30 2009, 11:02 PM
Post
#102
|
|
Advanced Member Group: Members Posts: 2,363 Joined: 31-July 07 From: Crawford, TX. Member No.: 7,958 |
That appears to be a non-metallic color so you should be able to sand it out and maybe only touch up that area. On all the basecoat clear coats I've used the clear needs to go on within a certain amount of time or it needs to be scuffed and another base layer put on for good adhesion of the clearcoats. I was thinking it was twelve hours max between the base and clearcoat. Maybe you can just scuff it with gray scotchbrite and then clear.
|
|
|
|
| scotty b |
Jan 31 2009, 10:02 AM
Post
#103
|
|
rust free you say ? Group: Members Posts: 16,375 Joined: 7-January 05 From: richmond, Va. Member No.: 3,419 Region Association: None |
QUOTE(pete-stevers @ Jan 30 2009, 06:14 PM)  and here is my big bad...can't even look at scotty b in eyes i guesse i am going to have to wet sand the base... i am guessing 800 and then another layer of base ...eh? and then clear.... Let it completely setup then sand it with 600. I would persoanlly take it back down to the primer and them reshoot/ blend the area out. A lot of tmes when you get a run like that, you can sand it till it looks fine and even feels fine but there is still a very slight ridge still there that will show when cleared. If you decide to sand it back to the primer just go a bit outside of the run, and feather your sanding out. Reshoot the color and fan it out from the center so it will blend in with the existing color. ( hope that makes sense, I'm not real good at explanicating stuff ) If you want to be doubly safe scuff the whole car and clean it, blend that area out then reshoot the whole car with one coat. This will ensure a good color match, and will also get your chemical bond back before applying the clear. I would advised if this sits for more than 24 hours running over it with a grey scotch brite pad. Also for all of you doing your own paint jobs, don't go overboard with your pre-paint final sanding. As I stated before, 600 is great for putting base over. What happens when you go higher is you create a slicker surface with less scratches for the paint to grab hold of. This will result in runs. 600 for base and 600 is fine for clearing over too. Remember your clear will be a thicker material than your base. And the same for single stage paint. Single stage paint jobs really only need 400 then you can apply paint. |
|
|
|
| pete-stevers |
Feb 1 2009, 12:38 PM
Post
#104
|
|
Shinee Side Up Group: Members Posts: 2,674 Joined: 10-October 04 From: Abbotsford,BC, Canada Member No.: 2,914 Region Association: Pacific Northwest |
i fixed up the runs in the base
and shot three layers of clear got a few more runs, but it is in the clear and unfortunately the targa will need to be re cleared due to all sorts of fish eye i thought i has washed it well but i think it was polishing wheel dust... |
|
|
|
| PeeGreen 914 |
Feb 1 2009, 12:45 PM
Post
#105
|
|
Just when you think you're done...wait, there is more..lol Group: Members Posts: 10,219 Joined: 21-September 06 From: Seattle, WA... actually Everett Member No.: 6,884 Region Association: Pacific Northwest |
(IMG:style_emoticons/default/headbang.gif) Damn runs. Well keep at it Steve. You'll get there soon and it will look amazing. You're doing nice work so far.
|
|
|
|
| pete-stevers |
Feb 1 2009, 02:15 PM
Post
#106
|
|
Shinee Side Up Group: Members Posts: 2,674 Joined: 10-October 04 From: Abbotsford,BC, Canada Member No.: 2,914 Region Association: Pacific Northwest |
the runs in the clear don't bother me as much as the fish eye on the targa but that too is in the clear,
i think my main trouble was actually lighting, most of the runs happened on the side where i have a 500 watt light shining, it is to stark and harsh to see what is going on while spraying, i will be installing a few more flourescents in the room at a later date. |
|
|
|
| Sher |
Feb 1 2009, 02:54 PM
Post
#107
|
|
Newbie Group: Members Posts: 7 Joined: 1-February 09 From: B.C Canada Member No.: 10,008 Region Association: Pacific Northwest |
Well, here it goes - my first post as a new member of the club!
I'm excited that my first post can be about how proud I am of my husband. You've done a terrific job on this project, Steve. It's been a big undertaking, but you've done well. I love seeing how excited you get with each coat of paint! Keep up the good work! We're going to have some fabulous drives in your car this summer (IMG:style_emoticons/default/smile.gif) |
|
|
|
| Todd Enlund |
Feb 1 2009, 03:10 PM
Post
#108
|
|
Resident Photoshop Guru Group: Members Posts: 3,252 Joined: 24-August 07 From: Reed (Portland), Oregon Member No.: 8,032 Region Association: Pacific Northwest |
|
|
|
|
| sixnotfour |
Feb 1 2009, 05:38 PM
Post
#109
|
|
914 Wizard Group: Members Posts: 11,272 Joined: 12-September 04 Member No.: 2,744 Region Association: NineFourteenerVille |
Sher , being a proud wife you should know that,
(IMG:style_emoticons/default/thisthreadisworthlesswithoutpics.gif) And, (IMG:style_emoticons/default/welcome.png) Hi Sher Jeff H. |
|
|
|
| charliew |
Feb 2 2009, 12:24 AM
Post
#110
|
|
Advanced Member Group: Members Posts: 2,363 Joined: 31-July 07 From: Crawford, TX. Member No.: 7,958 |
There is a accelerator you can add that will make the paint dry faster and that would help stop the sags or runs. Also are you sure you got fisheyes or solvent popping from the top flashing off before the solvent got out? I once cleared a gas tank and moved it out in the sun to see better and I think it got hot and the surface dried too quick and it solvent popped really bad. There is also a fisheye eliminator and I use it in every cup of base or clear. Fisheyes are really a mess to fix.
There is also a panel clear that dries very fast and that keeps bugs and trash out of the paint and also helps eliminate runs. The best way is to have really good light and just put it on really even and wait between coats, I always do the edges first with clear and then the big areas so I am sure I got the edges, Paint doesn't like to be as thick on the edges. I use a optima gun for base and clear made in germany and it just fogs the paint on. |
|
|
|
| PanelBilly |
Feb 2 2009, 05:56 PM
Post
#111
|
|
914 Guru Group: Members Posts: 5,969 Joined: 23-July 06 From: Kent, Wa Member No.: 6,488 Region Association: Pacific Northwest |
I can't wait to see the finished product!
|
|
|
|
| pete-stevers |
Feb 2 2009, 05:58 PM
Post
#112
|
|
Shinee Side Up Group: Members Posts: 2,674 Joined: 10-October 04 From: Abbotsford,BC, Canada Member No.: 2,914 Region Association: Pacific Northwest |
i am going to repray the targa and hood...
and i have to buff out a frickin fly, and a few runs untill then she stays taped up.. |
|
|
|
| Sher |
Feb 2 2009, 10:32 PM
Post
#113
|
|
Newbie Group: Members Posts: 7 Joined: 1-February 09 From: B.C Canada Member No.: 10,008 Region Association: Pacific Northwest |
So you want to see some pics? Here's afew from yesterday ...
Attached image(s)  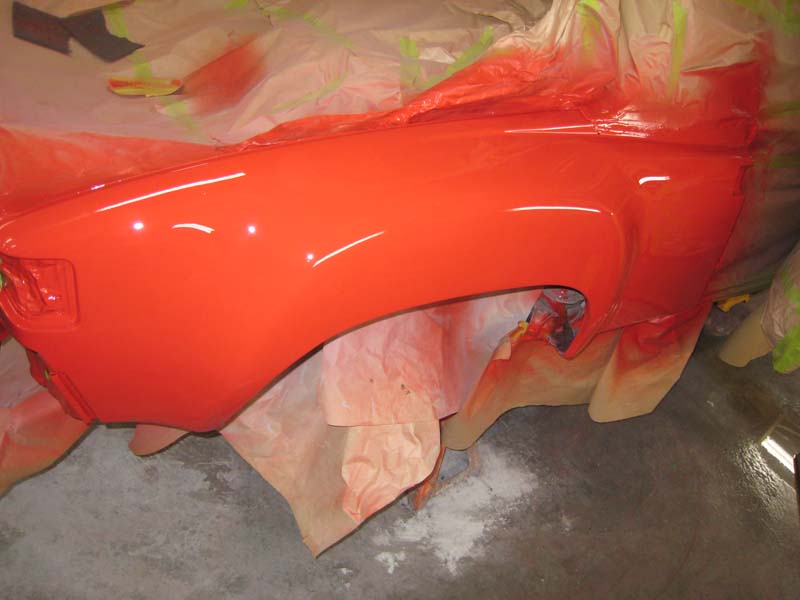 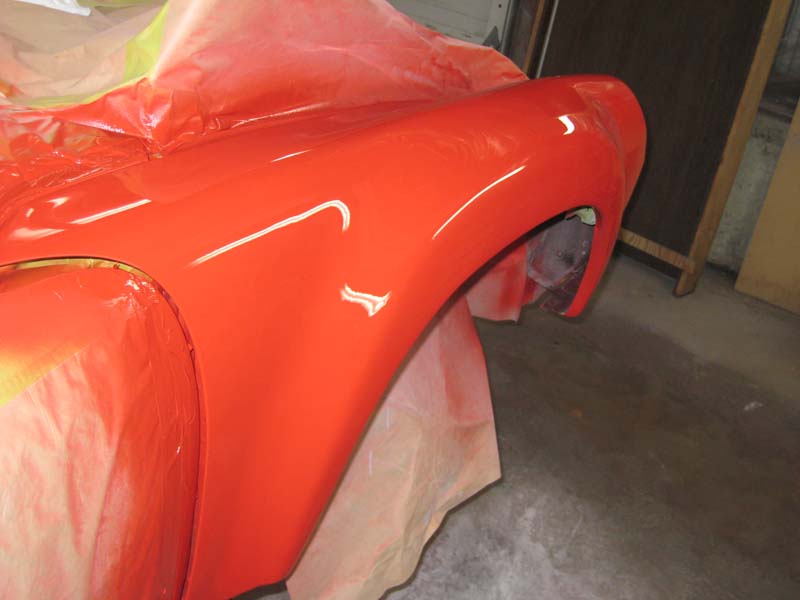 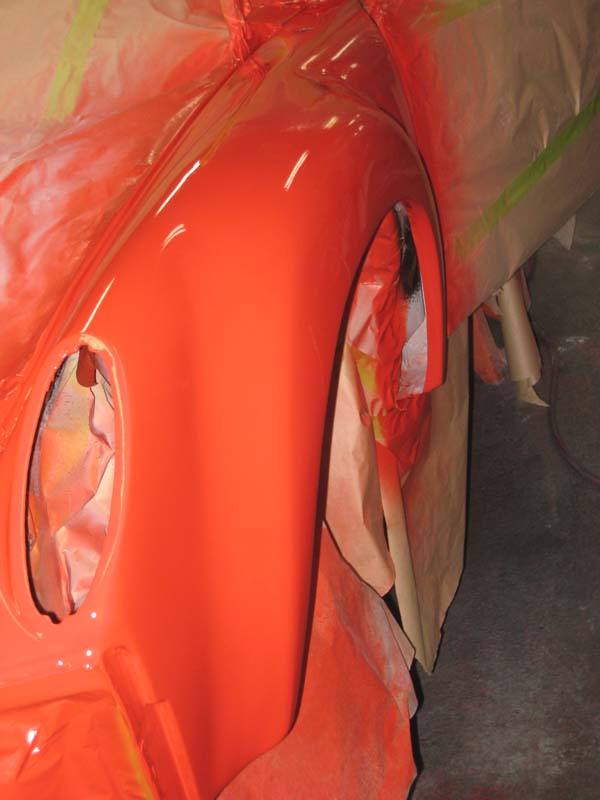
|
|
|
|
| sixnotfour |
Feb 2 2009, 11:58 PM
Post
#114
|
|
914 Wizard Group: Members Posts: 11,272 Joined: 12-September 04 Member No.: 2,744 Region Association: NineFourteenerVille |
thats hot
|
|
|
|
| PeeGreen 914 |
Feb 3 2009, 12:09 AM
Post
#115
|
|
Just when you think you're done...wait, there is more..lol Group: Members Posts: 10,219 Joined: 21-September 06 From: Seattle, WA... actually Everett Member No.: 6,884 Region Association: Pacific Northwest |
|
|
|
|
| Gint |
Feb 3 2009, 08:04 AM
Post
#116
|
|
Mike Ginter Group: Admin Posts: 16,108 Joined: 26-December 02 From: Denver CO. Member No.: 20 Region Association: Rocky Mountains |
QUOTE(Sher @ Feb 2 2009, 09:32 PM) So you want to see some pics? Here's afew from yesterday ... Hi Sher! Shar says hi too. (IMG:style_emoticons/default/bye1.gif) |
|
|
|
| scotty b |
Feb 3 2009, 07:34 PM
Post
#117
|
|
rust free you say ? Group: Members Posts: 16,375 Joined: 7-January 05 From: richmond, Va. Member No.: 3,419 Region Association: None |
Steve let the clear set up completely, take a NEW unused razor blade, wrap ONE layer of masking tape over each end. hold the razor 90* to the panel, and drag it over top of the run(s) This will scrape the run down to a point. The tape will keep it from going all the way to the good clear surrounding it. As soon as it starts to scrape you can watch the run dissapear as the scraping will become wider with each pass. Once the run is scraped as far as you can easily get it, take a small hard block ( piece of solid wood works well ) cut it down to a small square, and start wet sanding what it left of the run.Constantly wipe it dry, re wet it and check it to see how it looks. You may very well and up breaking through the clear, but that can be wet sanded out, re-cleared and blended in without harming the base. If you aren;t trying to het it A+ perfect you can buff it soon after wet sanding and may have a lkittle bit of a distortion oin the clear, but most will never notice it.
IF there is a ball at the end of the run it gets a bit trickier. If that is the case begin scraping only the ball until it looks like it is even with the run, then proceed. If there is a ball it is now VERY important to let it dry completely, the ball if not dry will tear away from the paint creating a bigger problem. |
|
|
|
| Bleyseng |
Feb 3 2009, 09:09 PM
Post
#118
|
|
Aircooled Baby! Group: Members Posts: 13,037 Joined: 27-December 02 From: Seattle, Washington (for now) Member No.: 24 Region Association: Pacific Northwest |
QUOTE(Sher @ Feb 1 2009, 12:54 PM) Well, here it goes - my first post as a new member of the club! I'm excited that my first post can be about how proud I am of my husband. You've done a terrific job on this project, Steve. It's been a big undertaking, but you've done well. I love seeing how excited you get with each coat of paint! Keep up the good work! We're going to have some fabulous drives in your car this summer (IMG:style_emoticons/default/smile.gif) Sherida, I wanna see all 4 of you in that 9146 this summer! Paint looks good Steve!!! Guess I get to see it in person soon.. (IMG:style_emoticons/default/cheer.gif) |
|
|
|
| Todd Enlund |
Feb 4 2009, 12:27 AM
Post
#119
|
|
Resident Photoshop Guru Group: Members Posts: 3,252 Joined: 24-August 07 From: Reed (Portland), Oregon Member No.: 8,032 Region Association: Pacific Northwest |
QUOTE(scotty b @ Feb 3 2009, 05:34 PM) Steve let the clear set up completely, take a NEW unused razor blade, wrap ONE layer of masking tape over each end. hold the razor 90* to the panel, and drag it over top of the run(s). Neat trick. Thanks for sharing! |
|
|
|
| pete-stevers |
Feb 4 2009, 08:18 PM
Post
#120
|
|
Shinee Side Up Group: Members Posts: 2,674 Joined: 10-October 04 From: Abbotsford,BC, Canada Member No.: 2,914 Region Association: Pacific Northwest |
what grit should i be blocking this clear down with if i am going to re-clear the whole shooting match, this time i am going to use a gun witha bigger orfice.
|
|
|
|
|
2 User(s) are reading this topic (2 Guests and 0 Anonymous Users)
0 Members:

|
Lo-Fi Version | Time is now: 15th June 2026 - 10:16 AM |
Invision Power Board
v9.1.4 © 2026 IPS, Inc.