|
|
|
Porsche, and the Porsche crest are registered trademarks of Dr. Ing. h.c. F. Porsche AG.
This site is not affiliated with Porsche in any way. Its only purpose is to provide an online forum for car enthusiasts. All other trademarks are property of their respective owners. |
|
|


| Zaney |
 Apr 23 2009, 11:06 PM Apr 23 2009, 11:06 PM
Post
#1
|
|
Deuchland en der Haus  Group: Members Posts: 461 Joined: 1-March 04 From: Engine 11 Redmond, WA Member No.: 1,738 Region Association: Pacific Northwest |
Well, I finally have found the time to put down some of the ideas and pictures that have been going on for about a year now.
It all started last April when I found out that hitting the curb in a round-about is not the best thing for your suspension. Needless to say that it definitely put my '74 out of service. The passenger A-Arm broke, bent the tie rod, ruined the ball joint, bottomed out the shock, and blew a tire. The only thing that I damaged was my pride. (IMG:style_emoticons/default/headbang.gif) So, thanks to my Dad's AAA the teener was towed 3 blocks back to his house and waited to be brought back to Redmond from Tacoma (40 miles or so). I took it home and put it on jack stands to check out the damage. I decided that this is as good a time as any to upgrade and refurbish my front end. However, like any project that begins around here it usually ends up in a major rustoration. Let me list out the plans for the teener: Engine: 2002 Subaru 2.5 N/A using stock ECU and stock trimmed harness Transmission: 2002 Subaru 5-Speed with DIY style Bremar conversion to 2wd Intake: Aftermarket Ricer 3" Exhaust: Stock trimmed WRX header to a Dynomax SS Ultraflo muffler Suspension: Tarret sway bar on Engman mounts Koni Yellow adjustable shocks with rear Ground Control adjustable perches and springs Elephant racing monoballs, low friction control arm mounts, polybronze control arm bearings, polybronze trailing arm bearings Turbo tie rods w/ bump steering spacer New ball joints Five-lug conversion with new bearings, 911 front M calipers on vented rotors, 914 rear calipers on 914-6 rotors with Porterfield Pads 19mm New master cylinder & new hard lines 911 16 x 7 inch Fuchs on Falken 205/50/ZR16 Body Mods: Engman stiffening kit Stock seats (for now) Momo Prototipo steering wheel Rennline Perforated REV 2 Adjustable Aluminum Pedal Set (someday) Racing "minimal" look for interior Stereo TBD or omit John Kelly styled rear fenders (hand hammered) Paint scheme: Silversickle Body all silver with Phoenix Red wheels, bumpers, and rockers Ambitious but, not out of reach! Now for some pics... Pictures when I bought it as a roller 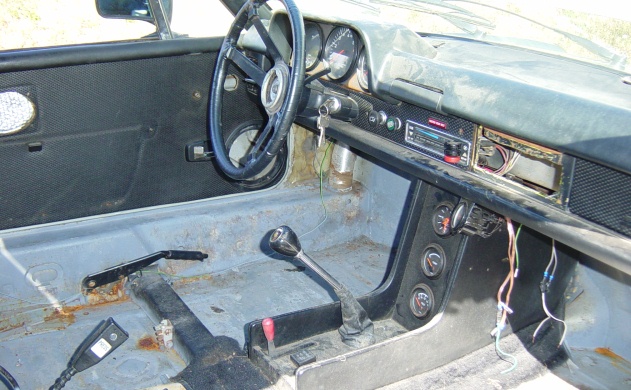 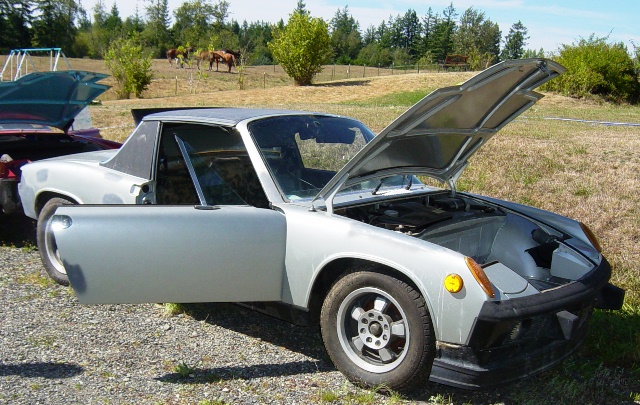 My Dusty '74 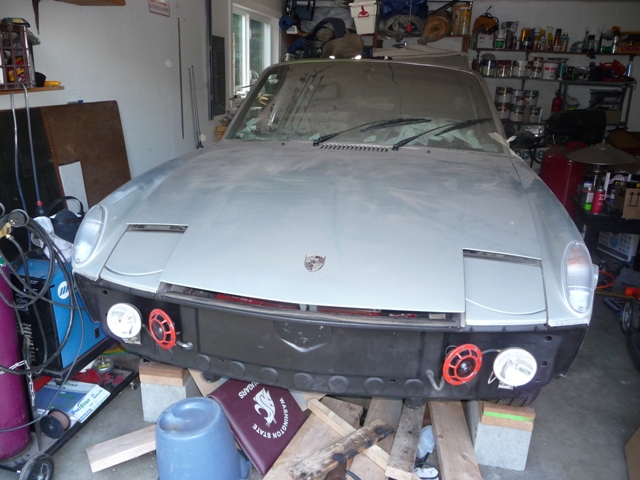 A bit crowded 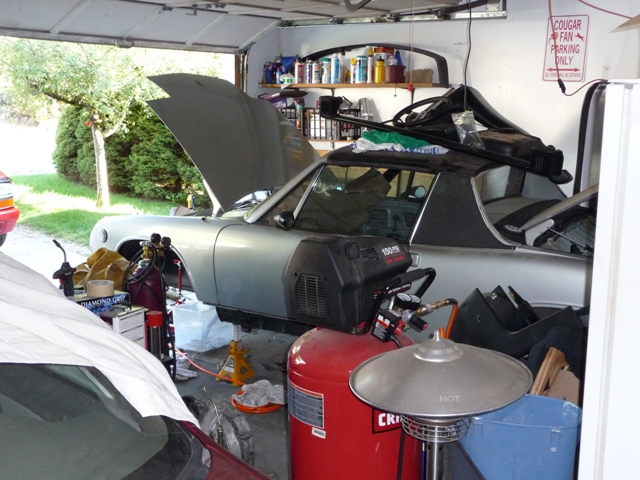 |
   |

 
|
Posts in this topic
Zaney Zaney's Suby Rustoration Adventure Apr 23 2009, 11:06 PM Zaney
Kind of grimy
really grimy Apr 23 2009, 11:11 PM Zaney
Cleaned up the steering rack area
Cleaned up ... Apr 23 2009, 11:15 PM Zaney
Cleaned up under the fuel tank
Sent the tan... Apr 23 2009, 11:20 PM Zaney
Cleaned up the steering rack and attatched the ... Apr 23 2009, 11:22 PM Zaney
Good enough to lick!
Almost ready for the ... Apr 23 2009, 11:26 PM Zaney
Back from the radiator shop and awaiting install... Apr 23 2009, 11:29 PM dlo914 Have you thought up how to run the cable lines for... Apr 24 2009, 12:36 AM TonyAKAVW Wow, talk about a nice car to start with! Tha... Apr 24 2009, 02:20 AM charliew Is the cover on the torsion bar to prevent it from... Apr 24 2009, 08:58 AM
Zaney
Kind of grimy
really grimy Apr 23 2009, 11:11 PM Zaney
Cleaned up the steering rack area
Cleaned up ... Apr 23 2009, 11:15 PM Zaney
Cleaned up under the fuel tank
Sent the tan... Apr 23 2009, 11:20 PM Zaney
Cleaned up the steering rack and attatched the ... Apr 23 2009, 11:22 PM Zaney
Good enough to lick!
Almost ready for the ... Apr 23 2009, 11:26 PM Zaney
Back from the radiator shop and awaiting install... Apr 23 2009, 11:29 PM dlo914 Have you thought up how to run the cable lines for... Apr 24 2009, 12:36 AM TonyAKAVW Wow, talk about a nice car to start with! Tha... Apr 24 2009, 02:20 AM charliew Is the cover on the torsion bar to prevent it from... Apr 24 2009, 08:58 AM
 dlo914
Is the cover on the torsion bar swaybar to preven... Apr 24 2009, 09:30 AM Zaney I should clarify the condition of the car at the t... Apr 24 2009, 09:38 AM Zaney I made a door brace for the passenger side after S... Apr 24 2009, 09:55 AM Zaney Then came the moment of truth and I broke out the ... Apr 24 2009, 10:09 AM Zaney
Cut the fender to get at the wheel house and too... Apr 24 2009, 10:13 AM Zaney
In the engine bay I cut out all of the aircooled... Apr 24 2009, 10:17 AM Zaney After the passenger long was repaired on the inter... Apr 24 2009, 10:23 AM Zaney Underneath, the seat rail reinforcements were repl... Apr 24 2009, 10:29 AM Zaney Earlier, I jumped the gun a bit with the interior ... Apr 24 2009, 10:35 AM Zaney Here is my new engine sitting patiently.
Apr 24 2009, 10:37 AM Zaney Suby 5 speed waiting for the Bremar conversion par... Apr 24 2009, 10:40 AM charliew I guess the tarret is that much bigger than the st... Apr 24 2009, 10:43 AM Zaney
I guess the tarret is that much bigger than the s... Apr 24 2009, 10:56 AM Zaney Last two pics for now...
New brake pivot plate ... Apr 24 2009, 10:45 AM Phoenix 914-6GT That's looking great Nate. :welder: Apr 24 2009, 12:07 PM Zaney Thanks Jon! :D
Welded up the passenger long ... Apr 24 2009, 09:38 PM rickthejetman hi there new to the 914 world and im contemplating... May 9 2009, 10:22 PM Zaney Hey Rick!
Two options for ya! Search for ... May 9 2009, 11:52 PM Zaney BTW, got the camera and the passenger long repair ... May 10 2009, 12:03 AM Zaney
Time to finish up a quick house project then, b... May 10 2009, 12:05 AM Zaney Well, a lot has happened in the past 12 weeks... ... Aug 8 2009, 01:50 AM Zaney I was able to take six weeks off of work in order ... Aug 8 2009, 01:57 AM Zaney I am in the process of cleaning up the wheel wells... Aug 8 2009, 02:01 AM Zaney First good result in welding thinner sheet metal p... Aug 8 2009, 02:08 AM nsr-jamie I love these kind of posts, keep up the good work ... Aug 8 2009, 04:14 AM strawman Great to see another Suby conversionite (is that a... Aug 10 2009, 01:06 AM Zaney Finally some time to UPDATE!
Welded up the do... Nov 18 2009, 10:12 PM Zaney Cleaned the underbelly where the Trans and Muffler... Nov 18 2009, 10:15 PM Zaney Filled in the side markers and Sold them to Fourbl... Nov 18 2009, 10:22 PM Zaney Hopefully, I will get a few hours to install my En... Nov 18 2009, 10:25 PM strawman Good job Nate, keep up the great work! Nov 20 2009, 10:34 AM plymouth37 Nice work, you are going to end up with a really g... Nov 20 2009, 11:31 AM Zaney Dana and Geoff,
Thanks for the words of encourage... Nov 20 2009, 11:49 AM Zaney It has been a while since an update but, progress ... Mar 7 2010, 12:46 AM Zaney Pic of interior firewall
Engine bay firewall
Mar 7 2010, 12:48 AM Zaney Hell hole ready for seam sealer and 2K Primer.
16... Mar 7 2010, 12:50 AM Zaney And the trunk firewall before being boxed out for ... Mar 7 2010, 12:58 AM FourBlades Nate,
You are really kicking ass now! :trop... Mar 7 2010, 06:49 AM rebelmdot Great work! A guy is supposed to pick up my 9... Mar 7 2010, 07:21 AM Zaney Thanks for the words of encouragement!
John, ... Mar 7 2010, 09:38 PM strawman
I can't seem to remove the stubborn cranksha... Mar 8 2010, 10:17 AM Zaney Geoff,
I believe that you are correct! ... Mar 8 2010, 07:19 PM Zaney So after celebrating my daughter's 1st Birthda... May 24 2010, 11:33 PM Zaney Drove down to Tacoma where I stopped by Delta Cams... May 24 2010, 11:37 PM Zaney Exhaust side
Longblock assembled after reading ... May 24 2010, 11:40 PM Zaney Throttle body cleaned up using a homemade soda-bla... May 24 2010, 11:42 PM Zaney Strawman version of the Suby engine mount bar. In... May 24 2010, 11:45 PM Zaney Rear firewall trunk area cleaned up and ready to b... May 24 2010, 11:47 PM Zaney Next step after the firewall is fabbed up is to lo... May 24 2010, 11:51 PM strawman Lookin' good! :beer3:
You might want to... May 25 2010, 06:20 PM Zaney Thought I would listen to Geoff's advice and t... May 31 2010, 12:25 AM Zaney
tied all the gusset plates together into the ... May 31 2010, 12:29 AM Zaney Followed the advice of many who have come before m... May 31 2010, 12:33 AM charliew Don't slow down now. Try to get someone to cut... Jun 5 2010, 10:51 PM Zaney Got a bit of time thanks to Grandma visiting and w... Jun 5 2010, 10:57 PM Zaney Looking up from the engine bay "new expansion... Jun 5 2010, 10:59 PM Zaney RE: Zaney's Suby Rustoration Adventure Jun 5 2010, 11:01 PM Zaney Next, I am going to take apart the tranny and atte... Jun 5 2010, 11:06 PM Zaney Keep the momentum going...
Painted the rear trunk... Jun 13 2010, 02:34 PM nsr-jamie I love this thread! Keep up the excellent work... Jul 4 2010, 05:53 AM Zaney Alrighty then!
More progress on the Suby Trans... Jul 20 2010, 01:57 PM Zaney Here is my attempt at the Suby Transmission mount ... Jul 20 2010, 02:04 PM Zaney Here is the alignment of the axle for the Suby Tra... Jul 20 2010, 02:09 PM Zaney There is plenty of room in the engine bay with thi... Jul 20 2010, 02:13 PM KELTY360 Nice looking work. I like the way you took a littl... Jul 20 2010, 02:54 PM KELTY360 Nice looking work. I like the way you took a littl... Jul 20 2010, 02:58 PM Zaney
Nice looking work. I like the way you took a litt... Jul 20 2010, 04:40 PM charliew Why not just take off from the front radiator to m... Jul 20 2010, 11:18 PM Porcharu Good to see MY idea for the trunk is working out w... Aug 25 2010, 10:59 PM Zaney I am actually in the redesigning phase of my trans... Aug 26 2010, 12:02 AM charliew I think you will find that unless you brace the mo... Aug 26 2010, 02:16 PM Zaney After studying some online pics of some Suby trans... Sep 10 2010, 01:29 PM Zaney The main reason for the new mounts was to provide ... Sep 10 2010, 01:36 PM strawman Looks great Nate! Keep the updates coming.
Si... Sep 10 2010, 02:19 PM Zaney Well, it has been a while but finally some progres... Nov 13 2010, 07:26 PM sawtooth Very nice. I'll be doing the same very soon. K... Nov 13 2010, 08:09 PM strawman Great job Nate. I'm finally in the "pre-a... Nov 14 2010, 01:48 AM Zaney Thanks Geoff!
Next step is copying your hydrau... Nov 14 2010, 10:54 AM Zaney Been too long since I have posted any progress on ... May 3 2011, 02:19 PM sawtooth Looking great Nate, keep it up! You'll hav... May 3 2011, 02:24 PM Zaney
Ordered the Gates radiator hose from Renegade Hyb... May 3 2011, 02:23 PM Zaney
Phoenix Red!!!
16x7's! Tir... May 3 2011, 02:25 PM Zaney
Suby engine!! Ready to be installed... May 3 2011, 02:28 PM ruby914 Looking good. Nice work Nate.
What profile tires ... May 10 2011, 09:09 AM Zaney I picked up a set of Falken 205/50/ZR16 tires... May 10 2011, 10:49 AM JRust Hey Nate is that Outfronts alternator relocation b... May 10 2011, 01:18 PM Zaney
Hey Nate is that Outfronts alternator relocation ... May 15 2011, 08:17 PM Zaney Here are some pics of some more progress: :Qarl... May 27 2011, 09:52 PM Zaney
Side view of Outfront unmodified Alternator brac... May 27 2011, 09:53 PM sawtooth Hey Nate, what's the status. You must be getti... Jun 14 2011, 04:24 PM
dlo914
Is the cover on the torsion bar swaybar to preven... Apr 24 2009, 09:30 AM Zaney I should clarify the condition of the car at the t... Apr 24 2009, 09:38 AM Zaney I made a door brace for the passenger side after S... Apr 24 2009, 09:55 AM Zaney Then came the moment of truth and I broke out the ... Apr 24 2009, 10:09 AM Zaney
Cut the fender to get at the wheel house and too... Apr 24 2009, 10:13 AM Zaney
In the engine bay I cut out all of the aircooled... Apr 24 2009, 10:17 AM Zaney After the passenger long was repaired on the inter... Apr 24 2009, 10:23 AM Zaney Underneath, the seat rail reinforcements were repl... Apr 24 2009, 10:29 AM Zaney Earlier, I jumped the gun a bit with the interior ... Apr 24 2009, 10:35 AM Zaney Here is my new engine sitting patiently.
Apr 24 2009, 10:37 AM Zaney Suby 5 speed waiting for the Bremar conversion par... Apr 24 2009, 10:40 AM charliew I guess the tarret is that much bigger than the st... Apr 24 2009, 10:43 AM Zaney
I guess the tarret is that much bigger than the s... Apr 24 2009, 10:56 AM Zaney Last two pics for now...
New brake pivot plate ... Apr 24 2009, 10:45 AM Phoenix 914-6GT That's looking great Nate. :welder: Apr 24 2009, 12:07 PM Zaney Thanks Jon! :D
Welded up the passenger long ... Apr 24 2009, 09:38 PM rickthejetman hi there new to the 914 world and im contemplating... May 9 2009, 10:22 PM Zaney Hey Rick!
Two options for ya! Search for ... May 9 2009, 11:52 PM Zaney BTW, got the camera and the passenger long repair ... May 10 2009, 12:03 AM Zaney
Time to finish up a quick house project then, b... May 10 2009, 12:05 AM Zaney Well, a lot has happened in the past 12 weeks... ... Aug 8 2009, 01:50 AM Zaney I was able to take six weeks off of work in order ... Aug 8 2009, 01:57 AM Zaney I am in the process of cleaning up the wheel wells... Aug 8 2009, 02:01 AM Zaney First good result in welding thinner sheet metal p... Aug 8 2009, 02:08 AM nsr-jamie I love these kind of posts, keep up the good work ... Aug 8 2009, 04:14 AM strawman Great to see another Suby conversionite (is that a... Aug 10 2009, 01:06 AM Zaney Finally some time to UPDATE!
Welded up the do... Nov 18 2009, 10:12 PM Zaney Cleaned the underbelly where the Trans and Muffler... Nov 18 2009, 10:15 PM Zaney Filled in the side markers and Sold them to Fourbl... Nov 18 2009, 10:22 PM Zaney Hopefully, I will get a few hours to install my En... Nov 18 2009, 10:25 PM strawman Good job Nate, keep up the great work! Nov 20 2009, 10:34 AM plymouth37 Nice work, you are going to end up with a really g... Nov 20 2009, 11:31 AM Zaney Dana and Geoff,
Thanks for the words of encourage... Nov 20 2009, 11:49 AM Zaney It has been a while since an update but, progress ... Mar 7 2010, 12:46 AM Zaney Pic of interior firewall
Engine bay firewall
Mar 7 2010, 12:48 AM Zaney Hell hole ready for seam sealer and 2K Primer.
16... Mar 7 2010, 12:50 AM Zaney And the trunk firewall before being boxed out for ... Mar 7 2010, 12:58 AM FourBlades Nate,
You are really kicking ass now! :trop... Mar 7 2010, 06:49 AM rebelmdot Great work! A guy is supposed to pick up my 9... Mar 7 2010, 07:21 AM Zaney Thanks for the words of encouragement!
John, ... Mar 7 2010, 09:38 PM strawman
I can't seem to remove the stubborn cranksha... Mar 8 2010, 10:17 AM Zaney Geoff,
I believe that you are correct! ... Mar 8 2010, 07:19 PM Zaney So after celebrating my daughter's 1st Birthda... May 24 2010, 11:33 PM Zaney Drove down to Tacoma where I stopped by Delta Cams... May 24 2010, 11:37 PM Zaney Exhaust side
Longblock assembled after reading ... May 24 2010, 11:40 PM Zaney Throttle body cleaned up using a homemade soda-bla... May 24 2010, 11:42 PM Zaney Strawman version of the Suby engine mount bar. In... May 24 2010, 11:45 PM Zaney Rear firewall trunk area cleaned up and ready to b... May 24 2010, 11:47 PM Zaney Next step after the firewall is fabbed up is to lo... May 24 2010, 11:51 PM strawman Lookin' good! :beer3:
You might want to... May 25 2010, 06:20 PM Zaney Thought I would listen to Geoff's advice and t... May 31 2010, 12:25 AM Zaney
tied all the gusset plates together into the ... May 31 2010, 12:29 AM Zaney Followed the advice of many who have come before m... May 31 2010, 12:33 AM charliew Don't slow down now. Try to get someone to cut... Jun 5 2010, 10:51 PM Zaney Got a bit of time thanks to Grandma visiting and w... Jun 5 2010, 10:57 PM Zaney Looking up from the engine bay "new expansion... Jun 5 2010, 10:59 PM Zaney RE: Zaney's Suby Rustoration Adventure Jun 5 2010, 11:01 PM Zaney Next, I am going to take apart the tranny and atte... Jun 5 2010, 11:06 PM Zaney Keep the momentum going...
Painted the rear trunk... Jun 13 2010, 02:34 PM nsr-jamie I love this thread! Keep up the excellent work... Jul 4 2010, 05:53 AM Zaney Alrighty then!
More progress on the Suby Trans... Jul 20 2010, 01:57 PM Zaney Here is my attempt at the Suby Transmission mount ... Jul 20 2010, 02:04 PM Zaney Here is the alignment of the axle for the Suby Tra... Jul 20 2010, 02:09 PM Zaney There is plenty of room in the engine bay with thi... Jul 20 2010, 02:13 PM KELTY360 Nice looking work. I like the way you took a littl... Jul 20 2010, 02:54 PM KELTY360 Nice looking work. I like the way you took a littl... Jul 20 2010, 02:58 PM Zaney
Nice looking work. I like the way you took a litt... Jul 20 2010, 04:40 PM charliew Why not just take off from the front radiator to m... Jul 20 2010, 11:18 PM Porcharu Good to see MY idea for the trunk is working out w... Aug 25 2010, 10:59 PM Zaney I am actually in the redesigning phase of my trans... Aug 26 2010, 12:02 AM charliew I think you will find that unless you brace the mo... Aug 26 2010, 02:16 PM Zaney After studying some online pics of some Suby trans... Sep 10 2010, 01:29 PM Zaney The main reason for the new mounts was to provide ... Sep 10 2010, 01:36 PM strawman Looks great Nate! Keep the updates coming.
Si... Sep 10 2010, 02:19 PM Zaney Well, it has been a while but finally some progres... Nov 13 2010, 07:26 PM sawtooth Very nice. I'll be doing the same very soon. K... Nov 13 2010, 08:09 PM strawman Great job Nate. I'm finally in the "pre-a... Nov 14 2010, 01:48 AM Zaney Thanks Geoff!
Next step is copying your hydrau... Nov 14 2010, 10:54 AM Zaney Been too long since I have posted any progress on ... May 3 2011, 02:19 PM sawtooth Looking great Nate, keep it up! You'll hav... May 3 2011, 02:24 PM Zaney
Ordered the Gates radiator hose from Renegade Hyb... May 3 2011, 02:23 PM Zaney
Phoenix Red!!!
16x7's! Tir... May 3 2011, 02:25 PM Zaney
Suby engine!! Ready to be installed... May 3 2011, 02:28 PM ruby914 Looking good. Nice work Nate.
What profile tires ... May 10 2011, 09:09 AM Zaney I picked up a set of Falken 205/50/ZR16 tires... May 10 2011, 10:49 AM JRust Hey Nate is that Outfronts alternator relocation b... May 10 2011, 01:18 PM Zaney
Hey Nate is that Outfronts alternator relocation ... May 15 2011, 08:17 PM Zaney Here are some pics of some more progress: :Qarl... May 27 2011, 09:52 PM Zaney
Side view of Outfront unmodified Alternator brac... May 27 2011, 09:53 PM sawtooth Hey Nate, what's the status. You must be getti... Jun 14 2011, 04:24 PM  |
2 User(s) are reading this topic (2 Guests and 0 Anonymous Users)
0 Members:

|
Lo-Fi Version | Time is now: 22nd April 2026 - 11:15 AM |
Invision Power Board
v9.1.4 © 2026 IPS, Inc.