Help - Search - Members - Calendar
Full Version: Zaney's Suby Rustoration Adventure
914World.com > The 914 Forums > 914World Garage
Pages: 1, 2, 3, 4
Zaney
Well, I finally have found the time to put down some of the ideas and pictures that have been going on for about a year now.

It all started last April when I found out that hitting the curb in a round-about is not the best thing for your suspension. Needless to say that it definitely put my '74 out of service. The passenger A-Arm broke, bent the tie rod, ruined the ball joint, bottomed out the shock, and blew a tire. The only thing that I damaged was my pride. headbang.gif

So, thanks to my Dad's AAA the teener was towed 3 blocks back to his house and waited to be brought back to Redmond from Tacoma (40 miles or so). I took it home and put it on jack stands to check out the damage.

I decided that this is as good a time as any to upgrade and refurbish my front end. However, like any project that begins around here it usually ends up in a major rustoration. Let me list out the plans for the teener:

Engine: 2002 Subaru 2.5 N/A using stock ECU and stock trimmed harness
Transmission: 2002 Subaru 5-Speed with DIY style Bremar conversion to 2wd
Intake: Aftermarket Ricer 3"
Exhaust: Stock trimmed WRX header to a Dynomax SS Ultraflo muffler

Suspension: Tarret sway bar on Engman mounts
Koni Yellow adjustable shocks with rear Ground Control adjustable perches and springs
Elephant racing monoballs, low friction control arm mounts, polybronze control arm bearings, polybronze trailing arm bearings
Turbo tie rods w/ bump steering spacer
New ball joints
Five-lug conversion with new bearings, 911 front M calipers on vented rotors, 914 rear calipers on 914-6 rotors with Porterfield Pads
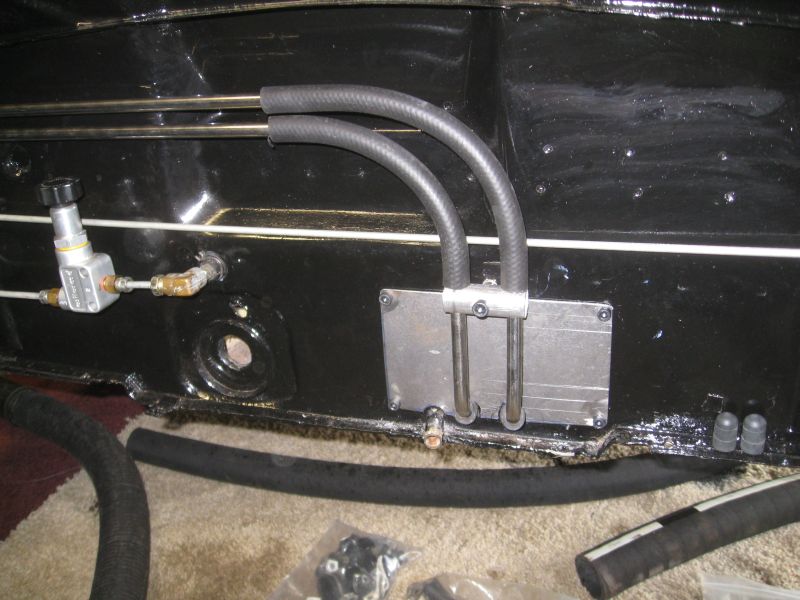
19mm New master cylinder & new hard lines
911 16 x 7 inch Fuchs on Falken 205/50/ZR16

Body Mods: Engman stiffening kit
Stock seats (for now)
Momo Prototipo steering wheel
Rennline Perforated REV 2 Adjustable Aluminum Pedal Set (someday)
Racing "minimal" look for interior
Stereo TBD or omit
John Kelly styled rear fenders (hand hammered)

Paint scheme: Silversickle Body all silver with Phoenix Red wheels, bumpers, and rockers

Ambitious but, not out of reach!

Now for some pics...
Pictures when I bought it as a roller
Click to view attachment

My Dusty '74
Click to view attachment
A bit crowded
Click to view attachment
Zaney
Click to view attachment
Kind of grimy


Click to view attachment
really grimy
Zaney
Click to view attachment
Cleaned up the steering rack area

Click to view attachment

Cleaned up the wheelwells and installed the Tarett bar!
Zaney
Click to view attachment
Cleaned up under the fuel tank
Sent the tank to be boiled out and sealed up

Click to view attachment
Cleaned up a pair of A-arms I bought from Rhodyguy (Kevin) and installed the Elephant hardware
Zaney
Click to view attachment

Cleaned up the steering rack and attatched the turbo tie rods

Click to view attachment

Bdstone refurbished pedal cluster... Tasty! beerchug.gif
Zaney
Click to view attachment
Good enough to lick!

Click to view attachment
Almost ready for the tank
Zaney
Click to view attachment
Back from the radiator shop and awaiting install...

More to come...
It is getting late

driving.gif
dlo914
Have you thought up how to run the cable lines for the cable shifter to the suby tranny? Good luck on your upgrade and it's nice to see another suby swap being done.
TonyAKAVW
Wow, talk about a nice car to start with! That thing is pristine! Speaking from experience, the EJ25 is a great motor for a 914. I'm definitely jealous of all that suspension work!!

Good luck with the conversino can't wait to watch!

-Tony
charliew
Is the cover on the torsion bar to prevent it from rubbing on the tank?
Have you considered running the cooling lines down the bottom of the centertunnel? Now is a good time to figgure the lines out.
dlo914
QUOTE(charliew @ Apr 24 2009, 07:58 AM) *

Is the cover on the torsion bar swaybar to prevent it from rubbing on the tank? Have you considered running the cooling lines down the bottom of the centertunnel? Now is a good time to figgure the lines out.

Zaney
I should clarify the condition of the car at the time of the some of the 'cleaned up' pictures of the front end. I spent many hours on my back with a grinder/wire wheel taking the pan and wheel wells down to bare metal. Then, prepped the surface with Marine Clean and Metal Ready. Instead of POR-15 on the exterior surfaces I used Zero Rust sold in rattle cans (2 coats) and, finally in the wheel wells I sprayed an even layer of undercoat. So, this kind of scrutiny is being used on the rest of the car (minor OCD/ perfectionist tendencies). However, by doing so I unearthed what everyone finds in a 914; RUST! Some of the pictures to follow will show the extent of the cancer and rebuilding.

Dlo - I am going down the path blazed by Porscharu (Steve) since my mechanical skills are still in the novice range. I think I will be using this Shifter after Steve tweeks with it.

Tony - I have read about your journey into Suby Land in your thread about 3x to glean as much info as possible. You, Fiid, Steve Thatcher, and others have inspired me to do this conversion! Thanks for the kind words!

Charlie - I used a thin piece of pipe foam insulation to cover the swaybar to keep it from banging on the bottom of the gas tank. rTowle (Rich) has posted using a piece of garden hose but, I am going to try this and see how it goes. As for running the coolant lines, I am debating making a semi-removable panel for the center tunnel like Carreraguy had made for his Suby conversion. I probably would cut out the heater cable tubes and eventually make an access panel in the engine bay like Amenson did: IPB Image

More pics to come...

Zaney
I made a door brace for the passenger side after Strawman's (Geoff) example. Using a turnbuckle cut in two and welded onto a piece of 1 inch schedule 40 pipe. Then, connected to the upper seat buckle mount and welded to a plate in the foot well.

Click to view attachment

Upper attachment

Click to view attachment

Lower attachment
Zaney
Then came the moment of truth and I broke out the heavy artillery. Many spot welds were drilled out and the pneumatic saws were humming to cut out the rotten areas: rear floor pan, right inner long, jack points, passenger sill, right lower wheel house, and the hell hole. sawzall-smiley.gif

I researched the "Digging into Hell" thread and others to make sure that I did not open up too much at one time. Especially, since I am not using a rotisserie. (wish I was)

Here are some pics:

Click to view attachment

Cut out rear floor pan
Zaney
Click to view attachment
Cut the fender to get at the wheel house and took off the sill and inner rocker.

Click to view attachment
Had to repair part of the interior long, repaired then double wall reinforcement, cut out the heater tubes & supports.

Wire wheeled it out, prepped and painted.

Zaney
Click to view attachment
In the engine bay I cut out all of the aircooled tin and extra metal. Wire wheeled it down, cleaned and prepped for POR-15. I have to re-open the hell hole repair I did awhile ago but, it will be a lot cleaner with new metal!! welder.gif

Click to view attachment
Cut out my slop!
Zaney
After the passenger long was repaired on the interior side I got the rear floor pan ready. I used Jeff Hail's sketch about over lapping the front and the rear pieces so the rear is on top of the front section. Rosette welded on top and seam welded under neath. I also replaced the passenger side cross member support since it was rotted out too. I ground down the welds enough but not all the way (yet), prepped them and applied seam seal on them for now.
I will get more particular when I install the Engman interior stiffening kit later.

Click to view attachment

Zaney
Underneath, the seat rail reinforcements were replaced as well as new Restoration Design rear jack points.

Again, the welds were not ground down all the way yet and seam sealed for now.

Click to view attachment
Hard to get into all the tight spots to grind everything. Maybe I will use a die grinder with stones.

Click to view attachment

Fine details will happen after all the repair welding is completed.
Zaney
Earlier, I jumped the gun a bit with the interior paint and POR-15 on the front floor pan. But WOW! I like the color contrast!

Click to view attachment
Touch ups after I am done...

Click to view attachment
My neighbor said, "Take it over and use it! It is only sitting around over here."
Thanks Tony!
Zaney
Here is my new engine sitting patiently.
Click to view attachment
Zaney
Suby 5 speed waiting for the Bremar conversion parts.
(Have to work some overtime soon...)

Click to view attachment

Other Koni shocks and Ground Control Goodies waiting for their turn to play!

Click to view attachment
charliew
I guess the tarret is that much bigger than the stock bar.

With that much off the passenger side do you think the tub will twist? Do you still have the top on? You might want to diagonal brace the door gaps, across from side to side, to try to keep them square. My 75 is really sound and if I jack up the pass side on the front donut the door moves out .400 at the top by the handle. It doesn't move more than .080 using the rear donut. These cars will twist real easy, thats why the front fender has the rubber in the gap at the cowl.

You might want a obx lsd for the tranny while your there. These little cars really need lsd with hp and skinny tires.
Zaney
Last two pics for now...

Click to view attachment

New brake pivot plate from AA in place waiting for the Engman kit for grinding.

Click to view attachment

Today, I am going to weld up the passenger long and then get ready for the wheelhouse. I wanted to have as little as possible open and unsupported as possible. So, the welder will be sizzling today! welder.gif


Stay tuned for more...
-Z
Zaney
QUOTE(charliew @ Apr 24 2009, 09:43 AM) *

I guess the tarret is that much bigger than the stock bar.

With that much off the passenger side do you think the tub will twist? Do you still have the top on? You might want to diagonal brace the door gaps to try to keep them square. My 75 is really sound and if I jack up the pass side on the front donut the door moves out .400 at the top by the handle. It doesn't move more than .080 using the rear donut. These cars will twist real easy, thats why the front fender has the rubber in the gap at the cowl.

You might want a obx lsd for the tranny while your there. These little cars really need lsd with hp and skinny tires.


Charlie,

I still have the top on and put a smidgen of flex in the door brace to counter any shrinkage. I am following the path that many members have traveled before and have not had any trouble with their door gaps. So, cross your fingers!

That is why I wanted to button up the floor pan and passenger long before I cut open the rear wheelhouse/ hell hole area.

As for an LSD, that will come with an upgrade to a WRX or Sti engine. Unless, I find a good deal out there earlier. Plus, I plan on running on 16x7 inch tires all the way around. Maybe 9's in the rear if I can find someone to stretch my rear fenders.

Thanks for the heads up!

beer.gif
Nate
PeeGreen 914
That's looking great Nate. welder.gif
Zaney
Thanks Jon! biggrin.gif

Welded up the passenger long today but, my wife has the camera so no pics yet.

Took my time to make sure every rosette had enough time to cool before I zapped another in that area. welder.gif

My neighbor who let me borrow the Mig said he would give me a good deal on it. He said, he wants to buy a TIG setup. I think I will save some cash and buy it! (My baby shower gift!)

Oh ya, T-minus 4 weeks and counting til my little girl shows up. That is why the rustoration has kicked it up a notch! cheer.gif

Now it is time to wrap it up with the right wheel house...

Have a great weekend! beerchug.gif
Nate
rickthejetman
hi there new to the 914 world and im contemplating the subby swap as my 73 914 has no engine anyway. i was wondering what you do for axles when you use the subby 5 speed?
Zaney
Hey Rick!
Two options for ya! Search for Porcharu and his Subaru transmission tread for the output flanges. (that is what I am using) Or, custom axles made to order for around $500 + or -

Good luck and welcome.png
Zaney
BTW, got the camera and the passenger long repair pics!

Click to view attachment

Click to view attachment
Zaney
Click to view attachment

Time to finish up a quick house project then, back to the passenger wheelhouse replacement!

Wish me luck!!! beerchug.gif
Zaney
Well, a lot has happened in the past 12 weeks... Only a little progress on the car but some BIG Life changes! smile.gif

My wife decided she wanted to cut open the wall in out kitchen to make it more open (when she was 39 weeks pregnant!) So, nothing like a deadline to get a project done!

We went from this
Click to view attachment

To this in two weeks!
Click to view attachment

Oh ya, Little Miss Sydney was born twelve weeks ago right in the middle of the house project!!! screwy.gif cheer.gif

Luckily, my mother-in-law stayed with us for 10 days in order for me to wrap up the messy project!

Zaney
I was able to take six weeks off of work in order to help my wife recover from the C-section and, sneaked in some time on the Teener when I could too!

I cut out the rotten portion of the right side wheel house and replaced it with new metal! It was tricky to match the pieces but, I used a template to get it as close as possible! I also added two pieces of 16 gauge steel to help support the patched areas. Not sure if was needed but now I know it is double walled in those areas!
Click to view attachment

Found a wonder tool in order to help remove the old undercoating of the bottom of the chassis.
Click to view attachment

It RAWKS! aktion035.gif
Zaney
I am in the process of cleaning up the wheel wells and the bottom of the trunk area with the Flail tool. I think I am going to cut out the muffler shield in the end...

Click to view attachment

And also giving the hard to reach places the Marine clean, Metal ready and Zero Rust treatment before I weld the cut away fender panels back into place.

Click to view attachment

Zaney
First good result in welding thinner sheet metal panels without blowing holes in it!

Click to view attachment

Click to view attachment


Next: welder.gif

Fabricate or reuse the triangles for the sill
Weld in the sill and triangles
Weld the lower fender panel back in places
Fill in the turn signal markers

Repair the PO attempts with Bondo
Click to view attachment


Then, fill in the holes in rear trunk area for a previous PORSCHE reflector!


More to come!!!
Nate
nsr-jamie
I love these kind of posts, keep up the good work and please post more pics when you get it done and congrats on the new baby, also nice work on that kitchen!! Cheers!!
strawman
Great to see another Suby conversionite (is that a word?) making progress! I finished up my engine mount system today and am now working on the Suby trans mount. It was HOT today; think I lost about 5 pounds in sweat! I'll post some pictures in the coming days. Keep up the good work...
Zaney
Finally some time to UPDATE!

Welded up the door jam and the rocker sill & triangles.
Click to view attachment

Lower piece of fender
Click to view attachment

Filled in the PORSCHE reflector holes in the rear
Click to view attachment

Zaney
Cleaned the underbelly where the Trans and Muffler will go.

Click to view attachment

Driver's rear wheel well

Click to view attachment

Muffler shield removed and area treated for Rust! sawzall-smiley.gif

Click to view attachment
Zaney
Filled in the side markers and Sold them to Fourblades

Click to view attachment

Planned on removing the Sail Vinyl but, took care of Mucho rust too! chair.gif

Click to view attachment

More on passenger side and smoothed out too! welder.gif

Click to view attachment
Zaney
Hopefully, I will get a few hours to install my Engman stiffening kit that I was fortunate to acquire during the most recent group buy!
Click to view attachment

Then, my Suby build will really get down to brass tacks!

beerchug.gif
Nate

strawman
Good job Nate, keep up the great work!
plymouth37
Nice work, you are going to end up with a really great little car when you finish this one!
Zaney
Dana and Geoff,

Thanks for the words of encouragement! My welding and fabrication skills pale in comparison to your practiced art but, I am learning! pray.gif

Geoff, thanks for the pics of your project. I am counting on some holiday time to work on the car then! welder.gif

Hopefully, I can prep the car for the Engman kit tonight!

beer.gif
Nate
Zaney
It has been a while since an update but, progress is happening slowly. yellowsleep[1].gif

My 9 month old daughter has been the focus of my non-working hours at the Firehouse but, I have been able to sneak into the garage once and a while welder.gif

I installed the Engman Stiffening kit.
(Now for the OCD part) I stripped out all of the Por-15 in the passenger compartment and engine bay and prepped it again for Acid Etching Primer.

Passenger interior firewall is a mix of two different colors (leftovers of the same brand) Then, a round of seam sealer.

The engine bay will receive the same treatment after all the welding is completed.

2K Primer will be the next layer before paint.

I went against Por-15 because of many mixed results and the better application of the primers.

Click to view attachment
Zaney
Pic of interior firewall
Click to view attachment

Engine bay firewall
Click to view attachment
Zaney
Hell hole ready for seam sealer and 2K Primer.

16 gauge gusset plate welded into place ready for the Suby motor mount bar placement. welder.gif
Click to view attachment

Lower shot
Click to view attachment
Zaney
And the trunk firewall before being boxed out for the future turbo. Still need room for the starter and clutch slave cylinder though.

Click to view attachment

Click to view attachment


Now, I am researching the various engine maintenance procedures for the Suby in order to get it ready to mock up the placement.

Still need to order the Bremar transmission components and get the tranny ready for mock up too.

A lot to do still but I am trying to keep each milestone small and not think about too much. (Easy said than done beerchug.gif )

Cheers,
Nate
FourBlades

Nate,

You are really kicking ass now! smilie_pokal.gif

I am amazed you get so much done with a new baby in the house.

The areas you have prepped look like brand new metal.

Your turn signals look great on my car with clear lenses. smile.gif

John
rebelmdot
Great work! A guy is supposed to pick up my 911SC today sometime and then I will have a little extra $$ to begin a resto of my own. I currently have 3 and I am planning to do a Suby conversion to one of them. I think that it will be the 2nd one I do, so I will have some time for you to finish biggrin.gif . I will use your post for ideas and encouragement. I can't wait to see what you do next.
Zaney
Thanks for the words of encouragement!

John, your car is awesome! I think the clear markers against the deep blue turned out to be a great idea!

Christian, I am only following the lead of many people way more talented than myself.

Search - TonyAKAVW, Strawman, Fiid, Amenson, and Carreaguy for their builds!
Good luck with your Build!

This is what I am battling right now.

Click to view attachment

I can't seem to remove the stubborn crankshaft pulley 22mm bolt. A little overnight Aerocoil and maybe an impact wrench will get it off. I plan on replacing the stock pulley with a lightened one.

Any other suggestions are more than welcome to remove the frozen bolt.! smash.gif

Cheers!
Nate
This is a "lo-fi" version of our main content. To view the full version with more information, formatting and images, please click here.
Invision Power Board © 2001-2024 Invision Power Services, Inc.