|
|

|
Porsche, and the Porsche crest are registered trademarks of Dr. Ing. h.c. F. Porsche AG.
This site is not affiliated with Porsche in any way. Its only purpose is to provide an online forum for car enthusiasts. All other trademarks are property of their respective owners. |
|
|
  |
| strawman |
 Nov 20 2009, 10:34 AM Nov 20 2009, 10:34 AM
Post
#41
|
|
Senior Member    Group: Members Posts: 891 Joined: 25-January 08 From: Los Osos, CA Member No.: 8,624 Region Association: Central California 
|
Good job Nate, keep up the great work!
|
| plymouth37 |
 Nov 20 2009, 11:31 AM Nov 20 2009, 11:31 AM
Post
#42
|
|
Senior Member    Group: Members Posts: 1,825 Joined: 24-May 05 From: Snoqualmie, WA Member No.: 4,138 Region Association: Pacific Northwest 
|
Nice work, you are going to end up with a really great little car when you finish this one!
|
| Zaney |
 Nov 20 2009, 11:49 AM Nov 20 2009, 11:49 AM
Post
#43
|
|
Deuchland en der Haus   Group: Members Posts: 461 Joined: 1-March 04 From: Engine 11 Redmond, WA Member No.: 1,738 Region Association: Pacific Northwest |
Dana and Geoff,
Thanks for the words of encouragement! My welding and fabrication skills pale in comparison to your practiced art but, I am learning! (IMG:style_emoticons/default/pray.gif) Geoff, thanks for the pics of your project. I am counting on some holiday time to work on the car then! (IMG:style_emoticons/default/welder.gif) Hopefully, I can prep the car for the Engman kit tonight! (IMG:style_emoticons/default/beer.gif) Nate |
| Zaney |
 Mar 7 2010, 12:46 AM Mar 7 2010, 12:46 AM
Post
#44
|
|
Deuchland en der Haus   Group: Members Posts: 461 Joined: 1-March 04 From: Engine 11 Redmond, WA Member No.: 1,738 Region Association: Pacific Northwest |
It has been a while since an update but, progress is happening slowly. (IMG:style_emoticons/default/yellowsleep[1].gif)
My 9 month old daughter has been the focus of my non-working hours at the Firehouse but, I have been able to sneak into the garage once and a while (IMG:style_emoticons/default/welder.gif) I installed the Engman Stiffening kit. (Now for the OCD part) I stripped out all of the Por-15 in the passenger compartment and engine bay and prepped it again for Acid Etching Primer. Passenger interior firewall is a mix of two different colors (leftovers of the same brand) Then, a round of seam sealer. The engine bay will receive the same treatment after all the welding is completed. 2K Primer will be the next layer before paint. I went against Por-15 because of many mixed results and the better application of the primers. 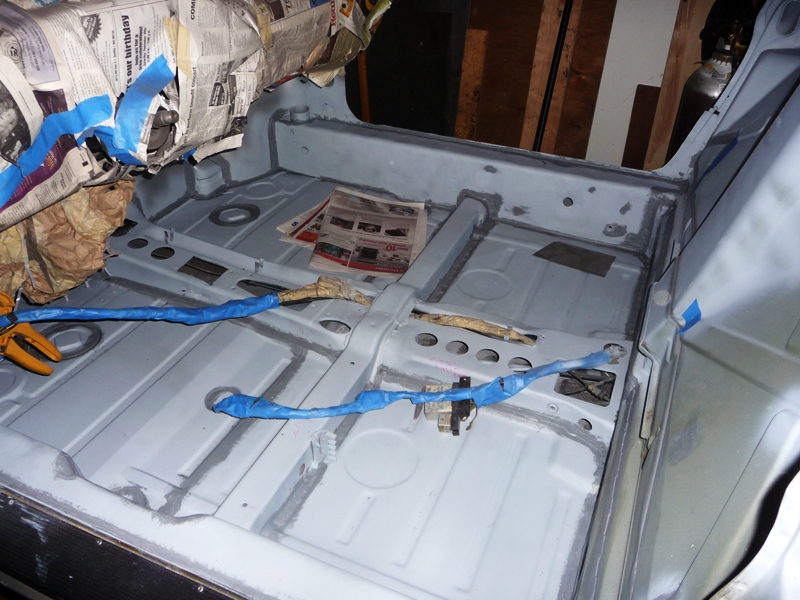 |
| Zaney |
 Mar 7 2010, 12:48 AM Mar 7 2010, 12:48 AM
Post
#45
|
|
Deuchland en der Haus   Group: Members Posts: 461 Joined: 1-March 04 From: Engine 11 Redmond, WA Member No.: 1,738 Region Association: Pacific Northwest |
Pic of interior firewall
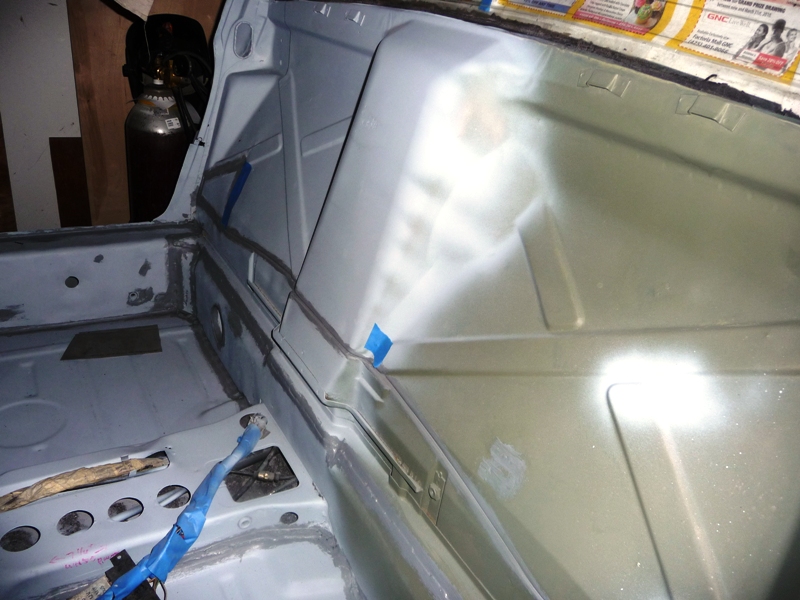 Engine bay firewall 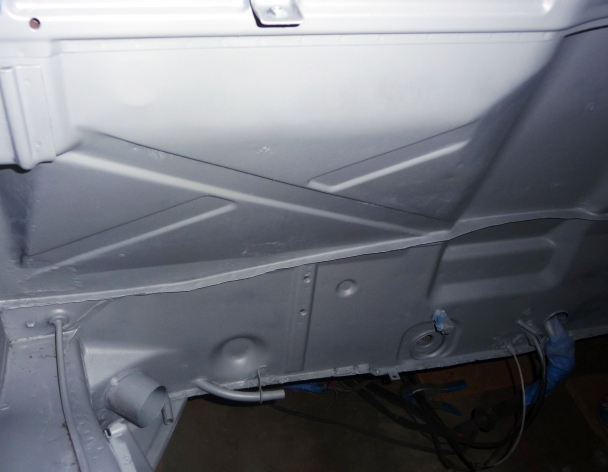 |
| Zaney |
 Mar 7 2010, 12:50 AM Mar 7 2010, 12:50 AM
Post
#46
|
|
Deuchland en der Haus   Group: Members Posts: 461 Joined: 1-March 04 From: Engine 11 Redmond, WA Member No.: 1,738 Region Association: Pacific Northwest |
Hell hole ready for seam sealer and 2K Primer.
16 gauge gusset plate welded into place ready for the Suby motor mount bar placement. (IMG:style_emoticons/default/welder.gif) 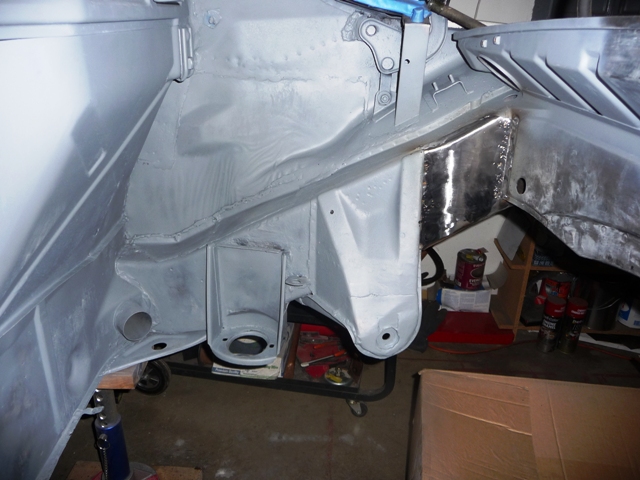 Lower shot 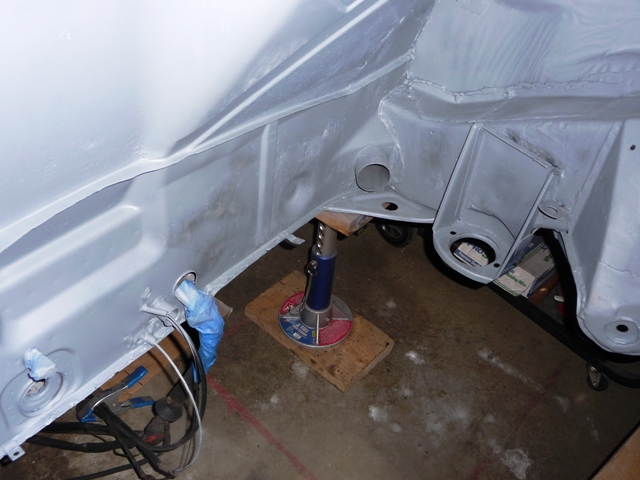 |
| Zaney |
 Mar 7 2010, 12:58 AM Mar 7 2010, 12:58 AM
Post
#47
|
|
Deuchland en der Haus   Group: Members Posts: 461 Joined: 1-March 04 From: Engine 11 Redmond, WA Member No.: 1,738 Region Association: Pacific Northwest |
And the trunk firewall before being boxed out for the future turbo. Still need room for the starter and clutch slave cylinder though.
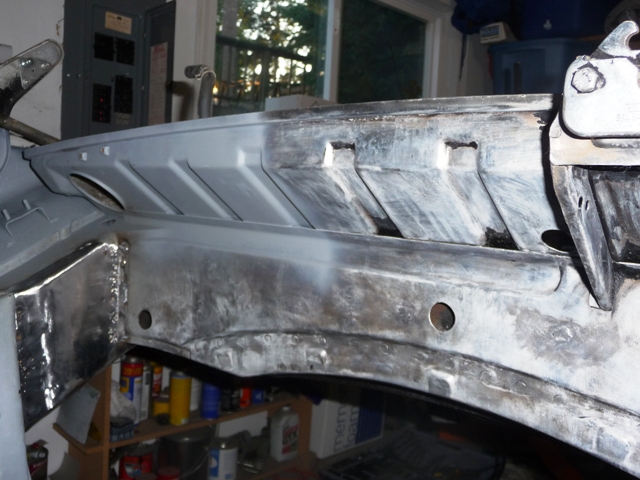 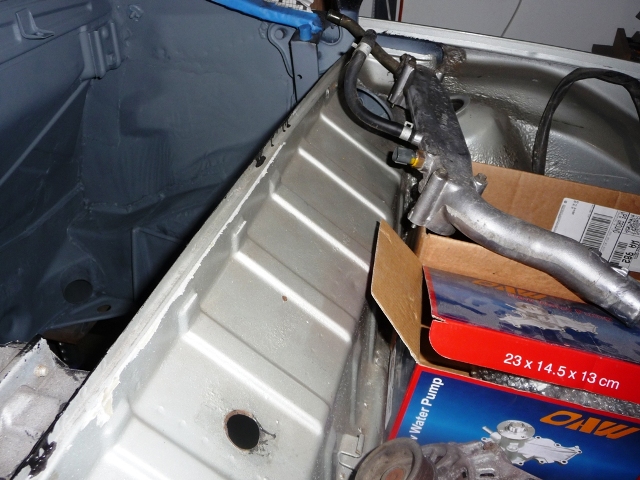 Now, I am researching the various engine maintenance procedures for the Suby in order to get it ready to mock up the placement. Still need to order the Bremar transmission components and get the tranny ready for mock up too. A lot to do still but I am trying to keep each milestone small and not think about too much. (Easy said than done (IMG:style_emoticons/default/beerchug.gif) ) Cheers, Nate |
| FourBlades |
 Mar 7 2010, 06:49 AM Mar 7 2010, 06:49 AM
Post
#48
|
|
From Wreck to Rockin     Group: Members Posts: 2,056 Joined: 3-December 07 From: Brevard, FL Member No.: 8,414 Region Association: South East States 
|
Nate, You are really kicking ass now! (IMG:style_emoticons/default/smilie_pokal.gif) I am amazed you get so much done with a new baby in the house. The areas you have prepped look like brand new metal. Your turn signals look great on my car with clear lenses. (IMG:style_emoticons/default/smile.gif) John |
| rebelmdot |
 Mar 7 2010, 07:21 AM Mar 7 2010, 07:21 AM
Post
#49
|
|
914ini   Group: Members Posts: 224 Joined: 25-January 08 From: Tennessee Member No.: 8,625 Region Association: South East States |
Great work! A guy is supposed to pick up my 911SC today sometime and then I will have a little extra $$ to begin a resto of my own. I currently have 3 and I am planning to do a Suby conversion to one of them. I think that it will be the 2nd one I do, so I will have some time for you to finish (IMG:style_emoticons/default/biggrin.gif) . I will use your post for ideas and encouragement. I can't wait to see what you do next.
|
| Zaney |
 Mar 7 2010, 09:38 PM Mar 7 2010, 09:38 PM
Post
#50
|
|
Deuchland en der Haus   Group: Members Posts: 461 Joined: 1-March 04 From: Engine 11 Redmond, WA Member No.: 1,738 Region Association: Pacific Northwest |
Thanks for the words of encouragement!
John, your car is awesome! I think the clear markers against the deep blue turned out to be a great idea! Christian, I am only following the lead of many people way more talented than myself. Search - TonyAKAVW, Strawman, Fiid, Amenson, and Carreaguy for their builds! Good luck with your Build! This is what I am battling right now. 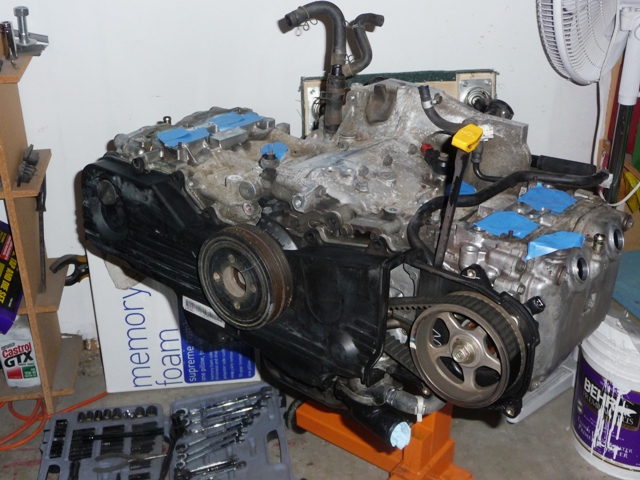 I can't seem to remove the stubborn crankshaft pulley 22mm bolt. A little overnight Aerocoil and maybe an impact wrench will get it off. I plan on replacing the stock pulley with a lightened one. Any other suggestions are more than welcome to remove the frozen bolt.! (IMG:style_emoticons/default/smash.gif) Cheers! Nate |
| strawman |
 Mar 8 2010, 10:17 AM Mar 8 2010, 10:17 AM
Post
#51
|
|
Senior Member    Group: Members Posts: 891 Joined: 25-January 08 From: Los Osos, CA Member No.: 8,624 Region Association: Central California 
|
I can't seem to remove the stubborn crankshaft pulley 22mm bolt. A little overnight Aerocoil and maybe an impact wrench will get it off. I plan on replacing the stock pulley with a lightened one. Any other suggestions are more than welcome to remove the frozen bolt.! (IMG:style_emoticons/default/smash.gif) Cheers! Nate Hi Nate -- An impact gun has always worked for me on all of my Suby engines. It is torqued to only something like 76 ft/lbs (don't have my manual in front of me), so I'm surprised you're having trouble with it. Maybe your impact gun isn't strong enough? The crap one that came with my old Craftsman air compressor was useless; I bought an Ingersoll Rand that is lighter and much burlier. Good luck, and keep up the great work! Geoff |
| Zaney |
 Mar 8 2010, 07:19 PM Mar 8 2010, 07:19 PM
Post
#52
|
|
Deuchland en der Haus   Group: Members Posts: 461 Joined: 1-March 04 From: Engine 11 Redmond, WA Member No.: 1,738 Region Association: Pacific Northwest |
Geoff,
I believe that you are correct! "You get what you pay for," is exactly what the $19.99 Impact gun from Harbor Freight is about. I think I can borrow one in the short term that has a little more zip! I am going to strip it down to a shortblock and take the cams down to Tacoma and have Delta Cams put their street grind on them for about $150 or so. Wish me luck! (IMG:style_emoticons/default/smash.gif) |
| Zaney |
 May 24 2010, 11:33 PM May 24 2010, 11:33 PM
Post
#53
|
|
Deuchland en der Haus   Group: Members Posts: 461 Joined: 1-March 04 From: Engine 11 Redmond, WA Member No.: 1,738 Region Association: Pacific Northwest |
So after celebrating my daughter's 1st Birthday (IMG:style_emoticons/default/birthday3.gif) Sydney, I thought I would give an UPDATE (IMG:style_emoticons/default/beerchug.gif)
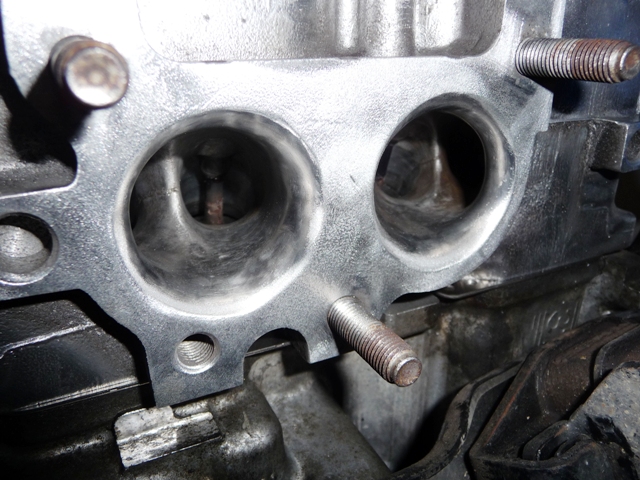
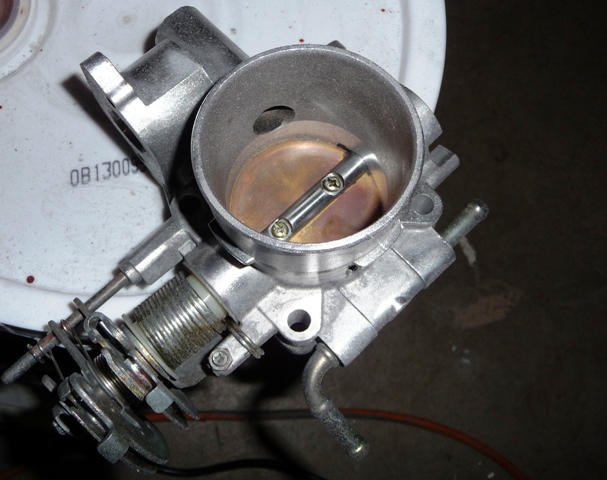
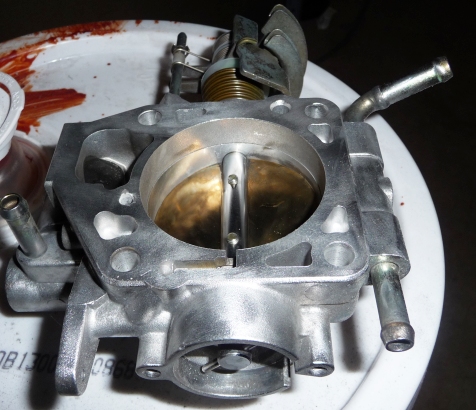
I stripped the Suby down to a short block and gave it the once over! - New gaskets, new water pump, new time belt and pulleys, new Delta Cams (1000 grind), valves reseated and rockers gapped, and the cylinder heads were cleaned up, gasket matched, and polished up! (IMG:style_emoticons/default/smilie_pokal.gif) - The intake and TB were cleaned up and polished a bit too. I will eventually paint the intake either STi red or Chevy red-orange (IMG:style_emoticons/default/idea.gif) - The rear trunk/firewall area is stripped, cleaned, Metal-Readied, and awaiting Fabrication! I am trying to find access to a bead roller to attempt the stock 'buttresses' in the new panel. I am also following Steve's (Porschru) lead on the bracing in that area with 1 inch square tubing. - I copied the engine bar design from Geoff (Strawman). - Finally, I picked up an early MR2 shifter for a great deal on evilbay! On to the Pics!!! 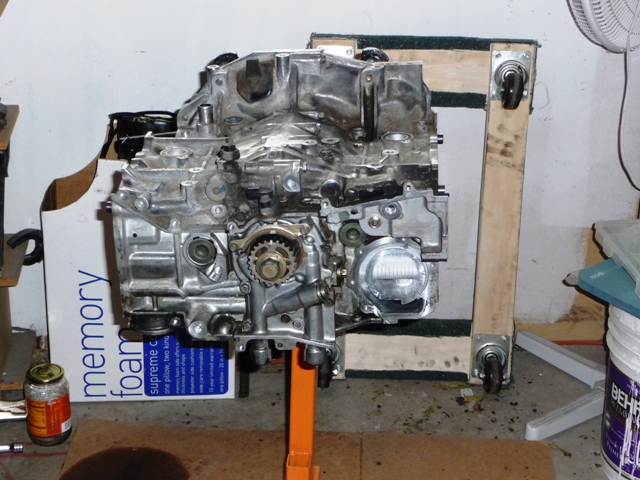 Short block cleaned up 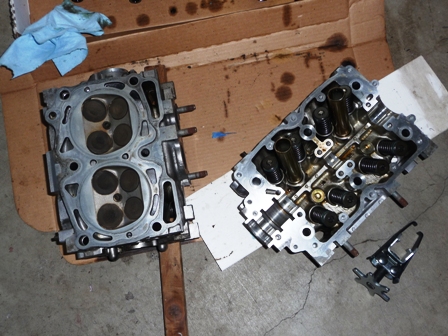 Cylinder heads awaiting tear down. |
| Zaney |
 May 24 2010, 11:37 PM May 24 2010, 11:37 PM
Post
#54
|
|
Deuchland en der Haus   Group: Members Posts: 461 Joined: 1-March 04 From: Engine 11 Redmond, WA Member No.: 1,738 Region Association: Pacific Northwest |
Drove down to Tacoma where I stopped by Delta Cams and picked up some 1000 grinds after giving them my cores.
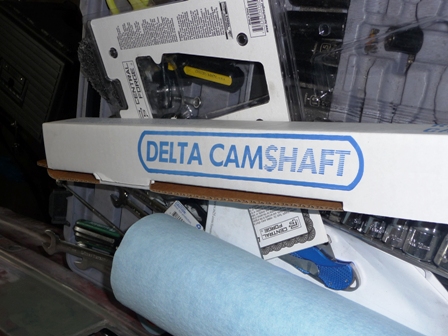 Spent many hours staying up reading DIY threads about port matching and gasket matching cylinder heads. So, I thought what the hell (IMG:style_emoticons/default/stirthepot.gif) 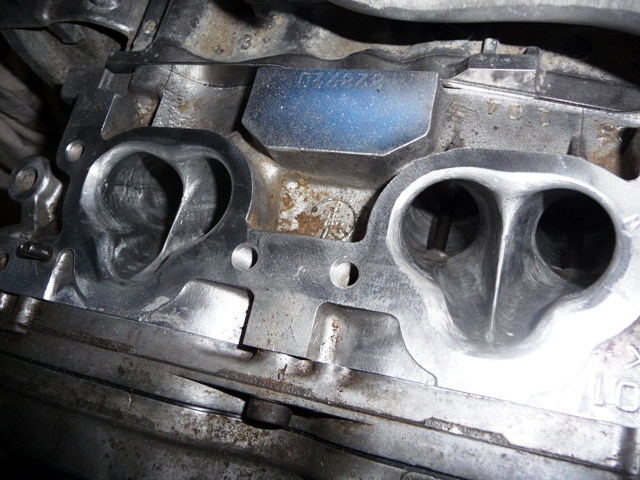 Intake side |
| Zaney |
 May 24 2010, 11:40 PM May 24 2010, 11:40 PM
Post
#55
|
|
Deuchland en der Haus   Group: Members Posts: 461 Joined: 1-March 04 From: Engine 11 Redmond, WA Member No.: 1,738 Region Association: Pacific Northwest |
Exhaust side
 Longblock assembled after reading over the Suby Tech Manual for awhile... 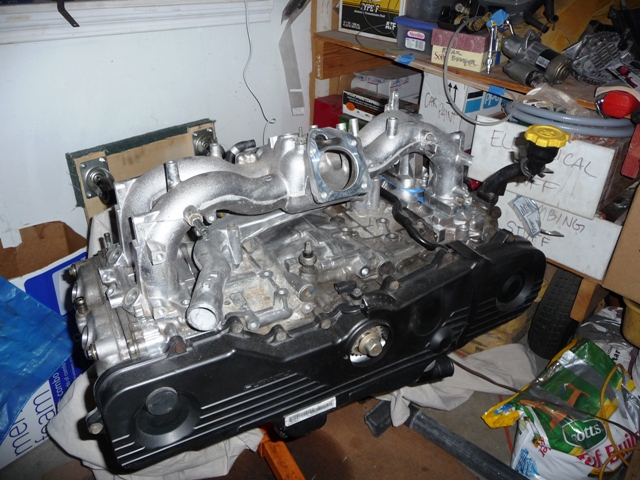 |
| Zaney |
 May 24 2010, 11:42 PM May 24 2010, 11:42 PM
Post
#56
|
|
Deuchland en der Haus   Group: Members Posts: 461 Joined: 1-March 04 From: Engine 11 Redmond, WA Member No.: 1,738 Region Association: Pacific Northwest |
Throttle body cleaned up using a homemade soda-blaster siphon gun!
  |
| Zaney |
 May 24 2010, 11:45 PM May 24 2010, 11:45 PM
Post
#57
|
|
Deuchland en der Haus   Group: Members Posts: 461 Joined: 1-March 04 From: Engine 11 Redmond, WA Member No.: 1,738 Region Association: Pacific Northwest |
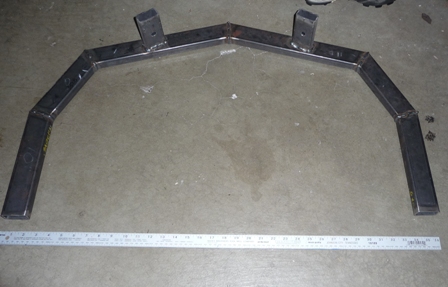
Strawman version of the Suby engine mount bar. Inspired from S. Thatcher and Tony!
 MR2 Shifter ready to be cleaned up and mocked up! 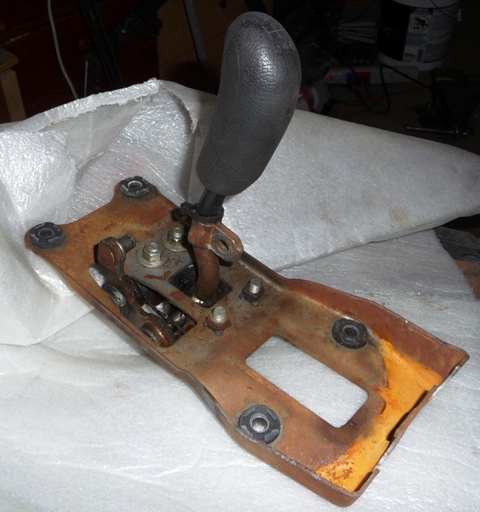 |
| Zaney |
 May 24 2010, 11:47 PM May 24 2010, 11:47 PM
Post
#58
|
|
Deuchland en der Haus   Group: Members Posts: 461 Joined: 1-March 04 From: Engine 11 Redmond, WA Member No.: 1,738 Region Association: Pacific Northwest |
Rear firewall trunk area cleaned up and ready to be (IMG:style_emoticons/default/sawzall-smiley.gif) and (IMG:style_emoticons/default/welder.gif) !!!
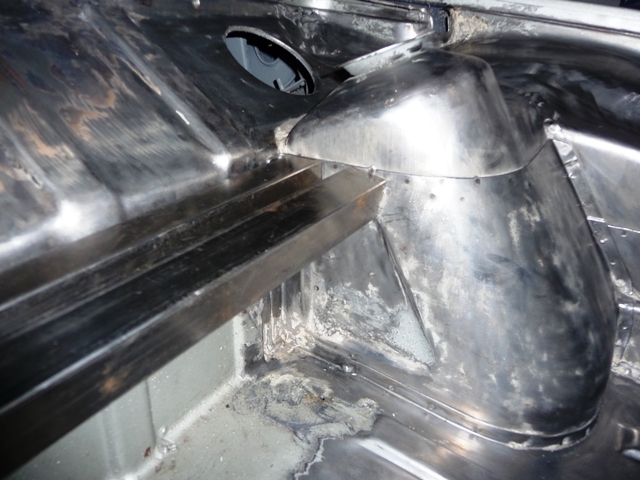 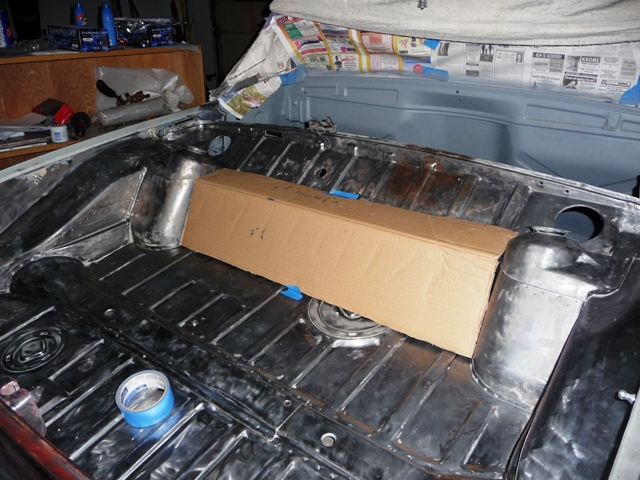 |
| Zaney |
 May 24 2010, 11:51 PM May 24 2010, 11:51 PM
Post
#59
|
|
Deuchland en der Haus   Group: Members Posts: 461 Joined: 1-March 04 From: Engine 11 Redmond, WA Member No.: 1,738 Region Association: Pacific Northwest |
Next step after the firewall is fabbed up is to locate the final resting position for the powerplant and make the tranny mount.
Also, sort out the FI mess (IMG:style_emoticons/default/chair.gif) 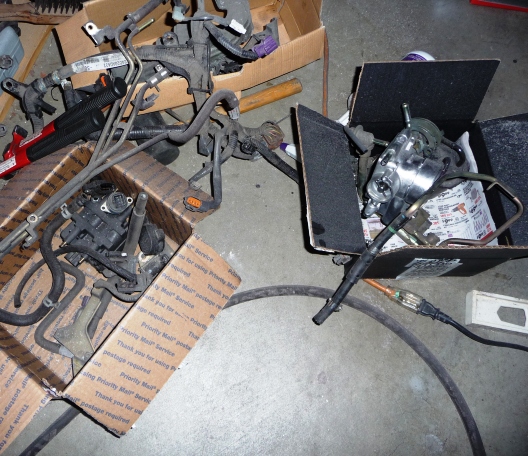 Chime in if you see me missing a step or forgetting something! Thanks in advance!! (IMG:style_emoticons/default/beerchug.gif) Nate |
| strawman |
 May 25 2010, 06:20 PM May 25 2010, 06:20 PM
Post
#60
|
|
Senior Member    Group: Members Posts: 891 Joined: 25-January 08 From: Los Osos, CA Member No.: 8,624 Region Association: Central California 
|
Lookin' good! (IMG:style_emoticons/default/beer3.gif)
You might want to seam weld the shock towers "while you're in there" -- prior to cutting/welding up the "turbo/starter/clutch release arm" box in the rear trunk. From everything I've read here, using significantly higher-rate-than-stock rear springs could tear the towers loose. If you're using the same U-bar mounting system on the upper longs that I did, you might also wanna tie-in the upper longs to the shock towers on the engine bay side of things while welding in those mounts. Your progress is shaming me into providing an update on my project... keep up the great work!!! (IMG:style_emoticons/default/beerchug.gif) |
  |
2 User(s) are reading this topic (2 Guests and 0 Anonymous Users)
0 Members:

|
Lo-Fi Version | Time is now: 10th January 2026 - 05:58 PM |
Invision Power Board
v9.1.4 © 2026 IPS, Inc.


