|
|
|
Porsche, and the Porsche crest are registered trademarks of Dr. Ing. h.c. F. Porsche AG.
This site is not affiliated with Porsche in any way. Its only purpose is to provide an online forum for car enthusiasts. All other trademarks are property of their respective owners. |
|
|

  |

| charliew |
 Aug 26 2010, 02:16 PM Aug 26 2010, 02:16 PM
Post
#81
|
|
Advanced Member  Group: Members Posts: 2,363 Joined: 31-July 07 From: Crawford, TX. Member No.: 7,958 |
I think you will find that unless you brace the motor or tranny front to rear they will swing forward and rearward under power. the only thing preventing it is the strength of the tubing crossection at the vertical part of the motor mount. Thats probably why Dana built the cradle type mount he made for rh. You maybe could build a mount from the top of the bellhousing to the tubing you put between the towers like the subys (pitch link) use to stop it.
|
   |

 
|
| Zaney |
Sep 10 2010, 01:29 PM
Post
#82
|
|
Deuchland en der Haus Group: Members Posts: 461 Joined: 1-March 04 From: Engine 11 Redmond, WA Member No.: 1,738 Region Association: Pacific Northwest |
After studying some online pics of some Suby trans mounts, I gave it another try.
I followed the advise of other Conversionites (IMG:style_emoticons/default/beer.gif) and used 911 sports mounts to attach the Suby trans to after fixing it with hard mounts. The pics will say it better... Sorry for the blurriness, camera phone pics. 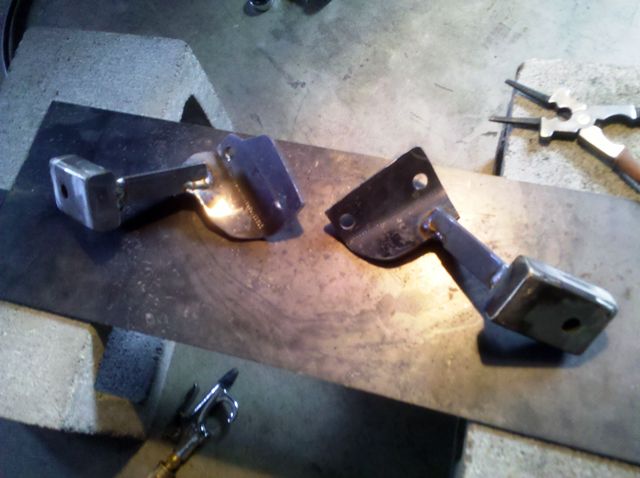 1 inch tubing that is boxed and sleeved for the bolt (prevent crushing) attatched with 1"x1"x.25" angle steel to a .25" plate cut to fit the Suby case 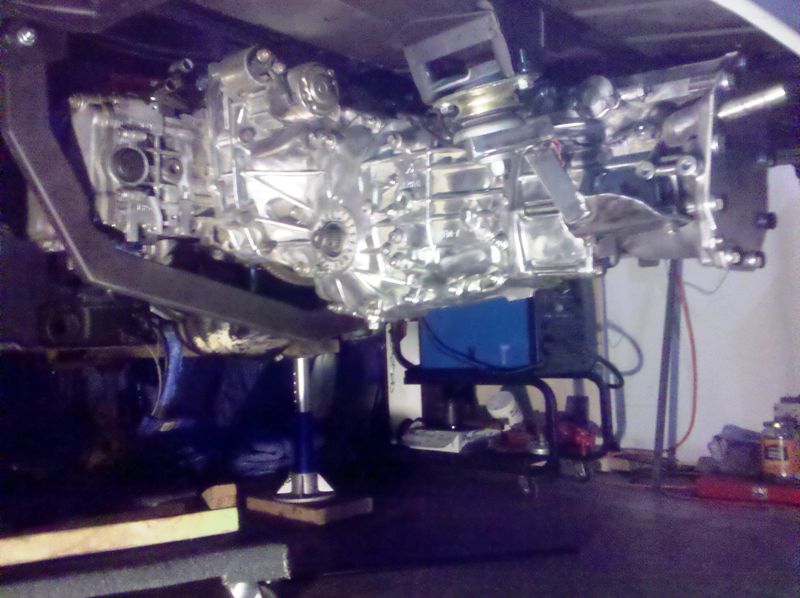 Suby mounts version 2.0 |
|
|
|
| Zaney |
Sep 10 2010, 01:36 PM
Post
#83
|
|
Deuchland en der Haus Group: Members Posts: 461 Joined: 1-March 04 From: Engine 11 Redmond, WA Member No.: 1,738 Region Association: Pacific Northwest |
The main reason for the new mounts was to provide clearance for any obstacles that the rear of the car might encounter (ie. speedbumps)
I will see how the forward and rear sway of this system is effected by the acceleration and braking of the car. It was suggested to join the engine and trans mounts to provide more stability. I will watch this when I get it on the road and go from there. 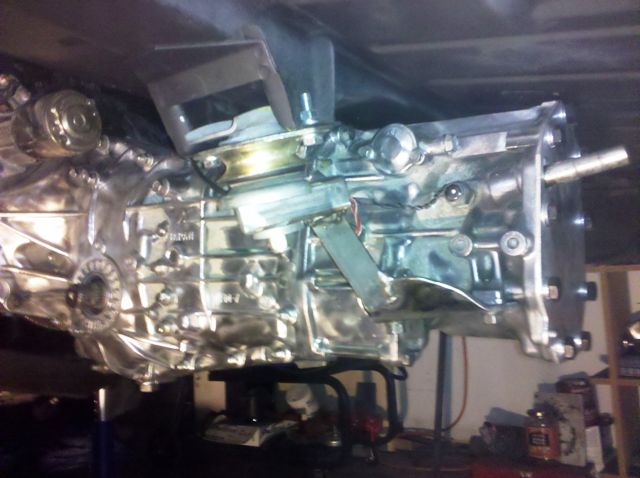 Another pic in car 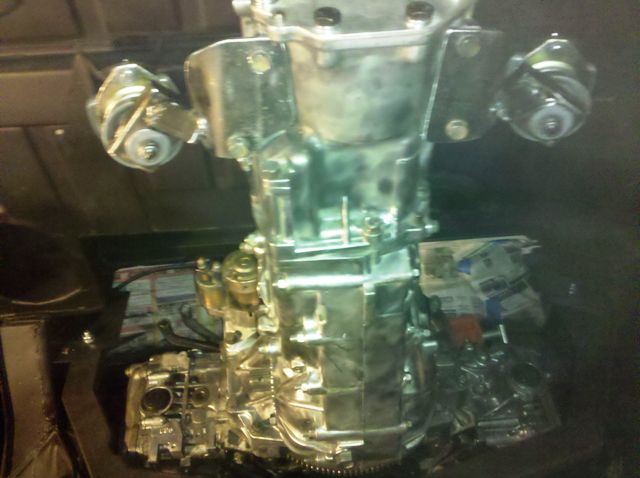 From below More to come! Cooling system and cable shifting system are next! (IMG:style_emoticons/default/beer.gif) Nate |
|
|
|
| strawman |
Sep 10 2010, 02:19 PM
Post
#84
|
|
Senior Member Group: Members Posts: 891 Joined: 25-January 08 From: Los Osos, CA Member No.: 8,624 Region Association: Central California |
Looks great Nate! Keep the updates coming.
Signed, A Guy Who Has Been Too Lazy to Update My Build |
|
|
|
| Zaney |
Nov 13 2010, 07:26 PM
Post
#85
|
|
Deuchland en der Haus Group: Members Posts: 461 Joined: 1-March 04 From: Engine 11 Redmond, WA Member No.: 1,738 Region Association: Pacific Northwest |
Well, it has been a while but finally some progress!
I have been studying the pics of DBCooper's (Paul) awesome build and tried to copy his version of the cable shifter. I had some cables made from a company in the mid west and used some scrap metal from an old Seagrave fire engine for the shifter linkage! So, here is the fruit of my MAN SKILLZ! (novice that they may be (IMG:style_emoticons/default/piratenanner.gif) ) 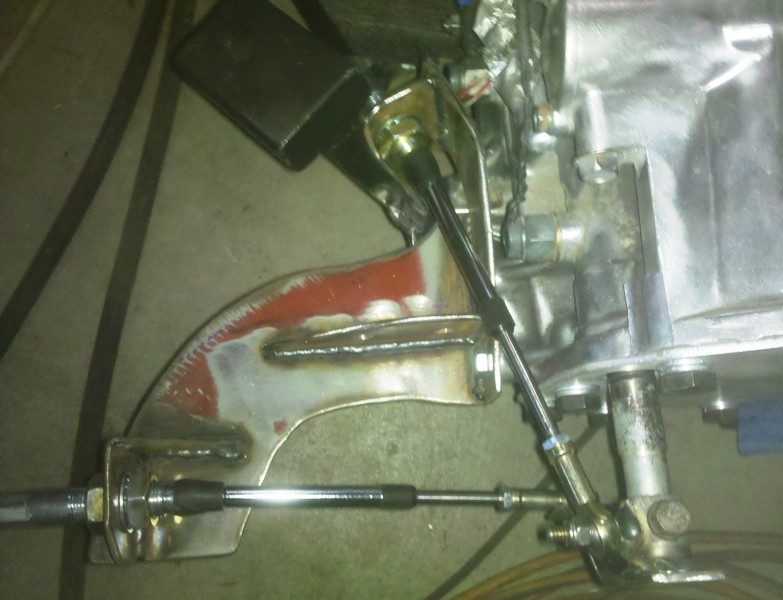 Top down view 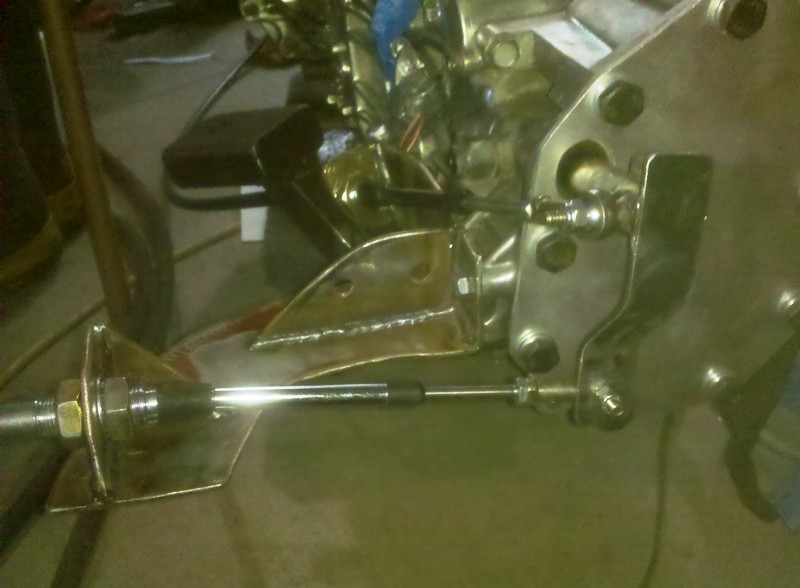 Looks kinda familiar (IMG:style_emoticons/default/beer.gif) 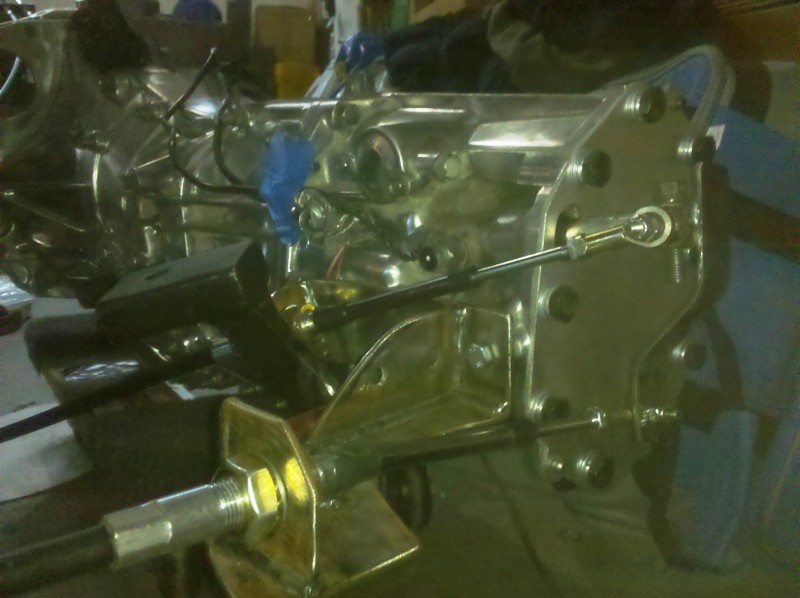 Still need to paint it up I was able to play with a plasma cutter at the fire mechanic shop for the first time and boy that thing is awesome! (IMG:style_emoticons/default/welder.gif) 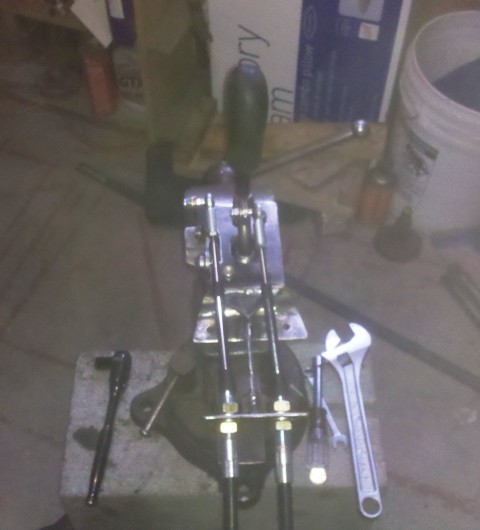 Cable shifter using an MR2 linkage 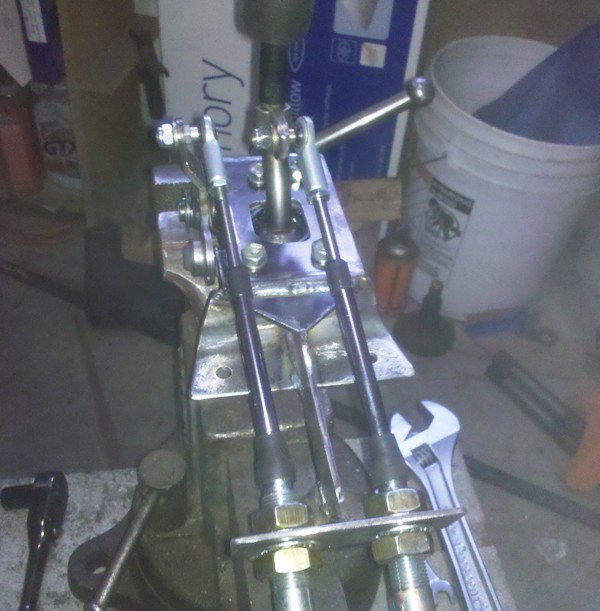 another 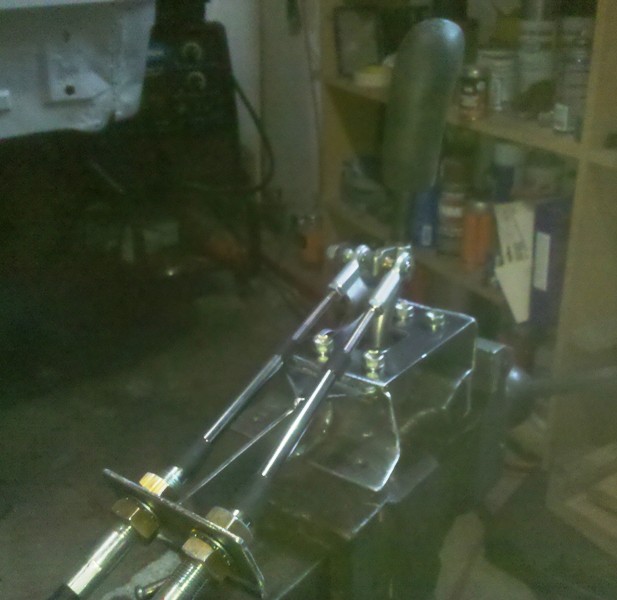 I still need to mount it in the car and make it pretty but, I am very proud of myself considering I have never done this before! (IMG:style_emoticons/default/beerchug.gif) Now it is time to go out in the garage and pretend I am driving it (IMG:style_emoticons/default/driving.gif) Cheers, Nate |
|
|
|
| sawtooth |
Nov 13 2010, 08:09 PM
Post
#86
|
|
Member Group: Members Posts: 297 Joined: 25-June 08 From: Boise, ID Member No.: 9,211 Region Association: Intermountain Region |
Very nice. I'll be doing the same very soon. Keep up the great work!
|
|
|
|
| strawman |
Nov 14 2010, 01:48 AM
Post
#87
|
|
Senior Member Group: Members Posts: 891 Joined: 25-January 08 From: Los Osos, CA Member No.: 8,624 Region Association: Central California |
Great job Nate. I'm finally in the "pre-assembly" stage with my Suby-teener, so it is great to see your progress to inspire me. Keep up the good work!
|
|
|
|
| Zaney |
Nov 14 2010, 10:54 AM
Post
#88
|
|
Deuchland en der Haus Group: Members Posts: 461 Joined: 1-March 04 From: Engine 11 Redmond, WA Member No.: 1,738 Region Association: Pacific Northwest |
Thanks Geoff!
Next step is copying your hydraulic clutch solution and getting the car one step closer! |
|
|
|
| Zaney |
May 3 2011, 02:19 PM
Post
#89
|
|
Deuchland en der Haus Group: Members Posts: 461 Joined: 1-March 04 From: Engine 11 Redmond, WA Member No.: 1,738 Region Association: Pacific Northwest |
Been too long since I have posted any progress on the Suby project but, there has been a bit of movement! (IMG:style_emoticons/default/smash.gif)
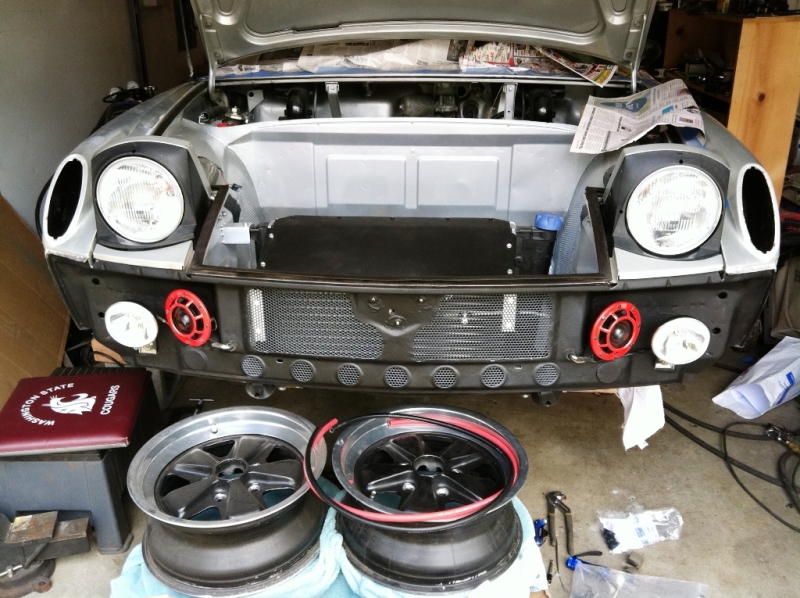 -Installed the hydrallic clutch master cylinder and ran the hard line to the back. Followed Strawman's idea about using it with the stock pedal cluster. -Gathered all the necessary pieces for the five lug swap. I did the front strut option and followed Sir Andy's thread for the rears. -Cleaned up the front trunk and prepped it for the radiator. Cut the exhaust holes and welded in the all of the openings. -Painted the Fuchs and I am picking up some tires this week! -Got the Suby manifold flipped over, moved the alternator, and rewired the engine harness to fit. -Trimmed out all off the unnecessary wires out of the stock Suby harness using Small Car Performance info and made a harness to mate with the Teener. |
|
|
|
| Zaney |
May 3 2011, 02:23 PM
Post
#90
|
|
Deuchland en der Haus Group: Members Posts: 461 Joined: 1-March 04 From: Engine 11 Redmond, WA Member No.: 1,738 Region Association: Pacific Northwest |
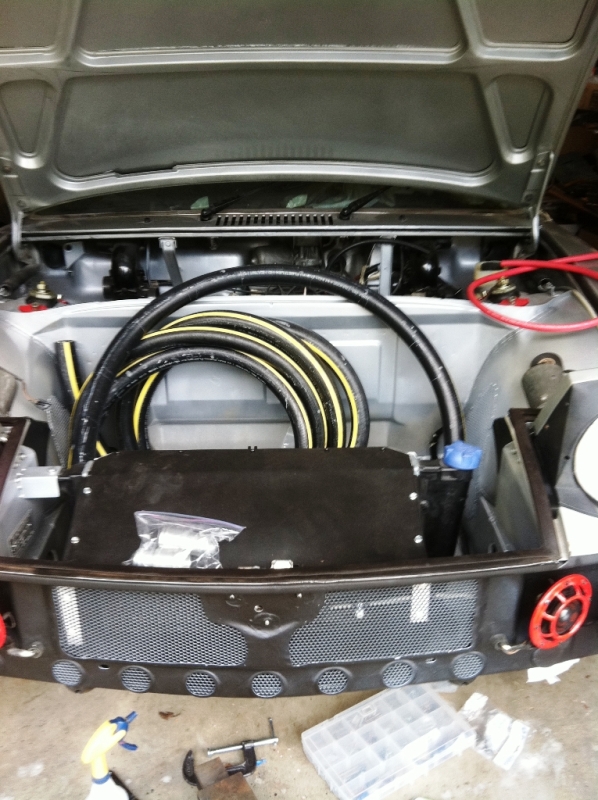 Ordered the Gates radiator hose from Renegade Hybrids and reinstalled the front wiring harness. Still need to install the hose. |
|
|
|
| sawtooth |
May 3 2011, 02:24 PM
Post
#91
|
|
Member Group: Members Posts: 297 Joined: 25-June 08 From: Boise, ID Member No.: 9,211 Region Association: Intermountain Region |
Looking great Nate, keep it up! You'll have that suby running in no time. (IMG:style_emoticons/default/aktion035.gif)
|
|
|
|
| Zaney |
May 3 2011, 02:25 PM
Post
#92
|
|
Deuchland en der Haus Group: Members Posts: 461 Joined: 1-March 04 From: Engine 11 Redmond, WA Member No.: 1,738 Region Association: Pacific Northwest |
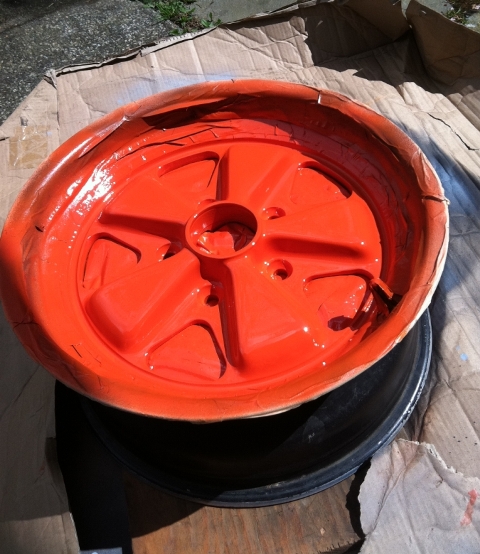 Phoenix Red!!! 16x7's! Tires to be picked up this week. |
|
|
|
| Zaney |
May 3 2011, 02:28 PM
Post
#93
|
|
Deuchland en der Haus Group: Members Posts: 461 Joined: 1-March 04 From: Engine 11 Redmond, WA Member No.: 1,738 Region Association: Pacific Northwest |
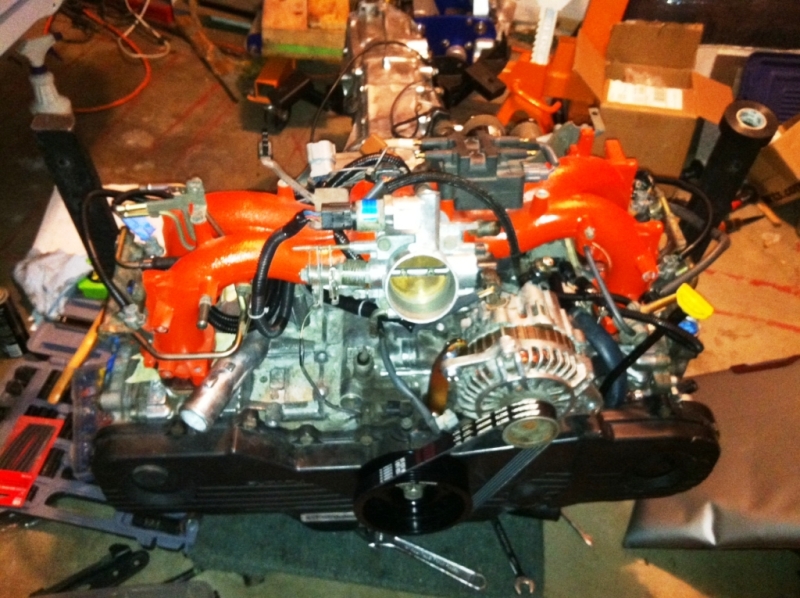 Suby engine!! Ready to be installed! Minus some tubing... -Still need to route the engine fuel lines with the Walbro fuel pump. Already put in Racer Chris' SS lines. -Need to order small bits for the front fuel system before putting everthing back. |
|
|
|
| ruby914 |
May 10 2011, 09:09 AM
Post
#94
|
|
Senior Member Group: Members Posts: 720 Joined: 26-April 09 From: Hawthorne, Ca Member No.: 10,305 Region Association: None |
Looking good. Nice work Nate.
What profile tires will you use? |
|
|
|
| Zaney |
May 10 2011, 10:49 AM
Post
#95
|
|
Deuchland en der Haus Group: Members Posts: 461 Joined: 1-March 04 From: Engine 11 Redmond, WA Member No.: 1,738 Region Association: Pacific Northwest |
I picked up a set of Falken 205/50/ZR16 tires!!
Still waiting for set of lug nuts from Rennline in the mail. Then, I will see if I need to stretch the rear wheel wells. (IMG:style_emoticons/default/smash.gif) |
|
|
|
| JRust |
May 10 2011, 01:18 PM
Post
#96
|
|
914 Guru Group: Members Posts: 6,317 Joined: 10-January 03 From: Albany Oregon Member No.: 129 Region Association: Pacific Northwest |
Hey Nate is that Outfronts alternator relocation bracket? If so how did you get it to fit & the alternator not hit the AIR ports? I had to stick ny alternator further up & right
|
|
|
|
| Zaney |
May 15 2011, 08:17 PM
Post
#97
|
|
Deuchland en der Haus Group: Members Posts: 461 Joined: 1-March 04 From: Engine 11 Redmond, WA Member No.: 1,738 Region Association: Pacific Northwest |
QUOTE(JRust @ May 10 2011, 12:18 PM)  Hey Nate is that Outfronts alternator relocation bracket? If so how did you get it to fit & the alternator not hit the AIR ports? I had to stick ny alternator further up & right I have a 2002 2.5 NA engine and flipping the manifold 180 was not just a plug and play. I had to trim back the heater hardpipe leading down to the water pump and use a rubber hose to connect it. Also, I had to take apart the engine stock harness and splice in a few extra inches to make everything reach. I am using the stock ECU and harness that I trimmed down using Small Cars' print out for a 2002. I am also using a phenolic spacer for the intake manifold which also gave me a bit of clearance room for everything to fit. I will post some pic of everything in place once I am done with all the wiring. Cheers, Nate |
|
|
|
| Zaney |
May 27 2011, 09:52 PM
Post
#98
|
|
Deuchland en der Haus Group: Members Posts: 461 Joined: 1-March 04 From: Engine 11 Redmond, WA Member No.: 1,738 Region Association: Pacific Northwest |
Here are some pics of some more progress: (IMG:style_emoticons/default/piratenanner.gif)
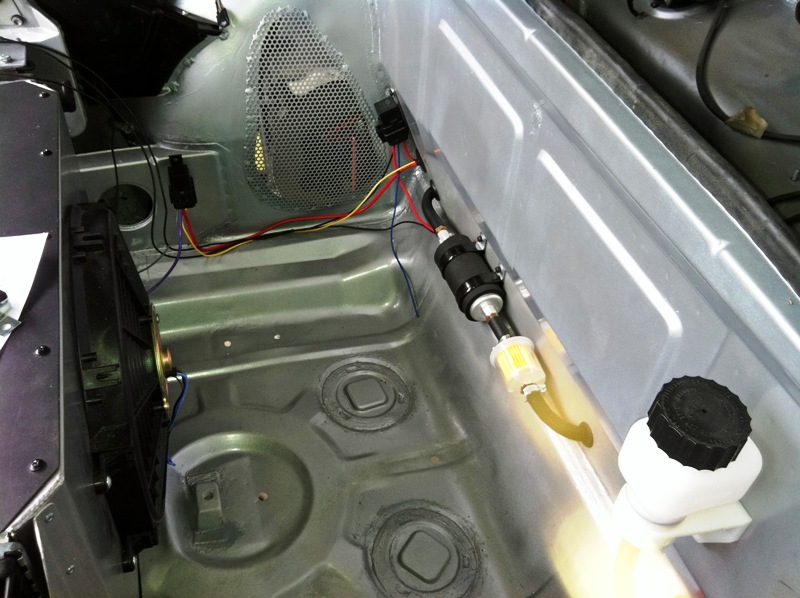 Front trunk with Walbro fuel pump installed & remote reservoir for hydraulic clutch 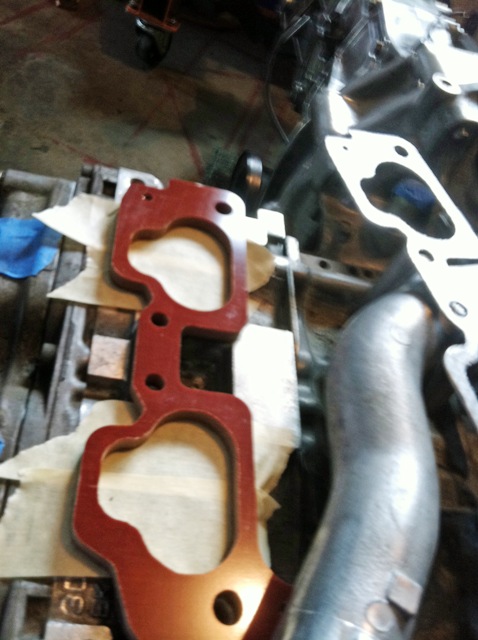 Phenolic spacer ordered from Grimmspeed 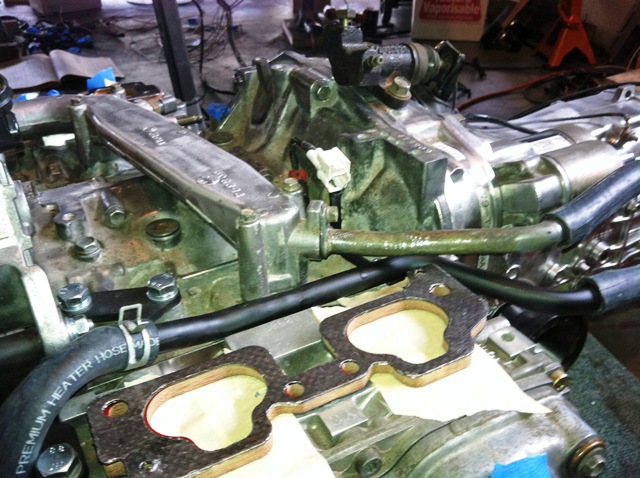 Modified heater downpipe to the water pump |
|
|
|
| Zaney |
May 27 2011, 09:53 PM
Post
#99
|
|
Deuchland en der Haus Group: Members Posts: 461 Joined: 1-March 04 From: Engine 11 Redmond, WA Member No.: 1,738 Region Association: Pacific Northwest |
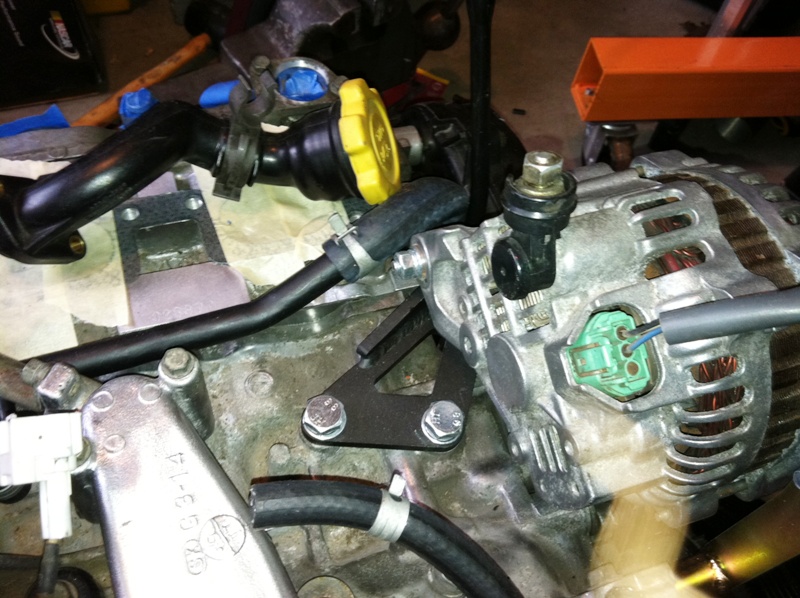 Side view of Outfront unmodified Alternator bracket more pics to come next week (IMG:style_emoticons/default/popcorn[1].gif) |
|
|
|
| sawtooth |
Jun 14 2011, 04:24 PM
Post
#100
|
|
Member Group: Members Posts: 297 Joined: 25-June 08 From: Boise, ID Member No.: 9,211 Region Association: Intermountain Region |
Hey Nate, what's the status. You must be getting close. Going to make it to WCR?
|
|
|
|
|
1 User(s) are reading this topic (1 Guests and 0 Anonymous Users)
0 Members:

|
Lo-Fi Version | Time is now: 24th June 2026 - 11:33 PM |
Invision Power Board
v9.1.4 © 2026 IPS, Inc.