|
|
|
Porsche, and the Porsche crest are registered trademarks of Dr. Ing. h.c. F. Porsche AG.
This site is not affiliated with Porsche in any way. Its only purpose is to provide an online forum for car enthusiasts. All other trademarks are property of their respective owners. |
|
|

  |

| xsurfer |
 Apr 27 2009, 10:02 PM Apr 27 2009, 10:02 PM
Post
#1
|
|
Member  Group: Members Posts: 279 Joined: 4-April 06 From: La Canada, CA Member No.: 5,818 |
Unemployment has created time to chase oil leaks. The car is an 87,000 orig. mile car. It drips oil by the back of the left door and just in front of the left rear wheel. There is oil and grime everywhere in the area of the oil tank. I intend to R & R the tank cleaning everything. I have no experience removing the tank. I have heard I need flat end wrench from Porsche to do so. Is that correct.
All suggestions and help greatly appreciated. I can't stand the oil leak. Thanks Gene |
   |

 
|
| ahdoman |
Apr 27 2009, 10:19 PM
Post
#2
|
|
It's phonetic...Ah-D-O-Man (Audioman) Group: Members Posts: 667 Joined: 7-November 05 From: Santa Clarita, Ca. Member No.: 5,084 Region Association: Southern California |
Gene,
Not sure about the size of the fitting but you won't be able to take it off the tank while the tank is still installed. You'll have to split the oil line between the hose that's attached to the tank and where it goes into the cooler at the bottom. To remove the tank you'll have to pull the rocker, remove everything from the tank and with a little luck you'll be able to twist it out of the fender. I decided to cut the fender brace and pry the fender open a little to help get it out. Sorry I don't have any pics of the process. |
|
|
|
| PRS914-6 |
Apr 27 2009, 11:14 PM
Post
#3
|
|
Excellence Magazine Project 914 3.6 Group: Retired Members Posts: 1,278 Joined: 20-May 06 From: Central California Member No.: 6,031 Region Association: None |
Before removing the tank I would clean the tank well with a degreaser inside the fenderwell so you can inspect. If no leaks are coming from the oil line fittings I would replace the o-ring at the oil filter console. First remove the filter , then the 3 bolts holding the console on and then you can get to the o-ring.
Also, it's pretty typical that when you unscrew the filter at oil changes that some oil runs down making a puddle that may appear to be a leak. |
|
|
|
| SLITS |
Apr 28 2009, 06:04 AM
Post
#4
|
|
"This Utah shit is HARSH!" Group: Benefactors Posts: 13,602 Joined: 22-February 04 From: SoCal Mountains ... Member No.: 1,696 Region Association: None |
Remove oil filter console (3 hex bolts)
Remove filler neck (hose clamp) Disconnect scavange pump oil line and remove securing nut Split line going to pressure side of pump (1st section of line remains attached to tank) Remove two attachment nuts, isolators and washers Push tank back and slide out of fender |
|
|
|
| xsurfer |
Apr 28 2009, 08:27 AM
Post
#5
|
|
Member Group: Members Posts: 279 Joined: 4-April 06 From: La Canada, CA Member No.: 5,818 |
I have replaced the gasket on the filter console. The tank was slightly worn under the original gasket which was very hard when I removed it.
I'll clean the fender well. Are the flat wrenches sold by pelican, stoddards, etc a necessity? Thanks! |
|
|
|
| 6freak |
Apr 28 2009, 09:14 AM
Post
#6
|
|
MR.C Group: Members Posts: 4,740 Joined: 19-March 08 From: Tacoma WA Member No.: 8,829 Region Association: Pacific Northwest |
QUOTE(SLITS @ Apr 28 2009, 05:04 AM)  Remove oil filter console (3 hex bolts) Remove filler neck (hose clamp) Disconnect scavange pump oil line and remove securing nut Split line going to pressure side of pump (1st section of line remains attached to tank) Remove two attachment nuts, isolators and washers Push tank back and slide out of fender All that and then some remove + side of batt #1 put the car on blocks remove left rear wheel (clean tank area) #2 drain oil (not just the plug, screen and all)and let sit for a day to drain #3 break oil line loose from bottom of tank let drain for a day 36mm crows foot 12 point or 1''7/16 with long extention if memory serve`s and you will have to remove the electrical brain and all the stuff above the filter ,mark your wires #4 remove filter and filter console ..Put a mark on the console pointing to the top to make sure it go`s back on the same way (VITAL) #5 undo the oil line under said filter (tough to get to)26mm? #6 filler cap and tubes dont forget to remove your dip stick before the filler neck comes off #7 two nuts and nylon washers leave them in until you are completey ready to move the tank #8 remove the 3 screws from the bottom of the rocker (clean under there while loose) use a small piece of wood or something to hold it out away from the car you do not need to take it completey off and you DO NOT need to CUT anything #9 With the oil lines off remove the 2 nuts and nylon washers put your hand between the tank and the car and give it a wiggle should fall down a slite bit and come right out mine did ...The key is to get that OIL LINE OFF the tank and it can be done with the right tools ....I dought your tanks leaking it prolly the line connection, clean it up real good and if you have any issues under there that would be the time to address them dont forget to change all the rubber dougnuts and filler tube rubber sleave ....HAVE FUN and make sure there are no children presant cause you will learn some new cus words.....send me a pm if you get in a pickle or need a tool............ |
|
|
|
| mskala |
Apr 28 2009, 10:04 AM
Post
#7
|
|
R Group: Members Posts: 1,925 Joined: 2-January 03 From: Massachusetts Member No.: 79 Region Association: None |
I had similar problem. O-ring under the filter console was squished, hard and useless (probably 25 years old).
Strange that I've never seen a tip to change these every few years, it's easy and cheap. |
|
|
|
| PRS914-6 |
Apr 28 2009, 11:04 AM
Post
#8
|
|
Excellence Magazine Project 914 3.6 Group: Retired Members Posts: 1,278 Joined: 20-May 06 From: Central California Member No.: 6,031 Region Association: None |
QUOTE(mskala @ Apr 28 2009, 09:04 AM) I had similar problem. O-ring under the filter console was squished, hard and useless (probably 25 years old). Strange that I've never seen a tip to change these every few years, it's easy and cheap. Yep, it's pretty common. Here is a pic: 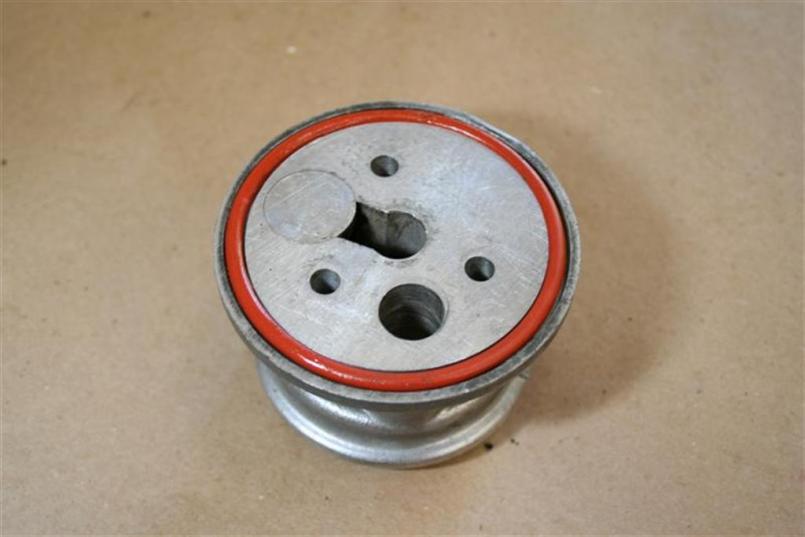 |
|
|
|
| brp986s |
Apr 28 2009, 11:17 AM
Post
#9
|
|
Member Group: Members Posts: 434 Joined: 27-September 07 From: los angeles Member No.: 8,167 |
As stated, it is a miserable job taking that tank out. When I as putting my tank back in I used fingers on one hand to locate the hole in the inner fender to guide the filler tube to this hole. My fingers found the hole - good, but then the tank got stuck in the fender. Gave it a good shove and the filler tube found the hole too. Problem is, there isn't enough room for a finger and the tube in that hole. Ouch. Enventually got a whole new fingernail from that.
Also, just looking at those 3 6mm console bolts wrong can cause them to strip and you'll have it all to do again (especially the cussing part). Get the special flare wrench from PP to separate the drain lines and the crow-ring spanner from stahlwill to take the hose off the tank: http://www.stahlwille-online.de/index.php?...h&pcid=1678 There ia a place in torrance "ultrasonic cleaning" that will clean your tank in/out - you won't recognize it. You'll be able to see if you have rust issues. Rust can form on top from dirt accumulation. good luck! |
|
|
|
| 6freak |
Apr 28 2009, 12:23 PM
Post
#10
|
|
MR.C Group: Members Posts: 4,740 Joined: 19-March 08 From: Tacoma WA Member No.: 8,829 Region Association: Pacific Northwest |
shouldnt need to replace that O-ring but once every ten years or so ..like you stated it lasted 25+ years .......should have any rust issue on the tank its copper ..But look above where it goes and clean real good in there while you have access...good luck
|
|
|
|
| McMark |
Apr 28 2009, 12:31 PM
Post
#11
|
|
914 Freak! Group: Retired Admin Posts: 20,179 Joined: 13-March 03 From: Grand Rapids, MI Member No.: 419 Region Association: None |
They're not solid copper. They're copper coated. I'll post a picture in about 45 minutes of a stock 911 tank with clear sections of copper and rust. (IMG:style_emoticons/default/wink.gif)
|
|
|
|
| 6freak |
Apr 28 2009, 12:55 PM
Post
#12
|
|
MR.C Group: Members Posts: 4,740 Joined: 19-March 08 From: Tacoma WA Member No.: 8,829 Region Association: Pacific Northwest |
QUOTE(McMark @ Apr 28 2009, 11:31 AM) They're not solid copper. They're copper coated. I'll post a picture in about 45 minutes of a stock 911 tank with clear sections of copper and rust. (IMG:style_emoticons/default/wink.gif) I would guess where the lines go and the filter console...But cool I learned something today....Mine still had lots of paint on it |
|
|
|
| Gint |
Apr 28 2009, 02:31 PM
Post
#13
|
|
Mike Ginter Group: Admin Posts: 16,071 Joined: 26-December 02 From: Denver CO. Member No.: 20 Region Association: Rocky Mountains |
QUOTE(brp986s @ Apr 28 2009, 11:17 AM) Get the special flare wrench from PP to separate the drain lines and the crow-ring spanner from stahlwill to take the hose off the tank: http://www.stahlwille-online.de/index.php?...h&pcid=1678 I'm not certain why, but I just get a blank page on this site from the link provided. Got a part number? 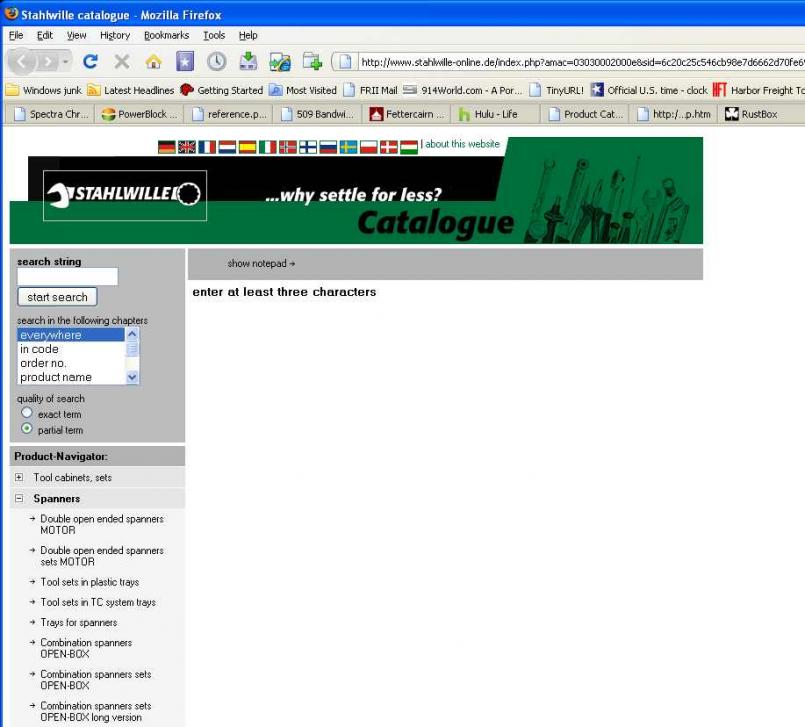 |
|
|
|
| McMark |
Apr 28 2009, 02:43 PM
Post
#14
|
|
914 Freak! Group: Retired Admin Posts: 20,179 Joined: 13-March 03 From: Grand Rapids, MI Member No.: 419 Region Association: None |
Pictures of a 911 tank. The second one is a magnet stuck to it.
Attached image(s) 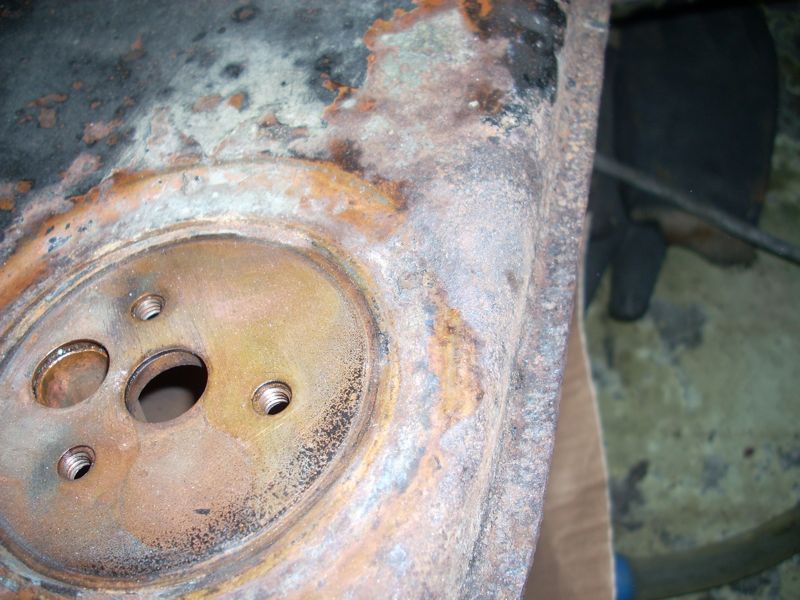 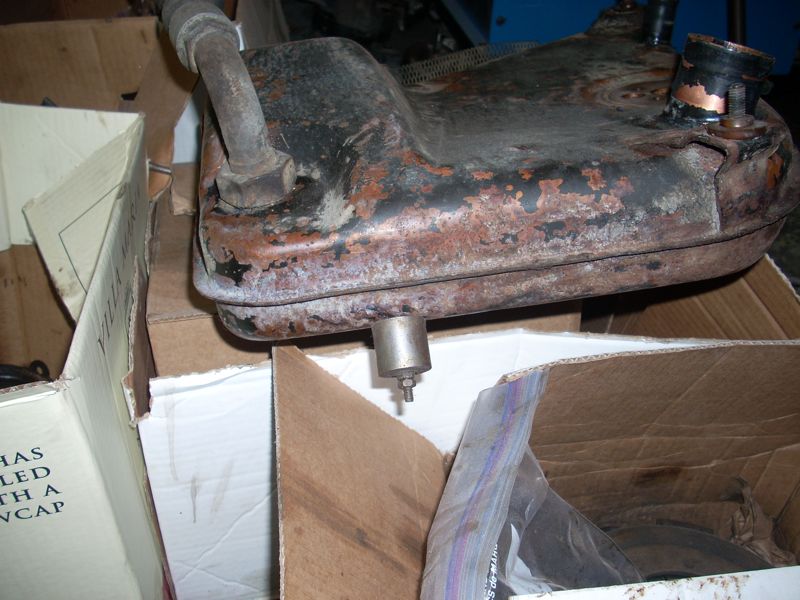
|
|
|
|
| 6freak |
Apr 28 2009, 02:48 PM
Post
#15
|
|
MR.C Group: Members Posts: 4,740 Joined: 19-March 08 From: Tacoma WA Member No.: 8,829 Region Association: Pacific Northwest |
QUOTE(McMark @ Apr 28 2009, 01:43 PM) Pictures of a 911 tank. The second one is a magnet stuck to it. Wow would have never guess that ..thats good to know...U DA MAN...LOL (IMG:style_emoticons/default/flag.gif) |
|
|
|
| McMark |
Apr 28 2009, 03:18 PM
Post
#16
|
|
914 Freak! Group: Retired Admin Posts: 20,179 Joined: 13-March 03 From: Grand Rapids, MI Member No.: 419 Region Association: None |
I suspect the copper is a means of sealing the tank because they are just stamped steel, spot welded together at the flange. Which, of course, does not make a seal.
|
|
|
|
| J P Stein |
Apr 28 2009, 05:38 PM
Post
#17
|
|
Irrelevant old fart Group: Members Posts: 8,797 Joined: 30-December 02 From: Vancouver, WA Member No.: 45 Region Association: None |
I suspect the copper plating is a sacrificial coating to keep the steel from rusting....a limited lifetime item unless you stay on top of it.
|
|
|
|
| brp986s |
Apr 28 2009, 08:08 PM
Post
#18
|
|
Member Group: Members Posts: 434 Joined: 27-September 07 From: los angeles Member No.: 8,167 |
QUOTE(Gint @ Apr 28 2009, 01:31 PM) QUOTE(brp986s @ Apr 28 2009, 11:17 AM) Get the special flare wrench from PP to separate the drain lines and the crow-ring spanner from stahlwill to take the hose off the tank: http://www.stahlwille-online.de/index.php?...h&pcid=1678 I'm not certain why, but I just get a blank page on this site from the link provided. Got a part number? They have a variety of crow rings and I don't remember the size. Punch in "crow-ring" (with the hyphen) in the search box. Someone mentioned the size previously. |
|
|
|
| Gint |
Apr 29 2009, 06:28 AM
Post
#19
|
|
Mike Ginter Group: Admin Posts: 16,071 Joined: 26-December 02 From: Denver CO. Member No.: 20 Region Association: Rocky Mountains |
QUOTE(brp986s @ Apr 28 2009, 08:08 PM) QUOTE(Gint @ Apr 28 2009, 01:31 PM) QUOTE(brp986s @ Apr 28 2009, 11:17 AM) Get the special flare wrench from PP to separate the drain lines and the crow-ring spanner from stahlwill to take the hose off the tank: http://www.stahlwille-online.de/index.php?...h&pcid=1678 I'm not certain why, but I just get a blank page on this site from the link provided. Got a part number? OK, it's just a crow's foot. I thought it might be something special I'd never seen before. Thanks. For those that might not be familiar with a crow's foot (or crow-ring in proper English apparently): (IMG:http://www.stahlwille-online.de/pictures/all/440_fot_011.jpg) |
|
|
|
| charliew |
Apr 29 2009, 08:53 AM
Post
#20
|
|
Advanced Member Group: Members Posts: 2,363 Joined: 31-July 07 From: Crawford, TX. Member No.: 7,958 |
I would also paint the outside with a cold galvanizing paint. It's the paint they use when they make repairs on chain link fence posts like welding on hinges and so forth. It's good outside forever. Looks like dull zinc or whats on a corrugated tin roof. I don't know if it will hold a colored topcoat but it will outlast you. If I ever open longs it will be what I use inside them or any other cavity that gets cleaned on the 914.
|
|
|
|
|
1 User(s) are reading this topic (1 Guests and 0 Anonymous Users)
0 Members:

|
Lo-Fi Version | Time is now: 15th May 2024 - 10:25 PM |
Invision Power Board
v9.1.4 © 2024 IPS, Inc.