|
|
|
Porsche, and the Porsche crest are registered trademarks of Dr. Ing. h.c. F. Porsche AG.
This site is not affiliated with Porsche in any way. Its only purpose is to provide an online forum for car enthusiasts. All other trademarks are property of their respective owners. |
|
|

  |

| dlee6204 |
 Mar 12 2010, 10:39 PM Mar 12 2010, 10:39 PM
Post
#141
|
|
Howdy  Group: Members Posts: 2,162 Joined: 30-April 06 From: Burnsville, NC Member No.: 5,956 |
I somehow roped a friend into coming over and giving me a hand. I let him strip the rear trunk lid. (IMG:style_emoticons/default/biggrin.gif)
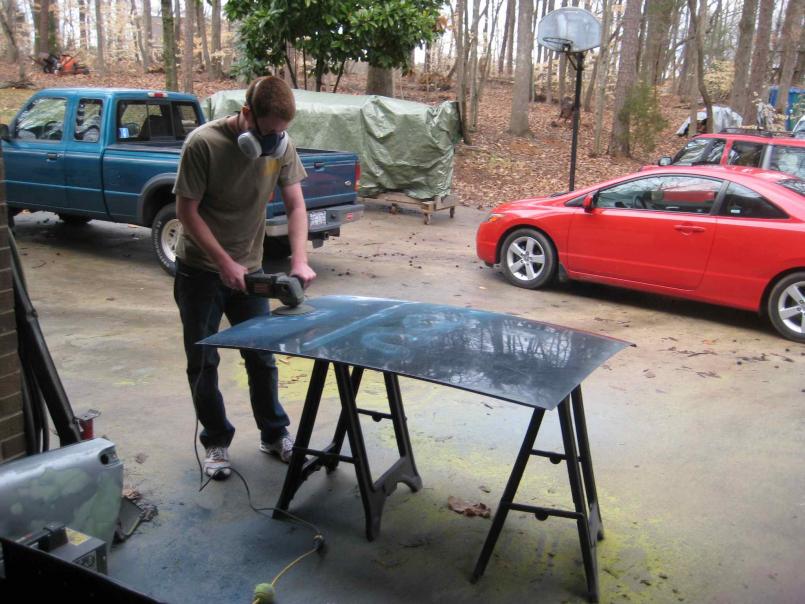 Almost done! 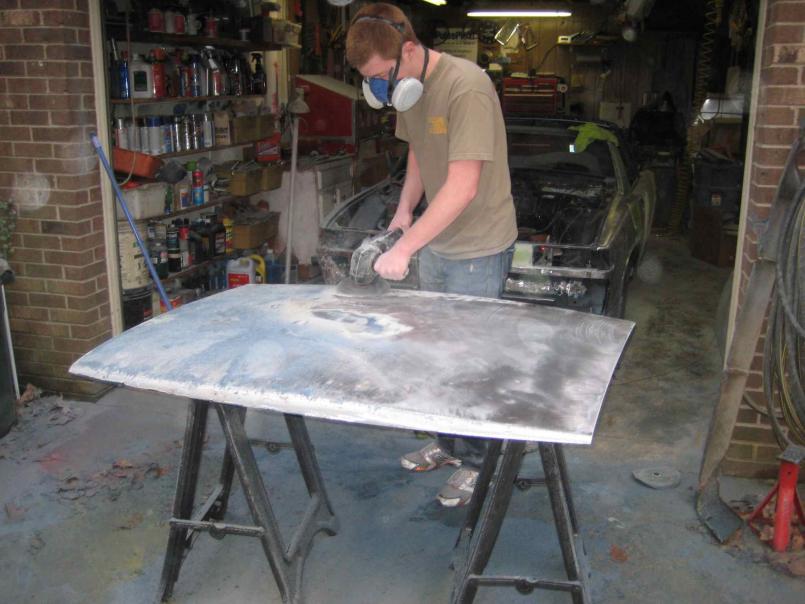 |
   |

 
|
| dlee6204 |
Mar 12 2010, 10:43 PM
Post
#142
|
|
Howdy Group: Members Posts: 2,162 Joined: 30-April 06 From: Burnsville, NC Member No.: 5,956 |
Stripped the other fender too
 and started the body filler 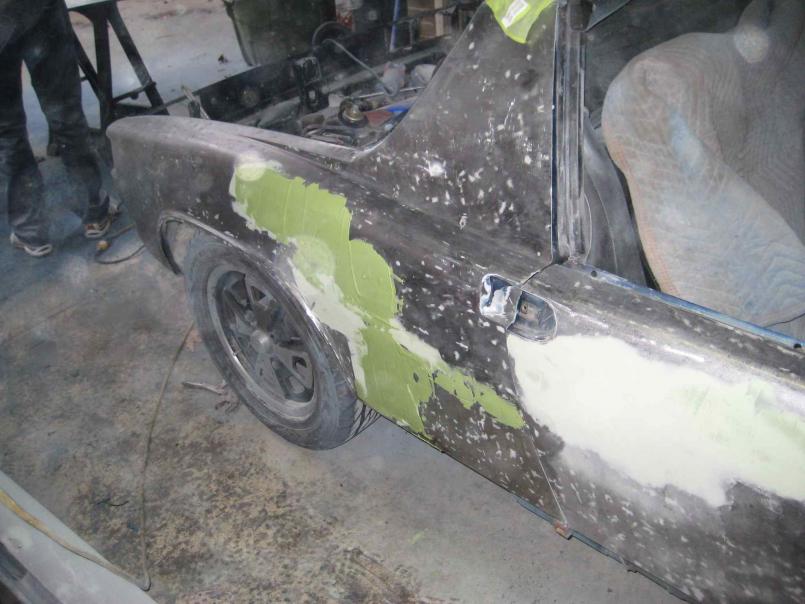 |
|
|
|
| dlee6204 |
Mar 12 2010, 10:48 PM
Post
#143
|
|
Howdy Group: Members Posts: 2,162 Joined: 30-April 06 From: Burnsville, NC Member No.: 5,956 |
Only thing left to strip is the engine lid. Pretty much its all body work and sanding from now on.
|
|
|
|
| SUNAB914 |
Mar 19 2010, 06:49 AM
Post
#144
|
|
Senior Member Group: Members Posts: 698 Joined: 29-December 08 From: Fredericksburg VA Member No.: 9,880 Region Association: South East States |
Doug, how humbled I am after going through your thread. I was glad to meet you last night in person, if I had know you were a welding godess I would have plugged in my welder and found something for us to do. Great job, you would be a great instructor!
|
|
|
|
| dlee6204 |
Mar 23 2010, 07:21 PM
Post
#145
|
|
Howdy Group: Members Posts: 2,162 Joined: 30-April 06 From: Burnsville, NC Member No.: 5,956 |
QUOTE(SUNAB914 @ Mar 19 2010, 08:49 AM)  Doug, how humbled I am after going through your thread. I was glad to meet you last night in person, if I had know you were a welding godess I would have plugged in my welder and found something for us to do. Great job, you would be a great instructor! Thanks Chris! If you were going to put me to work, that would have required a longer joy ride around base! (IMG:style_emoticons/default/driving.gif) It was nice meeting you too. I made it home safely with the windshield around 2 am. I can't wait to get the car painted and install it. |
|
|
|
| dlee6204 |
Mar 23 2010, 07:26 PM
Post
#146
|
|
Howdy Group: Members Posts: 2,162 Joined: 30-April 06 From: Burnsville, NC Member No.: 5,956 |
Update: I don't have any new pictures of the progress I made but it involves lots and lots of sanding! I have a few small spots of filler left to do and then finish sanding the finishing putty. I'll try to snap some pictures this weekend.
|
|
|
|
| dlee6204 |
Mar 28 2010, 11:13 PM
Post
#147
|
|
Howdy Group: Members Posts: 2,162 Joined: 30-April 06 From: Burnsville, NC Member No.: 5,956 |
More progress... I finished welding up the rear trunk and seam sealed it.
Before adding seam sealer (Sorry I don't have an after pic) 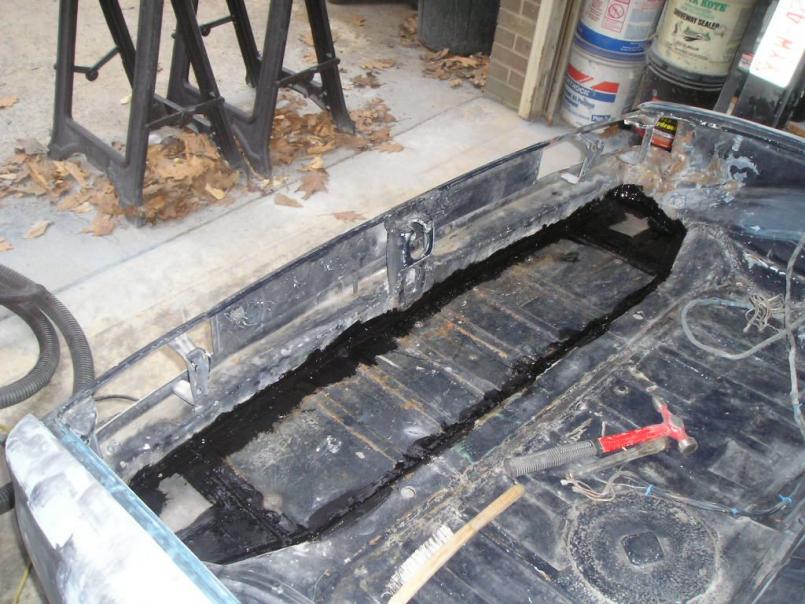 I also sealed up the floor from underneath and welded on the heat shield. 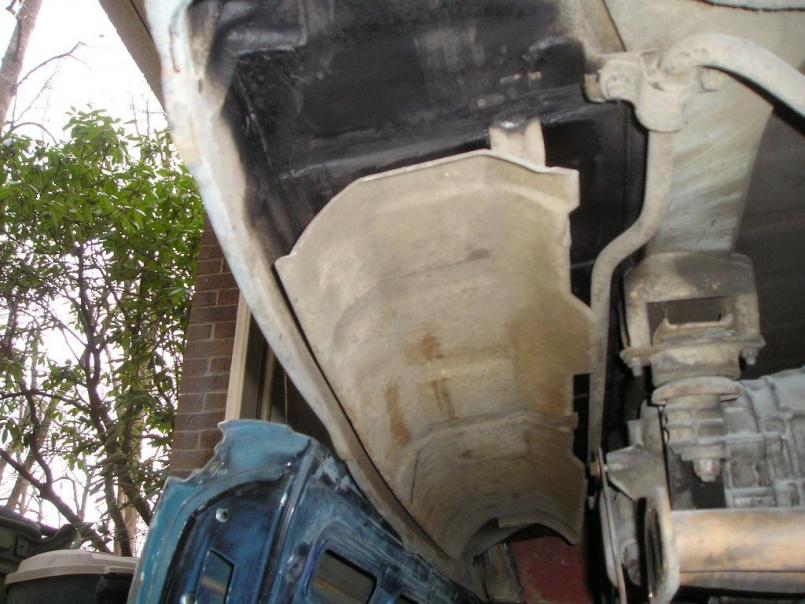 |
|
|
|
| dlee6204 |
Mar 28 2010, 11:21 PM
Post
#148
|
|
Howdy Group: Members Posts: 2,162 Joined: 30-April 06 From: Burnsville, NC Member No.: 5,956 |
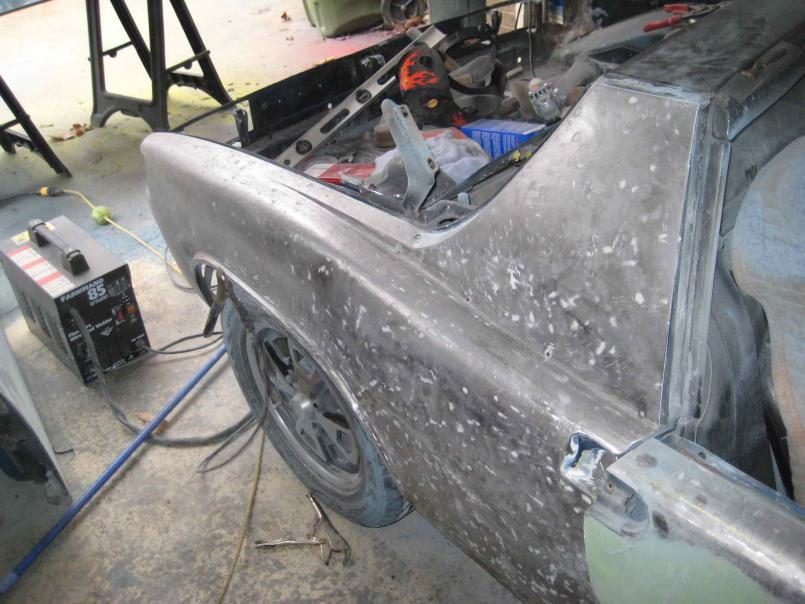
Here is the driver's side door after some filler and finishing putty.
 I also welded up the portion of the rear fender that I cut out to do rust repair. 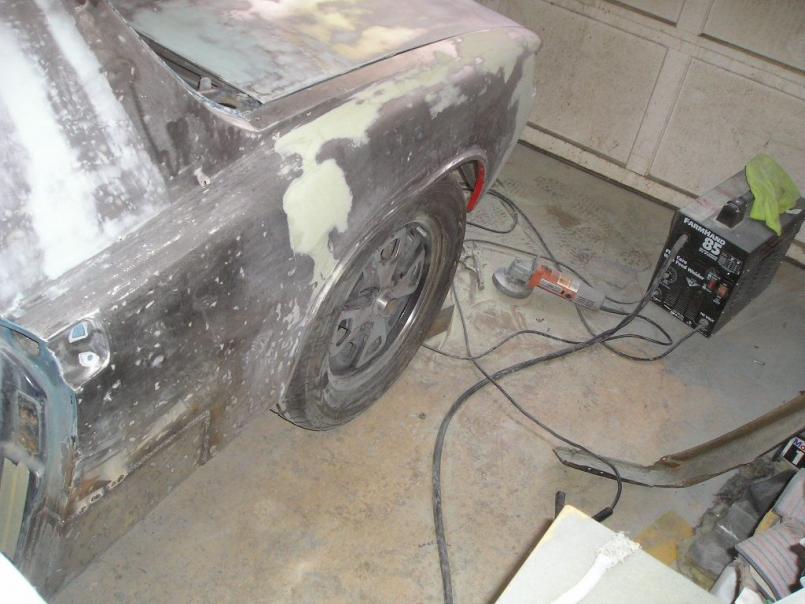 Some more filler... 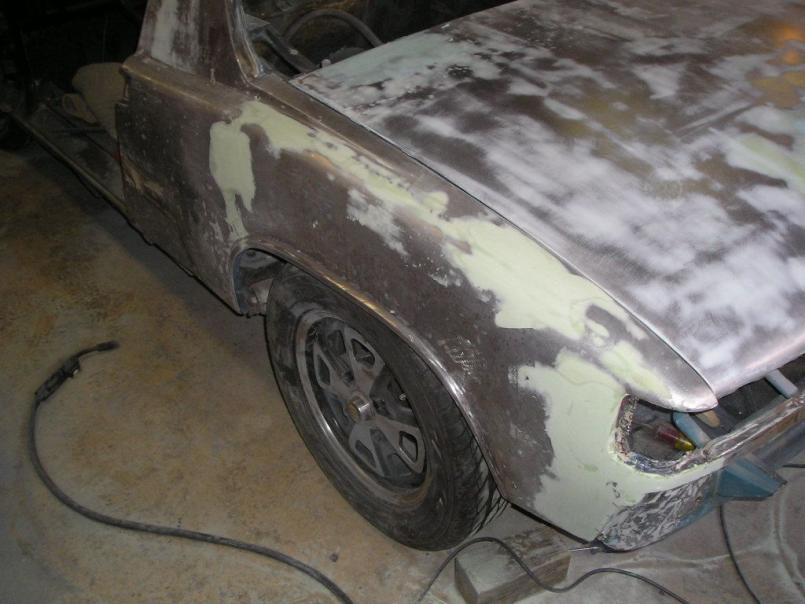 |
|
|
|
| dlee6204 |
Mar 28 2010, 11:41 PM
Post
#149
|
|
Howdy Group: Members Posts: 2,162 Joined: 30-April 06 From: Burnsville, NC Member No.: 5,956 |
After I sand this down, this should be the last of the filler. Then I have to cover it in metal glaze. This fender still needs the most work compared to the rest of the car.
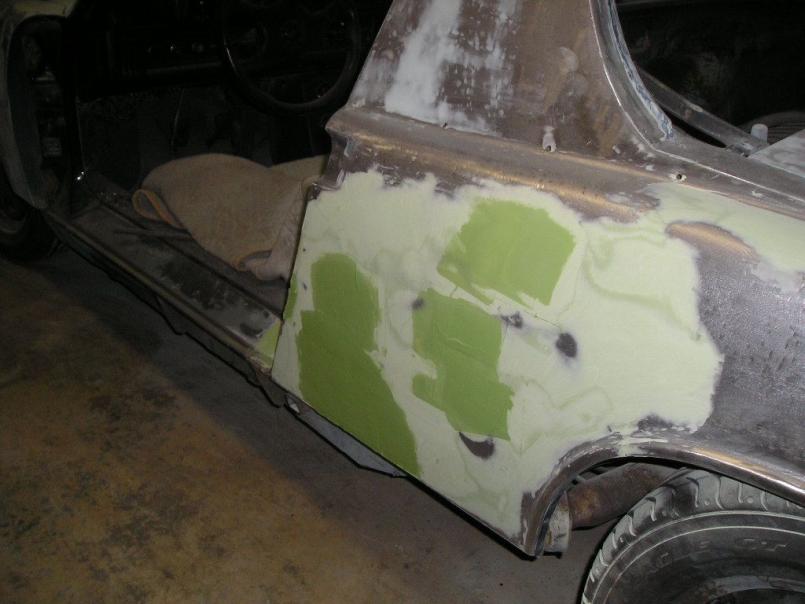 The rest of the car has been covered with glaze and sanded. There are a few spots that need some more attention but nothing major. 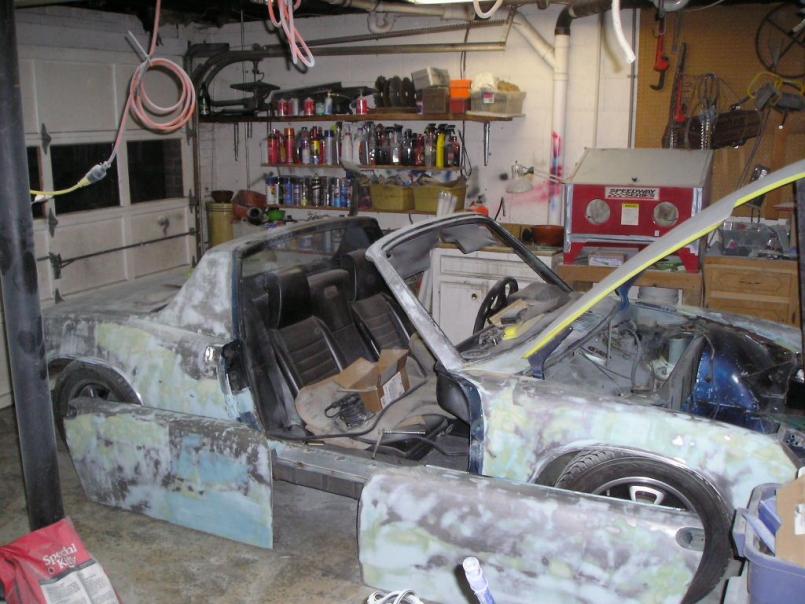 |
|
|
|
| dlee6204 |
Mar 28 2010, 11:52 PM
Post
#150
|
|
Howdy Group: Members Posts: 2,162 Joined: 30-April 06 From: Burnsville, NC Member No.: 5,956 |
Found some more pictures (IMG:style_emoticons/default/smile.gif)
I welded a piece to finish off the front weather-strip channel. 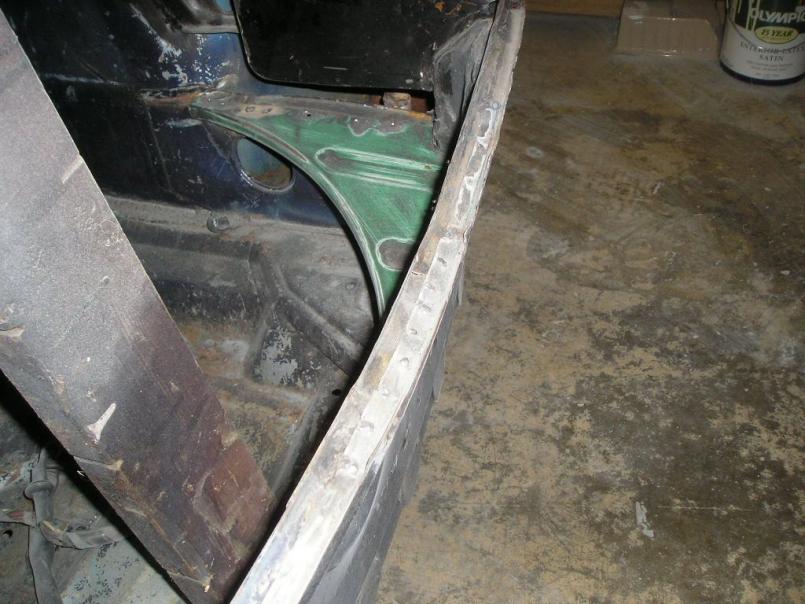 I also bought a like new windshield from Chris (SUNAB914) which will be installed after paint. 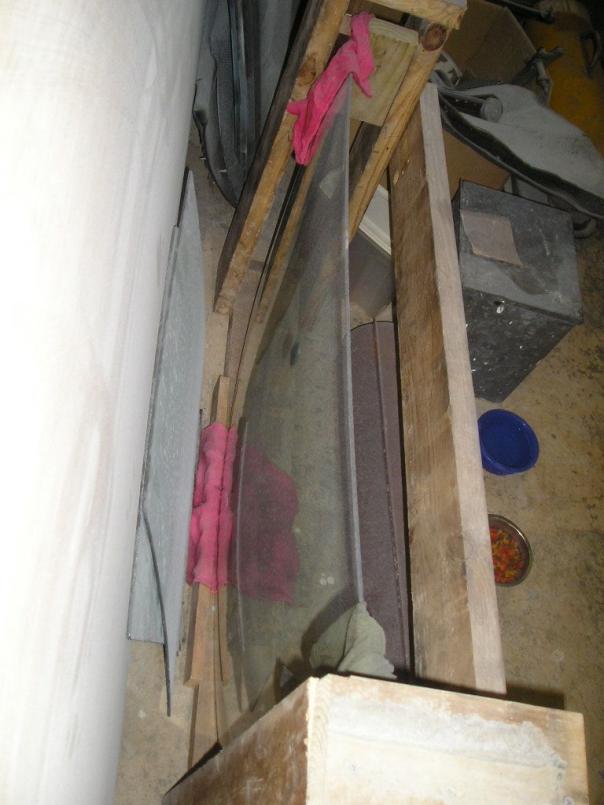 Things that need to get done... Trunks need to be sanded, Engine lid needs to be sanded, Headlight covers need to be sanded, Underside of trunk lids need sanding, driver's side rear fender needs some more love, exterior of the car needs final sanding, and door jambs needs a little sanding. So pretty much just some more sanding and I'll be good to go. They are calling for 80's the end of this week so I'm hoping I can get this thing sprayed! |
|
|
|
| FourBlades |
Mar 29 2010, 08:17 AM
Post
#151
|
|
From Wreck to Rockin Group: Members Posts: 2,056 Joined: 3-December 07 From: Brevard, FL Member No.: 8,414 Region Association: South East States |
You are kicking some ass on that car! You will be super stoked once you have the new paint on. I found it very motivating to finish the car once it was painted. John |
|
|
|
| Root_Werks |
Mar 29 2010, 12:29 PM
Post
#152
|
|
Village Idiot Group: Members Posts: 8,988 Joined: 25-May 04 From: About 15NM from Canada Member No.: 2,105 Region Association: Pacific Northwest |
That is some really good progress. Can't wait to see this one get painted.
|
|
|
|
| dlee6204 |
Apr 3 2010, 08:29 PM
Post
#153
|
|
Howdy Group: Members Posts: 2,162 Joined: 30-April 06 From: Burnsville, NC Member No.: 5,956 |
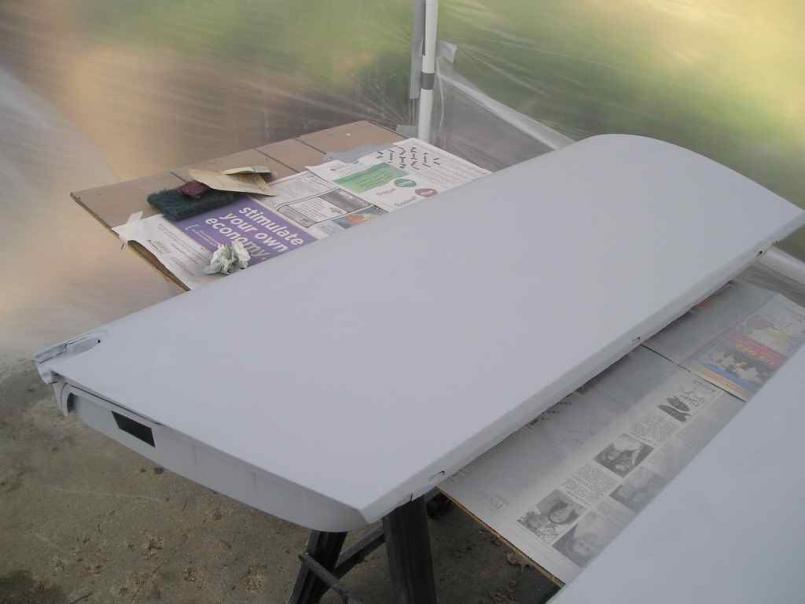
I finished up with sanding the doors, trunk lids, engine lid and the headlight covers. The body of the car still has a few small spots that need some sanding though. I went ahead and set up a paint booth so I could start getting some of this stuff primed. And priming I did! (IMG:style_emoticons/default/biggrin.gif)
We bought this carpot/ canopy a long time ago to use for painting so I set it up yesterday and then draped plastic down the sides. It worked really well for my needs. (IMG:style_emoticons/default/smile.gif) I apologize for the pictures, it was getting dark by the time I stopped. 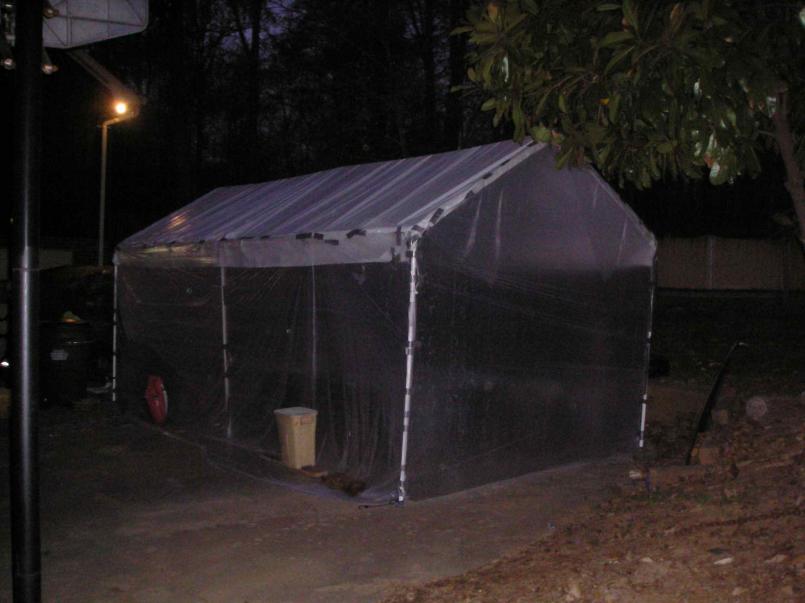 This was my first time painting anything with a gun but I got use to it real fast and was surprised how well it started out. I primed the underside of the lids, the backside of the doors and some smaller pieces. Tomorrow morning I will turn everything over and prime the other sides. I will also get better pictures of everything. 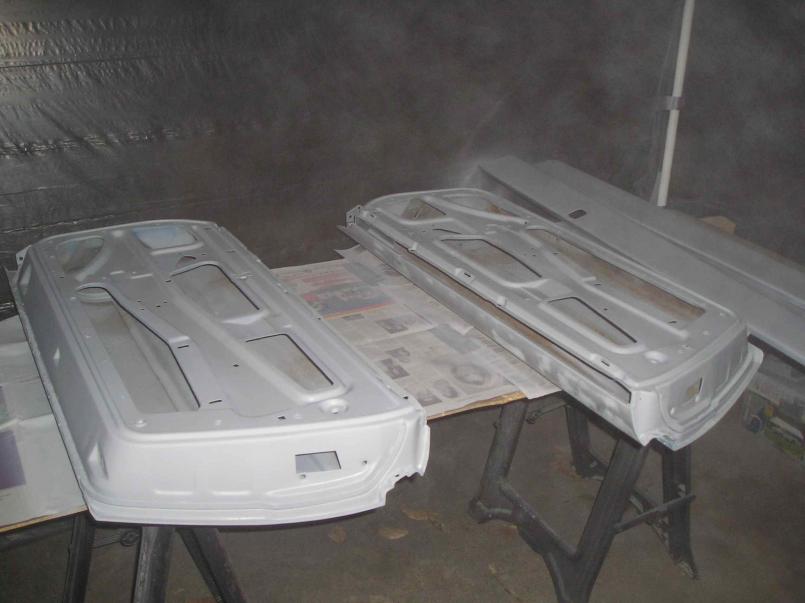 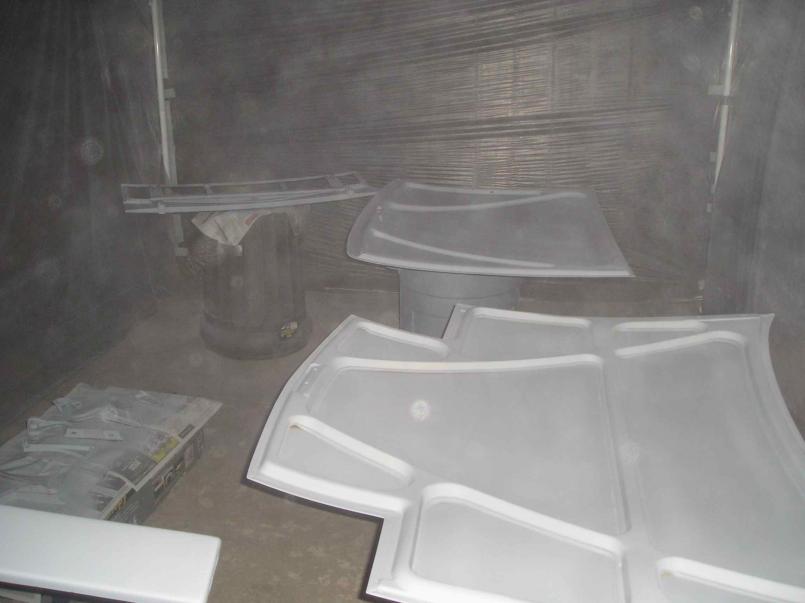 |
|
|
|
| dlee6204 |
Apr 3 2010, 08:33 PM
Post
#154
|
|
Howdy Group: Members Posts: 2,162 Joined: 30-April 06 From: Burnsville, NC Member No.: 5,956 |
|
|
|
|
| al weidman |
Apr 3 2010, 11:50 PM
Post
#155
|
|
Al Weidman Group: Members Posts: 156 Joined: 22-February 08 From: Oroville, Ca. Member No.: 8,736 Region Association: Northern California |
There is some serious talent in this "World" and am amazed. There are dreamers, planners and doers. You are definitely a doer and will translate to other aspects or your life. This one looks to be on the short list now. I hope to have my project done before you finish the LE, not to rush you. BTW are you using 20 gauge on your repairs? and welding with flux coated wire besides. Didn't anyone tell you that was hard? Al.
|
|
|
|
| dlee6204 |
Apr 4 2010, 10:24 PM
Post
#156
|
|
Howdy Group: Members Posts: 2,162 Joined: 30-April 06 From: Burnsville, NC Member No.: 5,956 |
QUOTE There is some serious talent in this "World" and am amazed. There are dreamers, planners and doers. You are definitely a doer and will translate to other aspects or your life. This one looks to be on the short list now. I hope to have my project done before you finish the LE, not to rush you. BTW are you using 20 gauge on your repairs? and welding with flux coated wire besides. Didn't anyone tell you that was hard? Ah, you have a quite a while before I even touch the LE. (IMG:style_emoticons/default/biggrin.gif) Most of the repairs were 18-20 gauge depending on the application. My welder is also the biggest piece of crap alive and I hope to never use it again! It probably isn't the best to use, but its what we've always had around. |
|
|
|
| dlee6204 |
Apr 4 2010, 10:28 PM
Post
#157
|
|
Howdy Group: Members Posts: 2,162 Joined: 30-April 06 From: Burnsville, NC Member No.: 5,956 |
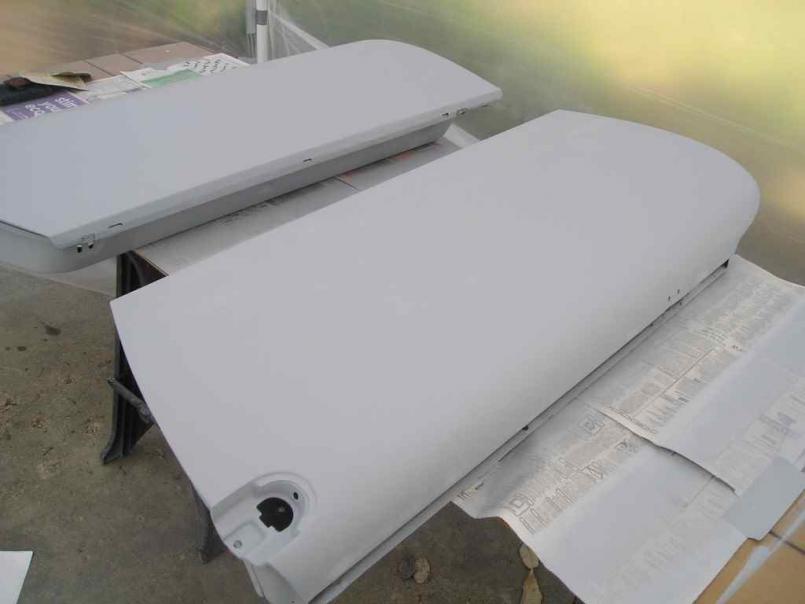
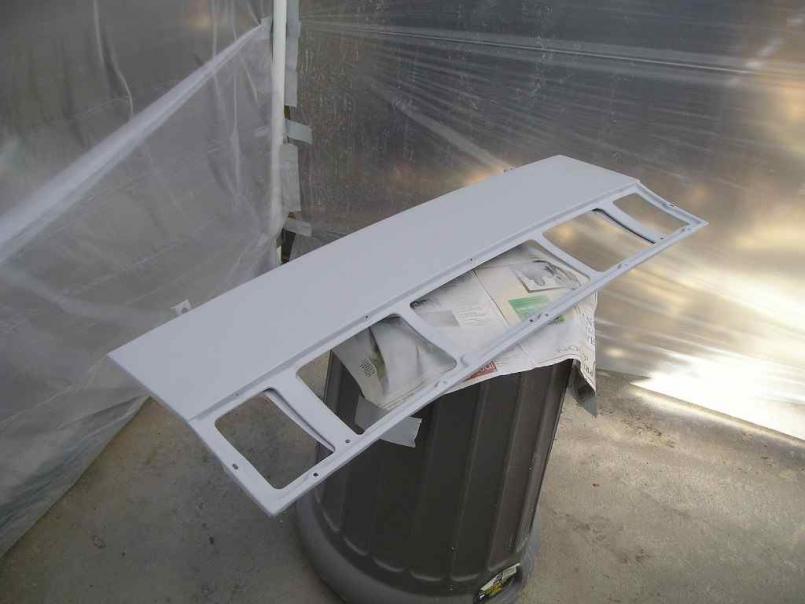
Here are some pictures in the daylight. This was only after the first coat of primer.
     |
|
|
|
| rick 918-S |
Apr 4 2010, 10:32 PM
Post
#158
|
|
Hey nice rack! -Celette Group: Members Posts: 21,275 Joined: 30-December 02 From: Now in Superior WI Member No.: 43 Region Association: Northstar Region |
|
|
|
|
| dlee6204 |
Apr 4 2010, 10:46 PM
Post
#159
|
|
Howdy Group: Members Posts: 2,162 Joined: 30-April 06 From: Burnsville, NC Member No.: 5,956 |
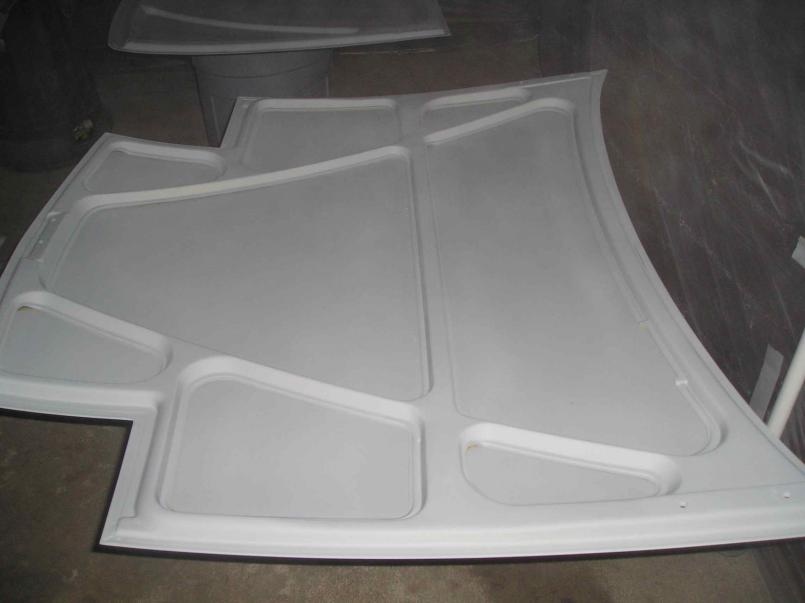
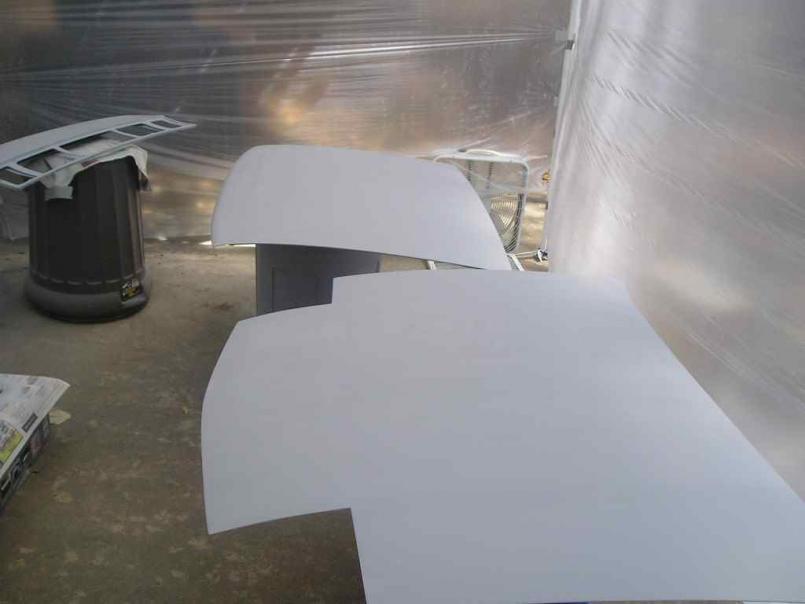
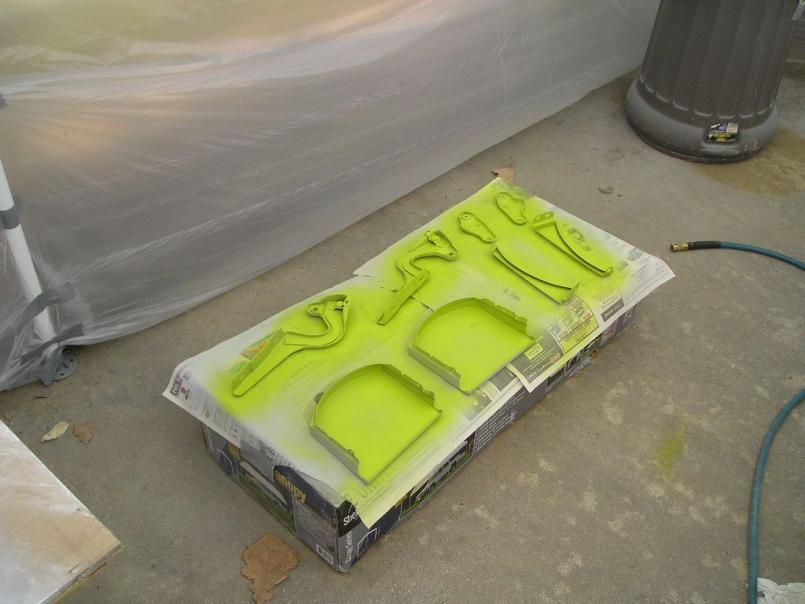
After the first two coats of primer I sanded everything down and applied two more coats. I then moved on to adding some COLOR.
The original color of this car was marathon blue metallic which was partly stripped and painted over several times. I had the option to return it to the original color or another color of my choice. I decided against painting a metallic since I am a complete newb and decided on my favorite 914 color... mmm Ravenna Green. 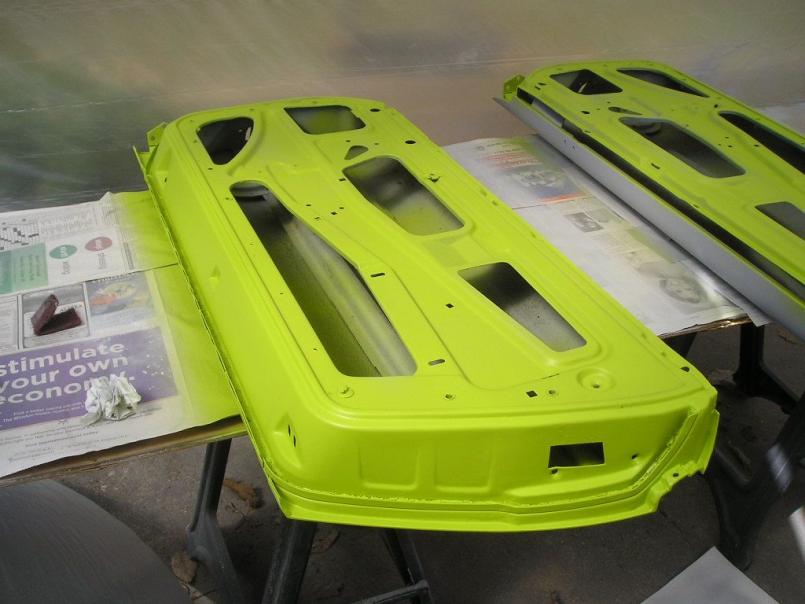 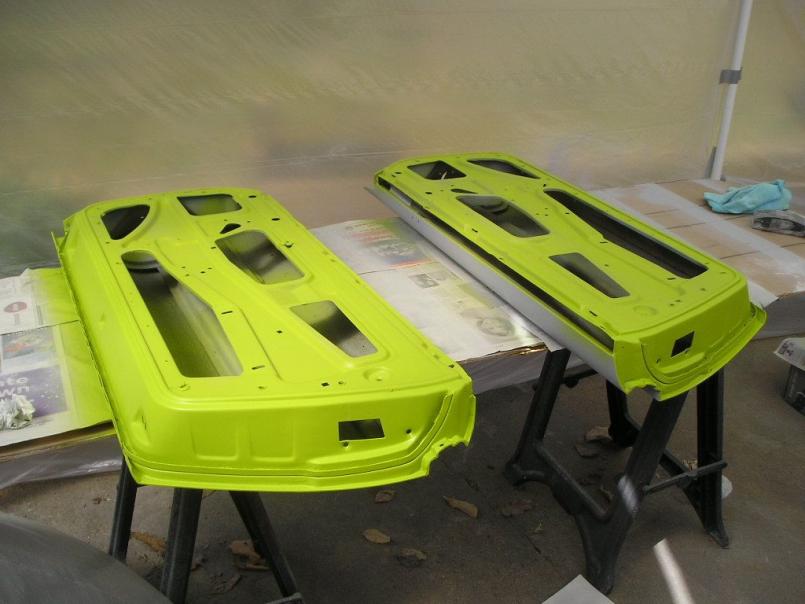 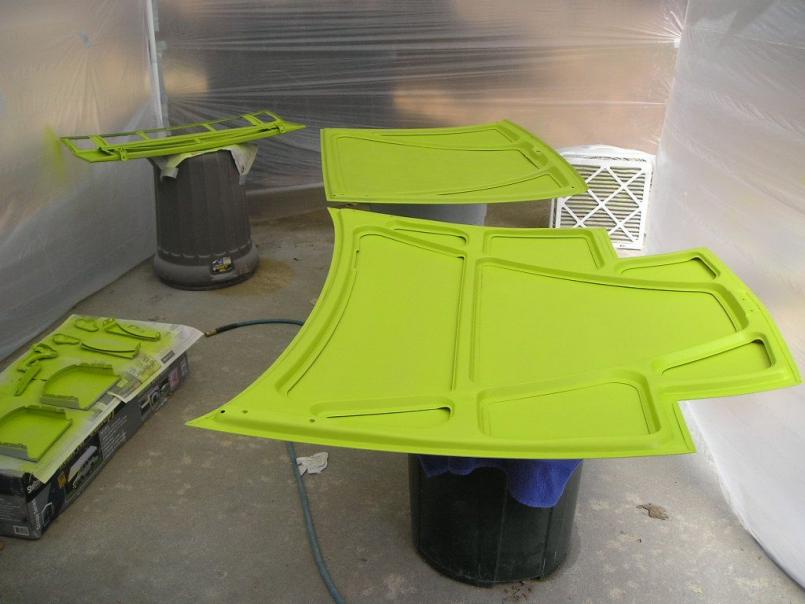 |
|
|
|
| dlee6204 |
Apr 4 2010, 10:49 PM
Post
#160
|
|
Howdy Group: Members Posts: 2,162 Joined: 30-April 06 From: Burnsville, NC Member No.: 5,956 |
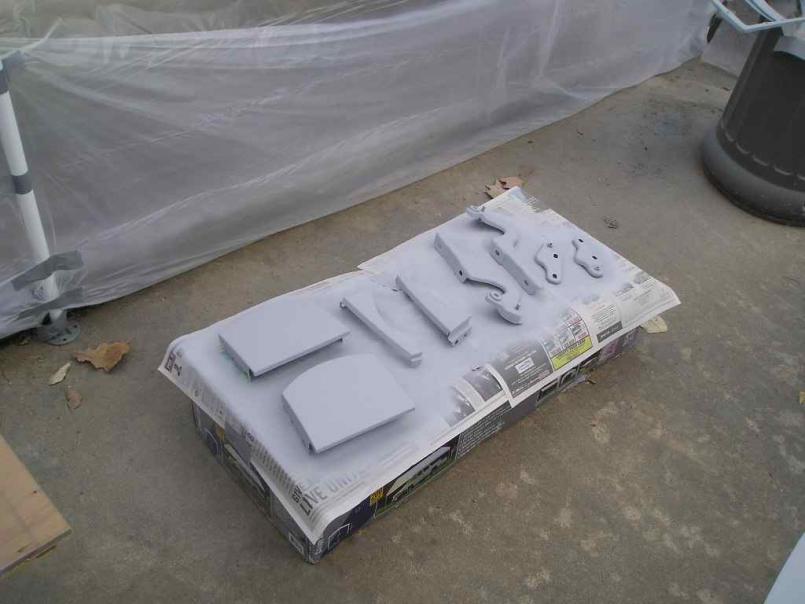
Two more...
 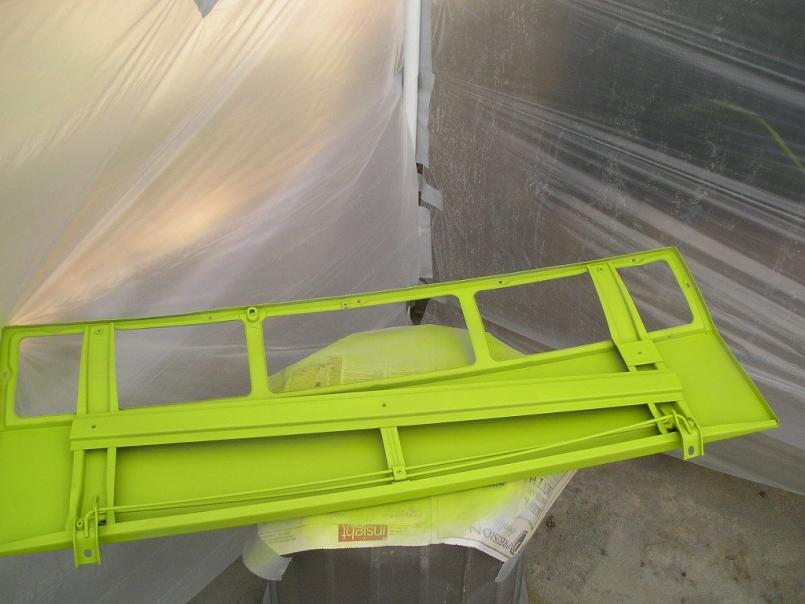 Next weekend I will flip everything over and finish painting the detached pieces. I will hopefully get to paint the car too! |
|
|
|
|
1 User(s) are reading this topic (1 Guests and 0 Anonymous Users)
0 Members:

|
Lo-Fi Version | Time is now: 28th May 2026 - 08:41 AM |
Invision Power Board
v9.1.4 © 2026 IPS, Inc.