|
|
|
Porsche, and the Porsche crest are registered trademarks of Dr. Ing. h.c. F. Porsche AG.
This site is not affiliated with Porsche in any way. Its only purpose is to provide an online forum for car enthusiasts. All other trademarks are property of their respective owners. |
|
|

  |

| Phoenix914 |
 Apr 5 2010, 07:45 AM Apr 5 2010, 07:45 AM
Post
#161
|
|
Member  Group: Members Posts: 389 Joined: 6-December 06 From: Oviedo, FL Member No.: 7,322 Region Association: South East States |
Although I am disappointed that you aren't sticking with the original Marathon Blue Metallic (like mine!), that Ravenna Green is a striking color. You are doing an awesome job! (IMG:style_emoticons/default/popcorn[1].gif)
|
   |

 
|
| Root_Werks |
Apr 5 2010, 09:02 AM
Post
#162
|
|
Village Idiot Group: Members Posts: 8,988 Joined: 25-May 04 From: About 15NM from Canada Member No.: 2,105 Region Association: Pacific Northwest |
Well, at least you're doing the color change right. Ravena green is a sweet color and looks like you're off to a great start. Can't wait to see more pics as more gets painted!
(IMG:style_emoticons/default/smilie_pokal.gif) |
|
|
|
| hi4head |
Apr 5 2010, 07:31 PM
Post
#163
|
|
Member Group: Members Posts: 69 Joined: 4-April 06 From: Lexington, NC Member No.: 5,819 Region Association: None |
Way to go Doug!
I came by to check on your status (and to get mine back out on the road to recheck the oil leaks). No one was home, some parts were in the temp booth, but nothing had been sprayed yet. Glad to see you got to spray some paint. I can't wait to see your progress when Kris and I get back from vacation. Chris |
|
|
|
| iamchappy |
Apr 5 2010, 07:52 PM
Post
#164
|
|
It all happens so fast! Group: Members Posts: 4,893 Joined: 5-November 03 From: minnetonka, mn Member No.: 1,315 Region Association: Upper MidWest |
Ravenna, Major Stokage.......
|
|
|
|
| dlee6204 |
Apr 10 2010, 03:12 PM
Post
#165
|
|
Howdy Group: Members Posts: 2,162 Joined: 30-April 06 From: Burnsville, NC Member No.: 5,956 |
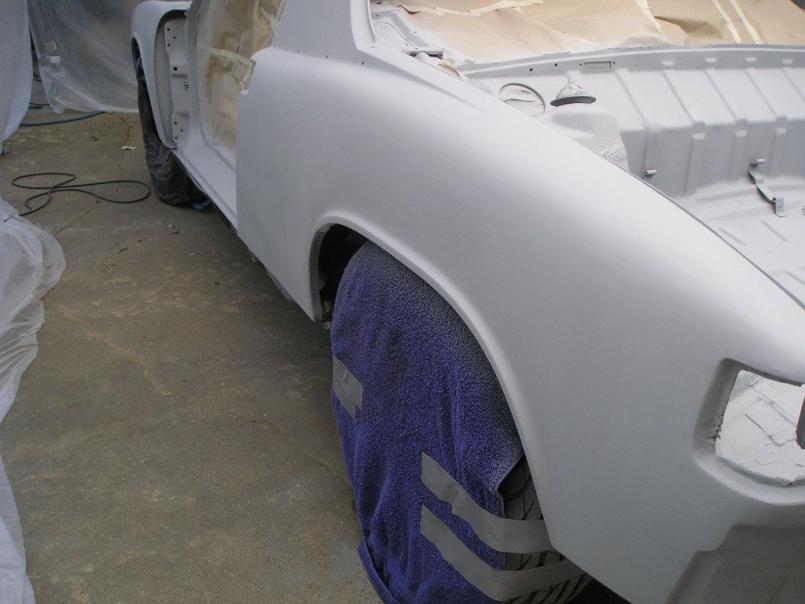
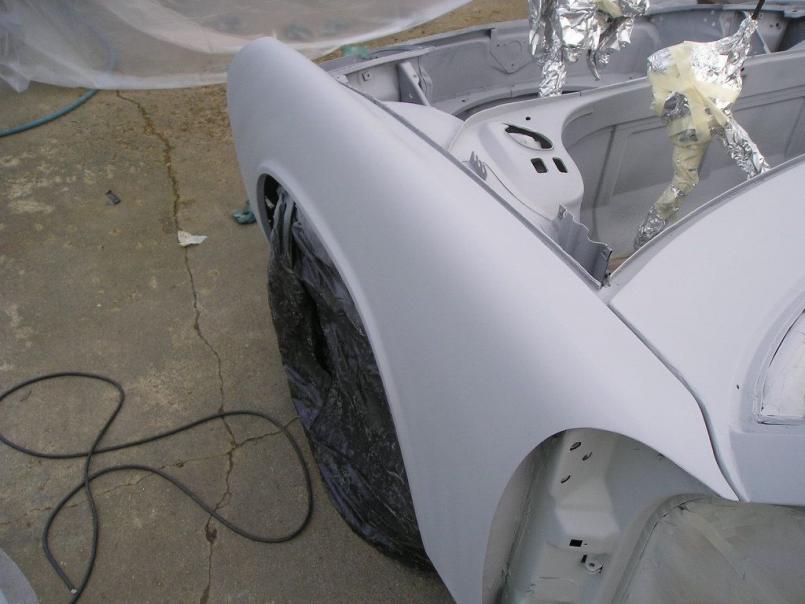
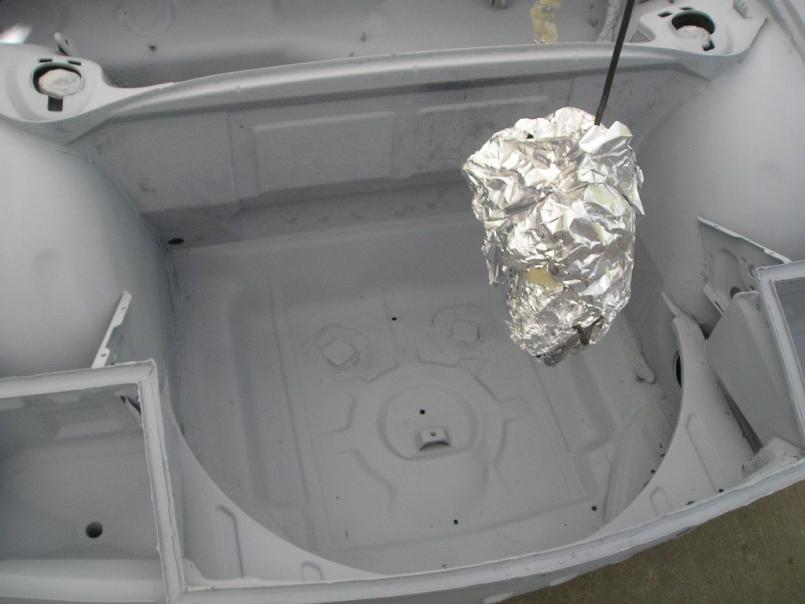
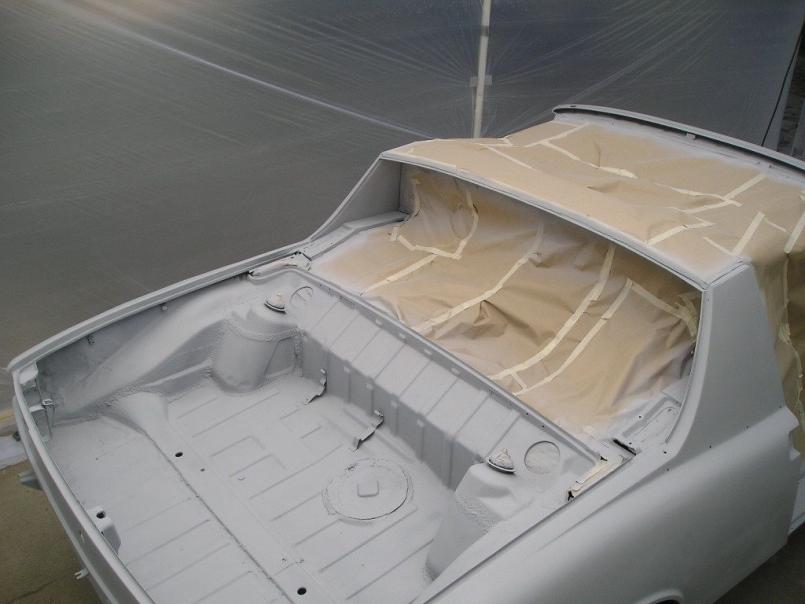
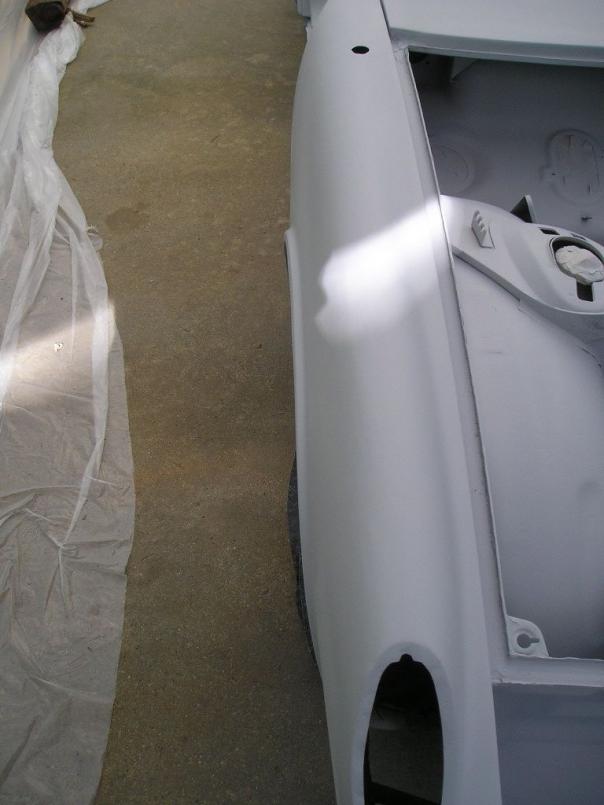
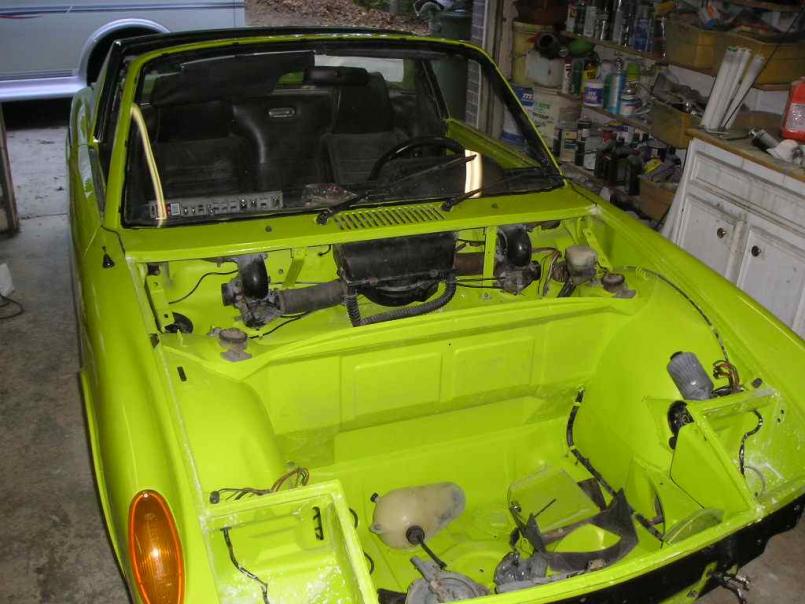
Yesterday it was too cold and rainy here to paint so I spent the day getting the body ready for primer. This morning I masked off the car and finished little things up, then this afternoon I shot the first few coats of primer on the body. Now I can see there are a lot of little things that need sanding and such.
   |
|
|
|
| dlee6204 |
Apr 10 2010, 03:14 PM
Post
#166
|
|
Howdy Group: Members Posts: 2,162 Joined: 30-April 06 From: Burnsville, NC Member No.: 5,956 |
A few more...
   |
|
|
|
| dlee6204 |
Apr 11 2010, 12:52 PM
Post
#167
|
|
Howdy Group: Members Posts: 2,162 Joined: 30-April 06 From: Burnsville, NC Member No.: 5,956 |
|
|
|
|
| dlee6204 |
Apr 12 2010, 04:36 PM
Post
#168
|
|
Howdy Group: Members Posts: 2,162 Joined: 30-April 06 From: Burnsville, NC Member No.: 5,956 |
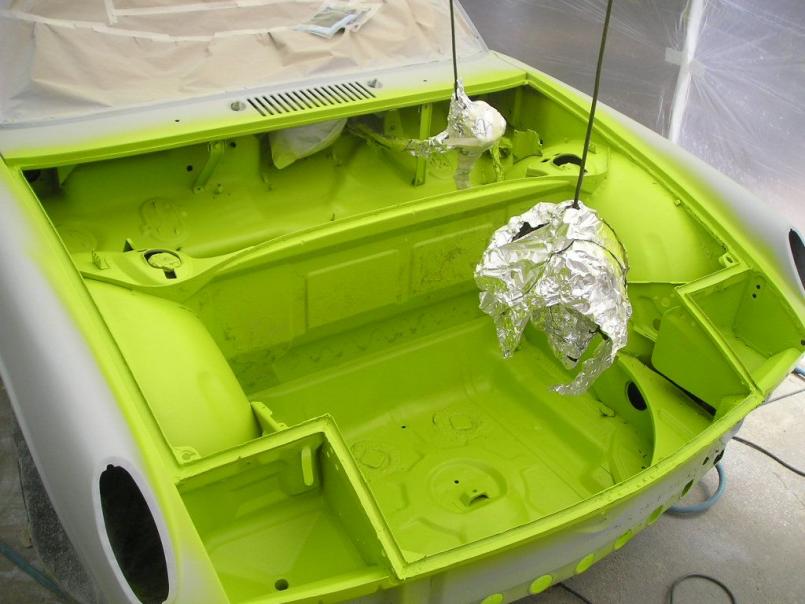
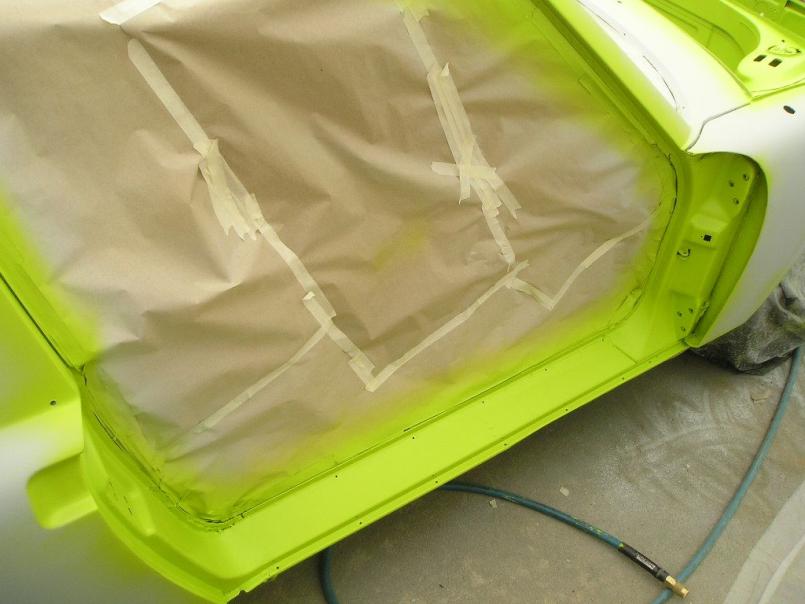
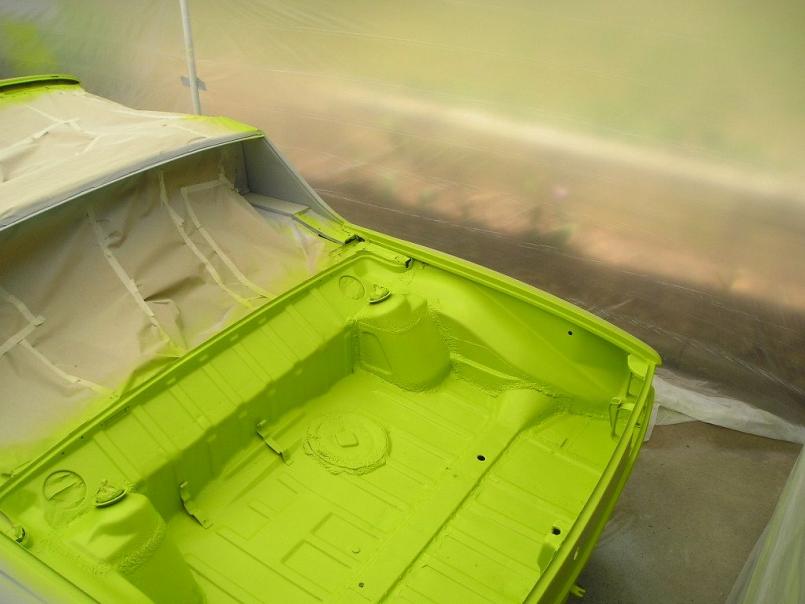
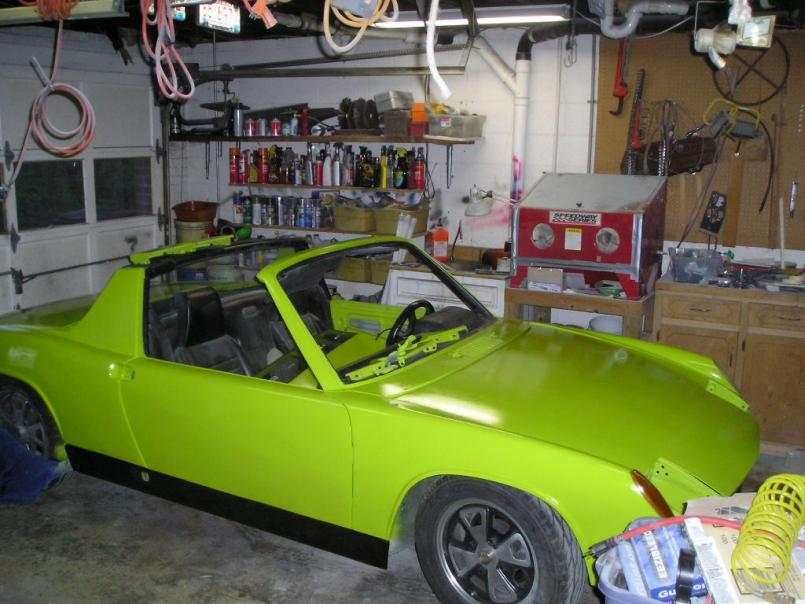
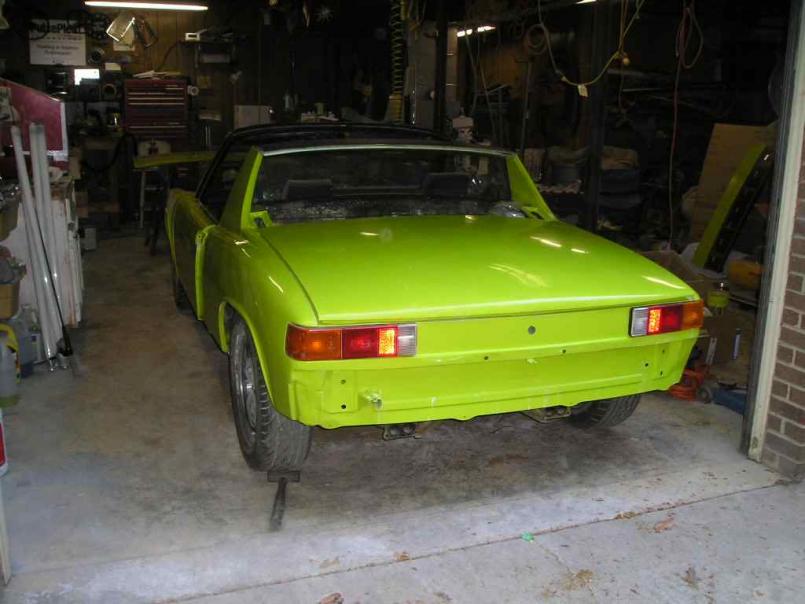
Okay there's some good new and bad news. The good news is that the car is painted. I laid down the color then clear.
some color... 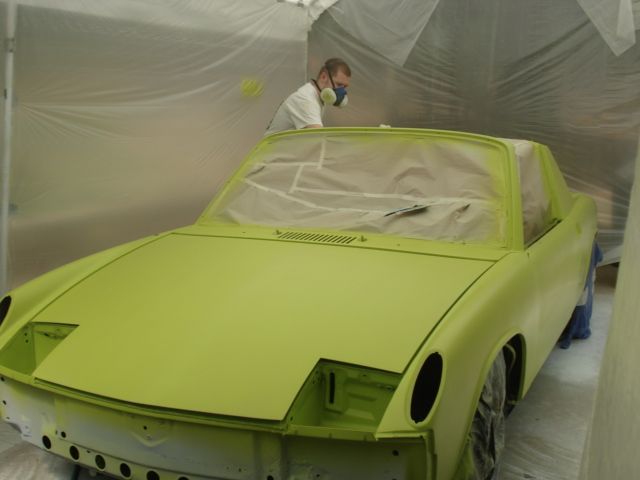 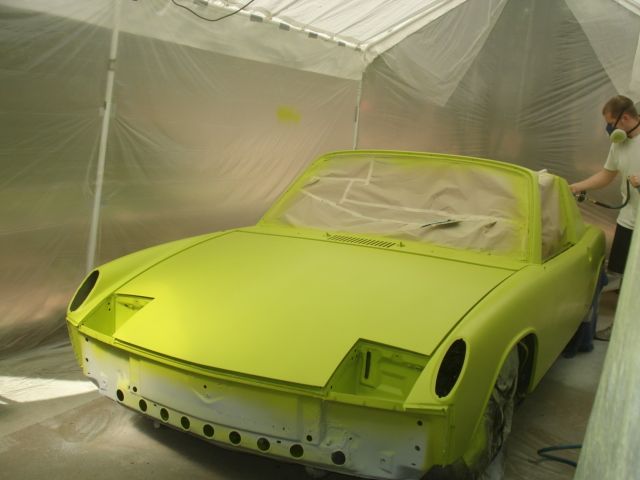 |
|
|
|
| dlee6204 |
Apr 12 2010, 04:42 PM
Post
#169
|
|
Howdy Group: Members Posts: 2,162 Joined: 30-April 06 From: Burnsville, NC Member No.: 5,956 |
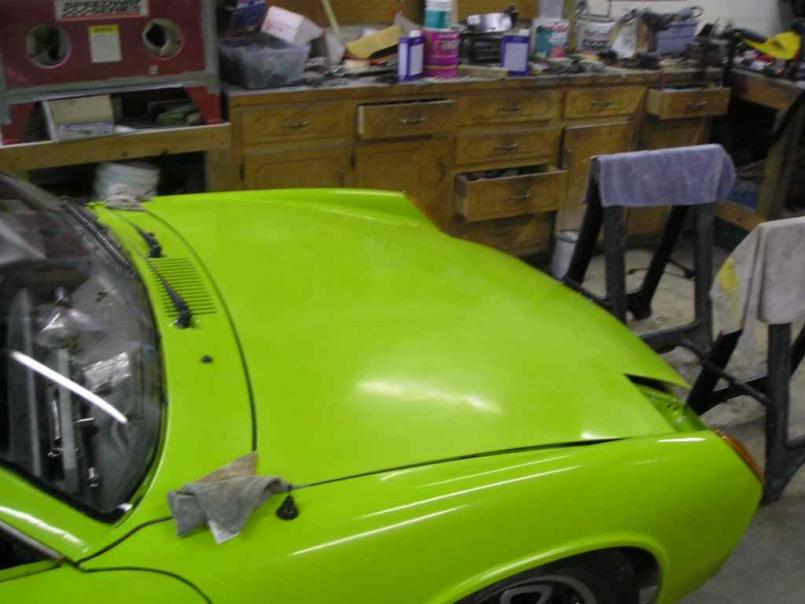
The bad news is that I really sucked it up when applying the clear and I laid it on in too thin of coats and also my gun adjustments were off. So now I have to sand it down again then apply more clear.
Here are some pictures after the clear was applied. It looks alright in the pictures but far from it in person. 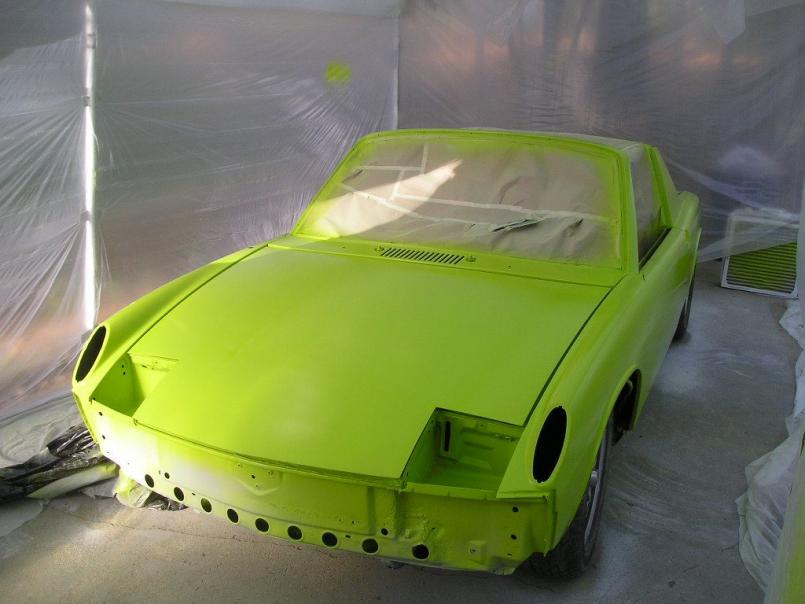 Yikes 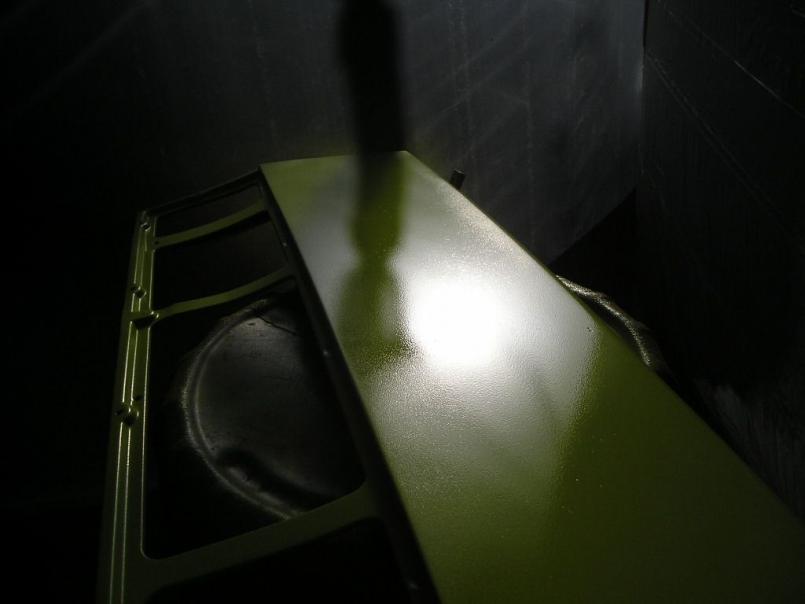  |
|
|
|
| dlee6204 |
Apr 12 2010, 04:44 PM
Post
#170
|
|
Howdy Group: Members Posts: 2,162 Joined: 30-April 06 From: Burnsville, NC Member No.: 5,956 |
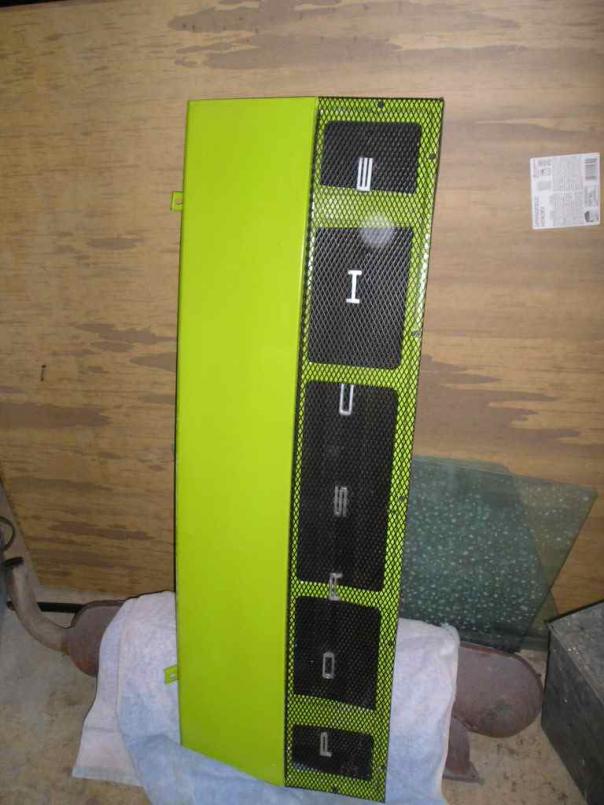
Some more
  Attached thumbnail(s) 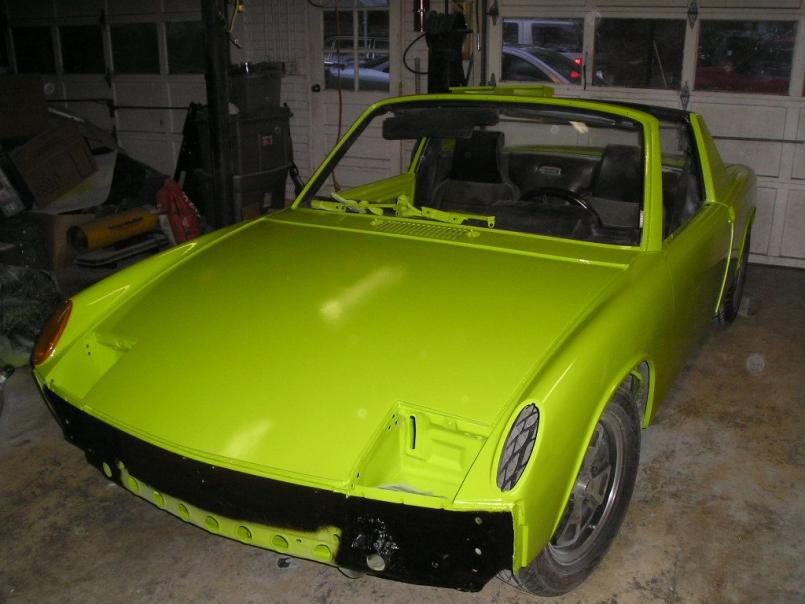
|
|
|
|
| arkitect |
Apr 12 2010, 10:49 PM
Post
#171
|
|
Senior Member Group: Members Posts: 617 Joined: 3-March 10 From: Stockton, CA Member No.: 11,426 Region Association: None |
Doug,
Very cool build, I've got about half way thru, can't wait to read the rest. When replacing the longs, did you use a backing plate or butt welded? Good idea of getting it running and all the bugs worked out before putting on paint. One of these days maybe mine will be on the road. Dave |
|
|
|
| dlee6204 |
Apr 13 2010, 07:03 AM
Post
#172
|
|
Howdy Group: Members Posts: 2,162 Joined: 30-April 06 From: Burnsville, NC Member No.: 5,956 |
Thanks Dave. I butt welded the longs which probably is not the strongest joint but I plan to add an Engman stiffening kit the next time I have the interior out.
|
|
|
|
| Root_Werks |
Apr 13 2010, 10:41 AM
Post
#173
|
|
Village Idiot Group: Members Posts: 8,988 Joined: 25-May 04 From: About 15NM from Canada Member No.: 2,105 Region Association: Pacific Northwest |
Very cool, looks like it's moving along nicely!
|
|
|
|
| gothspeed |
Apr 17 2010, 03:48 PM
Post
#174
|
|
Senior Member Group: Members Posts: 1,539 Joined: 3-February 09 From: SoCal Member No.: 10,019 Region Association: None |
Very inspiring!!!! You are doing a fantastic job!!! (IMG:style_emoticons/default/smile.gif)
|
|
|
|
| Limesoda |
Apr 17 2010, 06:46 PM
Post
#175
|
|
Newbie Group: Members Posts: 22 Joined: 16-April 10 From: Portland, OR Member No.: 11,622 Region Association: Pacific Northwest |
Absolutely amazing. I am in awe. I just got a Ravenna Green 73 2.0. I will definitely use the info in your thread. Thank you so much for documenting this transformation. You should be very proud of yourself.
Chris |
|
|
|
| dlee6204 |
Apr 18 2010, 07:32 PM
Post
#176
|
|
Howdy Group: Members Posts: 2,162 Joined: 30-April 06 From: Burnsville, NC Member No.: 5,956 |
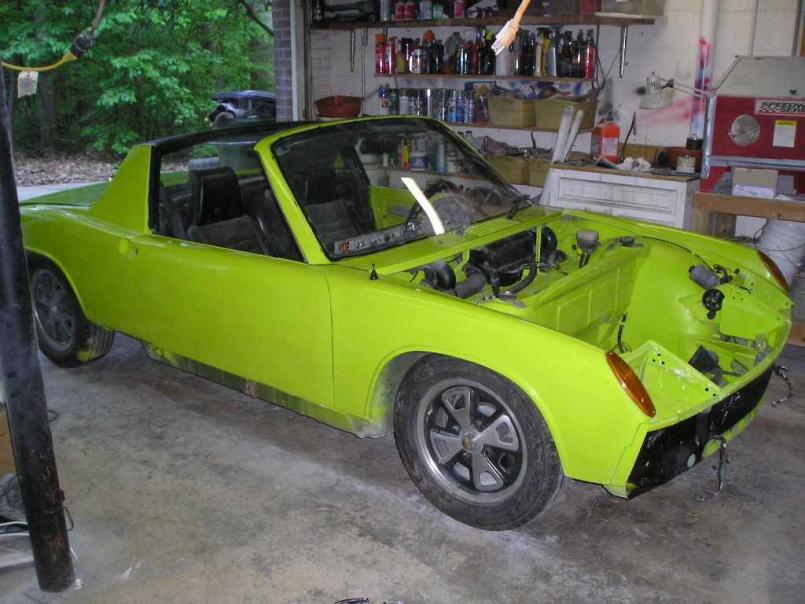
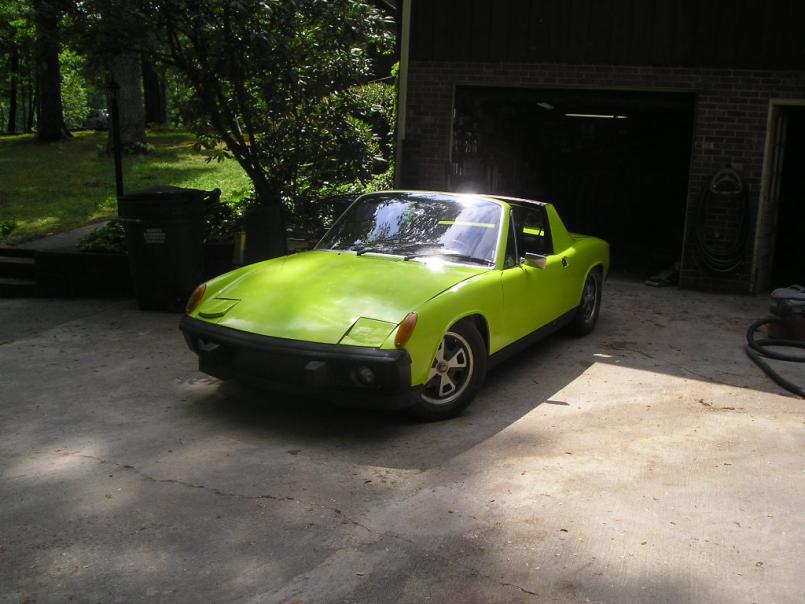
Big Update! After messing up applying the clear the first time, I had to sand everything back down and apply more clear. So I spent Friday wet sanding the car down then Saturday morning I applied more. Late saturday night I began wet sanding again to get everything smooth and then I buffed everything. I finished that up today. I then started to reassemble everything. (IMG:style_emoticons/default/smile.gif) Ventilation under the cowel, rubber seals, windshield, taillights, some of the headlight stuff all got added to the car. The gas tank will be going in next and that's all thats needed to fire this puppy up. Next weekend will be the big weekend where I take the car out for a drive (IMG:style_emoticons/default/driving.gif) (after I finish reassembling it of course)
     |
|
|
|
| AndrewP |
Apr 25 2010, 10:10 AM
Post
#177
|
|
Newbie Group: Members Posts: 3 Joined: 16-July 09 From: Jamestown, OH Member No.: 10,572 Region Association: None |
Did you install the windshield yourself?
Andrew |
|
|
|
| corsepervita |
Apr 25 2010, 10:41 AM
Post
#178
|
|
Member Group: Members Posts: 327 Joined: 18-April 10 From: Redmond, OR Member No.: 11,631 Region Association: Pacific Northwest |
Diggin' the green. Very nice.
|
|
|
|
| dlee6204 |
Apr 25 2010, 02:25 PM
Post
#179
|
|
Howdy Group: Members Posts: 2,162 Joined: 30-April 06 From: Burnsville, NC Member No.: 5,956 |
QUOTE Did you install the windshield yourself? Yes but my father gave me a hand putting in place. I cleaned the channel real well and then laid down a 1/4" bead of butyl tape. I then gently laid the windshield in place and i used a piece of windshield moulding to make sure all the windshield moulding clips had enough room to move and then I pressed the glass firmly in place. And of course installed the trim. (IMG:style_emoticons/default/smile.gif) |
|
|
|
| dlee6204 |
Apr 25 2010, 02:36 PM
Post
#180
|
|
Howdy Group: Members Posts: 2,162 Joined: 30-April 06 From: Burnsville, NC Member No.: 5,956 |
I've been meaning to post an update but I have been too busy driving the car! (IMG:style_emoticons/default/driving.gif) I finished putting the car back together on Friday (muffler, rocker panels, door innards, fuel tank, headlight hardware, and cleaning painting and installing a new front bumper.) I also made sure to switch all the trim back to anodized since the trim was black before. I had a few sets lying around so all went together nicely. I still have some small things to do like do a final fitment of lids, install sail vinyl, door pockets etc. Once the car was put back together, it started right up and ran beautifully. I'm so glad I can drive this car again. It is a huge weight off my shoulders now that it is drivable. Anyways I will post some pictures now.
 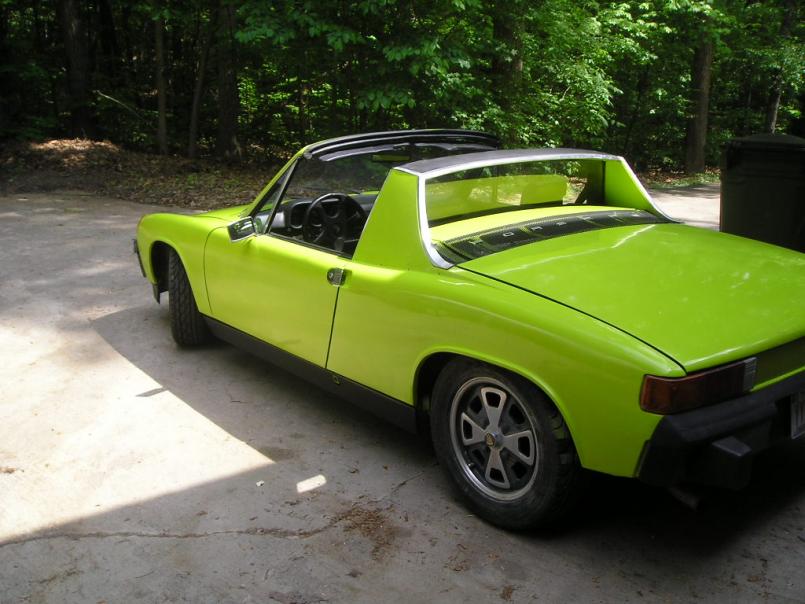 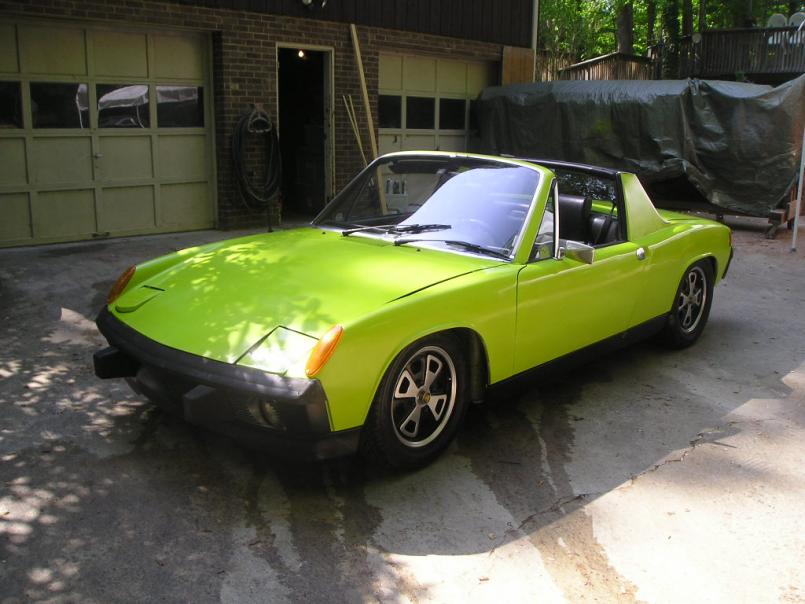 I'll get more pictures of the car up later. |
|
|
|
|
1 User(s) are reading this topic (1 Guests and 0 Anonymous Users)
0 Members:

|
Lo-Fi Version | Time is now: 28th May 2026 - 08:42 AM |
Invision Power Board
v9.1.4 © 2026 IPS, Inc.