|
|
|
Porsche, and the Porsche crest are registered trademarks of Dr. Ing. h.c. F. Porsche AG.
This site is not affiliated with Porsche in any way. Its only purpose is to provide an online forum for car enthusiasts. All other trademarks are property of their respective owners. |
|
|

  |

| dlee6204 |
 Dec 3 2009, 05:00 PM Dec 3 2009, 05:00 PM
Post
#81
|
|
Howdy  Group: Members Posts: 2,162 Joined: 30-April 06 From: Burnsville, NC Member No.: 5,956 |
QUOTE I have really enjoyed reading this thread. You make everything look easy! I have the exact same car, color included. Mine has been repainted the original Marathon Blue. My rear wheel bearings also need to be replaced, but I have been putting it off until I remove the engine for rebuilding. What kind of radio did you install. Is it one that fits the dash without mods? Thanks Bryan! The radio I used was just a spare Kenwood CD headunit that I had lying around. Once the stock radio faceplate is removed, there is a standard size hole in the dash that most stereos will fit in. Mine slipped right in and it only took less than an hour to get everything working. I still have to add basket-weave material around it to make it look better. I'll post pictures later on that shows more of the interior. Originally I wanted to install a stock stereo but with a little budget I just installed the CD unit for the time being. |
   |

 
|
| dlee6204 |
Dec 5 2009, 08:13 AM
Post
#82
|
|
Howdy Group: Members Posts: 2,162 Joined: 30-April 06 From: Burnsville, NC Member No.: 5,956 |
So I did something SAWEET to my car last night. I installed White LED Strips in the gauges to get rid of the yellow halogen bulbs. It came out looking great.
(I apologize for the blurry pictures) I took the gauges apart, painted the interior housing a more reflective color, and installed a strip of LED's and wired it out the back. The difference is staggering. The parts... 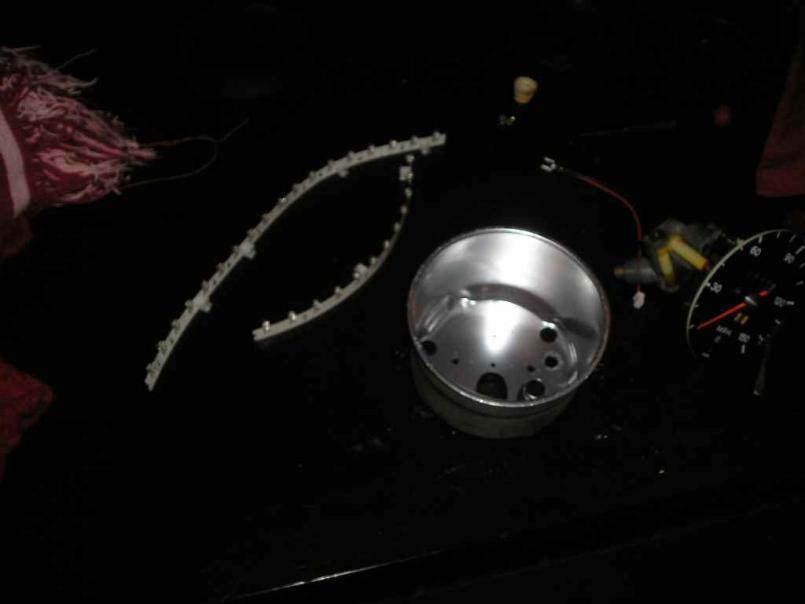 After I finished the speedo. This shows a big difference. I might be able to see my gauges now... (IMG:style_emoticons/default/w00t.gif) 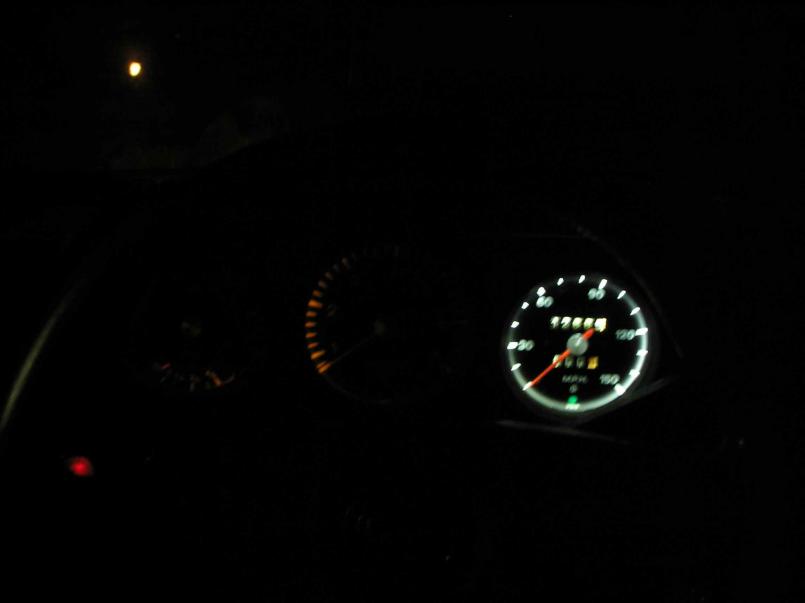 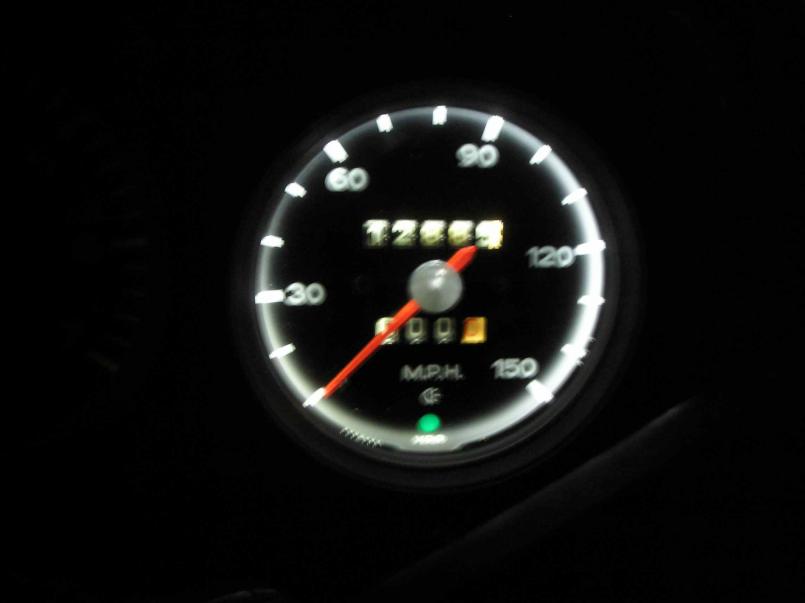 Complete assembly. I also painted the rings on all three gauges as well as the mounting plate. 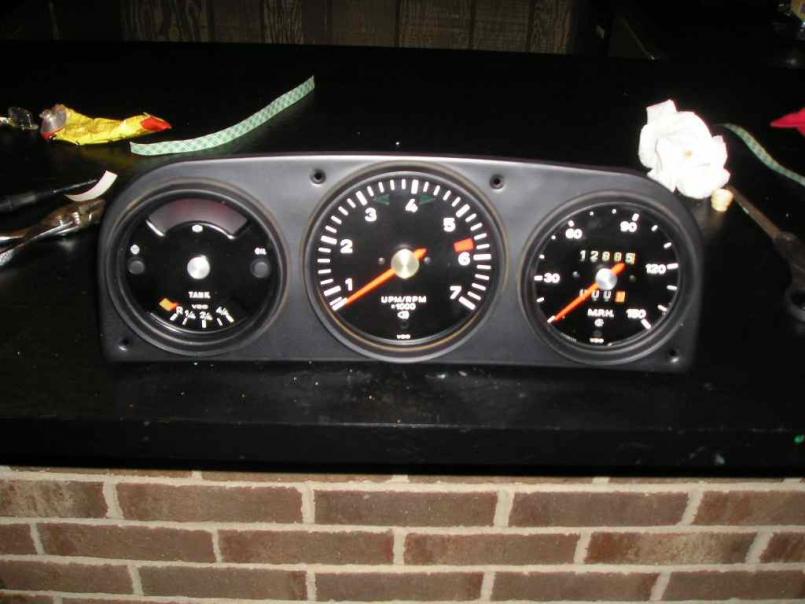 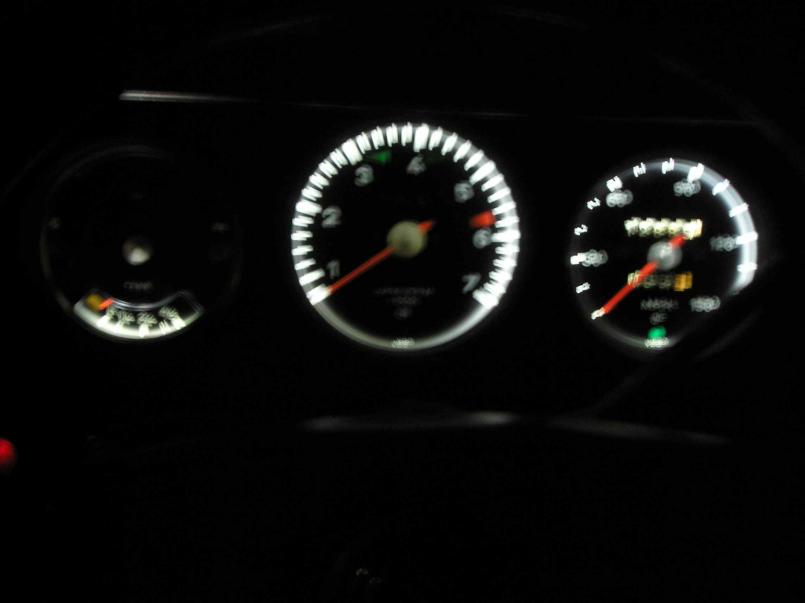 Now I just have to do the center console gauges.  |
|
|
|
| dlee6204 |
Dec 5 2009, 12:54 PM
Post
#83
|
|
Howdy Group: Members Posts: 2,162 Joined: 30-April 06 From: Burnsville, NC Member No.: 5,956 |
Finished up the second driveshaft...
Oh my... 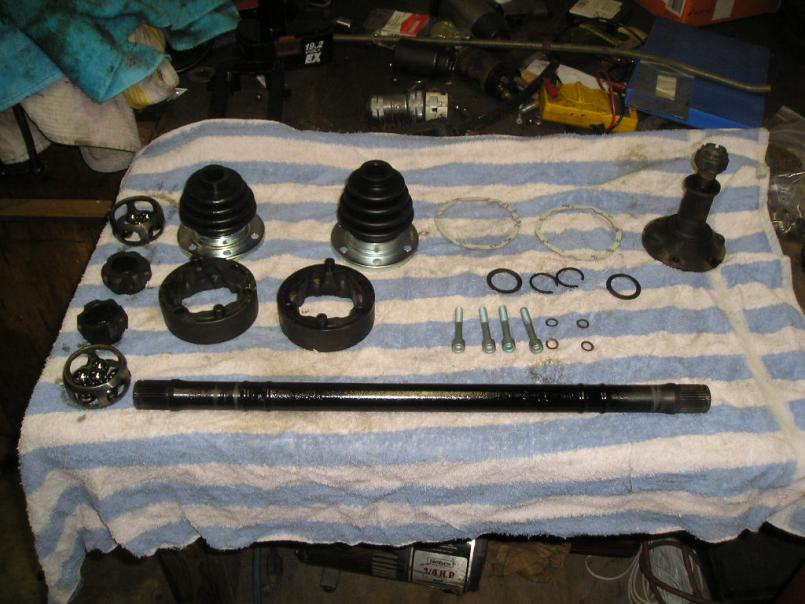 Complete! 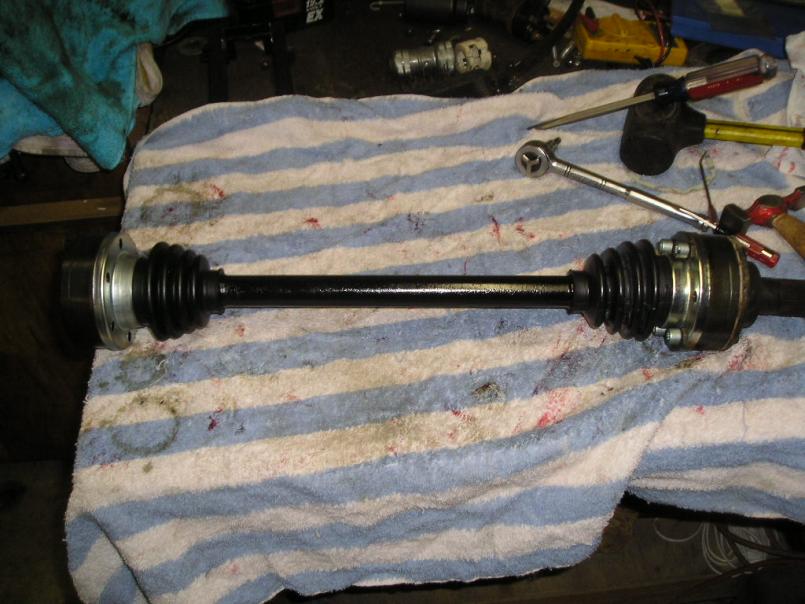 |
|
|
|
| hi4head |
Dec 5 2009, 02:08 PM
Post
#84
|
|
Member Group: Members Posts: 69 Joined: 4-April 06 From: Lexington, NC Member No.: 5,819 Region Association: None |
Way to go Doug!!
Thing look great and you sure look like you've been busy. Stop by the house sometime when you're home for the weekend. Chris |
|
|
|
| jonferns |
Dec 5 2009, 09:39 PM
Post
#85
|
|
Advanced Member Group: Members Posts: 2,081 Joined: 29-March 07 From: New Jersey Member No.: 7,631 Region Association: North East States |
It's coming along great Doug. Please keep the pics coming.
|
|
|
|
| dlee6204 |
Dec 6 2009, 10:21 PM
Post
#86
|
|
Howdy Group: Members Posts: 2,162 Joined: 30-April 06 From: Burnsville, NC Member No.: 5,956 |
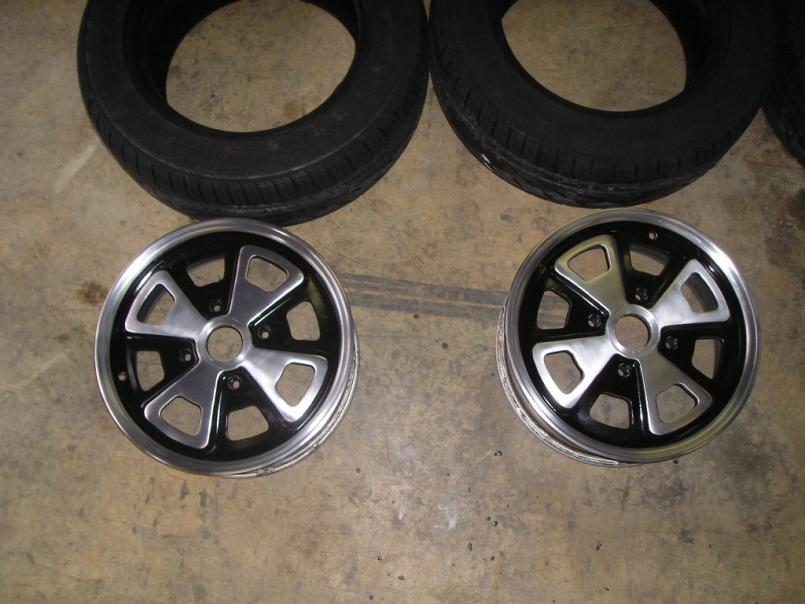
I finished the rest of the wheels today. Here's some pictures of my progress...
Here's a wheel before I started working on it. 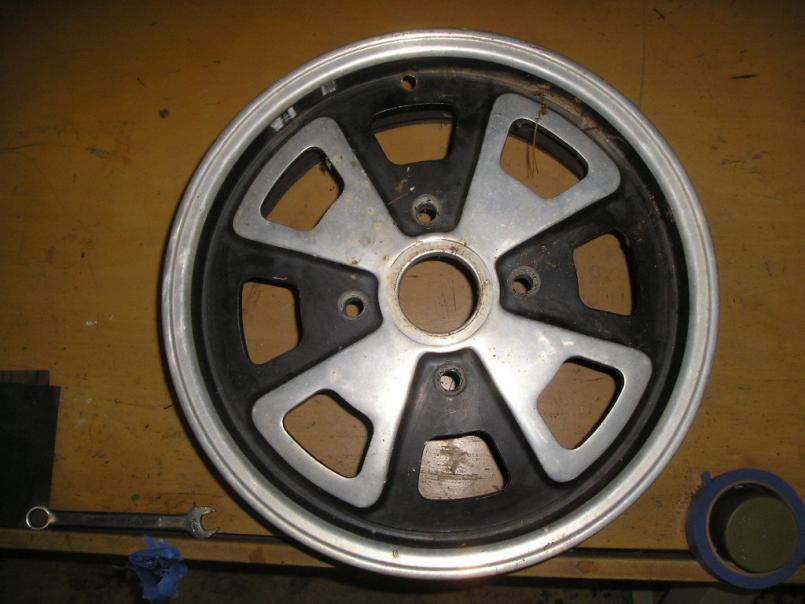 Nobody likes a rash...  Rash gone. 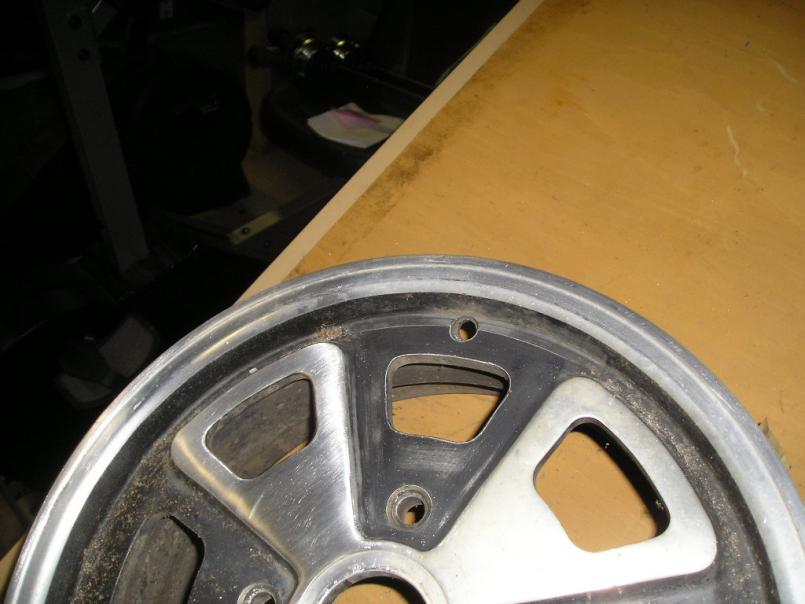 |
|
|
|
| dlee6204 |
Dec 6 2009, 10:25 PM
Post
#87
|
|
Howdy Group: Members Posts: 2,162 Joined: 30-April 06 From: Burnsville, NC Member No.: 5,956 |
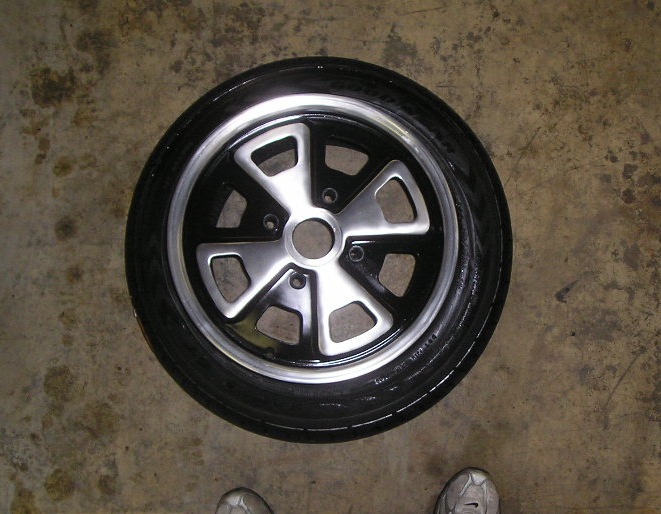
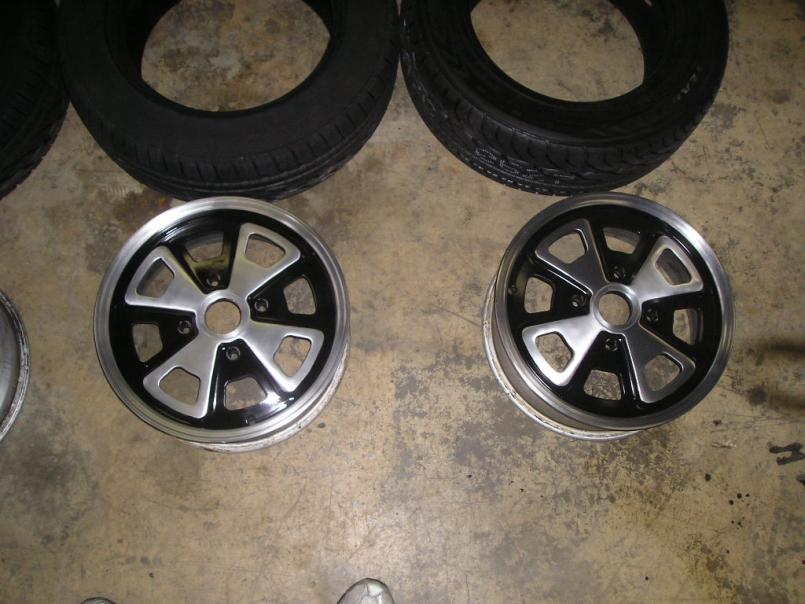
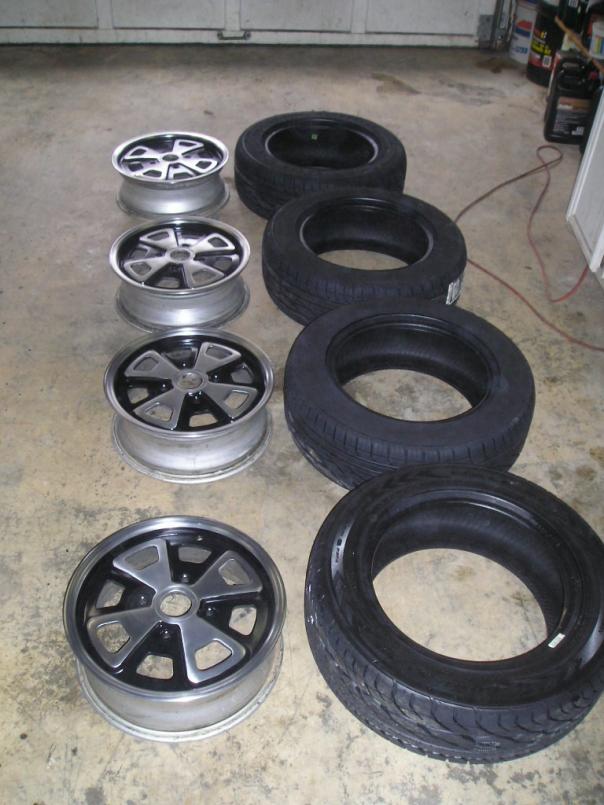
Finished product
   |
|
|
|
| dlee6204 |
Dec 6 2009, 10:26 PM
Post
#88
|
|
Howdy Group: Members Posts: 2,162 Joined: 30-April 06 From: Burnsville, NC Member No.: 5,956 |
Now I just need to get the tires mounted.
 That's all for now. More to come later in the week! |
|
|
|
| dlee6204 |
Dec 10 2009, 01:41 PM
Post
#89
|
|
Howdy Group: Members Posts: 2,162 Joined: 30-April 06 From: Burnsville, NC Member No.: 5,956 |
I started restoring a set of good taillights I had lying around. I finished up the passenger side and installed it. The old one was badly cracked all over and being held together by the gasket. (IMG:style_emoticons/default/huh.gif)
Before work 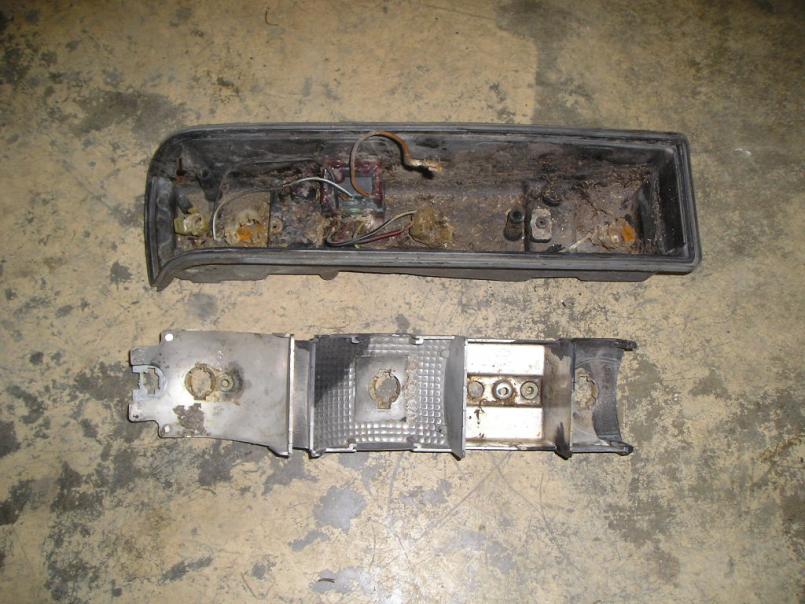 After I painted the innards and the housing. I cleaned all the contacts and installed a new gasket between the lens and housing.  Finished 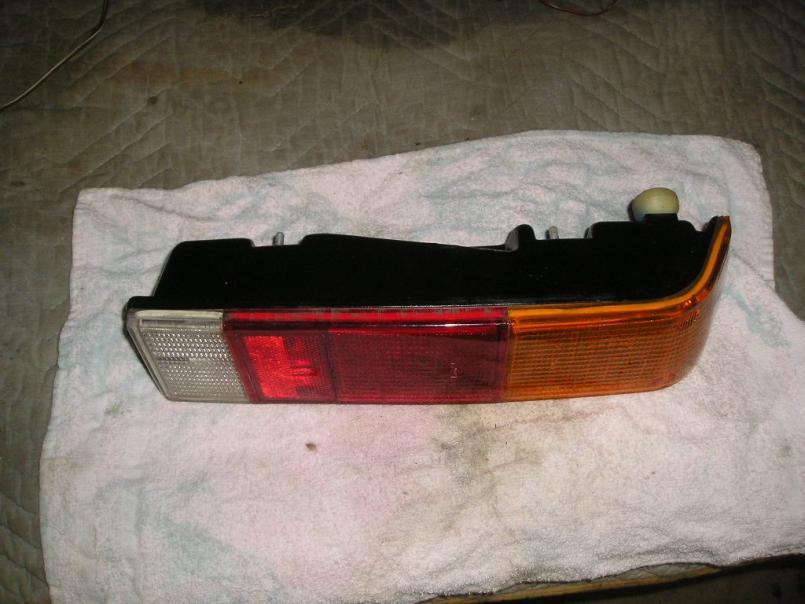 |
|
|
|
| dlee6204 |
Dec 10 2009, 01:44 PM
Post
#90
|
|
Howdy Group: Members Posts: 2,162 Joined: 30-April 06 From: Burnsville, NC Member No.: 5,956 |
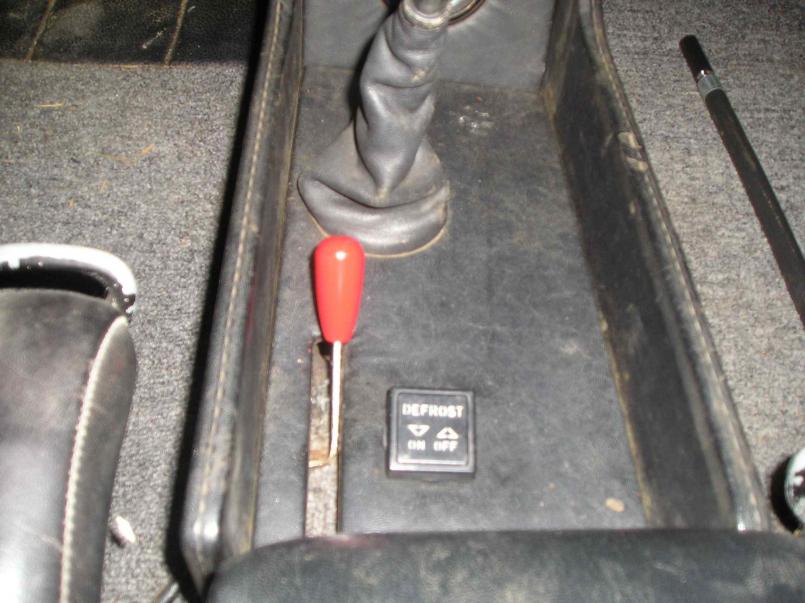
And sometimes its the small things that bring satisfaction. I painted my heater level knob (IMG:style_emoticons/default/biggrin.gif) Last weekend I also got the illumination for the heater knob working too!
 |
|
|
|
| dlee6204 |
Dec 10 2009, 01:48 PM
Post
#91
|
|
Howdy Group: Members Posts: 2,162 Joined: 30-April 06 From: Burnsville, NC Member No.: 5,956 |
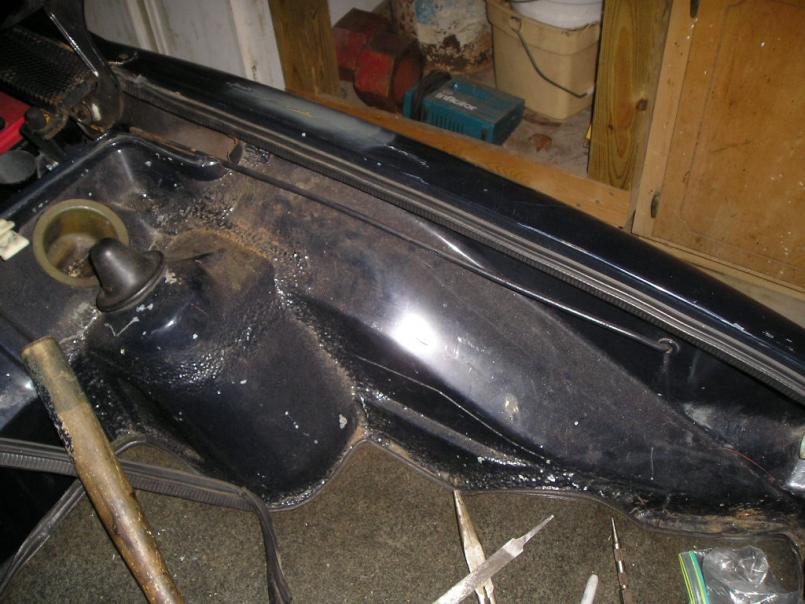
I did some work in the rear trunk. At some point one of the previous owners decided to install a rod to hold up the trunk lid. However when I acquired the car, the trunk lid opens and shuts fine without it and both hinges were already replaced. So the rod is now gone...
 |
|
|
|
| dlee6204 |
Dec 10 2009, 01:56 PM
Post
#92
|
|
Howdy Group: Members Posts: 2,162 Joined: 30-April 06 From: Burnsville, NC Member No.: 5,956 |
And I did a little "upgrade" to the rear trunk. I added a second light. To me, it made sense to have one on both sides. This setup helps light up the entire trunk also lights up both sides of the engine compartment instead of one.
I painted the top part of the reflective lens and housing with a reflective paint. This keeps the light reflected down in the engine compartment. 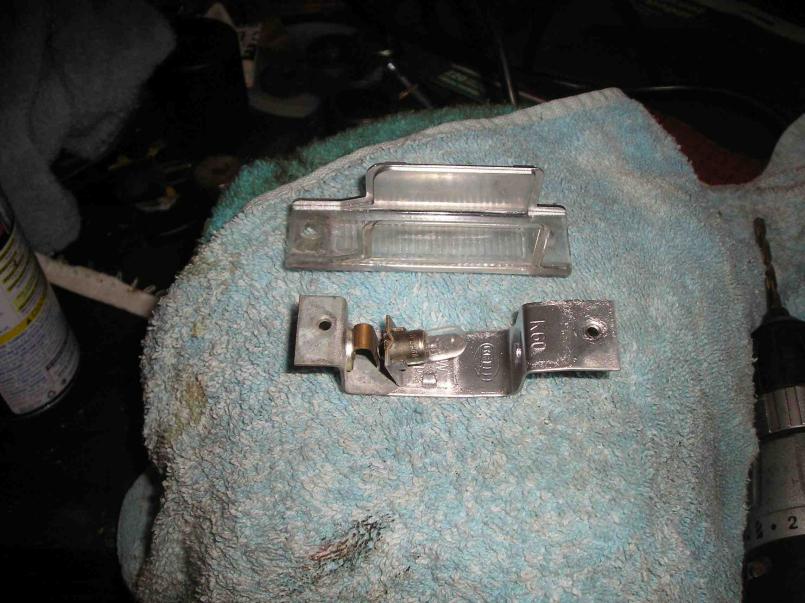 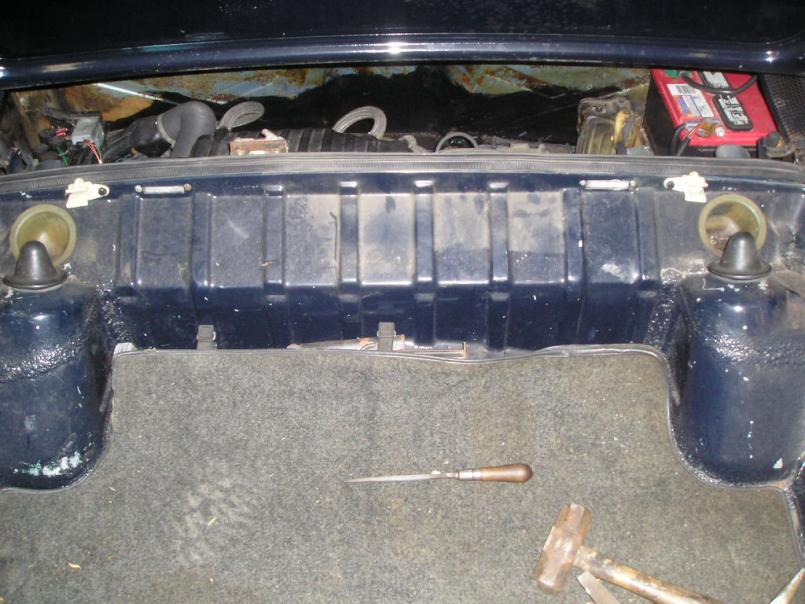 |
|
|
|
| Gint |
Dec 10 2009, 04:45 PM
Post
#93
|
|
Mike Ginter Group: Admin Posts: 16,105 Joined: 26-December 02 From: Denver CO. Member No.: 20 Region Association: Rocky Mountains |
Those Fuchs look great! And you maintained something like a factory finish it would appear. Are the petals brushed? Did you remove the anodizing?
|
|
|
|
| dlee6204 |
Dec 10 2009, 06:23 PM
Post
#94
|
|
Howdy Group: Members Posts: 2,162 Joined: 30-April 06 From: Burnsville, NC Member No.: 5,956 |
QUOTE(Gint @ Dec 10 2009, 05:45 PM)  Those Fuchs look great! And you maintained something like a factory finish it would appear. Are the petals brushed? Did you remove the anodizing? QUOTE Those Fuchs look great! And you maintained something like a factory finish it would appear. Are the petals brushed? Did you remove the anodizing? Thanks! The petals do have a brushed texture. I started by sanding the entire wheel with 150 grit i believe, then i stepped up to 400. After that I used steel wool on the metal finish areas to give it a very light brushed look. I then masked and painted the black. Then I painted clear over everything. They came out looking better than expected and I'm very pleased with them. The wheels were in such good shape that I debated whether to polish the entire wheels or paint the insides black. I decided that I liked the black look better. |
|
|
|
| Cevan |
Dec 10 2009, 06:56 PM
Post
#95
|
|
Senior Member Group: Members Posts: 1,079 Joined: 11-December 06 From: Western Massachusetts Member No.: 7,351 |
Those wheels came out great! Nice work. (IMG:style_emoticons/default/beer.gif)
|
|
|
|
| dlee6204 |
Dec 11 2009, 09:58 PM
Post
#96
|
|
Howdy Group: Members Posts: 2,162 Joined: 30-April 06 From: Burnsville, NC Member No.: 5,956 |
Well today I painted some of the heat ducting for the passenger side.
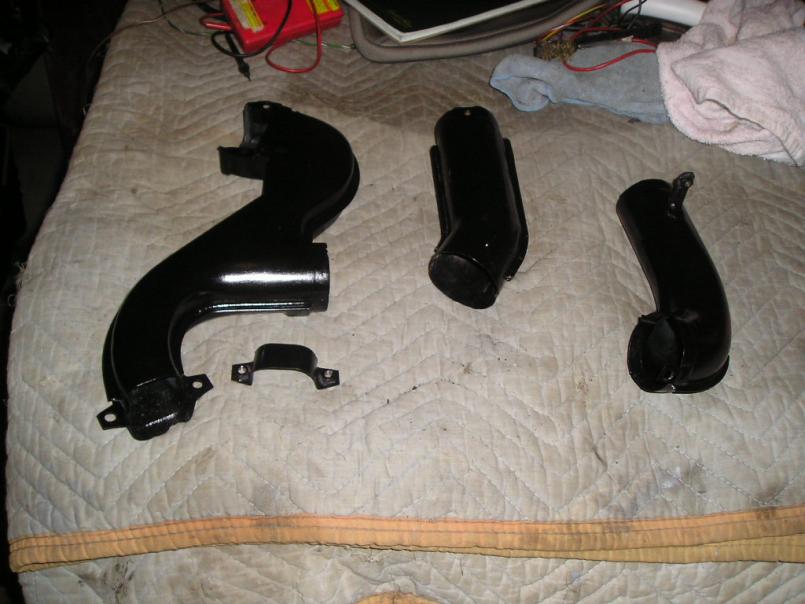 I also painted the steering pan and put new seals on it. 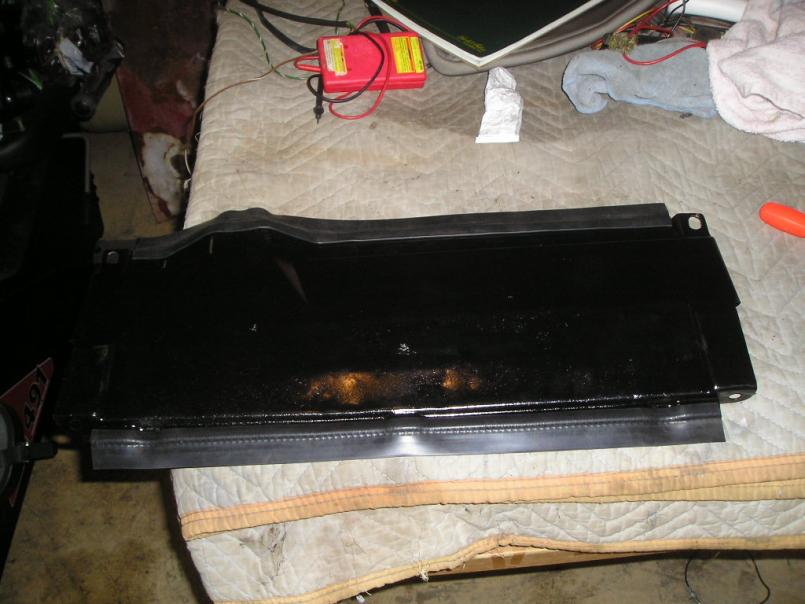 |
|
|
|
| dlee6204 |
Dec 11 2009, 10:10 PM
Post
#97
|
|
Howdy Group: Members Posts: 2,162 Joined: 30-April 06 From: Burnsville, NC Member No.: 5,956 |
Currently the fresh air fan doesn't work so I plan on replacing it. I pulled a good working unit off a parts car and did a little work to it. First, the gaskets on the opening/closing valves were completely toast. With the fan on and valves closed, there was an ample amount of air coming out of the ducting. To fix this, I replaced these foam gaskets with a new foam ring that I cut out of a 1/4" sheet of foam we had lying around. Now, the valves keep out the air when they are in the closed position.
Here is a picture of the old gaskets in place. You can see where part of it was missing around the edge. 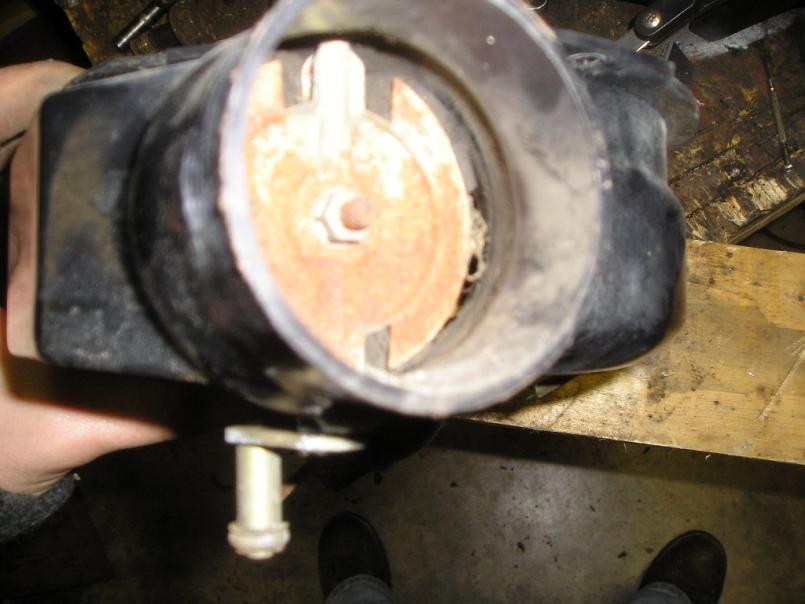 Here is the new gasket I made compared to the old one. 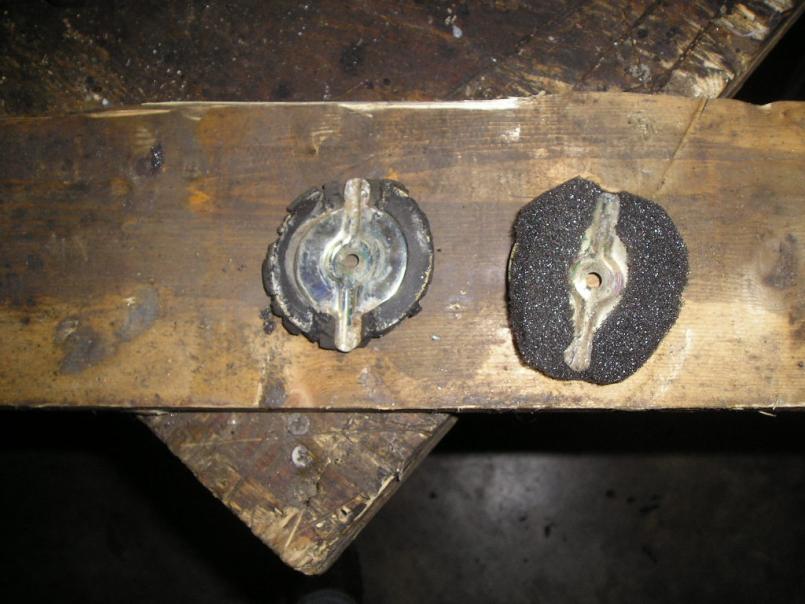 And here it is in the ducting. 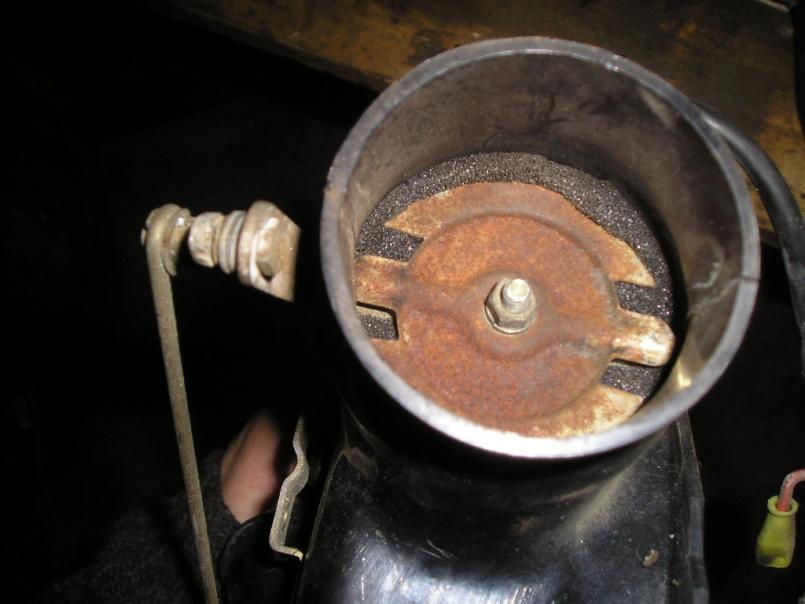 |
|
|
|
| dlee6204 |
Dec 11 2009, 10:14 PM
Post
#98
|
|
Howdy Group: Members Posts: 2,162 Joined: 30-April 06 From: Burnsville, NC Member No.: 5,956 |
Here is the fan assembly ready to be installed in the car.
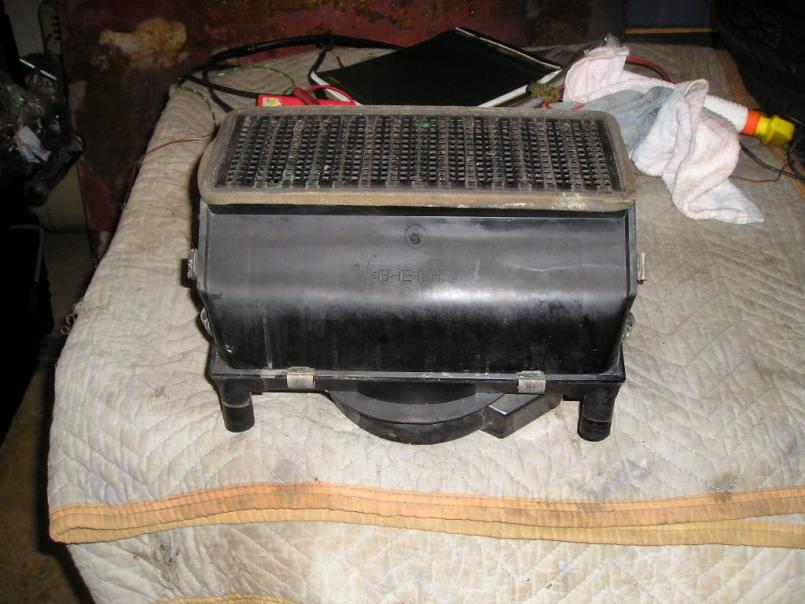 I'm starting to have a pile of parts building up. (IMG:style_emoticons/default/biggrin.gif) I need to start installing them on my car! |
|
|
|
| dlee6204 |
Dec 13 2009, 10:24 PM
Post
#99
|
|
Howdy Group: Members Posts: 2,162 Joined: 30-April 06 From: Burnsville, NC Member No.: 5,956 |
So I put the 914 on jack stands this weekend to get some stuff done on it. I started by removing the gas tank and going through the air ducting up front. The air valves weren't in sync with the dash controls so i adjusted them. In the process, I broke one of the cables and that was a real pain to replace. I also replaced the fan and it still doesn't work so I need to make sure all the contacts are clean and attached in the dash.
I moved onto the rear end. Recently I've been having a progressive noise coming from the driver's side rear so I wanted to figure out why. I also wanted to fix the negative camber issue and replace the driveshafts while I was in there. After taking off the caliper and rotor, I notice the hub was way too loose in the bearing. I was able to wiggle it back and forth and then it popped out! (IMG:style_emoticons/default/WTF.gif) (I previously replaced this bearing.) 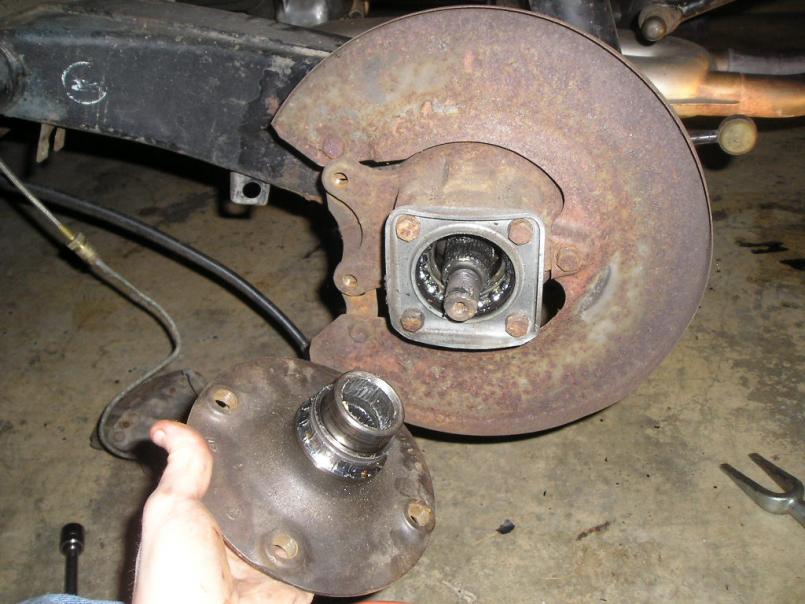 I figured that was the source of the noise so I moved onto the camber issue. I replaced the trailing arm with a spare and it still had too much negative camber so I knew it wasn't a bent trailing arm. I ended up putting in approximately 1 cm of spacers to solve the camber issue. I also put in a new wheel bearing (a different brand than the first) in the second trailing arm so now I should be good to go. The driveshafts were replaced in the process. 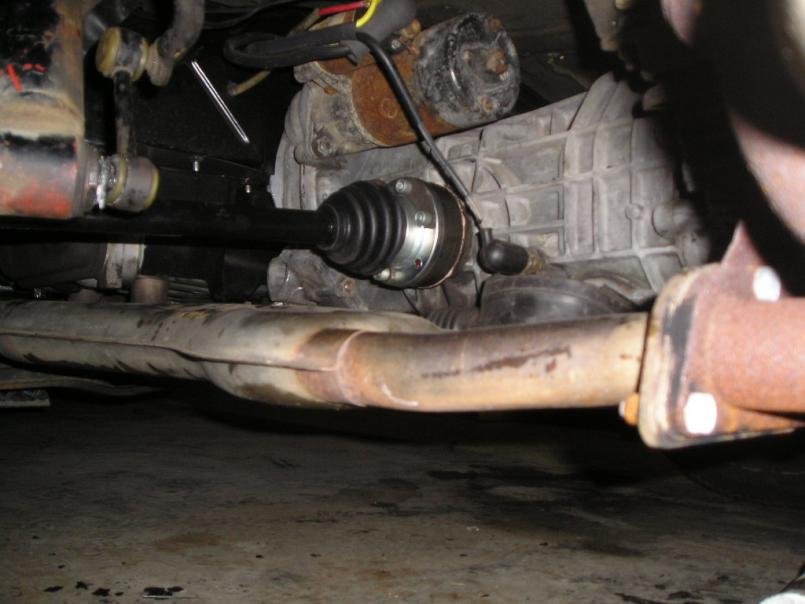 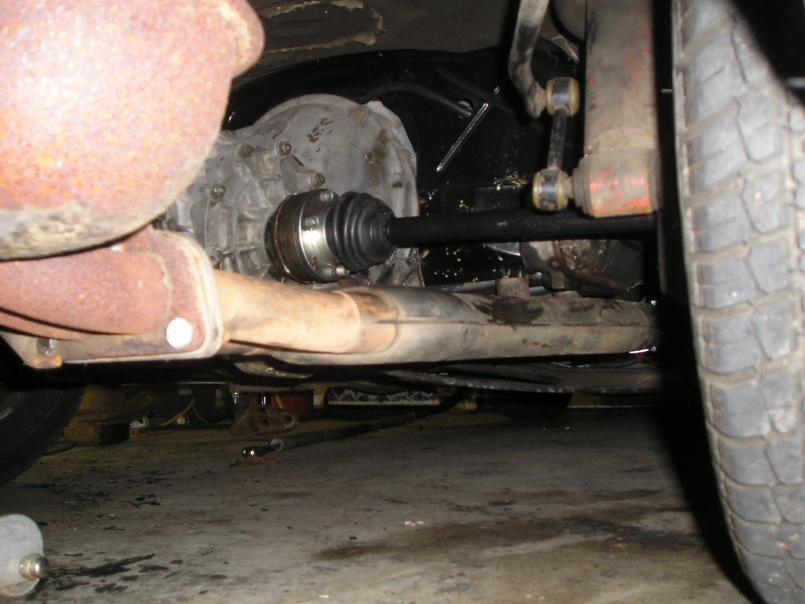 |
|
|
|
| dlee6204 |
Dec 13 2009, 10:29 PM
Post
#100
|
|
Howdy Group: Members Posts: 2,162 Joined: 30-April 06 From: Burnsville, NC Member No.: 5,956 |
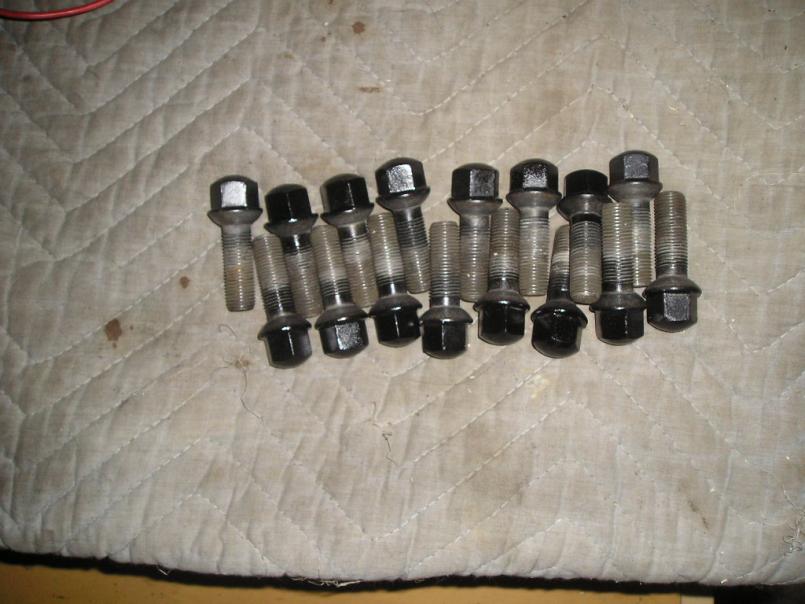
Hopefully you guys don't think thats ALL I did this weekend (IMG:style_emoticons/default/biggrin.gif) I painted my lugnuts to match the wheels.
 When searching through the loads of parts we have around here I found an original leather steering wheel. SAWEET. I cleaned up the wheel, painted the metal horn button part, and re-glued the horn pad. I think I will install this on my car and sell the old one. 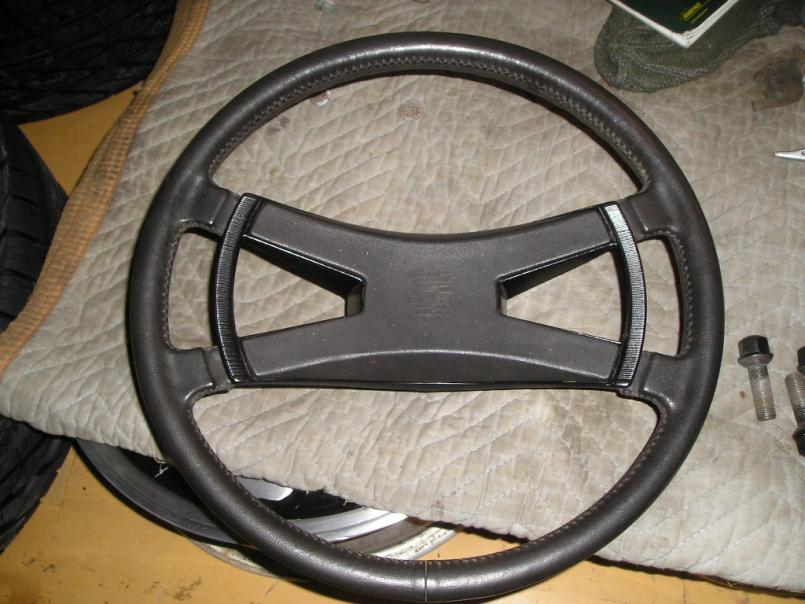 |
|
|
|
|
1 User(s) are reading this topic (1 Guests and 0 Anonymous Users)
0 Members:

|
Lo-Fi Version | Time is now: 19th January 2026 - 02:23 AM |
Invision Power Board
v9.1.4 © 2026 IPS, Inc.