Help - Search - Members - Calendar
Full Version: Valve Adjustment help needed - Vielen dank!
914World.com > The 914 Forums > 914World Garage
stephenaki
OK, so I have searched and can't find a thread related to my situation, maybe because people are smarter and more experienced than me. The question is pretty much spelled out in the topic description.

The crank, rods, piston and cylinders are 2.0, the heads are machined 1.7, what measurement do I use for the valve adjustment? 1.7 or 2.0? confused24.gif

I am leaning towards 1.7 but would like to get an educated opinion from the group. Help please, I want to re-do the valve adjustment before I mess with anything else.
Bartlett 914
That is a good question. Makes me want to ask why there is a difference between 1.8 and 2.0 adjustment procedure at all.
Katmanken
Which is bigger??

The gap is designed to get smaller as the engine heats up.

If the gap is set to the smaller value and it is wrong, the valve train will expand and the valve may be forced open slightly when the engine is hot. (aka burn a valve)

If the gap is set to the higher value and it is wrong, the valvetrain will expand when hot, there will be a little more gap and the valve train will make a little more noise. (not as loud as cold)

I'd try the max gap value. It's more forgiving. Especially if the engine wears in and the valve gap starts closing.

Per the factory change, they may have added the gap due to observations over time that the valve gap was closing slightly more than expected, or the US customers were stretching the miles between adjustments.
Ken
Gint
While I understand that completely, I've heard many times over the years that all the 914 motors can have all the valves set to .006. Having said that though, you've just rebuilt this thing right? You might want to go with and initial setting .008 for break in and then monitor where it goes afterwards. I'm not the expert though...
tat2dphreak
QUOTE
I've heard many times over the years that all the 914 motors can have all the valves set to .006.

agree.gif I'd like the cap'n or jake to chime in, but I've always heard .006 on all valves, and that's what I've done in the past.
stephenaki
Well, until I get a good answer I am not proceeding with anything else. I don't want to have to do it again! So, I'll just wait till the Cap'n or Jake do chime in but sooner the better as it is getting cold here in Germany and I'd rather not ride the bike this winter unless I have too. popcorn[1].gif Speaking of which, I need to go and cover the bike, she's sitting out in the elements since I haven't been able to park her in the garage.
Cap'n Krusty
Your 1.7 heads are unlikely to have sodium filled exhaust valves, so the setting is .006" all the way around. You'll need to reset them at 300 miles, then 1500, and every 3000 thereafter. BE SURE you calculate the deck height and combustion chamber volume accurately and adjust the cylinder base shims accordingly or you're gonna have WAAAAAAY too much compression. The Cap'n
stephenaki
QUOTE(Cap'n Krusty @ Oct 11 2009, 08:23 AM) *

Your 1.7 heads are unlikely to have sodium filled exhaust valves, so the setting is .006" all the way around. You'll need to reset them at 300 miles, then 1500, and every 3000 thereafter. BE SURE you calculate the deck height and combustion chamber volume accurately and adjust the cylinder base shims accordingly or you're gonna have WAAAAAAY too much compression. The Cap'n


Thanks, I'll adjust the valves then check compression and see where it is at.
904svo
Its a 2 ltr, then adjust .006 intake and .008 exhaust if you are using stock
push rods.
stephenaki
OK, so, after fiddling around with trying to find TDC, distributor notch not lined up properly and no mark on the impeller fan, I finally got all the valves adjusted.

Unfortunately, she will turn over BUT, won't start! headbang.gif

Now, she started on Saturday, ran rough but started then cut out and I couldn't get her to start again. Maybe I flooded the motor?

Before I elicit help on the starting piece let me make sure I got TDC correct. I did some searching on the PP forum for finding TDC as well. Here is one simple question as I know it is true on my MG motors. There are two times that TDC on #1 are reached; intake stroke and exhaust stroke. Is it possible that I found TDC on the exhaust stroke and therefore adjusted the valves incorrectly?

If, this is not the case with the 914, then, any suggestions on getting her to start? I am thinking ether to get it going and use any fuel that flooded the motor? If I screwed up what I think is TDC then I guess I'll go back to valve adjustment mode tomorrow! I really wish I married a contortionist!! blink.gif
tradisrad
It may be a stupid question, but did you put the dizzy cap back on? All wires hooked up? accidentally bump a wire off of the coil? etc...
r_towle
First off, think about what the camshaft looks like.
You share a lobe with two valves.

If you remove both valve covers, when a valve on the left side of the motor is fully compressed, the valve on the right side of the motor is then ready for adjustment, its on the back of that same lobe.

Forget TDC...forget what you know.
Just ensure that the valve on the left side is as open as it can be...rock the motor back and forth a little bit and watch that valve.
When you know its fully open, the valve on the other side is fully closed.

For finding the final TDC mark, use a mirror and look for the notch on the fan closest to the rear of the motor..its not easy to find.
Regardless of how the distributor drive gear is installed, or where the notch on the distributor is located, once you find the mark on the fan, you are on TDC for number one.
From there you need to ensure your firing order is correct.
That is 1432 clockwise looking from the top.

For the gap, its 006 and simple.


Rich
Cap'n Krusty
QUOTE(904svo @ Oct 11 2009, 01:10 PM) *

Its a 2 ltr, then adjust .006 intake and .008 exhaust if you are using stock
push rods.


Guess you didn't read the question, huh?

The Cap'n
Cap'n Krusty
QUOTE(stephenaki @ Oct 11 2009, 09:54 AM) *

QUOTE(Cap'n Krusty @ Oct 11 2009, 08:23 AM) *

Your 1.7 heads are unlikely to have sodium filled exhaust valves, so the setting is .006" all the way around. You'll need to reset them at 300 miles, then 1500, and every 3000 thereafter. BE SURE you calculate the deck height and combustion chamber volume accurately and adjust the cylinder base shims accordingly or you're gonna have WAAAAAAY too much compression. The Cap'n


Thanks, I'll adjust the valves then check compression and see where it is at.


NOT "the compression", the "compression RATIO". Has to be calculated before the heads go on. If you're using virgin 1.7 heads, it'll be too high. If you're using 1.7 heads that have been flycut, it'll be way too high. If you left out the head gaskets, as some here are inclined to do, it'll be WAAAAAAAAAAAY too high.

As for looking for TDC by using the mark on the distributor, good luck. It's set by the mark on the fan, and if that wasn't done right, nothing will be right. You don't need to do that unless you're using the antiquated, tedious, effort intensive, and downright old fashioned and inaccurate Pelican Parts technique. Using my technique, easily found in the "classic threads" section of this website, I can have a whole valve adjustment job done while you're still looking for your first (of 4) TDC.

The Cap'n
SirAndy
QUOTE(stephenaki @ Oct 12 2009, 09:24 AM) *

distributor notch not lined up properly

Make sure your dizzy is not 180 degrees off. The shaft with the notch will fit flipped but your engine will never run right.

Ask me how i know ...
dry.gif Andy
stephenaki
QUOTE(r_towle @ Oct 12 2009, 09:33 AM) *

First off, think about what the camshaft looks like.
You share a lobe with two valves.

If you remove both valve covers, when a valve on the left side of the motor is fully compressed, the valve on the right side of the motor is then ready for adjustment, its on the back of that same lobe.

Forget TDC...forget what you know.
Just ensure that the valve on the left side is as open as it can be...rock the motor back and forth a little bit and watch that valve.
When you know its fully open, the valve on the other side is fully closed.

For finding the final TDC mark, use a mirror and look for the notch on the fan closest to the rear of the motor..its not easy to find.
Regardless of how the distributor drive gear is installed, or where the notch on the distributor is located, once you find the mark on the fan, you are on TDC for number one.
From there you need to ensure your firing order is correct.
That is 1432 clockwise looking from the top.

For the gap, its 006 and simple.


Rich

Rich,
OK, so my presumption is correct and I did screw the pooch on this one. So, remember shade tree mechanic here, I get the sucker to TDC (I can feel the notch where you're talking about, didn't need a mirror) adjust the valve screw that is open to .006." Now, rotate the wheel until I hit TDC mark again and adjust the other valve screw. When you say "valve" I am making the assumption you mean the valve screw on the rocker arm as the actual valve will be closed and I should be able to move the rocker arm up and down slightly.

Is my comprehension correct or am I still way out in left field? I assume that this would cause a problem with starting or just with it running crappy?

As for the other questions, yes, the distributor cap was back on and yes, I checked to ensure all connections were solid. As stated earlier, the car actually fired up and ran, roughly, on Saturday. So close yet so far!! lol-2.gif
stephenaki
QUOTE(SirAndy @ Oct 12 2009, 10:15 AM) *

QUOTE(stephenaki @ Oct 12 2009, 09:24 AM) *

distributor notch not lined up properly

Make sure your dizzy is not 180 degrees off. The shaft with the notch will fit flipped but your engine will never run right.

Ask me how i know ...
dry.gif Andy


Andy,
I read on the PP forum on how to line it up but am a bit leary on what I am doing given the couple of items that could fall into the sump! The notch on my dizzy is oriented left on the drivers side and just about dissects the #1 & 2 spark plugs. I read that is should be facing the drivers left front wheel? I think I noticed a mark that the dizzy rotor pointed to when I had it at what I assumed was TDC. My assumption was the guys at Boxter marked the new location as TDC.
stephenaki
QUOTE(Cap'n Krusty @ Oct 12 2009, 10:06 AM) *

QUOTE(stephenaki @ Oct 11 2009, 09:54 AM) *

QUOTE(Cap'n Krusty @ Oct 11 2009, 08:23 AM) *

Your 1.7 heads are unlikely to have sodium filled exhaust valves, so the setting is .006" all the way around. You'll need to reset them at 300 miles, then 1500, and every 3000 thereafter. BE SURE you calculate the deck height and combustion chamber volume accurately and adjust the cylinder base shims accordingly or you're gonna have WAAAAAAY too much compression. The Cap'n


Thanks, I'll adjust the valves then check compression and see where it is at.


NOT "the compression", the "compression RATIO". Has to be calculated before the heads go on. If you're using virgin 1.7 heads, it'll be too high. If you're using 1.7 heads that have been flycut, it'll be way too high. If you left out the head gaskets, as some here are inclined to do, it'll be WAAAAAAAAAAAY too high.

As for looking for TDC by using the mark on the distributor, good luck. It's set by the mark on the fan, and if that wasn't done right, nothing will be right. You don't need to do that unless you're using the antiquated, tedious, effort intensive, and downright old fashioned and inaccurate Pelican Parts technique. Using my technique, easily found in the "classic threads" section of this website, I can have a whole valve adjustment job done while you're still looking for your first (of 4) TDC.

The Cap'n


Cap'n
Will look into your thread, as far as the heads, no, not virgin 1.7 heads, no I didn't leave out the head gaskets. The pistons are dished, how much of a difference will this make in the ratio? Learning all the time.
SLITS
Pull number 1 spark plug ... stick your finger in the spark plug hole ... have someone rotate the engine ... when you start to feel pressure on your finger you are on the compression stroke (both valves closed) and then you can bring the mark up in the notch, assuming you are rotating the engine in the correct direction.

You can also look for the notch in the flywheel and line it up with the split in the case.
Sleepin
QUOTE(SLITS @ Oct 12 2009, 02:57 PM) *

Pull number 1 spark plug ... stick your finger in the spark plug hole ... have someone rotate the engine ... when you start to feel pressure on your finger you are on the compression stroke (both valves closed) and then you can bring the mark up in the notch, assuming you are rotating the engine in the correct direction.

You can also look for the notch in the flywheel and line it up with the split in the case.


agree.gif

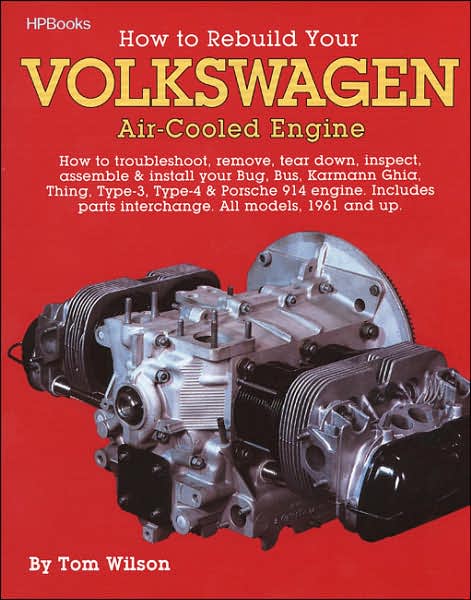
Go buy this book!

IPB Image

It helped me out when it came to understanding these interesting little engines! biggrin.gif
stephenaki
QUOTE(Sleepin @ Oct 12 2009, 02:31 PM) *

QUOTE(SLITS @ Oct 12 2009, 02:57 PM) *

Pull number 1 spark plug ... stick your finger in the spark plug hole ... have someone rotate the engine ... when you start to feel pressure on your finger you are on the compression stroke (both valves closed) and then you can bring the mark up in the notch, assuming you are rotating the engine in the correct direction.

You can also look for the notch in the flywheel and line it up with the split in the case.


agree.gif

Go buy this book!

IPB Image

It helped me out when it came to understanding these interesting little engines! biggrin.gif


That book would be one of 4 in my collection. No, I was just having a brain fart when it came to valve adjustments. I knew better but was dazed and confused so screwed the pooch. The thread that the Cap'n started on valve adjustments are simple, straight forward and how I did MG motors. I was just stupid and over thought the problem. Will be back under the car tonight correctly setting clearances and hopefully getting it started.
stephenaki
First, my thanks to the Cap'n for setting me on the path to 914 enlightenment pray.gif

Using the technique in the classics thread made the adjustments a lot faster and easier. Definately screwed the pooch, sheeplove.gif sorry only found a sheep here, on the first boneheaded adjustments. Found some glaring problems as I did proper adjustments would explain why she wouldn't start.

Also discovered the dang gasket on the 3&4 bank had slipped and didn't seal properly as was indicated by the oil under the head. So, got everything adjusted and renewed the gasket making sure she stays in place. Will try to start her tomorrow after work. Really wish my German landlord hadn't paid the lowest bidder to wire the garage, I wouldn't have to run an extension cord from my front bathroom to the garage if he had it done right the first time! hissyfit.gif

Will let everyone know how things go tomorrow when I try to fire her up, keep your fingers crossed! The ride to work on the bike was friggin cold, and wet! I'll ride in 30 degree temps but prefer to do it when it is dry so I don't happen upon any black ice! Gotta get the car up and running! driving.gif
Cevan
Just another option: What I did when I had the motor out was to make a small window in the rear engine tin so I could see the notch in the flywheel. Then, I painted a corresponding mark on the flywheel 180 degrees around thru the small window in the bottow of the transaxle. Now I can spin the motor precisely 180 degrees at a time from either above or below the car and adjust the valves in the firing order sequence.
Cap'n Krusty
QUOTE(Cevan @ Oct 13 2009, 02:10 PM) *

Just another option: What I did when I had the motor out was to make a small window in the rear engine tin so I could see the notch in the flywheel. Then, I painted a corresponding mark on the flywheel 180 degrees around thru the small window in the bottom of the transaxle. Now I can spin the motor precisely 180 degrees at a time from either above or below the car and adjust the valves in the firing order sequence.


That's all very well, but why? Using my method, which results in more accurate clearances, requires only the Mk 1 eyeball and a feeler gauge. You NEVER have to know what cylinder it's "on". With VERY little practice, bumping the engine over with a starter button (or even jumping the terminals with an old screwdriver) results in the engine always stopping in "just the right" place.

The Cap'n
Cevan
QUOTE(Cap'n Krusty @ Oct 13 2009, 05:44 PM) *

QUOTE(Cevan @ Oct 13 2009, 02:10 PM) *

Just another option: What I did when I had the motor out was to make a small window in the rear engine tin so I could see the notch in the flywheel. Then, I painted a corresponding mark on the flywheel 180 degrees around thru the small window in the bottom of the transaxle. Now I can spin the motor precisely 180 degrees at a time from either above or below the car and adjust the valves in the firing order sequence.


That's all very well, but why? Using my method, which results in more accurate clearances, requires only the Mk 1 eyeball and a feeler gauge. You NEVER have to know what cylinder it's "on". With VERY little practice, bumping the engine over with a starter button (or even jumping the terminals with an old screwdriver) results in the engine always stopping in "just the right" place.

The Cap'n


Because it's easy. And I don't wear out my starter. And there's nothing wrong with doing it my way. beer.gif
Gint
QUOTE(Cap'n Krusty @ Oct 13 2009, 02:44 PM) *
You NEVER have to know what cylinder it's "on".
I've done it your way before. And I like to know exactly what cylnder it's on. smile.gif I guess I prefer doing it the hard way. beerchug.gif
Cap'n Krusty
QUOTE(Cevan @ Oct 13 2009, 05:51 PM) *

QUOTE(Cap'n Krusty @ Oct 13 2009, 05:44 PM) *

QUOTE(Cevan @ Oct 13 2009, 02:10 PM) *

Just another option: What I did when I had the motor out was to make a small window in the rear engine tin so I could see the notch in the flywheel. Then, I painted a corresponding mark on the flywheel 180 degrees around thru the small window in the bottom of the transaxle. Now I can spin the motor precisely 180 degrees at a time from either above or below the car and adjust the valves in the firing order sequence.


That's all very well, but why? Using my method, which results in more accurate clearances, requires only the Mk 1 eyeball and a feeler gauge. You NEVER have to know what cylinder it's "on". With VERY little practice, bumping the engine over with a starter button (or even jumping the terminals with an old screwdriver) results in the engine always stopping in "just the right" place.

The Cap'n


Because it's easy. And I don't wear out my starter. And there's nothing wrong with doing it my way. beer.gif


"Wear out your starter"? That's a new one. Other than it's not as accurate, I suppose it's OK. I used to do it that way, until the guys at the dealership started laughing at me. Remember, I can "run the valves" faster than you can find the first cylinder. The Cap'n
stephenaki
Almost wore out the battery but not the starter and turning the tire is the only exercise i'm getting right now on account of being sick!

I did pick up 4 new winter tires for lovely Germany yesterday as well; will put those on once I get the car running!
stephenaki
OK, last question just to make sure I don't screw something else up. The fuel pump, two wires, black going to ground but the red was connected to the coil; I am pretty sure it was connected to the negative side of the coil. Is this right or should it be connected to the positive terminal? Been one of those days and I don't need any more surprises or want to create more problems.
SLITS
If they connected the pump to the coil terminal ... you want it on the + side, NOT the negative side. The + side is switched 12VDC.
stephenaki
QUOTE(SLITS @ Oct 14 2009, 08:54 AM) *

If they connected the pump to the coil terminal ... you want it on the + side, NOT the negative side. The + side is switched 12VDC.

That's what I thought, I hope I didn't fry the dang thing, will see shortly.
stephenaki
Well ladies and gentlemen...it started! piratenanner.gif and ran!! piratenanner.gif piratenanner.gif piratenanner.gif So I just have to redo the connection to the coil from the fuel pump, it is loose and falls off, then synch the carbs.

Runs a lot smoother now that the valves are adjusted properly. I would like to offer my heartfelt thanks to all that assisted this dumbass in getting the car back up and running. pray.gif pray.gif I'll fix the connection, synch the carbs and put the lid back on tomorrow, provided I don't go downhill with this stupid virus that won't let go of me!

The next project is to swap out the tires for winter tires and make sure the heating is working or at least the defroster. I officially declare this thread dead and relegate it to anonymity... lol-2.gif
Kirmizi
Well done!! smilie_pokal.gif
Mike
SirAndy
QUOTE(stephenaki @ Oct 14 2009, 07:40 AM) *

The fuel pump, two wires, black going to ground but the red was connected to the coil;

barf.gif

http://www.914world.com/bbs2/index.php?showtopic=25954
stephenaki
QUOTE(SirAndy @ Oct 14 2009, 09:25 AM) *

QUOTE(stephenaki @ Oct 14 2009, 07:40 AM) *

The fuel pump, two wires, black going to ground but the red was connected to the coil;

barf.gif

http://www.914world.com/bbs2/index.php?showtopic=25954


Andy,
Yes, I did the research and looked at your solution however, I think I am missing some key parts when the PO did the conversion to carbs. Will fix it later when I have more time as I do like your solution better.
SLITS
Everybody's a critic ... at least it runs which is far more than a lot can say.

I just jumpered the relay and used the stock wiring.

Great job .... clap56.gif
Cevan
QUOTE(stephenaki @ Oct 14 2009, 01:17 PM) *

Well ladies and gentlemen...it started! piratenanner.gif and ran!! piratenanner.gif piratenanner.gif piratenanner.gif


smilie_pokal.gif beerchug.gif
This is a "lo-fi" version of our main content. To view the full version with more information, formatting and images, please click here.
Invision Power Board © 2001-2024 Invision Power Services, Inc.