Full Version: Rear Sway Bar Mounting
I am contemplating installing a rear sway bar and am trying to locate a source for the mounting tabs and reinforcing plate. PP lists them as NLA. Have an opportunity to pick bar from a local parts car but will pass if I can't source the mounting hardware.
Try Engman he has an ad/link in me member vendors section

I just installed a set, got them from GPR. It's actually Johnathan's car, so he got them from himself.
Engman Kit weld and bolt. http://engmanparts.com/chassis.php
Some photos of the work.
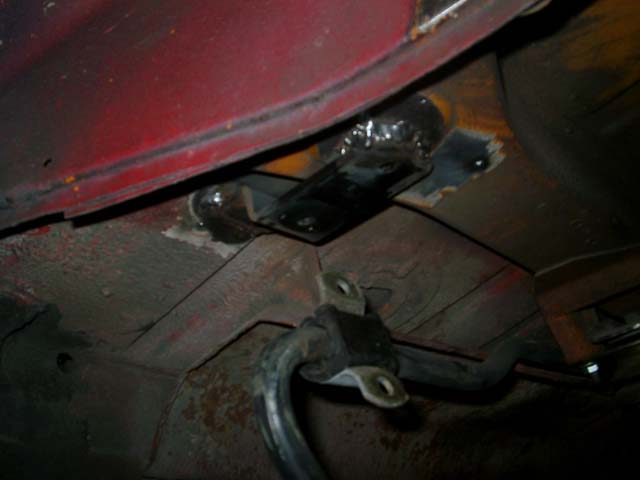
Weld bracket tab to crossmember.
Click to view attachment
Coat with primer/paint
Click to view attachment
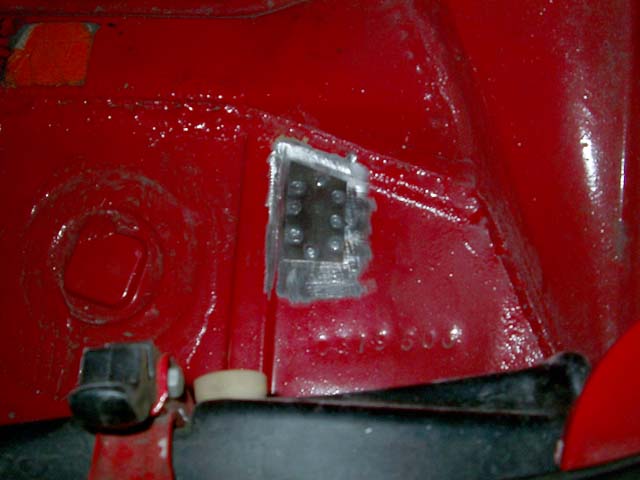
Paint suport plates for inside trunk.
Click to view attachment
Coat with undercoating.
Click to view attachment
Install new shock bolt for sway bar.
Click to view attachment
Install sway bar.
Click to view attachment
your done.
Some photos of the work.
Weld bracket tab to crossmember.
Click to view attachment
Coat with primer/paint
Click to view attachment
Paint suport plates for inside trunk.
Click to view attachment
Coat with undercoating.
Click to view attachment
Install new shock bolt for sway bar.
Click to view attachment
Install sway bar.
Click to view attachment
your done.
QUOTE(badm @ Dec 25 2010, 06:22 AM) 
Engman Kit weld and bolt. http://engmanparts.com/chassis.php
Thanks, the photos are a great help in seeing how the install is done. Is the backing plate welded in the trunk or just bolted? I assume the later since it was painted prior to install.
QUOTE
Thanks, the photos are a great help in seeing how the install is done. Is the backing plate welded in the trunk or just bolted? I assume the later since it was painted prior to install.
I bolted the plates as well as 2 part epox, But I wold weld if I was doing this befor I painted the car
QUOTE
I bolted the plates as well as 2 part epox, But I wold weld if I was doing this befor I painted the car
Thanks for the info, you wouldn't have a picture of the inside of the trunk would you?
QUOTE(Sailor @ Dec 27 2010, 08:01 AM)
QUOTE
I bolted the plates as well as 2 part epox, But I wold weld if I was doing this befor I painted the car
Thanks for the info, you wouldn't have a picture of the inside of the trunk would you?
I dont but I will get out to the garage at some point today and get a photo, are there any others you want?Badm.
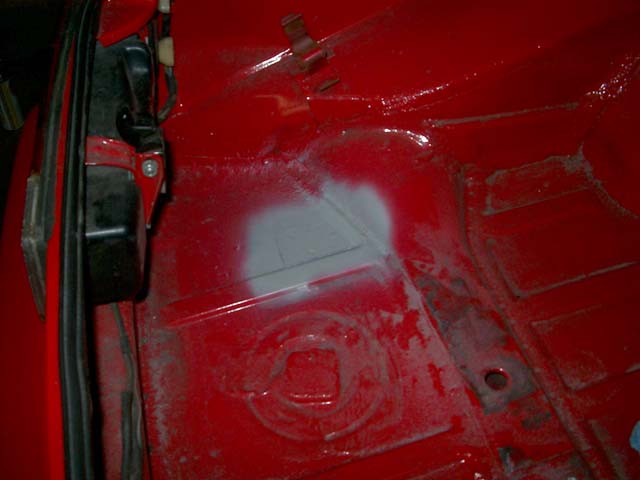
Here's some showing the inside of the trunk mount:
Hard to see any detail from this but, we soda blasted the car, welded in the reinforcement and this shot is the Wurth undercoating going on before paint:
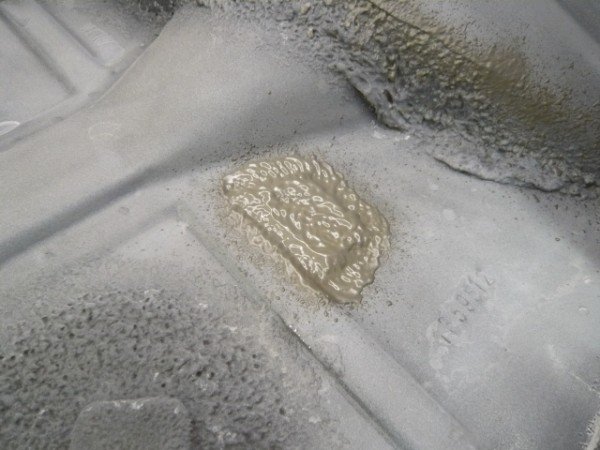
Hard to see any detail from this but, we soda blasted the car, welded in the reinforcement and this shot is the Wurth undercoating going on before paint:
QUOTE
I dont but I will get out to the garage at some point today and get a photo, are there any others you want?Badm.
That should do it , thanks.
QUOTE(Sailor @ Dec 27 2010, 11:00 AM)
QUOTE
I dont but I will get out to the garage at some point today and get a photo, are there any others you want?Badm.
That should do it , thanks.
The plates had a flush mount grade 8 allen head bolt welded in befor paint, epoxy between plate and floor, grade 8 nylock nut. Badm.
Click to view attachment
Click to view attachment
Click to view attachment
I welded in the support and bracket ...
Thanks everyone for the photos, they are very helpful. Just picked up a set of stock sway bars today. Hope to have them in by spring. 
Congratulations. You're going to love the difference.
I think they (the front at least) should have come standard on a 914.
I think they (the front at least) should have come standard on a 914.
Anyone have new source for these brackets to install the rear sway bars ?
QUOTE(porsche913b_sp @ Jan 20 2013, 11:50 PM)
Anyone have new source for these brackets to install the rear sway bars ?
You are going to have to MIG weld them on, so if you have a welder, some 1/16" thick metal, a vice, drill hammer and 4 nuts they are real easy to make.
QUOTE(porsche913b_sp @ Jan 20 2013, 08:50 PM)
Anyone have new source for these brackets to install the rear sway bars ?
I don't know where to buy but... It looks super easy to fabricate...


With the passing of Engman
I will be fabricating a set for myself, the rear mount tabs are 1" x 1/8" plate
The only challenge is making the two 90 degree bends about 1/2" from each other.
The rest is skill level 1.5. Drill and hacksaw to fabricate
Installation requires more skill and equipment
I will be fabricating a set for myself, the rear mount tabs are 1" x 1/8" plate
The only challenge is making the two 90 degree bends about 1/2" from each other.
The rest is skill level 1.5. Drill and hacksaw to fabricate
Installation requires more skill and equipment
They are not listed on his website, but you can get that from Racer Chris at CFR - Tangerine Racing.
I know because I got mine from him recently...
http://www.tangerineracing.com/contact_us.htm
I know because I got mine from him recently...
http://www.tangerineracing.com/contact_us.htm
QUOTE(scott_in_nh @ Jan 21 2013, 07:21 PM)
They are not listed on his website, but you can get that from Racer Chris at CFR - Tangerine Racing.
I know because I got mine from him recently...
http://www.tangerineracing.com/contact_us.htm
They will be in the new website that's nearly ready to go live.
This is a "lo-fi" version of our main content. To view the full version with more information, formatting and images, please click here.