aircooledboy
Oct 6 2011, 07:41 PM
Weather has turned to gorgeous fall driving time here in the midwest. My favorite time to drive the teener.

Stopped to get gas yesterday, and as I was waiting for it to fill I noticed an odd deflection in the metal at the edge of the passenger side cooling cut out in the wheel well. I think to myself "self, you should keep an eye on that and make sure it doesn't turn into a crack like you've heard about." Then I look and see a similar one on the drivers side (see white circles in picture below). Hmmmm. . . Then I look closer and. . . awwww shiat!!!!!

I see pretty bad cracks on BOTH cut outs (see red circles below).
Click to view attachmentClick to view attachment
aircooledboy
Oct 6 2011, 07:48 PM
Forgive the crappy cell phone pictures, but it was handy.
John made the cut outs bigger than most, and consequently it has been discussed that they may have issues at some point, so I watched them for the first few years I had the car with no problems. I haven't had much time for the teener for the last couple years, so I stopped paying attention. I don't really know how long it took them to develop.
The passenger side one is worse, reaching very close to the pinch weld for the gas tank bulkhead. The driver side is shorter. My question is what is the best method to repair. Can I just weld them up, or do I need to stengthen them somehow too?
rick 918-S
Oct 6 2011, 08:00 PM
Hi Chris!
I would weld and grind the crack then weld in a brace from the shock towers to the front suspension pickup point. I would also consider welding a brace from the bulk head across the floor pan. I will add a diagram in a minute.
aircooledboy
Oct 6 2011, 08:09 PM
Hey Rick!!
You read my mind on the diagram.

rick 918-S
Oct 6 2011, 08:27 PM
Excuse my crude drawing skills. The upper drawing shows the cut out. The red is some 4130 tubing.
I'm sure someone has actual photos of a typical bracing. My wheel wells are not cut as high as yours. You getting alot of flex to crack the opening.
mark21742
Oct 7 2011, 05:36 AM
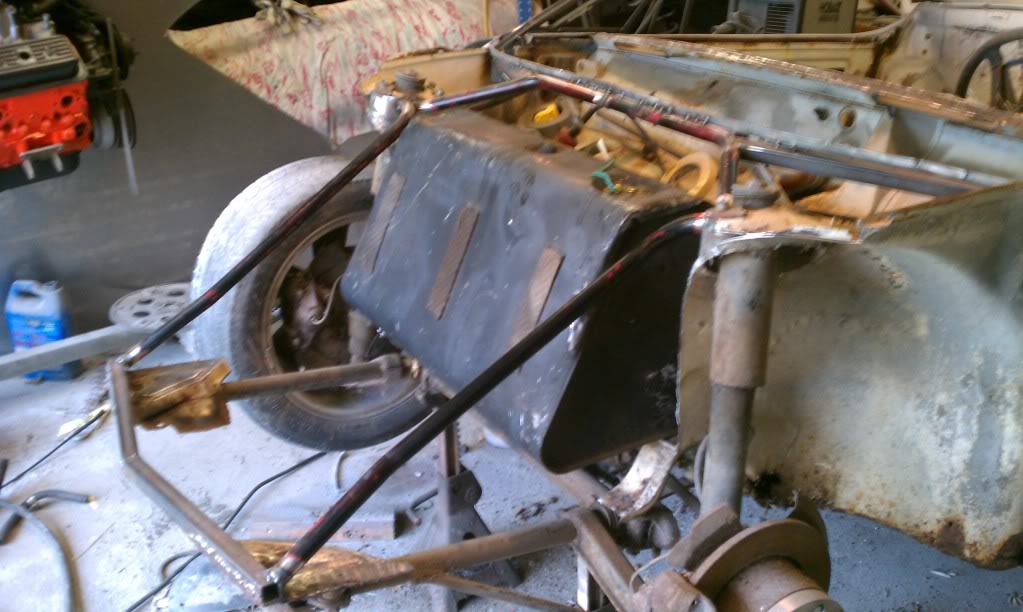
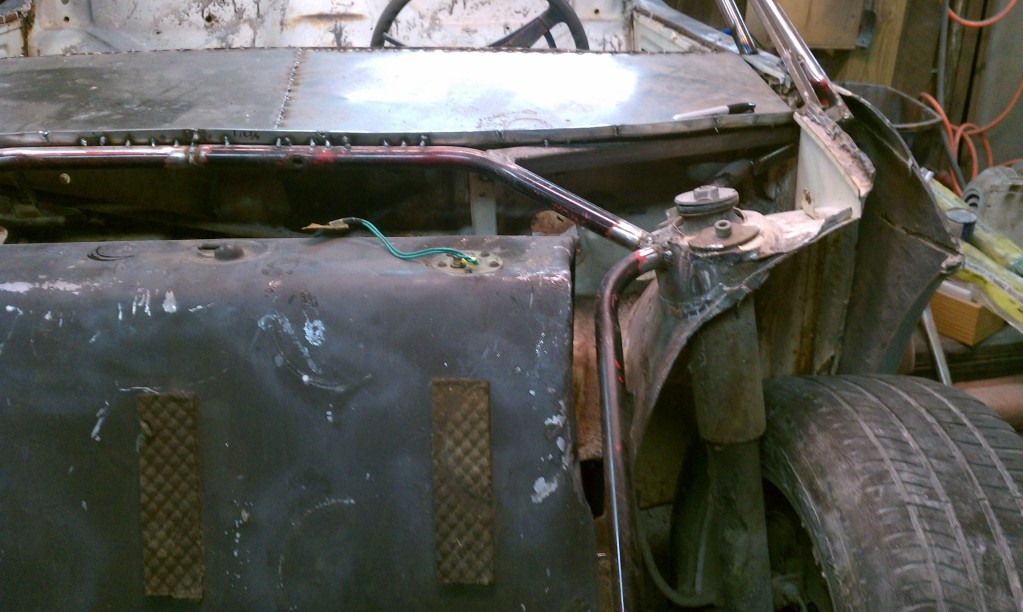
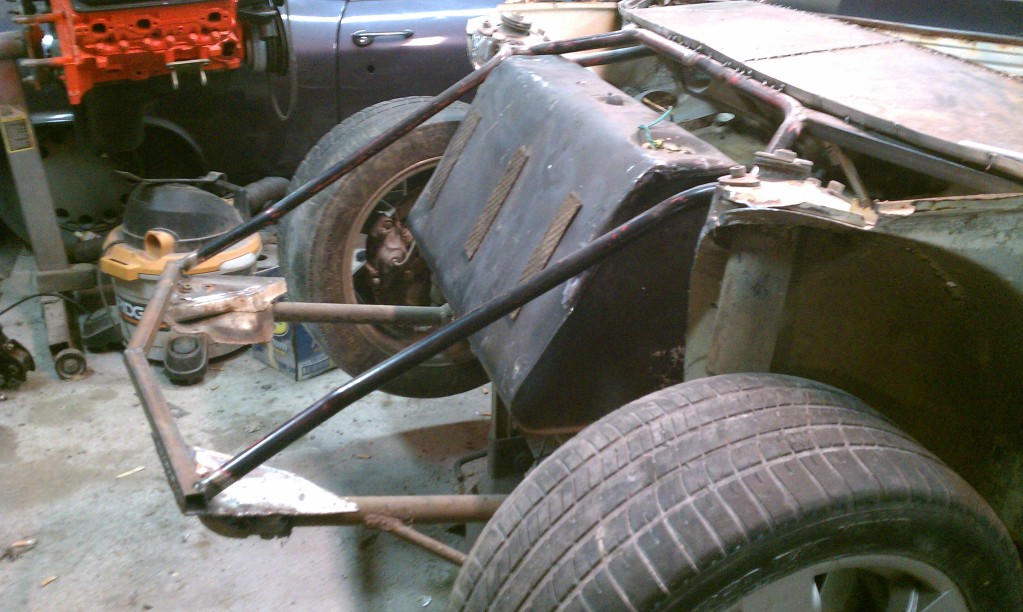
I'm glad to see these drawings! This is almost exactly how I braced mine when I cut all the factory sheet metal out from the front end, I just have a "cage",the torsionbar mounts from and tops of the strut towers infront of the windsheild with just enough sheet metal to hold my new fuel cell.......this setup was quick, easy and strong as hell
Eric_Shea
Oct 7 2011, 11:44 AM
I always wonder about those things every time I see them. Kinda confirms my fears.

at least weld from the shock tower/firewall area down to the front pickup points.
Might help if you STOPPED DOING WHEELIES!

Drill a 1/4" hole at the end of the crack to stop the crack from extending, until you get the welding done.
Tom
aircooledboy
Oct 7 2011, 02:14 PM
Because I don't want to kill my 901, I'm usually reasonably gentle on the launches, but after that, I have been known to drive her pretty hard from time to time.
The last turn onto my road is about a 75 degree left turn going from a 55 mph to a 55 mph with great visability in all directions. I just LOVE to hit that bad boy at about 65 with nobody around.

Its just too damn much fun.
Might be the source of my woes here though.

I can probably get them welded up this weekend just to get me through the rest of the teener season IF I can do it without pulling the gas tank. What do you guys think, can I get way with that or am I asking for

.

JRust
Oct 7 2011, 02:15 PM
Besides the bracing I like using a weldable metal mesh. Get something heavy duty & it should strengthen the area plenty. It also shouldn't restrict the air flow through them.
rick 918-S
Oct 7 2011, 09:17 PM
Ya, you should be able to weld that. If you have it use a wet blanket over the tank incase you get the sparks flying. Get a piece of 3/4 or 1" copper tubing and hammer it flat. Clamp it to the wheel side as a back up strip. You won't chase the crack by blowing holes as you weld.
Mike Bellis
Oct 8 2011, 12:12 AM
I have air vents that big with no signs of cracking. Water cooled for 5-10 years. I would be worried of some other soft spot in the front end causing too much flex. Bracing will help but find out which factory spot welds are no good. Many stress crack like that form at sharp corners. Your corners look rounded. Red flag for me.
76-914
Oct 8 2011, 07:41 AM
QUOTE(rick 918-S @ Oct 7 2011, 08:17 PM)

Ya, you should be able to weld that. If you have it use a wet blanket over the tank incase you get the sparks flying. Get a piece of 3/4 or 1" copper tubing and hammer it flat. Clamp it to the wheel side as a back up strip. You won't chase the crack by blowing holes as you weld.
Shit. I never knew that! I luv the University of 914's.

aircooledboy
Oct 9 2011, 04:39 PM
Boy, nothing like welding a little sheet metal to remind me this welding business is harder than it looks.

Here are some real picture of the cracks. They both start at the exact spot where the arc of the corner transitions into the straight cut.
Click to view attachmentClick to view attachmentYou guys aren't getting any after pictures. I have to have some pride.

Rick, I'm not sure how I'm gonna make your idea fly. Mr. radiator covers the the front torsion bar pick up. I could probably run the bottom piece all the way to that spot, but the angle bracket would only get about 1/2 front to back before I run into the radiator.
Click to view attachmentMark, have you got a picture of your design?
mark21742
Oct 9 2011, 05:32 PM
I hope to get back out to the garage in a few hours....I'm not finished with it, but I'll take and post a few closeup pics for you
mark21742
Oct 10 2011, 06:59 PM
strawman
Oct 10 2011, 10:34 PM
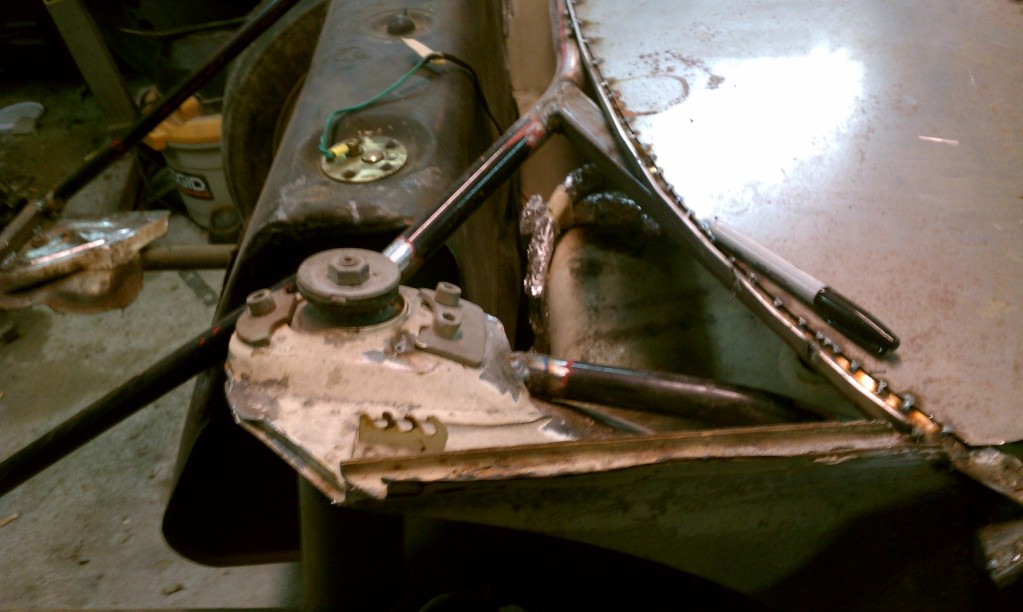
Hey mark21742, I'm no engineer, but I believe you'll need to triangulate the suspension fore-aft points (i.e., the lower points that the A-arm connects). If you don't provide a solid link between those points, your lower fore-aft connection is a moving part. And since your diagonals are not straight (i.e., bends near the top and bottom), there could be some movement of that "hypotenuse" that connects the upper strut point and the forward A-arm mount.
YMMV,
Geoff
mark21742
Oct 11 2011, 04:25 AM
QUOTE(strawman @ Oct 11 2011, 12:34 AM)
Hey mark21742, I'm no engineer, but I believe you'll need to triangulate the suspension fore-aft points (i.e., the lower points that the A-arm connects). If you don't provide a solid link between those points, your lower fore-aft connection is a moving part. And since your diagonals are not straight (i.e., bends near the top and bottom), there could be some movement of that "hypotenuse" that connects the upper strut point and the forward A-arm mount.
YMMV,
Geoff
Exactly, I just ran out of tube steel lol by the time I got another twenty foot I had jumped over to one of my other projects for the weekend.
I wanted to fit the new fuel tank before I ran my lower rails, and use the lower rails as the fuel tank mounts too.....I'm going to run one front to back from the front torsion mounts into the floor braces, and one stair up and down from the lower brace to the upper brace along the strut tower, then a diagonal from front lower to rear lower.....I plan on cutting and fitting these tonight
charliew
Jan 23 2012, 09:29 AM
I think I would go to the trouble of putting a piece of 1/8 sheet across the top over the opening over the crack after is is repaired if you can't get the diagional brace in. How does the door gap look at the lower front? I think the crack is from the twist from side to side as much as a sag condition. The one crack looks like it is trying to overlap some. If you weld it as it is sitting it may close up more as the metal melts so maybe jack it up under the dooor to see if it opens up and just raise it till it's not under stress before welding it. Without braceing it will probably just recrack along the edge of the weld as the original metal has now been heated and is softer than it was and the weld is harder and thicker than the metal was. Have you added stiffer bars or is it bottoming out from being lowered?
Edit: I forgot this was a older thread but it is a good topic.
This is a "lo-fi" version of our main content. To view the full version with more information, formatting and images, please
click here.