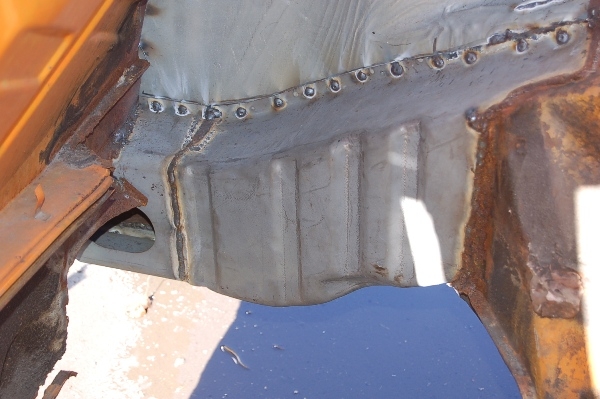
my "new" teener project is still at the mechanics shop where it was when i got it but i should be able to tgake it home in the next few days. i had the shop pull the calipers and the pedal assembly which i have rebuilt and they are supposed to put back in tomorrow (i went by and rust-encapsulated the floor under the pedals...and took them new brake hoses and a new brake master). Anyway, when i was by there this morning i took a bunch of pictures of the underside of the car while it was on the lift so i can start to get sorted on what i've got and what i can do about it. having said all of that....
...i've looked at some build threads with stuff about repair of the longs but haven't got it in my head yet as to exactly how that part of the structure is put together. anybody have a good diagram or some good photos to show how all that is put together?
Full Version: "longs" structure
The majority of the length of the longs is just to 'C' shapes welded together, almost like this: []
The lip where the seal installs is the upper weld junction, and the lip underneath is the lower weld junction.
Not a complex piece. Try downloading the PET file from Porsche and looking at the exploded diagrams. It might be helpful.
The lip where the seal installs is the upper weld junction, and the lip underneath is the lower weld junction.
Not a complex piece. Try downloading the PET file from Porsche and looking at the exploded diagrams. It might be helpful.
Cross section view. Door sill on upper left, floor at lower right.
Click to view attachment
Click to view attachment
It's a bit more complicated than that, as it is 2 layers for a lot of it.
There are some pretty good shots and discussion of the long construction on my build thread that is linked to in my signature. -Page 6 I get into the inner side and there are pics of the outer on page 1 and 3.
There's no piece available for the inside inner forward of the firewall or the inside outer rear of the firewall, all on the passenger side. Because of this, a lot of 914's get put together wrong, just 1 layer on each side by the passenger rear firewall.
I think a lot of body guys, even, don't know about this, as I've been told by everyone that the replacement pieces are available for everything, but I've got confirmation from the panel maker that it's not so.
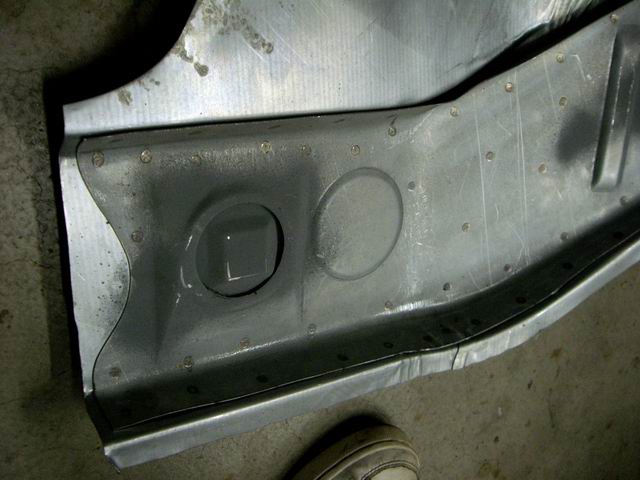
The outer also, the replacement pieces I got didn't have the inner layer, despite that it shows it in the photo and talks about it being spot welded on the site.
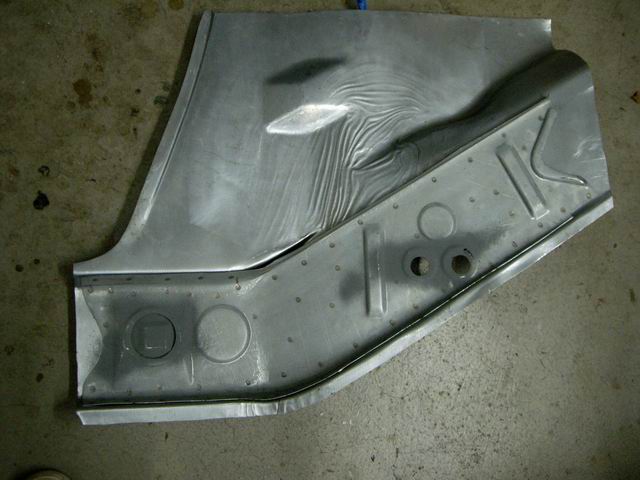
restoration design piece for outer passenger long
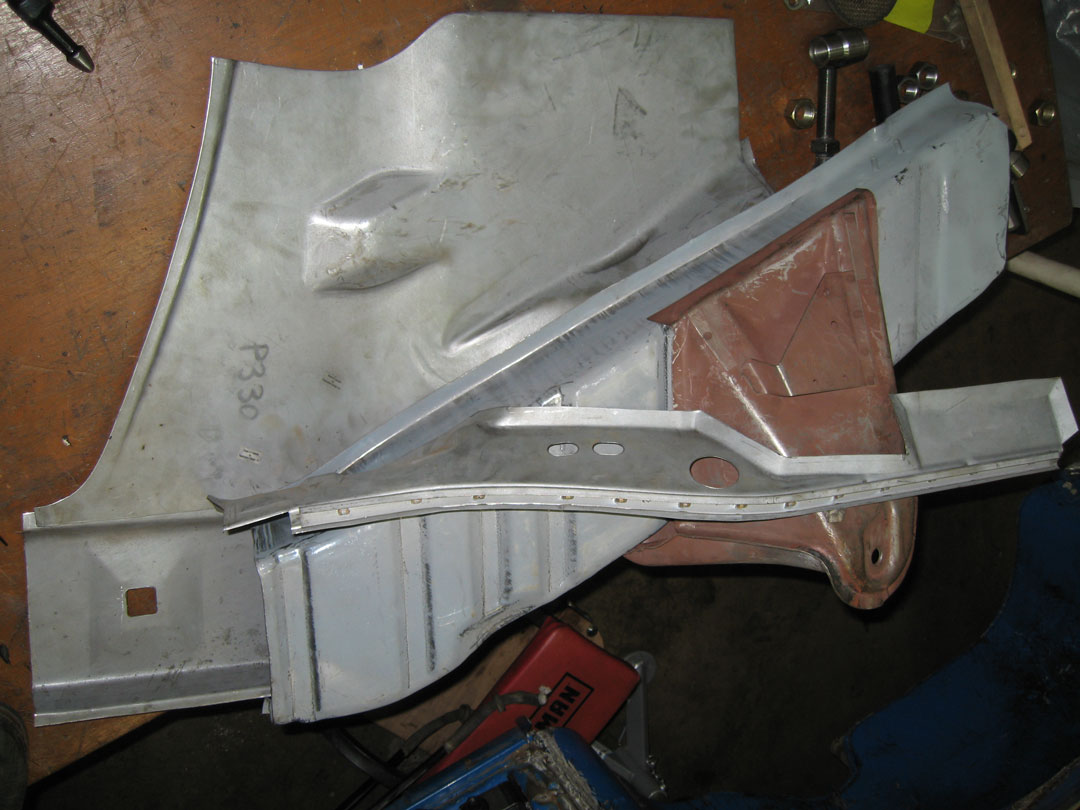
Here's my piece I got from them without it, the piece below the one labelled 330.
There are some pretty good shots and discussion of the long construction on my build thread that is linked to in my signature. -Page 6 I get into the inner side and there are pics of the outer on page 1 and 3.
There's no piece available for the inside inner forward of the firewall or the inside outer rear of the firewall, all on the passenger side. Because of this, a lot of 914's get put together wrong, just 1 layer on each side by the passenger rear firewall.
I think a lot of body guys, even, don't know about this, as I've been told by everyone that the replacement pieces are available for everything, but I've got confirmation from the panel maker that it's not so.
The outer also, the replacement pieces I got didn't have the inner layer, despite that it shows it in the photo and talks about it being spot welded on the site.
restoration design piece for outer passenger long
Here's my piece I got from them without it, the piece below the one labelled 330.
luckily these cars never rust  well except for this one
http://www.914world.com/bbs2/index.php?showtopic=16748
** oh yeah - you should be stting down for this !!!
well except for this one http://www.914world.com/bbs2/index.php?showtopic=16748
** oh yeah - you should be stting down for this !!!
hmmm. so where is the best place to get panels? oh, and what about the chassis reinforcement bits i've seen threads on, where can you get that?
Restoration Design for replacement panels. I've used nearly every one of their pieces and they fit very nice and are well made.
Tangerine Racing sells a reinforcing kit for bracing the doors while working on your car. I have one and really like it.
John
 You can't go wrong with Restoration Design
My pics above are all Restoration-Design pieces.
i recently ordered and received an outer engine compartment long like you showed in your picture. i got it from RD in Canada. it is 2 layers thick and is very strong. the inner long that we get from AA or RD is thicker than the stock. and in fact is one layer thick.
QUOTE(McMark @ Feb 14 2012, 02:49 PM) 
The majority of the length of the longs is just to 'C' shapes welded together, almost like this: []
The lip where the seal installs is the upper weld junction, and the lip underneath is the lower weld junction.
Not a complex piece. Try downloading the PET file from Porsche and looking at the exploded diagrams. It might be helpful.
Mark,
great looking "spot" welds on the long. I guess as a pro you would use a spot welder more often then us hobby mechanics.
Any particular reason why you used a MIG and and not a spot welder? I have some small work and thinking of buying a $160 240AC HF spot welder.
Thanks,
Dragan
This is a "lo-fi" version of our main content. To view the full version with more information, formatting and images, please click here.