Help - Search - Members - Calendar
Full Version: Trunk Floor Repair
914World.com > The 914 Forums > 914World Garage
OllieG
Hi all, I haven't posted much on 914World so 'greetings from the UK'!

I'm converting a '74 to a 6cyl. Right now I'm replacing the rear trunk floor with an RD floor replacement and was hoping some of you guys could give some advice on how best to install it..

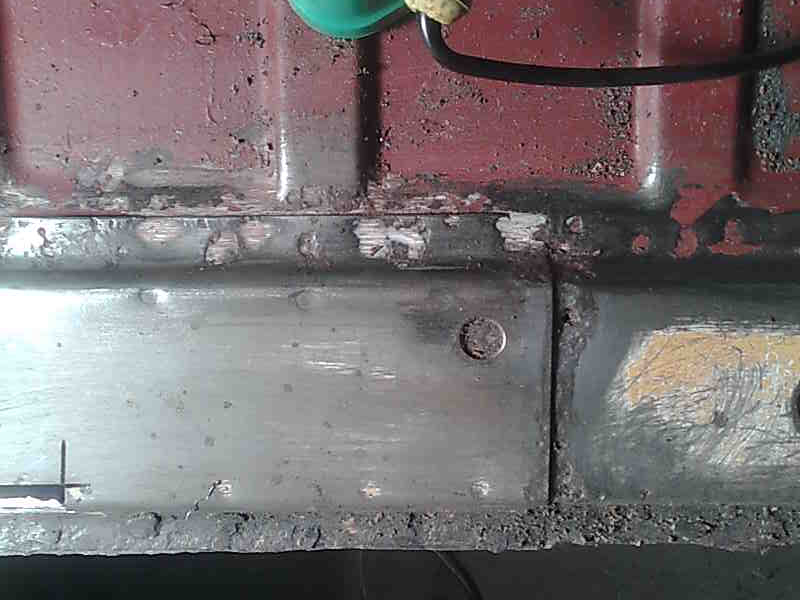
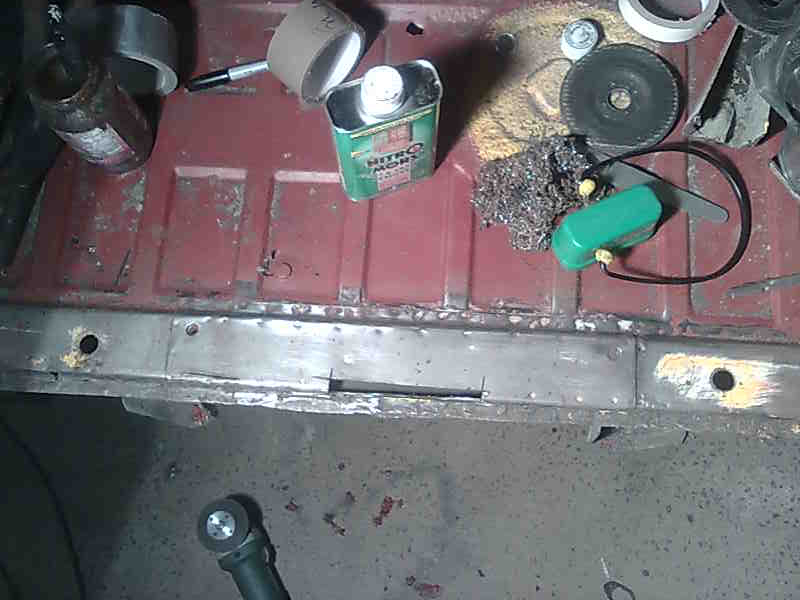
The previous owner did a heinous job in trying to repair the original floor with a flat sheet. I've cut and ground that out now. I still have some of the original floor edges to remove but am nearly ready to install the replacement floor.

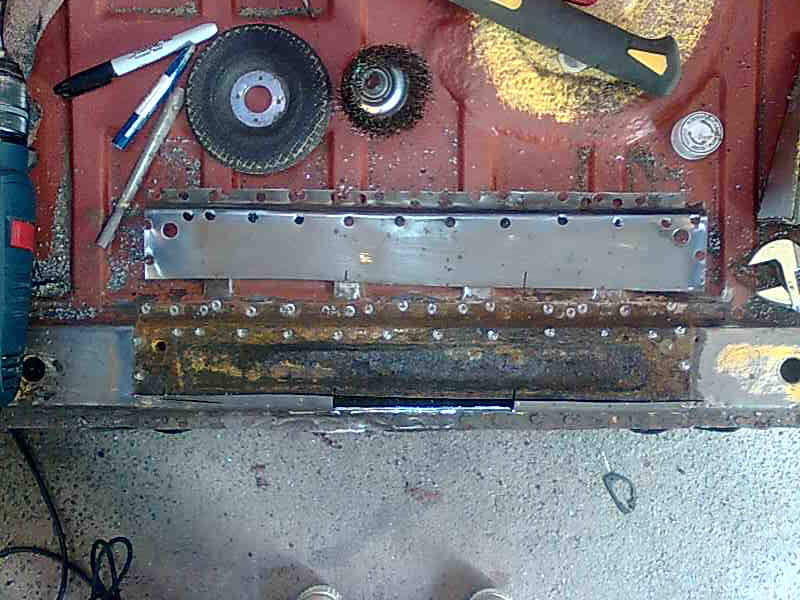
I'm wondering what's the best way to deal with the area across and over the transmission mounts?..this will be where the original floor will be cut and the new floor will be welded in.

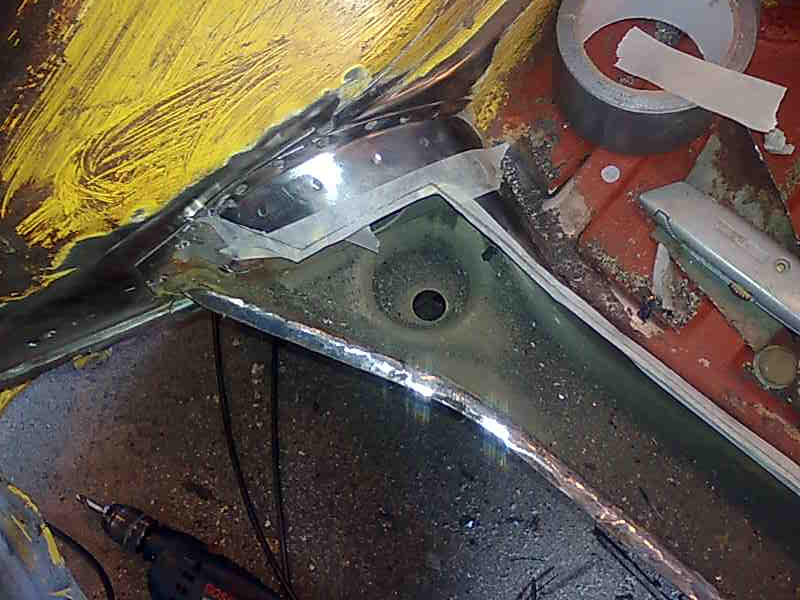
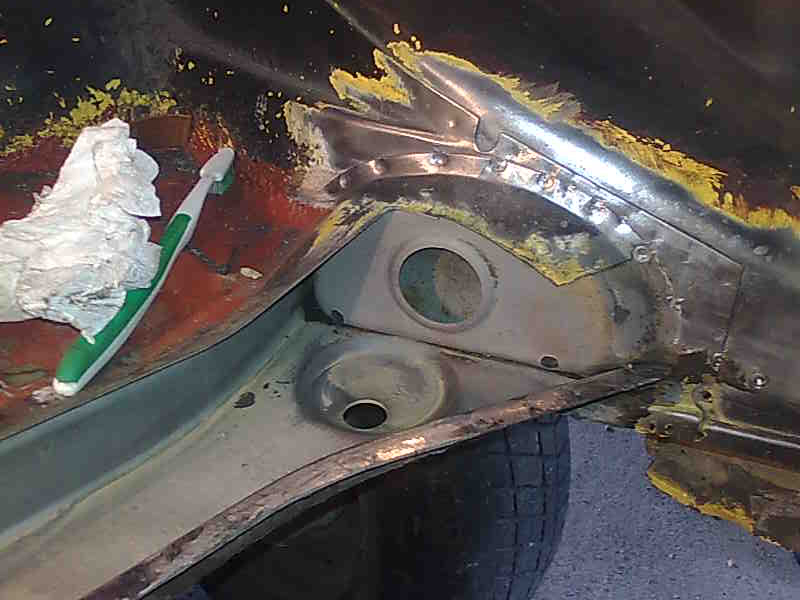
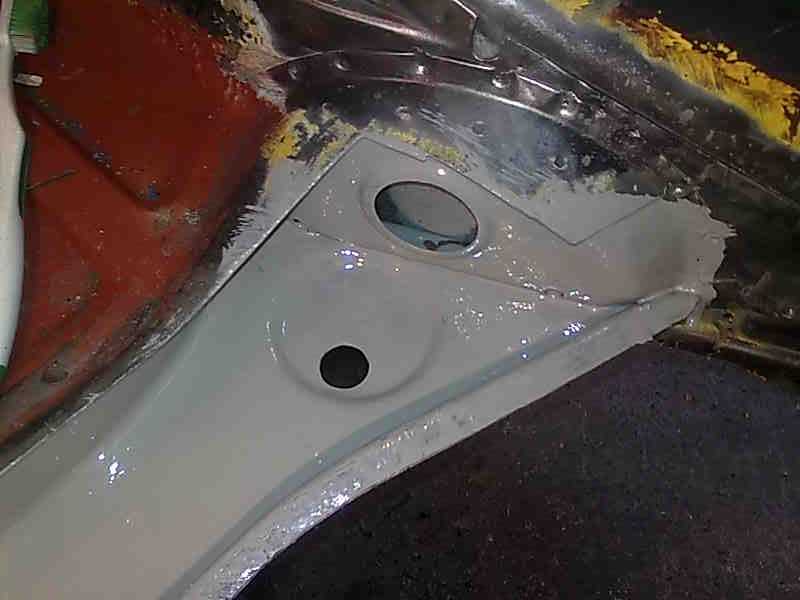
There is an additional reinforcing piece right above the transmission mounts which I feel will need to be removed as there are clear signs of rust beneath it, which needs sorting - see pic.

IPB Image
IPB Image

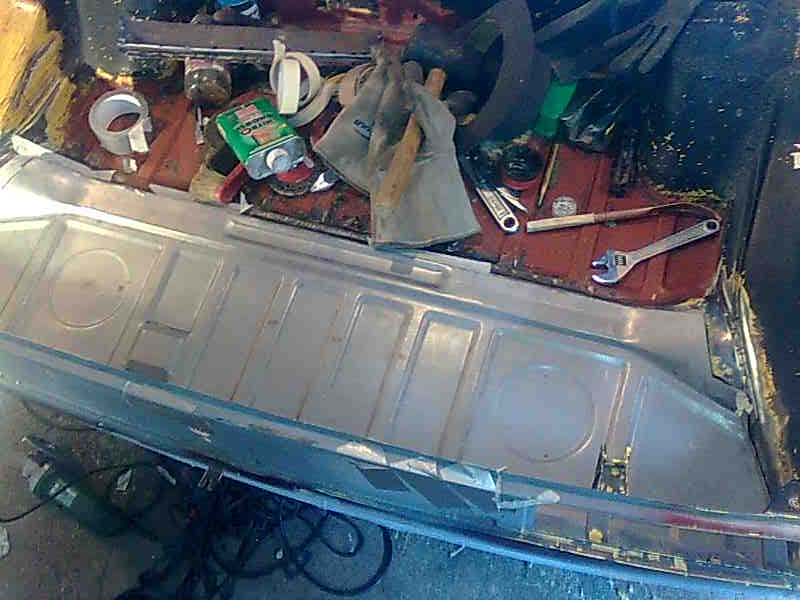
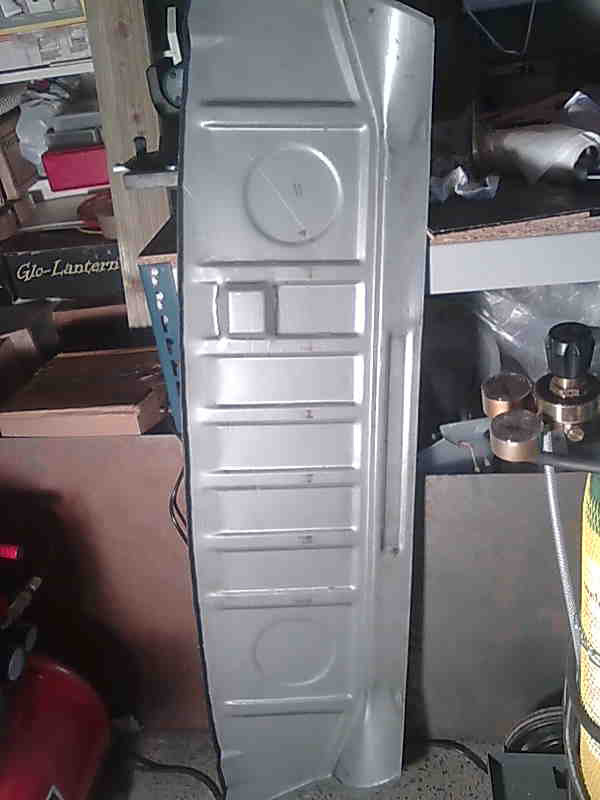
Obviously once this piece is removed the strength of the 'beam' will be compromised. The RD panel has section pressed into it at this point to add stiffness(see pic)..but is it enough alone?

IPB Image

Has anyone else done this job?..and should I be worried about the strength of the floor above the transmission mounts with just the single layer of the RD floor? Hope this makes sense!!

Thanks for any tips...

Ollie.
SirAndy
I've done that repair but on mine the double part was not rusted.

In your case, i would drill out the spotwelds on the doubled up piece, clean out the rust, weld in the RD part and then add a custom strip to double up that area again.
There's quite a bit of "twisting" going on at those transmission mounts, especially if your /6 has a bit of torque.

smash.gif
OllieG
Thanks Andy...will do that. I drilled out the reinforcing panel and found lots of rust beneath.The floorpan itself, like the RD replacement, has the same sectioned strip beneath the reinforcing piece... I'll custom make a new piece as I'll likely opt for an SC 3.0L, so plenty of torque!.

Cheers, Ollie.

IPB Image
914werke
Isnt that plate available from RD also?
gothspeed
Good information on this thread smile.gif
OllieG
QUOTE(rdauenhauer @ Mar 29 2012, 09:22 PM) *

Isnt that plate available from RD also?


I don't think so..wish it was as I think it's going to be difficult to recreate with 'home garage' tools. Any tips on bending radii into sheet accurately welcome!
jmill
QUOTE(OllieG @ Mar 29 2012, 04:02 PM) *

Any tips on bending radii into sheet accurately welcome!


Wood and a bench work great. clamp the sheet metal between your bench and a piece of wood with the metal sticking out. Bend the piece up or down and slowly hammer form the piece to get a nice bend. You can sand a radius into the wood to get the bend radius you want.

jmill
To form the joggle clamp the piece like so and hammer lip down. Match thickness of wood to height of joggle.

OllieG
QUOTE(jmill @ Mar 30 2012, 01:26 AM) *

To form the joggle clamp the piece like so and hammer lip down. Match thickness of wood to height of joggle.


Got it...thanks John, great tips. Saves me buying a sheet bender and modifying that! Will post pics of the results.

Ollie.
IronHillRestorations
What I do is take a Sharpie and ruler and make a straight line through the center of the flange and the spot welds, along that flange. Then using a cut off tool, I cut through the top layer of metal only, so you end up with a small lip to set the repair pan on, and you can make a less noticeable repair.
OllieG
I've cut out all of the original floor now (horrible job, especially in the tight corners beneath the lights) - drilled out spot welds and ground away the metal I couldn't reach with the drill.

I've also, very carefully and slowly(!) cut and fitted the floor - a 'mm' at a time it seemed, but the floor fits beautifully now (if I do say so myself) so it 'should' weld in neatly.

IPB Image

IPB Image

I cleaned out the bottom section of the 'tranny' support beam and epoxied the inside of it before it's all sealed-up when the floor pan is welded in.

There's virtually no rust proofing in this cavity from the factory..I cleaned off the dirt and grease and there was a fair amount of bare untreated metal. I guess it was all the dirt that had been 'rustproofing' it all these years. It's better rustproofed now with the epoxy than when it left the factory!

IPB Image

IPB Image

Hope this is of interest, but I haven't found any threads of this job so thought it might be useful! Anyway, aiming to get it all done next week..will post pics of the finished job.

Ollie.
This is a "lo-fi" version of our main content. To view the full version with more information, formatting and images, please click here.
Invision Power Board © 2001-2024 Invision Power Services, Inc.