I have been working on my 914 for almost 20 years now and have never actually posted info about it. I have read and re-read on this and various other versions of this forum for a long long time and figured it was time to step from the dark dankness of the internet shadows and actually contribute some (also I have questions that remain unanswered, so lots of selfish motivation still abounds).
And now I have to be honest and say I have neglected the poor thing for the past 6 years. It has been sitting patiently waiting for me to finally finish my PhD, get married, and medicate my boundless ADD, most of which has now been accomplished!
I am hoping with a little encouragement and advice I can stay on track and get this thing done over the next few months, barring any ridiculous life crap (which always comes along).
So what are my hopes and dreams?
-2260cc engine
-Megasquirt
-fun times
Thats it! I really feel like that should be easy right? HA!
Full Version: 2.0-2.3L type 4 engine, my journey to enlightenment
ah... another poor teener gets pushed aside while life gets in the way.
jackstands or drivable?
how about some pics so we can properly razz you for procrastination?
jackstands or drivable?
how about some pics so we can properly razz you for procrastination?
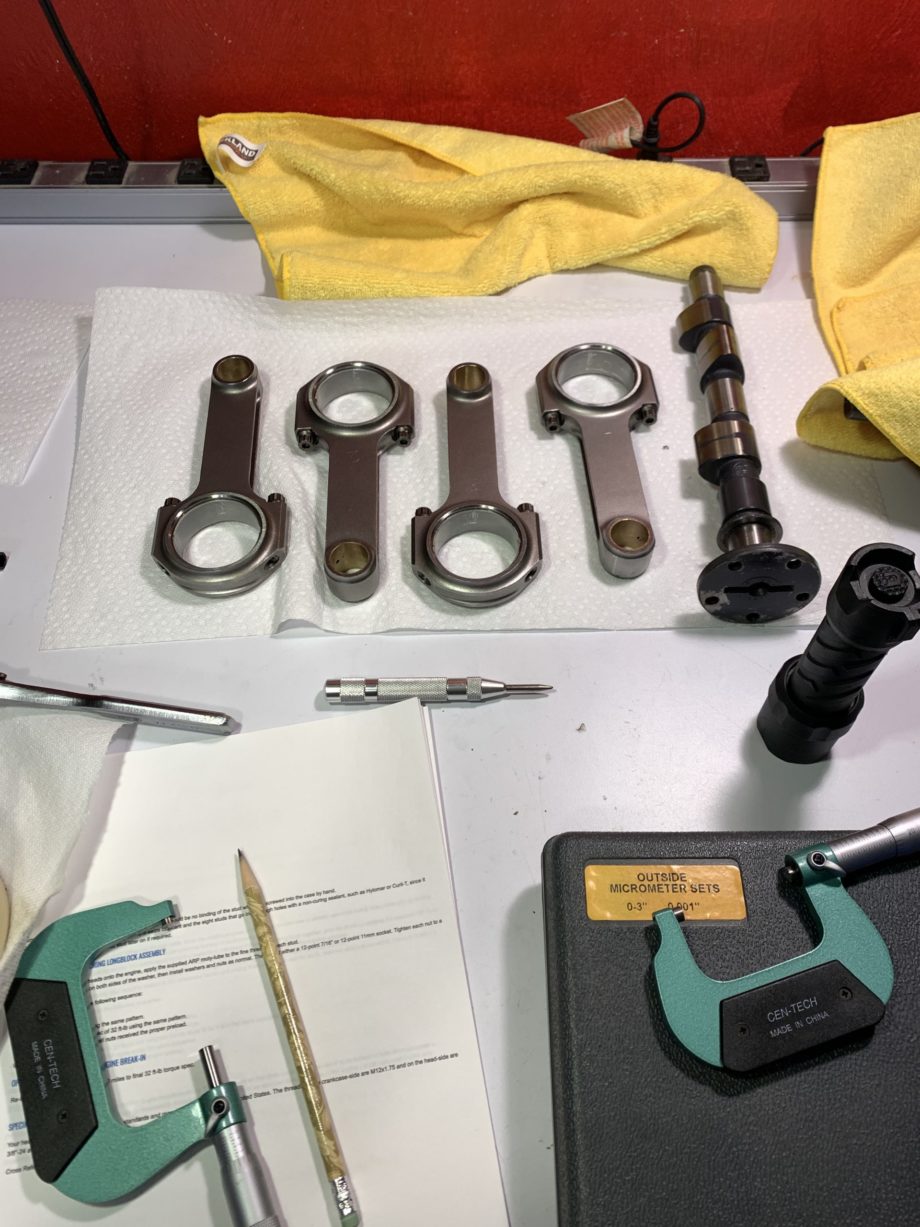
Items I have for engine build portion:
-Scat Rods (22mm small end, porsche 2.0 journal end, 5.325" Length)
-FAT 78mm crank
-96mm KB pistons and cylinders (RAT purchase)
-Webcams 86b camshaft
-New Chromoly Keepers/retainers
-New HD single springs
-New Chromoly pushrods (need to be cut to length)
-Swivel feet adjusters
-Aluminum solid spacers
-New bronze bushings and new SS valves
-new seals, bearings, blah blah blah.
QUOTE(pt_700 @ Apr 5 2012, 03:02 PM) 
ah... another poor teener gets pushed aside while life gets in the way.
jackstands or drivable?
how about some pics so we can properly razz you for procrastination?
Ask and thou shall receive, pictures of components added! The poor misses has been on its wheels, but not rolling for 7 years, with specific neglect for a solid 6,
 .
.So to begin with the questions I would like to pose here:
1: I discovered that the bushing in the rods are really really tight, like .0001" tight. These are not press fit correct? If so what is the best solution for widening them? Master cylinder hone?
2: I am also wanting a compression ratio that will make me smile a little, but on pump gas, 10.5:1? 11:1? I was also planning on using ARP/Raceware head studs for this purpose, any preferences between the two (experience only here guys)? And would this necessitate thru-bolts as well?
Muchas Gracias to the 914 world
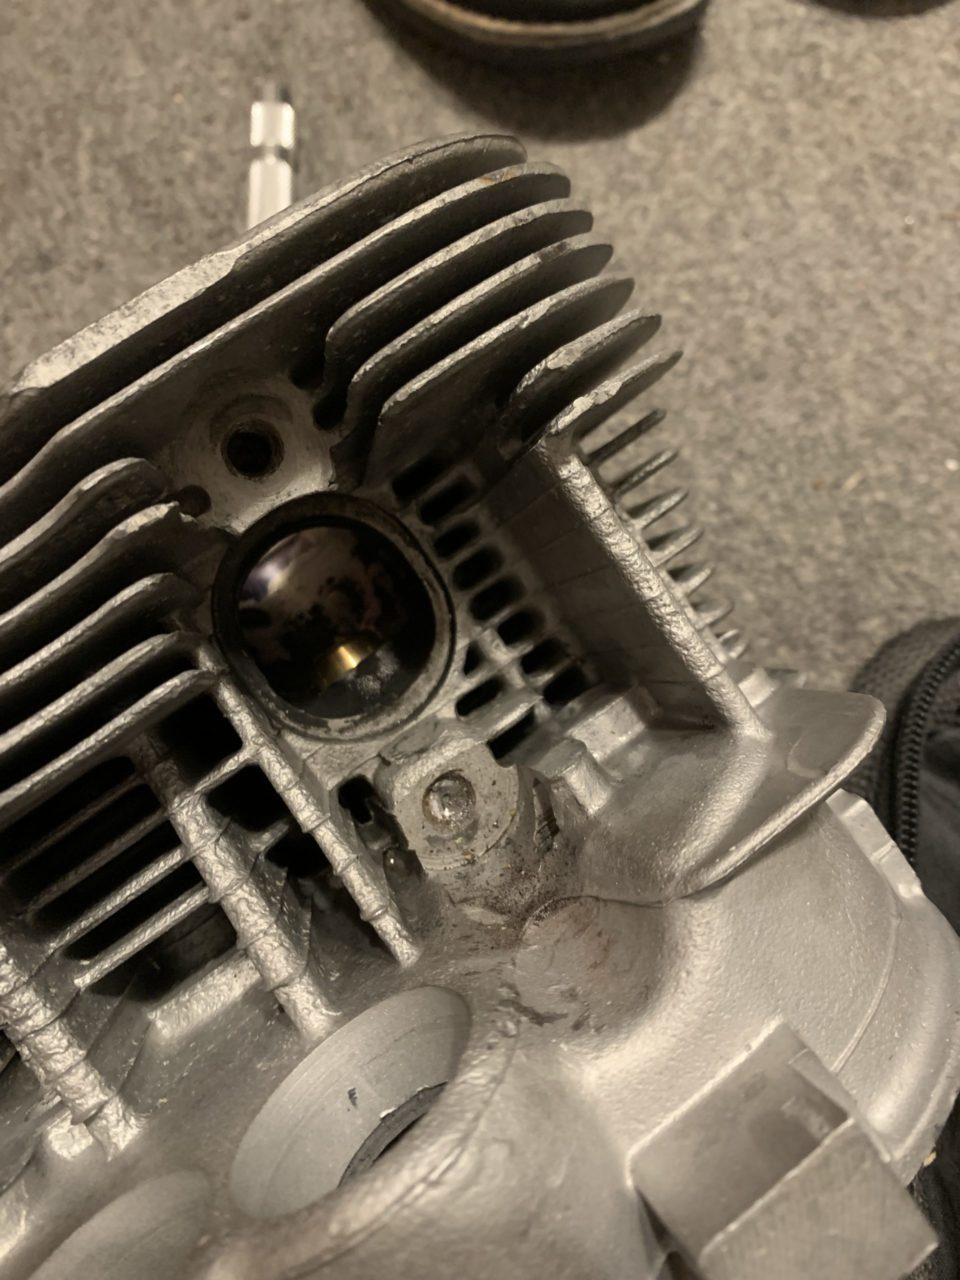
My nice clean block!!
Click to view attachment
With one small SNAFU
Click to view attachment
Luckily I found a use for the other half of the broken stud! A rudimentary old valve guide punch!
Click to view attachment
Click to view attachment
With one small SNAFU
Click to view attachment
Luckily I found a use for the other half of the broken stud! A rudimentary old valve guide punch!
Click to view attachment
QUOTE(bohalrantipol @ Apr 5 2012, 12:36 PM)
[So to begin with the questions I would like to pose here:
2: I am also wanting a compression ratio that will make me smile a little, but on pump gas, 10.5:1? 11:1? I was also planning on using ARP/Raceware head studs for this purpose, any preferences between the two (experience only here guys)? And would this necessitate thru-bolts as well?
Muchas Gracias to the 914 world
air cooled motors don't like high compression and pump gas
they have more heat in their heads and tend to run a couple of points lower compression than their water cooled equivalent (especially type4's)
premium crap pump gas.... I would say about 8.7-ish
really over 9.0 you are going to need race gas or something better than the 91 octane sold around here.
11:1 forget about it.
oh and regarding the rod small ends.
they make a hone
you mount it into a vice and trun the rod end on it by hand
it hones out the bushing (soft) until you get a good fit
Take the rods, wrist pins and bushings to the machine shop. Did you dril and tap the galleys for plugs?
![popcorn[1].gif](http://www.914world.com/bbs2/style_emoticons/default/popcorn[1].gif)
A couple of shots pre-itsbeensittingforalongtime
these are shots immediately following me having completely stripped the car, added flairs (which I slightly regret doing now) and painted all in my parents garage (my mom loved all the smells that emanated from the garage!). Also these are scanned images sorry!
Click to view attachment
Click to view attachment
All good info! keep it coming please!
I am a bit of a "i am going to do everything myself" kind of guy...a bit of a control freak you might say. Can anyone see any reason why a master cylinder hone would not work? I suppose I could buy a new tool, that is always fun. I do plan on taking the block to the machine shop as I literally have done everything I can possible think of to get that f'ing stud out: Heated it, welded on nuts, slotted it and used a hammer driver, started to use my drill press on it broke two bits and before I decided to melt the thing down for scrap, I quit.
So maybe I should bite the bullet and get them to do the rods too, but I am a stubborn SOB.
Ah good ole ideal gas law. I had thought about the extra heat and was considering adding a front mount oil cooler and/or an ethanol mix/spray. Maybe even a better method of cooling ala' RATs DTM, or better yet the Orange adapto corsair setup to combat the extra heat. You really think 8.5-9 is the tops? seems really low to me...
But lets say I can manage the heat, at what point do I need to worry about different head bolts/thru-bolts?
By the way, your car is amazing brant! Really, really good work.
I'm sure there are different opinions
and I am not an expert
so probably with a raby dtm or other attention to detail higher must be possible.
but my 2 related experiences were:
the factory "euro" high compression pistons were around 8.5:1
(the US motors were in the 7.5 to 8.0 range for various years)
also I ran 3 race motors on AV gas (it has its own short comings) but we used to race a motor with about 9.3 that didn't like pump gas
so I may have been a bit on the safe side... but for a street motor that you want to last I don't think you can go too high...
the oil cooling is great.. but may not effect head temperatures
thanks for the compliments.. it was really fun to build and we did nearly every fab thing ourselves (including the body work)
brant
Brants car is just as nice as it looks in the pics, even better.
I am hoping that with the later closing of the 86b camshaft, that my dynamic compression will be low enough to justify a higher static ratio. What cam where you running when you had those problems?
I don't remember now exactly
It was a full race webcam with carbs, but I don't remember the grind
it was over a 10 year period with 3 different builds/cams
I know its apples/oranges... but my first 6 race motor was a stock 67S and rated at 9.8:1 factory compression ratio. It didn't like pump gas either and we always ended up running 98 race gas in it.. but thats still apples and oranges with different profiles and variables.
QUOTE(bohalrantipol @ Apr 5 2012, 02:16 PM)
I do plan on taking the block to the machine shop as I literally have done everything I can possible think of to get that f'ing stud out: Heated it, welded on nuts, slotted it and used a hammer driver, started to use my drill press on it broke two bits and before I decided to melt the thing down for scrap, I quit.
I have several Italian cars with alloy blocks and every once in a while, a steel stud breaks off in a block that is too valuable or impossible to replace. Some of the best machinists in the country directed me to a company that uses high-tech vibration frequencies to actually disintegrate the steel stud without affecting the alloy block, leaving the stud hole threads perfect. It was local to me in CA, and this was years ago, before widespread Internet, but I'll bet the process (patented I think) is more widely available now. Do a search on Google for the process.
I am hoping the machine shop will look upon the task as routine. How much did you pay for this disintegration ray service? Sounds very intriguing, you think the tooling is expensive? I have recently seen a system that uses a high frequency induction technique to heat only a steel nut up....is that what you are talking about?
Call Jerry's broken drill and tap in Orange County Ca.. They can remove it without issue.
QUOTE(bohalrantipol @ Apr 5 2012, 02:36 PM)
1: I discovered that the bushing in the rods are really really tight, like .0001" tight. These are not press fit correct? If so what is the best solution for widening them? Master cylinder hone?
They should be tight - less than a thousandth. Not a press fit, but a tight hand fit.
They should be honed perfectly square and straight, that's why engine shops have a special machine for rods.
You could do it with a master cylinder hone but since the rod bushing is short and open at both ends it would be hard to control in a crosshatch pattern.
A good EDM machine shop could remove that broken stud.
I agree with lowering the CR. We just had a 2056 built up with 8.6 so I could run pump gas (street car).
An oil cooler won't reduce head temps very much.
Looks like you've got a nice stash of parts to work with
An oil cooler won't reduce head temps very much.
Looks like you've got a nice stash of parts to work with
Looking at all those goodies gets me excited! I just need to get them all into one aluminum box, instead of the many cardboard ones they are currently in!
What Camshaft where you running in that setup? Duration etc.?
What Camshaft where you running in that setup? Duration etc.?
After much ado, I got all my machine work completed and in the house.
Click to view attachment
Stock 2.0 heads, which I think look like they are in really good shape! Of course I would rather have new castings, but I can think of many things I would rather spend 3K on.
Click to view attachment
Click to view attachment
Click to view attachment
Stock 2.0 heads, which I think look like they are in really good shape! Of course I would rather have new castings, but I can think of many things I would rather spend 3K on.
Click to view attachment
Click to view attachment
It also looks like there was a little bit of porting done on the intake track....not to shabby.
Click to view attachment
Unfortunately my machinist could not get the stud out either, so he drilled it out and put in an insert. I think he did a pretty damn good job!
Click to view attachment
Click to view attachment
Unfortunately my machinist could not get the stud out either, so he drilled it out and put in an insert. I think he did a pretty damn good job!
Click to view attachment
Finally, I have to admit something....I have been cheating on my lady!
my new boy toy...
Click to view attachment
I figured because they are both german they would get along....maybe have a menage a trios in my garage later?
my new boy toy...
Click to view attachment
I figured because they are both german they would get along....maybe have a menage a trios in my garage later?
Curious if anyone had an opinion ARP vs RACEWARE. They both are priced exactly the same. The 911 community seem to go more often with the RACEWARE stuff....Any experiences out there?
I used ARP in an engine and had no problems. Keep the progress going. I have a similar engine that I want to go Megasquirt with using stock intakes.
Enjoying this thread.
Waiting for more.
John
Waiting for more.
John
Couple of suggestions.
Given where you are at, I would have all the rotating assemblies balanced and weight matched, i.e., pistons, rods, etc.
Would suggest you check with someone like Len Hoffman and determine if those springs are good enough for the RPM range you plan on running. Not taking this step can be a costly one,
That red front fairing sitting on your bench next to the bike battery looks vaguely Ducati-ish to me... 
QUOTE(bohalrantipol @ Apr 5 2012, 12:36 PM)
QUOTE(pt_700 @ Apr 5 2012, 03:02 PM)
ah... another poor teener gets pushed aside while life gets in the way.
jackstands or drivable?
how about some pics so we can properly razz you for procrastination?
Ask and thou shall receive, pictures of components added! The poor misses has been on its wheels, but not rolling for 7 years, with specific neglect for a solid 6,
.So to begin with the questions I would like to pose here:
1: I discovered that the bushing in the rods are really really tight, like .0001" tight. These are not press fit correct? If so what is the best solution for widening them? Master cylinder hone?
2: I am also wanting a compression ratio that will make me smile a little, but on pump gas, 10.5:1? 11:1? I was also planning on using ARP/Raceware head studs for this purpose, any preferences between the two (experience only here guys)? And would this necessitate thru-bolts as well?
Muchas Gracias to the 914 world
The ONLY solution for the pin fit in the rods is to have them fitted at an experienced automotive machine shop. Take the pins with you when you go there, they have to use them to fit the bushings. There is NO other acceptable way!
The Cap'n
QUOTE(Randal @ Aug 8 2012, 02:11 PM)
Couple of suggestions.
Given where you are at, I would have all the rotating assemblies balanced and weight matched, i.e., pistons, rods, etc.
Would suggest you check with someone like Len Hoffman and determine if those springs are good enough for the RPM range you plan on running. Not taking this step can be a costly one,
Advice Retroactively taken, everything was balanced at the same time as my heads/case was being worked on, forgot to mention that! The springs are a question I have been on again, off again thinking about. To get better seat pressures I would have to machine the guide bosses, which I wanted to avoid for now. I figured if I started to feel some valve float I would go back in with a new set of heads, as well as more spring! haha.
QUOTE(smj @ Aug 8 2012, 02:35 PM)
That red front fairing sitting on your bench next to the bike battery looks vaguely Ducati-ish to me...
Good eye sir! That is indeed a Ducati 996 fairing, my "other" toy. You can kind of see its butt sticking up in front of the 914, my track only bike.
Click to view attachment
QUOTE(Cap'n Krusty @ Aug 8 2012, 02:43 PM)
The ONLY solution for the pin fit in the rods is to have them fitted at an experienced automotive machine shop. Take the pins with you when you go there, they have to use them to fit the bushings. There is NO other acceptable way!
The Cap'n
I avoided the crap can method and got my machinist to do it for me, charged me like $40 so it was well worth it (although I would not mind having the tools necessary to do it).
Another distraction....
My friends and I are doing another crap can race this weekend at VIR
Click to view attachment
Click to view attachment
I really need to focus....
My friends and I are doing another crap can race this weekend at VIR
Click to view attachment
Click to view attachment
I really need to focus....
QUOTE(Michelj13 @ Aug 8 2012, 01:42 PM)
I used ARP in an engine and had no problems. Keep the progress going. I have a similar engine that I want to go Megasquirt with using stock intakes.
Thanks! Since that is one of the only asserted opinions, I will take it! ARP on order....
So I finally began the assembly process! A lot has happened in my life in the last 6 months including a move, which is always a pain in the butt!
First things first I decided to ditch my crappy two-arm VW engine stand for a five arm jobby. It was $89, which is a lot cheaper then the other more heavy duty available options, and I was frustrated by the fact that I could have made one with $10 worth of steel and a few hours, but who has that time!
All and all I like the stand, and it was worth the savings for me in effort, so I can focus on actually getting the engine back together!
Click to view attachment
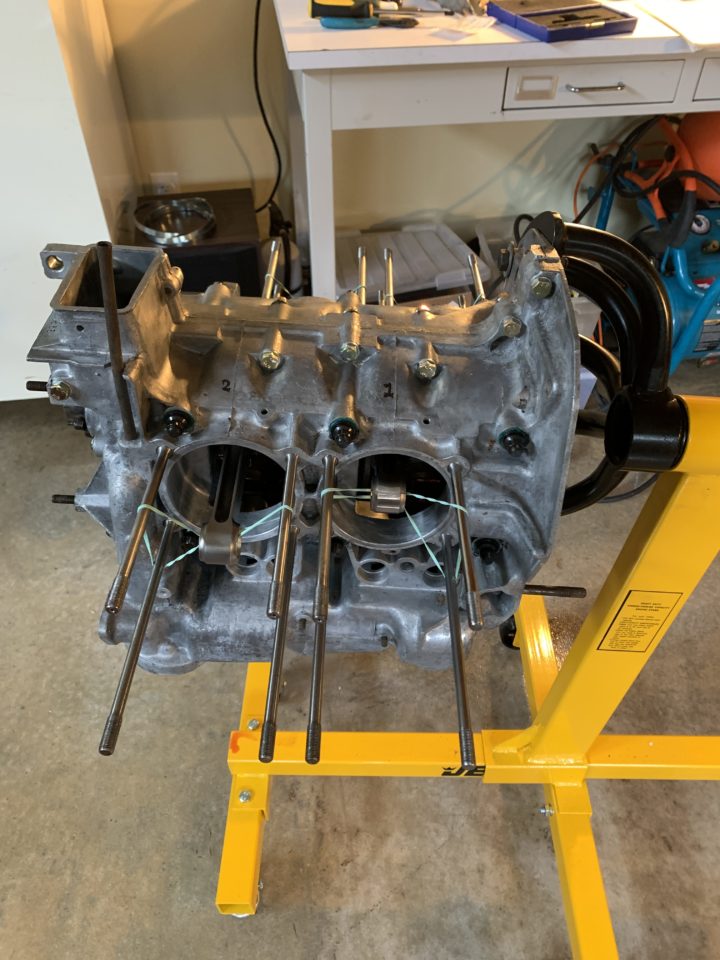
I did a dry assembly of everything to make sure that I had the clearance necessary for my crank/cam combo, and I could not find any issues!!
Click to view attachment
Click to view attachment
I then started to install the ARP head studs I ordered, which if you have never seen these in person they are very impressively constructed. Worth the money? Well I really have no empirical way to determine that, but they do give me a sense of security, perceived or real I think that is a good thing. I really would like this engine to last, and I feel like these parts are things that I can use in the future if I want to play with the internals some more.
Click to view attachment
Click to view attachment
I unfortunately discovered that my ARP kit was missing one stud from LNengineering, but a tic later one was in the mail to me! As has been stated before, they are a stand up set of folks to deal with and I would not hesitate to recommend them to someone else.
First things first I decided to ditch my crappy two-arm VW engine stand for a five arm jobby. It was $89, which is a lot cheaper then the other more heavy duty available options, and I was frustrated by the fact that I could have made one with $10 worth of steel and a few hours, but who has that time!
All and all I like the stand, and it was worth the savings for me in effort, so I can focus on actually getting the engine back together!
Click to view attachment
I did a dry assembly of everything to make sure that I had the clearance necessary for my crank/cam combo, and I could not find any issues!!
Click to view attachment
Click to view attachment
I then started to install the ARP head studs I ordered, which if you have never seen these in person they are very impressively constructed. Worth the money? Well I really have no empirical way to determine that, but they do give me a sense of security, perceived or real I think that is a good thing. I really would like this engine to last, and I feel like these parts are things that I can use in the future if I want to play with the internals some more.
Click to view attachment
Click to view attachment
I unfortunately discovered that my ARP kit was missing one stud from LNengineering, but a tic later one was in the mail to me! As has been stated before, they are a stand up set of folks to deal with and I would not hesitate to recommend them to someone else.
This process has of course ended with me having some questions for the wisdom of the internets!
I am not sure which way the rods are supposed to face...Jake Rabys video indicates that all of them should have the numbers facing the same direction on the crank when you go to install them (facing "up") I assume this applies to the aftermarket ones as well?
Also, I am not sure if I should use a thread sealant on the ARP Head studs when I reinstall them, any opinions here appreciated! Then on to final assembly!!
Click to view attachment
And I am back at it.....
many years later, a couple of kids, time flies.
So I began assembly of the heads and here is the situation:
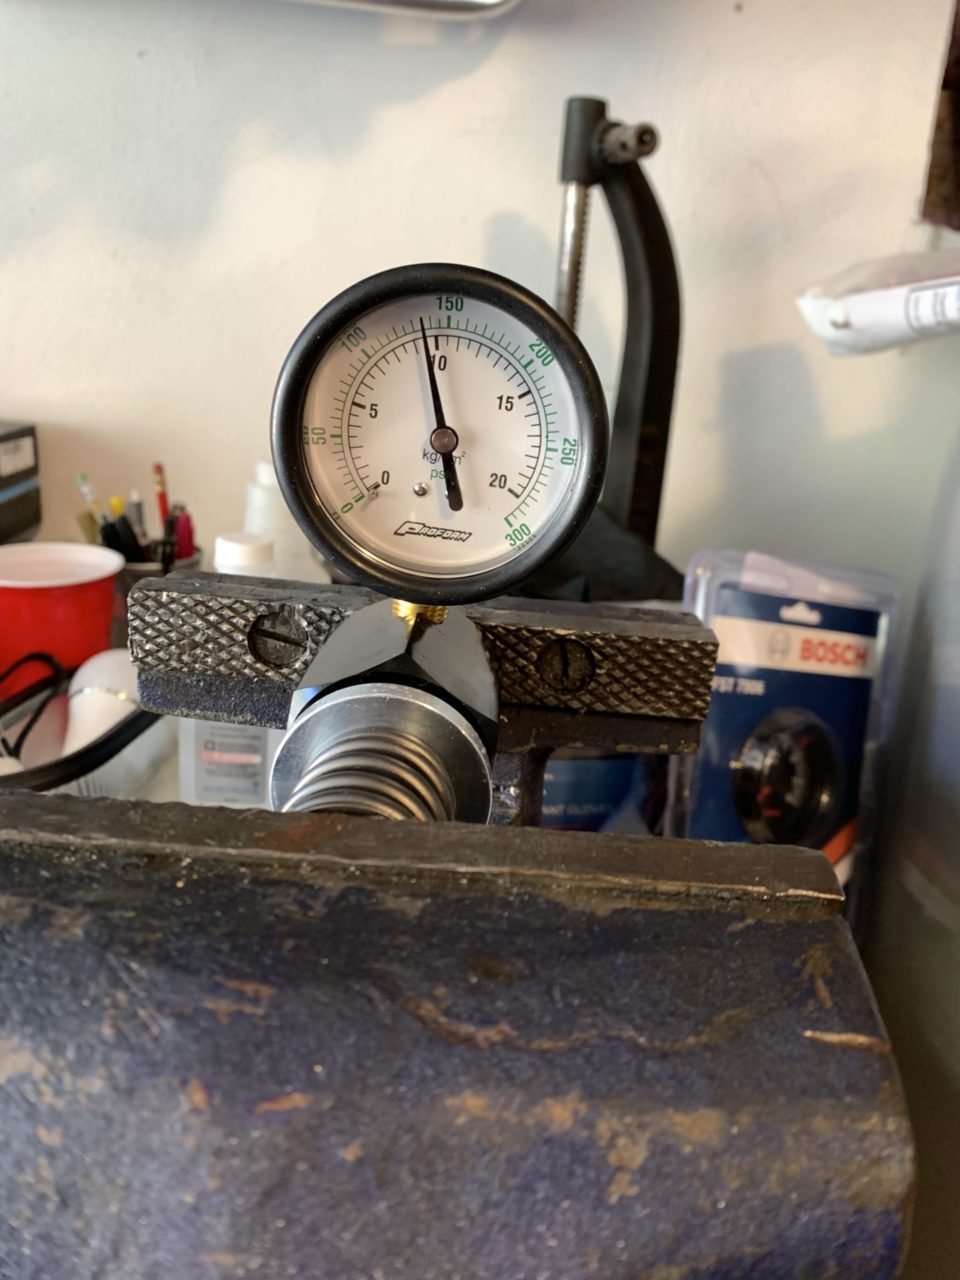
I measured an installed spring height of ~1.445" and the Scat 20011 springs advertise a seat pressure of 135 lbs at 1.55". A couple of issues present themselves here.
1. The spring will coil bind around 0.92" which leaves me only around 0.031" at max lift for the 86b cam I have.
2. My seat pressure is ~153 PSI, which I am ok with, but my opening pressure @ 0.50" of lift is only ~241 PSI. I had read a while ago that Jake uses around 280 Lbs @ 0.5", so I feel like I am a bit off target here.
My questions that I pose to the internets are thus:
How much seat pressure is good here?
I would rather leave the heads alone from a milling perspective if I can get away with it, but I am concerned I wont be able to accommodate the 0.494" lift with out milling. Unless I find a magical spring.
For the Nose pressure, what is a good target? And are there any single springs out there that get the general recommendation for my setup?
Thanks y'all!
many years later, a couple of kids, time flies.
So I began assembly of the heads and here is the situation:
I measured an installed spring height of ~1.445" and the Scat 20011 springs advertise a seat pressure of 135 lbs at 1.55". A couple of issues present themselves here.
1. The spring will coil bind around 0.92" which leaves me only around 0.031" at max lift for the 86b cam I have.
2. My seat pressure is ~153 PSI, which I am ok with, but my opening pressure @ 0.50" of lift is only ~241 PSI. I had read a while ago that Jake uses around 280 Lbs @ 0.5", so I feel like I am a bit off target here.
My questions that I pose to the internets are thus:
How much seat pressure is good here?
I would rather leave the heads alone from a milling perspective if I can get away with it, but I am concerned I wont be able to accommodate the 0.494" lift with out milling. Unless I find a magical spring.
For the Nose pressure, what is a good target? And are there any single springs out there that get the general recommendation for my setup?
Thanks y'all!
Look, I get it, I have been cheating on you 914world. You saw me with another car, it's true, but I sold the BMW. You have always been the only one I truely care about.
To coax you back in, pictures!
The first thing my aging brain did was ask:
"what the hell lifters are these?"
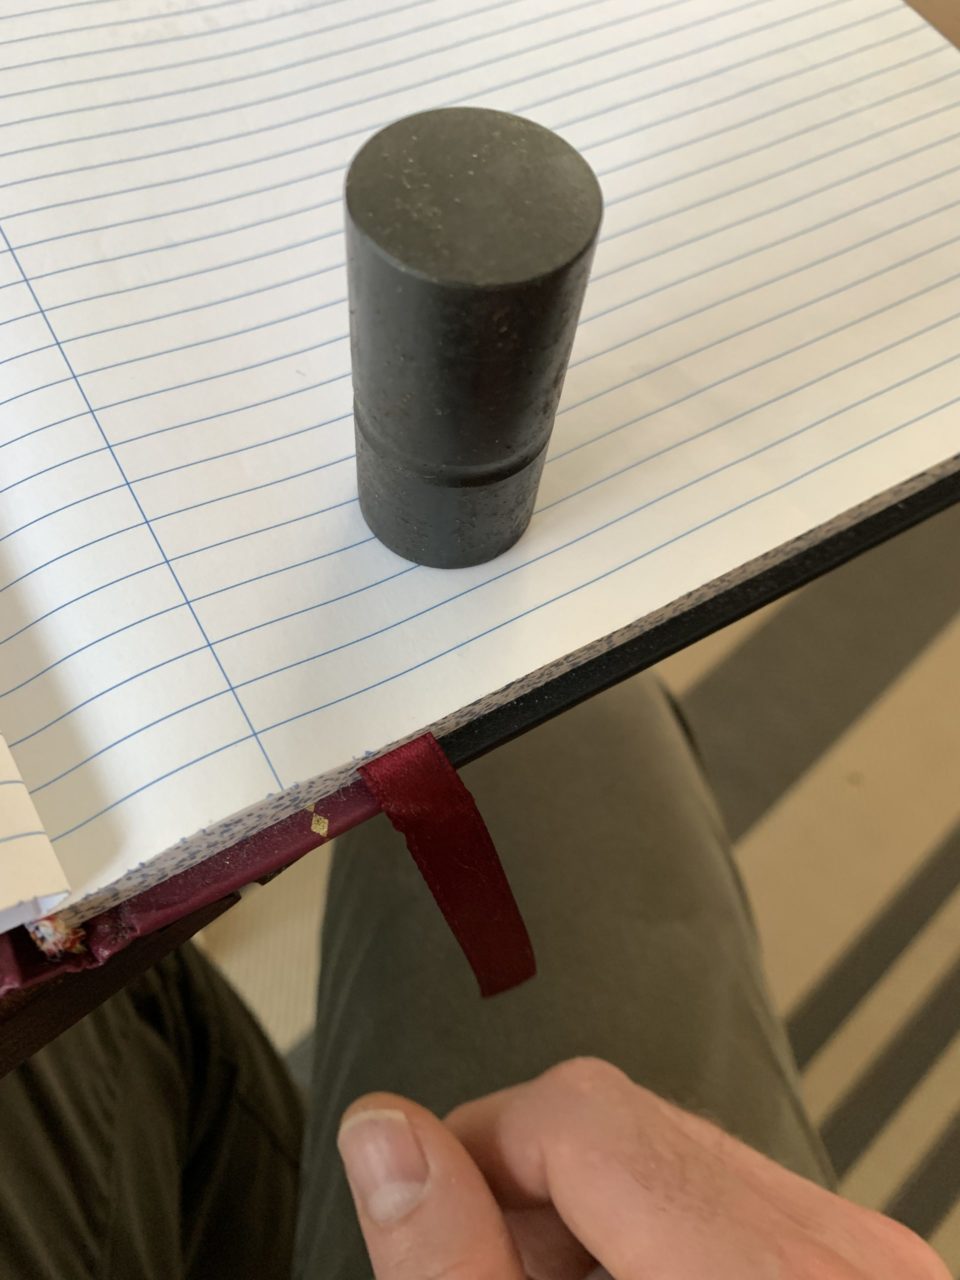
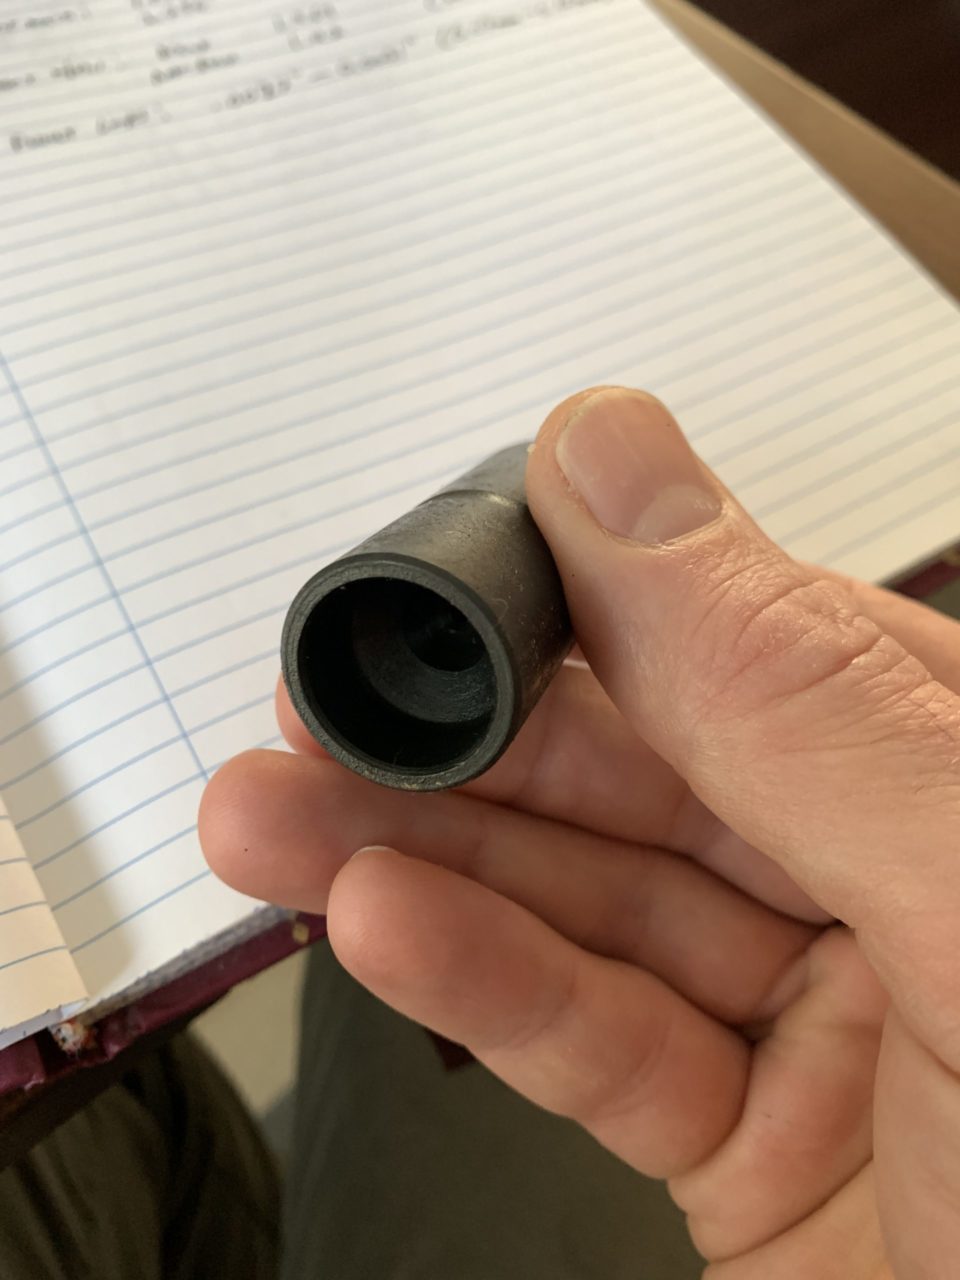
So I called webcam to see if they could help me identify them, and sure enough they are not theirs. So I ordered a set of Webcam solid lifters as I have seen/heard of plenty of horror stories about cams eating themselves when the improper lifter cam combo and oil is used.
And for posterities sake:
Scat 20011 Springs next to a stock spring
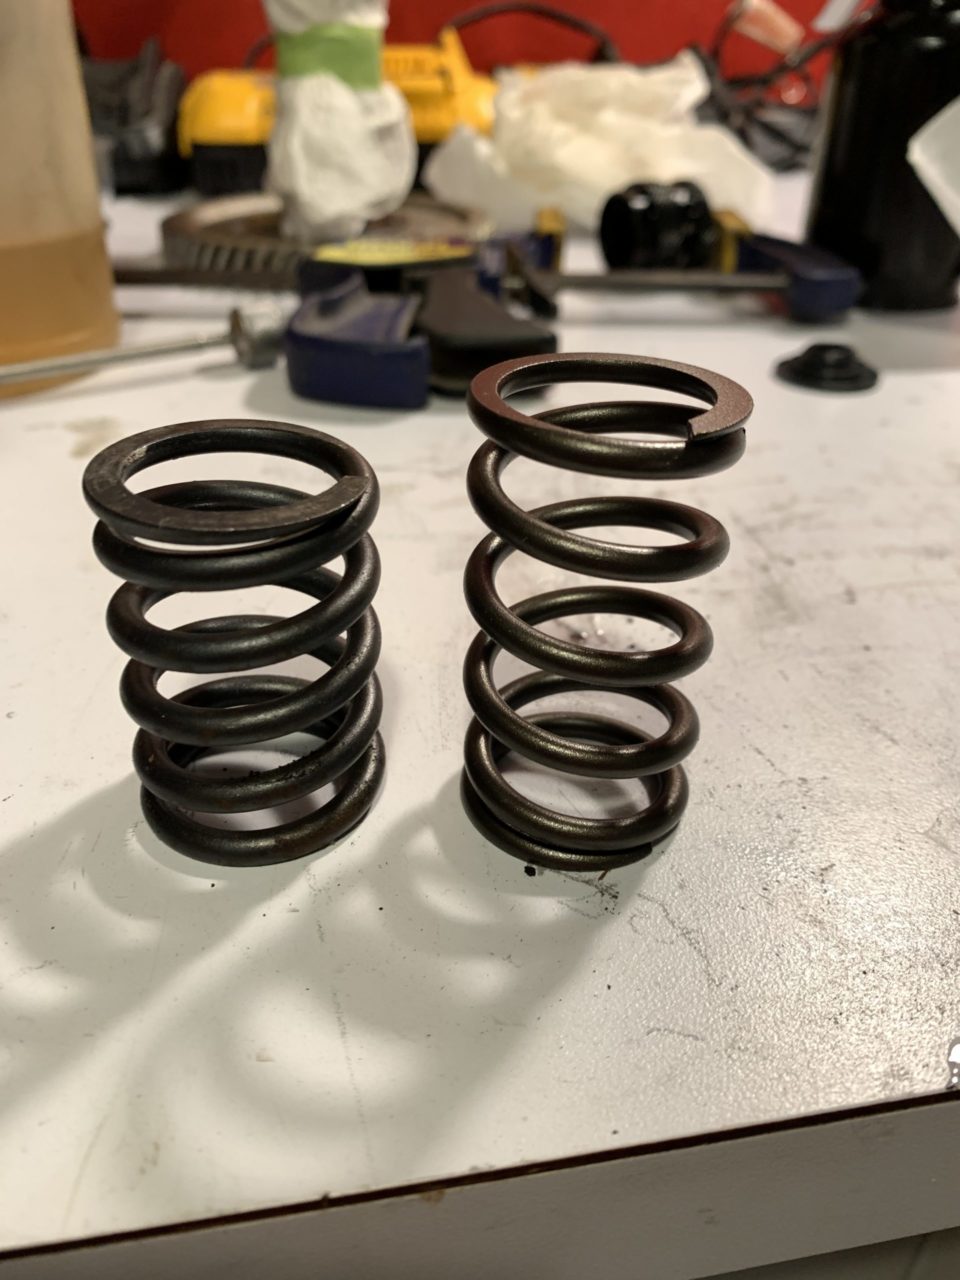
I measure out the Scat springs to be around 2.32" total length and an ID of around 0.931"
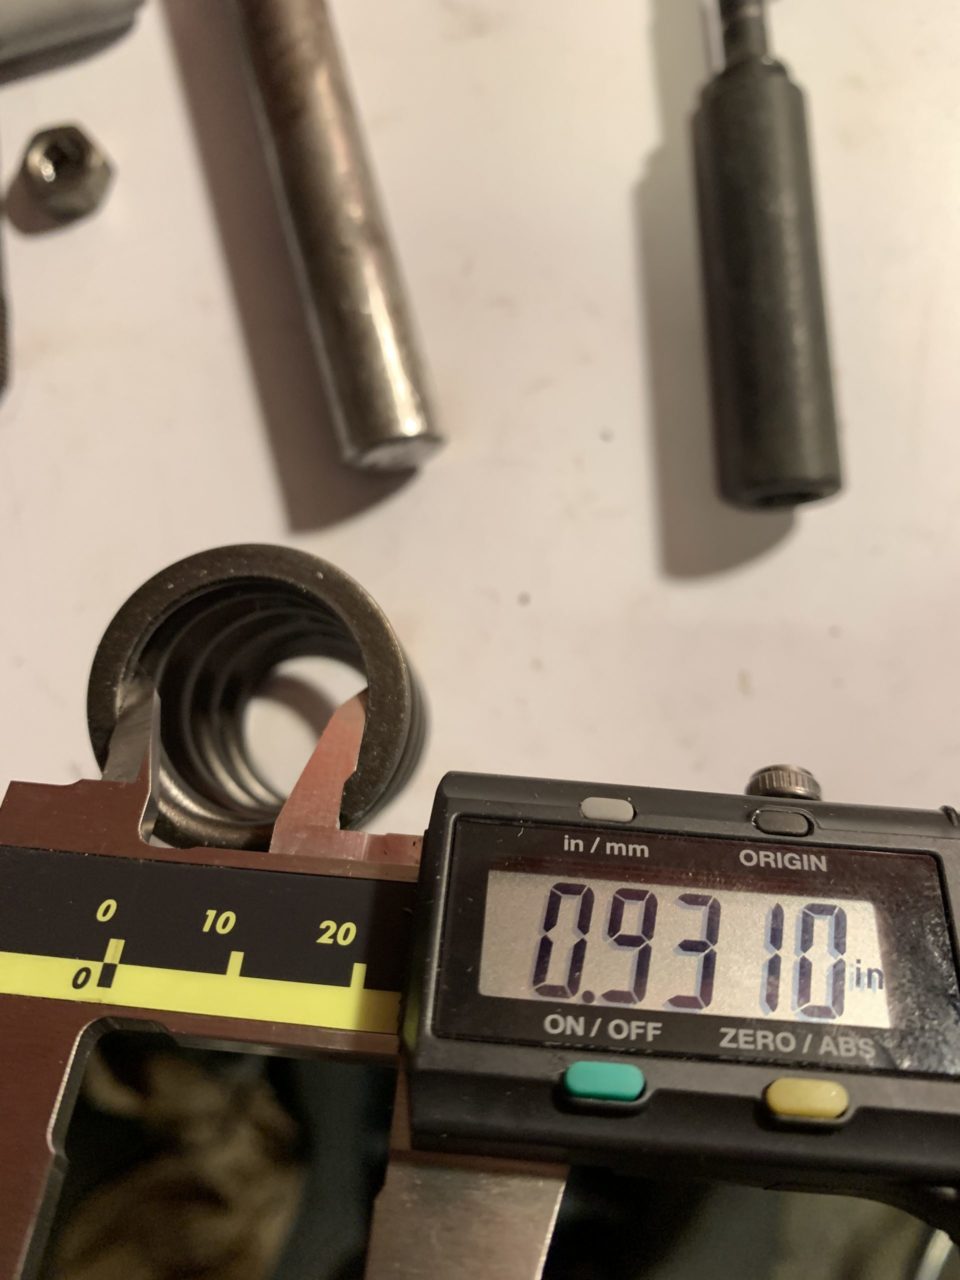
The guide boss is around 0.924" so the fit is certainly snug:
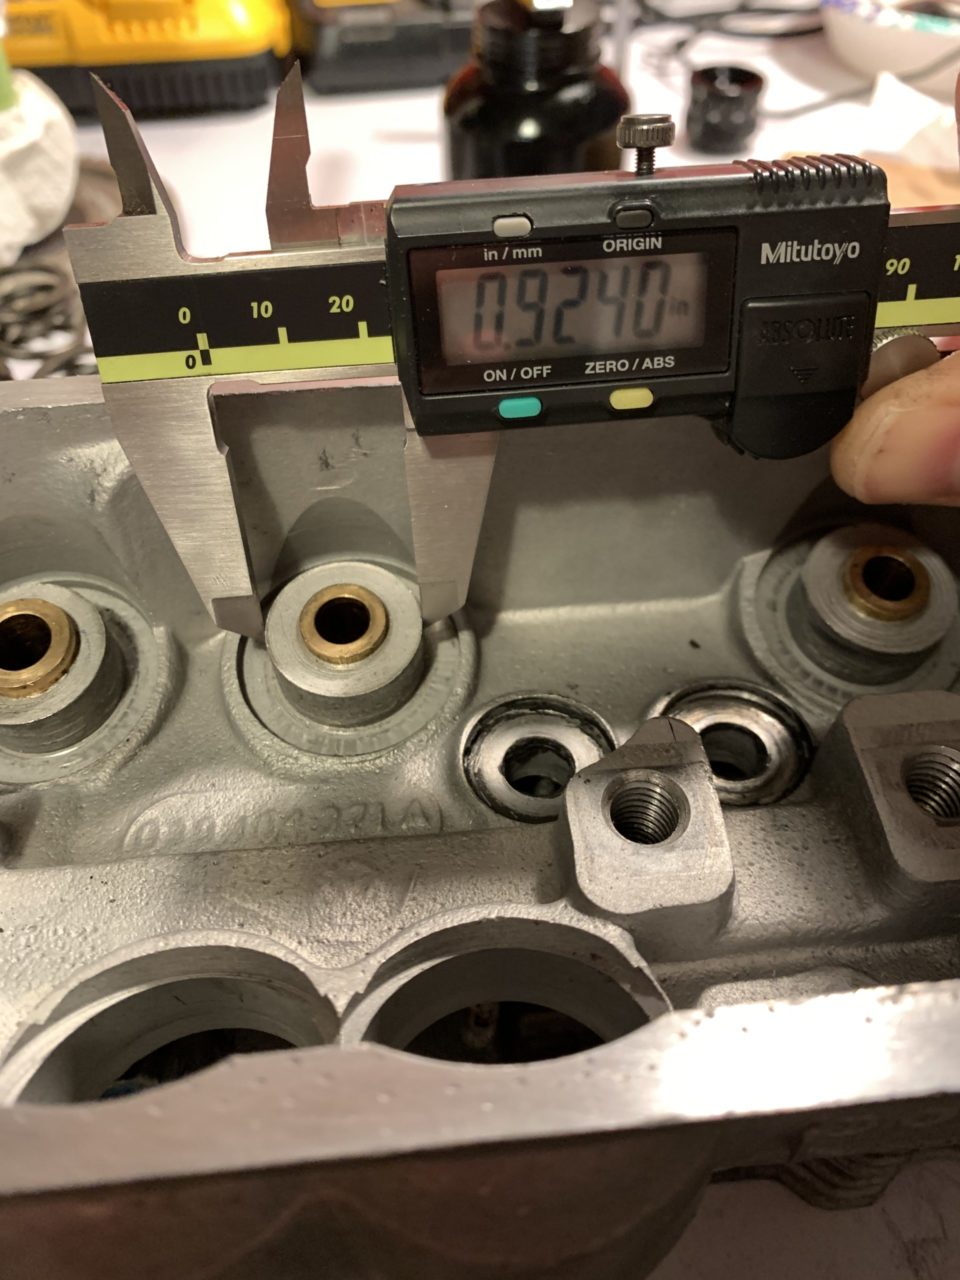
But they fit. At first my installed height was around 1.45", but a few "seating taps" with my hammer got it to around 1.48" so I am getting to a more acceptable level.
Next I noticed that my stock keepers were nice and shiny at the mating surface, where as my brand new ones looked like someone finished the edge with a chisel *sigh*.
So over to the only reason I agreed to redo my kitchen countertops: an ultra flat sanding surface!!
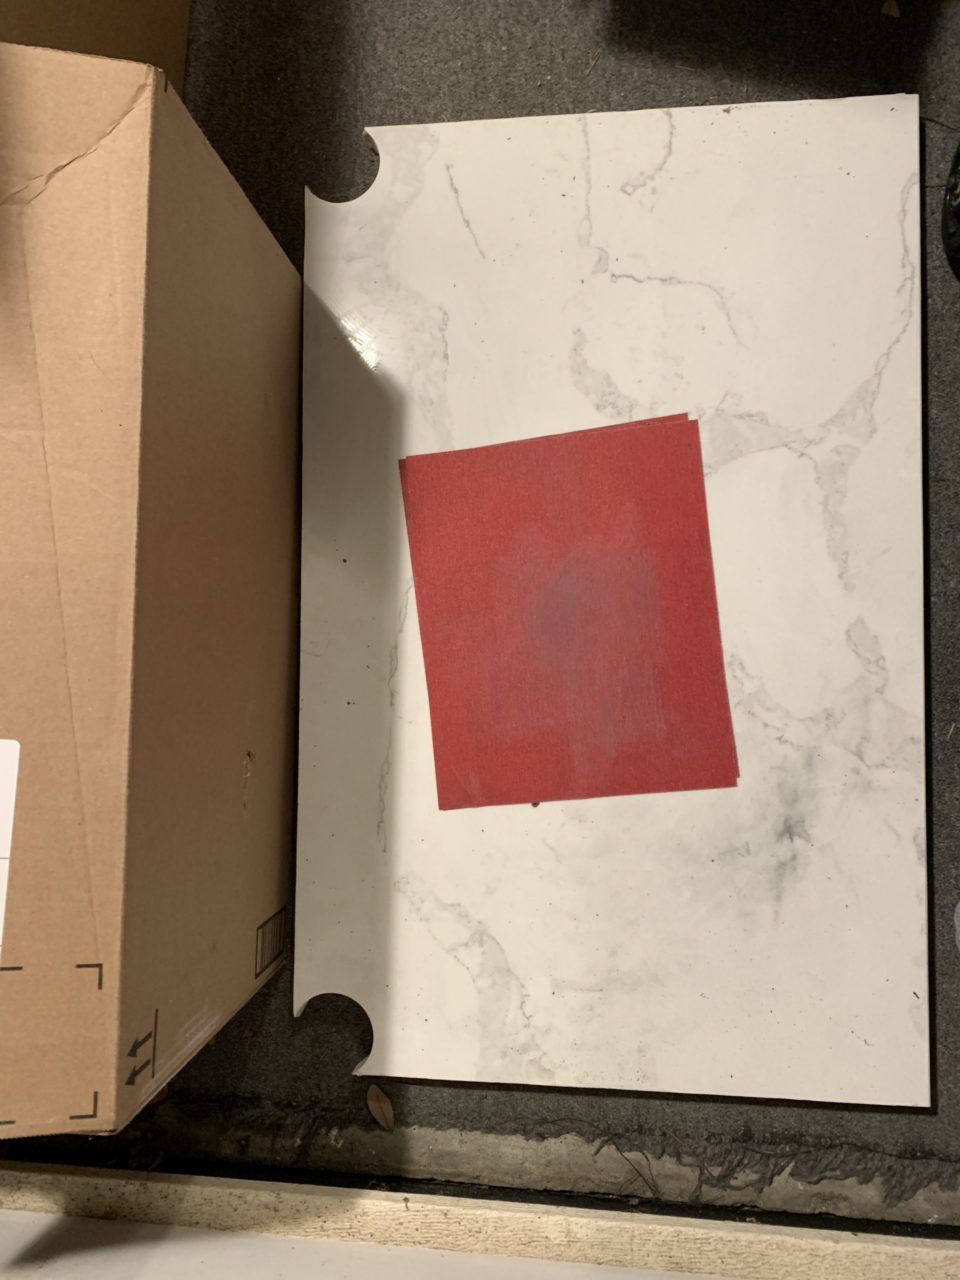
And a few strokes later:
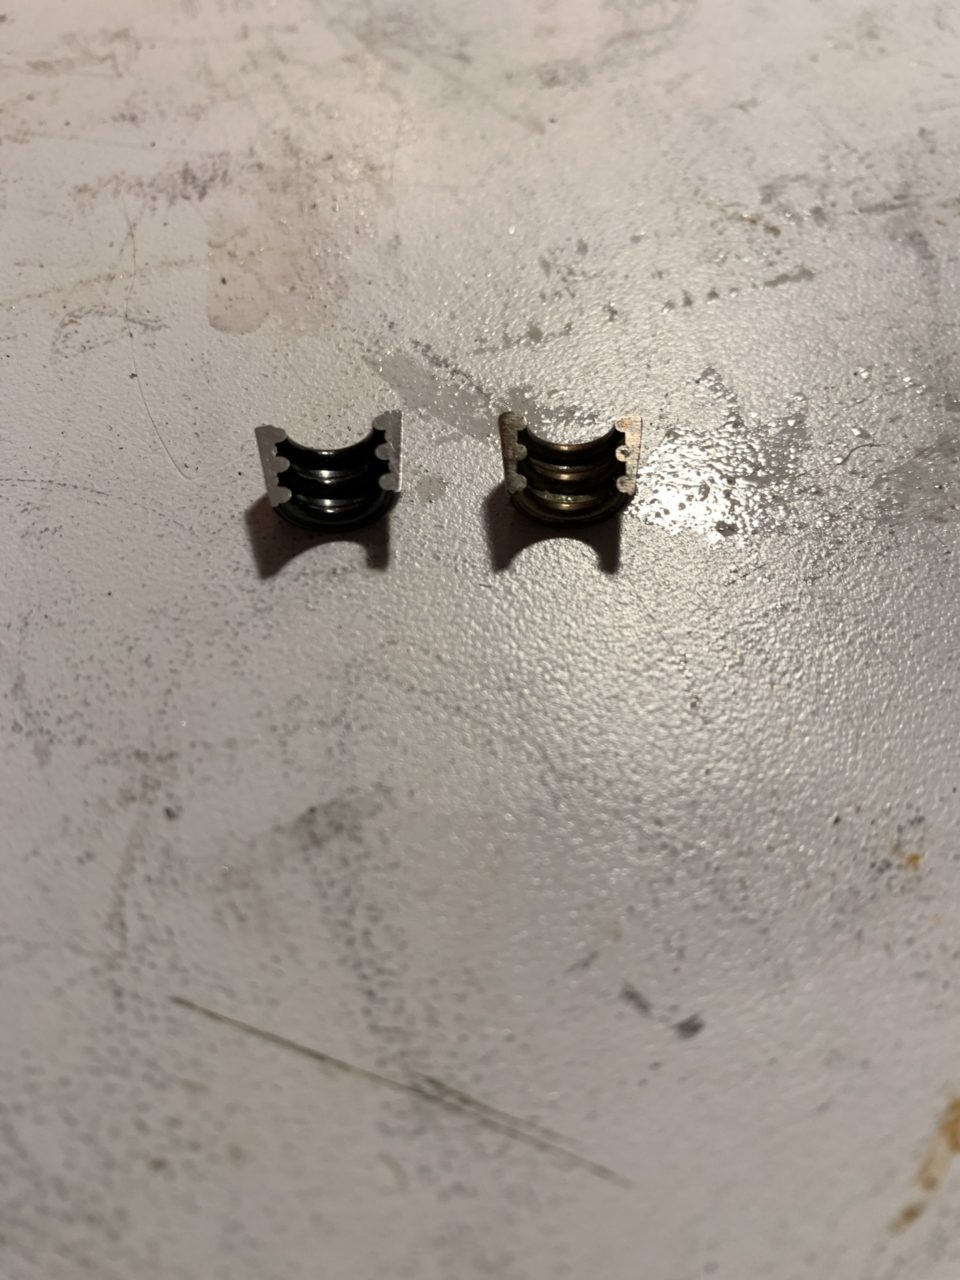
Nice and shiny and smooth (stock keeper is on the right, new one on the left)
With this done the keepers no longer "rocked" when placed on the stem of the valves and when I installed them, I am now at 1.5" of installed height! Yay!
This should give me a seat pressure of around 140 PSI
And my clearance from coil bind should be around 0.1" with a hypothetical nose pressure of around 220 PSI. I am still on the fence about if this is enough for the webcam 86B. In conversation with webcam, they said it is in the middle between their double and single springs. I have no intentions of running this thing above 6000 RPM, so that is where I am at. Should I run what I brought? Should I go double spring? I could also go "beehive", but both would likely require machining.
Beehive springs
To coax you back in, pictures!
The first thing my aging brain did was ask:
"what the hell lifters are these?"
So I called webcam to see if they could help me identify them, and sure enough they are not theirs. So I ordered a set of Webcam solid lifters as I have seen/heard of plenty of horror stories about cams eating themselves when the improper lifter cam combo and oil is used.
And for posterities sake:
Scat 20011 Springs next to a stock spring
I measure out the Scat springs to be around 2.32" total length and an ID of around 0.931"
The guide boss is around 0.924" so the fit is certainly snug:
But they fit. At first my installed height was around 1.45", but a few "seating taps" with my hammer got it to around 1.48" so I am getting to a more acceptable level.
Next I noticed that my stock keepers were nice and shiny at the mating surface, where as my brand new ones looked like someone finished the edge with a chisel *sigh*.
So over to the only reason I agreed to redo my kitchen countertops: an ultra flat sanding surface!!
And a few strokes later:
Nice and shiny and smooth (stock keeper is on the right, new one on the left)
With this done the keepers no longer "rocked" when placed on the stem of the valves and when I installed them, I am now at 1.5" of installed height! Yay!
This should give me a seat pressure of around 140 PSI
And my clearance from coil bind should be around 0.1" with a hypothetical nose pressure of around 220 PSI. I am still on the fence about if this is enough for the webcam 86B. In conversation with webcam, they said it is in the middle between their double and single springs. I have no intentions of running this thing above 6000 RPM, so that is where I am at. Should I run what I brought? Should I go double spring? I could also go "beehive", but both would likely require machining.
Beehive springs
I use type one Crowder or Gene Berg dual springs, Bugpack cr-mo retainers and hardened keepers with steel shims. You have to machine the guide bosses.
The Scat spring in your pic is type one.
The Scat spring in your pic is type one.
QUOTE(Mark Henry @ Apr 8 2021, 01:39 PM)
I use type one Crowder or Gene Berg dual springs, Bugpack cr-mo retainers and hardened keepers with steel shims. You have to machine the guide bosses.
The Scat spring in your pic is type one.
Thanks Mark,
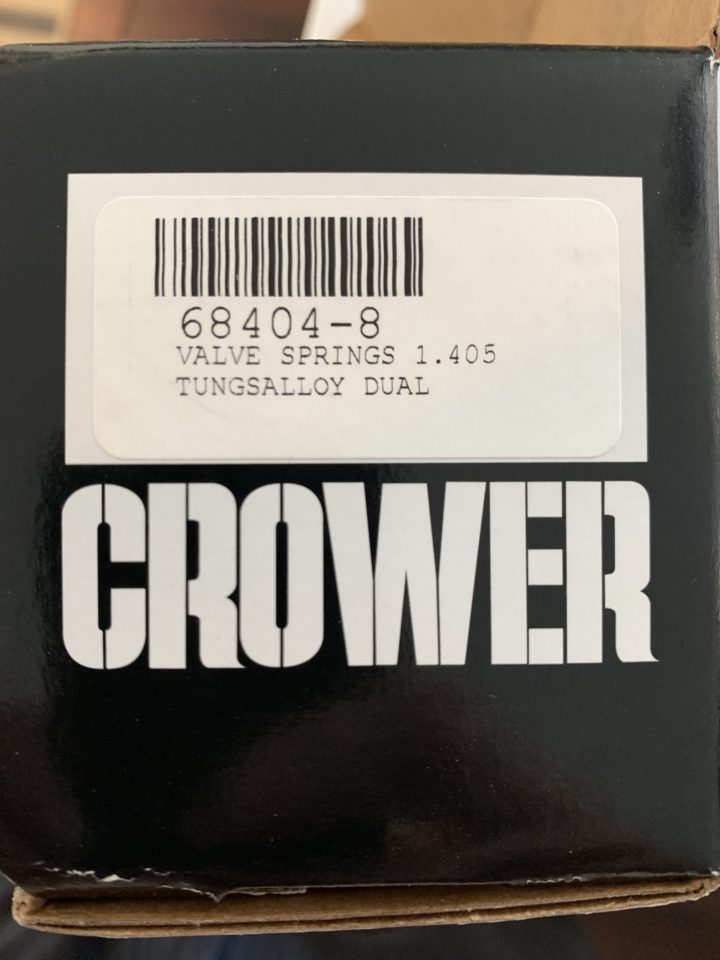
Yeah I knew they were type 1, but they do fit...ish. Are you using the Crower 68404? Are you using their recommended installed height of 1.6"?
QUOTE(bohalrantipol @ Apr 8 2021, 02:47 PM)
QUOTE(Mark Henry @ Apr 8 2021, 01:39 PM)
I use type one Crowder or Gene Berg dual springs, Bugpack cr-mo retainers and hardened keepers with steel shims. You have to machine the guide bosses.
The Scat spring in your pic is type one.
Thanks Mark,
Yeah I knew they were type 1, but they do fit...ish. Are you using the Crower 68404? Are you using their recommended installed height of 1.6"?
I'd have to look but that sounds right, I always have look dimensions up, but I have the real porsche tool so it's a metric go/no go style gauge. I often buy Berg springs or aircooled,net just because it a matched set that's already been checked.
One step I missed... you have to trim the tops of the guides, spring side.
So the retainer doesn't hit the guide.
Well things have "progressed", even though it always seems like its two steps back and one step forward. I bought the Crower springs, and they look nice. I had intended on doing the guide boss machining myself, but then this happened:
Seems like the theme of this thread. I should change the title to "Broken studs of all sorts!"
So I dropped both the heads off at my machine shop to get the springs fitted and to have the stud bits removed.
Finally the lifters are still an issue. Apparently Web is 6-8 weeks out before they can sell me a set, so I guess I will have to wait. I have read so many conflicting stories about cams/lifters. I am honestly at a little bit of a loss. Hopefully, sticking with the same manufacture will be a little bit of reassurance.
QUOTE(bohalrantipol @ May 1 2021, 11:28 AM)
Well things have "progressed", even though it always seems like its two steps back and one step forward. I bought the Crower springs, and they look nice. I had intended on doing the guide boss machining myself, but then this happened:
Seems like the theme of this thread. I should change the title to "Broken studs of all sorts!"
So I dropped both the heads off at my machine shop to get the springs fitted and to have the stud bits removed.
Finally the lifters are still an issue. Apparently Web is 6-8 weeks out before they can sell me a set, so I guess I will have to wait. I have read so many conflicting stories about cams/lifters. I am honestly at a little bit of a loss. Hopefully, sticking with the same manufacture will be a little bit of reassurance.
I'm a a web cam dealer, I'm waiting on lifters as well, last year they were waiting on cam billets. Did you try aircooled.net and AA also sells Web cams.
Studs like that is just an annoyance, I have a whole pile of 2.0 heads that I should scrap... but I just can't do it.
QUOTE(Mark Henry @ May 1 2021, 11:37 AM)
I'm a a web cam dealer, I'm waiting on lifters as well, last year they were waiting on cam billets. Did you try aircooled.net and AA also sells Web cams.
Studs like that is just an annoyance, I have a whole pile of 2.0 heads that I should scrap... but I just can't do it.
Yeah, I tried looking around a little. Aircooled.net told me they usually stock "webcam" compatible lifters that they are claiming are the same as what Webcam sells (sourced from SCAT), but at half the price. Webcam has the Lub-a-lobe lifters, but on the phone they told me they dont really "trust" them. Which is pretty confidence inspiring. AA doesnt list anything but the Lub-a-Lobe webcam lifters, which are also listed as sold out. Amazing to me that no one makes these!
With regards to the pile of 2.0 heads, its always amazing to me the supply vs demand phenomenon with these engines. That you can buy a SET of brand new CNC'ed aluminum heads for something like a chevy/ford/dodge at the same price for a single "new casting" 914 head. I get that the RnD and the cost of developing casting forms doesn't get recouped unless you have either enough people to buy one or price them to sell to the few that do need them. The thing that I hate is that I could buy an ARP stud kit for a chevy, with the same fasteners essentially as the Porsche, but I would pay triple the price because it is for a Porsche. Thats it. In my opinion it does not reflect well on a company that is willing to price gouge people, regardless of the "high class" car crowd they are selling too. Ticks me off.
So while I waited on things I thought I had already.....
I mic'ed for the second time: crank, rods (these were balanced/clearanced for me, so they were perfect), bearings, and the engine case. I had done this already, but wanted to practice the "measure twice" principle, especially since I did that almost 10 years ago, lol. Luckily everything seemed good, and I was getting about ~.0025" clearance on the rods, and .003" on the main bearings. So those are at least good to go.
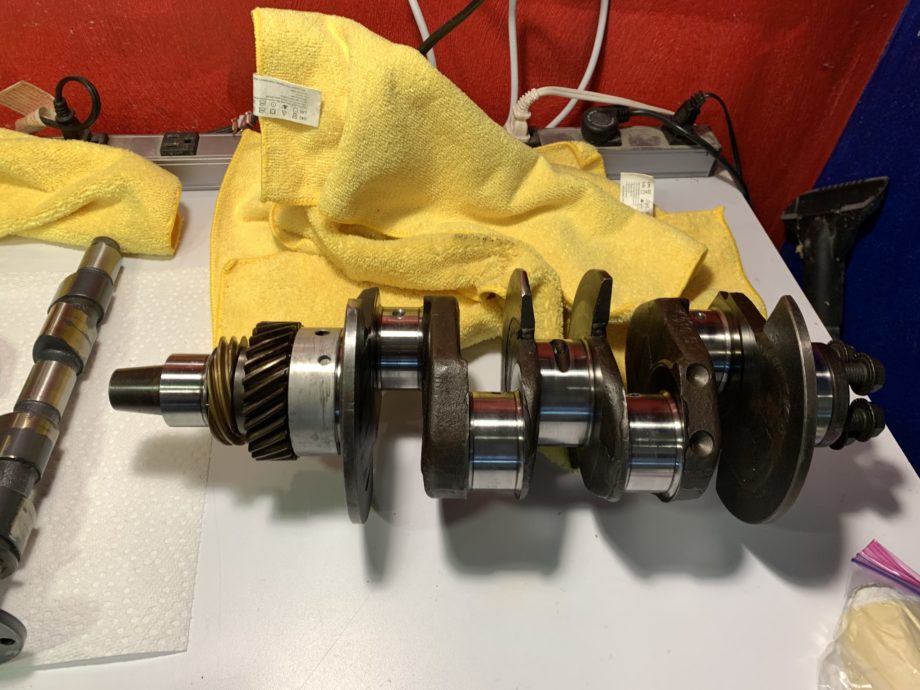
I mic'ed for the second time: crank, rods (these were balanced/clearanced for me, so they were perfect), bearings, and the engine case. I had done this already, but wanted to practice the "measure twice" principle, especially since I did that almost 10 years ago, lol. Luckily everything seemed good, and I was getting about ~.0025" clearance on the rods, and .003" on the main bearings. So those are at least good to go.
I finally got all of my head issues solved. I had the same machine shop get that broken stud out that did the stud from my case. They do great work. While they were doing that I also had them install these:
So they are good to go!
So they are good to go!
Wow. What a journey you have been on. I really hope you are able to get that engine assembled and it fires with no issues. I would like knowing you got to drive your car. 
QUOTE(Cairo94507 @ Aug 19 2021, 01:34 PM)
Wow. What a journey you have been on. I really hope you are able to get that engine assembled and it fires with no issues. I would like knowing you got to drive your car.
Thanks, I think "journey" is really the right word.
So to that end more of my journey:
I managed to do the final assembly of the crankshaft and rods.

Then I lubed everything I needed to lube with these fancy products:

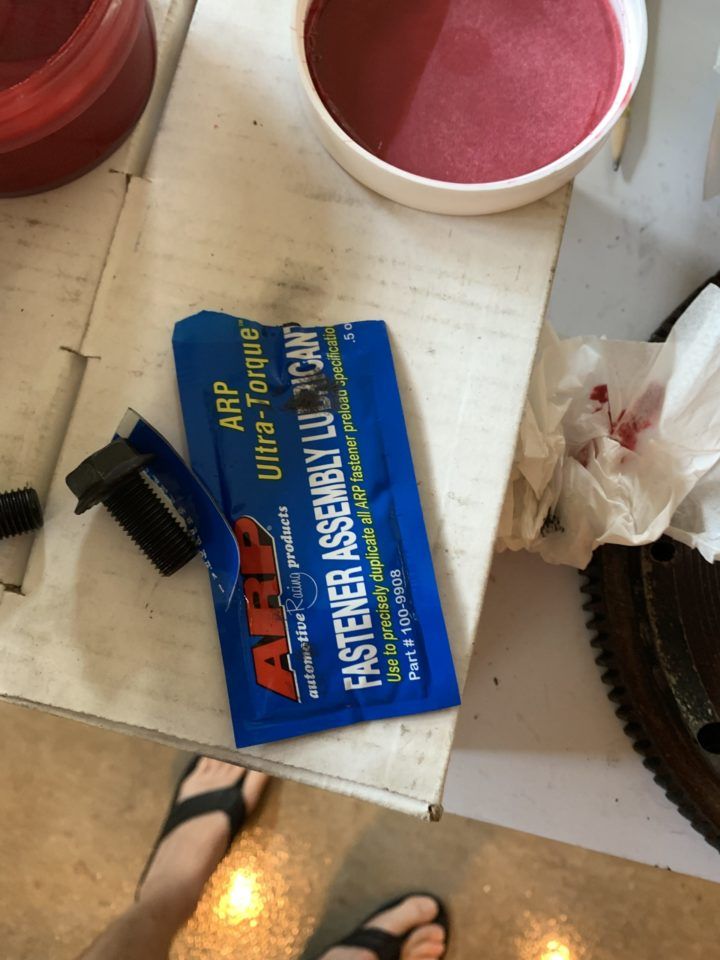
And then assembled it all into a single package using the "type 4 store" recommended sealing (Curil K2 for case). They have been sitting so long apart, I was amazed at how easy they slid together:
I then installed all of the aluminum threaded NPT inserts using ARPs Thread sealant:
ARP Thread Sealer
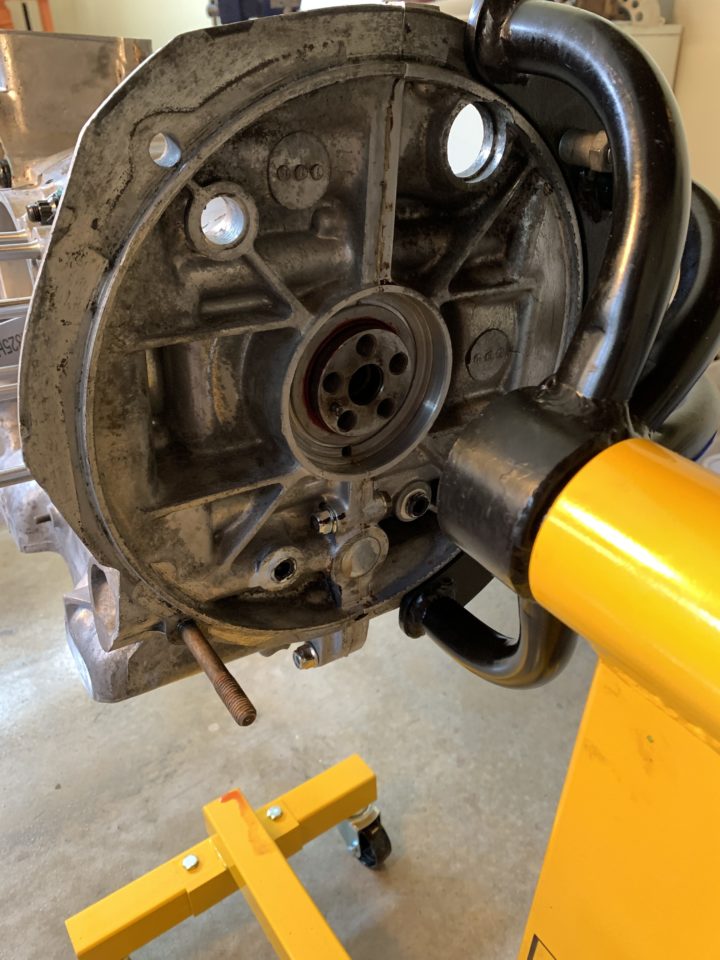
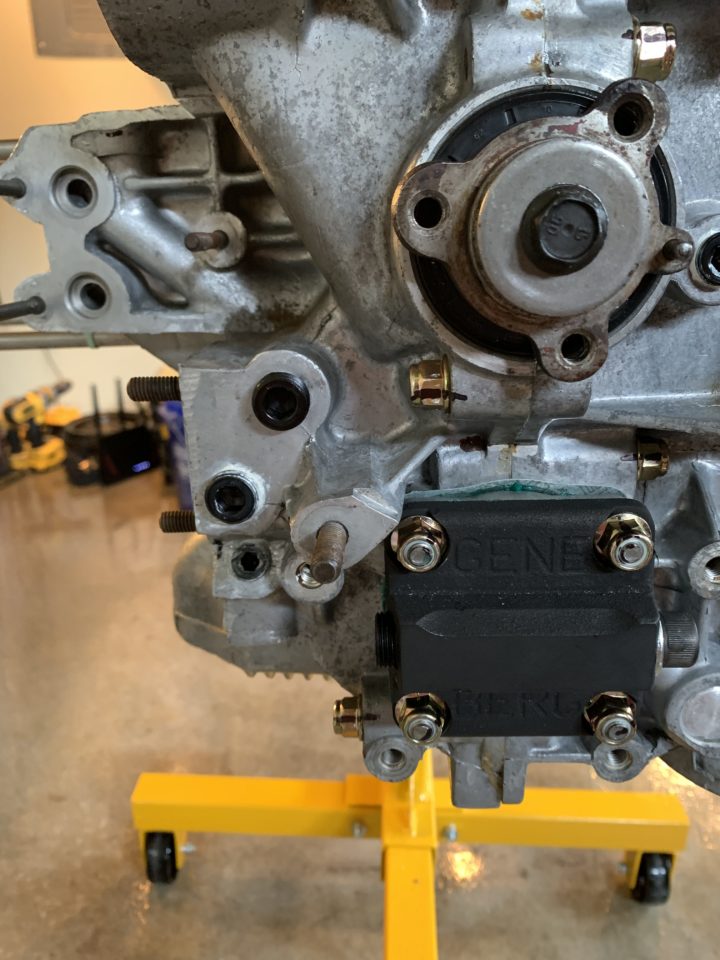
I then turned my attention to the oil pump. I had installed a set of the longer studs, so when test fitting everything seemed to go together well. I had to do some further clearancing on the pump back as well as my cam bolts, which surprised me as I bought everything claiming to be set up "for type 4 engines". Anyway, the pump I decided to go with was a 30mm Schadek from the type 4 store:
Oil pump (full flow)
The reason for this was I decided I want to run a front mount oil cooler, and a full flow system. I installed the pump and cover, and I did something that I couldn't find any reference to elsewhere. I used a very thin coating of Curil T on the pump body and with BOTH gaskets. I dont want any leaks. We will see if this works. All installed and buttoned up. If anyone manages to read this far: I used the same Nylock shoulder nuts I used everywhere else on the engine, do I need to put sealing washers behind these?
This is a "lo-fi" version of our main content. To view the full version with more information, formatting and images, please click here.