Found a big block of foam and thought I would see about making my own center console. Here's the progress so far. This will be my first project using fiberglass... any pointers or advice? Should I use cloth or mat? Should I paint or use color resin?
Thanks
Rob
Full Version: Interior remodeling
Mat will work fine. Don't try to do it all in one large piece. It will lay down better with small sections, just overlap them like paper-mache.
Bodywork and paint afterwords is the best way to make it look smooth. Chances are it's not going to be very pretty after laying the fiberglass. Technically, colored resin (or Gel Coat) is meant to be used in a mold that has been polished. You spray in the gel coat first, and then lay in the fiberglass mat after that. Then once you pop the whole assembly out of the mold you see the color. Assuming you're planning on laying up over the foam, your finished product will show a ton of mat-weaving. So bondo will be necessary to smooth it out.
Oh, and if you're laying the fiberglass over the foam, make sure the resin doesn't eat the foam, if it does, wrap the foam in plastic wrap first.
Oh and you might as well stick a 6.5" subwoofer in there. 
http://www.jlaudio.com/6w3v3-4-car-audio-w...r-drivers-92145
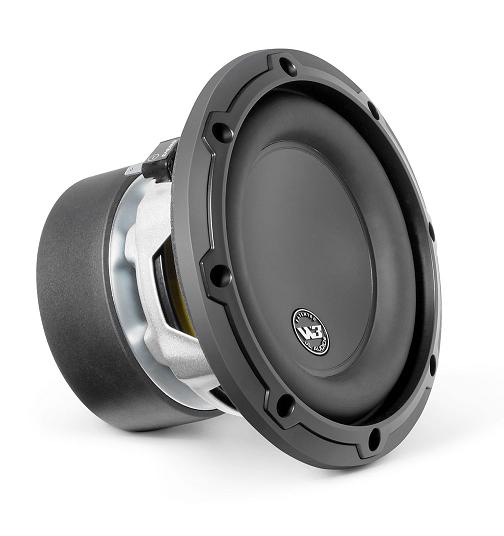
http://www.jlaudio.com/6w3v3-4-car-audio-w...r-drivers-92145
Thanks Mark! If I used cloth and then a few coats of resin, would that save me from having to use bondo?
A subwoofer is definitely in the plan too!!
A subwoofer is definitely in the plan too!!
Wrap it in vinyl and make an upholstered cap
Interesting job ahead of you. Regardless of what you lay over the foam you are going to need to fill and fair the job with a polyester fairing compound.
If it were me I would do a test as McMark suggests to make sure your resin is compatible with the foam.
Then I would lay on a layer of Chopped strand matt CSM which will take the curves and recesses way better than cloth. When the resin has started hardening and the CSM is not moving, follow with your filler, leave to harden and then fair it with a small longboard of sandpaper. You will need to refill and fair until it is right.
Also make sure the foam is square and not bent in any way-it's a bit hard to straighten it when it has glass on it. Good luck.
How are you going to Handle the hole for the shifter?
Gated shifter?
Gated shifter?
http://www.fiero.nl/forum/Forum3/HTML/000091-53.html
Check this out for methods,research the grp tech boards.
http://www.westsystem.com/ss/
As a first time user,you will make a mess.Clean is it.
Plan your work,work your plan.Write it down even as steps,use a timer.
Keep the toxic stuff off your skin,wear a mask.
Have fun.
Check this out for methods,research the grp tech boards.
http://www.westsystem.com/ss/
As a first time user,you will make a mess.Clean is it.
Plan your work,work your plan.Write it down even as steps,use a timer.
Keep the toxic stuff off your skin,wear a mask.
Have fun.
QUOTE(Bob L. @ Nov 9 2014, 10:27 AM) 
How are you going to Handle the hole for the shifter?
Gated shifter?
The hole shown in front of the cup holders is for a renshifter.
Just plan on using bondo, cause it's gonna happen.
QUOTE
Check this out for methods,research the grp tech boards.
http://www.westsystem.com/ss/
As a first time user,you will make a mess.Clean is it.
Plan your work,work your plan.Write it down even as steps,use a timer.
Keep the toxic stuff off your skin,wear a mask.
Have fun.
http://www.westsystem.com/ss/
As a first time user,you will make a mess.Clean is it.
Plan your work,work your plan.Write it down even as steps,use a timer.
Keep the toxic stuff off your skin,wear a mask.
Have fun.
Recommend using epoxy. I've used quite a bit of the West system resins over foam with good results. Polyester resin eats some foams. i used fabric rather than mat as it will leave a smoother finish two plys of a 6 oz fabric should do well. you can wrap the outside in visiqueen which will provede a smooth exterior if you get a good wrinkle free wrap.
If you want to be sexy, use carbon fiber fabric instead of F/G.
I did a whole boat interior that way
Very cool. Where can I buy some of this foam? That'd work very well for my plans as well.
http://www.freemansupply.com/
http://www.freemansupply.ca/products.htm
http://www.fibreglast.com/category/tooling...d-tooling-dough
https://www.google.ca/#q=polyurethane+model...hio&spell=1
Long ago,there was only 1 or 2 places to find a supplier for small quantities.
With all of this,there is a great resource.
http://www.freemansupply.ca/products.htm
http://www.fibreglast.com/category/tooling...d-tooling-dough
https://www.google.ca/#q=polyurethane+model...hio&spell=1
Long ago,there was only 1 or 2 places to find a supplier for small quantities.
With all of this,there is a great resource.
Thanks for all the suggestions so far!! At this point I'm thinking I will bondo over the foam and get a nice good base. Then fabric or CF over that. Then several coats of resin sanding in between to get a nice smooth surface. I will probably cut the peice to make a lid and compartment before bondo and glass.
I found this block of foam while driving by a place a while ago. They were throwing a bunch of these blocks out. Asked if I can have one. I've had it in the garage for a coulple years and decided it's time to make something out of it.
I found this block of foam while driving by a place a while ago. They were throwing a bunch of these blocks out. Asked if I can have one. I've had it in the garage for a coulple years and decided it's time to make something out of it.
A bit more progress.
QUOTE(CptTripps @ Nov 10 2014, 11:56 AM)
Very cool. Where can I buy some of this foam? That'd work very well for my plans as well.
Here's some foam blocks from a taxidermy supply. It's easy to use, carves with a knife and sands nicely with drywall sanding screen. (Not so much dust)
http://www.vandykestaxidermy.com/Search.aspx?k=foam%20block
QUOTE(rtalich @ Nov 10 2014, 03:31 PM)
Thanks for all the suggestions so far!! At this point I'm thinking I will bondo over the foam and get a nice good base. Then fabric or CF over that. Then several coats of resin sanding in between to get a nice smooth surface. I will probably cut the peice to make a lid and compartment before bondo and glass.
Your idea looks awesome so far, but I think you have it a little backward (at least from how folks typically fabricate). Foam first. Then lay your fiberglass over. Then finish with bondo and primer.
You don't want to lay bondo over the foam because it won't have a firm surface to adhere to. This could be a real problem as it sits in the sun and cures over the years.
Generally when you make a one-off part you always finish fiberglass with a skim coat of bondo/filler. Resin by itself won't leave you with a great surface to prime and paint without roughing it up. And trying to sand resin with anything finer than 120 grit is basically pointless. That's why your final step will always be bondo and primer. Unless of course you have a mold, like Mark was talking about. Then no filler should be necessary - just gel coat.
And for a first time amateur build I really think you should use polyester with Chopped strand matt. Make it resin rich and it will handle those curves and radiuses better than cloth and you are going to have to use filler anyway and do some fairing after so save yourself the grief.
Epoxy is great but you need peelply if you want cloth to hold corners and that starts to get tricky. Once again good luck. Will look forward to seeing the finished job.
Thanks!!! I will follow the steps and advice above.
Consider some access to adjust the shifter. If you ever have to it'll be a PITA. 
This is basically bondo, only it's more work and more of a PITA. Bondo is fiberglass resin with filler (talc) mixed in to thicken it. If it's too thick for your project, try glasing putty. It's resin with less filler, so it's smoother. The resin will run and drip and will build up thickness much more slowly. Glasing putty will fill the strand texture quickly and easily.
QUOTE
Then several coats of resin sanding in between to get a nice smooth surface.
This is basically bondo, only it's more work and more of a PITA. Bondo is fiberglass resin with filler (talc) mixed in to thicken it. If it's too thick for your project, try glasing putty. It's resin with less filler, so it's smoother. The resin will run and drip and will build up thickness much more slowly. Glasing putty will fill the strand texture quickly and easily.
are you going to incorporate a spot for the SDS controller?
QUOTE(G e o r g e @ Nov 12 2014, 12:00 PM)
are you going to incorporate a spot for the SDS controller?
Thinking about it. Not sure if there will be enough room yet. Gauges come first.
Although I may not... probably going to be switching to micro squirt in the future.
http://www.fisheriessupply.com/resins-and-...ies/epoxy-resin
Polyester resin stinks,sets real fast,in a few minutes.
Epoxy allows a longer working time to smooth your part,so it's worth it.
Use glove+masks+safety glasses.
Keep the stuff off your skin.
Polyester resin stinks,sets real fast,in a few minutes.
Epoxy allows a longer working time to smooth your part,so it's worth it.
Use glove+masks+safety glasses.
Keep the stuff off your skin.
QUOTE(porschefile2010 @ Nov 12 2014, 01:19 PM)
And for a first time amateur build I really think you should use polyester with Chopped strand matt. Make it resin rich and it will handle those curves and radiuses better than cloth and you are going to have to use filler anyway and do some fairing after so save yourself the grief.
Epoxy is great but you need peelply if you want cloth to hold corners and that starts to get tricky. Once again good luck. Will look forward to seeing the finished job.
Don't need peel ply, just plastic sheet like visqueen to get smooth surface. My experience is using epoxy and with the west system resign/hardeners & pumps you get the correct resin/ hardener mix every time. Here's example of curved surfaces done without peel-ply or plastic sheet. wet out the foam and lay fabric over and wet out again. Again 2 plys is what i have used. but wanted more structure for marine interior panels. These left with fabric print-thru, then painted
Click to view attachment
Some progress. I brushed on a few coats of white wood glue to seal the foam.
Before:
Before:
Before:
After:
One more. Ready for glass. I am leaning toward covering the main parts with thin foam and vinyl. And then make molds for the compartment lid and gauge panel. And then making those parts with carbn fiber.
Pretty happy with the results so far!!
Pretty happy with the results so far!!
Very nice! Thats almost marketable!
QUOTE(Andyrew @ Nov 21 2014, 03:57 PM)
Very nice! Thats almost marketable!
 Looks really nice
Did you compensate for the thickness of the glass/vinyl when the lid is closed?
QUOTE(Andyrew @ Nov 21 2014, 03:57 PM)
Very nice! Thats almost marketable!
QUOTE(scotty b @ Nov 21 2014, 04:14 PM)
QUOTE(Andyrew @ Nov 21 2014, 03:57 PM)
Very nice! Thats almost marketable!
Looks really nice Thanks!!
QUOTE(Chris914n6 @ Nov 21 2014, 04:35 PM)
Did you compensate for the thickness of the glass/vinyl when the lid is closed?
I'm taking it very slow. I've done quite a bit of wood working so I am taking that approach to this project. Thinking things thru before doing them.
What about using the heat shrink type material used on model airplanes for a covering?
QUOTE(914Sixer @ Nov 22 2014, 03:20 PM)
What about using the heat shrink type material used on model airplanes for a covering?
Hmmm. That sounds interesting. I'll have to look that stuff up. Or do you have a link?
Thanks!!
[/quote]
Although I may not... probably going to be switching to micro squirt in the future.
[/quote]
My advise would be go Mega squirt instead. I had micro squirt,..........My wife hated it!
Sorry couldn't help it. Your console is looking great BTW. I'm definately watching this one.
Although I may not... probably going to be switching to micro squirt in the future.
[/quote]
My advise would be go Mega squirt instead. I had micro squirt,..........My wife hated it!
Sorry couldn't help it. Your console is looking great BTW. I'm definately watching this one.
No link but Google is probably able to help find the model airplane skin/material.
QUOTE(veekry9 @ Nov 12 2014, 12:23 PM)
http://www.fisheriessupply.com/resins-and-...ies/epoxy-resin
Polyester resin stinks,sets real fast,in a few minutes.
Epoxy allows a longer working time to smooth your part,so it's worth it.
Use glove+masks+safety glasses.
Keep the stuff off your skin.
And that crap wraps too. Epoxy. Aircraft Spruce is your friend. BTW, I've used plain old Johnson Paste floor wax as a release agent many times.
QUOTE(rtalich @ Nov 22 2014, 06:00 PM)
QUOTE(914Sixer @ Nov 22 2014, 03:20 PM)
What about using the heat shrink type material used on model airplanes for a covering?
Hmmm. That sounds interesting. I'll have to look that stuff up. Or do you have a link?
Thanks!!
It's called Monokote or Ultracote but it is not what you want for that application. It's meant to be used over balsa wood and won't stick to foam. It's applied with a hot iron to shrink the material and is very thin and fragile.
http://www3.towerhobbies.com/cgi-bin/WTI00...&P=0&S=
This is a "lo-fi" version of our main content. To view the full version with more information, formatting and images, please click here.