I am replacing the center section of the lower firewall. The section that I have includes the ends of all of the tubes.
I did Google search and didn't find a good thread on replacement by a used piece. anybody have any insights?
thanks.
Full Version: Lower firewall
QUOTE(JimN73 @ Aug 23 2015, 09:54 PM) 
I am replacing the center section of the lower firewall. The section that I have includes the ends of all of the tubes.
I did Google search and didn't find a good thread on replacement by a used piece. anybody have any insights?
thanks.
Did you buy the lower 5'' piece or the hole lower firewall?
I did the hole piece on my brothers car this summer and it was a pita.
Take a lot of pics and measurements before you cut anything out.
I found that the lower 5 '' piece would be ok to patch any rust damage but I like the full piece better. Plan on at least 2 to 3 full days of work.
Check his thread out here : http://www.914world.com/bbs2/index.php?showtopic=212849
I bought the lower 5" to repair mine several years ago. Actually, it was a right 1/2 and a left 1/2. I got it from AA. That made it fairly easy to handle. I think it would be tough to maneuver a full width piece. Tight fit on the ends around the heater and e-brake tubes. IIRC I did the floor pans first. I think the firewall sits on the back edge of the pans.
Plus my inner short wall was toast. I ended up just forming up some cardboard as a template for the inner one. Then cut, fit and welded it to the new floors too.
Post some pix, let's see what you have to work with.
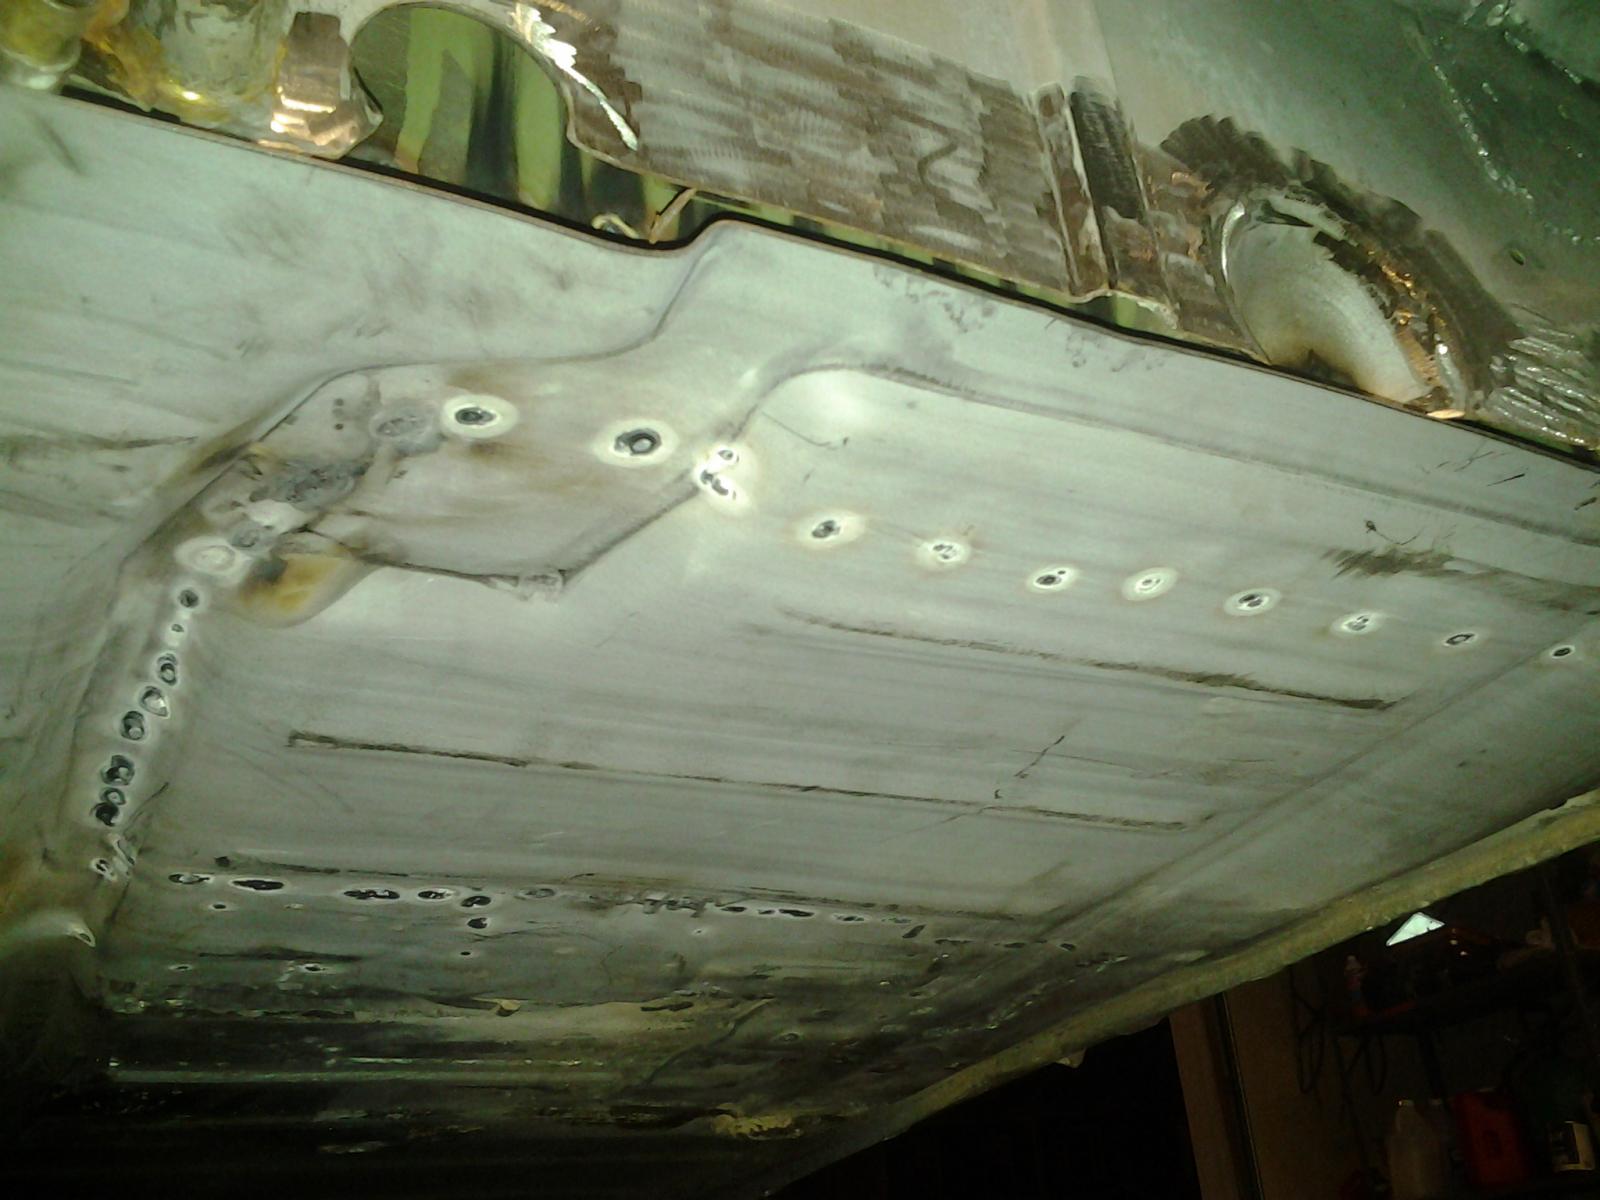
Found a picture of mine. Sorry it is SO big. But I was also able to coat the inside with Eastwood inner frame rust-proofer. As a previous posts suggests, measure and take lost of pictures first.
Plus my inner short wall was toast. I ended up just forming up some cardboard as a template for the inner one. Then cut, fit and welded it to the new floors too.
Post some pix, let's see what you have to work with.
Found a picture of mine. Sorry it is SO big. But I was also able to coat the inside with Eastwood inner frame rust-proofer. As a previous posts suggests, measure and take lost of pictures first.
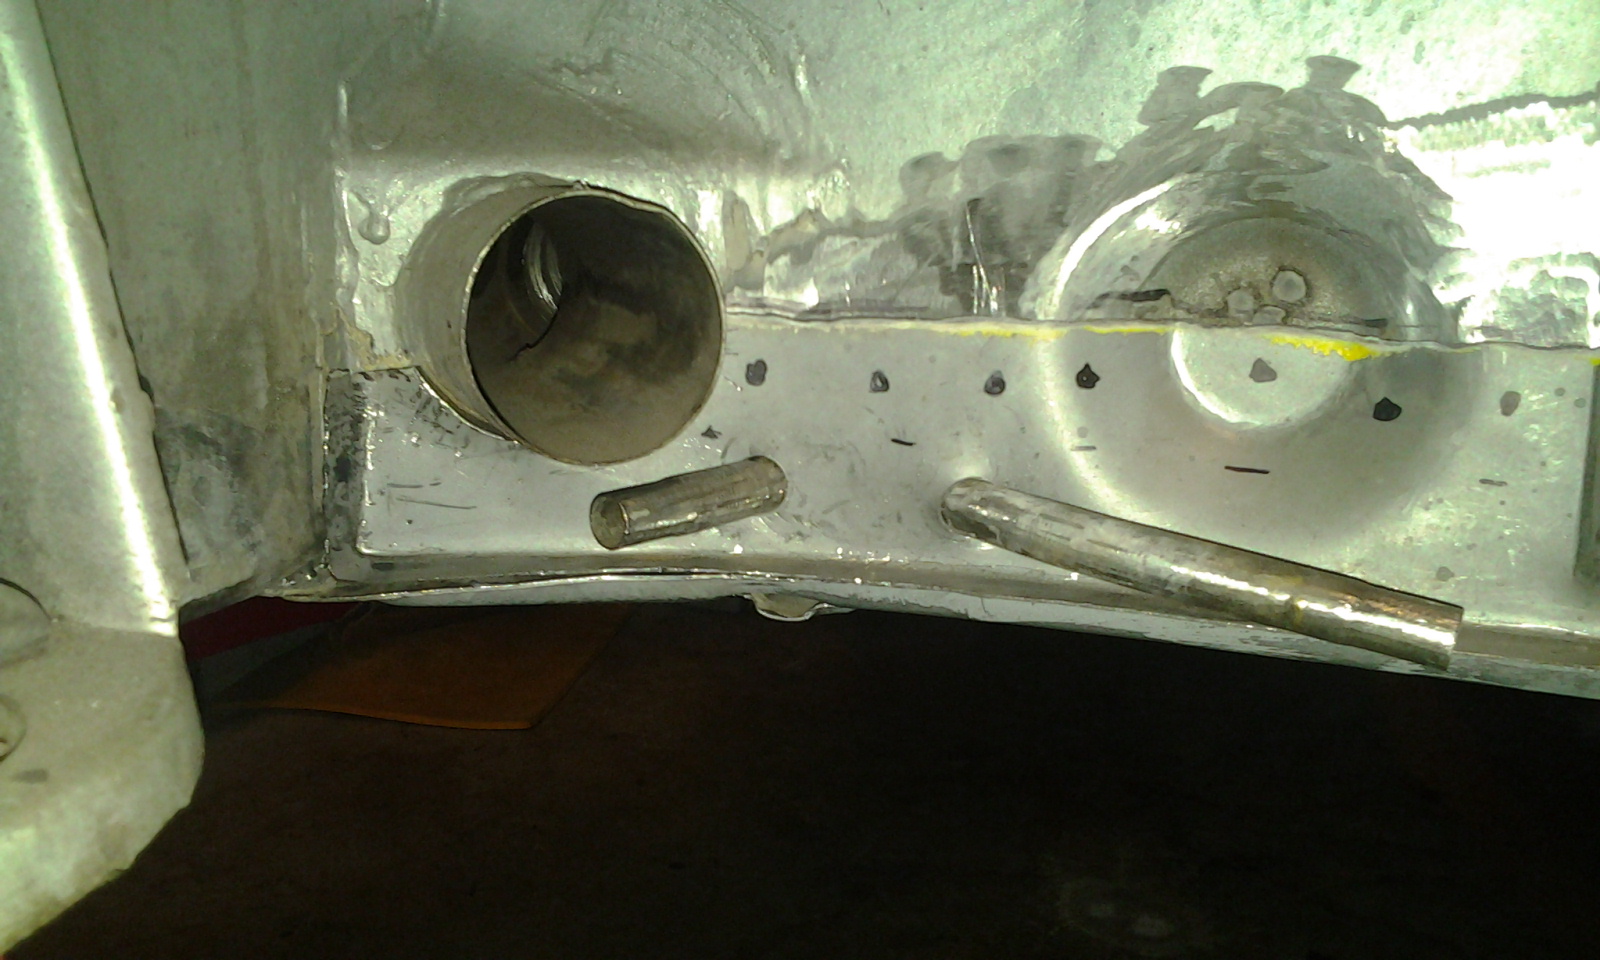
More HUGE photos..... Oh yeah, I did a lot of "dry-fitting" to make certain that it fit right.
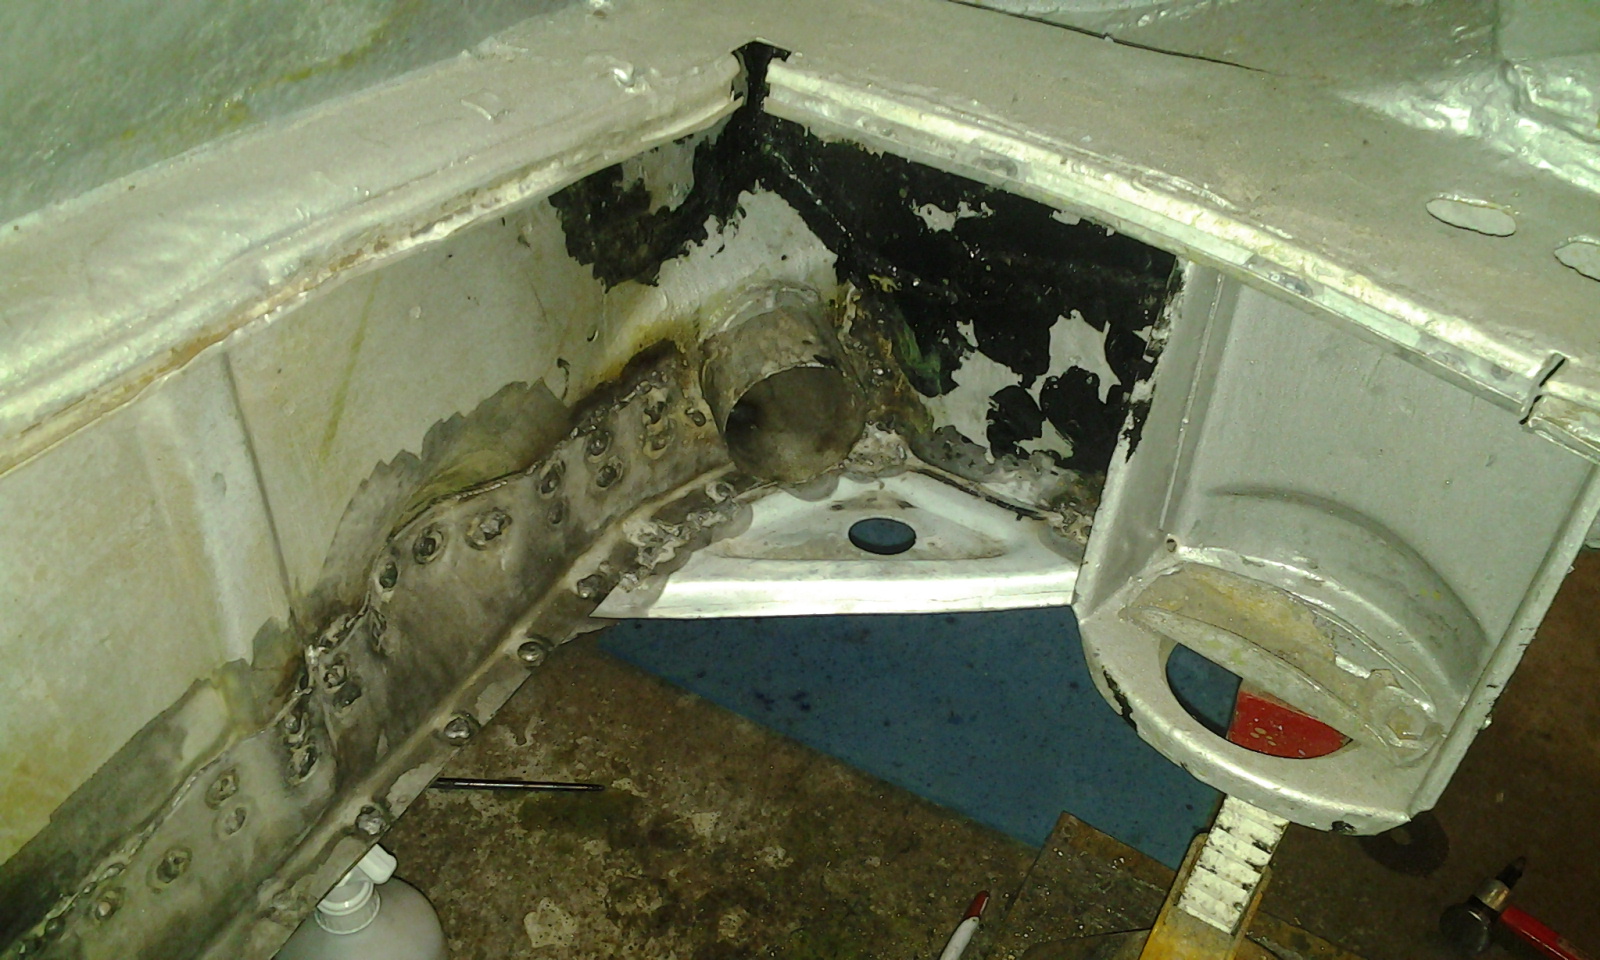
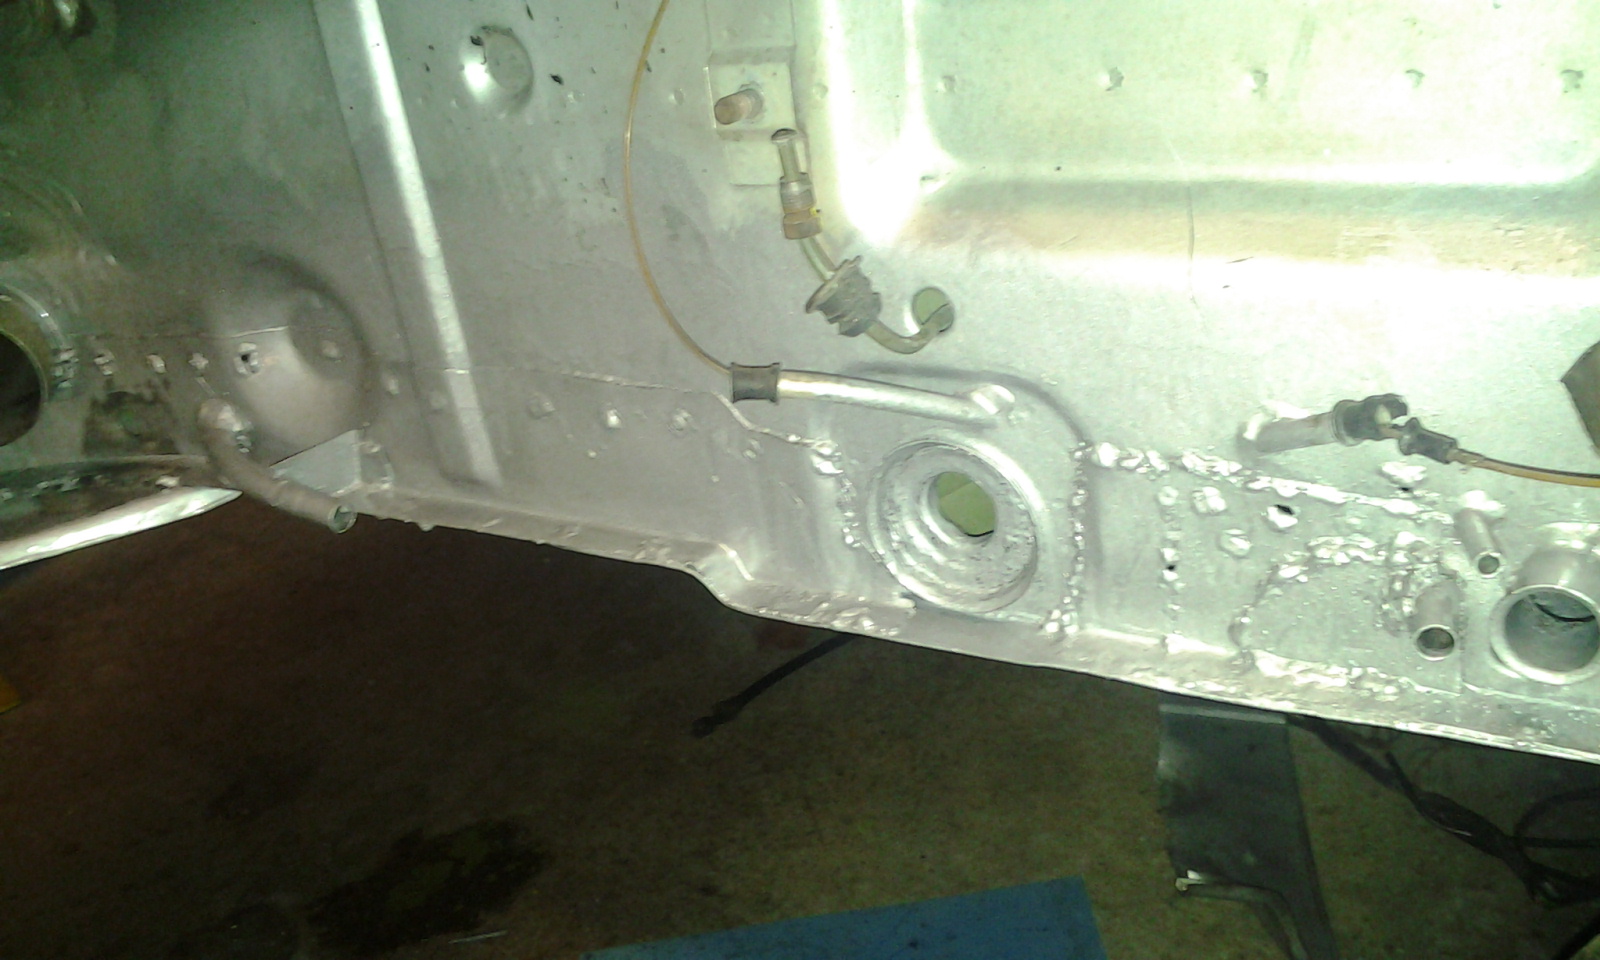
My crappy looking welding and some POR-15 seam sealer. Don't forget to buy and re-attach the corner braces.
notice on this last photo that I reinforced the clutch tube. The PO had used a thick plate welded to the firewall, so I did the same. I also kept the factory shift-shaft hole and lip for the boot. I did not want to have to make one of those.
This is a "lo-fi" version of our main content. To view the full version with more information, formatting and images, please click here.