I know this is not that exciting of a topic however, I want to do this rite.
I will be starting on this next week.
When installing the carpet kit is there a particular piece to start with or is pretty much self explanatory. Also, sound proofing, what's the best way of going about doing it.
I just got a fully optioned 74 2.0 with a worn out dark brown interior so I'm switching to black with grey carpet.
Thanks for the help.
Full Version: Completely redoing interior
By doing it right are you trying to do an oem job or just make it look great?
QUOTE(PanelBilly @ Oct 30 2016, 11:02 AM) 
By doing it right are you trying to do an oem job or just make it look great?
A little of both,
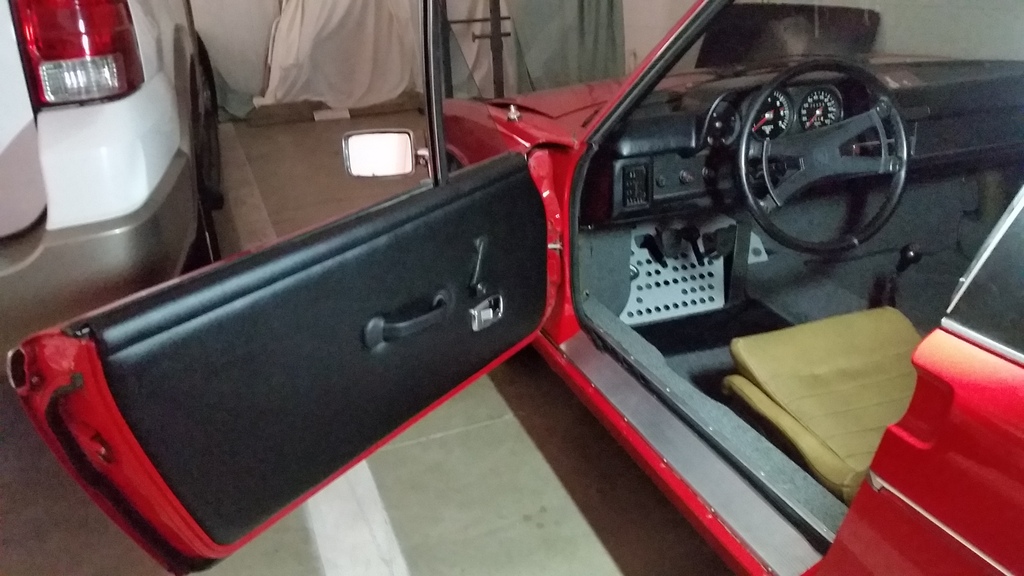
I am planning on using the door panels with the pull strap, I like the extra room they afford and I think look cleaner. Every thing else will be box stock.
Get some matching vinyl and use it where the carpet doesn't cover the floor. I glued everything down so it would move around.
I'm almost done with mine now. I plan to pull it again in the not too distant future when I restore the car. Hence why I did some things the way I did.
I used Noico 80 sound deadening. It's cheap and had good reviews on Amazon. The carpet I started with the front most walls and used double sided 3m heavy duty tape on vertical surfaces. I would have used glue if I did not plan to remove it in the near future. I don't think the order really matters too much. Just test fit everything in the car and you'll come up with a plan. The floor carpet has a couple strips of tape as well.
I was considering the gt style as well but decided against it and went with the RS style handle with factory pull.
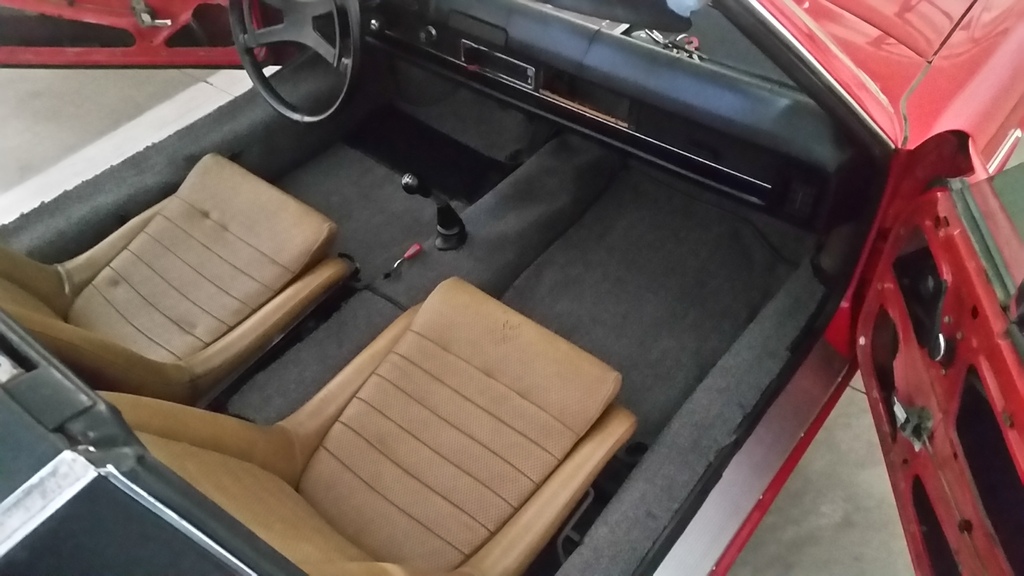
Had my seats done in beige vinyl with cloth cushions, Malgina red body so the beige goes well. Did my pedal board in carbon.
Click to view attachment
Click to view attachment
Click to view attachment
Click to view attachment
Click to view attachment
Click to view attachment
So far that look's nice
I started with the side pieces first (the ones that start at the sill plate and go down to the floor pans. The driver's side is tricky since the steel has a contour for the E-brake. You'll need to carefully make some relief cuts for it to lay flat.
I used loctite carpet adhesive. Worked great.
I used loctite carpet adhesive. Worked great.
QUOTE(cuddyk @ Oct 30 2016, 09:26 PM)
I started with the side pieces first (the ones that start at the sill plate and go down to the floor pans. The driver's side is tricky since the steel has a contour for the E-brake. You'll need to carefully make some relief cuts for it to lay flat.
I used loctite carpet adhesive. Worked great.
The 3M spray adhesive was recommended to me, any draw backs to using that product that any of you know of.
So your saying the drivers side should be cut for contour releif,doesn't the carpet kit compensate for that or is that a trick that needs to be done.
QUOTE(tomh @ Nov 1 2016, 12:02 AM)
QUOTE(cuddyk @ Oct 30 2016, 09:26 PM)
I started with the side pieces first (the ones that start at the sill plate and go down to the floor pans. The driver's side is tricky since the steel has a contour for the E-brake. You'll need to carefully make some relief cuts for it to lay flat.
I used loctite carpet adhesive. Worked great.
The 3M spray adhesive was recommended to me, any draw backs to using that product that any of you know of.
So your saying the drivers side should be cut for contour releif,doesn't the carpet kit compensate for that or is that a trick that needs to be done.
Not sure which carpet kit you have, but in mine, the pieces arrived dead flat. The "dimple" for the e-brake has several contours (up / down and side to side). So, my carpet needed some cutting along the contour lines so it would lay flat against the dimple with no wrinkles.
No real trick. Just takes time and patience.
If your carpet is flat like mine, the best way I've found is to glue the vertical part between the rear firewall and where the e-brake dimple is first. Then test fit the carpet in the dimple without glue. You'll see that it wants to bunch up. Where the carpet "folds" on itself is where you'll need to make the relief cuts. Make them a little longer than the "folds" themselves. But go slowly...one area at a time. After you make a cut, you'll see that the carpet on both sides will lay flat, and the edges of the cut you just made will overlap each other. Glue down the flat parts, and once set, make a single cut through the overlapping material. This insures that both sides of the "fine" cut are a perfect match. Then just carefully glue down the edges of the match cut and work together with your hands till it's invisible. Easy Peasy.
The only real "trick" is to use a very sharp, very new box-cutter blade for EACH cut. You MAY get two cuts out of a blade. If you try to use the blade more than that, you risk tearing the carpet or having to run the blade through the material several times, which makes it hard to achieve that "match" cut.
PM me if you have any other Qs!
Great info,the car will finally be in my garage Friday for me to begin.
I'm sure i'll have pleanty of questions.
I'm sure i'll have pleanty of questions.
Cool! You'll have a fun weekend then!
On part 2 of your original question... for sound deadening you can use Dynamat or some other similar brand...or I've heard that Lowes sells pretty much the same stuff under the name peel-and-seal in the roofing department for half the price.
But...
914's came from the factory with sound deadening material in the form of tar-like mats covering the entire floorpan area. It's usually painted body color. If your car still has them, most people recommend pulling them up, and removing the white-ish factory seam sealer as well. Rust can lurk and spread underneath. It'll take a few hours to do, and t's a bit of a nasty job, but worth it to halt any cancer. Do a search and you'll find lots of techniques and suggestions.
I took my floors down to bare metal, then applied a coat of Ospho and silver Rust Bullet:
Click to view attachment
Followed by sound deadening Raamats. Note that you don't really need to cover the whole floor like I did. Sound mats primarily work by interrupting vibration, so a much smaller coverage area works just as well. I had extra left over, so I figured better on the floor than in a landfill.
Click to view attachment
then vinyl for the non-carpeted spots, and finally, carpet. The e-brake dimple is visible here as well.
Click to view attachment
Dang, Great job - that looks SOOO NICE!
I'm so jealous of you guys with cars that have complete floors, let alone carpet!
I'm so jealous of you guys with cars that have complete floors, let alone carpet!
I don't think you have to slice the carpet. Heat gun?

Steam it
QUOTE(mepstein @ Nov 2 2016, 11:28 AM)
I don't think you have to slice the carpet. Heat gun?
The issue with the e-brake relief is that, in a flat piece, there's too much material for the surface area to be covered...which is what causes the "bunching". Somehow that material needs to be removed (cut) or redistributed (molded) in such a way that it doesn't fold up on itself.
I have perlon felt which, in my case, wasn't "moldable". Perhaps other carpets from other suppliers may hold a shape better with heat. You'd basically have to heat the backing to a point where it molded to the contours perfectly, cooled in place and had no memory. Not sure that's doable in a garage, but we've got some smart and industrious peeps here.
Steam is great for getting out wrinkles in upholstery, but not, in my experience, on stuff that's glued down.
This info is very valuable to,
Totally appreciate it.
When I'm under way on it I'll figure out how to upload my pictures.
Keep any and all suggestions coming.
Totally appreciate it.
When I'm under way on it I'll figure out how to upload my pictures.
Keep any and all suggestions coming.
QUOTE(tomh @ Nov 2 2016, 06:40 PM)
This info is very valuable to,
Totally appreciate it.
When I'm under way on it I'll figure out how to upload my pictures.
Keep any and all suggestions coming.
That's the great thing about the World...lots of alternatives, opinions and experience!
I'm looking at the same project this winter - carpet plus sound reducer. Which carpet set did you use? I'm leaning toward the top set at 914rubber.com for that.
For the sound pad, I have been looking at Rattle Trap by Fat Mat. Does anyone have any experience with that?
Is it critical to remove the old tar stuff before putting down the deadening mat? I'm not going for concours, but don't want to waste time and money and want to do it right.
For the sound pad, I have been looking at Rattle Trap by Fat Mat. Does anyone have any experience with that?
Is it critical to remove the old tar stuff before putting down the deadening mat? I'm not going for concours, but don't want to waste time and money and want to do it right.
I got my kit from Rich at HPH it was the 11 piece perlon kit i believe.I just put some sound mat in from Lowes. I only had to remove the tar from the rear pans for some small rust repair so i didn't put any matt in the front. Take your time and use pleanty of adhesive at least 3 coats. I found it pretty easy and it came out great. I will post pictures when i figure out how.
Ok here goes, i'm trying a picture upload.Click to view attachment
Looks good!!
does look good!
since you are now accomplished at uploading photos how bout a shot of your steering wheel? I want to do something other than stock/the butterfly horn pad with mine so always interested in other options

cjl
since you are now accomplished at uploading photos how bout a shot of your steering wheel? I want to do something other than stock/the butterfly horn pad with mine so always interested in other options
cjl
I'll take a close up of the wheel tonight and post it,I was just toying around with ideas for it and I came up with something that looks cool and keeps the stock size which I like.
QUOTE(PanelBilly @ Oct 30 2016, 10:14 AM)
Get some matching vinyl and use it where the carpet doesn't cover the floor. I glued everything down so it would move around.
I sell these pre cut
http://shop.914rubber.com/6-piece-floor-vi...-NEW-914FV6.htm
Here is what i did to my wheel,removed butterfly painted with aluminum paint and made a magnetic center cap. Im in the commerical graphic industry so making things like that is easy. I will probably keep it on. For now i like it but i might go with a momo if my budget holds out.......yea right!Click to view attachment
QUOTE(tomh @ Dec 28 2016, 01:12 PM)
Here is what i did to my wheel,removed butterfly painted with aluminum paint and made a magnetic center cap. Im in the commerical graphic industry so making things like that is easy. I will probably keep it on. For now i like it but i might go with a momo if my budget holds out.......yea right!Click to view attachment
Very clean-looking and very nice. Looks factory, not homemade at all.
Thanks for the complement on th wheel,i know its not the purest thing but its my my idea of building and messing with cars.
I am now ready to put the wheels on get it off the JACK STANDS and drive it a few week before heady off to paint.
Looks like new years weekend will be driving around the 914.
Happy new year to all you out there.................
I am now ready to put the wheels on get it off the JACK STANDS and drive it a few week before heady off to paint.
Looks like new years weekend will be driving around the 914.
Happy new year to all you out there.................
cool wheel thanks for the pic
really like the center/horn button -very clean, nice work
cjl
really like the center/horn button -very clean, nice work
cjl
Looking good Tom! Congrats!
QUOTE(tomh @ Oct 30 2016, 11:54 AM)
I know this is not that exciting of a topic however, I want to do this rite.
I will be starting on this next week.
When installing the carpet kit is there a particular piece to start with or is pretty much self explanatory. Also, sound proofing, what's the best way of going about doing it.
I just got a fully optioned 74 2.0 with a worn out dark brown interior so I'm switching to black with grey carpet.
Thanks for the help.
Bump
I'll take a black carpet set.
This is a "lo-fi" version of our main content. To view the full version with more information, formatting and images, please click here.