Full Version: how do you make wiring harness repairs?
do you soldier joints together or crimp them together using butt connectors
I mostly use butt connectors and a pro quality crimper. Soldering and heat shrink tubing works good too, just takes longer to do.
if you do make a solder joint, make sure it is not in a location that might see flexing or too much vibration....
using the proper wire is key as well, not they cheap stuff sold at the hardware store (it'll work, but for how long is the question)
when inspecting your harness, bend the wires, any wire that is stiff or the covering is brittle needs to be replaced...
I thought my engine harness was in good shape until I tried to crimp a new connector onto the black/red wire for the coil and the covering was brittle.....I ended up replacing that wire as well as all the engine related wiring with new wires last night......
I know Jeff's replacements aren't cheap, but the quality is above reproach. I got replacement alternator harness from him since mine was really brittle. I'm quite sure it is higher quality than OEM, but looks just like original (if that matters to you).
If you choose to solder, make sure you use some electronic grade flux. You will notice a huge difference when soldering a clean joint covered in flux than without. Flux core solder helps a little, but using a liquid or paste flux is the way to go. Just make sure you don't use an acid flux like they use for soldering pipes together.
Definitely cover the joint with shrink tubing. Electrical tape is no good. It comes unraveled, gets gummy, sticky and messy. You can even get shrink tubing that has sealant on the inside so that when you shrink it, it seals the joint watertight.
Mueller is right about not using solder joints at areas of significant flex or vibration. To remedy this, tie the wiring harness down in as many places as possible to keep it from moving. A wiring harness typically has no need for flex or movement.
-Tony
| QUOTE (TonyAKAVW @ May 26 2005, 02:31 PM) |
| Mueller is right about not using solder joints at areas of significant flex or vibration. To remedy this, tie the wiring harness down in as many places as possible to keep it from moving. A wiring harness typically has no need for flex or movement. -Tony |
I learned the hard way...cost me 1 AAA tow job

My Mallory/MSD distributor D-Jet upgrade trigger system failed on me due to a bad solder joint.....the new circuit will be fully encapsulated in e-grade epoxy to help eliminate that from happening again..........
Don't use connectors and a crimper that just pinch the connector to the wire. Use ones that bend around then into the wire.
| QUOTE (Reiche @ May 26 2005, 02:39 PM) |
| Don't use connectors and a crimper that just pinch the connector to the wire. Use ones that bend around then into the wire. |
like this??

(my new harness that I am putting together)
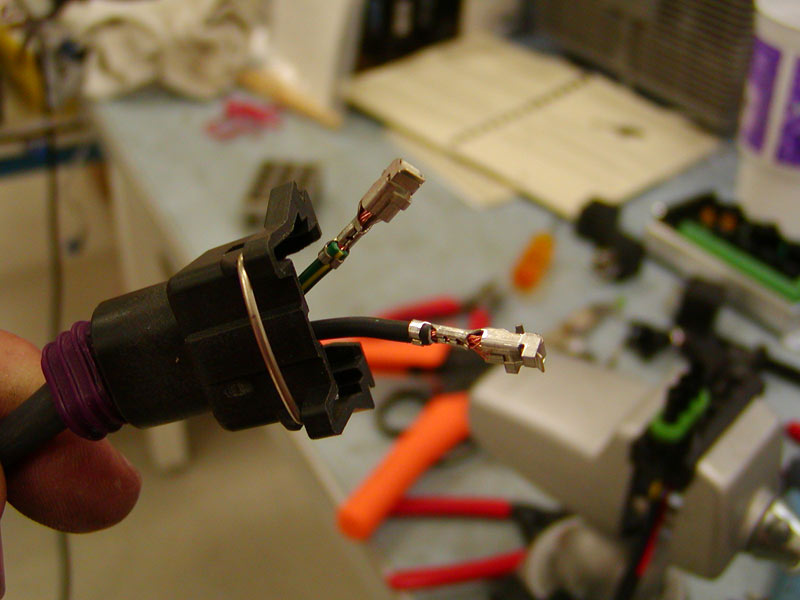
EXACTLY!
Where did you get them (tool and connectors?) Radio Shack used to have them but I haven't checked in a while.
Where did you get them (tool and connectors?) Radio Shack used to have them but I haven't checked in a while.
FI trigger point connections (all 3) and one of the mps connections are all done real cheaply and quickly. I think it worked fine for a long time, but now they are toast. It's missing and the mixture is all wrong. i used the red plastic crimp thingies. I'm just gonna rip them off after work and put on some replacement connector things...and when i get home i can look at it closer.
It really dosent matter if you crimped, soldered, or twisted the wires together. If the current flow path is good there will be no problem. Crimping with proper connectors is the best way. Solder is not intended as a mech. connection, only a conducting path. A soldered connection will break if the solder is allowed to wick up the wire under the insulation. This will take away a flex point and cause it to break.
David
David
This is a "lo-fi" version of our main content. To view the full version with more information, formatting and images, please click here.